document resume ed 219 060 hitchens, howard, ed. producing slide … · ed 219 060. author title....
TRANSCRIPT

ED 219 060
AUTHORTITLE
INSTITUTION
REPORT NOPUB DATENOTEAVAILABLE FROM
EDRS PRICE
DOCUMENT RESUME
IR 010 231
Hitchens, Howard, Ed.Producing Slide and Tape Presentations: Readings from"Audiovisual Instruction " ---4.Association for Educational Communications andTechnology, Washington, D.C.ISBN-0-89240-035-88071p.Association for Educational Communications andTechnology, 1126 16th St., NW, Washington, DC20036.
MF01 Plus Postage. PC Not Available from EDRS.DESCRIPTORS *Audiotape Recordings; *Audiovisual Aids;
*Audiovisual Instruction; *Program Design; Scripts;*Slides
ABSTRACTDesigned to serve as a reference and source of ideas
on the use of slides in combination with audiocassettes forpresentation design, this book of readings from AudiovisualInstruction magazine includes three papers providing basic tips onputting together a presentation, five articles describing techniquesfor improving the visual images, five explaining how to make titleslides, two on slide-tape programming equipment; and five providingexamplas of use in operational situations. The concluding sectionincludes a paper on how to publish a slide-tape presentation andanother on rehearsing a slide presentation without a projector.(CHC)
***********************************************************************
Reproductions supplied by EDRS are the best that can be madefrom the original document.
***********************************************************************

U.S. DEPARTMENT OF EDUCATIONNATIONAL INSTITUTE OF EDUCATION
EDUCATIONAL RESOURCES INFORMATION
CENTER (ERIC)4. T"O document has been reproduced as
received from the person or organizationoriginating It
Minot changes have been made to Improvereproduction quality
Points of view or opinions At a ted In this documerit do not necessarily represent official NIE
position or policy.
PRODUCING SLIDE AND TAPEPRESENTATIONS
Readings from "Audiovisual Instructicin" 4
Association for Educational Communications and TechnologyWashington, D.C. 1980
2r...,r
"PERMISSION TO REPRODUCE THISMATERIAL IN MICROFICHE ONLYHAS BEEN GRANTED BY
H. Hitchens
TO THE EDUCATIONAL RESOURCESINFORMATION CENTER (ERIC)."

Copyright ° 1980Association for
Educational Communications and TechnologyISBN 0-89240-035-8
AECT President, Carolyn SkidmoreAECT Executive Director, Howard B. HitchensResearch, Marilyn CoughlinProduction, Laurie de Mier
Additional copies of this book may be purchased bywriting to the Publications Department, Association forEducational Communications and Technology, 112616th Street NW, Washington, D.C. 20036.
Audiovisual Instruction, now Instructional Innovator, isthe official magazine of the Association for EducationalCommunications and Technology. A subscription to themagazine is included with membership in AECT. Sub-scriptions are also available to nonmembers. For infor-mation, write to: Instructional Innovator, CirculationDepartment, AECT, 1126 16th Street NW, Washington,D.C. 20036.

/
FOREWORD
To many readers, educational technology today is nearly synonymous with what hasbeen labeled as "high technology"satellite broadcasting, television by cable andbroadcast, microcomputers, and direct instructional applications of automated databases. The organizing of information into purposive messages, however, is at the heartof the development of a technology of instruction, and a general educational tech-nology. The vast array of communications toots at our disposal to accomplish this jobalways impresses.
This latest in the series of books of ireadings from AUDIOVISUAL INSTRUCTIONmagazine has to do with what many of us in this professional field have come to regardas basic or conventional communications media-slide tape presentations. The growthof photography as a general activity among the citizens of this country has beenphenomenal. Nearly every elementaryichild has been exposed to the 35mm slide. It isprobably one of .the most easily used; technically and operationally, media that wehave in our inventory.
This book of readings is dedicated to serving as a reference and book of ideas on theuse of slides in combination with audiocassette, for presentation design. Includedhere are some basic tips on putting together a presentation, techniques for improvingthe visual images, how to make title slides, a section on equ:pment, and examples ofuse in operational situations. The book of readings concludes with some notions thatare labeled as innovative ideas, but I suspect that there are ideas throughout thearticles in the book which the interested reader will find useful.
Particular thanks should be extended to Marilyn Coughlin of the AECT staff for fer-reting out these articles initially. It is our hope that these basic ideas on visual presen-tation will move the field forward.
40
Howard Hitchens -- Editor

CONTENTS
SECTION I: THE BASICS OF A SLIDE-TAPE PRESENTATION
7
13
16
Preparing a Slide-Tape Program: A Step-by-StepApproachMack Ryan
Script Card to StoryboardBruce R. Ledford and Gordon Thomas
Focused NarrationsMike Lewman
SECTION II: TECHNIQUES FORSLIDES
19
22
26
29
30
Shortcuts to Better SlidesC. Hugh Gardner
Making the Most of Your VisualmakerC. Hugn Gardner
Multiple Image SlidesDavid M. Jenkins
7302 Could be the Answer to Some of YourTransparency Production NeedsPaul E NovakChanging the Image Shape of 35mm SlidesDuane E. Hedin
SECTION III: HOW TO MAKE TITLESk 1DES
32
3541
42
Making Title SlidesDeane W. Hutton and Jean Anne Les,:ohier
How to Make Title Slides with High Contrast FilmDeane K Dayton
Adding Impact to 35mm SlidesNeal Hall
Make Perfect Slide Captions Every TimeMarie E. Col/art and Beth L. Wismar
5

45 How to Produce Title Slides in a HurryJohn A. Kalmbach
SECTION IV: SLIDE-TAPEEQUIPMENT
47
50
An Inexpensive, Easy-to-Build, Slide-TapeProgrammerTerrence Lukas
Your Program SyncsNeal Hall
SECTION V: EXAMPLES OF SLIDE-TAPE UTILIZATION
54
57
59
6264
Develop Your Own Mediated Career InformationRichard L. Douglass, Dale G. Zikmund, James THorner, Rosemary L. HomerSlick Slides for Reluctant ReadersTerry McConnellAttendance Problems? Try a 'Success Story'Slide ShowWard Holm Tanzer
Make the Most of Vacation Slides!Gerald Barkholz
Bilingual Slide-Tape Library OrientationJames Martinelli
SECTION VI: INNOVATIVE IDEAS
67
70
How to Pub Hitt Your Own Slide-TapePresenta:lonMichael Bentley
Rehearsing a Slide Presentation Without aProjectorArthur P. Sharkey. Jr., and Richard H. Emenecker
, \%
\ , C
,,
.0
"........
' ..

THE BASICS OF A SLIDE-TAPEPRESENTATION

PRODUCING SLIDE AND TAPE PRESENTATIONS
PREPARING A SLIDE -TAPE PROGRAM:A STEP-BY-STEP APPROACH
MACK RYAN
A slide-tape production can serve as an initial stepin opening the doors of creativity for teachers and stu-dents Both can find great satisfaction in creating aproduct that they feel is useful, that requires the appli-cation of skills, and that can be ei.loyed by others. Aneffective teaching tool, a slide -tare program can bedesigned based on specific objectives in nearly anysubject area.
The budget for producing a slide-sound program ismodest The raw material costs for a 10 to 15 minuteproducticn total about $15 00 This includes the priceof the audiotape And the processed film. The price ofthe audio and the photographic equipment will varyaccording to the level of sophistication and con-venience desired by the purchaser, with a range of$200 fora basic audio-photographic unit to $1,000 andup for more advanced equipment. Add $200 to $300 tothese costs for a projector and a screen. This is not anexorbitant investment for tools that permit th. develop-ment and implementation of instructional programstailored to local needs.
Slide-tape packages provide a very convenient andflexible instructional program Slides are easily storedin trays, carousels, cartridges, or files and can beorganized, arranged, or rearranged to suit the needs ofthe user Simply replace an old slide with a nevi/ one ifthere is a need to update the presentation. Audiotapesand cassettes also lend themselves to modificationand updating by means of the erasure and rerecordfeatures on the audio machines. The combined y isual-sound production can be packaged, easily indexed,and stored in locally or commercially manutacturedlockers for easy accessibility.
Because of the operational simplicity and portabilityof the equipment involved, slide-tape programs lendsthemselves to a variety of instructional settings. Thistype of media can be utilized effectively in a numberof ways, including individualized study or repeatedpresentations with large and small groups of students.Programmed and self-paced packages for independentstudy or sophisticated high fidelity multi-image projetted programs are within the range of this medium.
Once you've decided that a slide-tape program willbest convey your instructional objective, how do yougo about producing one? Begin the process by exam-ining the purpose of the program. What are you trying
Assoc iation for Educational Comrnumcdt ions and re( hnolo*, 1980 Rep inter] from ,At iit.isu,ilInstrutUun, No),umbtr 1975, and September 1975.
I
7
to achieve with the presentation? Will it relate to thecurrent instructional program? Is its aim to instruct, tomotivate, or to do both? What information and attitudeswill the audience bring with them? Do you want toprovide students with additional information? Do youwant to change their attitudes? Contact your workingcolleagues who are interested in the project and solicittheir suggestions for the slide-tape project. Once thisphase is completed, simply list the ideas you plan toinclude in the program and research them to insurethat no major ideas or facts have been overlooked.
A complete "outline- is now in order. Include in itthe content as well as any other ideas or visual imagesthat have come to you as you explored the purpose ofthe program and examined the research material relatedto it.
Now obtain a pack of blank 4" x 6 index cards. Startwriting down or drawing crude sketches (whether youwrite, draw, or do both at this stage depends on yourverbal or visual orientation) of ideas or facts about theprogram as you think about them. (This is where theoutline will serve as d valuable reference tool.) The in-teraction between your thoughts about the programand expressing them in writing or in a visual form willgenerate a script. If you think of a point as you concen-trate on an idea, try to state it in as few words as pos-sible or prepare a rough sketch of it. Put each idea orfact on a separate index card, with the sketch in theupper left hand corner and the statement underneathit (See Figure 1). Go back later and complete the card ifeither the statement or the sketch has not been added.
Lay out the 50 to 100 cards you have prepared on alarge table and arrange them in an order that makessense. For a better view of your work, tack the cards insequence to d large all board (See Figure 2) if itsavailable. It helps you visualize what your final pro-duct will look like and is an excellent way to find likelytrouble spots before final production Associates canalso be invited to look at it and make suggestionsabout its probable effectiveness. Take the time tomake your critical decisions at this point. (3y followingthis procedure, you will have to make fewer majorchanges during the hectic, frantic period of writing,photographing, and recording.
Ask yourself some hard questions as you examinethe planning board Are the visuals related to the text?Are they easily "read"? Are they too cluttered withinformation? Is the language simple and direct? Is thescheme of arrangement logical?
With the planning stage completed, you are readyto procet d to the net step. A high-quality slide soundpresentation requires a good script. This can be
Li

1
THE AGE
OF
HOMESPUN
MUSICAL BACKGROUND
6
Photograph: Woman la Loom(Medium Distance
Shot)
FARM UOt SE WIVES WOVE CLOTI? OF PI'RE WOOL
Figure 1
achieved if a number of principles are adhered to in itspreparation. These revolve around the script's organiza-tion, narration, visuals, and sound. Let's move to thefirst element of the program, its organization.
Go back to the index cards tacked up on the planningboard. Again examine them closely and arrange themto insure that the program will develop in a logical,organized sequence. It should have a beginning, amiddle, and an end. The beginning should give onlyessential mformat:on and point the audience in thedirection you have set for them. Too much informationin the beginning can,confuse your viewers. The middleshould build on the mfon -lawn given in the beginningSome of the cards will have to be discarded, othersmodified, and new ones added to the board. Duringthis organizational process it will help to keep the fol-lowing guidelines in mind:
1. Mold the inclusion of too many concepts It ismuch better to develop one concept clearly thanto include several incomplete generalizations.
2. A \oid a lengthy introduction. Catch the students'attention quickly by the visualization of a problemor Other stimulus device
3. Set The stage at the beginning of the presentationto let\students know what it's all about
4. Organic with the progressive disclosure or "reveal"technique in mind. Begin with the known and pro-gress to the unknown.
5 Weave the theme throughout the program6. Reinforce or summarize thoughtfully7 Whenever possible, employ «npansons with
READINGS FROM AUDIOVISUAL INSTRUCTION-4
the present to make the information more mean-ingful.
8. Encourage student participation and involvementby asking questions that relate to the students' ownexperiences and observations.
9. Include human sidelights whenever possible in-dicating the role the individual plays.
10. Try to bring out the value systems of the people:what they are and what the social structure does tosupport these values.
11. Apply the human element to inanimate objects(e.g., buildings, tools, etc.), by explaining whatgoes on there and how it's used.
12. Use pointed examples for simplification and clari-fication. "Make the invisible visible" by usinganalogies and illustrapons that can make an ab-stract idea concrete. '
13. Use art frames for review and ask questions thatwill stimulate discussion whenever possible.
14. Be careful of using symbolism, particularly withslower students.
15. The optimum duration of a slide-sound presenta-tion will depend on the amount of narration. Themaximum length for the elementary grades shouldbe 10 minutes, and 10-15 minutes for the secondarygrades. Usually 50 slides will be a sufficient numberfor the program.
After organizing the program, focus on your visualsThey should carry the weight of the show. The narrativeshould flow from the slides. Otherwise, you will havejust a narrative with slides added. Test their practicality.Are some of the scenes too far away to photograph? isthere a picture at hand you can copy? How complexwill the art work be? Is the material you want to copycopyrighted and therefore a release required from thepublisher? Are any of the scenes you plan to shoot toocontroversial? Include infonnation on the card aboutshooting location, camera angle, lighting, and art workThis will save time when you get to the productionphase of the project Your presentation will also bemore satisfactory if you refer to the suggestions listedbelow when working with your visuals
1. Be careful of giving too much detail in thevisual.
2. Select visuals that display action3. Use charts and graphs sparingly because
Figure 2

PRODUCING SLIDE AND TAPE PRESENTATIONS 9
they are difficult to follow and because there isnot much time for study and comprehension.
4 Avoid using a map for the first slide after the titleslide.
5 Avoid multiple panel and montage visuals (severalpictures on one slide) as much as possible exceptfor comparison or for showing progression.
6. WheneVer possible, include people of more thanone race or sex in the visuals.
7. Don't use "pick ups" or repeat art visuals. Getvariation through long views, close-ups, and angleshots.
Once you feel the organization and visuals are set.start writing the narration. Don't be discouraged if ittakes two or three drafts before you come up with apolished narrative Just remember that you will getbetter at it as you prepare additional programs. Tohelp you improve your writing, observe these rules asyou set about the task
1 Keep the narrative as conversational in Stile aspossible "Read" into a microphone withoutthe script and then playback and edit the nar-rative.)
2 Use short, tied' sentences, with only one ideaper sentence.
3 Use a vocabulary appropriate for the grade level.Explain any terms that may not be familiar to students at this grade level
4 Use only on idea per slide. Make certain thatthe text "Codes" or applies only to what is shownin the visual. Always start a frame with some-thing directly related to the picture on thc.screen.As far aS possible, keep sentences in the presenttense, except in historical matter or where thepast tense is grammatically required.
6 Donut break sentences from one visual to anotherunless you can maintain continuity.
7 Vary the length of the narration from frame toframe to avoid monotony.
8 'Occasionally insert a question to,cmcourage theclass to do some thinking
9. Avoid more than one question in a frame.10 Avoid beginning frames with "For example" or
"For instan«."Avoid use ot the all-inclusive terms. "all", "none","every", and "always".
12. Avoid controversial statements.13 Avoid negative statements, aLtentoate the
positive14 Avoid phrasing that is colloquial, poets(, or
subject to more than one interpretation.1; The text should tollow the eye path of the visual
and, or labels lett to right, top to bottom.16 Write concisely Avoid using more than 50 words
in one trame
The last element ut your st opt is the sound trac k. Asound track c an odd another dimension to yourshow It in( reases interest, adds impact, creates amood. and punt tomes the major points ut the program It c an also be used to automatic ally pat e thepresentation. given the appropriate equipment. Musk.,
interviews, sounds of machines, vehicles, animals,rain, wind, and a host of other sounds can be addedto the sound track to mace the presentation more ef-fective. However, caution should be exercised toinsure that the audio doesn't overwhelm the visualcharacter of the program.
These additional tips can help you in preparing thesound track.
1. Vary the commentary, if appropriate, by usingmore than one narrator.
2. Avoid using woris that are uncommon, foreign,or subject to misinterpretation because of simi-larity in sound to other words.
3. Choose a musical background that is com-patible with the theme of the program.
4. Identify in the script the cues for music andsound effects and advancing the slides.
Everything is now on paperorganization. nar-rative, visuals, and sound track. This first draft is nowcomplete. Leave it for a few days and then go back toit. Revising will be necessary. Lengthy sentences willhave to be shortened. You will have to find substitutesfor terms that are too difficult for your, students.Some of the visuals may lack human interest andshould be revised. The need to code the first sentenceof the narration with the visual might have been over-looked in some instances. These errors along withothers will be identified and rev ised. Now go to someot your associates or your students and obtain theirreactions to the script. A major revision of the scriptis not Ile(essary if they indicate they got the messageand understood it.
Pretend you already have a completed programwith the slides loaded in your projector. Tape the talkand follow, the cues in the script as you record. Play itback and check it for the flow of the narn.ove. Someminor changes will probably be in order based on thispreliminary recording, playback session and the sug-gestions provided by your peers. After successfullycompleting this preliminary test, you are ready tomove to the production phase ot the program s de- 0velopment.
PAR] H
Are you surprised when you see an eight- year -oldsnapping plc tures w ith all instant, automatii amera.Probably not. Technology has enabled people ot allages to produce photographs of acceptable qualitywith c,1111CreiS that art' both inexpensive and automated.With t ontident e that yoll, too, L an operate d c amera.you are ready to produce the visuals for a slick-tapeprogram
When selec ting amera for this task, consultsomeone with considerable knowledge and experiencein photography the audiovisual director, a peer whoIs an amateur photographer. or a sales representati% ein a reliable iamera store are usually good sources.Explain why you are purchasing the camera and howyou plan to use it. The type i I camera yotl choosywill depend on your for the school 5, budget and thekinds of slides you want to produce. It c opywork Is
0

involved in your project, a Kodak Ektagraphic Visual -maker or the more sophisticated 35mm single lensreflex cameras are likely suggestions. Perhaps your in-stitution already has a camera that will do the job
,Master its operation with the assistance of someonewho has used it. Make sure the camera will producequality slides. This can be determined by shooting atest roll of color film. The shooting exercise will alsogive you confidence in handling the camera. Yourfirst set of color slides can do wonders for yourmorale and encourage you to continue toward yourgoal.
What type of film should you select? Color shouldbe used. Nlbt only is it pleasing to the eye, but it alsorepresents reality. An apple, a burning flame, or asample of blood doesn't have much impact whenseen in a black and white photograph. If most of yourscenes are to be photographed indoors under artificiallight, determine whether the lights are tungsten orfluorescent and match your film to the lightingconditions. If lighting conditions are poor, you canuse flash bulbs or electronic flash equipment. Outdoorshooting in the daylight hours, barring a storm, is lesstrying than indoor work. Most of the medium speedfilms will produce very satisfactory exposures. Whena lighting problem arises, consult the local cameradealer or an associate who is an experienced phOtog-rapher.
You are now ready to start shooting. The camera isloaded and you have several rolls of film stashed inyour pockets. Wait! Don't forget to check your plan-ning cards. They are your guides to shooting andshould be at your fingertips. Study them and deter-mine the locations for photographing the differentscenes. Group the cards according to the proximity ofonc scene to another, and then schedule your picture-taking accordingly. This step makes it unnecessary toreturn to the same location more than once.
Space doesn't permit a complete discussion here ofthe shooting techniques of still photography. EastmanKodak publishes a number of excellent books for thispurpose, especially recommended is Kodak's Here'sHow series. The suggestions listed below providesome tips for imp -oving your photographs:
1. Avoid visual monotony by varying the shootingdistances. Try close-up, medium-range, and longshots.
2. Use different camera angles, including low-angle, high-angle and eye-level shots. By ad-justing the camera angle, different moods andillusions can be created that will add interest toThe show.
3. Select shutter speeds that will enhance the "ac-tion" quality of the photograph. Panning amoving vehicle with your camera at a slowshutter speed will provide a clear picture of thevehicle but blur the background. This techniquecan give the audience the feeling of motion asthey view the photograph.
4. Take at least three exposures of the scene,particularly if the lighting is contrasting. Thelight meter, whether it's in the camera or thehandheld type, can be fooled. Make the firstexposure based on the lightmeter's reading.
READINGS FROM AUDIOVISUAL INSTRUCTION-I
The second exposure should be made one stopover, and the third, one step under the exposureindicated by your light meter.
5. Avoid camera movement. Brace yourself againsta wall or place the camera on a stationary ob-ject, particularly if a slow shutter speed (1/60thof a second or less) is used. Use a tripod if itsavailable, when you are shooting at a slowshutter speed.
6. Compose the picture carefully in the view-finder before releasing the shutter. Be sure allthe elements you want included in the slide areseen in the viewfinder and are in focus.
7. "Squeeze" the shutter release button with aslow, steady movement.
Limit the number of titles you prepare for the slide-sound program. This is a visual-sound medium nota print medium. In addition to titles at the beginning(introduction) and end (summary), you might wantto include a few that bridge gaps or pose questions.Particularly effective are readymade titles that canbe found in your community. These include street/road signs. theater and store marquees, and community,civic or bcisiness signs ("Senior Citizens MeetingToday," "County Historical Exhibit," Office of theMayor," and "Think"). Some of your art students canhelp in the artwork and lettering that goes into titling.Other students can search books, magazines, andnewspapers for illustrations that can be included intitle sides. Two excellent articles in the May 1974issue of Learning Resources, "Titling for Slide Presen-tations" and "Making Title Slides," provide addition-al information about preparing slide titles.
Let's assume that your script calls for a number ofvisuals that require copystand work-- illustrations fromnewspapers, magazines, hooks, and titles for the slides.A copystand can be purchased rather inexpensivelyfrom a photography store. You can also construct
Comero Holder
Camera Holder Bock
Single Lens Comero
Verticol Slide
Verticol Support
COPYING STAND
Bose
Figure 1

PRODUCING SLIDE AND TAPE PRESENTATIONS 11
one foi about ten dollars. The device shown in Figure1 consists of a plywood base 30 inches by 36 inches,with a vertical track approximately 24 inches high attached at one end of the Base. The camera can befixed to a moveable block on this track that can bs,lowered or raised to the proper elevation, dependingon the size of the object to be photographed. Scrapsof black felt or black paper will serve very nicely as amask for the picture to be photographed. Two photo-flood lights can be placed about 30 inches from thecenter of the copyboard and at an angle of 45 degreesto the lens axis for even illumination of the - object tohe photographed. Auxiliary magnifying lenses forc lose-up work will cost approximately 54.50 each andthe lens adapter itself costs about $4.50.
The number of magnifying lenses needed dependsupon the size of the plc tures to be photographed andthe size of the sublet t will determine the type ci lensto be used. Using a + i, +2, or +3 portrait lens infront of a standard 50mm lens, y ou can copy subjectstrom 18 inc hes by 26 inc hes down to four inches bysix inches. With careful preparation, the reproductionc an he lust as well chinned as the original, even theoriginal captums c an be legible when projected.Consider also the Kodak 1.1.4..;raphic Visualmaker ifyou are operating on Al limited budget. It comesequipped with an instamati«-eillera, a copystand,lens, and flash unit that will c opy work three inchesbt three Inc hes or night Inc hes by eight mc hes.
The scoot is prepared And the visuals, includingthe titles, are r.ady and loaded in the projector. Allthat remai.. t( be done to complete the slide-soundprogram is to record the narration and any backgroundsounds Or music Find a suitable location for this ac-iivity A sound studio would be ideal, but if that's notavailable, select a setting that is isolated from externalnot r and t iequent interruptions Check out the acous-tics of the room by making a short recording andplaying it bac k with the volume control turned upListen carefully' for any extraneous sounds that arebeing pu ked up and try to eliminate them When youare satisfied that you have a quiet location for yourrecording session, assemble your eqomment
The level of sophistic adult of your program andthe audiovisual equipment that is available will determme your equipment needs You will need a slideprojector, a reel-to-reel tape recorder or cassetterecorder, a microphone, a slide projector, and thescript Additional equipment will be required for amore sophisticated program, including such items asa sound mixer, another record player, or tape recorderwith music or sound effects on the record or tape, ora tape re«irder *projector synchronizer A word ofc action stick with the fundamentals and master thembefore you mere into the higher levels of electronicgadgetry
St-t up your titupnient Ha( e the prow( for as faitrom you as possible so the ma rophone doesn t pic kup the whir of the projec tor's tan or the sound of itsslide change mechanism. If you are still picking upnoise from the projector on your initial test recording,try to plat e a baffle ke g., a cardboaid box with a holeut out for the lens, over the projecioi ,keep adequate
ventilation in mind,. Plat e the it rophone on padding
thick, enougn to deaden any vibrations that might bepicked up from movement within and outside of therecording area. The remote control unit for the slideprojector, the tape recorder, and microphone shouldbe close at hand. It also helps to have the scriptresting on a portable reading stand for easy, readingksee Figure 2). Request the assistance of another person if you feel that the recording session could gomore smoothly with another pair of hands.
vtitttz,
.
yr
I !gun* 2
Several tria' runs in recording the program willprobably be necessary. As you move through thescript, you will learn to pace the narration so that theshow moves briskly. The cues for slide changes willbe revised so tl- at the length of time each visual re-mains on the's( wen will vary from slide to slide. Arange of one to 15 seconds for the slide changesshould be about right for maintaining the interest ofthe audience. Audible cues can also be recorded onthe tape to communicate to the operator that theslide should be changed This can be clone with thetap of a pencil as eac h slide is advanced, but be care-ful that the audible cues don t detract from yourshow As you record, check the recording indicatoron the tape mac blue from time to time to see that itis set at an appropriate recording level. Handling themicrophone properly can present a challenge. Trynot to hold it too close to you; a distance of aboutone toot should be about right Speak past the micro-phone rathei than directly into it. By following thesesuggestions, your voice will sound more natural onthe recording.
Careful preparation is required for the presentationof your slide-tape show. If you wait until your audiencearrives before setting up and testing your equipment,a numbei of embarrassing surprises might await youthe electrical wall outlet may take a two-prongedelectrical plug :shale the projector's extension cordhas a three-pronged plug, the lamp in the projectormay burn out as you turn it on, the slides may beloaded right side up in the carousel su that the imagesare projected upside down, the tape recorder's exten-
12

12 READINGS FROM AUDIOVISUAL INSTRUCTION4
stun cord may not reach the electrical outlet, theprojector may be located too close to the screen sothat the image projected is too small, the windowshades may be inadequate for blocking out the sun-light, and, the seating arrangement may make it dif-ficult for some Jf the viewers to see the screen. Theseproblems can be overcome by setting up and checkingthe operation of your equipment well ahead of thetime for the scheduled preseritation.
When the audience arrives, tell them about thetopic of your presentation and explain how it relatesto the subject they are studying. Inform them of themajor objectives of the progrm.. This helps them tozero in on the more relevant aspects of the presenta-tion. Don't overdo the introduction, lest the programbecome a lecture-slide-tape presentation.
Whether or not the sound-visual program is aimedat introducing or summarizing a topic, the plansshould include provision for a discussion of the topicafter the showing. This requires you to prepare a fewquestions dealing with the topic beforehand. Re-sponses to these questions from the audience willgive you some indication of your success in achieving
your goals and your success as an adventurer into anew medium.
Meeting the challenge of producing a stimulatingslide-tape presentation can be an individual or grouptriumph. For the teacher who is interested in groupactivity, it offers opportunities for student planningand cooperation. One group might be assigned thejob of searching for photographic material for theprogram. Another group could screen the incomingmaterial. Other groups could prepare the script, shootthe visuals, do the recording, and operate the equip-ment. A test group could be organized to preparequestions for discussion or examination. Faculty andstaff members from other disciplines could also beinvolved to make it a truly multi-disciplinary produc-tion.
The value of the slide-tape show as an educationaland creative tool should not be underestimated. Itattracts student attention, arouses interest, tests stu-dent understanding, and allows the teacher greatfacility of selection. Its versatility, ease of prepara-tion, and low cost make it a valuable teachingmedium.

PRODUCING SLIDE AND TAPS PRESENTATIONS 13
SCRIPT CARD TO STORYBOARD
BRUCE R. LEDFORDGORDON THOMAS
Storyboarding is a technique that provides systemand control in media software. It can be applied to anyform of media, including slide sets, filmstrips, motionpictures, television, audiotapes, and even print media.The technique requires only a supply of note cards anda large wall or table area.
The CardsCards are used primarily because th'y are durable
and self-supporting. They are relatively inexpensiveand easy to obtain. The 5" x 8" card is a convenientsize. The card should be divided as shown in Figure 1.This division can be hand drawn ith a straight-edgeand a felt tip pen, or it can be printed. Hand drawingcan be very time consuming, so it may be useful tohave a supply of these cards printed professionally.
The three sections of the card are used to develop(1) narrative, (2) visuals, and (3) status and objectives.The upper left section can be used to sketch illustra-tions and ideas or to describe them verbally (see Figure2). The source for the idea can be stated for reference.The illustration should be in direct support of the nar-rative.
The upper right section of the card contains thestatus information and objective. The status informa-tion that provides the control system includes artwork, photography status, processing status, return of
4" -1
film from processor, whether the completed visual isput into the program or filed, and file status. Other in-formation contained in this section includes the num-ber of the scene or its position in the program, themedium to be used, and a statement of the objectivefor the card (see Figure 3).
The narrative is written in large letters on the bottomsection of the card. All the narrative pertaining to thevisual should appear in this section. The narrative forone slide should not exceed 45 to 50 words. If anothermedium is used, or if the space is not large enough, goto the next card, continue the narrative on it, and leavethe upper sections blank except for the word "Continu-ation" in the upper left section. This technique shouldmake the narrative coherent and contiguous (see Figure4).
The StoryboardThe storyboard can be a cork or ply board on which
clear plastic strips have been stapled. The better stripshave a beaded edge that implements the insertion,holding, and withdrawal of cards. A tentative orderwithin the cards can be arranged by placing them in
11
2
5
8"
Association for Ethicational Communications and Tech-nology, 1980 Reprinted from Audiovisual instruction, Sep-temiier 1976
4- 4.r
Figure 1

14 READINGS FROM AUDIOVISUAL INSTRUCTION
1111i1711103
0,rf0it1Ike
SOURCE ORIGhVAL ARr (eRgra0A1)
F ;gun. 1
igure 2
1
All Il
toE1ART NUMBER 46SrSHOTIErPROCESSING
0 RETURNED0 PROGRAMMED0 FILED
MEDIUM SL /DE
OBJECTIVE" rd eNtl'Afize j 1" 2' r 77/e EAfaucwin. naJostmewr
"I'llity""dSOURCE AZT OifrOoN I
resr"
-047474,91
SOURCE ORi6/414L Aar (aeracw)
TcARTE(SHOT@PROCESSING
0 RETURNED0 PROGRAMMED
0 FILEDMEDIUM JUDE
OBJECTIVE" " 4-09/14-fize dre,Mei 17/1 l'Aforet4L 40.4,5rmeArrTEST'
NUMBER 06
comiTErhva nic siaal Reelfele#CY TEST, THE1/6k7 .57r), /5 ro rig"( ThIE EMOT764,/.7L /1Pauf7;ifee-
7-4-37:
F :me 4

PRODUCING SLIDE AND TAPE PRESENTATIONS 15
the story board from left to right and from top to bot-tom. Skippery third or fourth space on the board toallow for easier editing (see Figure 5).
Selecting cards and placing them on the storyboardhas several purposes:
1. They give the designer an integrated overview of
the organization.2. They allow for easy sequencing and rearrangement.3. They allow for easy deletion and replacement.4. They allow for easy revision and refinement.5. They allow for convenient abridgement between
cards to provide or enhance continuity.
NM MON MNMU 1.111 NM =MI Maw MENNMI MIMI NMNM NM 1111MI II NM " MIN IMO NMNMI ..... ff.:
MIMI OMNIIININI F tgure 5

16
FOCUSED NARRATIONS
MIKE LEWMAN
Very little has been written about the way narra-tions are done for various types of audiovisual pre-sentations. I'm not talking about the way narrationsare mitten, but how they are read. Many people donot spend enough time to make their narrations as ef-fective as possible. We can all tell, or at 'east wethink we can, when a photograph is out of focus. Butnot many people can really tell when a narrator isfocusing on what he is reading.
In general, audio is often the forgotten child inmulti-media presentatiohs. And within the audio seg-ment, narrations can really get slighted. Narrationsare often put off until the last minute when some-body ,finally realizes there is a script which has to beread., There are lots of people who can read well, thatis, they can pronounce most words correctly, recog-nize punctuation, etc. But few people have the particu-lar kind of awareness necessary to transcend the"read-i-ness" of a script and communicate ideas. Fora narration to be effective, you must become involvedwith what the script says and to whom it is beingsaid.
In a poorly done narration, the narrator comesacross as if he is talking down to his audience. Un-fortunately, educators are among the worst at talkingdown to people. They may sound to themsehdes likethey are really interested in what they are reading orsaying, but the audience frequently is made, to feelinferior It is a problem generated by the mind set "Iknow and I'm telling you." In the classroom orrecorded on tape this approach can really turn kidsoff. Kids and adults all resent being talked down to.It's boring, offensive, and the last thing in the worldyou want to come across in a narration.
Despite what you might think, it is possible to nar-rate as though you are an intellectual contemporarywith your audience, regardless of any age differenceinstead of approaching the narration as "I know andI'm going to tell you," pretend you just happen toknow about the topic in the narration and you wantto share it with the audience. Be believable. It isoften helpful to pretend that one member of youraudience is lust across the table from you and you aregoing to relate this meaningful information to him ona one-to-one basis. In an effort to try to clarify how anarrator can get himself 'into" a narration, try thefollowing experiment.
°dation for Educational Communications and Tech-nology, 1980. Reprinted from Audiovisual Instruction, March1976.
READINGS FROM AUDIOVISUAL INSTRUCTION4
Imagine that you are charged with producing aslide-tape presentation designed to orient sixth gradestudents to a new junior high school. You have talkedwith the junior high guidance staff, sixth grade teachersand the junior high and sixth grade students. Youhave determined that there are a number of riroblemsand misconceptions that incoming junior high stu-dents are scared by the immense physical size of thejunior high building. The new students are filled withapprehensions about all the "unknowns" lurking be-hind those ominous school walls.
The opening slide in your program is a shot of thismassive, concrete school building. There is suspense-ful background music and the narrative reads.
"Well, there it is .Southside. Sort of scary looking,huh?"
The background music segues to bright cheerful music,we see a medium shot of a smiling student, and thenarrative continues:
"We hope you don't think Southside Jr. High is ascary place because it really isn't. It's just a school.Maybe bigger than the school you've been usedto, but nevertheless just a school."
How would you approach doing this narrative orhow would you direct someone else to do it? It wouldseem that there are a number of ways to approachthe problem. Think about the fears that you probablyhad when you entered a new school. As you read, letthe understanding and compassion that you wouldlike to have heard when you were uncertain comethrough to allay the apprehensions of your youngaudience. With those memories and that situation inyour mind, read and record the narrative segment de-scribed. Listen to the recording you made and askyourself critically, "Does thay sound like one persontalking compassionately to another or does it soundlike someone reading something they're totally unin-terested in?"
Another possible way to get "into" this narrativemight be to picture yourself sitting on a curb with afriend looking at this massive school. You were injunior high last year and your friend will enter thisyear See those two figures in your mind and thin'about how two kids that age would probably talk toeach other about the schOol. With this "actor picture"in your mind, try the narration once more. There arecertainly other ways to approach this narration, buthopefully this illustrates the kind of thought processesyou can go through to really make your narrations dowhat you want them to do.
Involvement with the words and phrases in a nar-1
-4.

PRODUCING SLIDE AND TAPE PRESENTATIONS
rative script is critically important. Instead of justseeing words, you need to practice being able to seeword pictures. Some words are chucked full of lifeand personality. They have' flavor" and they conjureup images. You have to see these word pictures asyou read if you are going to get involved in what thescript is trying to impart. Your voice must evoke theactivities and moods that are in the words. If thewords are happy, smile as you read and let that smilecome through as a happy, smiling voice.
If a scoot is a descriptive one, reading it very care-fully in a regular manner can be deadly. Don't beafraid of 'white space , in other words, don't be af-raid to pausy in the script. Variety in pacing as younarrate makes listening interesting and more natural.\ou will sound more conversational. Listen to people'sconversation and you will hear lots of pauses. Silenceis like negative space in design, it is as important asthe sound in a good narration.
Don't be afraid to emulate the natural pattern ofthe way people speak. You should narrate the waypeople talk. Let your voice go up and down for em-phasis. Read slowly, then quickly, trip through somephrases or sentences. If you read a script carefully,you will find it has some phrases or sentences whichcan be thrown away. They are not critical to theoverall meaning or effect of the script. By doing this,you can then focus more verbal attention on the im-portant operative words and phrases in the script.
A repetitive reading pattern with roughly the samenumber of words between each pause can be dis-tracting and cause the listener to become restless andnot focus on what is being said This can be avoided,however, even with slide or filmstrip narrations whichby their very nature tend to be broken into regularsegments by the dictates of each individual slideframe. 'loci can improve these kinds of narrations bypunching some words, muttering others, and 'tossing
ott some There has to be a variety to hold the lis-tener's interest
One big fallacy about narrating is the assumptionthat all the punctuation placed in a script to make itsyntactically correct must be respected when it isread. The truth is the scriptwriter can foul up a nar-rator with punctuation and the compulsion to writeevery thought in a complete sentence. Good nar-rations should be written the way people talk andpeople do not always talk in complete sentences Asa narrator you should riot be afraid to put your onmarks on a script. Put in slash marks for pauses, placeparentheses around phrases or words you can "throwaway, and underline operative words and importantphrases As a general rule, the punctuation that isnet essary to make a sentence grammatically correctmay make it sound stilted when it is read Commas,for instance, may be necessary in the written sen-tence, but they all do not have the same meaning orrequire the same type or length of pause when read
17
Be ready to accept some grammatical errors to makethe narration flow more smoothly and be more ef-fective.
Involvement with a narration must be physical aswell as psychological. Sitting like a statue, movingonly your mouth as you read, will make the narrationsound lifeless and dull. Movement is important Asyou narrate use your hands to gesticulate for emphasislust as you probably would do if you were relatingthe content of tla narrative face-to-face with yourfamily or friends. You will probably have to physicallysmile as you read to get a smile into your voice If thescript calls for a weighty or authoritative sound, slowdown and use lots of diaphragmatic energy to, giveyour voice more authority
Your physical position as you narrate can have alot to do with how, you sound. Don't slough over apile and not move. Sit on the edge of your chair asyou read or stand up. By sitting straight or standingup you are able to use more cm and get more dia-phragmatic energy and enthusiasm into your voiceTry holding your script up at eyc level as you readThis straightens up your whole torso and lets you getmore energy and physical involvement into yourreading Remember, your eves, mouth, hands, andarms can all be used to help convey meaning to thelistener.
The overall attitude you have toward a narrativesc not cannot be overemphasized It you reallyyou can hear a preoccupied reader one who isn'tfocused. You must concentrate on what is to be said,to whom it is to be said, and how you're going to sayit Who are you going to be, where are you going to,be, just what "actor pit_ tures'. are you going to see asyou read the words? You cannot lw thinking aboutsomething else as you read You will probably findthat lifting the level of concentration to maintain-your "focus- on a script can be physically exhaustingBut by expending the energy to maintain that focus,you will also find your narrations will improve im-mensely
There are some people who read for ,1 living whoare not always "focused" on what they read Thereally accomplished professionals, hoviever, do un-derstand how important it is to narrate the way peopletalk. When we listen to them we don't get the feelingthey are talking down to us They come across as oneperson "focused on" and speaking to one person
You might feel that you have to be a professionalnarrator to develop all the narrative techniques de-scribed here. This is not true. If you will really listento the narrations you are involved with and if ,'ou willtry some of the technique, described here, you maybe pleasantly surprised at how, much more effectiveyour presentations will be. For Nears, we have spentlots of time with scripts worrying about what we aregoing to say. It's about time we eenie entrate hots wesay-it

,TECHNIQUES FOR SLIDES
.19

PRODUCING SLIDE AND TAPE PRESENTATI NS1 c
I
SHORTCUTS TO BETTER SLIDES
C. HUGH GARDNER
The beginning or occasional photographer usuallyencounters a few pe'rsistent problems. This article dis-cusses many of/ thoSe typical problems and ways toovercome them so you can produce better slides.
Most of the recommendations relate to,a,djustablecameraseither those se .manually by /he user orautomatically by internal camera mechanisms. Butdon't feel left out if you tise a nonadjustable cameramany of the recommendations relate ,to techniquesrather than equipment.
/Selecting A Camera
The new electronic Shutter cameras are the beStthing,yet for the occasional user, or even for the moreserious photographer who wants to spend more time,on picture composition and less on technical adjust-ments. Of course, this means an initial investment of$100 or more. But equipment which helps you producea/greater percentage of useful slides will,be less expen-sive in the long run.
Recommendations about which model or brand ofcamera to purchase are beyond the scope of this articleBut a few general guidelines may prove helpful.
1. If you want to do much with close-up photo-graphy or if you eventually want to own a telephoto orwide angle lens, then buy a single lens reflex camera.Don't waste money on rapid film transport systems;amateur photographers should take more time andcare in setting up each shot, notfrgss.
2. The recommended film size for color slides is35mm or 126 cartridge. Of the two, 35mm has a greatervariety of film choices available. The rectangular formatof 35mm appears more natural since it closely matchesthe proportions of movies and television. The 126cartridge format does have one notable advantage,hdwever instant, "foolproof" film loading
3. Within any given format, buy the smallest andlightest camera which has the features you needCameras that are left at home because of their size orcomplexity are poor investments. e
The Film Loading System.The most persistent problem of the 35mm camera is
the film loadinit, system. Here are some of the morefrequent mistakes the beginner usually nipkes
' Association for Educational Communic ations andirec h-pology, 1980 Reprinted from AuchmisUd1 Instructsun, Sep-tember 1978.
19
Pr klem. Fails to properly engage a fresh roll pf filmonto the takeup spool and, then proceeds t ' shootwithout ever moving the film.
Solution. Observe the movement of the rewind knobduring film advancement. After the back of the camerah,-.s been closed and the process of advancing film tothe first exposure position begins, watch/ for an oc-casional movement of the rewind knob to make surethe film is being withdrawn from the film cartridge Acertain amount of free play exists, so don't expect aconstant turning of the rewind knob. /
Problem. Assumes the camera is loaded and shootswith an empty camera.
Solution. Turn the re/ wind knob in the direction ofthe arrow to make 'sur there's film in the camera If itis not snugged ,up tight after three or four turns, theCamera is undoubtedly empty.
Problem Correctly assumes the camera is loadedwith film but incorrectly remembers the film type andA/, rating.
Solution Tape a note or part of the film box to thecamera as an aid to remember what type of:film is inthe camera.
Problem. Fails to rewind the film safely back intothe cassette before opening the camera
Solution Redo the rewind procedure before attempt-ing to open the camera.
Inadvertent Camera MOvementProbably more pictures are ruined by camera move-
ment than any other single factor. If your picturesexhibit a general, overall blur, this is one of yourproblems.
The cure is to hold the camera so that you can"pinch" or "squeeze off" the shutter release ratherthan push at it. You can practice this technique withan empty camera.
Tape a small pen flashlight on the bottom of thecamera with the bulb facing toward the front. Get'in adarkened area where you can see the spot of light fromthe flashlight. Stand about four feet from a wall andlook for movement of the light as you attempt to, holdthe camera motionless. Now squeeze off the shutterrelease. If you can see the flashlight spot move, youknow yoP need more practice. If you are using a singlelens reflex camera, shift your eyes slightly and lookpast the viewfinder directly to the wall
If yclu try the flashlight technique with an empty 126cartridge camera, you'll have to open up the back of
4 0 /

20 READINGS FROM AUDIOVISUAL. INSTRUCTION-I
the camera each time and trip the small lever at thefilm plane so the shutter release mechanism will be un-locked.
Backlighted SubjectsProbably the second Most frequent error is made in
photographing backlighted subjects with automaticexposure cameras People generally turn away frombright light sources for added eye comfort. If you wantto photograph people naturally-rather than pose them,you'll find yourself fighting this uphill battle.
A quick solution is always to use front or side light-ing on your subjects so that your automatic' cametacan give you a correct exposure. Or, take pictures onslightly hazy days when overall lighting is more evenor use open shade or fill-in flash.
A general recommendation for the beginner avoidbacklighted subjects when using an automatic cameraor when taking a light meter reading until your expertisecan help you solve all the variables.
,Flash or Existing LightUtiless you own some special equipment, flash photo-
graphy should be reserved for subjects at a rangecloser than 25 feet. Aside from exposure problems offlash, the general appearance of most photos could beimproved if a high speed film and existing light wereused This helps avoid the unnatural appearance createdby a single light source. Electronic bounce flash isanother solution, but initial,cost and exposure compli-cations probably make this a poor ,recommendationfor the beginner.
If your 35mm camera has an f/2.8 lens, use HighSpeed Ektachrome tungsten or daylight film to take in-door slides with existing light. Even if your camera islimited to a smaller lens opening f/3.5 or f /4 - -youcan still take indoor slides with existing light by gettingthe film processed at a higher ASA rating (check withyour lab).
If you take indoor slides with existing light, it is veryimportant not to include in your viewfinder image anywindows or doors through which daylight can be seen.If you do, your automatic camera will adjust itself forthis light and your indoor subjects will be badly under-exposed. Just remember to select a camera positionwhich "sees" only indoor light.
FocusingWith a rangefinder camera, getting the subject in
focus should not be a major probler, . If it is for you,then pra6ice the adjustment of focus through therangefinder and compare the stated distance on thecamera focusing scale with the actual distance of thesubject
The mystery about what is commonly called focusfor most amateurs is the variability of sharpness in theareas surrounding the subject Sometimes the picturesappear almost the way the eye remembers the scene.At other times the background and foreground appearnoticeably blurred
The area that surrounds the focused subject that ap-pciars "sharp" in the picture is called the depth of fieldThe factors which can make this depth of field larger
or smaller should be understood by every photographer.Any general book on photography will devote one ormore chapters to unraveling the mystery . I'll limit mycomments to the "rule of thirds." In applying this prin-ciple to achieve the best depth of field, the subject ofthe oicttire is considered to be an area rather than asingle point. The area extends from the closest objectof importance to the farthest object of importance.The camera should be focused on a point one-third ofthe way into the scene, going from the closest to thefarthest subject.
Pictorial MeritNow we come to the most elusive consideration.
Entire books have been written on this subject. The in-tent here is to summarize the most frequent errors andgive tips for their correction.
Most quality pictures have an easily identifiablesingle purpose. It could be a picture of your new car, orone of your friends, or your home. As three separate.pictures, the problems of good composition are fairlyeasilyhandled. But it would be a rare photo that couldproperly Lompliment all three subjects in a single pic-ture. -
The solution, aside from taking each subject separate-ly, is to move the camera in close enough so that eachsubject fills the picture area and the camera angleeliminates any distracting elements. This is alwaysgood advice, but for the 35mm or 126 cartridge camerait is a "must" in order to take full advantage of the rela-tively small film size.
The real purpose of a picture does not necessarilyconform to the full outside dimensions of the object.For example, maybe it's the newly polished grill onyour car, or your friend's portrait, or the flowers andlandscaping around the front entrance of your homethat really should be the subject of each picture.Photographers should ask themselves what it is thatthey really want to communicate with each pictureand then fill the viewfinder with that particular sub-ject.
When people are an important part of your pictures,be sure to hie` them busy doing something, ratherthan just staring into the camcra Probably the easiestway to get people to act at ease is to take so manypictures that they begin to ignore your presence. Anold p otographer's secret is to pretend to take pictures
,, until ypu begin to feel that things are back to normaland tfien begin actually exposing your film But beready on each pretend shot for a real exposure.
LandscapesOur landscapes photos/Seldom seem to evoke the
same grandeur that we recall in the original scene. Thisis "Jecause our physical' presence gave us a three-climet.,ional panoramic view of the entire area v.,hilethe Wm in our camera received only a two-dimen-sional glimpse of one small area. Countless chaptershave been written on how to use leading lines, fore-ground objects, frames, and other compositional de-vices to improve thec limited glimpses but probab-ly the best advice that can be given on a limited scale is
21

PRODUCING SLIDE AND ...TAPE PRESENTAI
to just carefully examine the inpage seen it the view-finder of the camera. Yu,: Should ask yo.ir tlf if thisimage were an enlarged hanging Gn the wall,would you enjoy looking at it. i not then try some dif-ferent angles or subjects.
Most photographers overlook countless photogenicsubjects because they are only ini.uenced by the three-dimensional panoramic view seen by their eyes. Theshadows cast by a small section of ornamental iron-work, the plight of a small wildflower trying push itsway through a crack in concrete. or the struggle of anabandoned building against the elements of time may
21
have great potential that is seldom noticed when oureyes and minds are focused on the total panoramicscene.
When you're taking slides, the film you expose inthe camera is the tinal product. Every effort, therefore,must be made to consider all elements of composi-tion, lighting, contrast, etc., at the time the film isexposed. Unlike the negative process, there will be nointermediate steps for cropping, color balance, etc.
Hopefully, this "inside information" will help youpa- duce a greater percentage of slides that others willtruly enjoy viewing.

22 READINGS FROM AUDIOVISUAL INSTRUCTION-1
MAKING THE MOST OF YOUR VISUALMAKERC. HUGH GARDNER
Many innovations are like fiash powder one brightlight and then they re gone. Two notable exceptionsof the last decade, at least from the standpoint of theclassroom teacher, have been the cassette reLorderand the Kodak Ektagraphic Visualmaker. Both helpfill a communication need, are relatively inexpensive,simple to operate, and give an almost 100% guaran-tee of a usable product. Unfortunately, the potentialof thVisualmaker is n as well known to the averageteacher. What the cassette recorder can do for re-corded sound, the Visualmaker can do for recordedsight. What better partners could you ask for?
Since the Visualmaker has been around for sometime, the chances are very good that there is one al-ready in your school or at least several in your district.Hopefully, you know this to be the case and haveused one on several occasions. In any event, the tipsand suggestions given here should prove very helpfulfor future applications.
Basic Equipment and SuppliesA logical start would be to get acquainted with the
equipment. The Visualmaker kit consists of a KodakInstamatic X 35 camera and two copystands on whichthe camera may be mounted for closeup pictures
The closeup capability i3 provided by a special lensbuilt into each copystand, a single Magicube flashprovides all the needed light. Thus no adjustmentsfur light or focus need to be made by the photographer,One copy stand provides for photographing an areaapproximately eight inches square, the other an areaapproximately three inches square. The decision as towhich stand is best for each occasion and its properalignments are really the only variables which givethe user any concern.
As for the supplies, let's begin with the film Nor-mally, slides are the desired product So, a 20 expo-sure roll of Kodachrome 64 or Ektachrome 64 in the126 instamatic size should be procured. Of course,there are other fine companies besides Kodak thatmake film for instamatic cameras. If your purpose isto have prints instead of slides, then load the camerawith either a black and white or color print film
Next, you Will need a sufficient number of flashcubes to expose your roll of film The original modelof the Visualmaker uses the regular flash( ubes, but
Association for Educational Communications and Emil-nolgy, 1980 Reprinted trom Audtmetsual Instruction, March1976
you are far more likely to encounter the later versionwhich uses the nt.vv Magicube. Be sure to check firstto see which you Will need as they are not inter-changeable. If your unit has the X-35 camera, it willneed the Magicubes. To help in framing and composi-tion, several sheets of different colored constructionpaper, a ruler, and a sb.-ap knife are desirable.
Setting Up EquipmentThe first step is to load the film into the camera. As
you do this, inspect the interior of the camera. Blowaway dust and wipe the inside lens if it is smudged.Finish up this housekeeping task by checking, andcleaning if necessary, the outer surface of the cameralens and the lenses of both copystands.
Let's begin by using the large stand. Open it up,and be sure to snap the side braces into their lockingsluts. Leave the focus setting at the beyond six-footposition on the X-35 camera. Place the camera lens-into the open ring of the .copystand lens and securethe camera with the tripod locking screw. Now in-sert a Magicube. If you have advanced the film to thefirst position, you are ready for your first shot. Placethe stand on top of your desired copy. Alignment ofthe copy is accomplished by observing the U-shapedopening of the stand legs. Do not look through thecamera viewfinder as it is of no value when thecamera is mounted to the stand. Steady the stand byplacing one hand On top of the camera and then usea finger and thumb of the other hand to "squeezeoff' the sh Ater release lever. A click will be heardand the flash should go off.
Next, stroke the film advance lever one and one-half to two strokes until it stop:,. This will move thefilm to the number two position and rotate the flash-cube to a fresh side. As you take the rest of your pic-tures, remember to put on a new flashcube afterevery four snaps.
Framing the ShotNow for some more technical information. S-.id
simply but somewhat inaccurately, the area betweenthe stand legs will be photographed by the camera.The hitch is that the camera actually "sees" less thanthis area by about a half inch on the three sides sur-rounded L the metal stand. The bottom of the photo-waphed area for the fourth side or open end is justabout even with the tips of the side legs. If this seemslike an engineering mistake, just remember that youwouldn't want to see the edges of the stand photo-graphed onto your slides. For the same reason, don't
')

PRODUCING SLIDE AND TAPE PRESENTATIONS
draw border lines at this half inch point or try to cutcopy exactly eight squares square if you CI , you willwind up seeing lines or tape tops on the ed e of yourslides. The safest practice is to let the pica) .;:r back-ground paper "bleed" out to at least the Wide edgesof the stand. The photographed area will 0 less thanthis, but you won t have to worry about 1iredictingthe exact point.
Now for a second consideration about framingthecompositionof the finished product. Generally speak-ing, important aspects of the visual, such as parts of adiagram and titles, should not extend the veryedges of the projected slide. So back to the old draw-ing board. When using the large copystand, impor-tant copy should not be more than seven inchessquaw. in other words, you are nowt substractinganother half inch from all four sides Of the photo-graphed area. This may not seem too confusing, butin actual practice it is difficult to visualize all of theseconsiderations. The solution is to cut a piece of post-erboard according to the dimensions shown for thelarge mask in Figure 1 By placing the mask on top ofthe stand legs you can now arrange your compositionas you would like the finished slide to look Removethe mask before snapping the picture and this dif-ficult situation has become easy.
; osais i440*
a
23
figure I
roue 2 Using the large stand ss at' a 'masking kande
I)

24 READINGS FROM AUDIOVISUAL INSTRUCTION-I
Figure 2 shows the mask for the large stand in use.Note that the mask fits under the side braces and ispushed the way to the vertical edge of the backframe. By constructing the mask out of a flexiblematerial, it can be "bowed" at the center and movedupward if loose materials or tile letters :re used.
A similar mask can be made for the small stand,but since all dimensions are magnified at this closerange. subtract only one-quarter inch in both casesFigure 1 also gives the proper dimensions for thesmaller mask and Figure 3 shows it actually beingused.
After some trial and error i,ou may have to changesome of the mask dimensions slightly for your particu-lar Visualmaker. Slight variation is the penalty thatmust be paid for mass produced, low cost copy equip-ment.
Selecting the CopyThe simplest and perhaps most useful way to use
the copystand is to make slides from photographs,drawings, illustrations, and diagrams from such sourcesas books, magazines, and circulars. Many differentvisuals may be brought together in a slide set and theuniformity of Slides taken with the Visualmaker willbelie their scattered origins. Labels may be laid ontop of a picture before photographing and a specificpart of a photo or diagram can be permanentiy in-dicated on the slide by laying a cut paper arrow in theappropriate place on the original.
The Visuahnaker-also makes it possible for teachersand students to prepare and photograph original art-work. Slides can be used to ask questions, summarize,give directions. mark divisions in material, or directstudents to the next activity. They may be made,usually for the eight inch copy stand, with crayons, feltupped pens, die cut letters. or clippings from printedcopy This artwork. should be done in colors that are instrong contrast to the background shade white ondark colors plc tograph better than pastels A standardtypewriter may be used to add written copy for thethree inch stand format and a primary-faced typewritercan be used for the eight inch format.
The Visualmaker copystand can also be used tophotogreph some three dimensional objects. Suchobjects may cast a shadow toward the open end ofthe copystand. but pic tures can be planned so theshadow does not intertere or so it enhances the elle& tIt you would prefer to minimize the shadow. tryholding a puce e cd white typing paper just outside thepi( ture area at !he open end of the stand By leaningit in at the top toward the camera, you can reflect5(1111C flash( ubt ;ht back toward the shadow areas.
Thc Visualmaker is especially suited to photographing specimens insec ts. leaves. rocks. soilsamples. and ultures It ( an also be used to photograph small aid( b. pieces ca equipment. and menloseups of a process sue h as dissecting d frog The
eight inch stand has an amazing amount of Locustolerance Nothing needs to be done differently if anobject is less than one and one-half inches thick, buteveo objects two to three inches deep c an be successfully photographed if the stand is positioned so thatthe normal focus plane cuts through the approximate
.A011.4von%**
.3410"-'"...C.,.
Imisr910" elika.154111'
wow 3 t %mall 'land mil) a imhisang guide tun 1(1WHIM nia.l uai gulch. btow .hooisug iht, pn fury
middle of the object. A similar focus tolerance on thethree inch stand Is about on -half inch.
The Vs,. almaker kit includes a pistolgrip. handlefor the eight inch stand to Lac ilitat holding the standin a verti al position when photographing such thingsas grow .111. plants or tree bark: you mutt remember touse flash, however, when the camein Is mounted onthe copystand, even in sunlight.
If a picture or drawing .s not big enough to fill thephotographed area, it c an be mounted on or framedwith colored piper. Let s say you want to photographd picture printed m d book 1 hieh measures five andont half inches by siv and one-half inches. The use ofthe three inc h stand would cut out too much of thewanted area and, of course, the eight inch standwould photograph unwanted items surrounding thepa time The solution is to select a pleasing color ofconstruction pap-pr and with d ruler and sharp knife,
ut an opening slightly smaller than the pit ture tinthis case about five inc hes by six inc hest. It you placethe mask on top of the pie ture and under the legs ofthe c opy stand, a very sasfac tory slide c an be pro-duc ed from the pie tore Figure illustrates this oftenenc ouhtered problem and Figure i sho,vs its simplebut aura( tivu solution with a c onstruc tun palm maskand tile letters
Other ApplicationsThe Visualmaker canna c an easily be used off the
opystand. Since it has an elec tit eye wha h makesoutdoor light setting automatic , c. en t rN age

PRODUCING SLIDE AND TAPE PRESENTATIONS 25
f .gurt. ; unthr.t: ttlpu wry ts about a !mt.&
students can use it with success. It should be notedthe elcc tric eye is powered by a battery
must i,c in working condition. If your camera fails toindicate a need for flash on indoor plc tures, you ( anArspect that the battery is either weak or corroded Ifthe camera is used indoors, a distance of twelve feetfrion the suhect is maximum tor a good flash exposedcolored slide.
Slides made without the stand - people, machines,signs, buddings - can he combined with those madeon the stand. Messing picture, in a slide set made onthe scene can often be tilled in by copying a flatplc ture from a book or magazine.
Ike ease of making slides with the Visualmakeropens many institic tional possibilities. One applica-
Fiore ; An ume a all appreprtate rft,h1,
lion (Awn overlooked is using slide sets give demonstrations of how to do something, such as use a sliderule, thread a protector, put in a zipper, or clean asparkplug. Such slide set, can pros: in aluable to thett.a, her who uses a highly indix idualized or learningstation approach.
1 his e ()mew of a slide-sound set orings us fullcircle back to the cassette recorder. Hopefully, youha(e made a decision in the interim to begin harness-ing up this .ommunication team. A curriculum de-sigaed to meet the needs of our complex world requiresboth pictorial and verbal communication. No longercan we afford the inefficiency that has characterizedour traditional efforts to tell the learner what we wanthim to understand

26 READIguS FROM AUDIOVISUAL INSTRUCTION4
MULTIPLE IMAGE SLIDES
DAVID M. JENKINS'
If you want a more dynamic slide presentation,why not try making multiple-image slides. Using aslide copier, you can produce multiple-image slidesin a 'standard 35mm format that can be projeCtedfrom a single projector All you need is a sheet of 31:4" x 4" glass (the type used for producing lanternslides is excellent), a roll of 3/16" opaque tape, andlots of good slides.
The following two procedures are designed for dif-ferent effects, The first process gives you either two,three or four images on one slide The second processwill let you project multiple-image slides sequentiallyfor comparison For example, the first slide wouldshow an image on the upper left quarter of the screen.The next slide would show the same picture on theupper left quarter plus another image on the upperright quarter. The next slide would show the first twopictures plus an image on the lower left quarter, andso on until as many as four pictures were on thescreen at one time. This is a very effective method ofshowing information for comparison.
Two Images on One Slide1) While two, three or four images can be produced
on one slide, you may want to limit your first ven-ture to two. Select two slides that you want toproject simultaneously. Pick slides with the sameformateither both horizontal or both vertical.Even though any combination will work, similarformats are easier to handle initially. (See Figure1.)
2) Remove the slide mounts and place the two 35mmtransparencies on the 31/4" x 4" piece of glass. Besure both the glass and transparencies are free ofdust and dirtthese will show up as specks on thefinished slide. (See Figure 2.)
3) Secure the transparencies on the glass with tape.There are several brands of slide masking tape youcan use. It is generally inexpensive and gives aclean, sharp edge to the image. If you are doing anumber of multiple-image slides, I recommendbuying tape in quantity since it goes surprisinglyfast. (See Figure 3.)
4) Using the tape, mask out the remainder of exposedglass. (See Figure 4.)
5) Remove the plate on top of the slide copier andplace the masked slides on the copy stage. Copy
Association for Educational Communications and Tech-nology, 1980 Reprinted from Audiovisual Instruction, January1977
Figure 1
Figure 2
9 P41
iv/ i
Figure 1

PRODUCING SLIDE AND TAPE PRESENTATIONS 27
the images just as you would normally copy aregular -slide. During the first few attempts, youmight want to experiment with several camera set-tings to compensate for one slide being slightlydarker than the other. The best approach is tocover one slide and get a light reading on theother; then get a reading on the second slide withthe first covered. Set the camera to a setting thatfalls between the two readings. (See Figure 5.).'Your finished product will be a single slide with
two images on it. Once you've mastered this, you can'then produce a single slide with two, three, or fourimages on it.
Multiple-Image Slides for Sequential UseThis process allows you to reveal different seg-
ments of the screen. It is done basically the same wayas the process above, but with the aid of easily con:structed black paper masks.1) Construct black paper masks according to the format
you want to use. (See Figure 6.)2) Mount the slides with tape on the back of the mask
in the order you want them to appear. (c,:.., ngures7 and 8.)
Figure 4
Figure 5
0i
3) Place the mask and the slides on the slide copier.Open the flap of the first, image to be exposed,keeping the other flaps closed. Copy the first slide.(See Figure 9.)
Figure 6
Figure 7i
Figure 8
ri r-40 C'd
0
Figure 9

28 READINGS FROM AUDIOVISUAL INSTR.UCTION 4
4) Advance the camera without moving the mount.Open the second flap along with the first and takethe second slide. (See Figure 10.)
Figure 10
5) Repeat this process for all of the flaps on the mask.You'll then have a series of slides you can show
sequentially for comparison. This would be a goodway, for example, to show growth charts for the lastfour years, revealing one consecutive year afteranother. Or in foreign language class, you could showa slide of the spelling of an Eng list) wo(d and ask stu-dents to spell the word in the foreign language. Afteranswering, the next slide can be exposed showingboth the English word and the proper foreign spell-i ng.
With a wide variety of slide combinations possible,a one projector, multiple-image slide presentationbecomes financially feasible and exciting. Multiple-image slides can make your presentation livelier andmore enjoyable.
PRODUCING SLIDE AND TAPE PRESENTATIONS 29
7302 COULD BE THE ANSWER TO SOME OF YOURTRANSPARENCY PRODUCTION NEEDS
PAUL E. NOVAK and PAULA NOVAK
Have you ever wanted a high quality overhead trans-parency from one of your favorite black and white35mm negatives? Have you wished for a quick set ofslides fora preSentation? If you answered yes to eitherof these questions, your solution will be found throughthe use of Kodak 7302 fine grain positive film (a finegain- negative - working material).
Overhead Transparency ProceisThis film is a tremendous medium to use for making
overhead transparencies. Processing is a snap for any-one who can make black and white prints and theprice per transparency is under a dollar. To make a 8"x 10" (20cm x 26cm) transparency, follow the stepslisted below:
1 Pick out one of your negatives, place it in the en-larger.
2. Focus on the printing easel.3 Get out a sheet of direct positive film using*either
an OA (yellow) or 1A (red) safelight. Put the film emul-sion up on the easel and make the exposure. To deter-mine exposure time, make a series of tests. This materialis about Y2 the speed of kedabromide grade 2.
4. Develop the film in a solution of one part Dektolto two parts water. The image comes up rapidly oncethe film is in the developing tray. The emulsion side, infact, might appear to be almost black and overexposed.Develop with the emulsion side down and the resultscan easily be judged by observing the changes on thenon-emulsion side. Normal developing time is abouttwo to four minutes, contrast can be built up by usingthe longer developing time. The film will have acloudy appearance after developing is completed.
5 Drain the film and put it in the stop bath for about30 seconds.
6 Fix the flint for about three tofive minutes. Youcan judge total fixing time by observing the disappear-ance of the cloudiness. Once the film clears, fixing is
Assoc Ninon for Educ atonal Corinnunications and fcbcnology, 1980 Not prmously published.
about one-half completed. Continue fixing for a timeequal to clearing time. Room lights can be turned onafter one minute of fixing to judge the results of yourefforts.
7. Wash the film in water for about five minutes.8. Give the film a 30 second dip in a Photo-Flo solu-
tion and hang it up to dry.9. Mount the transparency and it's ready for projec-
tion. If you want more protection for the emulsionside of the film, place a clear Sheet of acetate over theemulsion side when mounting the transparency.
35mm Slide ProcessA similar process can also be used to make 35mm
slides from a set of 35mm black and white negatives.Instead of projecting the negatives in the enlarger, acontact sheet is made using the direct positive film.Start by selecting the negatives you wish to use andfollow these steps:
1. Take out a 8" x 10" (20cm x 26cm) sheet of directpositive film, and place the negative strips on the film.Remember to keep emulsion to emulsion whenmaking the contact sheet.
2. Place a sheet of glass on top to insure good con-tact.
3. Make an exposure using the enlarger as a lightsource.
4. Develop, stop, fix, wash, and dry the film.5. Cut the film and mount the individual frames in
cardboard or plastic mounts. Resultsan almost in-stantly produced series of black and white slides.
Kodak 7302 direct positive fine grain is a very versa-tile and relatively low-cost photographic medium. Any-one possessing darkroom skills can easily learn to usethis film to produce overhead transparencies. In addi-tion, unprojectable negatives can be easily reversedfor projection. The process is simple, quick and low-cost. Give direct positive film a try and see if it meetssome of your transparency production needs.

30 READINGS FROM AUDIOVISUAL INSTRUCTIO
CHANGING THE IMAGE SHAPE OF 35MM SLIDES
DUANE E. HEDIN
As slide presentations are being more widely used ineducation, government, and industry, and as moremulti-media or multi-image programs are being shownin conferences and conventions, it is not unusual tosee 350 or 400 slides in one program. It has become ap-parent that something could, and perhaps should bedone to break the monotony of seeing the familiar rec-tangular image of a 35mm format in every image area.
When two or more images appear on the screen orscreens at once, it is a nice relief for the viewer to oc-casionally see a variety of shapes in the image areas.When used wisely it is not only pleasant, but canprovide contrast and comparison. Variety and emo-tional involvement can also be created depending onthe content of the slide and the shape of the mask.
About five years ago I devised a way of maskingslides the process is called High Contrast Slide Mask-ing. It has been used in many multi-media productionsand recently a growing number of people have adoptedthe idea, but continue to have many questions concern-ing "how to do it."
There are several reasons for masking slides whichinclude, among others, covering unwanted material orbackground distractions such as lettering, advertise-ments, and other objectionable material so that onlydesired parts of the illustration show through the mask.Masks can also help to focus a viewer's attention to aspecific area of the slide image. Thus, slide masking
. can have a tremendous visual message impact.Where the mask itself is part of the content and
lends support to the visual image, it assists in com-municating the message. For example, a slide of afootball game masked in a football instead of the wellknown rectangle not only focuses the viewer's atten-tion on the action by blocking out some of thespectators in the slide, but the shape of the slide rein-forces the message (see Figure 1). A beautiful fallscene masked irr* a leaf-shaped mask instead of thefamiliar rectangular format or a traffic accident maskedin a broken windshield are other examples. (see Figure2, 3)
There are several ways to mask a slide. Masking with,high contrast film is a good one, not only because themasks are opaque and project a very sharp line, but be-cause they can be used with existing or old slides.
To produce a mask, make a silhouette drawing with
_
Assoc lation for Educ at tonal Communic ations and tec h-nology. t98U Reprinted from Audio% tstia/ instruction, No-vember 197i
black india ink on white posterboard or drawing paperin the exact shape of the mask desired Then photo-graph the drawing with high contrast ortho film to theexact size wanted. After processing the negative, theoriginal black image will be the clear area on the nega-tive through which the image is projected. When dry,cut it to the outside dimension of the colored slide andsandwich the negative with the slide into the 35mmmount.
Care should be taken to mount the mask behind theoriginal film image (against the shiny backing of thefilm). If it is shown in an automatic focus projector,the image will be in focus instead of the mask. If forany reason the mask should be in sharper focus thanthe colored slide, then it should be mounted in frontof the original slide (against the dull or emulsion side,toward the projection screen).
High contrast images can be saved over the yearsand combined in positive form onto sheets of 8" x 10"high contrast film or 35mm high contrast strips or rollsWhen several masks are needed for a production, a
FIGURE 1
FIGURE 2
FIGURE 3
contact negative can easily be made from these andthe image to be sandwiched with the colored slidesimply cut out. The positive sheet is then left intact tobe used as a master for later masking needs. You'll findthat masking makes multi-media easier to produceand more exciting for viewers.
31

3HOW TO MAKE TITLE SLIDES

-32
MAKING TITLE SLIDES
DEANE W. HUTTON AND JEAN ANNE LESCOHIER
Of all the audiovisual aids to instruction availableto the 'classroom teacher, colof slides offer severalunique advantages. Most teachers own a camerawhether it be-a Kodak Instamatic or a Nikonandcolor glides are relatively* easy to present in bothgroup and individual ,instruction situations. And tomake a good set of home -made slides,look t.tulK pro-fessional, it is easy to add title,,slides. Title slides arenot only useful for introducing the material, but alsofor dividing into sections and for making summaries.So titles can be important for practical as well asaesthetic reasons.
There are, of course, many different kinds of titleslides. In fact, probably the simplest way to obtainverbal material on slides is to photograph "natural"signsbillboards, signposts, store marquees. But thesigns you want are not always available. To make atitle say exactly what you want; the surest thing is towrite out the words and photograph them. For thoseof us who cannot hand letter neatly, there are manyalternatives. There are cutout letters, press-on lettersand mechanical lettering devices such as Wrico guidesand Leroy guides and Varityper machines. Once thelettering is completed or pasted-up, it is relativelyeasy to photograph, particularly if the slide-makerhas access to close-up rings or lenses. However, theresulting title slide with a bare verbal message maybe a little dry. Its effectiveness can often enhancedby combining the verbal message with a related photo-graphic scene. How can title words be superimposedover scenes? The answer to this question is the pur-pose of this article.
Many methods are available for superimposingwords over a photographic scene. We will examinefour in some detail, describing equipment and pro-cedures, and indicating advantages and disadvantagesof each method. The following diagram sets out thefour methods of image manipulation and combina-tion in order of increasingly complexity and ver-satility:
Method 1:CAMERA DOUBLE-EXPOSUREOver-rides double-exposure prevention mechanism in35mm camera.
Association for Educational Communications and Tech-nology, 1980. Reprinted from Learning Resources, Audio-visual Instruction, May 1974.
READINGS FROM AUDIOVISUAL INS TRUCTION-4
Method 2:SANDWICH SLIDECombines separate frames in single mount.
Method 3:SLIDE DUPLICATOR(e.g. Repronar)Combines electronic flash, to illuminate slides, withbuilt-in double-exposure facility.
Method 4:DIAZO COMBINATIONConvert title slide and color slide to diazo positivesand combine with methods 2 or 3.
As might be expected, methods which are moresophisticated and versatile also cost more in time andmoney.
Method 1:CAMERA DOUBLE-EXPOSUREOver-rides double-exposure prevention mechanism in35mm camera.
Modern 35mm cameras usually have automaticdouble-exposure prevention mechanisms. However,in most cases the mechanism can be over-ridden.(This method will not be applicable to most camerasthat use a rewind switch rather than a rewind button.e.g. Nikon F)
Take
Don't advanceTighten
Hold
PhotographWarning
r)
the first picture (e.g. a scene), keep-ing in mind where ihe title words willbe placed.the film!the film in the camera by turning therewind lever.the rewind lever firmly, press therewind button and flip the advancelever one complete turn. This willcock the shutter ready for the nextexposure without advancing the filmso that the next frame will be super-imposed over the last.the title words.Use white or light colored letteringon a black background.

PRODUCING SLIDE AND TAPE PRESENTATIONS
Method 2:. SANDWICH SLIDECombines separate frames in single mount.
Photograph the scene and title words separately.In this case the lettering should beblack or a dark color on a light back-ground. Also, the scene should havea light area which correspond to theposition of the words on t the titleslide.
Remove each slide from its mount.Fix them together with small pieces of
adhesive tape over the sprocket-hole edges.
Re-mount the "slide sandwich" :n a freshmount.
Method 3:SLIDE DUPLICATOR(e.g. Repronar)Combines electronic flash, to illuminate slides, withbuilt-in double-exposure facility.
The Repronar can he used for making ordinary slidecopies, for adjusting exposure, for cropping the originalimage, and for making several kinds of title slide Wewill describe its use in superimposing white or light-colored lettering over a dark image area.
Make
Place
Switch
Switch
Press
Do notCock
ReplacePress
Advance
a title slide on high contrast film(e g Kodalith) with clear letter-ing on black background.scene slide on the ground glassof the Repronar.on viewing light, focus theimage, set f stop according tothe calculator.light from "view" to "flash" posi-tion.shutter-release button, windthe film.
shutter by pressing the plungerat back of camera.scene slide with title slide.shutter-release button again tomake the second exposurethe film.
33
To make a title slide with colored letters, repeat theabove procedure but place a colored filter (e.g., cel-lophane, gelatin or diazo film) in contact with the titleslide when it is copied. Use light colors, and make surethe letters are superimposed over a dark area of thescene.
Method 4:DIAZO COMBINATIONConvert title slide and color slide to diazoand combine with methods 2 or 3.
-7'
positives
The diazo process can be used for creating a con-tinuous-tone positive monochrome image from a colorslide. There are many ways to combining this positivewith the title. Here we outline the method for making atwo-color diazo title slide
Remove the color slide from the mount.Mace slide on contact with colored
diazo film.Expose diazo-slide combination to ul-
traviolet light.Do not develop at this stage! You now have a latent
positive diazo scene.Make a Kodalith positive title slide
from the Kodalith negative.Place Kodalith positive in contact with
diazo film of a second color.Expose to ultraviolet light.Develop in ammonia. You now have a
diazo positive title.Sandwich latent diazo scene with Kodalith
negative, title.Expose the sandwich to ultraviolet
light so that title "burns" intothe scene as clear letters.
Develop in ammonia. You ndw have adiazo monochrome scene withclear letters.
Combine diazo title scene with diazo title.The colored letters will showthrough the clear letters. Thesetwo can be combined by theSandwich Slide or Repronar.
This is one of the more complex diazo combinations.Simpler methods can be worked out from this outline.
We have outlined four methods for superimposingwords over scenes to make title slides. Refer to Table 1which outlines the advantages, disadvantages and sug-gested use of each method.
(over for Tahle 1)

/
r
34 READINGS FROM AUDIOVISUAL INSTRUCTION-4
TABU 1
METHOD ADVANTAGES DISADVANTAGESL
SUGGESTED USE
1
DoubleExposure
Quick.No special equipment needed.
Cannot preview the super-imposition.
iInitial exposures must be correct.Must use light lettering.
For making superimposed titleslides when camera is onlyequipment available.
2
SandwichQuick.No special equipment needed.
Original slide incorporated intosandwich.
Must .use dark letters on lightbackground.
To make titles that are needed ina hurry, using pre-existingcolor slides.
3
Repronar
Quick.Excellent control over relative
size$, of picture and lettering.
Equipment expensive (severalmodels, $200 up).
Cannot preview the super-imposition.
For mass production of title slides.
4
DinoProcess
Variety of effects possible.Flekible.
Time-consuming.Requires considerable skill and
practice.
Effective for producing title slideswith unusual color combina-tions.
r.,
I

PRODUCING SLIDE AND TAPE PRESENTATIONS35
HOW TO MAKE TITLE SLIDES WITH HIGHCONTRAST FILM /DEANr K. DAYTON
Photographers, educators and others often combinecolor slides into a single presentation to communicatebetter visually Such presentations can be greatly en-hanced by including attractive title slides or by super-imposing captions, labels, etc , over existing slides.The need, therefore, arises for a simple and inexpen-sive system to make title slides. The purpose of thisarticle is to describe such a system 7-one which is veryflexible/but still meets the requirements of low costand ease of use.
Locating Materials1 he key to this system of making title slides is a high
contrast film manufactured by the Eastman KodakCoMpany called "Kodalith Ortho Film, Type 3." This isan orthochromatic film which has long been used byoffset printers and graphic artists. When properly ex-posed and dekloped, it results in excellent reproduc-tions, yielding solid blacks, exceptionally clean whites,and no middle gray tones.
Kodalith is available in 35mm, as well as many otherformats. The 35mm film (Kodak film type 6556), how-ever, comes in 100 foot molls (approximately $10) andmust be repackaged into cartridges by the user. Suchrepackaging can either be done with a bulk loader or ina darkroom. Individuals desiring to produce large quan-tities of positive high contrast slides may also want topurchase a box of 8 X 10 sheet film (Kodalith film type2556 approximately $20 for 50 sheets) since it sim-plifies the process of making contact prints.
Kodalith can be developed in any of the following.Kodalith Super RT Developer, Kodalith Developer,Kodalith Fine-Line Developer, or Kodalith Liquid De-veloper To prolong their life, the developers are soldas two separate solutions, A and B, which are mixed insmall quantities just prior to use.
Kodalith films and developers d re not considered tobe amateur products and are sometimes hard to lo-(ate They are, however, stocked in some of the largerphotography shops. Shops that do not have them instock can often order them or can refer you to anotherstore Shops that advertise Kodak Graphic Arts SuppliesShould have the products readily available. Asa last re-sort, you can write to the Eastman Kodak Company( 343 State Street, Rochester, New York 14650) for theacldresS of the nearest distributor
Association for Educational Communications and fe(h-nology, 1980 Reprinted from Aodiovisua/ Instun turn, Apriland May 1977
The rest of the supplies (see the Required Materialslist) can be found in photography, drug, grocery, or artsupply stores. The required equipment should be readilyavailable in even the simplest of darkrooms capable ofhandling 35mm film. The one modification to thedarkroom, which is well worth the effort, is the instal-lation of a red safelight (Kodak Safelight Filter No. 1A,or similar substitute) if one is not already there. Redlight, unlike other colors, will not expose the orthofilm and therefore eliminates the necessity of workingin total darkness.
Preparing the ArtworkTechniques for producing the artwork for the slides
are plentiful, and in most cases quite simple. The onlymajor requirement is that the artwork be high contrast,consisting of a dark (preferably black, and definitelynot blue) image on a light (preferably white) back-ground A black inclia ink or felt-tip pen drawing onwhite paper makes an excellent original. Illustrationscan be made freehand, or can be composite picturespasted together from a variety of sources, such as highcontrast magazine illustrations or commercially pre-pared clip art As long as all of the illustrations are onwhite paper and are adhered well to a white back-ground, the paste-up marks should not show whenphotographed.
Lettering, too, may be freehand, or you may want totry a commercially produced system. There are a varietyof mechanical systems available LeRoy, Letterguide,
i tech. etc which produce professional appearinglettering using India ink, templates and a scriber. Thesesystems do, however, require d sizable initial invest-ment which the small-time producer may not be ableto afford An excellent substitute can be f000d intransfer type Presstype, Chartpac, Format, etc.which can be purchased by the sheet ($1 to $4 persheet) in art supply stores. These letters cum- in a widevariety of interesting sty les and sizes and are easilyapplied to the artwork.
A few precautions before preparing the artwork willprevent occurence of two common mistakes. Thefirst has to do with the size of the artwork and thelimitations of the equipment with which you plan tophotograph the artwork If you have a macro lens, or aseries of close-up filters, for your single lens reflexcamera, you need not worry much. However, if you doriot have these items, be certain that the artwork islarge enough to be in focus when it fills the viewfinderof your camera.
Second, sin( e the artwork is to 1w «ipied onto a.35mm slide, it is impOrtant that it 1w prepared in asuitable format (see Figure 1) When a 15m in slide is in
ti

36
Artwork must
conform tothis fOrmat
Figure I
a horizontal position, the ratio of the image height tothe image width is approximately 2 to 3. This meansthat the prepared artwork must also fit within thisratio if it is to have a pleasing appearance. For example,if the width of the finished artwork is 12 inches, itsheight must be two-thirds of that distance, or eightinches. Prior to beginning the artwork, it is a wisepracLi,e to estimate its approximate site and thendraw a properly proportioned format rectangle directlyon the drawing paper with a light blue pencil. Theartwork can then be composed within this rectangle.The light blue pencil marks will not show up when theartwork is photogri,phed with the Kodahth
Photocopying the ArtworkTu eliminate the problem of parallax, a single lens
reflex camera should be used to copy the artwork If acopy stand is (wadable, the camera should be rigidlymounted to the camera support, making certain thatthe bac k of the camera is parallel to the base of thecopy stand The artwork is then placed on ths base Ifit has a tendency to curl, a c lean sheet of glass may beused to hold t flat Photographic lights with reflectorsshould be placed at either side of the copy stand andaimed down at an angle of approximately -Vi° fromhorizontal so that they evenly illuminate the artworksurtaL L. k see Figure 2) A c able release should be usedon the camera to eliminate the possibility of mu% eMentduring the exposure
run
READINGS FROM AUDIOVISUAL INSTRUCTION-4
In the event a copystand is unavailable, a tripod canbe used to support the camera. In this case the artworkmust be secured to the all and the camera positionedas shown in Figure 3. If two photographic lights withreflectors cannot be located, any source of light (otherthan red) can be used. If this is done, make sure thatthe artwork is evenly illuminated.
Kodalith has an ASA of 6, but I find the value to besomewhat unreliable due to the narrow latitude of thefilm and differences in light sources, developer tem-peratures, manufacturers specifications, etc. For thatreason, it's a good idea to shoot a test roll prior tocopying a large quantity of material. Since the filmmust be bulk loaded, it's a simple matter to load ashort roll (ten to 15 exposures) into the camera, set theshutter speed at one secon.1, and make several expo-sures at one-half stop interval, throughout the aperturescale, recording the aperture setting for each shot. Theartwork used for these test exposures should be of amedium size and rather complex in order to providethe best estimate of the correct exposure.
Once the film has been devc.loped, following themanufacturer's specifications, the best exposure canbe selected and its aperturedetermined by referring tothe notes taken while shooting. A properly exposednegative should preserve all of the fine detail, as wellas have clear, transparent whites and solid blackswhich are free of pinholes. As long as no conditionschange (light position, developer temperature, etc )an aperture selected in this manner should provideadequate exposures for the rest of the artwork. However,it is a good precaution to bracket all exposures byshooting each piece of artwork at an aperture one stopgreciter and one stop less than the selected exposure.This practice of shooting in three!, often eliminates theneed to reshoot some of the slide and is consideredto be well.worth the additional c ost in materials.
The film can be developed under a red safelight-ineither a roll film tank or a tray, The use of a tray permitsdevelopment by inspection in the event a test roll wasnot shot. However, the use of a film tank probably re-sults in more e en development of roll film De eloperis prepared lust prior to use by mixing equal portionsof the two solutions. Development times and temperatures for the anous de% elopers can be found on thedata sheet packed with the tilm. Except for the typeand use of the developer, the process is identical to thedevelopment of any other roll of .35mm black and
'hotngraphsng tt .1 triptgl
ti I

PRODUCING SLIDE AND TAPE PRESENTATIONS 37
REQUIRED MATERIALS
This is a list of all of the materials required to com-plete all of the processes described in this article. Ifthe reader intends w try only some of
SuppliesKodalith Ortho Film, Type 3
- 35 mm, type 6556 (10 foot roll)-8" X 10" sheet film, type 2556
developer (one of the following)-Kodalith Developer- Kodalith Super RT Developer- Kodalith Fine-Line Developer-Kodalith Liquid Developer
stop bathfixerphotographic paperblack and white. continuous tone filmdrawing paperindia inkslide mountsnegal ive opaquecotton swabswatercolors (one of the following)
-foodcoloring-Dr. PH. Martin's Synchromatic
Transparent Watercolorsacetic acid (stop bath or vinegar)spirits of ammoniarubber cementcolored mimeograph inkclean newsprintmasking tape
the processes, manbe needed. In sucshould be consulter
of the materials listed sill nota case. the text ot the article
before any purr haws are made.
Equipment
35 mm single lens reflex cameracopyst and or tripodlights with reflectors (2)cable releasefilm cartridgebulk film loaderdarkroomred safelight (Kodak Filter No. 1A)film developing tank with reeldeveloping trays (3)enlarger (or other light source)glass platesqueegeecotton glove'drawing instrumentsa lettering system (one of the follow-
ing)-a mechanical lettering system
(LeRoy, Letterguide, etc.)- sheets of transfer letters (For-
man, Chartex, Presstype, etc.)rulerlight blue pencilprojectorsmall brushbottle-, for mixing colors
white film. The novice can find an adequate descrip-tion of the development process on the film datasheet.
If a negative slide is acceptable (white lettering orartwork on black background), it's a simple matter toselect the best exposure of each slide once the film isdry. Cut the negative of this expos,ure and secure it in amount available at most photography stores. If apositive slide is desired (black artwork or lettering,onwhite background), the negatives can be contactprinted. emulsion to emulsion, onto another strip ofroll film or onto a sheet of Kodalith film, type 2556.Then develop the film and mount the negatives in thesame manner as described above. 11 you are unfamiliarwith the process of making contact print, you can findan explanation in any basic photography hook.
Occasionally, slides prepared in this manner havepinholes or other imperfections ini the black areas, dueto improper development or dirt somewhere in thesystem These imperfections can be removed withnegative opaque, available at photography stores.Opaque is simply a very dark paint which will blockthe passage of light. It can he applied directly to the
slide with a bush. This material, however. should beused only on a dry slide and as the last step before con-tact printing or mounting.
INTERNATIONALMORSE
CODE
A positise high «intr.ist slide
t) r,ko 0

38
04D 0
0 0
A negative high contrast slide
Most high contrast films see either black or whiteand no shades of gray. It is, therefore, sometimes dif-ficult to determine the correct exposure because it isaffected by the quality and contrasts of the original.To determine the optimum exposure for your standardset up, use a gray scale (Kodak Graphic Arts) for aseries of exposures. After development, read the nega-tives for what's called the "dirty thirty." Al! values tothe dark side of .30 on the gray scale are black (clear onthe negative). All values to the light side are white(opaque on the negative). That leaves .30 a confusedgray or "dirty Exposure is now optimized for bestcontrast.
Ed
Part II
Although Kodalith Ortho Film is black and white,one or more colors can easily be added to the slides toenhance their beauty. One of the major ingredients ofphotographic emulsion is the substancewhich holds the siker particles in suspension on thefilm Watercolor can be used to tint this gelatin (oating, just like food-coloring (a watercolor) is used totint gelatin salads or desserts
A Watercolored PositiveThere are two good sources for watercolors Food
coloring, mailable at the grocery store, conies in fourbasic colors and can be diluted and combined tocreate almost any other color. HoweY ei, if consistencyof color is required, it might be wise to purchase somebottles of Dr. PH. Martin's Sy nchromatic TransparentWatercolors, available through art supply stores Thebottles come in sizes as small as one-half ounce or aslarge as one quart, and in a wide range of colors
If a single color is to be added to a high contrastslide, the best result will bc obtained by dipping thedry piece of film iiito a tray of watercolor. Experi-mentation with pieces of scrap film is recommended,since many colors will need to be diluted to preventthem from being too intense for good projection. Toincrease the permanency of the color, a small quantityof acetic acid (stop bath or vinegar) can be added tO
READINGS FROM AUDIOVISUAL INSTRUCTION-4
the diluted watercolor. To ensure even saturation andto prevent spotting, the film should be immersed in atray for two or three minutes and then either squeegeedor blotted quickly with clean newsprint before beinghung up to dry.
If two or more colors are to be applied to the sameslide, they are best applied with a cotton swab latherthan in a tray. This procedure is particularly effectivewith negative slides which have patcl..es of color sur-rounded by large regions of black. Such negatives re-duce the precision required to apply the color bymasking the uneven edges of the color.
Since both the emulsion and base sides of the film
IMark the title area& image corners witha light blue pencil
are coated with a gelatin-like substance, color can beapplied to either side. The emulsion coating (the dull.side), however, is much thicker and will result in adarker shade. To ensure even saturation, color appliedwith a cotton swab should be permitted to stand onthe surface of the film without drying for at least twominutes before being blotted off with clean news-print.
If you have a difficult time preventing the colorsfrom running into adjoining areas, a rubber cementsolution can be used a:, a mask. The masking materialis made by mixing rubber cement with a little coloredmimeograph ink to make it more visible. Using a smallbrush, this can then be applied to those areas of theslide that are not to be colored since areas coated thisway Will not accept watercolor. After a color has beenapplied, the rubber cement can be removed by gentlyrubbing it off with a finger. Since the rubber cementwill not affect the watercolors one e they have beenapplied, the process can be repeated for each addi-tional color.
Mistakes in coloring can usually be corrected bywashing the film in running water in the same mannerin which it was washed during the development pro-cess This procedure, however, requires redrying of thefilm and removes all of the color. Minor mistakes canbe corrected with spirits of ammonia, available inmost drug stores. Like watercolors, spirits of ammoniacan be applied with a cotton swab. Once the ammoniahas been liberally absorbed Into the surface of thefilm, it will remove watercolors.
Ci r)4.4

PRODUCING SLIDE AND TAPE PRESENTATIONS
Superimposing Titles Over Existing SlidesAttractive effects can be achieved by superimposing
high contrast, positive slides over continuous tone,color slides. The result is very similar to that often seenin motion picture titles. The artwork for a superimposedtitle is prepared as previously described, except that itmust be planned with the color slide in mind. A goodpractice is to project the slide a piece of drawing
II
A watereo/ored negative slide,
a
paper Then, indicate on the paper with a light bluepencil the area where the title is to appear. Superim-posed titles are most legible on light colurc,: areaswith little or no detail Before turning off the projector,be sure to indicate on the paper where the corners ofthe slide fall, so that the two images can be registeredlater.
After you are finished with the projector, add thetitle to the indicated area, using one of the recom-mended lettering systems A blue pencil and ruler canbe used to connect the corner marks, thereby indicatingthe edges of the frame in the finished slide. Once theartwork is completed, photograph it, making certainthat the edges of the camera viewfinder coincide withthe frame edges which are drawn on the artwork. De-velop the film and contact print it, emulsion to emul-sion, onto another sheet of film. The resulting positiveshould then be developed and trimmed to size in pre-paration for mounting.
If the color slide is inserted in a plastic mount, it is asimple process to pry the edges of the mount apart andslide the film out. This should, of course, be done with
A watercolored positive slide
39
a cotton glove to prevent fingerprinting the slide. Thepositive high contrast slide is then positioned, emul-sion to emulsion, on top of the color slide and the twoinserted back into the mount. if the color slide came ina cardboard mount, the original mount will probablyhave to be destroyed and the two remounted in eitheranother cardboard or a plastic mount.
A title superimposed over an existing slide
The process of contact printing emulsion to emul-sion results in a high contrast positive and a color slidewhich are correctly oriented when the two are placedemulsion to emulsion. This is important, since it placesthe two photograpt;ic images, for all practical purposes,in the same focal plane. Separation of the two emul-sions, even by a short distance, might result in the lackof proper focus for one of the two images when theslide is projected on a screen. Occasionally, the heatfrom the projector or the characteristics of the filmmay cause the two pieces of film to separate and resultin the same problem. This, however, can be eliminatedby.mountIng the slides in glass mounts which will holdthe two pieces of film tightly together.
Posterized SlidesPosterization is a process by which continuous tone
pictures are converted to high contrast by eliminatingall of the intermediate gray tones. The effect is easily;thieved with Kodalith film and often results in veryd amatic and artistic slides.
The original photograph can be taken with any
40
...o1 linksa owes...
A posterized title slide

40
black and white film, such as Plus-X or Tri:X. Posteriza-, tion is usually most attractive if the original print con-
tains many dprk shadp ws which reveal the form of theobject in the photograph. Such an effect can be createdby using a single light source to one side of the object.The print can be made on any nontextured photographicpaper. If the negative is of low contrast, an effortshould be made during the printing process to heightenthe contrast by whatever means possible. Transfertype can be used to superimpose titles over the lightareas of the finished print.
The posterization is accomplished by rephoto-graphing the print with kodalith Ortho Film. Depending.upon the desired effect, the high contrast negative, or
READINGS FROM AUDIOVISUAL INSTRUCTION4
a poitive made by contact printing, can be used forthe slide. Watercolors can, of course, be added tomake the slide more attractive.
Conclusion
Individuals interested in the preparation of visualmaterials that contain a message will discover thathigh contrast film can greatly expand the sometimelimited potential of continuous tone photographyThis article has only briefly described one use of highcontrast filmthe preparation of title slides. However,serious experimentation with this process can lead youto a broad range of other uses.

...
- , PRODUCING SLIDE AND TAPE PRESENTATIONS
ADDING IMPACT. TO 354M SLIDESNEAL HALL
"It seems"as though everyone who works preparingvisual presentations has some favorite "trick" for doing35mm slides. Adding interesting visuals is a plus forany presentation. We all know that "words" on ascreen have about as much visual impact as the insideof a lens cover, but now and then there seems to be noway around showing just words. To add impact, manysystems exist: color backgrounds; burn-ins over otherscenes; high-contrast negatives or positives' coloredwith tape, gel, or food coloring; and many other waysmuch more exotic.
Most of these methods take time and effort. Some-times it's easiest to photograph on color reversal filmand have the processing done by a commercial pro-,cessor.
Here is a method that allows the simplicity of "pushthe button and leave the rest to the drug store" withmore visual impact than standard color reversal slidesusually offer. Using this system, black type will beprojected as white_ Black type is usually easiest tb seton typewriter, headliner, oc by using press type. But,white type generally looks best on the screen becauseit is lighter than its surroundingsit stands out andgives more impact to the words. This' system givescolored backgrounds with fully saturated, vivid, trans-parent color. The method involves a chemical mis-match between film and processing. The film 'used isKodak Ektachrome Xa reversal type slide film; butinstead of processing into slides via its normal chem-istryit's processed in color negative chemistry. Thisgives a color negative, where black equals white andcolors are produced as their complement. Since theorange colored masking present in most color negativematerials is not present in Ektachrome X, the colorcomplements are rendered quite pure.
Color can be added to the original copy in a numberof wayscolored paper, color filters over the cameralens, or colored gel over the light source; but remember,what you see is the opposite of what you get. You can,get some idea of the final color reproduction by draw-ing a color wheel. Start with a circle (clock face). Writein red at 2 o'clock, green at 6 o'clock, and blue at 10o'clock. Add the complementsyellow at 4 o'clock,cyan (blue-green) at 8 and magenta (blue-red) at 12.Now you have a graphic representation to show input
.. .
Assockition for Educational Communications and Tech-nology, 1980 Reprinted from Audiovisual Instruction, .November 1975.
41,
versus output. Color on the final slide will be directlyacross from (180° away) the color on the original. Itcan be found that yellow paper will photograph asblue, light red or pink as green, etc.
Exposure will take some experimentation Ek-tachrome X carries an ASA of 64, but this system willincrease the effective ASA to about 400. Proper ex-posure is achieved when the whites are clear andopen. Since color balance is relatively unimportant inthis system, there's no need to worry about the colortemperature of the light sources.
After exposure, mark the film magazine "process C-22" and have it processed. Tell the lab to process only(otherwise you'll get prints also), and it might be wiseto buy some -35mm mounting framescommercialprocessors normally don't mount color negatives, how-ever, some will if asked.
This process will yield 35mm slides that are visuallyinteresting because of the vivid and unusual colors,and the reversed type makes for a much snappierscreen image.
Editor's Note Some commercial processors are using anew process "C -41'- instead of C-22. C-4115 a 100 de-gree process, and might be a little hot for EktachromeX. Check that your processor is in fact using C-22 be-fore ydhoend the film.
e
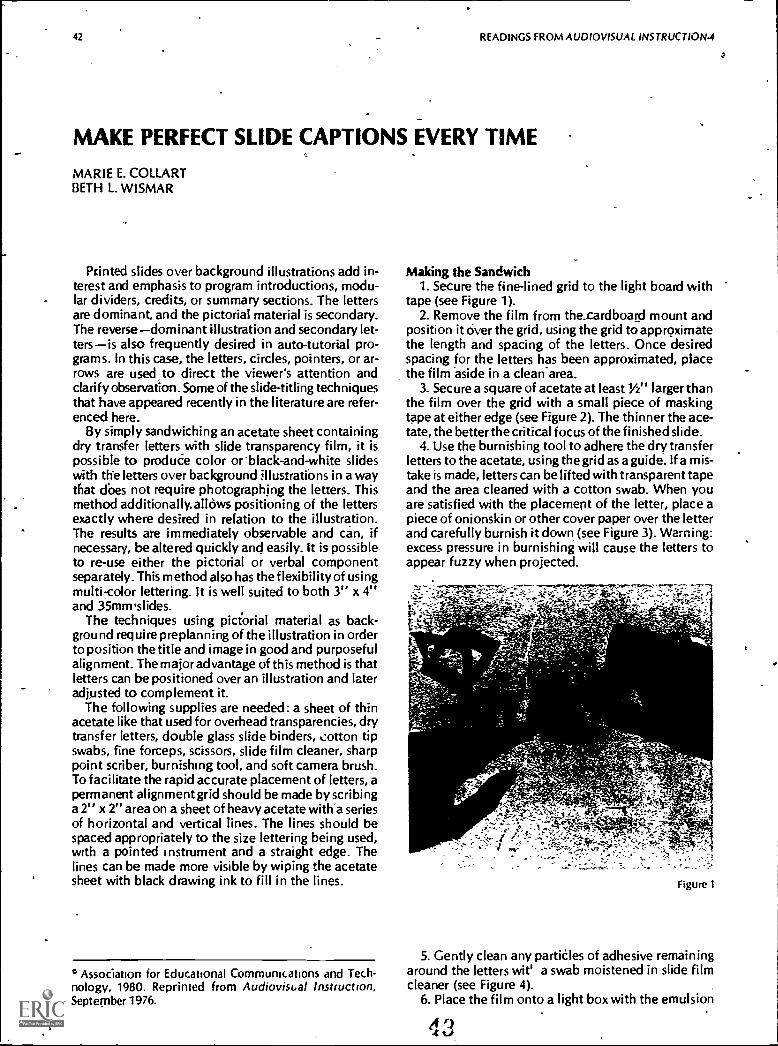
42 READINGS FROM AUDIOVISUAL INSTRUCTION-4
MAKE PERFECT SLIDE CAPTIONS EVERY TIME
MARIE E. COLLARTBETH L. WISMAR
Printed slides over background illustrations add in-terest and emphasis to program introductions, modu-lar dividers, credits, or summary sections. The lettersare dominant, and the pictorial material is secondary.The reversedominant illustration and secondary let-tersis also frequently desired in auto-tutorial pro-grams. In this case, the letters, circles, pointers, or ar-rows are used to direct the viewer's attention andclarify observation. Some of the slide-titling techniquesthat have appeared recently in the literature are refer-enced here.
By simply sandwiching an acetate sheet containingdry transfer letters with slide transparency film, it ispossible to produCe color or *black-and-white slideswith the letters over background illustrations in a waythat does not require photographing the letters. Thismethod additionally, allows positioning of the lettersexactly where desired in relation to the illustration.The results are immediately observable and can, ifnecessary, be altered quickly and easily. It is possibleto re-use either the pictorial or verbal componentseparately. This method also has the flexibility of usingmulti-color lettering. It is well suited to both 3" x 4"and 35mrwslides.
The techniques using pictorial material as back-ground require preplanning of the illustration in orderto position the title and image in good and purposefulalignment. The major advantage of this method is thatletters can be positioned over an illustration and lateradjusted to complement it.
The following supplies are needed: a sheet of thinacetate like that used for overhead transparencies, drytransfer letters, double glass slide binders, cotton tipswabs, fine forceps, scissors, slide film cleaner, sharppoint scriber, burnishing tool, and soft camera brush.To facilitate the rapid accurate placement of letters, apermanent alignment grid should be made by scribinga T' x 2" area on a sheet of heavy acetate witha seriesof horizontal and vertical lines. The lines should bespaced appropriately to the size lettering being used,with a pointed instrument and a straight edge. Thelines can be made more visible by wiping the acetatesheet with black drawing ink to fill in the lines.
Association for Educational Communications and Tech-nology, 1980. Reprinted from Audiovisual Instruction,September 1976.
Making the Sandwich1. Secure the fine-lined grid to the light board with
tape (see Figure 1).2. Remove the film from the..cardboard mount and
position it aver the grid, using the grid to approximatethe length and spacing of the letters. Once desiredspacing for the letters has been approximated, placethe film aside in a clean'area.
3. Secure a square of acetate at least Y2" larger thanthe film over the grid with a small piece of maskingtape at either edge (see Figure 2). The thinner the ace-tate, the better the critical focus of the finished slide.
4. Use the burnishing tool to adhere the dry transferletters to the acetate, using the grid as a guide. If a mis-take is made, letters can be lifted with transparent tapeand the area cleaned with a cotton swab. When youare satisfied with the placement of the letter, place apiece of onionskin or other cover paper over the letterand carefully burnish it down. (see Figure 3). Warning:excess pressure in burnishing will cause the letters toappear fuzzy when projected.
5. Gently clean any partiCles of adhesive remainingaround the letters wit' a swab moistened in slide filmcleaner (see Figure 4).
6. Place the film onto a light box with the emulsion

PRODUCING SLIDE AND TAPE PRESENTATIONS
Figure 5
43
1111111Nis..
f igure 3
'.11(41
fii;iiii60110.4#411.00010114MOMMII080110410400101111114".""
-
LlifinflownitunemaisaeseisiossoesseasmiMOO
Havisotssoosomtfisseesoesib sritemeisstutiessiontieseisisairessits
gissussisssssssssssosssaitstssusssiwwTinririTmtrttrin-rmrITTT11.11-TITT Whit
1-8001111VVVVVVVIVVWWW11WIlni1Yrria....:"..,-.4..
Figure 7

44 READINGS FROM AUDIOVISUAL INSTRUCTION-4
slide down, and align the acetate over the film so thatthe letters are positioned exactly as desired.
7. Mark the four corners of the film by making asmall scratch in the acetate with a sharp pointed in-strument or scriber (see Figure 5).
8. Cut the acetate to the film size, following thescratch marks. Handle the acetate carefully to avoidscratches on the visible surfaces (see Figure 6).
9. The acetate and film are now ready to be mounted.Use forceps to mount the film in the glass mount, withthe emulsion side to the glass. Mount the acetate intothe second half of the glass mount with the letterstoward the glass (see Figure 7). Lightly press the twohalves of the glass mount together.
10. Project the new slide to check for positioning.clarity of print, and absence of dirt. If adjustments areneeded, open the mount, reposition, and clean with asoft camera brush. Once satisfied, tightly snap the twohalves of the glass mount together.
The finished slide is now ready for immediate use ina universal slide tray. Due to the thickness of the glassmount, duplication of the slide is necessary if it is to beused in a 140-slide tray. It is possible at any time toopen the original mount to separate the acetate andfilm.
If the method is to be used with 3" x 4" lanternslides, the technique is the same except that the filmand acetate should be cut slightly smaller than theslide glass and fastened to it with mylar "silver" slide -binding tape. If the transparency will not bedismountedfor future use, or if highly critical focus is essential,one can burnish dry transfer letters directly onto the
film. With this method, however, one risks damagingand scratching the film.
If exact register of pointers or lead line is essential,the film can be mounted in glass first. The labels arethen burnished onto the outside of the glass. If thethinnest possible glass mounts are used, the labels willbe only slightly blurred. Sharper rendition can beachieved by duplicating the slides, focusing on theemulsion and not on the labels. The originals producedby this method-must be treated with extreme care toprevent damaging the letters, which are fully exposed.
ReferencesChesebrough, P , "Super Titles by Superimposition, Part 1:Sand-
wiching with Ortho F dm, Learning Resources, Vol 1. No 1 (1974),P 5.
Farrar, B L , "Fast Title Slide for a Penny," Audiovisual Instruc-tion, Vol 20, No. 9 (1975), p 34.
Hall, N , Adding Impact to 35mm Slides. Audtol. bud Instruc-tion, Vol 20, No 5 (1975), p 57
Hutton. D W and I A Loeschier, "Super Titles by Superimposi-tion. Part 2 The Beam Splitter," Learning Resources, Vol 1, No 1(1974), p. 8.
Making Title Slides, Learning Resources Supplement inAudiol.isual Instruction, Vol 19, No 5(1974), p 8
Jenkins, H T.GC Maloney, and W. Morgan, MakingCompositeColor Slides with a Rear Projection System," Biomedical Communi-cations, Vol 3, No 1 (1975), p. 14.
Jenkins, W H A Guide to Skillful Slide Presentations, Photo-gr,iphic Applications, Vol 9, No 4 (1974), p 26
Kalmbach, J A , 'How to Reproduce Title Slides in a Flurry,Learning Resources, Vol. 2. No 3 (1975), p 19
Rutt. David, "Titling for Slide Presentations," Learning ResourcesSupplement in Audiovisual Instruction, Vol. 19, No 5 (1974), p. 4
Titling Techniques Slide, With A Purpose (Rochester, \IV East-man Kodak Co , 1974), Publication p 12
A 7'

PRODUCING SLIDE AND TAPE PRESENTATIONS 45
HOW TO PRODUCE TITLE SLIDES IN A HURRY
JOHN A. KALMBACH
It is both easy and inexpensive to produce colorfulslides from black on white original art work. That'srightIndia ink lettering, Varityper lettering, or eventypewriter letters and numbers on a white backgroundmake fine masters from which colorful slides can bemade.
If you want a slide with white letters on a colorfulbackground, the first step is to photograph the graphic(black letters on a white background) using KodalithOrtho high contrast 35mm film. Develop the negativesusing Kodalith Super Developer, parts A and B. Thenext step is to use ,the 35mm negatives as a master.Place a sheet of diazo film withthe master and exposethem in a diazo machine. Theend result is colorful35mm slides suitable for mounting. Not only is thisprocess quick and inexpensive, but the end product isvery colorful and effective. And just think of all theslides you can produce from just one sheet of diazofilm!
A second alternative is to produce slides with blackletters on a colored background. This can be accom-plished by photographing the original graphic on acopystand using a sheet of diazo film to add color tothe finished slides. The diazo film can be placed directlyon the original graphic work and photographed, or thefilm can be placed over the lens of the camera. Remem-ber, the exposure will be different depending on whether
you photograph through the diazo film or directlyonto it. I have had good luck with cyan and magentadiazo film under these circumstances, but a wide varietycr colors of diazo film are available from which tochoose. Be sure to use color slide film for this procedure.I use Ektachrome High Speed Type B under 3400Klighting conditions.
A third alternative will produce slides with whiteletters on a very rich blue background using the sameoriginal graphic. The process will seem confusing atfirst, but if you follow a simple steps you will be verypleased with the finished slides. Use Ektachrome XDaylight film, EX 135, which has an ASA of 64, but setthe shutter with an ASA of 400. Then photograph theart work under 3400K lighting conditions and onto asheet of orange diazo film. Develop the color slidefilm using the C-22 process.* You will be more thanpleased with the results!
This technique involves a chemical mismatchbetween Ektachrome X (a color reversal film) developedusing process C-22 (chemistry for color negative film).If a commercial processor is doing the lab work, besure its C-22, not C-41. The new high speed process C-41 uses 100 degrees as standard temperature and that'stoo high for Ektachrome X
Master (original)
1 black on white
2 lilac k on white
3 black on white
Process Result
Kodaluth Ortho 35mm negative 1 white letters on colored bar k--uses 35mm negative as a ground
master to make (ham coloredslides
photograph onto Or through(aw sheet film background
be careful of camera settings
2 'black letters on colored
Ektachrome X Daylight Film 3 white letters on blue ha( k(EX 135) rated at ASA 400 groundphotograph onto orange diaiofilm
pro( ess film using C-22 pro( ess
-------- -------Association for Nut ational Communications and Tech-
nology. 1980 Reps mted from Learning Resources, Audio -rwdl May 1975

4SLIDE-TAPE EQUIPMENT
Ar

PRODUCING SLIDE AND TAPE PRESENTATIONS
AN INEXPENSIVE, EASY-TO-BUILD,SLIDE-TAPE PROGRAMMER
TERRENCE LUKAS
There are many programmers on the market thatautomate slide presentations by synchronizing theslides with an audio portion. Most of these pro-grammers, however, require a stereo tape recorder/player and use up one of its channels for the purposeof recording and playing back signals for synchroniza-tion The price range is rather wide, with the least ex-pensive being approximately $40.
This article discusses the construction and use of aprogrammer that is simple to build and use, costs onlya fraction of the cheapest commercial models, andcan be used with any tape recorder/playermonauralor stereo, reel-to-reel, 'or cassette. This programmerdoes not use an audio channel at all. Instead, a pencil
. mark is made on the magnetic tape at a point wherethe slide change is to occur. Thus, when you 're using astereo tape recorder/player you can have both stereosound and synchronization.
ConstructionAll:of the parts in this programmer are readily avail-
able at Radio Shack stores (Radio Shack numbers aregiven in parentheses after the part) or from most erec-tronic supply houses.
1. Power line cord with plug (278-1255)2. 6 volt relay (275-004)3 6 to 12 volt transformer (273-1505)4. RS107 transistor (276-107)5. 22 ohm resistor 1/2 watt (271-005)6. 251 potentiometer (271-094)7. 50 volt rectifier (diode) (276-1135)8 100 MFD 15 volt electrolytic capadtor (272-1028)Connect the components as illustrated in Figure 1. If
desired, a power switch may be used between the
47
power line and the input to the transformer at point A.If the Radio Shack potentiometer is used, it alreadycontains such a switch. Some important points to re-member are:
1. Make sure that the pointed end of ithe bullet-shaped rectifier (diode), or the banded end onsome other types, is connected in the right direc-tion.
2. It is important that polarity of the capacitor iscorrect.
3 The base (B), emitter (E) and collector (C) of thetransistors should be indicated by literature ac-companying the transistor.
4 Connect the adyance.wires from the projector tothe normally open switching contacts of the re-lay.
5. Turn the potentiometer to about one-half of itsadjustment range.
Everything should be connected except for the twowires marked "to tape" in Figure 1. At this point youare ready to test the circuit.
Take a soft lead pencil and make a dense line on apiece of paper or on the coated side of a short piece ofmagnetic recording tape. Next, take the two wiresmarked "to tape" and touch one to each end of thepencil line (See Figure 2). The relay should be activatedand, if you have the projector connected, it should ad-vance. If the relay is activated without the contact ofthe "to tape" wires or if the relay is not activated bythis procedure, adj ust the sensitiyity of the prograinmerby turning the potentiometer knob to tne right or left.Recheck the circuit if there is any further trouble tomake sure that all the wiring is correct and that Pointsone through four above have been followed.
Rectifier Relay
Potentiometeroutput Transistor
Capacitor
Transformer Resistor
to tape

48
Figure 2
The final step is to connect the "to tape" wires tomake contact with the magnetic tape. There are manyways of accomplishing thisthe basics are presentedbelow:
1
For Reel-to:Reel Recorder/Player " .
For reel-to-reel recorder/players this part is the sim-plest. No modification is necessary and nothing needbe permanently attached to the machine. Simply con-struct two contacts as shown in Figure 3. This can bedone by using two ordinary paper clips bent a shownand screwed..down to a small piece of wood. Tije spacebetween contacts can vary quite a bit. I findd five to10mm to be a good working distance. Attach one wireto each contact. Position this assembly so that thecoated side of the tape passes over the, paper clips(Figure 4) making contact with both. The assembly caneither be taped in place for temporary use or perma-nently attached using glue and/or screws. You are nowready to program. When rewinding the tape it is usuallybest to position the tape to bypass the contacts.
For Cassette Recorder/PlayersDue to the miniaturization of these units they are a
bit more difficult to work with, but the two contactscan still be accomplished with a minimum of modifica-tion.-The coated side of a cassette tape faces out so it isnecessary to position two small contacts in such a waythat they will go through one of the unused openings
Ayr
sr'
worop-
z9
I
° Figure 5 The tape head (1) can be used as one contact and a smallpiece of brass (2) used as the second contact for cassette linesensing contacts
READINGS FROM AUDIOVISUAL INSTRUCTION-4
4'S
t''APt'or
Figure 3
Figure 4
of the tape housing and make contact with the tape. Inmost cases one of these contacts can be the housing ofthe tape head and the other a small piece of brassusually called shim brass (See Figure 5) The distancebetween contacts is 'variable They may be very closebut be sure that they do pot touch each other.
ProgrammingAfter you have the narration recorded and your
slides organized, all that you need do is listen to thetape, stop the recorder at the point that you want theprojector to advance, and make a mark on the coatedside of the tape with a soft read pencil in the areawhere the tape contacts the assembly. The length ofthe line will depend on tape speed and the distancebetween the two contacts as well as the length of con-tact closure of the relay necessary to advance theprojector. Too long a time may cause more than oneadvance and too short a line may result in no advance.You will have to experiment a little with your system todetermine the best size to use I find that in most casesa line about two cm is ideal.
It should be noted that this programmer can also beused with dissolve units. If the dissolve unit you havehas a dissolve rate that can be changed by varying theimpulse, this programmer is ideal since you need varyonly the length of the pencil line.
/4ri
A 0

PRODUCING SLIDE AND TAPE PRESENTATIONS 49
.To re-move a signal, simply erase the line. You can
alter the length of the signal by either erasing part ofthe line or by making it longer.
Variations iA number of variations in this type of programmer
are possible The small size of the programmer usuallypermits its incorporation within the tape unit itselfand power can often come directly from the tapeunit's transformer, thus eliminating the largest part ofthe programmer Two programmers can be used tocontrol two different projectors (or four projectorsthrough the use of two dissolve units) by using two sets
( opyright by terreme Lukas, 1975
of contacts, one set that covers the upper part of thetape and another set that covers the lower part.
The slide tape programmer described in this articleis easy to build and operate. However, the soft leadused for programming the "cues" will also clog tapeheads, so regular cleaning will be important. Also, theconstant abrasion between the sensing contacts andthe magnetic oxide will cause quite a bit of additionalwear to the tape. Remember when mounting contacts(especially on a recorder with a metal deck) to be surethat they am properly insulated. N.H.
r
4-

/50 READINGS FROM AUDIOVISUAL INSTRUCTION-4
YOUR PROGRAM SYNCS
NEAL HALL
The lights went dim, the projector was started, andthe speaker adjusted the small podium light. Then,CLICK, CLICK and the first slide was on the screen.CLICK, CLICK, and slide two appeared. History doesnot recall when someone first used a child's cricket(you know, that little spring metal thing your motheralways told you not to swallow) as an audiovisualsynchronization device, out we can all hope its dayhas passed. the remote control cord has replaced the"cricket", the nod of the head (which never mademuch sense in a darkened room), and such subtle'forms of synchronization as "may we have the nextslide please." Then, too, thetape recorder has replaceda person at the podium. Teaching a tape recorder topush the remote control button seemed no easy task,but it has been done and in a variety of ways.
If you have never done a synchronized slide/tapepresentation, there are a number of synchronizingsystems from which to choose. Perhaps the simplistutilizes a stereo tape recorder. The audio informationis recorded on one channel and the cueing informationrecorded on another. Well wait here while you con-
, sult Figure 1. It represents the major track configura-tions used on audiotape recorders for 3/4" reel-to-reel,and 150 mil (cassette) units. It's convenient to use arecorder with separate controls for recording eachchannel. The easiest way to proceed is to record theaudio information on one of the stereo channels.Rewind the tape, and while listening to that channel,record the cueing pulses on the second channel. Thereare a number of devices which will encode (put thesignal on the tape) and decode (listen for the signal inplayback and advance the projector). One of thesimplest and most inexpensive is a unit called theKodak Sound Slide Synchronizer (less than $40) Figure2 gives an idea of how simple this hookup is.
Another relatively simple system (for encoding anddecoding cue pulses) utilizes a standard cassette tapeas the storage capsule for both the audio informationand the synchronizing track. The encoding and de-coding functions are built into the cassette taperecorder. A slide projector is connected to the recorderand the cassette can be cued by the press or a button.These units use the standard monaural cassette formatfor playing back the narration track, but include ahead which encodes and decodes the cueing channel.
Alsociation (Or Educational Communications and Technology,1980 Reprinted from Audio 'rural Instruction, November. 1975
full track monoone direction only
1/2 track or 2 track stereoone direction on!.
side 1
side 2.
1/2 track mono-2 directions (tape is 'turned over")
4. A ,,,,, ,,,,,, .1, ,,,,,, ''11011
stereo channel B side 2,,,,,,,,,,e nos : i
st r h nn IA side,,,, It if
. ,,,,, ,..
1/4 track or'4 track stereo-4 directions (tape is "turned over")
.......... 1,,011141./10,'.1i../t,
00051:11
uad channel A
,/. 1,11, .... ..... ..... ..... ...........
41,10 .....
oa ........ Os. ..............quad-4 channelsone direction
stereo ch B side 2
stereo ch A side 2mono side 2 +lit--
mono side 1stereo ch A side 1
stereo-ch B side 1
standard cassettemono or stereo (150 and tape)
cue track
111111111/110111111NOPPRINBEIffillita1111111.
or --1111mv... narration track
"programmed" cassette (150 and tape)
safety or separation between traf.4:smmnim
Figure. I
Graphics agolnpanying this article by Sandy Spicer

PRODUCING SLIDE AND TAPE PRESENTATIONS
These are two relatively simple systems and you willbe amazed at how smooth and professional a presen-tation you can achiee with them. Instead of oneprojector, you can use two projectors and el dissokeunit. One dissolve unit, although controlling twoprojectors, only requires a single change cue.
If you want to get more .?xotic than the single thannel ,one projtclor or one dissoly e unit), life getsa littleinure complicated Before beginning any discussion ofsynchronizers, it might be beneficial to look at howsynchronizers do their job The synchronizing unit b«instantly listening to the tape for a set of signalswhich make sense to the unit These signals can beintermixed with the audio information and than tiltered out before the audience hears the track, or theycan be stored on their own sejtarate'audio track Anexample ot the firs' system, the inaudible system, isthe cassette or record/filmstrip projector. On theseunits, the narration track (narration, music, sound ef-fects, etc ) is filtered so that all frequencies below 1201 lz are attenuated (turned down). By not recordingany trequencies lower than 120 H7 in the narration,this, leaves the very low frequencies open to recordsync pulses 50 Hz is the frequency used for syncpulses. When the audiocassette is played back in thecassette/tilmstro projector, d special circuit (similarto the crossover network in a hl -ti set) sends all frequen-t ws aboye 12011z to the speaker and on to the a udienc eThe c ircuit sends all trequencies under 120 Hz to theAvant eine( ham sin Because we took out of the soundkat k all t req tient ws below 12011 z and put in the 1011zadvance tone, we have basic ally created two int orma-tion channels on one tape track The record dilmstripsystem is similar but uses it 30 Hz tone to advance thepicture This 30 Ili tone interrupts an otherwise con-stant 10 I iz tone used as d lot trout ot record noise andmachine noises From there on, the phonograph sys-tem gets rather complicated Let's just say it works \veiland return to the tape recorder and separate synchroniz-ing units
Bet ause most ot the more popular sync hronizmg(Levu cbs preter to have one kat k of their very own, astereo or tour kat It tape re( trder works best Whatyou record in the way of a synchronizing signal is en-tirely up to your sync hronizer Since there is little or nostandardization between units, o(hng and oclingshould be at «imphshed with the same type of unit
Synchronizers do their jobs in a number of waysThere are physical systems, amplitude systems, fre-quent y systems, digital systems, optical systems, andpunt h taw. systems In the phy sic al sy stem, vie( trona011td( t n generated by plat ing some «indut wig sub
stain e on the audiotape Some systems use adhesic,ha( ked metal foil whit h is stuck to the tape As thetape is played, it goes through d SP('( Id' sensing headand the ( ()mkt tit& material is used to «nitpick. the
(tit \\ hit h Awn( es the slide Other physical systemsuse d spot 1,11 1)(.11( II to ake marks on the tape that
tw hen passed through the sensing head, completethe vie( trom« ire uit
I he amplitude system (and there are not many ofthese; utilizes,' ( irt uit whic h listens to thtli ue kat t. otthe tape \Niter' a signal of a specific yitiltime is heard,the system ( ompletes a c uit and ackan«.s the 'nowt:or
51
In a discussion of the frequency system, amplitude(olume) and frequency :tone; are both brought intoplay The monitoring cite uit basically listens for a (or-tam frequency as the go' comitiand to complete thecircuit. These systems have some amplitude adjust-ment w filch enables them to properly discriminate theue signal from extraneous tape noise. The frequency
system also opens some other possibilities. The c. uetrack for some systems is used to record a number ofdifferent frequencies. Each trequency completes ddifterent ircutt and thereby gies a command to a dif-ferent !mete of equipment Three, four, or more projec-tors or dissoke units can 1w used depending on thetype of sy throw zer. Fur example, three projectors
To Code (Record) Tape
to projector
4- sync unit
pnputpress button to .
record advance tone
To Decode (Playback) Tape
sync undhears advsnce tonecycles projector
output from tape ,
I ;gnu. 2
Could be ( untie( tea to a ( ertain sy ( hrt,niier The l(\%t requenc ies alk (' prole( tur one, the middle trentien
ies ant e prow( tur h\(1, and t he high re(11.1e11( wsadvance 'nowt tur three f (WM ) (lls( mutilatorslistening to the c ueing t flannel pit k up the frequencyto w hi(Ii they are tuned and press the go button( ompleting the proper ek.( trunk ( owlet bon The morefrequency disc mutilators built into the sync hronizer,the more prow( true units that ( an he controlled
et s take a look at w hat ( ould be ( onsidered a baskthree st wen show We'll use three dissolve units, sixprow( tors, so we c an di ssolY t. on eaClt ot the threes( wens We need a «mtrol signal for eat h unit, but wealso want to control combinations ot units So, to control our bask three st reen shrm %%e need ire 01W, ( uetwo, cue three, cue one two, cue one three, cue
ti

52 READINGS FROM AUDIOVISUAL INSTRUCTION4
twothree, cue one two--three. That's ,,sevencueing channels and quite a lot of buttons for a taperecorder to keep straight.
Digital systems perform basically the same func-tions as frequency discrimination systems but performtheir function in a slightly different way. In the digitalsystem, the proper projector is cycled when its corres-ponding channel is triggered by the right digitallycoded information The digital information is generallyencoded on one specific frequency and within a cer-tain amplitude range As kind of a general comparison,consider the old type telephone dial versus the newpush button system With the old type dial you couldhear the clicks as you dialed a specific number. The
'number seven produced seven rather rapid clicks onthe phone line That was digital. The new touch tonetelephones produce beeps at different frequencies toequal the numbers They are basically frequency dis-crimination units.
The last two systems, optical and punch tape, havebasically one thing in common. They need only one"go" signal from the tape recorder and can interpretthat signal into a variety of functions. One optical sys-tem uses the single "go" command from the recorderto advance a projector that contains special two-by-two slides with holes punched in them. The holesallow light to fall on photo electriC cells. The photocell then completes a corresponding electric circuitand advances the show unit. If you have nine photocells you can independently control nine functions bypunching holes in the blanks that allow light to fall onthe proper photo cell Each time the photo cellilluminating projector is advanced by the tape, a newpunched slide drops and a new combination of demands is given to the show units.
The punched tape system uses paper or my lar rollsinto which holes have been punched. When the "go"command is received from the tape recorder, thepunched tape is advanced to the next set of holes, Thecoded information is interpreted by the synchronizerand relayed to the corresponding show equipment.The punched tape then waits for the next "go signalfrom the tape player to repeat the process The punchedtape sy stem is capable of controlling a large number ofue functions and is about the most versatile and
reliable system in use today The punched tape systemhas gained wide ace entail( t. for storage of commandsof complex shows Using a c ue to open and closepower relays. 16min protectors c an be started andstopped, lights can be turned on and otf, c urtains can
be opened and closed, and anything that can beautomated can be controlled via the stored commandand related electronic circuitry. Remember, only one"go" command needs to be put on the audiotape,allowing even the simplest synchronizer to be masterof the most complex punched tape system.
"But is it all that simple?" you ask. Wellyes andno. Yes, when everything is working right and no at allother times. Some of the problems you can run into aredifficult to solve because we are dealing with "machinetalk" that's not meant for people. Getting the syncsignal on at the proper volume level is important. It it'stoo loud, you can overdrive the storage capacity of theaudiotapedistorting the frequency, and the synchro-nizer may ignore the commaad. Toe, low a signal andagain you're ignored. Those 29C meters on, the frontpanel of most recorders work all right as a guide butgenerally don't give you a precise indication of thestrength of the signal being put on tape. Also, if youchange tape stock you'll need to recalibrate the metersafter running tests. Run some experiments with yourequipment! Another hint use new or carefully de-gaussed tape. Extraneous tape noise or leftover signalscaused by inexact head alignment may cause falsecues. Check out compatibility between tape recordersif you record on one unit and plan to play back onanother. If the heads are not set to the same standard,you can have reliability problems.
Sometimes electronic noise can cause a false ad-vance signal. Such noise is referred to as line spikes"and can obtain the frequencies your programmer istuned to. "Line spikes" generally cannot be heard bythe human ear, but they can get into the recorder elec-tronics and raise havoL Its not common but it canhappen.
Once I programmed a show at home and it ran per-,fectly five or six times. The next day at the office withthe same equipment, it ran wild. The culprit turnedout to be the building elevator Everytime it reverseddirection, electronic noise came down the power lineto the recorder This somehow caused audio clicks inthe cue track electronics. Those clicks contained theproper f requem y at suffic lent strength, and the rest isembarrassing history. What problems you encounterin working with most of the modern day units will notcause you premature loss of hair The proper equip-ment, a little prat tic e, a L aretul ey a on the instructionbook, aad a word from the manufacturer if there'ssomething you don t understand, yydl allow you theluxury of being a part of your ow n audience
td

5EXAMPLES OF SLIDE-TAPE UTILIZATION

54 READINGS FROM AUDIOVISUAL INSTRUCTION-4
DEVELOP YOUR OWN MEDIATED CAREERINFORMATION
RICHARD L. DOUGLASSDALE G. ZIKMUND.JAMES T. HORNERROSEMARY L. HORNER
Choosing an occupation is a crucial decision facinga young person, one which influences the realizationof other goals as well as overall life satisfaction. Find-ing a way through the maze of job possibilities to anInformed decision requires information about avail-able occupations, their requirements, and what theyoffer. Current literature indicates that this informationmust be accurate, adequate, and up-to-date, shouldcome from persons employed at the occupations inquestion, and should be readily available to students,in an easily interpreted form. ,
Selection of `MediaResearch confirms the audiovisual materials con-
tribute to learning,efficiency. The type of mediachosenfor presentation of occupational information shouldallow the developer of materials to do the followingthings:
Collect and record information directly from aworker in a particular occupation (e.g., cabinetmaker).
.Revise inaccurate information readily, if indicatedby a validation procedure.
Provide this occupational information whenneeded, in an easily interpreted form.
Update information easily when required.Accomplish this on a modest budget.
At the University of Nebraska, in a project to developmaterials depicting 125 occupations, the authors foundthat synchronized slide-tapes met these criteria. Pro-duction and editing equipment were readily available,and software materials were less expensive than othermedia such as motion pictures- and videotape. Thecomprehension of slidetape presentations requiresminimal reading ability. Perhaps most importantly,slide-tapes can be updated easily, with little effort orexpense.
Phase OneGathering InformationWhat do students want and need to know about
jobs? This question, and answers supplied by the Ameri-can Personnel and Guidance Association, rural socio-logists, economists, psychologists, and educators,guided the development of the following question-
.
c Association for Educational Communications and Tech-nology, 1980. Reprinted from Audiovisual Instruction, April,1976.
nacre, which was used in interviews with workers ineach occupation.
Questionnaire"We appreciate very much your cooperatiop in the
occupational education activities which we are con-ducting at the University of Nebraska AgriculturalEducatioq Department. The questions we will ask youare contained on this sheet. You might find it helpfulto read them over in organizing your thoughts and re-sponses."
1. Would you please describe your job? What do.you do in a typical day?
2. Are th "re any specific tools or equipment thatyou use on this job?
3. How many hours per week do you work?4. Do you have freedom on the job, or are you under
close supervision?5. What interests, physical requirements, and special
abilities are helpful to a person working in this area?6. What is the minimum education or training re-
quired for employment in this occupation?7. In what way do you feel your occupation is im-
portant to our total society?8. How are your opportunities for advancement and
what is the employment outlook in your occupation?9. How do you feel your job compares with other
jobs in terms of being able to support a family?10. How would,a person find job openings in your
occupation?11. What are tbe advantages and disadvantages in
this occupation?
Thank you very much!
After a thorough search of available occupationalinformation on each job title to be produced, a jobbrief was written. A person currently working in eachjob was located and interviewed. College studentsworking in the Department of Agricultural Educationlearned to use a reel-to-reel tape recorder and properinterviewing techniques. After explaining the projectto each worker, they recorded an interview on the jobusing the questionnaire.,
Interview TechniquesThe following techniques proved successful:1 Ask the supervisor (employer or manager) to sug-
gest candidates for the interview We usually got aworker who was a bit of a ham. A worker who could
i.. t)
c

PRODUCING SLIDE AND TAPE PRESENTATIONS 55
talk at ease during the interview was an asset.2. Do not send out the questionnaire in advance;
respondents tend to write out their answers and readthem during the interview.
3. Keep the microphone six to eight in,:hes from themouth of the person talking. Use the manual volumecontrol rather than the automatic volume control, thiswill prevent background, on-the-job noise from get-ting amplified during pauses.
4. Make a trial run. Ask a few questions, then stop;listen to the recording, then start over. This helps theworker relax and results in a more candid interview.
5. A the end of each interview, ask if any questionsshoulu be asked again. If so, keep the recorder goingand try again.
6. Have the interviewee and the employer sign a re-lease form to allow use of the interview for educationalpurposes.
Phase TwoEditingCollege students then edited the audiotape and pre-
pared a storyboard. Two reel-to-reel recorders and apatch cord were used to duplicate selected portions oftne interview. Guidelines for editing were. eliminatedistractions from the interview; shorten long pauses,eliminate repeated answers, and hold the total inter-view time under 10 minutes: Each edited interview wasevaluated by the author on the criteria of accuracy(compared with the job brief), technical quality, andestimated appeal to young people. Each usable inter-view was transcribed onto index cards, one thoughtper card. Students sketched on each card the composi-tion of a visual that should accompany the narrative.
Phase Three-PhotographingPhotography was the third task. The authors found
that the student who had recorded the interview alsotook the slides, the results were superior to those ob-tained by a different photographer. The interviewerwas able to recall responses to questions and takeslides illustrating what was said. Photographers usedan automatic slide camera, flash, 126 Ektachrome film,and the storyboard cards. The instant automatic camerawas used because the budget was limited, the studentswere not skilled photographers, and the resulting per-cent of usable slides was satisfactory.
Superior results were obtained if:The film and batteries were fresh. (This eliminated
technical difficulties.)The student took several exposures of each sceneThe film was processed commercially.
Title, credits, and illustrations were photographedusing a copy stand and a single-lens reflex camera
Mine FourMatching
Finally, slides were matched with the recorded in-terview. The storyboard cards provided a starting point.(Incidentally, this process brought out the creativity ofthe college students doing the work. Using the jobbrief, the interview, and the slides, they had the task ofpresenting an accurate and interesting view of thejob.) The aim was to change the slide whenever a newthought was presented but at least every nine seconds.When a question was being asked, the slide often showed
the interview in process or a general shot of the\jobsurroundings.
After the slides were matched, the same studentrecorded a synchronizing tone on the second track ofthe audiotape using a stereo tape recorder. (We alsoused a reel-to-reel language laboratory recorder.) Aftera test run and review by the authors, the tape was dup-licated onto a single track for use in a monaural taperecorder.
Phase FiveValidatingA jury of persons including workers and educators
familiar with the jobs evaluated the quality and ac-curacy of the final product. Field tests were made on avariety of groups, including junior high, high school,and culturally disadvantaged youth (17-22 years ofage), postsecondary students, adults, and a compositeage group, to determine whether this mediated careerinformation modified aspirations, attitudes, and know-ledge about the world of work.
Results of Field TestingOne study involved 279 eighth-grade students and
three guidance counselors in one school. Each coun-selor had one Mediated Career Information (MCI)treatment class and two group-guidance classes. TheMCI group of 90 students viewed slide-tape presenta-tions of 100 occupations. The other group of 180 stu-dents followed the usual group guidance program,which included a wide variety of audiovisual materials,class discussion, and a required paper on a selectedcareer. The latter program was generally consideredexcellent.
Evidence from this study suggests that occupationalinformation provided solely by slides and tapes is atleast as effective as that presented in various ways inthe group' guidance class in modifying aspirations,understanding, and attitudes toward the world ofwork.
In another study, 253 high school sophomores inguidance class viewed eight slide-tape presentations.The students were randomly assigned to treatment(132) and control (121) groups in a 20-item posttest -only design. The experimental group had higher know-ledge-of-occupations scores, significant at the .001level of confidence. Also, the aspirations level wassignificantly higher at the .01 level of confidence. Nodifferences were observed in their "opinions aboutwork" score. This age group was attentive and some in-dividuals asked for an extension of the activity..
From our research we have concluded not only thatslide-tape presentations of occupational informationare quite acceptable to youth at various age levels, butalso that it is effective, especially at the junior highand secondary levels and with culturally deprivedyouth, in modifying aspirations and knowledge aboutthe world of work.
Recommendations for Local ProductionsEncouraged by results of field tests and numerous
requests from teachers and counselors, the authorsfeel confident that mediated career information isneeded. There is merit in student involvement in thedevelopment of slide-tape presentations Productiontechniques are simple and inexpensive Workers are
vU

56 READINGS FROM AUDIOVISUAL INSTRUCTION-4
usually flattered when kids ask about their work.Advisory committees and published occupational
handbooks can help validate the accuracy of materialsproduced Media center coordinators, librarians, andvocational counselors have the skills, equipment, and
access to students who can produce slide-tape presen-tations on specific jobs. The effectiveness of materialsdeveloped using the procedure described above hasbeen well demonstrated. The result students withmore realistic self concepts and career decisions.
ti

PRODUCING SLIDE AND TAPE PRESENTATIONS 57
SLICK SLIDES FOR RELUCTANT READERS
TERRY McCONNELL
A reading specialist and media specialist, workingas a team, can develop an exciting technique for re-medial reading instruction. producing slide tapes basedon popular paperback books. A slide tape is producedthat builds up interest and suspense in a book; theslide tape is stopped at its climax, and students aredirected to read certain pages in the book itself to findout what happens next. Here's how two junior highschool teachers did it:
With the help of student actors and camera opera-tors, we produced slide tapes based on two books byS.E. Hinton: The Outsiders and That Was Then, This IsNow Both books are very appealing to junior high stu-dents, possibly because they deal with adolescentproblems such as drugs, dating, and gang fights. Sincethe characters are American teenagers of the 1960sand 70s, it was easy to get student actors who fit thedescriptions of characters in the book. The scenes takeplace in common settings, such as city streets, drugstores, bowling alleys, and parks.
Why a slide tape for a local production with studenttalent? Why not use videotape or 8mm film? We deter-mined beforehand that the learning materials shouldbe suitable for individualized instruction. A slideprojector and audio cassette player are much easierfor a student to manipulate than an 8mm projector orvideotape recorder. There is less chance for breakagewith slides, and the editing is much less time-consum-ing than for film or videotape.
Before we took any pictures, a storyboard had to bewritten Most of the dialogue in the tapes was takendirectly from portions of the books, with some shorten-ing and modification For example, a scene that takesplace at a drive-in movie at night was changed to adrive-in hamburger stand in the afternoon to makeshooting more convenient.
Students were chosen for the various roles, witheach student both acting and speaking his part. Twoc mend were used in casting the students (1) they hadto fit to some extent the physical appearance of thecharacters they were portraying, and (2, they had tohave reading or motivational problems in English orreading classes The student actors showed interest in
\ ssoi idtital tut I clot <aught' . 0111111l1111( dillfrils ,t11(1 I et 11-nulogy . 19811 Reprinted Irian Indirn, istiai Instill( (eon,September 1976
,v Li
the project, and most actually did read one of thebooks.
Because the actors had reading problems, producinga tape of acceptable quality required time and patience.It took about four hours of work to get a finishedproduct of fifteen minutes' length. Having the story-board script with us at all times made the processmuch more simple.
Students also were involved in the actual canierawork. In The Outsiders, students made Instamaticcamera slides to supplement the 35mm slides. The stu-dents also had to cope with reading the script in orderto organize the slides into proper sequence.
A reel-to-reel tape recorder was used for the audioportion.,From the master reel, casettes were made forclassroom use. A bell signal was used to indicate theadvance of each slide.
A series of written exercises was designed aroundboth slide tapes. The first step in these exercises was tocontinue reading the book from where the slide tapeended. At the end of each tape, the students were toldon what page to begin. The Outsider exercises involvedvocabulary and word attack skills that the studentswould need to make sense out of the portions of thebook they were reading.
That Was Then, This Is Now was presented to smallgroups of ten to thirteen students. Most were readingone to four years below grade level. The room wasdivided into six centers. The first center used the slidesand tape with follow-up exercises. The students weretaken to a climax point in the action using the tape andslides, they were then given the text to find out whathappened next. Self-checks were made by the studentswith the follow-up worksheets. Four additional cen-ters used the tape along with the follow-up exercises.The remaining center used both slides and the tapealong with follow-up work.
The exercises consisted of word puzzles, scrambledwords, and other games. They emphasized vocabulary,use of context clues, sequence, literal, interpretative,and applied comprehension, and following directions.As the students completed each exercise, they wereable to correct their work and receive immediate feed-back The exercise program was self-paced by the stu-dents and took place during three 50-minute classperiods
To find out whether the slide tapes were having thehoped-for motivational effect, the students were askedto fill out questionnaires after completing That WasThen, This A Now exercises. All the students who hadseen the slide tape indicated that they read and corn-

58 READINGS FROM AUDIOVISUAL INSTRUCTION-4
pleted at least one of the learning exercises. In addi-tion, 66 percent said they intended to read the book,94percent felt that this was a good way to learn," and54 percent said the slides and/or tape were their favoritepart of the package. Observation of the students atwork also proved that they were interested in the story.Even those who expressed a great dislike of readingwere stimulated to read and find out what happened ateach climax point.
One of the biggest factors in the project's successwas that the students knew the actors personally. Thishelped them to identify more easily with the charac-ters in the story. The students' familiarity with thelocal settings also increased their interest, as did thegame format for exercises. These slide tapes stimulatedstudents to work on their reading skills. They providean example of how nonpn nt materials can make printmaterials more appealing to students.
i

PRODUCING SLIDE AND TAPE PRESENTATIONS 59
ATTENDANCE PROBLEMS? TRY A "SUCCESS STORY"SLIDE SHOW
ri
WARD HOLM TANZER
Our problem was not unique. Delaware Technicaland Community College, Southern Campus, attractedhundreds of new students yearly because it awardedassociate degrees in various lucrative technologiesand placed 80 percent of its graduates in good jobs intheir fields. Students liked Del Tech. However, overhalf the freshmen seeking admittance proved to bedeficient in English and were required to take a no-credit pre-tech writing course before being acceptedin a technology. Progressing at their own speed, somestudents breezed through pre-tech writing in shortorder. Others took a long time. With these, the light atthe end of the tunnel often dimmed. Attendance felloff. Unofficial withdrawals mounted. Many who aimedat a technology never arrived there.
Del Tech Motivational ProgramTo help correct this situation, the English staff de-
veloped a number of stratagems for pre-tech writingstudents. We set up individual "encouragement con-ferences We telephoned students who stayed home.We ironed out job-class schedule conflicts. The chair-men of technologies wrote memos of congratulationswhen students passed the half-way mark in their writingcourse. Then, last winter, the English staff decided toadd another arrow to its quiver a motivational soundslide show
Step 1 Selecting a Case HistoryThe basic aim of our slide show was to picture for
the student the rewards of sticking it out, of acquiringan associate degree The most effective way to achievethis objective, we felt, would be through the use of acase history that was a success story. Consequently,we searched the college files for an archetypical stu-dent: one who had applied for admittance to a tech-nology but had been barred because of his deficien-cies in English, who had been assigned to pre-techwriting and had worked his way through it, who hadbeen admitted to a technology and in the course oftaking his technical subjects had passed English I, II,and III; who had finally achieved his associate degreeand after graduation had found himself in a rewardingjob Last but not least, we sought a person who not
_ _
Assoc cation for Educational Communi«rtions and tec h-nology. 1980 Reprinted from Audiovisual Instruction,0( tober 1975
6 0
only would be willing to participate in such a venture,but also would be working for a boss who wouldpermit him to be photographed
The staff found all these qualities, and more, in anelectronics student named Norman Travis, who hadgraduated two years before. Norman had come up thehard way. He had perservered. He had triumphed.NOW with IBM, he made an excellent salary as an
1 he leading character plays himself rn The Nor man Travis 1 tory, a177011%. <shut-Jai slide shcm developed by the English staff at De'.nrart.Tec hilt( a! and Community College, Southern Campus
associate customer's engineer, servicing computersand other data processing equipment for prestigiousfirms like DuPont. Wcx4alked to Norman and to hissupervisor at IBM. Both agreed to cooperate. The Nor-man Travis Story was on its way.
Step 2 Structuring the ScriptShooting a slide show without a complete script is
like building a house without a framework. Once wemade the basic technical decisions that we wouldshoot in 35mm color and use cassette soundwe settechnicalities aside and concentrated on what wewar ed to say.
After talking among ourselvesand with Norman

60 READINGS FROM AUDIOVISUAL INSTRIX ;ION-4
we finally produced a treatment with the following1' seven sequences.
1. State the problem- The English staff asks Norman,"Is pre-tech writing worth all the agony it costs stu-dents?"
2. Show Norman in all his electronic glamour on thejob today
3. Flash-11 to orman's first days at Del Tech fiveyears ago, how his ispleasure at being assigned tono-credit re-tech writing.
4. Qui ly cover Norman's progress after he acceptedpre-tech instruction and began the long pull towardgraduation.
.
5. Skip ahead to Norman in present job; he illustrateshow important it is to be able to write and speakproper English with his clients and supervisors.
6. Dramatize orman's straight-forward advice topre-tech students: English is aqvital part of education;regular attendance and constant study is essential.
7. Summarize the advantages of Norman's way oflife compared to the pick-and-shovel existence of thedrop-out.
Step 3. Writing the ScriptKnowing that dialogue was impossible to use in a
slide presentation, we rendered the script in simplenarrative style, as a narrator would record it on tapelater. The first lines of our show ran as follows: "Thisman's name is Norman Travis. He started in pre-techfive years ago and is now an associate customer'sengineer servicing IBM computers. Not long ago theEnglish Department called Norman.
In scripting, we used the right half of the page onlyfor narration, leaving the left side open for shot des-criptions later. We wrote five drafts of the narration,ending up with a 12-minute script.
When the script was completed, we began filling in
r
"*-
hmAyledge of English is like information in a Luniputer First thedata is stored It is checked
I
-.. 1111111.111
I he %hos% stresses the importan«. of English both %%rotten and oralin the lob ol assor hitt. i ustomr s engineer at IBM then, when it is needed, out it pops, ready to be put to use
U1

PRODUCING SLIDE AND TAPE PRESENTATIONS 61
the left or picture side as shown in the chart.To make the show "move and prevent dragging, we
fitted in as many shots as we could to the narration.The final count was 95 shots to approximately 1,700words of script. We numbered all shots consecutivelyas they were written.
Through Out the writing, we tried to keep in mind theold motion jiicture adage. the worst technicians in theworld can't ruin a good script, the best technicianscan't rescue a bad one. We also tried to impress ourcolleagues or ourselves as we wrote, we were reachingtoward pre-tech students, some discouraged, someconfused, most of them cynical.
Step 4: Shooting the ScriptWhen the script was as good as we could make it, we
broke it down and, ignoring sequence of action,grouped shots together by,location in a set-up list. Wehad 10 shots in the data processing room, for example,8 shots in a classroom; etc.
We next cased each location with our college photo-grapher, determining ahead of time exactly where mecamera would be located, which actors and extraswould be involved in the shot, and whether the shotwou'id be a close-up (CU), medium shot (MS), longshot (LS), or establishing (ES).
We had notified Norman, of course, as well as IBM,Dupont, and ether participators in the show about ourprogress and the date we wanted to photograph. Onshooting day Norman arrived at the college at 8.30with three changes of clothing, the photographer camewith his Honeywell Pentax Spotmatic and 15 rolls ofKodak High Speed Ektachrome. We were off By fiveo clock we had completed shooting at all locations. Toplay safe, the photographer "'bracketed" many shots asrhe took them, meaning that he photographed each)scene three times with three different aperture open-ings. He also experimented with different camera angles.During the day he made over 300 exposures.
Later, our college artist photographed several draw-ings which were required by the script and also number-ous inserts (close-up shots of inanimate objects likebooks that can be shot on easels or tables).
When the slides came back, we selected the best ex-posures, placed them in a projector, and, reading thenarration aloud, gave The Norman Travis Story a trialrun We found several plact s where the action slowedand interest lagged To correct this problem, we cutthe script again and added still more pictures, makinguse of the extra shots taken with different anglesFinally, when the Story had 113 slides and only 10minutes of narration, it seemed right.
Step 5 Recording the Voice-OverOur script started with a regular off-camera narra-
tor, but switched to Norman s voice when he begantelling his story
One of our instructors provided the Opening narra-tion, and we would have liked very much to have usedNorman's own voice for the remainder, however, cau-
tion argued otherwise. A successful narrator must havea bit of ham in him. Norman had none. We stronglysuspected that like most inexperienced narrators hewould stiffen up under the tensions of recording ses-sions, sound as though he were reading the script(which he would be), make frequent mistakes, and be-come very qnhappy. As a substitute, we selected withNorman's full concurrencea young black counselorwho was able to fit his voice to Norman's image andpossessed the dramatic experience to record page afterpage without making any fluffs.
In recording, we had the assist of the Del Techaudiovisual technician, who recorded the voices on1/4-inch tape, edited the tape, and transferred the soundto a cassette with a converting facility.
Step 6. Cueing the CassetteWhen the cassette was ready, we loaded it into our
Singer Caramate and rehearsed the show a few times,changing the slides in the carrousel manually Num-bering die shots on the narrator's Script, we made onelast check, and then cued the tape electronically bypushing the "advance" button on the Caramate. Theentire operation took less than an hour, at the end ofwhich we were sitting back, listening to the Story playitself automatically Originally, we had experimentedwith music but decided finally that music gave a pre-tentious and a stagey effect to a picture that was basi-cally a documented experience. All the show seemedto need was voice and pictureand the story to carryIt.
Our out-of-pocket expenses in producing the Storywere astonishly small, less than 1,100 of the cost of aprofessionally produced 16mm training film
Results of the Slide ShowWhen we screened the Story for pre-tech classes, we
were pleased with the reaction. Students seemed tohang on every word No shuffling No wanderingglances Exclamations of approval Word about theshow got around IBM ordered a copy for a New Yorktraining facility Four newspapers wrote up the projectOther Del Tech campuses asked for copies So suc-cess
Perhaps. As every instructor knows, it is dangerousto judge AV on the first impressions it gives The stu-dent who raves the loudest about a presentation maybe the first to cut class the next day Also, the Story wasnot targeted toward the press or IBM, flattering thoughtheir attentions were, It was produced for pre tethersThey would be the final judges Not until we showedthe picture many, many more times could we expect adependable response pattern to emerge
Meanwhile, we hope that the Story brightens thelight at the end of the tunnel a little fur students andprovides reinforcement to our general motivationalprogram If the Story helps salvage just a few careers inits time, it will he worth all the effort vv.(' put into itsproduction

\62
\MAKE THE MOST OF VACATION SLIDES!
READINGS FROM AUDIOVISUAL INSTRUCTION-4
GERALD F. BARKHOLZ
Many articles have been written which describe auniform method for planning a slide-tape presentationto be used in the classroom. But there is a way to makethe most of those pictures that are "unplanned." Slidestaken on a vacation or sightseeing trip can be puttogether to become a useful classroom experience foryour students.
The traditional procedurefor planning a slide presen-tation is to begin by listing lea rning'objectives keep-ing in mind that all content, both visual and verbalmust support those objectives Then, after analyzingthe audience in terms of background, level and ex-pectations, one begins to collect material and writedown ideas related to what is to be communicated andhow it is to be illustrated. The procedure then calls forthe formation of a storyboard: a series of index cards,each having a specific illustration and arranged insequence From here, the pictures are shot and thefinished slides are correlated to the storyboard and ascript is written.
It would be rather difficult to ;Ind fault.with theseprocedures for planning and producing a slide-tapepresentation But what about the spontaneous picturesyou take on a vacation or sightseeing trip where youmay not know ahead of time exactly what you will seeand photograph? Do these experiences and images gounshared? We are all willing to show our slides tofamily and friends So why not turn these pictures intoan organized presentation to be used with classes aswell You have the opportunity to share some of theunique and unexpected situations you encounteredand to have a documented recollection for the future.
Generally you can follow the same steps for produc-ing a slide-tape presentation mentioned earlier, but inthe following order.
1) Shoot pictures and take notes2) Arrange slides3; Write script4) Record script5) Present slide-tape presentation to audienceOne of the most important aspects of preparing a
presentation of this type (aside from shooting goodpictures) is taking notes and collecting data while onthe trip Your notes can be minimal as long as the pre-sentation is prepared soon after the trip, while eventsare still fresh on your mind.
There are two good methods for collecting data.
Assor latam tor I (Jut Mauna: Communn drums and ler h-nolow, . 1980 Ruprintti from ,1udirrIsual Instrut til01, Apra1979
One is to keep a simple log or diary of your activitiesand notations of specific sights you photographed. Afew words may be all that is necessary to bring backthe significance of a particular shot. In addition tokeeping a log, you can also collect brochures, pamph-lets, and travel guides which do art excelle job ofdescribing the local sights and also, give historicalbackground. Most hotels and motels have a pile of freebooklets on the front counter on What to See and Doin "These booklets provide you with invaluableinformation to use later when writing your script.
Another excellent method for collecting data is tocarry a portable cassette tape recorder and recordsituations as they occur. This not only permits you tocapture your own feelings arid thoughts, but gives youthe added opportunity to pick up some "local color."If you have a recording, you no longer have to say,"You had to be there to appreciate this old fisherman'sphilosophy," or to try to describe to others what it'slike to bargain for goods in a straw market at Nassau.You could even get a local to describe a particularsight and record your conversation with him or her.The recordings not only give information for yourscript, but also provide actual sounds that can bemixed in with your commentary.
If you are visiting a foreign country or even a regionin your own state that has its own characteristic music,a phonograph record can probably be purchased froma local record shop. This will provide excellent back-ground music for any narration or can be used forbreaks in commentary to allow your viewers to just,enjoy the scenes on the screen.
After you have returned home and had your slidesprocessed, you can move on to the next stepwritingthe script. Begin by spreading out the finished slideson a lighted slide sorter or light table. Arrange theslides in groups according to the subject in the pic-tures and then arrange these groups in what might be alogical order for presentation. Hopefully, you've takenseveral shots of each subject from different angles toadd variety when showing them, as well as to allowyou now to select the most interesting.
When you are satisfied with the way you arrangedthe slides, make a numerical list of all the slides youplan to use, identifying each slide by a word or phrasewhich tells you what the picture is about. With this listin front of you, begin writing as if you are describingyour trip and the pictures to a friend. Consult yournotes so you will not leave out little bits.of informationthat add interest Place little numbers over key wordsas you write to correspond to the slide which is comingon the screen as you talk. Remember that,,the pictures
e i.)li t..,

PRODUCING SLIDE AND TAPE PRESENTATIONS 63
are there to bring to life what you are saying. Avoidsaying, -This slide shows Just tell what it is so thatone picture flows into the next during a continuouscommentary.
When you have completed your written presenta-tion, record it on tape with appropriate backgroundmusic with either an audible or inaudible signal forsynchronizing the slides with the tape. You may evenprefer to have no signal and depend on your memoryor use of the script. Whichever you choose, you nowhave a completed presentation ready to show to yourclasses or to your friends.
When you decide to enrich the instruction of yourstudents with this type of slide-tape presentation, youare actively engaged in communicating somethingpersonal to your audience. It is personalized becauseyou're sharing your experiences and selecting thoseimages which mean something to you and which youfeel have relevance to the education of your students.Because you know your audience, you are in a positionto plan your presentation for the audience. You canturn your next vacation slides, or slides you may alreadyhave, into a rewarding educational experience for yourstudents,
;

64 READINGS FROM AUDIOVISUAL INS TRUC TION4
BILINGUAL SLIDE-TAPE LIBRARY ORIENTATION
JAMES MARTINELLI
Librarians, educators, and others who are faced withthe need to present orientation programs to individualsor small groups have long recognized the effectivenessof slide-tape presentations. The potential of the slide-tape format to present bilingual library orientationprograms, however, is a new area of exploration. Manyservice oriented institutions in urban localities com-posed of a large population to whom English is asecond language would find the slide-tape format veryeffective to describe the nature and extent of theiractivities.
Spanish-speaking students comprise a significantportion of the total student body of Passaic CountyCommunity College (PCC) a new urban communitycollege located in the business district of Paterson,New Jersey. Many of these students have difficultieswith English. This language barrier is a formidableobstacle to academic success for many students whoare very intelligent and highly motivated.
A working knowledge of how to use the library isnecessary to a student's academic success. Most fresh-men entering college do not realize the broad andsophisticated range of information resources at theirdisposal in the library. But many Spanish-speakingstudents enter college with virtually no knowledge ofAmerican library practice at all. With the support andassistance of the librarian and the media coordinator,we succeeded in producing a Spanish slide-tape libraryorientation program. An English language programwas also produced.
Four fundamental information components of thelibrary are covered in the presentation. 1) the cardcatalog and the Library of Congress subject headingslist, 2) geneidl and specialized encyclopedias and dictionanes, 3) biographical reference sources, and 4)periodical indices. The program is orientational innature, not instructional Student:, are advised in theintroduc tory narration not to take notes. The primaryobiec tives of the program are to present a general pic-ture ut the extent of information resources in thelibrary and to motivate the student to seek assistancein their proper use
While the content of the Spanish language programis the same as that of the English, the visuals used are
C Association for Educational Communications and Tech-nology, 1980 Reprinted from ,It/CillA blidi Instruction, January1976
directed toward Spanish-speaking students. When bio-graphical reference sources are discussed, for example,a slide showing an article about Cesar Chavez accom-panies the taped narration explaining the coverage ofa specific biographical reference tool. We madegraphics containing short statements in Spanish usinga dry-transfer lettering method. Slides were then madefrom the graphics to supplement and interpret pa rfs ofthe narration. For example, when the narration dis-cusses how to use the "Micropaedia" section of theEncyclopaedia Britannica, a slide is shown saying"Micro = Pequeno (Small), Paedia = Conocimiento(Knowledge)." The narration tells the student that the"Micropaedia" is useful in answering short, ready-reference questions.
One conspicuous advantage to a locally-producedlibrary orientation program is its ability to introducethe viewer to individuals in the library who are there toserve his information needs. A variety of circumstancescoincide to inhibit the Spanish-speaking student atPCC from using the library's total resources. Amongthese are the language harrier, ignorance of Americanlibrary practices and information search strategies,and as often as not, plain, old-fashioned shyness. Tocombat this tendency, a slide is shown of one of thelibrary's department heads after each of the four basicresources is discussed. The taped narration urges thestudent to seek assistance when using and the library'sinformation resources
While-producing a slide-tape presentation is oneproblem, getting people to watch it is another. In fact,getting people to know it e en exists can be difficult.At PCC, a full description of the program is carried inthe library 's newsletter and in the school newspaper atthe start of each semester In addition, announcementsare posted throughout the college campus An evenbetter publicity strategy, however, would be to pre-sent the program in a public area with continuousshowings Current plans at PCC call for using a 30-minute continuous loop tape cassette with synchro-nized slide changes to present the program for anentire day at the start of each semester. The studentlounge area will be the scene of the presentation. Oneday the Engl.sh program will be shown, the next claythe Spanish program will he shown Though the loungearea is not the most conducive place for rigorous con-centration, it will serve to introduce the program to alarge number of students and let them know it is avail-able for individual use as well.
Another effective means of publicizing the programto students is to involve them in the actual produc-
./ t.)
ti

PRODUCING SLIDE AND TAPE PRESENTATIONS
tion. A team of Spanish-speaking students at PCCtranslated the English language script for us. Mach ofthe success of the presentation was due to theirenthusiasm, which rubbed off on their peers.
65
1 he slide-tape format can make an excellent foreign-language orientation program. Slide-tape programs are .
cheap to make, easy to use, and can pay tremendousdividends in user satisfaction.
t.., J

6INNOVATIVE IDEAS

- PRODUCING SLIDE AND TAPE PRESENTATIONS 67
HOW TO PUBLISH YOUR OWN SLIDE-TAPEPRESENTATION
MiCHAEL BENTLEY
The presentation is over three fantastic screensstereo sound dissolve effects, 6 weeks of carefulpreparation and production of materials, 4 hours ofset-up and rehearsal for the presentation itself. There'sa glow a feeling of a job well done. And then the notecomes. The Assistant Superintendent for Curriculummissed it and wants to know what you said. How doyou inform him and the others whose requests willInevitably straggle as the word gets around? _The uptions are really a bit
You can always rerun the program but for oneperson who wants to know what you said, not howyou said it? Nrou can call him up and tell him aboutit but that sort of subverts the whole idea of prepar-ing a multimage presentation You can send him acopy of the script from which you worked roughnotes, changes, pencilled sketches and all You coulde-en have the script typed up but it would probablystill lack good material to go with it And if thereare no significant visual materials, why did you do thepresentation in the first place?
What to do? If it is indeed a good presentation, de-serving of more than a one-shot appearance, givesome thought to making a good picture/narration scriptfor distribution to interested parties. The script canserve as an information piece, a complete permanentrecord, and promotion device
The script would use actual photographs of theslides in the presentation combined with a typed nar-rative The suggested method for reproduction is offset printing The main problem comes from the factthat the narrative portion should be done from a linenegative (all black or white with shades of gray) forbest reproduction, while the pictures should be donefrom a screened*negative to give shades of gray Youcan get a pamphlet from Kodak which gives more ex-plicit information for you and for the printer' It is T -91-2-2. "Audiovisual Notes" and can be obtained bysending 20 cents to the Motion Picture and Educationmarkets Division, Eastman Kodak, Rochester, NewYork 14650.
At this point, it's worth pointing out that printingservice's and costs differ widely from place to placeYou may have access to a print shop in your school oryour district Or, you may be forced to use commercialprinters Generally speaking, the more work the printerdoes, the higher the cost If you have an adequate
Assoc whim tor Educational Communications and let 11-nology, 1980 Reprinted from I earning Resume's, Audi()visual instruction. March 1974
budget, you may want to take the slides and the typedscript to the printer, describe what you need, pick upyour job when it's ready and write a check for thecosts. If you're like most of us, you often have moretime and hands- (especially if you have student help)than you do cash.
I took the middle route in cost and printing services.I didn't try making my own screened negatives for theprinter (as in the Kodak pamphlet) but I did take him"camera-ready copy." This consisted of two pieces ofartwork for every page of the script (fig. 1). Both pieces
IOW I
of artwork had register maiks (fig. 2) so he could putthem together with a minimum of fuss. A cardinal ruleis "ALWAYS talk to the printer first"explain exactlywhat you need and find out what he needs to do yourjob most efficiently and inexpensively. Any "hand-,work" lw does costs both him and you.
The artwork for the screened negative part of thepage (per his instructions) held the pictures done theexact sue and in the exact place on the page wherethey were to appear. The second piece of artwork forthe same page had the typed narrative in the exactplace where it was to appear on the page. In my casethe printer gave me (free) some forms with light bluelines on them which helped to get things lined upstraight. I asked if graph paper would work as well Hesaid that some would and some would not. It dependedon the actual color and density of the lines and thepaper rself Again, ask your printer
The next step was designing the pages themselvesSince the presentation was three-screen, it was decidedto lay it out "long ways" on the page (fig. 3) How youdo it depends on how many images (or sexeens) youused and how 111U( h narrative you had with each plc -tore or set of pi( tures Some possible layouts are infigure 4.
The next step was preparing the typed copy and theactual pictures I enlisted the typing teat her and hisclass to prepare the copy I gas,e them fairly cleanmanuscript with exact width for setting margins, all
j.-atI3

68 READINGS FROM AUDIOVISUAL INSTRUCTION4
t-
(photo. page)
(narrative page)
Figure
spelling and punctuation corrected. I also explainedthat since it was to be one continuous manuscript, !tshould be done on typewriters with the same size andsty le of type did get an unexpected bonus, however,because the material was prepared on typewriters withinterchangeable elements, words could be done initalics simply by changifpg the typing element whiletyping that word.) In the meantime, I used a photo-graphy class to work on the pictures (even though Icould have done it faster myself) It gave them practicalexperience in an area not usually treated makingsame size black and white negatives from a color slide.Some students used an inexpensive ($20-30) slide.dup-licator which attached directly to the _35mm singlelens reflex camera body. Others used the camera witha bellows and a macro lens. The camera was mountedon our heaviest tripod, and we used a cable release.The procedure was more difficult with the bellows,but the experience gained would be useful for anymacrophotography not just slide copying. A slidecopying device such as a Repronar or Illumintran couldbe used t'ut none were available to us at that time Weused a tine grain, slow speed film to minimize grainand get a wide range of grays krecommended by theprinter) The class tan a series of tests measuring thedensity of the slide with a light rneterusing the barne
light source each time. We bracketed exposures in acouple of test rolls and when we were satisfied withthe results, we used the best settings, varying thesetting with the density of the slide All the slides werethen copied at the same size (1.1 ratio) and contactsheets were made. We kept careful track of the slidenumber and position (right screen, left screen and soon) so that the information could be transferred to themargin of the contact sheet (and so we could reas-semble the presentation correctly). We did not cut thecontact sheets apart until the correctly typed scriptwas ready and we were ready to assemble the artworkfor the pages. And when we did cut the contact sheets,we used white gloves and special carea little scratchor dirt c in go a long way.
Assembly time! The typed script was proofread notonce but three timesa standard commercial pro-cedure. It was cut apart into sections by number (fig.5). A section was carefully lined up and rubbercemented to the page. This page was taped (draftingtape, not masking tape) to the light board and thesheet with the pictures was carefully positioned over itand taped down. Registration marks were added toboth sheets. The pictures were then carefully glueddown in the space next to the copy. We continued thisprocedure, page after page, until all pages were done.The rule of thumb was that no copy block was carriedover to the next page unless the block was unusuallylong. That way the reader did not have any copywithout pictures next to it. The script was checked fornumber sequence and continuity as we pasted up eachpage. (Did you ever have to go back and repastefourteen pages because one copy block was left out?)then the whole thing was checked again before pagenumbers were added using dry-transfer -type to dressthings up Every student involved k including typists,was given credit either on the title page or on the lastpage of script We had thought of adding pictures ofeach gut there were too many students and too littlespace. Maybe next time.
The final chec k and I feel this important to everskipwas to run the presentation and chey k the scriptboth visually and aurally to see that it wri, an exactmatch to the presentation We actually killed twobirds with oh stone by in\ lung some of the peoplewho had missed it the first time The script was actually
A
11,
i5 the o,t nonolar !.altinv :c,;,711 !A re
Itit rated,' iti to rote the ri,,ht O.
to Illt (1),01.(. ti,e !,11.1r k. t of et,to..np the strent,h of th. 1 vht ?. md"ouch" the ha it the ha I I
36. In the rtpultr bat t Inv te..hn tout , r,the ernhat< is on i,oe.er Int, the Ithe not effective ^^ethod f,,r ht.ttninvth n.o.er 1, to ch, 1,e t In Flat do...r I t
notable, let Inv the wt ilItt t th, b itnarnint, aroun I it ire, drm the hell
:.hilt in hunt int, di reLt lon.ti eont iolI achieved to otodtin the h it It thefor revt.I ar bit t tI'e
vi be obt nod h, mil i nit I h it th h
circle Dire.i ion,11 cont )1 t is if1,,to di .tance

PRODUCING SLIDE AND TAPE PRESENTATIONS
rgilff 4
69
F ;gun. 5
checked twice, first during rehearsal (which was neces-; sarN since we had taken all the slides out of the trays to
copy them) and again during the actual presentation.The camera-ready copy then went to the printer (thedistra t has its LM n print shopm here things went withouthitch.
When the copies were returned eer% student (eventhe typists) got two copies one for friends and one forhome) and' copies were sent to people in the schooldistrict and in the «mimunitN As a result, we receivedse eral invitations to show the presentations againand a %%mem in the local paper, w hk h a wall% usedsome of the sc rlpt itselt In the long run, the results ofour ettorts were well worth the et fort

a
70 READINGS FROM AUDIOVISUAL INS TRUC T ION-I
REHEARSING A SLIDE-PRESENTATION WITHOUTA PROJECTOR
ARTHUR P. SHARKEY, IR AND RICHARD H EMTNECKER
You're seated in a plane on the was to an importantmeeting an idea: time to revues% Tur slide presenta-tion Rut. sou ( a n't set up a projector and screen inmid air to practice s( opt and slide coordination
The cab s carrying you on that interminable tripbetween airport and hotel. another lost opportunity tore\iew the show
Ot course you }lase s,-ript notes, but you'd still liketo he sure ot the sequence and the details to be«oxred b% each slide What sou need is some was tocarry a %usual re( ird ot the slides Fortunately, it canbe done with a fox-minute msestment of sour timeand tbitic lent use 01 a Polaroid c amera and cassettetape recorder
Difticult? On the «mtrary, the system s simple Oncesour slides are arranged in the proper order on a lightbox or on a sorter, take a picture ot the illuminatedslides using a Polaroid camera loaded with either blackand white or mlor film and equipped ssith a close upattac hment The camera ss ill pit k up a sutticient amountof bat khght to make between 30 and 40 slides c leadsretognizable The next step is to tape a less remarkspertaining to each slide
Noss. sshen sou re seated in that pi ine or tab. theonibmation tit pit titre and tape o,... sou an instant
rehearsal %%stem Simms sit bac k. take theture tram sour pocket, use the earphone monitor
trim the portable rec. ()ult.'', and review the presentationuntil sou tees «ntortable with the outline of your talkand the order 01 the slides
ith thus Noe 01 rehearsal. sou t an stand booreany group anti talk easil% without the all traps
Ah that one s out ot order, howeverAh I guess that refers to the next slide
Assor 'moon for du( ahondl (ommunications and N frnologs, 1980 Reprinted from tadsowsual Instrut ruin Nidl,1974
AL-a i IHi MEM
IR_
M_ =_
"Ah, I forgot to tell youThere are other adsantages of the picture record.
First, It s as allable immediately If the slides are acci-dentally spilled, the can be easels replaced
Sec ondly. the picture is a permanent record of theslide sequence Esen if the slides are later sorted intodi twain t allegories, the% can be easily retrieved it thesnow is to be presented again A 35 MM slide taken oftht- entire slide setup, in addition to the Polaroid tech-nique. would pros ide the added advantage of projec t-ability and c lam% for future use
F maIly , another person, burnished \lath the tapedsummary (aid the photograph, c an easels lose thesante presentation This as olds the problem of has ingone indo idual lot Led into guy mg the same show merand over again