dj sampler djs-1000 · djs-1000. 2 en the exclamation point within an equilateral ... fleurs, et ne...
TRANSCRIPT

Operating Instructions (Quick Start Guide)
pioneerdj.com/support/For FAQs and other support information for this product, visit the above site.
DJ SAMPLER
DJS-1000

En2
The exclamation point within an equilateral triangle is intended to alert the user to the presence of important operating and maintenance (servicing) instructions in the literature accompanying the appliance.
The lightning flash with arrowhead symbol, within an equilateral triangle, is intended to alert the user to the presence of uninsulated “dangerous voltage” within the product’s enclosure that may be of sufficient magnitude to constitute a risk of electric shock to persons.
CAUTION:TO PREVENT THE RISK OF ELECTRIC SHOCK, DO NOT REMOVE COVER (OR BACK). NO USER-SERVICEABLE PARTS INSIDE. REFER SERVICING TO QUALIFIED SERVICE PERSONNEL.
CAUTIONRISK OF ELECTRIC SHOCK
DO NOT OPEN
IMPORTANT
D3-4-2-1-1b_A1_En
Read these instructions.Keep these instructions.Heed all warnings.Follow all instructions.Do not use this apparatus near water.Clean only with dry cloth.Do not block any ventilation openings. Install in accordance with the manufacturer’s instructions.Do not install near any heat sources such as radiators, heat registers, stoves, or other apparatus (including amplifiers) that produce heat.Do not defeat the safety purpose of the polarized or grounding-type plug. A polarized plug has two blades with one wider than the other. A grounding type plug has two blades and a third grounding prong. The wide blade or the third prong are provided for your safety. If the provided plug does not fit into your outlet, consult an electrician for replacement of the obsolete outlet.Protect the power cord from being walked on or pinched particularly at plugs, convenience receptacles, and the point where they exit from the apparatus.
1) 2) 3) 4) 5) 6) 7)
8)
9)
10)
Only use attachments/accessories specified by the manufacturer.Use only with the cart, stand, tripod, bracket, or table specified by the manufacturer, or sold with the apparatus. When a cart is used, use caution when moving the cart/apparatus combination to avoid injury from tip-over.
Unplug this apparatus during lightning storms or when unused for long periods of time.Refer all servicing to qualified service personnel. Servicing is required when the apparatus has been damaged in any way, such as power-supply cord or plug is damaged, liquid has been spilled or objects have fallen into the apparatus, the apparatus has been exposed to rain or moisture, does not operate normally, or has been dropped.
D3-7-13-69_En
11)
12)
13)
14)
Ce point d’exclamation, placé dans un triangle équilatéral, a pour but d’attirer l’attention de l’utilisateur sur la présence, dans les documents qui accompagnent l’appareil, d’explications importantes du point de vue de l’exploitation ou de l’entretien.
Ce symbole de l’éclair, placé dans un triangle équilatéral, a pour but d’attirer l’attention de l’utilisateur sur la présence, à l’intérieur du coffret de l’appareil, de “tensions dangereuses” non isolées d’une grandeur suffisante pour représenter un risque d’électrocution pour les êtres humains.
ATTENTION :POUR ÉVITER TOUT RISQUE D’ÉLECTROCUTION, NE PAS ENLEVER LE COUVERCLE (NI LE PANNEAU ARRIÈRE). AUCUNE PIÈCE RÉPARABLE PAR L’UTILISATEUR NE SE TROUVE À L’INTÉRIEUR. CONFIER TOUT ENTRETIEN À UN PERSONNEL QUALIFIÉ UNIQUEMENT.
ATTENTIONDANGER D´ELECTROCUTION
NE PAS OUVRIR
IMPORTANT
D3-4-2-1-1b_A1_Fr
NOTETHE NO USER-SERVICEABLE PARTS COMPARTMENT WARNING IS LOCATED ON THE APPLIANCE BOTTOM.
D3-7-13-68_A1_En
REMARQUEL’AVERTISSEMENT DE PIÈCES NON RÉPARABLES PAR L’UTILISATEUR SE TROUVE SUR LE DESSOUS DE L’APPAREIL.
D3-7-13-68_A1_Fr

En 3
WARNINGThis equipment is not waterproof. To prevent a fire or shock hazard, do not place any container filled with liquid near this equipment (such as a vase or flower pot) or expose it to dripping, splashing, rain or moisture. D3-4-2-1-3_A1_En
WARNINGThis product equipped with a three-wire grounding (earthed) plug - a plug that has a third (grounding) pin. This plug only fits a grounding-type power outlet. If you are unable to insert the plug into an outlet, contact a licensed electrician to replace the outlet with a properly grounded one. Do not defeat the safety purpose of the grounding plug. D3-4-2-1-6_A1_En
WARNINGTo prevent a fire hazard, do not place any naked flame sources (such as a lighted candle) on the equipment.
D3-4-2-1-7a_A1_En
VENTILATION CAUTIONWhen installing this unit, make sure to leave space around the unit for ventilation to improve heat radiation (at least 5 cm at rear, and 5 cm at each side).
WARNINGSlots and openings in the cabinet are provided for ventilation to ensure reliable operation of the product, and to protect it from overheating. To prevent fire hazard, the openings should never be blocked or covered with items (such as newspapers, table-cloths, curtains) or by operating the equipment on thick carpet or a bed. D3-4-2-1-7b*_A1_En
Operating EnvironmentOperating environment temperature and humidity:+5 °C to +35 °C (+41 °F to +95 °F); less than 85 %RH (cooling vents not blocked)Do not install this unit in a poorly ventilated area, or in locations exposed to high humidity or direct sunlight (or strong artificial light). D3-4-2-1-7c*_A2_En
CAUTIONThe switch on this unit will not completely shut off all power from the AC outlet. Since the power cord serves as the main disconnect device for the unit, you will need to unplug it from the AC outlet to shut down all power. Therefore, make sure the unit has been installed so that the power cord can be easily unplugged from the AC outlet in case of an accident. To avoid fire hazard, the power cord should also be unplugged from the AC outlet when left unused for a long period of time (for example, when on vacation). D3-4-2-2-2a*_A1_En
When using this product, confirm the safety information shown on the bottom of the unit.
D3-4-2-2-4_B1_En
The graphical symbol placed on the product means alternating current.The graphical symbol placed on the product means direct current.The graphical symbol placed on the product means Class II equipment. D3-8-2-4_A1_En
AVERTISSEMENTCet appareil n’est pas étanche. Pour éviter les risques d’incendie et de décharge électrique, ne placez près de lui un récipient rempli d’eau, tel qu’un vase ou un pot de fleurs, et ne l’exposez pas à des gouttes d’eau, des éclaboussures, de la pluie ou de l’humidité. D3-4-2-1-3_A1_Fr
AVERTISSEMENTCet appareil est muni d’une fiche de mise à la terre (masse) à trois fils. Comme la fiche présente une troisième broche (de terre), elle ne peut se brancher que sur une prise de courant, prévue pour une mise à la terre. Si vous n’arrivez pas à insérer la fiche dans la prise de courant, contactez un électricien qualifié pour faire remplacer la prise par une qui soit mise à la terre. N’annulez pas la fonction de sécurité que procure cette fiche de mise à la terre. D3-4-2-1-6_A1_Fr
AVERTISSEMENTPour éviter les risques d’incendie, ne placez aucune flamme nue (telle qu’une bougie allumée) sur l’appareil. D3-4-2-1-7a_A1_Fr
PRÉCAUTION DE VENTILATIONLors de l’installation de l’appareil, veillez à laisser un espace suffisant autour de ses parois de manière à améliorer la dissipation de chaleur (au moins 5 cm àl’arrière et 5 cm de chaque côté).AVERTISSEMENTLes fentes et ouvertures du coffret sont prévues pour la ventilation, pour assurer un fonctionnement stable de l’appareil et pour éviter sa surchauffe. Pour éviter les risques d’incendie, ne bouchez jamais les ouvertures et ne les recouvrez pas d’objets, tels que journaux, nappes ou rideaux, et n’utilisez pas l’appareil posé sur un tapis épais ou un lit. D3-4-2-1-7b*_A1_Fr
Milieu de fonctionnementTempérature et humidité du milieu de fonctionnement :De +5 °C à +35 °C (de +41 °F à +95 °F) ; Humidité relative inférieure à 85 % (orifices de ventilation non obstrués)N’installez pas l’appareil dans un endroit mal ventilé ou un lieu soumis à une forte humidité ou en plein soleil (ou à une forte lumière artificielle). D3-4-2-1-7c*_A1_Fr
ATTENTIONL’interrupteur de cet appareil ne coupe pas complètement celui-ci de sa prise secteur. Comme le cordon d’alimentation fait office de dispositif de déconnexion du secteur, il devra être débranché au niveau de la prise secteur pour que l’appareil soit complètement hors tension. Par conséquent, veillez à installer l’appareil de telle manière que son cordon d’alimentation puisse être facilement débranché de la prise secteur en cas d’accident. Pour éviter tout risque d’incendie, le cordon d’alimentation sera débranché au niveau de la prise secteur si vous prévoyez une période prolongée de non utilisation (par exemple avant un départ en vacances).
D3-4-2-2-2a*_A1_Fr
Lorsque vous utilisez ce produit, vérifiez les informations concernant la sécurité sous l’appareil. D3-4-2-2-4_B1_Fr
Le symbole graphique indiqué sur le produit représente le courant alternatif.Le symbole graphique indiqué sur le produit représente le courant continu.Le symbole graphique indiqué sur le produit représente un équipement de Classe II. D3-8-2-4_A1_Fr
CAUTIONThis product is evaluated in moderate climate condition. D3-8-2-1-7b_A1_En
ATTENTIONCe produit a été testé dans des conditions de climat tempéré. D3-8-2-1-7b_A1_Fr

En4
NOTE:This equipment has been tested and found to comply with the limits for a Class B digital device, pursuant to Part 15 of the FCC Rules. These limits are designed to provide reasonable protection against harmful interference in a residential installation. This equipment generates, uses, and can radiate radio frequency energy and, if not installed and used in accordance with the instructions, may cause harmful interference to radio communications. However, there is no guarantee that interference will not occur in a particular installation. If this equipment does cause harmful interference to radio or television reception, which can be determined by turning the equipment off and on, the user is encouraged to try to correct the interference by one or more of the following measures:— Reorient or relocate the receiving antenna.— Increase the separation between the equipment and receiver.— Connect the equipment into an outlet on a circuit different from that to which the receiver is connected.— Consult the dealer or an experienced radio/TV technician for help. D8-10-1-2_A1_En
Information to UserAlterations or modifications carried out without appropriate authorization may invalidate the user’s right to operate the equipment.
D8-10-2_A1_En
CAUTIONThis product satisfies FCC regulations when shielded cables and connectors are used to connect the unit to other equipment. To prevent electromagnetic interference with electric appliances such as radios and televisions, use shielded cables and connectors for connections.
D8-10-3a_A1_En
FEDERAL COMMUNICATIONS COMMISSION DECLARATION OF CONFORMITYThis device complies with part 15 of the FCC Rules. Operation is subject to the following two conditions: (1) This device may not cause harmful interference, and (2) this device must accept any interference received, including interference that may cause undesired operation. Product Name: DJ SAMPLER Model Number: DJS-1000 Responsible Party Name: PIONEER ELECTRONICS (USA) INC. SERVICE SUPPORT DIVISION Address: 1925 E. DOMINGUEZ ST. LONG BEACH, CA 90810-1003, U.S.A. Phone: 1-800-421-1404 URL: http://www.pioneerelectronics.com D8-10-4*_C1_En
IMPORTANT NOTICETHE MODEL NUMBER AND SERIAL NUMBER OF THIS EQUIPMENT ARE ON THE REAR OR BOTTOM.RECORD THESE NUMBERS ON PAGE 15 FOR FUTURE REFERENCE.
D36-AP9-3*_A1_En
Recording equipment and copyright: You may use this product only to reproduce or copy materials for which you own the copyright or have obtained permission to copy from the copyright owner or for which you otherwise have a legal right to reproduce or copy. Unless you own the copyright or have obtained permission from the copyright owner or otherwise have a legal right to reproduce or copy, you may be violating the law, including copyright law, and may be subject to payment of damages and other remedies.
K018US_A1_En
The Safety of Your Ears is in Your HandsGet the most out of your equipment by playing it at a safe level – a level that lets the sound come through clearly without annoying blaring or distortion and, most importantly, without affecting your sensitive hearing. Sound can be deceiving. Over time, your hearing “comfort level” adapts to higher volumes of sound, so what sounds “normal” can actually be loud and harmful to your hearing. Guard against this by setting your equipment at a safe level BEFORE your hearing adapts.ESTABLISH A SAFE LEVEL:• Set your volume control at a low setting. • Slowly increase the sound until you can hear it
comfortably and clearly, without distortion. • Once you have established a comfortable sound
level, set the dial and leave it there.
BE SURE TO OBSERVE THE FOLLOWING GUIDELINES:• Do not turn up the volume so high that you can’t
hear what’s around you.• Use caution or temporarily discontinue use in
potentially hazardous situations.• Do not use headphones while operating a motorized
vehicle; the use of headphones may create a traffic hazard and is illegal in many areas. S001a_A1_En
POWER-CORD CAUTIONHandle the power cord by the plug. Do not pull out the plug by tugging the cord and never touch the power cord when your hands are wet as this could cause a short circuit or electric shock. Do not place the unit, a piece of furniture, etc., on the power cord, or pinch the cord. Never make a knot in the cord or tie it with other cords. The power cords should be routed such that they are not likely to be stepped on. A damaged power cord can cause a fire or give you an electrical shock. Check the power cord once in a while. When you find it damaged, ask your nearest service center or your dealer for a replacement. S002*_A1_En
[Supplied power cord]The supplied power cord is designed specifically for 120 V. Do not use it with a voltage other than 120 V.Doing so may cause a fire or electric shock.
D3-7-14_PDJ_A1_En
[Cordon d’alimentation fourni]Le cordon d’alimentation fourni est conçu spécialement pour une tension de 120 V. Ne l’utilisez pas avec une tension autre que 120 V. Cela pourrait provoquer un incendie ou un choc électrique.
D3-7-14_PDJ_A1_Fr
En 5
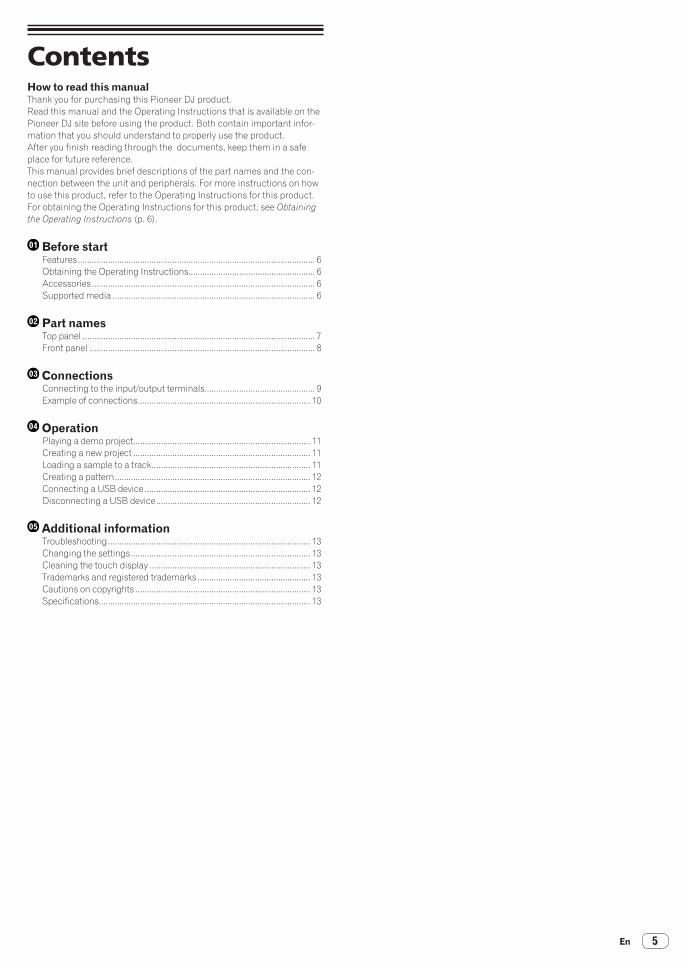
ContentsHow to read this manualThank you for purchasing this Pioneer DJ product.Read this manual and the Operating Instructions that is available on the Pioneer DJ site before using the product. Both contain important infor-mation that you should understand to properly use the product.After you finish reading through the documents, keep them in a safe place for future reference.This manual provides brief descriptions of the part names and the con-nection between the unit and peripherals. For more instructions on how to use this product, refer to the Operating Instructions for this product.For obtaining the Operating Instructions for this product, see Obtaining the Operating Instructions (p. 6 ).
Before startFeatures ....................................................................................................... 6Obtaining the Operating Instructions....................................................... 6Accessories ................................................................................................. 6Supported media ........................................................................................ 6
Part namesTop panel ..................................................................................................... 7Front panel .................................................................................................. 8
ConnectionsConnecting to the input/output terminals................................................ 9Example of connections ........................................................................... 10
OperationPlaying a demo project............................................................................. 11Creating a new project ............................................................................. 11Loading a sample to a track ..................................................................... 11Creating a pattern ..................................................................................... 12Connecting a USB device ........................................................................ 12Disconnecting a USB device ................................................................... 12
Additional informationTroubleshooting ........................................................................................ 13Changing the settings .............................................................................. 13Cleaning the touch display ...................................................................... 13Trademarks and registered trademarks ................................................. 13Cautions on copyrights ............................................................................ 13Specifications............................................................................................ 13

En6
Before start
FeaturesThis unit is a standalone hardware sampler and sequencer for DJs that enables intuitive performances. It functions as a new kind of musical instrument that can also be used for DJ performances and live perfor-mances and is equipped with a user interface providing high operability and numerous performance functions, so a wide range of musical expression is possible on stage.
Obtaining the Operating InstructionsSome operating instructions are provided in PDF files. Adobe® Reader® is required to view the PDF files.
1 Launch a web browser on a computer and access the following Pioneer DJ site.pioneerdj.com
2 Click [Support].
3 Click [FIND TUTORIALS & MANUALS].
4 Click the [DJS-1000] icon in the [DJ SAMPLER] category.
5 Click on the desired language on the download page.
Accessories! Power cord! LAN cable! USB cable! RCA pin cable! Operating Instructions (Quick Start Guide) (this document)
Supported mediaThis unit is compatible with USB mass storage class devices such as USB flash drives and digital audio players.
File systems FAT, FAT32 and HFS+
! Samples (wav and aiff with a sampling frequency of 44.1 kHz) on a USB device can be used with this unit.
! Depending on the USB device you are using, you may not achieve the expected performance.
! There is no guarantee that all USB devices will operate with this unit.
For more information, refer to the Operating Instructions of this prod-uct that is available on the Pioneer DJ website.

En 7
Part nam
es
Part namesFor more detailed, refer to the Operating Instructions of this product that is available on the Pioneer DJ website.
Top panel
9
hd e i
j
o
n
m
l
k
p qs
w
x
1
2
3
4
5 6
7
8
a
cb
f
y
z
A
t
g
r
u
v
1 PLAY/PAUSE f button
2 STOP/GATE button
3 REC/UNDO button
4 SHIFT button
5 Touch strip
6 HOLD button
7 MODE selection button and MODE indicators
8 FX LEVEL/DEPTH control
9 FX ON/OFF button
a USB STOP button
b USB indicator
c USB device insertion slot
d FX button
e PROJECT button
f SAMPLING button
g Touch display
h BACK button
i HOME/UTILITY/WAKE UP button and STANDBY indicator
j INPUT LEVEL control
k Rotary selector
l Parameter adjustment knobs
m BEAT SYNC MASTER button
n BEAT SYNC button
o MUTE button
p HOT SLICE button
q SLICE button
r SCALE button
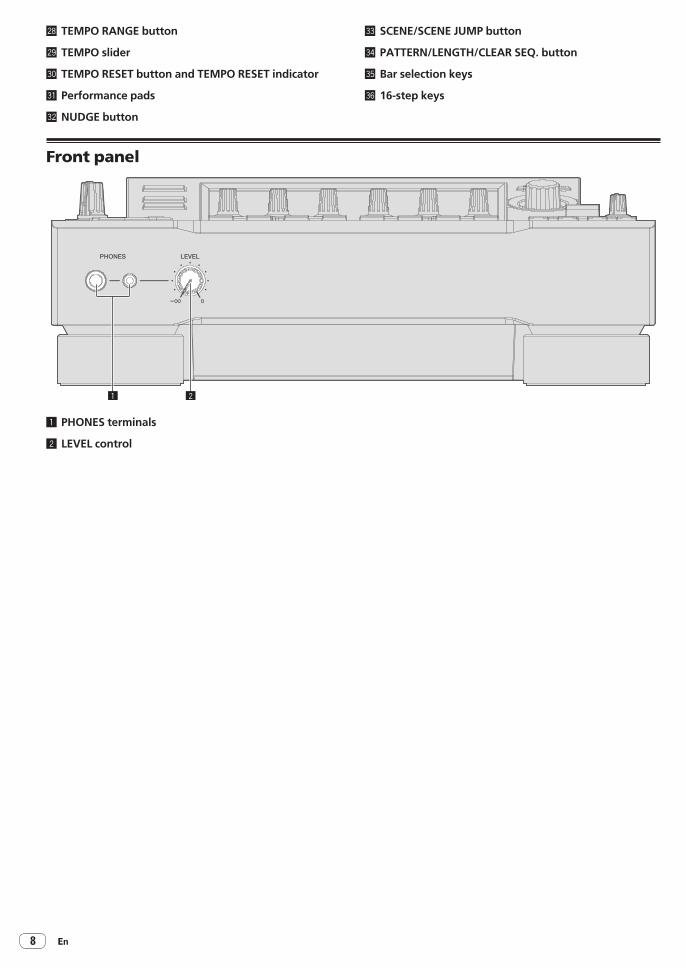
En8
s TEMPO RANGE button
t TEMPO slider
u TEMPO RESET button and TEMPO RESET indicator
v Performance pads
w NUDGE button
x SCENE/SCENE JUMP button
y PATTERN/LENGTH/CLEAR SEQ. button
z Bar selection keys
A 16-step keys
Front panel
21
1 PHONES terminals
2 LEVEL control

En 9
Connections
ConnectionsTurn off this unit and disconnect the power cord from the power outlet before connecting components or changing the connections.Connect the power cord to a power outlet after all the connections are completed.Be sure to use the power cord, USB cable, and LAN cable included with this product.Refer to the operating instructions for the components to be connected.
! When using a LAN cable to connect the components, be sure to use either the LAN cable included with this product or an STP (shielded twisted pair) cable.
! Do not disconnect the LAN cable when information is being shared with PRO DJ LINK.
! A switching hub (commercially available) may be necessary depending on the models to be combined. Use a switching hub of 100 Mbps or greater. Correct operation may not be possible depending on the switching hub.
! A switching hub (commercially available) is necessary when con-necting with a mixer that has only one LAN port. In the case of a mixer with enough LAN ports for all the DJ players and computers in the system, connect directly to a LAN port on the mixer’s rear panel without using a hub.
Connecting to the input/output terminals
Rear panel
ComputerDJ Mixer
Synthesizer, etc.
External sequencer, etc.PRO DJ LINK compatible DJ system
1 6 7 92 3 4 5 8 a
R L
1 u switch
2 INPUT terminals
3 THRU/OUTPUT2 terminals
4 OUTPUT1 terminals
5 AC IN
6 LINK terminal
7 Kensington security slot
8 MIDI OUT/THRU terminal
9 MIDI IN terminal
a USB-B terminal

En10
Example of connections
When using with external devices
MIDI cable
Audio cable
Audio cable
LAN cable
Synthesizer, etc.PRO DJ LINK compatible DJ system
CautionsMatch the audio cable channel input to the mixer and the player number.If a different player number is set, change the [PLAYER No.] setting on the [UTILITY] screen.= For instructions on changing the settings on the [UTILITY] screen, refer to this product’s Operating Instructions.! When information is being shared with PRO DJ LINK, [PLAYER No.] is displayed in gray and the player number cannot be changed. In such a
case, change the player number after first disconnecting the media and then turning off the link by, for example, disconnecting the LAN cable.
Starting up the unit
1 Connect external devices to this unit as described in Connections (p. 9 ).
2 Press the [u] switch on the rear panel of the unit.The indicators light up and this unit turns on.

En 11
Op
eration
OperationStart each procedure in the following sections from the home screen. Press the [HOME] button to display the home screen.
Playing a demo project
Loading a project
1 Press the [PROJECT] button.The PROJECT screen appears. You can perform operations such as load-ing and saving projects on the PROJECT screen.
2 Turn the rotary selector to select [OPEN] and then press the rotary selector.The media connected to the unit appears.If you select the media containing the project you wish to use and then press the rotary selector, the project list is displayed.! Press the [BACK] button to return to the previous screen.
3 Turn the rotary selector to select a demo project and then press the rotary selector.A confirmation pop-up screen appears.
Playing a pattern
1 Press the [PLAY/PAUSE f] button.The pattern currently selected for the demo project plays back. During playback, the [PLAY/PAUSEf] button lights up in green.! Pressing the [PLAY/PAUSEf] button during playback pauses
playback.! Pressing the [STOP] button during playback stops playback and
returns to the beginning of the pattern.
2 Press the [PATTERN] button.The unit enters the pattern switching mode and the [PATTERN] button lights up in white. The 16 step keys are lit in the currently selected scene colors during pattern switching mode.! 16 patterns can be assigned to each scene. One pattern is
assigned to each step key.! Scenes with recorded sequences are dimly lit, scenes with no
sequences recorded are not lit, and currently selected sequences are fully lit.
3 Press a 16-step key set with a sequence.The pattern assigned to the button is played.! The timing that the pattern is switched is in accordance with the
PATTERN QUANTIZE setting value set on the QUANTIZE screen. For details on PATTERN QUANTIZE, refer to the operating
instructions.! The pressed step key flashes while the pattern is switched.! Press the [PATTERN] button to exit pattern switching mode.
Creating a new project
1 Press the [PROJECT] button.The PROJECT screen appears. You can perform operations such as load-ing and saving projects on the PROJECT screen.
2 Turn the rotary selector to select [CREATE NEW] and then press the rotary selector.A new project is created and the main screen appears.! A confirmation pop-up screen appears.! If a new project is created without saving an existing project after the
project is changed, the unsaved project will be lost.
Loading a sample to a track
1 Tap the track to which you wish to load the sample on the home screen and then tap again in the selected state.The track menu screen appears.! The track menu can also be displayed by turning the rotary selector
to select a track and then pressing the rotary selector.

En12
2 Tap [BROWSE].The browse screen appears. You can search for samples and load sam-ples to tracks on the browse screen.! The browse screen can also be displayed by turning the rotary selec-
tor to select [BROWSE] and then pressing the rotary selector.
3 Turn the rotary selector to select a sample and then press the rotary selector.The sample is loaded to the track, and loaded on the screen.
! Select a folder and press the rotary selector to open or close the folder.
! Turn the rotary selector while pressing the [SHIFT] button to move the focus between folders (sample files are skipped).
Creating a pattern
Recording a performance (dynamic recording)
1 Press the [REC] button.The [REC] button lights up in red and the unit enters the recording state.
2 Press the [PLAY/PAUSE f] button.The [PLAY/PAUSEf] button lights up in green and the sequence plays while the unit is in the recording state.
3 Tap the performance pads to set triggers.A trigger is set when the pad is tapped. The step key to which the trigger was input lights or flashes in the track color.
Programming triggers (step recording)
1 Tap the track for step recording on the home screen.The sequence of the selected track is displayed on the 16-step keys.! A track can also be selected by turning the rotary selector.! A track can also be selected by tapping a performance pad.
2 Press the 16-step keys to input triggers.The step keys corresponding to the programmed sequence light up in the track color.
Saving a projectA project can be saved to a USB device. When saving a project, connect a USB device to the unit.
1 Press the [PROJECT] button.The PROJECT screen appears. You can perform operations such as load-ing and saving projects on the PROJECT screen.
2 Turn the rotary selector to select [SAVE] and then press the rotary selector.If the project name has already been entered, a saving pop-up screen appears. The progress is indicated by a progress bar in the pop-up screen.If the project name has not been entered, a pop-up screen and software keyboard for setting the project name appear.! The pop-up window disappears and the PROJECT screen appears
when the saving process is completed.! To change the project name select [SAVE AS], enter a project name,
and then save the project.
Connecting a USB device
1 Press the [u] switch to turn this unit on.
2 Connect a USB device to the USB device insertion slot.
Disconnecting a USB device
1 Press and hold the [USB STOP] button until the USB indicator turns off.Do not disconnect the USB device or turn this unit off while the USB indicator is flashing. Failure to do so may result in losing the manage-ment data and the USB device becoming unreadable.
USB indicator
USB STOP button
2 Disconnect the USB device.

En 13
Ad
ditional inform
ation
Additional information
Troubleshooting! If something is wrong with this unit, check the issues described in "Troubleshooting" of the Operating Instructions for this unit, and also access the
Pioneer DJ support site and check [FAQ] for [DJS-1000] pioneerdj.com/support/ Some problems occur due to the connected components. If the problem cannot be resolved after checking the connected components, ask the
service center or your dealer for repairs.! The unit may not operate properly due to static electricity or other external influences. In such cases, disconnect the power cord and connect it
again to restore normal operation.
Changing the settingsFor more information, refer to the Operating Instructions of this product that is available on the Pioneer DJ website.
Cleaning the touch displayDo not use organic solvents, acids or alkalis for cleaning the surface of the touch display. Wipe clean with a dry soft cloth or a cloth immersed in neu-tral detergent and properly wrung.
Trademarks and registered trademarks! “Pioneer DJ” is a trademark of PIONEER CORPORATION, and is
used under license.! This software is based in part on the work of the Independent JPEG
Group.
Cautions on copyrightsWhen playing music files you have acquired on this unit, we kindly ask you to respect copyrights.Recordings you have made are for your personal enjoyment and accord-ing to copyright laws may not be used without the consent of the copy-right holder.! When handling music downloaded from the Internet, etc., it is the
full responsibility of the person who has downloaded the music to ensure that it is used in accordance with the contract concluded with the download site.
SpecificationsPower requirements ....................................AC 110 V to 240 V, 50 Hz/60 HzPower consumption ............................................................................... 26 WPower consumption (standby) ............................................................. 0.4 WMain unit weight .....................................................................5.4 kg (11.9 lb)Max. dimensions........................................... 320.0 mm (W) × 110.1 mm (H) × 421.6 mm (D)
(12.6 in. (W) × 4.3 in. (H) × 16.6 in. (D))Tolerable operating temperature .........+5 °C to +35 °C (+41 °F to +95 °F)Tolerable operating humidity ...................... 5 % to 85 % (no condensation)
Audio SectionSampling rate ....................................................................................44.1 kHzA/D converter .........................................................................................24-bitD/A converter .........................................................................................32-bitFrequency response.............................................................. 20 Hz to 20 kHzTotal harmonic distortion ..................................................................0.003 %INPUT
Max. input level ..........................................................................+16 dBuInput impedance ............................................................................. 33 kW
OUTPUT1 and THRU/OUTPUT2Rated output level / Load impedance ................2.0 Vrms (1 kHz)/10 kW
Output impedance .......................................................................... 540 WPHONES
Rated output level / Load impedance .............. 200 mW+200 mW/32 W
InputsINPUT.........................................................................x1 (1/4 inch TS jack x1)
OutputsOUTPUT1 .....................................................................................x1 (RCA x1)THRU/OUTPUT2 .......................................................x1 (1/4 inch TS jack x1)PHONES ... x2 (1/4 inch stereo phone jack x1, 3.5 mm stereo mini jack x1)
OthersUSB-A terminal ............................................................................ x1 (5 V/1 A)USB-B terminal ........................................................................................... x1LINK .............................................................................. x1 (LAN 100Base-TX)MIDI IN .........................................................................................x1 (5P DIN)MIDI OUT/THRU ..........................................................................x1 (5P DIN)! The specifications and design of this product are subject to change
without notice.

En14

En 15
Ad
ditional inform
ation
UCP0516
Pioneer DJ Americas, Inc.LIMITED WARRANTY
WARRANTY VALID ONLY IN THE U.S.A. AND CANADA
WARRANTYPioneer DJ Americas, Inc. (PDJA) warrants that products distributed by PDJA in the U.S.A. and Canada that fail to function properly under normal use due to a manufacturing defect when installed and operated according to the owner’s manual enclosed with the unit will be repaired or replaced with a unit of comparable value, at the option of PDJA, without charge to you for parts or actual repair work. Parts supplied under this warranty may be new or rebuilt at the option of PDJA.
THIS LIMITED WARRANTY APPLIES TO THE ORIGINAL OR ANY SUBSEQUENT OWNER OF THIS PIONEER DJ PRODUCT DURING THE WARRANTY PERIOD PROVIDED THE PRODUCT WAS PURCHASED FROM AN AUTHORIZED PIONEER DJ DISTRIBUTOR/DEALER IN THE U.S.A. OR CANADA. YOU WILL BE REQUIRED TO PROVIDE A SALES RECEIPT OR OTHER VALID PROOF OF PURCHASE SHOWING THE DATE OF ORIGINAL PURCHASE OR, IF RENTED, YOUR RENTAL CONTRACT SHOWING THE PLACE AND DATE OF FIRST RENTAL. IN THE EVENT SERVICE IS REQUIRED, THE PRODUCT MUST BE DELIVERED WITHIN THE WARRANTY PERIOD, TRANSPORTATION PREPAID, ONLY FROM WITHIN THE U.S.A. AS EXPLAINED IN THIS DOCUMENT. YOU WILL BE RESPONSIBLE FOR REMOVAL AND INSTALLATION OF THE PRODUCT. PDJA WILL PAY TO RETURN THE REPAIRED OR REPLACEMENT PRODUCT TO YOU WITHIN THE U.S.A.
PRODUCT WARRANTY PERIOD Parts LaborAudio and Video .............................................................................................................................................................................................. 1 Year 1 YearThe warranty period for retail customers who rent the product commences upon the date product is first put into use (a) during the rental period or (b) retail sale, whichever occurs first.
WHAT IS NOT COVEREDIF THIS PRODUCT WAS PURCHASED FROM AN UNAUTHORIZED DISTRIBUTOR, THERE ARE NO WARRANTIES, EXPRESS OR IMPLIED, INCLUDING THE IMPLIED WARRANTY OF MERCHANTABILITY AND THE IMPLIED WARRANTY OF FITNESS FOR A PARTICULAR PURPOSE AND THIS PRODUCT IS SOLD STRICTLY “AS IS” AND “WITH ALL FAULTS".
PIONEER DJ SHALL NOT BE LIABLE FOR ANY CONSEQUENTIAL AND/OR INCIDENTAL DAMAGES.THIS WARRANTY DOES NOT APPLY IF THE PRODUCT HAS BEEN SUBJECTED TO POWER IN EXCESS OF ITS PUBLISHED POWER RATING.
THIS WARRANTY DOES NOT COVER THE CABINET OR ANY APPEARANCE ITEM, USER ATTACHED ANTENNA, ANY DAMAGE TO RECORDS OR RECORDING TAPES OR DISCS, ANY DAMAGE TO THE PRODUCT RESULTING FROM ALTERATIONS, MODIFICATIONS NOT AUTHORIZED IN WRITING BY PIONEER DJ, ACCIDENT, MISUSE OR ABUSE, DAMAGE DUE TO LIGHTNING OR TO POWER SURGES, SUBSEQUENT DAMAGE FROM LEAKING, DAMAGE FROM INOPERATIVE BATTERIES, OR THE USE OF BATTERIES NOT CONFORMING TO THOSE SPECIFIED IN THE OWNER’S MANUAL.THIS WARRANTY DOES NOT COVER THE COST OF PARTS OR LABOR WHICH WOULD BE OTHERWISE PROVIDED WITHOUT CHARGE UNDER THIS WARRANTY OBTAINED FROM ANY SOURCE OTHER THAN A PIONEER DJ AUTHORIZED SERVICE COMPANY OR OTHER DESIGNATED LOCATION. THIS WARRANTY DOES NOT COVER DEFECTS OR DAMAGE CAUSED BY THE USE OF UNAUTHORIZED PARTS OR LABOR OR FROM IMPROPER MAINTENANCE.
ALTERED, DEFACED, OR REMOVED SERIAL NUMBERS VOID THIS ENTIRE WARRANTY
NO OTHER WARRANTIESPIONEER DJ LIMITS ITS OBLIGATIONS UNDER ANY IMPLIED WARRANTIES INCLUDING, BUT NOT LIMITED TO, THE IMPLIED WARRANTIES OF MERCHANTABILITY AND FITNESS FOR A PARTICULAR PURPOSE, TO A PERIOD NOT TO EXCEED THE WARRANTY PERIOD. NO WARRANTIES SHALL APPLY AFTER THE WARRANTY PERIOD. SOME STATES DO NOT ALLOW LIMITATIONS ON HOW LONG AN IMPLIED WARRANTY LASTS AND SOME STATES DO NOT ALLOW THE EXCLUSIONS OR LIMITATIONS OF INCIDENTAL OR CONSEQUENTIAL DAMAGES, SO THE ABOVE LIMITATIONS OR EXCLUSIONS MAY NOT APPLY TO YOU. THIS WARRANTY GIVES YOU SPECIFIC LEGAL RIGHTS AND YOU MAY HAVE OTHER RIGHTS WHICH MAY VARY FROM STATE TO STATE.
TO OBTAIN SERVICEPDJA has appointed a number of Authorized Service Companies throughout the U.S.A. and Canada should your product require service. To receive warranty service you need to present your sales receipt or, if rented, your rental contract showing place and date of original owner’s transaction. If shipping the unit you will need to package it carefully and send it, transportation prepaid by a traceable, insured method, to an Authorized Service Company. Package the product using adequate padding material to prevent damage in transit. The original container is ideal for this purpose. Include your name, address and telephone number where you can be reached during business hours.On all complaints and concerns in the U.S.A. and Canada call Customer Support at 1-800-872-4159.
For hook-up and operation of your unit or to locate an Authorized Service Company, please call or write:
CUSTOMER SUPPORTPIONEER ELECTRONICS (USA) INC.
P.O. BOX 1720LONG BEACH, CALIFORNIA 90801
1-800-872-4159http://www.pioneerelectronics.com
DISPUTE RESOLUTIONFollowing our response to any initial request to Customer Support, should a dispute arise between you and Pioneer DJ, Pioneer DJ makes available its Complaint Resolution Program to resolve the dispute. The Complaint Resolution Program is available to you without charge. You are required to use the Complaint Resolution Program before you exercise any rights under, or seek any remedies, created by Title I of the Magnuson-Moss Warranty-Federal Trade Commission Improvement Act, 15 U.S.C. 2301 et seq. To use the Complaint Resolution Program call 1-800-872-4159 and explain to the customer service representative the problem you are experiencing, steps you have taken to have the product repaired during the warranty period and the name of the authorized Distributor/Dealer from whom the Pioneer DJ product was purchased. After the complaint has been explained to the representative, a resolution number will be issued. Within 40 days of receiving your complaint, Pioneer DJ will investigate the dispute and will either: (1) respond to your complaint in writing informing you what action Pioneer DJ will take, and in what time period, to resolve the dispute; or (2) respond to your complaint in writing informing you why it will not take any action.
RECORD THE PLACE AND DATE OF PURCHASE FOR FUTURE REFERENCE
Model No. ____________________________________________ Serial No. _________________________________________ Purchase Date ______________________
Purchased From _____________________________________________________________________________________________________________________________
KEEP THIS INFORMATION AND YOUR SALES RECEIPT IN A SAFE PLACE

PIONEER ELECTRONICS (THAILAND) CO., LTD.17th Fl., KPN Tower, 719 Rama 9 Road, Bangkapi, Huaykwang, Bangkok 10310 TEL: +66-2-717-0777
PIONEER TECHNOLOGY (MALAYSIA) SDN. BHD16th Floor, Menara Uni. Asia 1008 Jalan Sultan Ismail 50250 Kuala Lumpur TEL: +60-3-2697-2920
TEL: +886-(0)2-2657-3588
TEL: +852-2848-6488
PIONEER ELECTRONICS DE MEXICO S.A. DE C.V.Blvd.Manuel Avila Camacho 138 10 piso Col.Lomas de Chapultepec, Mexico, D.F. 11000 TEL: +52-55-9178-4270
PIONEER INDIA ELECTRONICS PRIVATE LTD.216, Second Floor, Time Tower, M.G. Road, Sector 28, Gurgaon 122001, Haryana, India TEL: +91-124-463-6100
PDJ_001_all
6F, Yokohama i-Mark Place, 4-4-5 Minatomirai, Nishi-ku, Yokohama, Kanagawa 220-0012 JAPAN
〒220-0012 神奈川県横浜市西区みなとみらい4丁目4番5号 横浜アイマークプレイス6階Корпорация Пайонир Диджей6F, Йокогама i-Mark Place, 4-4-5 Минатомирай, Ниси-ку, Йокогама, Канагава 220-0012 ЯПОНИЯ
Anteros Building, Odyssey Business Park, West End Road,South Ruislip, Middlesex, HA4 6QQ, U.K. TEL: +44-203-7617-220
2050 W. 190th Street, Suite 109, Torrance, CA 90504, U.S.A. TEL: +1 (424) 488-0480
PIONEER ELECTRONICS ASIACENTRE PTE. LTD. 2 Jalan Kilang Barat, #07-01, Singapore 159346 TEL: +65-6378-7888
PIONEER ELECTRONICS AUSTRALIA PTY. LTD.5 Arco Lane, Heatherton, Victoria, 3202, Australia, TEL: +61-3-9586-6300
To register your product, find the nearest authorized service location, to purchase replacement parts, operating instructions, or accessories, please go to one of following URLs :
Pour enregistrer votre produit, trouver le service après-vente agréé le plus proche et pour acheter des pièces de rechange, des modes d’emploi ou des accessoires, reportez-vous aux URL suivantes :
In the USA/Aux Etats-Unis or In Canada/Aux Canada http://www.pioneerelectronics.com
S018_C1_EnFr_PSV
© 2017 Pioneer DJ Corporation.All rights reserved.
Printed in Malaysia <DRH1455-A>