diana f+ 35mm back manual
DESCRIPTION
Diana F+ 35mm Back ManualTRANSCRIPT
INSTRUCTIONS FOR USE
GEBRAUCHSANWEISUNG
MODE D’ EMPLOI
ISTRUZIONI PER L’ USO
MANUAL DE INSTRUCCIONES
2
6
11
16
20
25
28
32
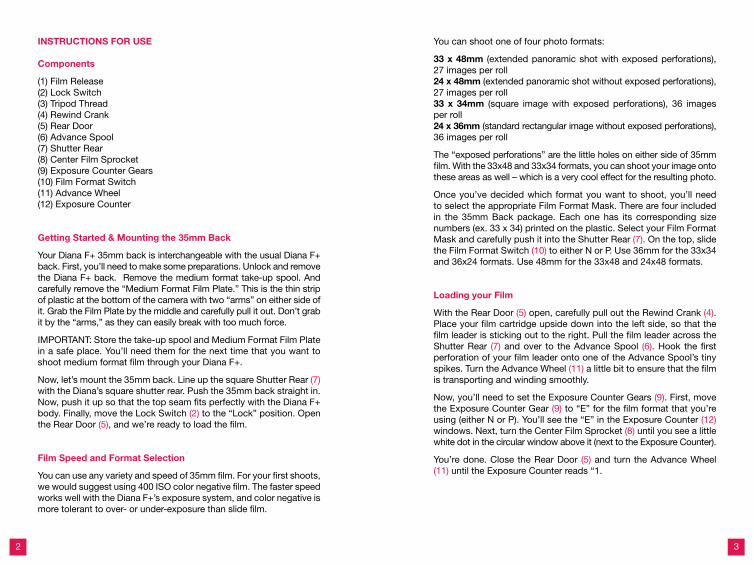
INSTRUCTIONS FOR USE
Components
(1) Film Release(2) Lock Switch(3) Tripod Thread(4) Rewind Crank(5) Rear Door(6) Advance Spool(7) Shutter Rear(8) Center Film Sprocket(9) Exposure Counter Gears(10) Film Format Switch(11) Advance Wheel(12) Exposure Counter
Getting Started & Mounting the 35mm Back
Your Diana F+ 35mm back is interchangeable with the usual Diana F+ back. First, you’ll need to make some preparations. Unlock and remove the Diana F+ back. Remove the medium format take-up spool. And carefully remove the “Medium Format Film Plate.” This is the thin strip of plastic at the bottom of the camera with two “arms” on either side of it. Grab the Film Plate by the middle and carefully pull it out. Don’t grab it by the “arms,” as they can easily break with too much force.
IMPORTANT: Store the take-up spool and Medium Format Film Plate in a safe place. You’ll need them for the next time that you want to shoot medium format film through your Diana F+.
Now, let’s mount the 35mm back. Line up the square Shutter Rear (7) with the Diana’s square shutter rear. Push the 35mm back straight in. Now, push it up so that the top seam fits perfectly with the Diana F+ body. Finally, move the Lock Switch (2) to the “Lock” position. Open the Rear Door (5), and we’re ready to load the film.
Film Speed and Format Selection
You can use any variety and speed of 35mm film. For your first shoots, we would suggest using 400 ISO color negative film. The faster speed works well with the Diana F+’s exposure system, and color negative is more tolerant to over- or under-exposure than slide film.
You can shoot one of four photo formats:
33 x 48mm (extended panoramic shot with exposed perforations), 27 images per roll24 x 48mm (extended panoramic shot without exposed perforations), 27 images per roll33 x 34mm (square image with exposed perforations), 36 images per roll24 x 36mm (standard rectangular image without exposed perforations), 36 images per roll
The “exposed perforations” are the little holes on either side of 35mm film. With the 33x48 and 33x34 formats, you can shoot your image onto these areas as well – which is a very cool effect for the resulting photo.
Once you’ve decided which format you want to shoot, you’ll need to select the appropriate Film Format Mask. There are four included in the 35mm Back package. Each one has its corresponding size numbers (ex. 33 x 34) printed on the plastic. Select your Film Format Mask and carefully push it into the Shutter Rear (7). On the top, slide the Film Format Switch (10) to either N or P. Use 36mm for the 33x34 and 36x24 formats. Use 48mm for the 33x48 and 24x48 formats.
Loading your Film
With the Rear Door (5) open, carefully pull out the Rewind Crank (4). Place your film cartridge upside down into the left side, so that the film leader is sticking out to the right. Pull the film leader across the Shutter Rear (7) and over to the Advance Spool (6). Hook the first perforation of your film leader onto one of the Advance Spool’s tiny spikes. Turn the Advance Wheel (11) a little bit to ensure that the film is transporting and winding smoothly.
Now, you’ll need to set the Exposure Counter Gears (9). First, move the Exposure Counter Gear (9) to “E” for the film format that you’re using (either N or P). You’ll see the “E” in the Exposure Counter (12) windows. Next, turn the Center Film Sprocket (8) until you see a little white dot in the circular window above it (next to the Exposure Counter).
You’re done. Close the Rear Door (5) and turn the Advance Wheel (11) until the Exposure Counter reads “1.
2 3
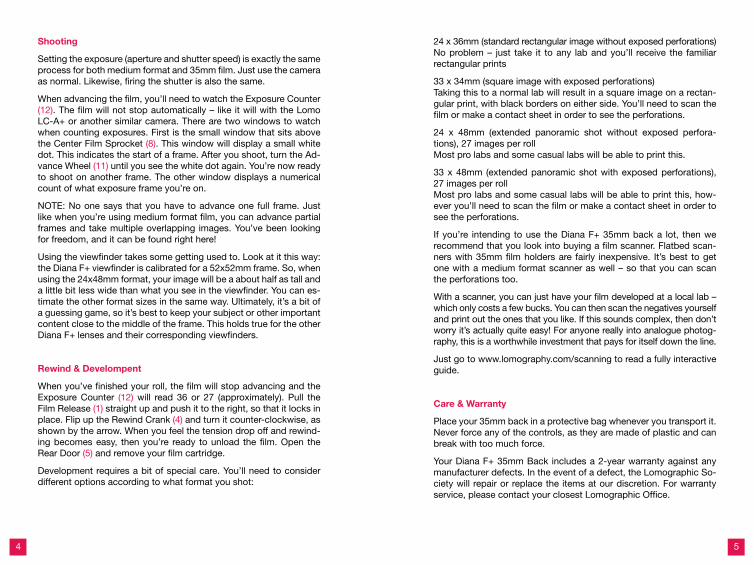
Shooting
Setting the exposure (aperture and shutter speed) is exactly the same process for both medium format and 35mm film. Just use the camera as normal. Likewise, firing the shutter is also the same.
When advancing the film, you’ll need to watch the Exposure Counter (12). The film will not stop automatically – like it will with the Lomo LC-A+ or another similar camera. There are two windows to watch when counting exposures. First is the small window that sits above the Center Film Sprocket (8). This window will display a small white dot. This indicates the start of a frame. After you shoot, turn the Ad-vance Wheel (11) until you see the white dot again. You’re now ready to shoot on another frame. The other window displays a numerical count of what exposure frame you’re on.
NOTE: No one says that you have to advance one full frame. Just like when you’re using medium format film, you can advance partial frames and take multiple overlapping images. You’ve been looking for freedom, and it can be found right here!
Using the viewfinder takes some getting used to. Look at it this way: the Diana F+ viewfinder is calibrated for a 52x52mm frame. So, when using the 24x48mm format, your image will be a about half as tall and a little bit less wide than what you see in the viewfinder. You can es-timate the other format sizes in the same way. Ultimately, it’s a bit of a guessing game, so it’s best to keep your subject or other important content close to the middle of the frame. This holds true for the other Diana F+ lenses and their corresponding viewfinders.
Rewind & Develompent
When you’ve finished your roll, the film will stop advancing and the Exposure Counter (12) will read 36 or 27 (approximately). Pull the Film Release (1) straight up and push it to the right, so that it locks in place. Flip up the Rewind Crank (4) and turn it counter-clockwise, as shown by the arrow. When you feel the tension drop off and rewind-ing becomes easy, then you’re ready to unload the film. Open the Rear Door (5) and remove your film cartridge.
Development requires a bit of special care. You’ll need to consider different options according to what format you shot:
24 x 36mm (standard rectangular image without exposed perforations)No problem – just take it to any lab and you’ll receive the familiar rectangular prints
33 x 34mm (square image with exposed perforations)Taking this to a normal lab will result in a square image on a rectan-gular print, with black borders on either side. You’ll need to scan the film or make a contact sheet in order to see the perforations.
24 x 48mm (extended panoramic shot without exposed perfora-tions), 27 images per rollMost pro labs and some casual labs will be able to print this.
33 x 48mm (extended panoramic shot with exposed perforations), 27 images per rollMost pro labs and some casual labs will be able to print this, how-ever you’ll need to scan the film or make a contact sheet in order to see the perforations.
If you’re intending to use the Diana F+ 35mm back a lot, then we recommend that you look into buying a film scanner. Flatbed scan-ners with 35mm film holders are fairly inexpensive. It’s best to get one with a medium format scanner as well – so that you can scan the perforations too.
With a scanner, you can just have your film developed at a local lab – which only costs a few bucks. You can then scan the negatives yourself and print out the ones that you like. If this sounds complex, then don’t worry it’s actually quite easy! For anyone really into analogue photog-raphy, this is a worthwhile investment that pays for itself down the line.
Just go to www.lomography.com/scanning to read a fully interactive guide.
Care & Warranty
Place your 35mm back in a protective bag whenever you transport it. Never force any of the controls, as they are made of plastic and can break with too much force.
Your Diana F+ 35mm Back includes a 2-year warranty against any manufacturer defects. In the event of a defect, the Lomographic So-ciety will repair or replace the items at our discretion. For warranty service, please contact your closest Lomographic Office.
4 5

GEBRAUCHSANLEITUNG
Komponenten
(1) Filmtransport Sicherungshebel(2) Sperr (Lock) Schalter(3) Gewinde für Stativ(4) Rückspulkurbel(5) Rückendeckel(6) Vorlaufspule(7) Masken Halterung(8) Bildzähler -Rädchen(9) Bild-Rahmen Zähl-Rädchen (10) Film Format Schalter(11) Aufziehrad(12) Bildzähler
Vorbereitung & Befestigen des 35mm Aufsatzes
Dein Diana F+ 35mm Aufsatz ist einfach mit dem standard Diana F+ Rückendeckel austauschbar. Doch zuerst mußt Du einige Vorberei-tungen treffen. Entriegle und nimm den Rückendeckel der Diana F+ ab. Entferne die Mittelformat-Spule und vorsichtig auch die “Mittel-format Film Halterung”. Das ist der dünne Plastiksteg am Boden der Kamera mit zwei “Armen” an beiden Seiten. Greife ihn in der Mitte und drücke ihn vorsichtig heraus. Nicht an den “Armen” nehmen, diese können sehr leicht brechen.
WICHTIG: Bewahre diese Teile sicher auf, Du wirst sie wieder brauchen, wenn Du das nächste mal mit der Diana F+ und Mittelfor-mat fotografieren willst.
Nun drücke den 35mm Aufsatz hinein und dann etwas hinauf, so dass die obere Kante perfekt in das Gehäuse der Diana F+ paßt. Schließlich lege den “Lock” Schalter (2) auf die “Lock” Position. Öff-ne den Rückendeckel (5) und lade den Film.
Film Geschwindigkeit und Formatwahl
Du kannst jede Art und Geschwindigkeit an 35mm Filmen verwen-den. Für Deine ersten Bilder würden wir einen ISO 400 Farbfilm empfehlen. Die schnellere Geschwindigkeit funktioniert gut mit dem
Belichtungs System der Diana F+ , und Farbfilme sind bei Über- und Unterbelichtungen toleranter als Diafilme.
Wähle zwischen vier Bildformaten:
33 x 48mm (erweitertes Panoramabild mit belichteter Perforation), 27 Bilder per Rolle24 x 48mm (erweitertes Panoramabild ohne belichteter Perforation), 27 Bilder per Rolle33 x 34mm (quadratisches Bild mit belichteter Perforation), 36 Bilder per Rolle24 x 36mm (rechteckiges standard Bild ohne belichteter Perforation), 36 Bilder per Rolle
Die “belichteten Perforationen” sind die kleinen Löcher oben und unten am Negativ eines 35mm Films. Mit den 33x48 und 33x34 For-maten kannst Du diesen Bereich sehr gut belichten und es bringt einen großartigen Effekt auf den Fotos.
Wenn Du Dich entschieden hast mit welchem Fomat Du fotografieren willst, dann mußt Du die geeignete Format-Maske auswählen. Im Paket befinden sich vier. Jede davon hat die entsprechenden Zahlen (zB.: 33 x 34) aufgedruckt. Wähle Die passende Maske und stecke sie vorsichtig in die Halterung (7). Schiebe den Filmformat Regler (10) entweder auf N oder P. Verwende N für 33x34 und 36x24 Formate. Das P für die 33x48 und 24x48 Formate.
Film laden
Ziehe vorsichtig die Rückspulkurbel (4) bei geöffnetem Rückendeckel (5) heraus. Platziere die Filmpatrone umgedreht auf der linken Seite, so dass der Filmanfang auf der rechten Seite heraussteht. Nun ziehe den Film über die Masken-Halterung (7) und über die Transportspule (6). Hänge die Perforationslöcher des Filmes auf die kleinen Haken an der Spule. Drehe das Aufziehrad (11) ein klein wenig, um sicherzugehen dass der Film transportiert wird und sich leicht aufziehen läßt.
Nun stelle das Bildzähl-Rädchen (9) für das benutzte Filmformat (P oder N) auf “E” im Fenster des Bildzählers (12) ein. Als nächstes drehe das Bild-Rahmen Zähl-Rädchen (8) bis Du einen kleinen weißen Punkt im runden Fenster darüber siehst (neben dem Bildzähler).
Fertig! Schließe den Rückendeckel (5) und drehe das Aufziehrad (11) bis der Bildzähler auf “1” steht.
6 7
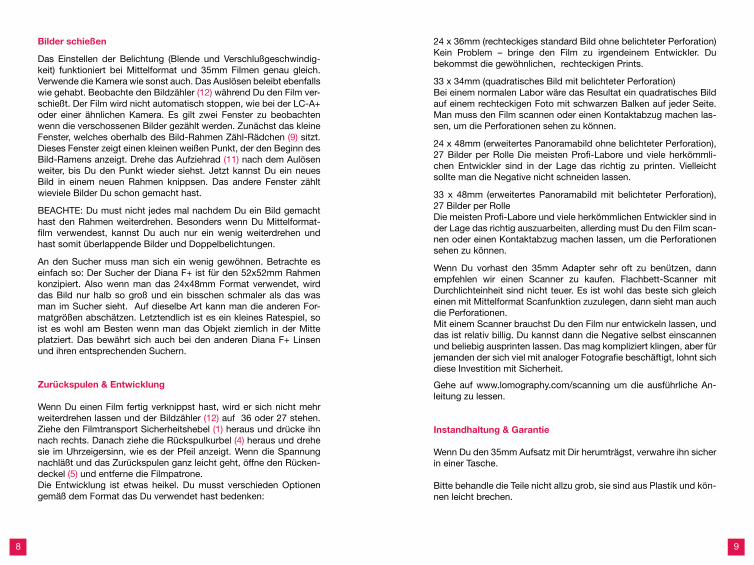
Bilder schießen
Das Einstellen der Belichtung (Blende und Verschlußgeschwindig-keit) funktioniert bei Mittelformat und 35mm Filmen genau gleich. Verwende die Kamera wie sonst auch. Das Auslösen beleibt ebenfalls wie gehabt. Beobachte den Bildzähler (12) während Du den Film ver-schießt. Der Film wird nicht automatisch stoppen, wie bei der LC-A+ oder einer ähnlichen Kamera. Es gilt zwei Fenster zu beobachten wenn die verschossenen Bilder gezählt werden. Zunächst das kleine Fenster, welches oberhalb des Bild-Rahmen Zähl-Rädchen (9) sitzt. Dieses Fenster zeigt einen kleinen weißen Punkt, der den Beginn des Bild-Ramens anzeigt. Drehe das Aufziehrad (11) nach dem Aulösen weiter, bis Du den Punkt wieder siehst. Jetzt kannst Du ein neues Bild in einem neuen Rahmen knippsen. Das andere Fenster zählt wieviele Bilder Du schon gemacht hast.
BEACHTE: Du must nicht jedes mal nachdem Du ein Bild gemacht hast den Rahmen weiterdrehen. Besonders wenn Du Mittelformat-film verwendest, kannst Du auch nur ein wenig weiterdrehen und hast somit überlappende Bilder und Doppelbelichtungen.
An den Sucher muss man sich ein wenig gewöhnen. Betrachte es einfach so: Der Sucher der Diana F+ ist für den 52x52mm Rahmen konzipiert. Also wenn man das 24x48mm Format verwendet, wird das Bild nur halb so groß und ein bisschen schmaler als das was man im Sucher sieht. Auf dieselbe Art kann man die anderen For-matgrößen abschätzen. Letztendlich ist es ein kleines Ratespiel, so ist es wohl am Besten wenn man das Objekt ziemlich in der Mitte platziert. Das bewährt sich auch bei den anderen Diana F+ Linsen und ihren entsprechenden Suchern.
Zurückspulen & Entwicklung
Wenn Du einen Film fertig verknippst hast, wird er sich nicht mehr weiterdrehen lassen und der Bildzähler (12) auf 36 oder 27 stehen. Ziehe den Filmtransport Sicherheitshebel (1) heraus und drücke ihn nach rechts. Danach ziehe die Rückspulkurbel (4) heraus und drehe sie im Uhrzeigersinn, wie es der Pfeil anzeigt. Wenn die Spannung nachläßt und das Zurückspulen ganz leicht geht, öffne den Rücken-deckel (5) und entferne die Filmpatrone. Die Entwicklung ist etwas heikel. Du musst verschieden Optionen gemäß dem Format das Du verwendet hast bedenken:
24 x 36mm (rechteckiges standard Bild ohne belichteter Perforation)Kein Problem – bringe den Film zu irgendeinem Entwickler. Du bekommst die gewöhnlichen, rechteckigen Prints.
33 x 34mm (quadratisches Bild mit belichteter Perforation)Bei einem normalen Labor wäre das Resultat ein quadratisches Bild auf einem rechteckigen Foto mit schwarzen Balken auf jeder Seite. Man muss den Film scannen oder einen Kontaktabzug machen las-sen, um die Perforationen sehen zu können.
24 x 48mm (erweitertes Panoramabild ohne belichteter Perforation), 27 Bilder per Rolle Die meisten Profi-Labore und viele herkömmli-chen Entwickler sind in der Lage das richtig zu printen. Vielleicht sollte man die Negative nicht schneiden lassen.
33 x 48mm (erweitertes Panoramabild mit belichteter Perforation), 27 Bilder per RolleDie meisten Profi-Labore und viele herkömmlichen Entwickler sind in der Lage das richtig auszuarbeiten, allerding must Du den Film scan-nen oder einen Kontaktabzug machen lassen, um die Perforationen sehen zu können.
Wenn Du vorhast den 35mm Adapter sehr oft zu benützen, dann empfehlen wir einen Scanner zu kaufen. Flachbett-Scanner mit Durchlichteinheit sind nicht teuer. Es ist wohl das beste sich gleich einen mit Mittelformat Scanfunktion zuzulegen, dann sieht man auch die Perforationen.Mit einem Scanner brauchst Du den Film nur entwickeln lassen, und das ist relativ billig. Du kannst dann die Negative selbst einscannen und beliebig ausprinten lassen. Das mag kompliziert klingen, aber für jemanden der sich viel mit analoger Fotografie beschäftigt, lohnt sich diese Investition mit Sicherheit.
Gehe auf www.lomography.com/scanning um die ausführliche An-leitung zu lessen.
Instandhaltung & Garantie
Wenn Du den 35mm Aufsatz mit Dir herumträgst, verwahre ihn sicher in einer Tasche.
Bitte behandle die Teile nicht allzu grob, sie sind aus Plastik und kön-nen leicht brechen.
98
Deine Diana F+ 35mm Aufsatz beinhaltet eine 2 Jahres Garantie gegen jegliche Herstellerdefekte. Im Falle eines Fehlers wird die Lomografische Gesellschaft nach eigenem Ermessen ihn reparieren oder ersetzen. Um die Garantie in Anspruch zu nehmen, kontaktiere bitte das nächstgelegene Lomo Büro (siehe Liste unten).
MODE D’ EMPLOI
Contenu
(1) Déclencheur de Film(2) Vérouillage(3) Monture Trépied(4) Manivelle de Rembobinage du Film(5) Couvercle Arrière(6) Bobine d’Avance(7) Obturateur Arrière(8) Cylindre d’Entraînement du Film(9) Engrenage Compteur de Photos(10) Sélecteur de Format de Film(11) Roue d’Avance(12) Compteur de Photos
Commencer & Monter le Dos de 35mm
Votre Dos Diana F+ 35mm est interchangeable avec le dos Diana F+ usuel. D’abord vous aurez besoin de quelques préparatifs. Ouvrez et enlevez le dos Diana F+. Retirez la bobine réceptrice de format moyen. Et enlevez doucement « la Plaque de Film de Format Moyen ». C’est la bande en plastique au fond de la caméra avec deux « bras » sur les deux côtés. Prenez la Plaque de Film par le milieu et retirez-la lentement. Ne la saisissez pas par les « bras », car ils peuvent se casser facilement sous trop de pression.
IMPORTANT: Rangez la bobine réceptrice et la Plaque de Film de Format Moyen à un endroit sûr. Vous en aurez besoin pour la prochaine fois, quand vous souhaiterez photographier en format moyen sur votre Diana F+.
Maintenant montons le dos de 35mm. Alignez le carreau de Obtu-rateur Arrière (7) avec celui de l’obturateur arrière Diana. Poussez le dos 35mm dedans. Mettez-le de telle sorte que le profil d’en haut aille parfaitement avec le boitier de la Diana F+. Et finalement, mettez le Vérrouillage (2) sur la position « Lock ». Ouvrez le Couvercle Arrière (5) et nous sommes prêts à charger le film.
10 11

Vitesse du Filme et la Sélection du Format
Vous pouvez utiliser toute variété et vitesse de film de 35mm. Pour vos premiers essays, nous suggerons d’utiliser un film negatif en couleur de 400 ISO. La vitesse plus grande marche bien avec le sys-tème d’exposition de la Diana F+ et le negatif en couleur est plus tolérant aux sur- et sous-expositions que le diapositif.
Vous pouvez photographier en un ou quatre formats:
33 x 48mm (prise panoramique étendue avec perforations exposées), 27 images par film24 x 48mm (prise panoramique étendue sans perforations exposées), 27 images par film33 x 34mm (image carrée avec perforations exposées), 36 images par film24 x 36mm (image standard rectangulaire sans perforations exposées), 36 images par film
Les “perforations exposées“ sont les petits orifices sur les deux côtés du film. Avec les formats de 33x48 et 33x34, vous pouvez photographier aussi sur ces endroits - ce qui est un effect trés cool pour la photo qui en résulte.
Une fois ayant décidé dans quel format vous voulez photographier, vous aurez besoin de choisir le Masque de Format de Film. Il y en a quatre inclus dans le paquet du Dos de 35mm. Chacun d’entre eux a les nombres de tailles correspondantes (ex. 33x34) imprimés sur le plastique. Choisissez votre Masque de Format du Filme et poussez-le doucement dans l’Obturateur Arrière (7). En haut, mettez le Sélecteur de Format du Film (10) sur N ou sur P. Utilisez le N pour les formats 33x34 et 36x24. Prenez le P pour les formats 33x48 et 24x48.
Charger votre Film
Avec le Couvercle Arrière (5) ouvert, retirez lentement la Manivelle de Rembobinage du Film (4). Placez votre cartouche de film à l’envers dans le côté gauche, de sorte que l’amorce du film aille vers la droite. Tirez l’amorce du film par dessus l’Obturateur Arrière (7) jusqu’à la Bobine d’Avance (6). Accrochez la première perforation de votre amorce du film sur une des petites dents de la Bobine d’Avance. Tournez la Roue d’Avance (11) un peu pour s’assurer que le film marche et tourne bien.
Maintenant, vous aurez besoin de régler l’Engrenage du Compteur de Photos (9). D’abord bougez l’Engrenage du Compteur de Photos sur « E » pour le format de film que vous utilisez (N ou P). Vous verrez le « E » dans la fenêtre du Compteur de Photos (12). Vous ne devez pas choisir le format que vous n’utilisez pas. Ensuite tournez le Cy-lindre d’Entraînement du Film (8) jusqu’à ce que vous voyez un petit point blanc dans la fenêtre circulaire au-dessus (à côté du Compteur de Photos).
Vous avez fini. Fermez le Couvercle Arrière (5) et tournez la Rour d’Avance (11) jusqu’à ce que le Compteur de Photos montre « 1 ».
Photographier
Le même procédé est utilisé pour régler l’exposition (ouverture et vitesse d’obturation) du format moyen et du film de 35mm. Servez vous de votre caméra comme d’habitude. C’est la même chose en ce qui concerne le déclencheur.
Quand vous avancerez le film, vous aurez besoin de surveiller le Compteur de Photos (12). Le film ne s’arrêtera pas automatiquement – comme avec la Lomo LC-A+ ou avec une caméra similaire. Il y a deux fenêtres à surveiller quand vous comptez les expositions. En premier, il y a la petite fenêtre qui se situe au-dessus du Cylindre d’Entraînement du Film (8). Cette fenêtre va aficher un petit point blanc. Ceci indique le début d’un cadre. Après avoir pris une photo, tournez la Roue d’Avance (11) jusqu’à ce que vous voyez le point blanc de nouveau. Vous êtes maintenant prêt(e) à photographier sur un autre cadre. L’autre fenêtre, avec un compteur numérique, affiche sur quel cadre d’exposition vous vous trouvez.
NOTE: Personne dit que vous devez avancer d’un cadre complet. Comme quand vous utilisez du film de format moyen, vous pouvez avancer partiellement de cadres et prendre de multiples images su-perposables. Vous avez cherché la liberté et on peut la trouver ici!L’utilisation du viseur est une chose à laquelle il faut s’habituer. Voyez-le ainsi : le viseur DianaF+ est calibré pour un cadre de 52x52mm. Par conséquence, lors de l’utilisation du format de 24x48mm, votre image sera environ à moitié haute et un peu moins large que ce que vous voyez par le viseur. Vous pouvez estimer les autres tailles de format de la même manière. En fin de compte, il s’agit un peu de deviner, alors le mieux c’est de garder votre sujet ou autre contenu important vers le milieu du cadre. Ceci est valable pour les autres
12 13

objectifs Diana F+ et leurs viseurs correspondants.
Rembobiner & Développer
Quand vous aurez fini votre rouleau, le film arrêtera d’avancer et le Compteur de Photos (12) affichera 36 ou 27 (environ). Retirez le Déclencheur de Film (1) vers en haut et poussez le vers la droite, de sorte qu’il soit bloqué sur place. Tournez vers en haut la Manivelle de Rembobinage du Film (4) et pivotez-la contre le sens des aiguilles d’une montre, comme la flèche l’indique. Quand vous sentez qu’il n’y plus de pression et que le rembobinage se fait facilement, vous serez alors prêt(e) à décharger le film. Ouvrez le Couvercle Arrière (5) et enlevez votre cartouche de film.Le développement exige un peu de soins spéciaux. Vous devrez prendre en considération différentes options selon le format avec le quel vous photographiez :
24 x 36mm (image standard rectangulaire sans perforations expo-sées)Pas de problème – amenez-le à n’importe quel labo et vous recevrez les clichés rectangulaires familliers.
33 x 34mm (image carrée avec perforations exposées)Si vous l’amenez à un labo normal, l’image resultera carrée sur un cliché rectangulaire, avec des marges noires. Vous devrez scaner le film ou faire une plache contact pour voir les perforations.
24 x 48mm (prise panoramique étendue sans perforations exposées), 27 images par filmLa majorité des labos professionnels et quelques uns usuels pour-ront faire des tirages de celui-ci.
33 x 48mm (prise panoramique étendue avec perforations exposées), 27 images par filmLa majorité des lobos professionnels et quelques uns usuels pour-ront faire des tirages, mais vous devrez scaner le film ou faire une plache contact pour voir les perforations.
Nous vous recommandons d’acheter un scanner de film, si vous avez l’intention d’utiliser souvent le dos Diana F+ 35mm. Les scanners à plat avec des supports de film de 35mm sont plutôt bon marché. Le mieux serait de se procurer un avec un scanner de format moyen aussi – ainsi vous pourez scanner les perforations aussi.
Grâce à un scanner, vous pouvez laisser développer votre film à un labo local – ce qui coûte peu. Vous pouvez scanner les négatifs vous-même et faire des tirages de ceux qui vous plaisent. Si cela paraît complexe, ne vous faîtes pas de soucis, c’est plutôt facile ! C’est une investition qui en vaut la peine pour tout personne fan de la photographie analogique.
Allez sur www.lomography.com/scanning pour lire un guide complète-ment interactif.
Soins & Garantie
Placez votre dos de 35mm dans un sac de protection lors du trans-port. Ne forcez jamais les bouttons de réglage, étant en plastique, ils peuvent se casser sous trop de pression.
Votre Dos de DianaF+ 35mm inclut une garantie de 2 ans pour les défauts de fabrication. En cas de défection, la Lomographic Society va réparer ou remplacer les articles à notre discretion. Pour la garantie, on vous prie de contacter le Lomographic Office le plus près (liste ci-dessous).
14 15

INSTRUCCIONES DE USO
Componentes:
(1) palanca seguridad transporte de película(2) Interruptor de bloqueo(3) Rosca para trípode(4) Rebobinado(5) Tapa trasera(6) Bobina de avance(7) Soporte para máscaras(8) Rueda/contador(9) Ventanitas(10) Selección de formato(11) Rueda de avance(12) Contador
Preparar y montar la trasera para 35 mm
La tapa trasera DianaF+ 35 mm es intercambiable con la trasera estándar de la cámara. Deberás proceder de la siguiente manera: quitar la bobina para la película de medio formato. También deberás quitar el soporte que lo sujeta. Nos referimos a la tira fina de plástico en la parte inferior de la cámara, con dos “brazos” a cada lado. Su-jeta la tira por el centro y suavemente tira de ella. No intentes tirar de “los brazos”, ya que pueden partirse con facilidad.
Importante:Guarda la bobina y la tira de plástico en lugar seguro. Lo necesitarás la próxima vez que vayas a hacer fotos de medio formato.
Bueno, y ahora pasamos a explicar la colocación de la tapa trasera para 35 mm. Alinea la nueva tapa para 35 mm de tal forma que el canto superior quede perfectamente encajado en la carcasa de la DianaF+. A continuación coloca el interruptor de bloqueo (2) en posición “lock”. Abre la tapa trasera (5) y carga la película.
Sensibilidad de la película y selección de formato
Puedes utilizar cualquier tipo de película y cualquier tipo de sensibili-dad. Para las primeras pruebas te aconsejamos que utilices cualquier película de negativo color y 400 ASA. Las velocidades más rápidas
funcionan muy bien con el sistema de iluminación de la DianaF+, y las películas de negativo son más tolerantes que la dispositiva a la hora de sobre exponer o de sub exponer.
Puedes seleccionar entre 4 formatos de foto:
33 x 48 mm (encuadre panorámico con exposición en las perforaciones), 27 imágenes por rollo24 x 48 mm (encuadre panorámico sin exposición en las perforaciones), 27 imágenes por rollo33 x 34 mm (encuadre cuadrado con exposición en las perforaciones), 36 imágenes por rollo24 x 36 mm (encuadre rectangular estándar sin exposición en las perforaciones), 36 imágenes por rollo
El término “con exposición en las perforaciones” significa que los agu-jeritos en la película también se exponen, formatos 33x48mm y 33x34 mm, consiguiendo unos resultados espectaculares y sorprendentes.
Una vez que ya hayas decidido qué formato utilizar no tienes más que seleccionar la máscara correspondiente. Incluimos 4 diferentes. Cada una de ellas viene grabado el tamaño, (p.ej. 33x34). Selecciona la máscara y la introduces suavemente en el soporte (7). Sitúa la selección de formato (10) bien en N o en P. Para 33 x 34 escoge el N y para 33x48 y 24x48 el de P.
Cargar la película
La apertura y la obturación funciona igual con 35 mm que con me-dio formato. Utiliza la cámara como siempre. Es disparo también es igual. Controla el contador (12) al hacer una foto. La película no se para de forma automática, como por ejemplo con la LC-A+ o con cualquier otra cámara. Deberás de controlar dos ventanitas. Prim-eramente la más pequeña, situada en la parte superior (9). Esta ven-tanita muestra un pequeño punto blanco, que indica el empiece del encuadre. Después de disparar, giras la rueda de avance (11) hasta que aparezca el siguiente punto. Ya puedes disparar la siguiente foto. La segunda ventana te indica las fotos que ya has hecho.
PRESTA ATENCIÓN: No hace falta que arrastres la película cada vez que haces una foto. Sobre todo cuando utilizas película de medio formato es interesante arrastras sólo un poco y conseguir imágenes superpuestas con múltiples exposiciones.
16 17

El visor: nos tendremos que acostumbrar un poco. El visor de la DianaF+ está concebido para un encuadre de 52x52 mm. Así que si utilizamos el formato 24x48 mm, la imagen será la mitad y un poco más estrecha de lo que se ve por el visor. Siguiendo estas indicaciones nos podemos hacer una idea al utilizar el resto de los formatos. En este sentido, la suerte también es un factor importante, y aconsejamos situar los objetos a fotografiar en el centro del enc-uadre. Lo mismo sirve al utilizar otros modelos de lentes DianaF+ y sus correspondientes visores.
Rebobinar y revelado
La película ha llegado a su fin cuando no puedas girar más la rueda de avance y el contador (12) se sitúe en 36 ó en 27. Saca la palanca de seguridad (1) hacia arriba y a la derecha. Saca la manivela de rebobinado (4) y gira en dirección a las agujas del reloj, como indica la flecha, hasta que dejes de notar tensión. Abre la tapa trasera (5) y saca el carrete. El revelado es un poco peliagudo. Debes de tener en cuanta las diferentes opciones dependiendo del formato que hayas seleccionado.
24 x 36 mm (imagen estándar rectangular sin perforaciones expuestas)Sin problemas – entrega tu carrete en cualquier laboratorio. Reci-birás fotos normales en formato rectangular
33 x 34 mm (imagen cuadrada con perforaciones expuestas)En un laboratorio normal el resultado sería una imagen cuadrada en un papel rectangular con una banda negra a cada lado. Para que las perforaciones se vean deberás escanear la película o hacer una hoja de contactos.
24 x 48 mm (imagen panorámica sin perforaciones expuestas) 27 imágenes por rolloLa mayoría de los laboratorios profesionales y laboratorios corrientes pueden hacer este tipo de copias. Conviene no cortar el negativo.
33 x 48 mm (imagen panorámica con perforaciones expuestas) 27 imágenes por rolloLa mayoría de los laboratorios profesionales y laboratorios corri-entes oueden hacer este tipo de trabajos, pero deberás escanear la película o hacer hoja de contactos para que las perforaciones sean visibles.
Si tienes previsto utilizar el adaptador para 35 mm a menudo, te aconsejamos que compres un escaner. Los escaners planos no son caros. Viene bien que puedan escanear también el medio formato, y ver de esa forma la perforación expuesta.Con un escaner en tu poder, sólo necesitas revelar el carrete, y esto es bastante asequible. Puedes escanear tus negativos personal-mente y hacer las copias que quieras. Puede que suene un poco complicado, pero no lo es, y además es muy rentable para todos aquellos que utilicen habitualmente la fotografía analógica. La inver-sión merece la pena.
Más información en www.lomography.com/scanning
Cuidados y garantía
Si llevas contigo el adaptador para 35 mm, guárdalo en un sitio pro-tegido. Manipula el adaptador con cuidado; sus piezas son de plás-tico y pueden romperse.
Tu adaptador de 35 mm DianaF+ incluye una garantía contra defec-tos de fabricación de dos años. En tal caso, la Sociedad Lomográfi-ca cambiará o reemplazará el producto según cada caso. Para hacer uso de la garantía, ponerse en contacto con la oficina más cercana (ver lista)
18 19

ISTRUZIONI PER L’ USO
Componenti
1. Levetta per il riavvolgimento della pellicola2. Tasto di chiusura3. Aggancio per treppiede4. Manopola di riavvolgimento5. Sportello posteriore6. Bobina d’ avvolgimento7. Retro dell’otturatore8. Rotella “Center Film”9. Meccanismo per il conteggio degli scatti 10. Pulsante per la selezione del formato della pellicola11. Rotella d’avanzamento12. Contatore di scatti
Inizio e montaggio del retro 35 mm
Il tuo retro 35 mm per la Diana F+ è sostituibile al tradizionale retro della Diana F+. Innanzitutto, avrai bisogno di fare alcune preparazioni. Sblocca e togli il retro tradizionale della Diana F+. Togli la bobina di avvolgimento formato medio. E con una certa attenzione togli anche il “piatto di posizionamento per il medio formato”. Si tratta del sottile strato di plastica posizionato sotto nel retro dell’apparecchio, con due “arti”, su ciascun lato. Prendi il piattino di posizionamento per il medio formato dal centro ed estrailo con una certa accortezza. Non prenderlo dagli arti, perché potrebbero facilmente rompersi con una forza eccessiva.
IMPORTANTE: conserva la bobina di riavvolgimento ed il piatto di posizionamento per il medio formato. in un posto sicuro. Ti servi-ranno la prossima volta che deciderai ancora di scattare con pellicola formato medio nella Diana F+.
Ora monta il retro da 35 mm. Allinea il retro dell’otturatore quadrato con il retro otturatore (7) della Diana. Spingici dentro per bene il retro 35 mm. Ora, spingilo in alto fino a quando sembrerà essere entrato perfettamente nel corpo della Diana F+. Infine, sposta il pulsante per la chiusura (2) in posizione Lock. Apri lo sportellino posteriore (5), e sei pronto per inserire la tua pellicola.
Sensibilità della pellicola e selezione del formato
Potrai utilizzare qualsiasi tipo di pellicola da 35 mm. Per i primi scatti, suggeriamo di usare una pellicola da 400 ISO a colori. Sensibilità più alte funzionano bene con il sistema di esposizione della Diana, e le pellicole a colori sono più tolleranti se sovra o sotto esposte che le pellicole da diapositive.
Puoi scattare scegliendo uno dei seguenti formati:
33 x48 mm (panoramica estesa con buchetti di perforazione ai lati), 25 scatti per rullino24 x 48 mm (panoramica estesa senza i buchetti di perforazione ai lati), 27 scatti per rullino33 x 34 mm (immagine quadrata con buchetti di perforazione ai lati), 36 immagini per rullino24 x 36 mm (immagine rettangolare standard senza buchetti di perforazione ai lati), 36 immagini per rullino.
I “buchetti di perforazione” sono i piccoli buchi presenti su ciascun lato della pellicola da 35 mm. Con il formato 33 x 48 e 33 x 34, riesci a scattare in quest’area molto bene – il ché è un effetto veramente cool nel risultato generale della foto.
Una volta deciso il formato che vuoi utilizzare, dovrai scegliere la mascherina idonea al formato della pellicola. Ce ne sono 4 incluse nella confezione del Retro 35mm della tua Diana. Ciascuna ha la corrispondente dimensione (ad es. 33 x 34) scritta sulla plastica. Sceglila e posizionala con attenzione nel Retro dell’otturatore (7). Fai scorrere il Pulsante per la selezione del formato (10) su N o P. Usa il N per il formato 33 x 34 e il 36 x 24. Quello P per il formato da 33 x 48 e 24 x 48.
Montare la pellicola
Con lo Sportellino posteriore (5) aperto, spingi verso l’esterno la Manopola di riavvolgimento (4). Posiziona il tuo rullino capovolto nel lato sinistro, in modo che il capo della pellicola sia in direzione destra. Tira il capo della pellicola lungo il Retro dell’otturatore (7) fino sulla bobina di avvolgimento (6). Aggancia la prima parte della tua pellicola nelle sottili fessure della bobina d’avvolgimento. Gira la rotella d’avanzamento (11) di un poco per assicurarti che il film sia ben inserito e si avvolga lentamente.
20 21
Adesso, devi controllare il Meccanismo per il conteggio degli scatti (9). Inizialmente, posiziona il Meccanismo di Conteggio degli scatti su “E” per il formato che stai utilizzando (sia N o P). Vedrai una “E” nella finestra per il conteggio degli scatti (12). Non avrai bisogno di settare il formato che non stai utilizzando. Poi, gira la rotella “Cen-ter Film” (8) fino a quando vedrai un piccolo puntino bianco nella finestrella tonda sopra di esso (vicino al Contatore di scatti).
Sei pronto. Chiudi lo Sportellino posteriore (5) e gira la Rotella d’ avanzamento (11) fino a quando nel Contatore di scatti leggerai “1”.
Scattare
Il settaggio (apertura di diaframma e velocità dell’otturatore) è esattamente lo stesso sia per il formato medio che per quello da 35 mm. Usa l’apparecchio fotografico normalmente. Anche il funziona-mento dell’otturatore resta lo stesso.Quando fai avanzare la pellicola, dovrai controllare il Contatore di scatti (12). La pellicola non si fermerà automaticamente – come con la Lomo LC-A+ o un’altro apparecchio simile. Ci sono due finestrelle in cui guardare quando stai contando gli scatti. La prima è la piccola finestrella posizionata sulla rotella “Center Film” (8). Questa finestrella mostrerà un piccolo puntino bianco. Ciò indica l’inizio di un foto-gramma. Dopo aver scattato, gira la rotella d’avanzamento (11) fino a quando vedrai comparire di nuovo un puntino bianco.Sei ora pronto per scattare di nuovo. Nell’altra finestra comparirà invece il conteggio numerico indicante a quale fotogramma sei arrivato.
NOTA BENE: Non sta scritto da nessuna parte che tu debba avanzare di un intero fotogramma: come quando usi pellicole di medio formato, puoi avanzare solo di una piccola parte di fotogramma, e prendere foto sovrapposte. Cercavi libertà totale ed anarchia, e hai trovato l’apparecchio giusto!
Utilizzare il mirino comporterà qualche ulteriore riflessione. Senti qua: il mirino della Diana F+ è calibrato per fotogrammi 52 x 52mm. Dunque, quando stai usando il formato 24 x 48mm, la tua immag-ine sarà di circa una metà d’altezza ed un po’ meno di larghezza di quanto tu vedi nel mirino. E puoi dedurre gli altri formati nello stesso modo. Alla fine è un po’ un gioco del caso, quindi sarà meglio centrare bene i tuoi soggetti nel mezzo della foto. Ciò resta vero anche per gli altri obiettivi DianaF+ ed i loro corrispondenti obiettivi.
Riavvolgimento e sviluppo
Una volta finito il tuo rullino, la pellicola smetterà di avanzare e nel Contatore di Scatti (12) leggerai 36 o 27 (all’incirca).Apri la levetta per il riavvolgimento della pellicola (1) e spostalo verso destra, così che resti bloccata. Tira in su la manopola di riavvolgimento (4) e girala in senso anti-orario, come mostrato dalla freccia. Quando senti la tensione diminuire e facilitarsi il processo di riavvolgimento, significa che sei pronto per estrarre il rullino. Apri lo sportello posteriore e toglilo.
Lo sviluppo richiede un po’ di accortezze. Dovrai considerare diverse opzioni, a seconda del formato scelto.
24 x 36mm (immagine standard rettangolare senza buchetti di per-forazione ai lati):No-problem: basta portarla in qualsiasi laboratorio fotografico e ritir-erai poi il classico sviluppo in formato rettangolare.
33 x 34 mm (immagine quadrata con buchetti di perforazione ai lati):Consegnandole ad un normale laboratorio ti svilupperanno foto quadrate o rettangolari, con bordi neri su ciascun lato. Dovrai scan-nerizzare i negativi o fare i provini a contatto per vedere i buchetti di perforazione.
24 x 48mm (scatto esteso a panoramica senza i buchetti di perfora-zione ai lati), 27 scatti per rullino:Molti laboratori professionali e anche qualche laboratorio normale potranno svilupparli.
33 x 48mm (scatto panoramica estesa con buchetti di perforazione ai lati), 27 scatti per rullino:Molto laboratori professionali e anche qualche laboratorio normale sapranno realizzarli. In ogni caso avrai bisogno di scannerizzare i negativi o fare provini a contatto per vedere i buchetti di perfora-zione ai lati.
Se hai intenzione di utilizzare per molto tempo il retro 35 mm della Diana F+, ti suggeriamo di acquistare uno scanner per negativi. Gli scanner Flatbed con inserisci-pellicole da 35 mm sono abbastanza economici. Sarebbe meglio acquistarne uno per pellicole da medio formato – così da poter scannerizzare anche i buchetti di perfora-zione.
Con uno scanner, puoi far sviluppare i negativi in un laboratorio fotografico – che costa veramente un’inezia. Puoi poi scannerizzare
22 23

i negativi da solo e stampare quelli che ti piacciono di più. Non ti preoccupare, non è così difficile come può sembrare! Per chiunque sia preso dalla fotografica analogica, è davvero un valido investimento i cui vantaggi ne copriranno i costi in poco tempo.
Vai su www.lomography.com/scanning per leggere una guida completa interattiva.
Manutenzione e garanzia
Metti sempre il tuo Retro 35mm in una protezione sicura quando lo trasporti. Non forzare mai i suoi meccanismi, perchè sono di plastica e quindi delicati.
Il tua retro 35mm per la DianaF+ include una garanzia di due anni contro qualsiasi difetto di produzione. In tal caso, la Lomography deciderà se far riparare oppure sostituire l’oggetto. per il servizio di garanzia, contatta l’ufficio Lomography a te più vicino tra quelli presenti nella seguente lista:
24 25

26 27
28 29

30 31

32 33

34 35

Lomographic Society EuropeHollergasse 41A-1150 ViennaAustriaT +43-1-899 44 0F +43-1-899 44 [email protected]
Lomographic Society North America20 Jay Street, #314Brooklyn, NY 11201USAT +1-718-522 4353F +1-718-522 [email protected]
Lomographic Society Asia PacificNo.2, G/F Po Yan StreetSheung WanHong KongT +852-2525 5417F +852-2525 [email protected]
Lomographic Society Japan4-24-8 Minamiaoyama, 3FMinato-ku, Tokyo, 107-0062T +81-3-6418-7867F [email protected]
Lomographic Society Korea1F 362-14, Seogyo-dong Mapo-gu121-838 SeoulSouth KoreaT +82-2-522 0255F +82-2-523 [email protected]
CONTACT & WARRANTYKONTAKT & GARANTIECONTACT ET GARANTIECONTATTI E GARANZIACONTACTO Y GARANTÍA