ddf module 4 journal_henrik green_803461
DESCRIPTION
ÂTRANSCRIPT
1
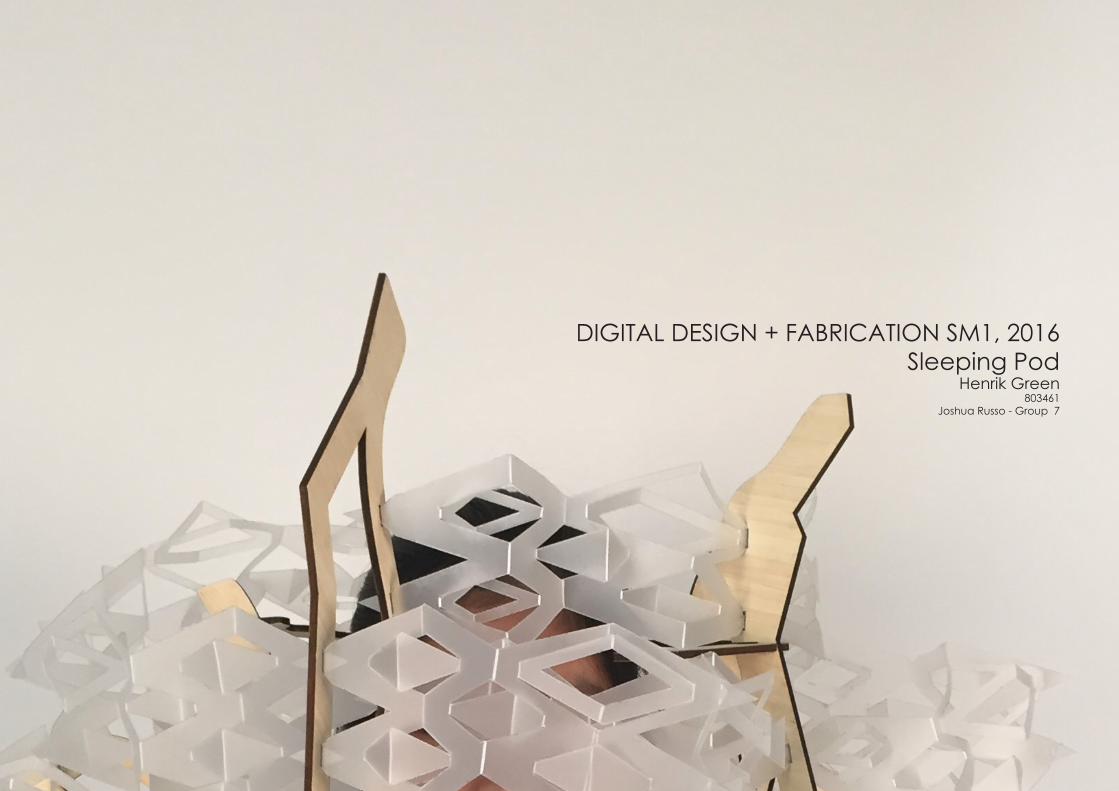
DIGITAL DESIGN + FABRICATION SM1, 2016 Sleeping Pod
Henrik Green803461
Joshua Russo - Group 7
2
3

4

5
0.0 Introduction 7
1.0 Ideation 9 1.1 Reading Response 10 1.2 Sketch Designs 11
2.0 Design 132.1 Precedent research 1 142.2 Precedent research 2 15 2.3 Design Development 16 2.4 Prototype One 17
3.0 Fabrication 19 3.1 Prototype Development 203.2 Assembly Process 223.3 Final Rhino Model 243.4 Final Design 25
4.0 Reflection 27
5.0 Bibliography 295.1 Credits 30
Contents


0.0 Introduction
For the subject Digital Design and Fabrication 2016 at the University of Melbourne we were asked to design a sleeping pod for a site at the university campus. Through an interaction ofdigital and physical media informed by readings the subject aimed to showcase the relation between a digital design process and the physical outcome.
This journal traces my work through the subject. The journal is structured into four sections: ideation, design, fabrication and reflection. The ideation deals with the notion of personal space and a specific material system to form the first ideas for the sleeping pod. In the sections design and fabrication these ideas are developed into a physical product. During design and fabrication, I worked along Nik Lee and Trinh Pham. The final part is a reflection of this process and of digital tools in a wider context of making.

8

9
Isometric view of the object as modelled in Rhino
1.0 IDEATION
Measured drawings of object Analytical drawings of object
The assigned object for me was a laser cut rocket. The object was lasercut and assem-bled as well as modelled in Rhino by manipu-lation of the cutting file for the object. The measured drawings were produced from the digital model.
In assembly of the rocket two things was noticed. First the notched joints are weak in tension and likely to fail when tensioned. Secondly the notches are cut from a plane material which, as discussed by Kolarevic (2003), constrains them to lie in the plane of the material. In other words, the notches can only rotate about the axis normal to the plane.

10
Schematic function of the sleeping pod seen from above. Physical personal space is here represented by the white inner ellipse. The shaded grey area should be observable from inside the pod to spot possible intruders. Attempts to make eye-contact is disrupted or diverted.
As discussed by Sommer (1969) the shape of personal space is not spherical but rather elliptical where a person has greater need for personal space in front, less at the sides and least at the back. Sommer goes on to discuss other types of intrusion to personal space, p.36-37. In relation to visual breach of personal space he retells of an experi-ment where “Eye contact produced a sud-den realization that ‘this is a human being’” (Sommer 1969, p.37)
The physical and visual protection of per-sonal space are considered the two main aspects of the design. Especially keeping in mind that: “… an important consideration in a spatial invasion is whether the parties involved perceive one another as persons.” (Sommer 1969, p.37)
From this the sleeping pod must perform in two ways:
1) The design should define a physical and or emotional effect to preserve physical personal space 2) The design should perform in such a way that emotional personal space is defended. Especially it should fend off eye-contact while allowing the wearer to visually control the surrounding.
1.1 Reading ResponseRobert Sommer, Personal Space (1969)

11
First sketch design proposal
Second sketch design proposal
Sketch model of reconfigured object exploring the possibilities of the section and profile system
The first design is heavily influenced by the reconfigured object both in form but also in function. It deals with the larger amount of personal space in front of a person by letting the shape mimic this boundary.
The second design deals with personal space by obstructing eye contact with surrounding people while allowing visual control of the surrounding. The personal space is here protected by emotionaleffect rather than a physical boundary.
1.2 Sketch Designs

12

13
At the start of Module 2 I joined the group of Nik Lee and Trinh Pham. At this point we had two sepaerate ideas. Here is a brief presentation of them.
My design when joining Nik Lee and Trinh Pham
2.0 DESIGNWith Nik Lee and Trinh Pham
The design of Nik Lee and Trinh Pham as I joined their group
My design at this point tried to combine the two main ideas from the sketch designs. It does this by a frame which outlines the personal space around the wearers head. The aspect of vision is adressed by arrangingnarrow ribs around the frame.
The design of Trinh and Nik at this stage was a number of polypropylene shapes which would be carried in a sort of backpack. The sleeping pod would unfold like a bird’s nest over the wearer protecting them from light and unwanted interaction with the surrounding.

14
In the precedent example, protection around avolume is achieved by multiple parallel sections.Visibility and light is controlled by altering thematerial density of the fence by milling of theprofiles to produce a wave like pattern inspired by a wooden plank. The visibility through some parts of the piece invites to interaction with people in itssurrounding while others blocks off sight.
Sketch proposals inspired from precedentVisibility and light is controlled by material density (designboom.com, 2016)
2.1 Precedent Research 1Not Whole Fence by Ball-Nogues Studio
The material density of the sleeping pod can be varied to provide:
1) visual control of personal space by making pos-sible to see through while being close to the pod but not from afar.
2) Control of light, the material density may be adjusted to achieve a comfortable quality of light inside the pod.

15
A possible connection between panels are zip ties as used in the precedent
The polycarbonate panels reflect light
Sketch inspired from the precedent. A nest of polycarbonate wraps around the body and diffuses lightThe stage set to the dance piece California (lms.unimelb.edu.au, 2016)
2.2 Precedent Research 2California: Stage set for John Jasperse
The material choice in John Japserse design isinteresting. Polycarbonate sheet can be a good idea for the external layer of the sleeping pod. A material that diffuses and reflects light while main-taining some level of translucency allows social in-teraction, but limits the amount of light that reaches the person inside sleeping pod.

16
First skecth model of the panel. The design produced an excessive amount of joints and not enough of a protective barrier.
Rhino model version two of this designSketch outcome of combining the designs
The proposed design at this stage is an MDF frame worn as a backpack with a panel of poly-propylene which can be folded away.
The panels are chosen to be polypropylene which allows folding and white to allow partial translucency.
Second sketch model was produced by folding the first one and had the same issues.
Third sketch model gave more visual protection and reduced the number of joints greatly.
First Rhino model of combined design
2.3 Design Development
17
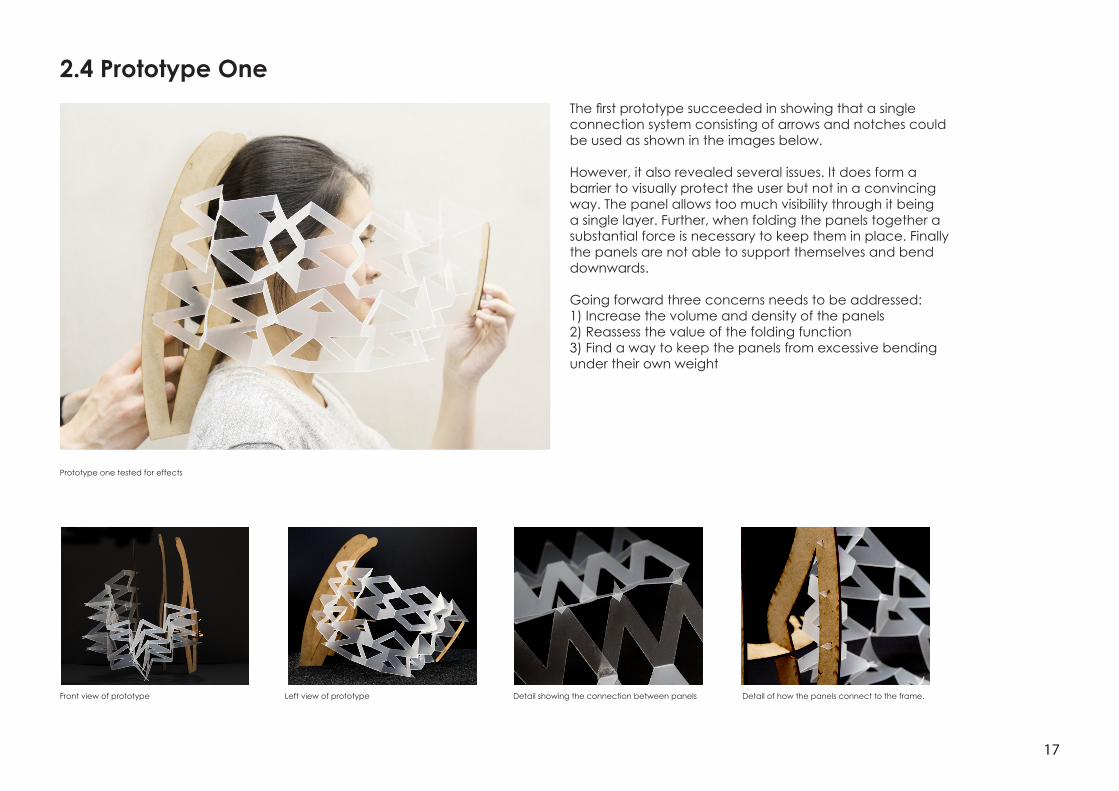
Detail of how the panels connect to the frame.Detail showing the connection between panelsLeft view of prototypeFront view of prototype
Prototype one tested for effects
The first prototype succeeded in showing that a single connection system consisting of arrows and notches could be used as shown in the images below.
However, it also revealed several issues. It does form a barrier to visually protect the user but not in a convincing way. The panel allows too much visibility through it being a single layer. Further, when folding the panels together a substantial force is necessary to keep them in place. Finally the panels are not able to support themselves and bend downwards.
Going forward three concerns needs to be addressed:1) Increase the volume and density of the panels2) Reassess the value of the folding function3) Find a way to keep the panels from excessive bending under their own weight
2.4 Prototype One
18
19
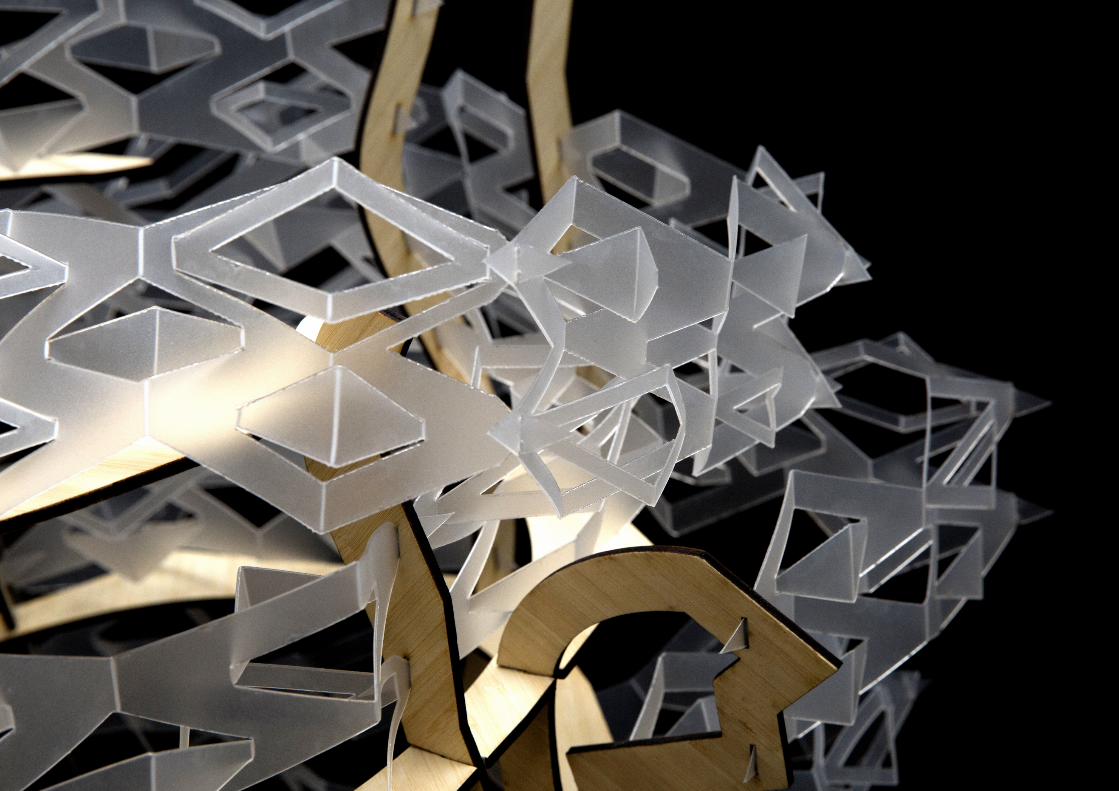
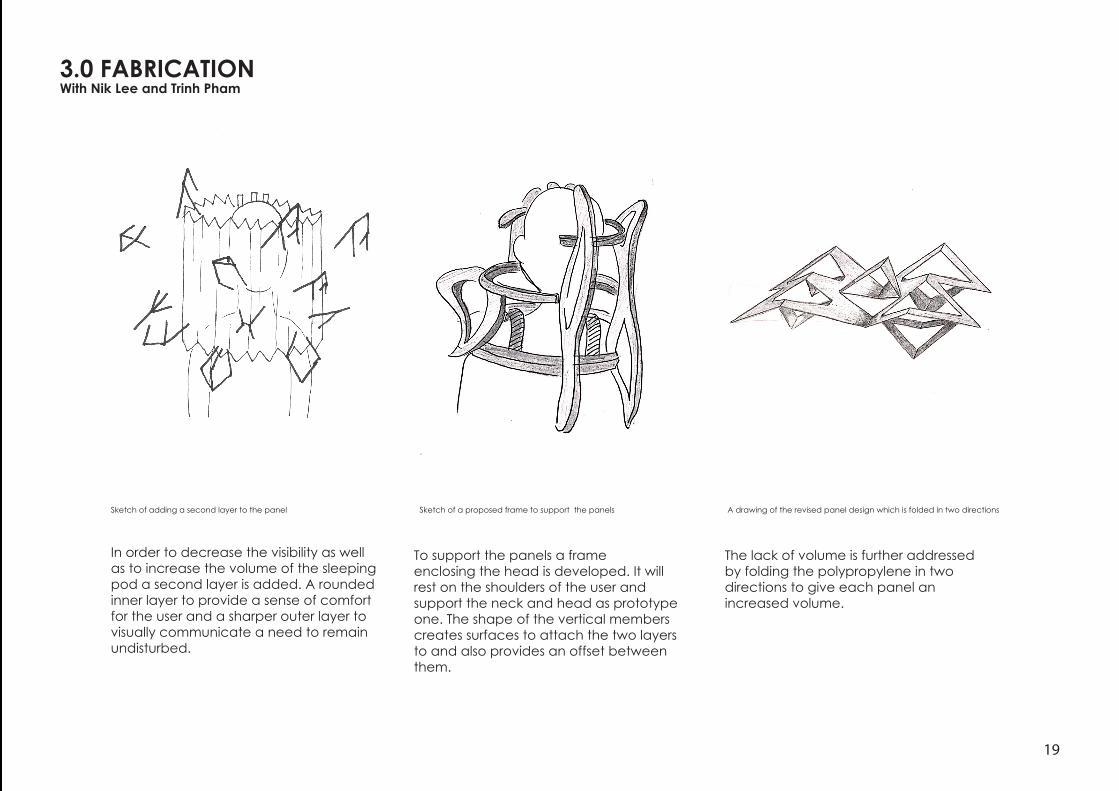
In order to decrease the visibility as well as to increase the volume of the sleeping pod a second layer is added. A rounded inner layer to provide a sense of comfort for the user and a sharper outer layer to visually communicate a need to remainundisturbed.
To support the panels a frame enclosing the head is developed. It will rest on the shoulders of the user and support the neck and head as prototype one. The shape of the vertical members creates surfaces to attach the two layers to and also provides an offset between them.
The lack of volume is further addressed by folding the polypropylene in twodirections to give each panel an increased volume.
Sketch of adding a second layer to the panel
3.0 FABRICATIONWith Nik Lee and Trinh Pham
Sketch of a proposed frame to support the panels A drawing of the revised panel design which is folded in two directions

20
Third prototype worn on siteThe second prototype worn on site
The site of the pod is chosen to be benches on the first floor of the atrium in MSD.
Prototype two issues:The frame breaks easily due to weak points. The frame and panels looks formally separate. The back support is hurtful when leaning back because it’s too long.
Solutions: Make the frame thicker at notches, add angular outer edges to the frame and shorten back.
The outer profiles of the frame is made angular to match the appearance of the panels
Prototype three issues:The MDF material gives the pod an unfinished look. The inner layer of panels do not match the frame. The back is still uncomfortable.
Solutions:Cut design in bamboo ply,create custom panels for inner layer and further adjust the back.
Rhino model of the revised design
Prototype Time Line
3.1 Prototype Development

21
When the design devolped in response to the shortcomings of the first prototype we felt it was time focus our energy on the refining the reworked design rather than dramatically changing it further.
Because we decided to refine rather than rework quite early on in the process plenty of time was available for optimasation. Each prototype solved specific issues or inconsistencies.
These improvements are chronologically arranged on the timeline below.
Final design worn on site
A photo comparing Bamboo to painted and untreated MDF
Successive refinement of the back support to provide comfort
The notches of the frame is made big enough to fit two panels allowing panels to join from both sides
A light coloured bamboo ply is chosen to be the final material. The lighter colour compared to the MDF enhances the disorienting effect of the panels.
The MDF was painted white as a comparison but the visual result was not convincing and the smell of the paint would be unpleasant for the user.

22
1) The assembly starts with joining the horizontal members and the back of the frame by putting the notches together.
2) The shoulder pieces are attached in the same way
3) The remaining vertical pieces are attached.
0) The burn marks from laser cutting is sanded off
1) The horizontal elements attached to the back
1, 2, 3) Balsa pieces fitted into the notches to deal with the higher error tolerances in the bamboo material
2
1
3
Assembly drawing of the frame, the horizontal members are purple and the vertical blue
3.2 Assembly Process
23
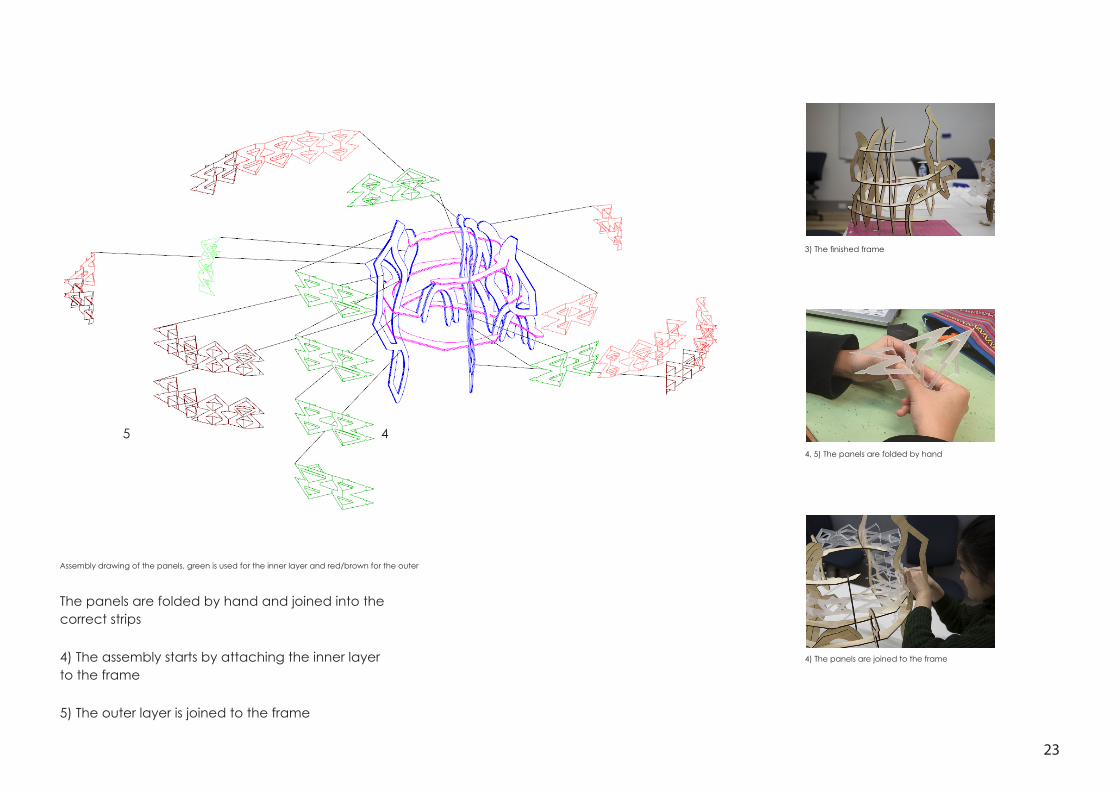
The panels are folded by hand and joined into the correct strips
4) The assembly starts by attaching the inner layer to the frame
5) The outer layer is joined to the frame
3) The finished frame
4, 5) The panels are folded by hand
4) The panels are joined to the frame
45
Assembly drawing of the panels, green is used for the inner layer and red/brown for the outer

24
Isometric view
3.3 Final Rhino Model
Top view
Front view

25
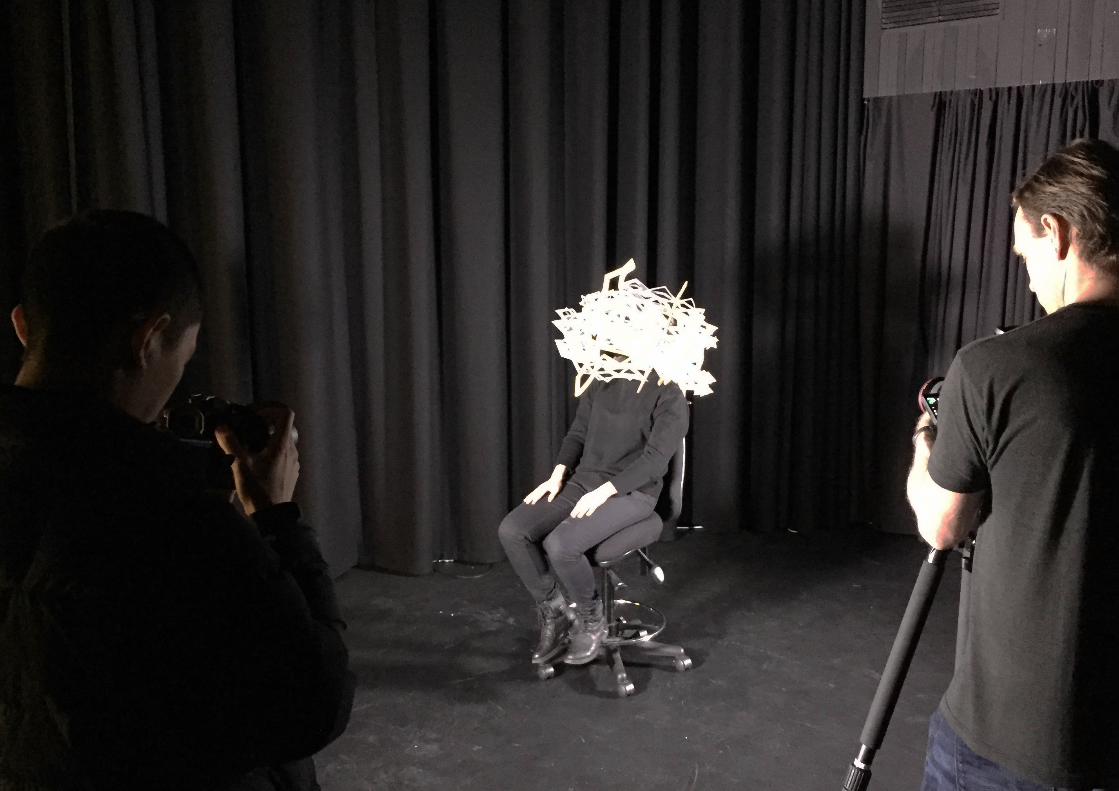
The final design effectively preventseye-contact with the wearer but still allows the user to observe outside movements.The appearance of the pod against black back-ground and white reveals quite different effects. Against black it looks sharp and dangerous while it blends into the white background. On the site this effect reproduces the elliptical shape of personal space discussed earlier.
3.4 Final Design
Right view Right view on siteFront view
26

27
The blur building by Diller Scofidio + Renfro for the Swiss Expo 2002 (dsrny.com, 2016)
The objective to build a sleeping pod from design to finished product was an inspiring but at first a somewhat daunting task. From the first week of the semester my work has been guided by the reading of Sommer (1969). Some of the notions of personal space presented in the text inscribed ideas that runs throughout the project. Especially the discussion of visual intrusion to personal space.
An important lesson is the iterative nature of the design process. Despite the clear division set by the headlines of this presentation, fabrication of physi-cal products started in the ideation stage and design continued until the final design was sent to be laser cut. Early on, our group decided to refine rather than remake the design. I believe this is reflected in the final outcome which against a white background resembles the Blur Building by Diller Scofidio + Renfro which uses water vapor to create an optical white-out (dsrny.com, 2016).
The relation between digital tools, in this case Rhino, and physical product was apparent. Often Rhino was used as a sketching tool in the refinement of the design to quickly and accurately describe ideas to the group. But the discrepancies between digital and physical model also became clear. Many of the shortcomings of the first prototype can be directly translated to the fact that the digital model generates form by geometry, not by ma-terial. Physical prototyping thus became very important to reconcile the extreme precision of computer modelling with the material reality. In the final digital model this issue is reversed. The intuitive process of bending and twisting the flexible panels to fit the frame is very difficult to replicate in the digital model.
However, it is important to remember that this is the first time we have encountered the process of digital making and this is a starting point. I would argue that all development relies on its’ predecessor. This project has begun to shape our understanding of digital design today in order that we might rethink its possibilities in future work.
4.0 REFLECTION
The final design against a white background
28
In a wider context, digital design opens up a new world of possibilities when, as discussed by Paul Loh during the lectures, digital fabrication enables a direct way of translating the digital model into physical form. This development also holds a potential to democratize design and making because the tools are way cheaper than a factory and the software involved are available to basically anyone with a computer.
One aspect of digital design this subject has not delved into is numerical simulation of material and environmental response by for example Finite Element Method. If such an approach is deployed physical prototyping can to some extent be replaced or informed by results from simulation. This does not mean that neither profession is likely to become obsolete in the near future but it will bring them closer together as they work in the same digital environments.
However, a digital, numerically analyzed model does by no means invariably result in good design. This will continue to be how an object meets demands put on it through form and function and “the crucial issue becomes when to utilize numeric processing and when to utilize human imagination” (Marble, 2008 p. 42). In relation to risk in digital design Marble states that “… it is the risk associated with interpreting and imagining alternative outcomes that needs to be maintained to give craft a new role in mediating between humans and technology” (Marble, 2008 p. 43). I believe he is right. Also, I think of digital making as a craft although the tools are different.
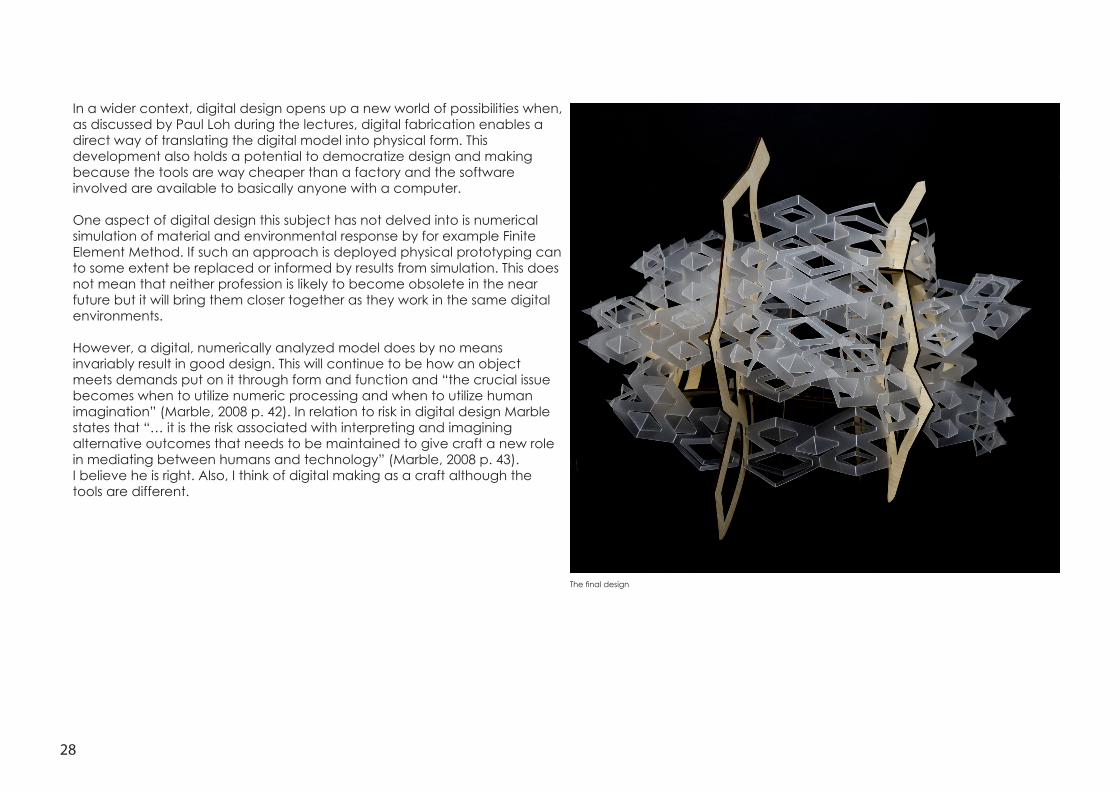
The final design

29
Kolarevic, B 2003, Architecture in the Digital Age - Design and Manufactur-ing /Branko Kolarevic. Spon Press, London
Marble, S, 2008. Building the Future: Recasting Labor in Architecture/ Philip Bernstein, Peggy Deamer. Princeton Architectural Press. pp 38-42
Sommer, R. 1969. Personal space : the behavioral basis of design / Robert Sommer. Englewood Cliffs, N.J. : Prentice-Hall, c1969.A
designboom.com, viewed 2016-06-06 <http://www.designboom.com/architecture/ball-nogues-studio-not-whole-fence-11-11-2014>
dsrny.com, viewed 2016-06/06<http://www.dsrny.com/projects/blur-building>
lms.unimelb.edu.au, viewed 2016-06-06 <https://app.lms.unimelb.edu.au/bbcswebdav/pid-5113797-dt-content-rid-18743650_2/courses/ENVS20001_2016_SM1/ENVS20001_2016_SM1_Import-edContent_20160128045120/California_AEDS.pdf>
5.0 Bibliography
30
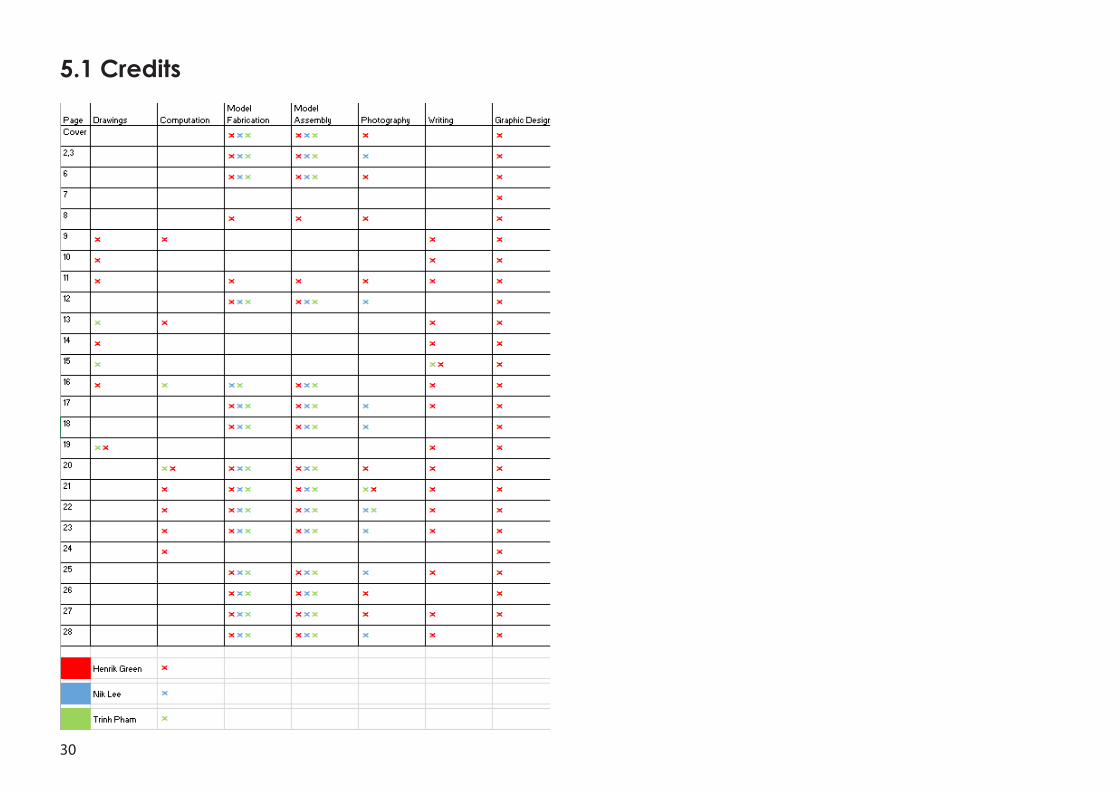
5.1 Credits