ct - loupedeck · welcome to loupedeck ct for lightroom user guide. this guide provides a complete...
TRANSCRIPT

CT
ADOBE LIGHTROOM CLASSIC User Guide for Loupedeck CT Software v.3.0
Copyright (c) 2017 Loupedeck Ltd. All rights reserved.
2
TABLE OF CONTENTS OVERVIEW OF LOUPEDECK CT ........................................................................................................ 3
LOUPEDECK CT & LIGHTROOM CLASSIC ......................................................................................... 3
General Elements ........................................................................................................................ 4
Workspace Elements ................................................................................................................... 4
ROUND & SQUARE BUTTONS ......................................................................................................... 5
WORKSPACES ................................................................................................................................ 11
Rating Simplified (Library) [Round Button 1] ............................................................................ 12
Rating Advanced (Library) [Round Button FN+1] ...................................................................... 13
Basic Adjustments [Round Button 2] ........................................................................................ 15
Color Adjustments ..................................................................................................................... 16
Color Adj. 2 [Round Button 3] ................................................................................................... 17
Optical Correction [Round Button 5] ........................................................................................ 18
Exporting [Round Button 8] ...................................................................................................... 18
LOCAL TOOLS ................................................................................................................................ 19
Crop Overlay Tool ...................................................................................................................... 19
Spot Removal Tool .................................................................................................................... 21
Red Eye Correction Tool ............................................................................................................ 22
Graduated Filter and Radial filter Tools .................................................................................... 23
Adjustment Brush Tool .............................................................................................................. 26
LIGHTROOM HELP MENU OPTIONS .............................................................................................. 28
MORE QUESTIONS?....................................................................................................................... 29

Copyright (c) 2017 Loupedeck Ltd. All rights reserved.
3
OVERVIEW OF LOUPEDECK CT Welcome to Loupedeck CT for Lightroom user guide. This guide provides a complete walk-through for Loupedeck CT usage with Lightroom. For more detailed instructions on Loupedeck Setup software (including installing) or Loupedeck CT hardware, please refer to Loupedeck CT user guide. Loupedeck CT supports:
▪ Windows® 10 ▪ Mac® OS 10.12 or later ▪ Adobe® Lightroom® Classic (most recent version)
MAC TIP: Install applications into Applications folder. Oherwise Loupedeck software may not be able to detect editing software on your computer.
WIN TIP: Install Loupedeck Setup software using admin rights. Otherwise there might be issues, as some parts of the software are either not installed correctly or installed with insufficient rights.
NOTE: For Loupedeck CT, minimum requirement is Loupedeck Setup software 3.0 ,which does not work on MacOS 10.11 (or older) or 32-bit Windows versions. 64-bit Windows 7, 8 or 8.1 versions are not supported, but Loupedeck Setup software might work if .NET Framework 4.5.1 (or later) is installed.
LOUPEDECK CT & LIGHTROOM CLASSIC

Copyright (c) 2017 Loupedeck Ltd. All rights reserved.
4
To make using Loupedeck CT as intuitive as possible for Lightroom Classic, all the actions are divided into two levels of control elements:
1) Workspace (elements): a. Dials b. Touch buttons c. Wheel (incl. touch screen)
2) General elements: a. Round buttons b. Square buttons
The first group is controlled by workspaces, and every workspace has an individual set of controls (e.g., dials in rating workspace are different from dials in color adjustment workspace). The second group, general elements, contains functions that are needed throughout your creative process (e.g., Save and Navigation arrows). These buttons do not change when workspace is changed.
General Elements Round buttons, when using Lightroom Classic, are dedicated to navigating between workspaces. Round buttons have a number from 1 to 8, and they change their color according to the assigned action type (e.g., green indicates workspace). NOTE! If workspace links were assigned under touch buttons, for example, they could not be reached when workspace is changed, as the content of touch buttons would change. Square buttons, are dedicated to the most used actions that are needed from time to time regardless of the activated workspace or Lightroom module (e.g., Library, Develop). Square buttons, unlike round buttons, are prelabeled to indicate a set of actions that are, in fact, common amongst almost every editing software (e.g., save, enter, navigation arrows). Like round buttons, square buttons are illuminated with RGB color LEDs and they change color according to the assigned action type (e.g., purple indicates an action).
Workspace Elements
Copyright (c) 2017 Loupedeck Ltd. All rights reserved.
5
Dials are prioritized for the most used adjustments (e.g., Exposure in Basic Adjustments workspace). Dials also have a press function that is, in most cases, bind for resetting adjustment value (e.g., pressing contrast dial will reset contrast back to zero).
TIP! If you don’t need resetting a value, you can assign a different press function to dials. E.g., setting auto tone action as press function for exposure dial, and Auto White Balance as press functions for temperature and/or tint dial(s), will speed up your editing process!
Touch Buttons (on touch screen) contain most used actions within every workspace (e.g., Rate 3 Stars in Rating workspace). Some workspaces have several pages of different actions. These pages are linked to the workspace’s first touch page for easy and quick access without the need to swipe the screen horizontally. In some workspaces first touch page also contains page links for dials or the wheel. Usually these links are for tool sets that are not commonly used (e.g., camera calibration wheel in Color Adjustments workspace). Wheel contains both rotation capability (wheel ring) and touch capability (wheel screen). In almost every workspace the wheel has a selector, a menu, for different sets of tools. E.g., Basic Adjustment workspace has a wheel selector for: Tone Curve, Noise Reduction, Sharpening and Vignetting tools. Pressing one of these links will open a set of tools that are used with the wheel. Some workspaces have a smaller set of adjustments or actions dedicated to the wheel. In those cases, actions and adjustments are assigned to the wheel without a selector menu (e.g., Rating Workspace has Grid View, Loupe View and Rate 3 stars).
ROUND & SQUARE BUTTONS

Copyright (c) 2017 Loupedeck Ltd. All rights reserved.
6
Although Loupedeck CT’s default profile for Lightroom utilizes square buttons for common actions (e.g., enter) and round buttons for navigating between workspaces, in addition to that, there are some common actions also assigned to round buttons – those actions are needed every now and then regardless of the activated workspace (e.g., before / after). In this chapter we go through all the actions that are assigned to both square and round buttons, not forgetting useful tips on how to boost up your own workflow!
CONTROL ELEMENT
INFORMATION, BUTTONS / DIALS
FACTORY DEFAULT ACTIONS / ADJUSTMENTS
Square Buttons (generally)
General information
Square buttons are prioritized for most common functions needed from time to time in your editing process. Square buttons are mainly pre-labeled, including buttons that are customizable, because in every supported software these buttons function very similarly if not exactly the same way. E.g., Save button contains saving or exporting functions regardless of the supported software.
Square Buttons (fixed)
Home ( O ) FN + Home
Home button has multiple functions when using Lightroom. Pressing home button will work in four stages depending on what is currently active. Press Home ( O ) to:
- Show first pages within a Local Tool (e.g., Crop Tool)
- Apply and exit Local Tool(s) - Show first pages of current workspace - Jump to Home View
Special function for Home button: Press FN + Home to activate System plugin for controlling OS-specific functions – e.g., screen brightness (laptops), media and desktop controls.
Copyright (c) 2017 Loupedeck Ltd. All rights reserved.
7
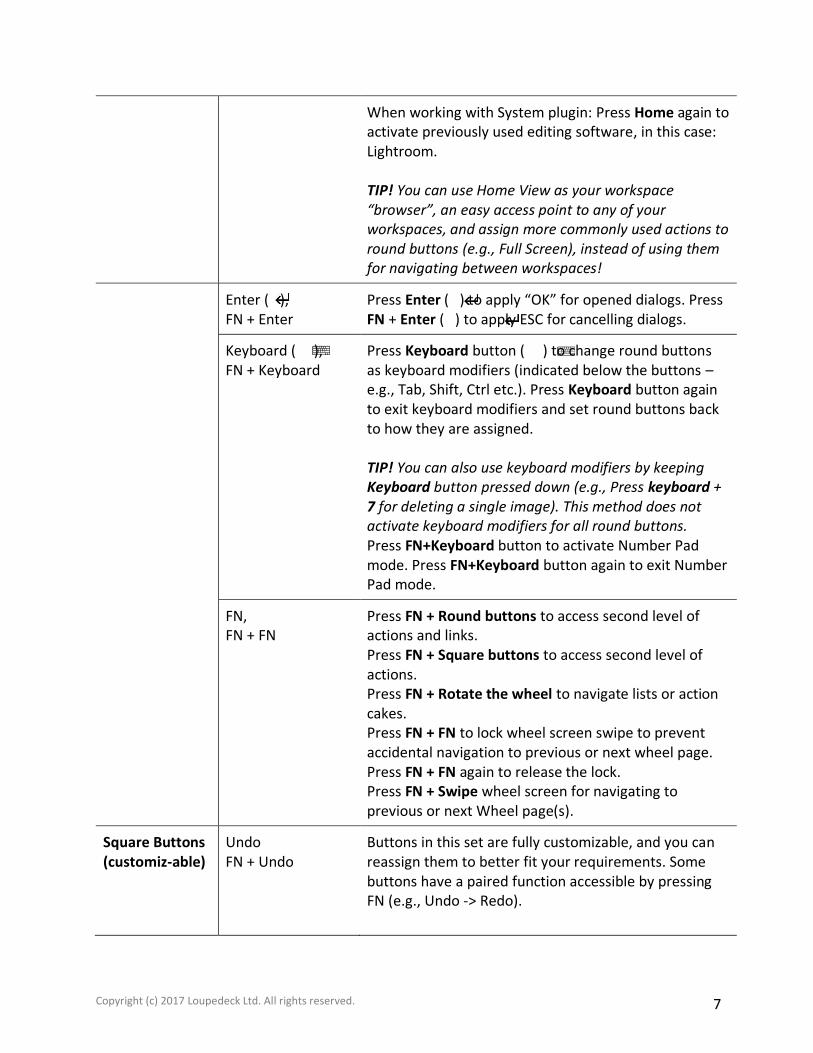
When working with System plugin: Press Home again to activate previously used editing software, in this case: Lightroom. TIP! You can use Home View as your workspace “browser”, an easy access point to any of your workspaces, and assign more commonly used actions to round buttons (e.g., Full Screen), instead of using them for navigating between workspaces!
Enter ( ), FN + Enter
Press Enter ( ) to apply “OK” for opened dialogs. Press FN + Enter ( ) to apply ESC for cancelling dialogs.
Keyboard ( ), FN + Keyboard
Press Keyboard button ( ) to change round buttons as keyboard modifiers (indicated below the buttons – e.g., Tab, Shift, Ctrl etc.). Press Keyboard button again to exit keyboard modifiers and set round buttons back to how they are assigned. TIP! You can also use keyboard modifiers by keeping Keyboard button pressed down (e.g., Press keyboard + 7 for deleting a single image). This method does not activate keyboard modifiers for all round buttons. Press FN+Keyboard button to activate Number Pad mode. Press FN+Keyboard button again to exit Number Pad mode.
FN, FN + FN
Press FN + Round buttons to access second level of actions and links. Press FN + Square buttons to access second level of actions. Press FN + Rotate the wheel to navigate lists or action cakes. Press FN + FN to lock wheel screen swipe to prevent accidental navigation to previous or next wheel page. Press FN + FN again to release the lock. Press FN + Swipe wheel screen for navigating to previous or next Wheel page(s).
Square Buttons (customiz-able)
Undo FN + Undo
Buttons in this set are fully customizable, and you can reassign them to better fit your requirements. Some buttons have a paired function accessible by pressing FN (e.g., Undo -> Redo).

Copyright (c) 2017 Loupedeck Ltd. All rights reserved.
8
Press Undo to jump to the previous state of Lightroom history. Press FN + Undo to Redo previous undone history state. NOTE! Every adjustment has a 1-second delay before the change is written into Lightroom history. If you press Undo before state change is visible in the history, the changes will not take effect and the previous visible state in history will be also undone.
Save, FN + Save
Press Save to open Export Dialog. Press FN + Save to activate “Full Resolution” export preset. TIP! Instead of using Exporting Workspace for your most used single image export presets, customize those export presets to Save and FN + Save buttons. That way you can export individual images on-the-go much faster!
A ( ), B ( ), C ( ), D ( ), E FN + A ( ), FN + B ( ), FN + C ( ), FN + D ( ), FN + E
Square Buttons from A to E are used for most common actions needed in Lightroom. Press A ( ) to navigate upwards. Press B ( ) to navigate downwards. Press C ( ) to navigate left. Press D ( ) to navigate right. Press E to toggle zooming image in/out. Press FN + A ( ) to select all images. Press FN + B ( ) to unselect all images. Press FN + C ( ) to select image on the left. Press FN + D ( ) to select image on the right. Press FN + E to show image’s info as overlay.
Round Buttons General information
Round Buttons are prioritized for navigating between workspaces in addition to some very useful general functions (e.g., using ALT + arrows for navigating within zoomed image). TIP 1! After navigating between pages, press workspace button to set first pages to every workspace element. This works the same way as pressing Home button.
Copyright (c) 2017 Loupedeck Ltd. All rights reserved.
9
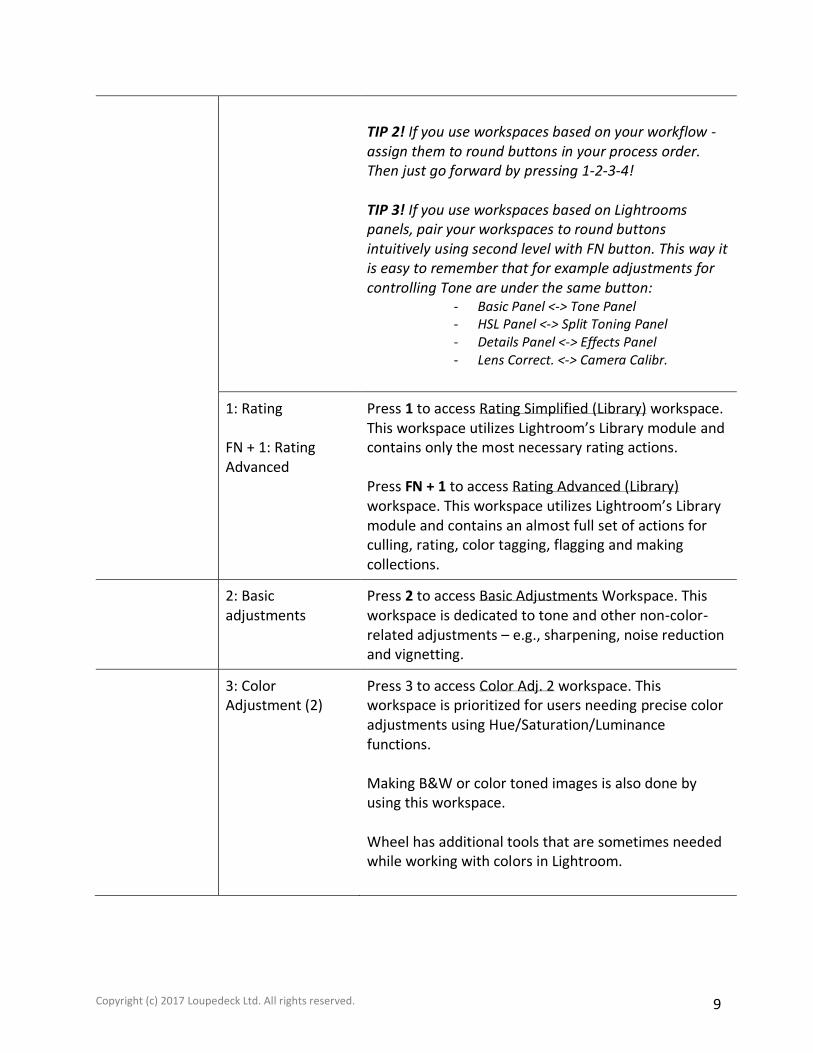
TIP 2! If you use workspaces based on your workflow - assign them to round buttons in your process order. Then just go forward by pressing 1-2-3-4! TIP 3! If you use workspaces based on Lightrooms panels, pair your workspaces to round buttons intuitively using second level with FN button. This way it is easy to remember that for example adjustments for controlling Tone are under the same button:
- Basic Panel <-> Tone Panel - HSL Panel <-> Split Toning Panel - Details Panel <-> Effects Panel - Lens Correct. <-> Camera Calibr.
1: Rating FN + 1: Rating Advanced
Press 1 to access Rating Simplified (Library) workspace. This workspace utilizes Lightroom’s Library module and contains only the most necessary rating actions. Press FN + 1 to access Rating Advanced (Library) workspace. This workspace utilizes Lightroom’s Library module and contains an almost full set of actions for culling, rating, color tagging, flagging and making collections.
2: Basic adjustments
Press 2 to access Basic Adjustments Workspace. This workspace is dedicated to tone and other non-color-related adjustments – e.g., sharpening, noise reduction and vignetting.
3: Color Adjustment (2)
Press 3 to access Color Adj. 2 workspace. This workspace is prioritized for users needing precise color adjustments using Hue/Saturation/Luminance functions. Making B&W or color toned images is also done by using this workspace. Wheel has additional tools that are sometimes needed while working with colors in Lightroom.

Copyright (c) 2017 Loupedeck Ltd. All rights reserved.
10
TIP! If precise HSL work is not needed, but color toning is a priority – assign “Color Adjustm.” workspace to round button 3 instead of “Color Adj. 2”.
4: Keyboard Modifier: ALT Zoomed Image, Crop Tool
When image is zoomed in: Keep round button 4 pressed and use navigation arrows to navigate within the image area. When Crop Tool is activated: Keep round button 4 pressed and use navigation arrows to fine adjust crop area position. Note! Pressing ALT and rotating adjustment dials will not activate threshold view or Lightroom’s alternative adjustment functions for Loupedeck. ALT keyboard modifier operates only if adjustments are used via Lightroom’s Graphical User Interface with mouse - when pressing ALT, panel information changes in GUI (e.g., Basic Panel: Tone -> Reset Tone).
5: Optical Correction
Press 5 to access Optical Correction workspace. This workspace is prioritized for correcting lens or camera angle errors.
Button 6: -
Button 6 has nothing assigned. TIP! Make your own workspace and test it on round button 6!
7: Before / After FN+7: Toggle Panels
Press 7 to see original image, before only view, with no applied edits. Press 7 again to see adjusted image version. NOTE! When “Before only” is active, Before text is applied on top right corner of Lightroom’s image area. Press FN + 7 to hide panels and to get maximized display area for image editing. Press FN + 7 again to reveal panels. TIP! Full Screen utilizes the whole image data (which might be many dozen megapixels) – but Hide Panels mode utilizes Lightroom’s “thumbnail” image, which is
Copyright (c) 2017 Loupedeck Ltd. All rights reserved.
11
considerably smaller and therefore all adjustments happen without any lag in real time. Full Screen mode is mainly for viewing images, and therefore highlight warning does not work, for example.
8: Exporting Press 8 to open Exporting workspace. This workspace contains filtering images, selecting them and different methods on “getting images out from Lightroom”, also known as saving or exporting. TIP! Make several different export presets in Lightroom (e.g., full resolution, web2048px, 4”x 5” etc.) and assign export presets to this workspace. That way it is quite quick to export big sets of images to the right image size and format. TIP 2! Assign your most used single image export presets to Save and FN + Save buttons!
WORKSPACES
Copyright (c) 2017 Loupedeck Ltd. All rights reserved.
12
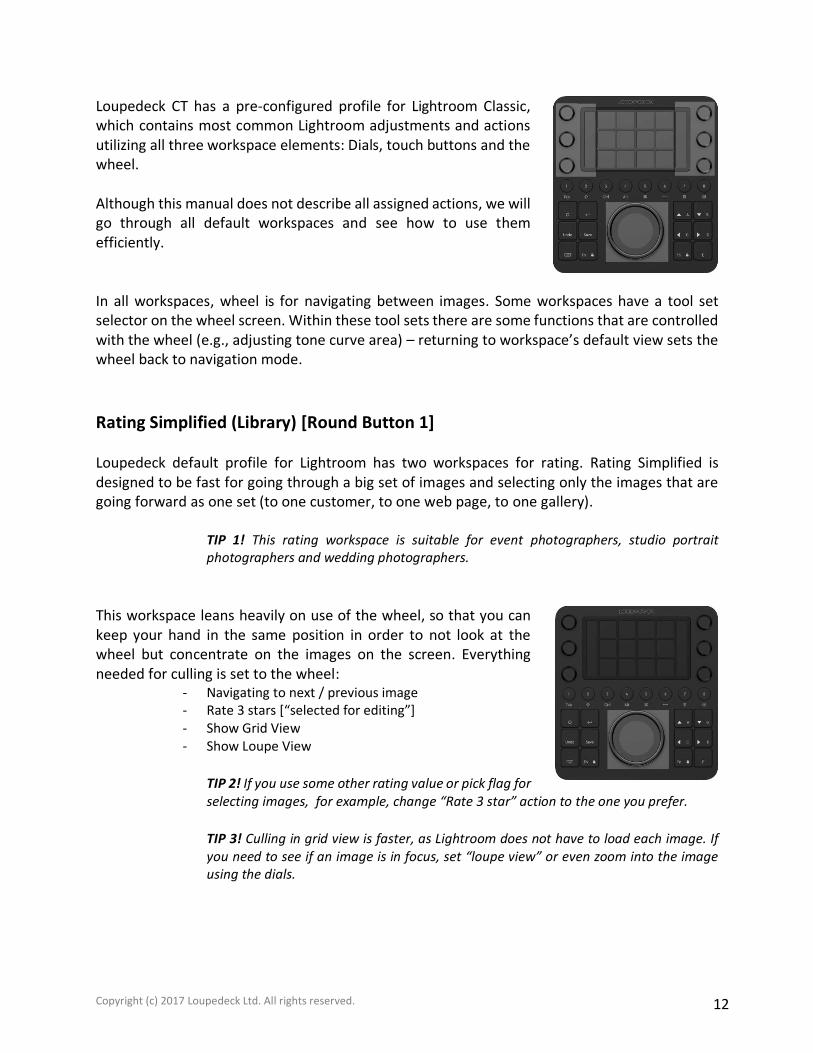
Loupedeck CT has a pre-configured profile for Lightroom Classic, which contains most common Lightroom adjustments and actions utilizing all three workspace elements: Dials, touch buttons and the wheel. Although this manual does not describe all assigned actions, we will go through all default workspaces and see how to use them efficiently. In all workspaces, wheel is for navigating between images. Some workspaces have a tool set selector on the wheel screen. Within these tool sets there are some functions that are controlled with the wheel (e.g., adjusting tone curve area) – returning to workspace’s default view sets the wheel back to navigation mode.
Rating Simplified (Library) [Round Button 1] Loupedeck default profile for Lightroom has two workspaces for rating. Rating Simplified is designed to be fast for going through a big set of images and selecting only the images that are going forward as one set (to one customer, to one web page, to one gallery).
TIP 1! This rating workspace is suitable for event photographers, studio portrait photographers and wedding photographers.
This workspace leans heavily on use of the wheel, so that you can keep your hand in the same position in order to not look at the wheel but concentrate on the images on the screen. Everything needed for culling is set to the wheel:
- Navigating to next / previous image - Rate 3 stars [“selected for editing”] - Show Grid View - Show Loupe View
TIP 2! If you use some other rating value or pick flag for selecting images, for example, change “Rate 3 star” action to the one you prefer.
TIP 3! Culling in grid view is faster, as Lightroom does not have to load each image. If you need to see if an image is in focus, set “loupe view” or even zoom into the image using the dials.

Copyright (c) 2017 Loupedeck Ltd. All rights reserved.
13
As navigating and rating are the priority functions of culling, secondary adjustments are set to the dials. First dial page has general functions like adjusting Grid View’s thumbnail size and zooming the image in/out. First page also contains most vital quick adjustments: Temperature, Exposure, Highlights and Shadows. Rest of the adjustments are on the next dial page (which can be selected by swiping the screen vertically).
- TIP 4! Adjustments are paired between pages, so that you don’t have to select another dial to adjust a “paired” function. E.g., after adjusting temperature, navigate to second dial page by swiping the touch screen vertically and rotate the same dial to adjust tint. Paired local adjustments (1st page / 2nd page):
o Change Thumbnail Size / Clarity o Zoom / Contrast o Temperature / Tint
o Exposure / Vibrance o Highlights / Whites o Shadows / Blacks
Touch buttons are for activating actions that are even more rare, which are not vital for rating process, or which are done only once or twice within one image set: e.g., Hide Panels (to maximize display area), Auto Tone (to check if some image can be used), or Rotate Image 90°.
Rating Advanced (Library) [Round Button FN+1] Rating Advanced contains almost all possible culling and filtering tools such as rating, flagging, color tagging and collections. This workspace is for you if you require multiple different methods to mark selected images. TIP! Advanced rating is used when marking images to multiple purposes, e.g.:
- Pick Flag: Selected for editing - 3 stars: After editing, selected for customer / publishing
Copyright (c) 2017 Loupedeck Ltd. All rights reserved.
14
- 4 stars: Marked for personal marketing (e.g., social media photo) - 5 stars: Portfolio or web page material - Green label: Customer needs these images first - Red label: Customer has forbidden to publish or use this photo - Add to (Target) Collection, e.g.: photo competition collection
(target collections can be managed in Lightroom’s Library module)
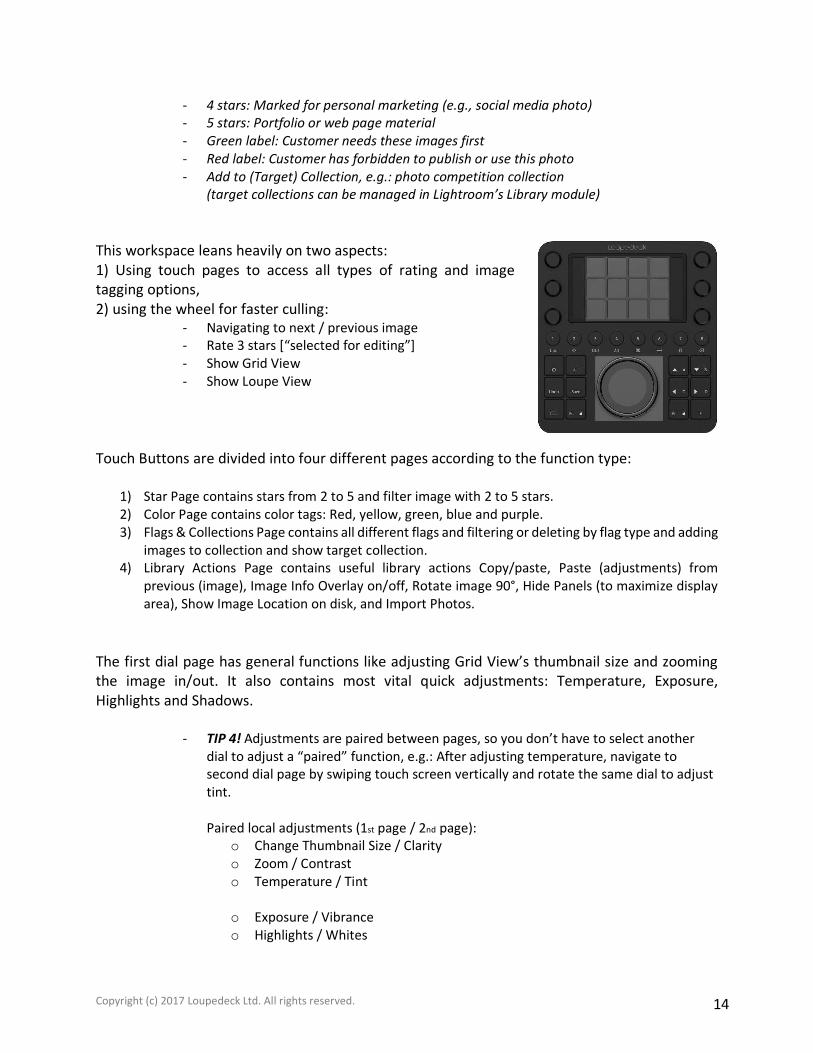
This workspace leans heavily on two aspects: 1) Using touch pages to access all types of rating and image tagging options, 2) using the wheel for faster culling:
- Navigating to next / previous image - Rate 3 stars [“selected for editing”] - Show Grid View - Show Loupe View
Touch Buttons are divided into four different pages according to the function type:
1) Star Page contains stars from 2 to 5 and filter image with 2 to 5 stars. 2) Color Page contains color tags: Red, yellow, green, blue and purple. 3) Flags & Collections Page contains all different flags and filtering or deleting by flag type and adding
images to collection and show target collection. 4) Library Actions Page contains useful library actions Copy/paste, Paste (adjustments) from
previous (image), Image Info Overlay on/off, Rotate image 90°, Hide Panels (to maximize display area), Show Image Location on disk, and Import Photos.
The first dial page has general functions like adjusting Grid View’s thumbnail size and zooming the image in/out. It also contains most vital quick adjustments: Temperature, Exposure, Highlights and Shadows.
- TIP 4! Adjustments are paired between pages, so you don’t have to select another dial to adjust a “paired” function, e.g.: After adjusting temperature, navigate to second dial page by swiping touch screen vertically and rotate the same dial to adjust tint. Paired local adjustments (1st page / 2nd page):
o Change Thumbnail Size / Clarity o Zoom / Contrast o Temperature / Tint
o Exposure / Vibrance o Highlights / Whites

Copyright (c) 2017 Loupedeck Ltd. All rights reserved.
15
o Shadows / Blacks
Basic Adjustments [Round Button 2]
This is the main workspace for adjusting images. It contains all main adjustments and some additional adjustments located on the wheel (e.g., sharpening). The main control elements of this workspace are the dials assigned with basic panel adjustments.
TIP 1! Adjustments are paired between pages, so that you don’t have to select another dial to adjust a “paired” function, e.g.: After adjusting temperature, navigate to the second dial page by swiping touch screen vertically and rotate the same dial to adjust tint. Paired adjustments (1st page / 2nd page):
o Temperature / Tint o Exposure / Vibrance *(TIP 2) o Contrast / Dehaze
o Highlights / Whites o Shadows / Blacks o Texture / Clarity
TIP 2! Vibrance is recommended instead of saturation, as saturation boosts every color regardless of which color is more or less vibrant. Vibrance on the other hand takes into account the amount of vibrance each color has and boosts less vibrant colors more, and more vibrant colors less. This helps with keeping a better balance for overall saturation.
Touch buttons contain dynamic tools (e.g., crop, adjustment brush) and common copy/paste actions (e.g., paste from previous, make a virtual copy, copy/paste adjustments). Touch buttons also contain links to:
- Tool selector (which is by default active within this workspace),
- Basic panel wheel (including all basic panel adjustments as a list),
- Develop Presets Page TIP 3! Assign your own personal develop presets to the develop preset page to boost your workflow!

Copyright (c) 2017 Loupedeck Ltd. All rights reserved.
16
Wheel element has four different tool sets, all of which utilize a List wheel widget. After selecting and using a tool set, press either “Tool Selector Wheel” page link on the touch screen or home button (once) to set wheel back to the first (default) page. Tool sets on the wheel are:
1) Tone Curve: Swipe wheel screen vertically to select tone curve area and rotate wheel to increase/decrease values.
2) Noise Reduction: Swipe wheel screen vertically to select noise reduction adjustment and rotate wheel to increase/decrease values.
3) Sharpening: Swipe wheel screen vertically to select sharpening adjustment and rotate wheel to increase/decrease values.
4) Vignetting: Swipe wheel screen vertically to select vignetting adjustment and rotate wheel to increase/decrease values.
Color Adjustments Lightroom profile contains two different workspaces for color adjustments. Color Adjustments is prioritized for non-precise work, for toning images and fixing local areas with local tools. This is most likely the more suitable workspace for wedding and concert event photographers.
Dials are the priority element with split toning adjustments. Wheel has a color tool selector for individual hue, saturation and luminance adjustments and for B&W channel adjustments. Before adjusting B&W channels, change the color profile to B&W by pressing “Swap Color/B&W Profile” action on the touch screen.
Copyright (c) 2017 Loupedeck Ltd. All rights reserved.
17
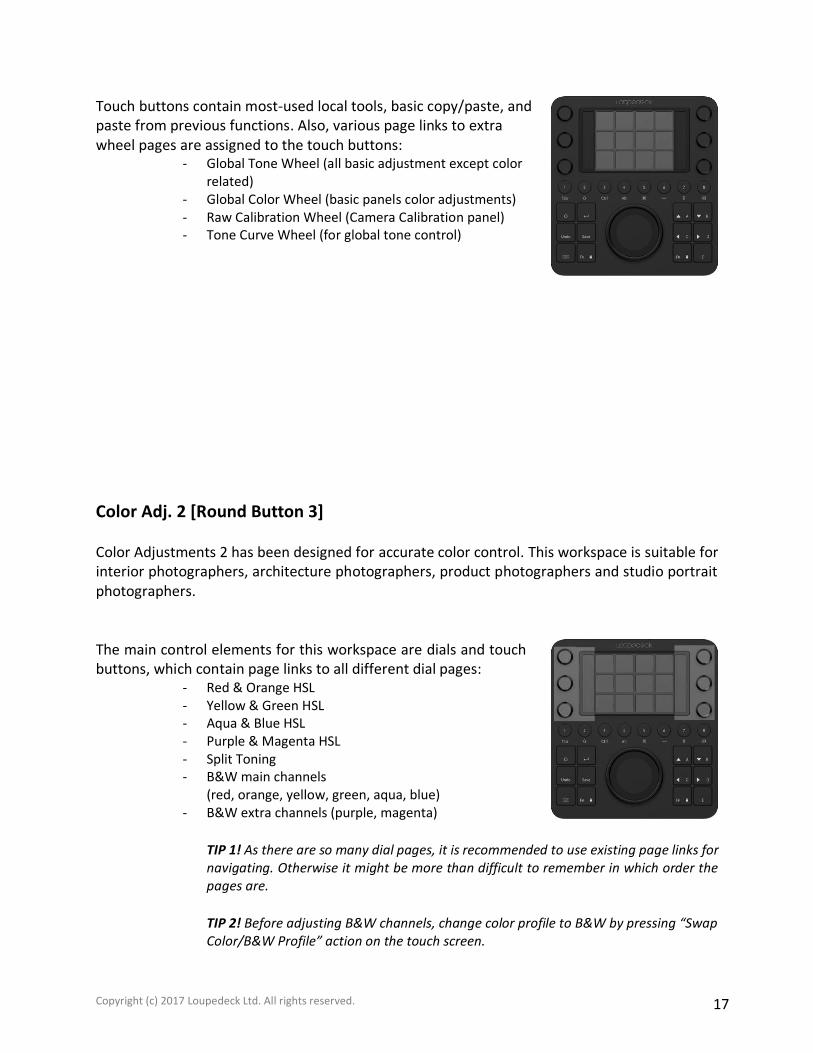
Touch buttons contain most-used local tools, basic copy/paste, and paste from previous functions. Also, various page links to extra wheel pages are assigned to the touch buttons:
- Global Tone Wheel (all basic adjustment except color related)
- Global Color Wheel (basic panels color adjustments) - Raw Calibration Wheel (Camera Calibration panel) - Tone Curve Wheel (for global tone control)
Color Adj. 2 [Round Button 3] Color Adjustments 2 has been designed for accurate color control. This workspace is suitable for interior photographers, architecture photographers, product photographers and studio portrait photographers. The main control elements for this workspace are dials and touch buttons, which contain page links to all different dial pages:
- Red & Orange HSL - Yellow & Green HSL - Aqua & Blue HSL - Purple & Magenta HSL - Split Toning - B&W main channels
(red, orange, yellow, green, aqua, blue) - B&W extra channels (purple, magenta)
TIP 1! As there are so many dial pages, it is recommended to use existing page links for navigating. Otherwise it might be more than difficult to remember in which order the pages are.
TIP 2! Before adjusting B&W channels, change color profile to B&W by pressing “Swap Color/B&W Profile” action on the touch screen.
Copyright (c) 2017 Loupedeck Ltd. All rights reserved.
18
Other adjustments that are needed at the same time with color adjustments can be accessed by selecting the tool set from the wheel’s selector.
- Basic Panel (for making global tone or white balance corrections) - Local Tools (for making local corrections) - Camera Calibration (for making calibration corrections) - B&W (for adjusting B&W channels – can also be adjusted with dials)
Optical Correction [Round Button 5] Everything that is related to optical errors, lens errors, camera angle errors, twisting, tilting or fringing are assigned to this workspace. This workspace doesn’t prioritize any of the tools or actions over the other: instead, it presents a collection of tools on the most convenient control element. Defringe tools are set to the dials. This is used to remove purple / green fringing from contrasty edges, e.g., edge between branch and sky. Lens Correction adjustments are set to the wheel. NOTE! Before using Lens Corrections, Lens Profile must be set ON – press Lens Profile On/Off on touch screen if lens profile is not automatically activated. Transform has been divided into two wheel sets. Transform basic contains most common transform adjustments, e.g., tilting image horizontally and vertically. Transform extra contains less used adjustments like setting x or y axis offset or scaling image bigger or smaller within the image area. Rough Fringe Correction utilizes Saturation adjustments for magenta & purple / green & aqua channels. It is most effective when fringing is very notable (as Lightroom’s defringe tool is made for more delicate fringing). Rough Fringe Correction can also be used if the image does not contain any similar colors except fringing – e.g., a photograph of a leafless branch towards the sky does not have purple color, but it most likely has purple fringing.
Exporting [Round Button 8]
Copyright (c) 2017 Loupedeck Ltd. All rights reserved.
19
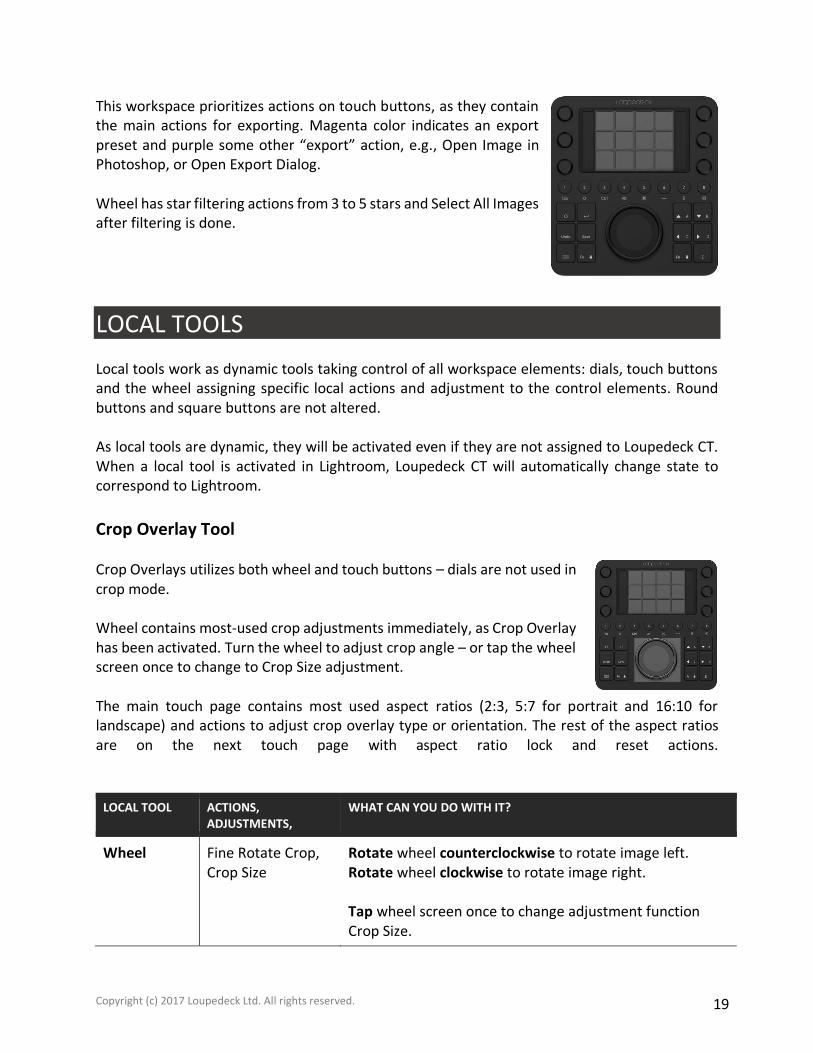
This workspace prioritizes actions on touch buttons, as they contain the main actions for exporting. Magenta color indicates an export preset and purple some other “export” action, e.g., Open Image in Photoshop, or Open Export Dialog. Wheel has star filtering actions from 3 to 5 stars and Select All Images after filtering is done.
LOCAL TOOLS Local tools work as dynamic tools taking control of all workspace elements: dials, touch buttons and the wheel assigning specific local actions and adjustment to the control elements. Round buttons and square buttons are not altered. As local tools are dynamic, they will be activated even if they are not assigned to Loupedeck CT. When a local tool is activated in Lightroom, Loupedeck CT will automatically change state to correspond to Lightroom.
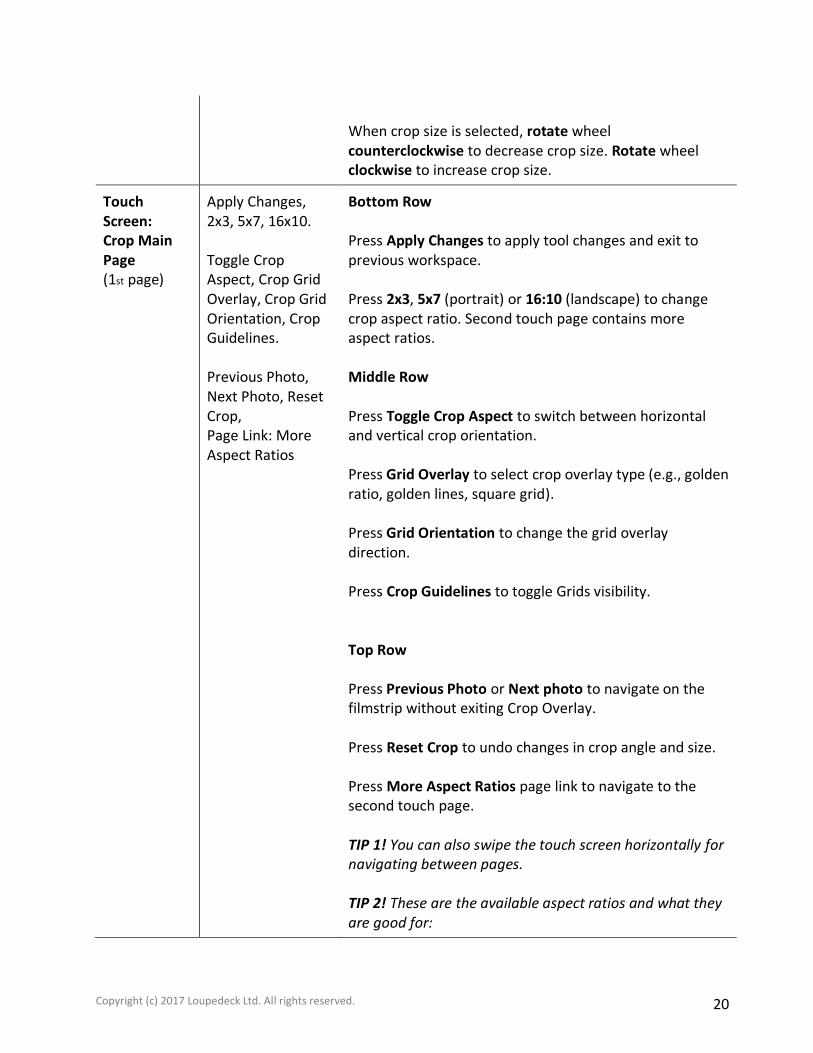
Crop Overlay Tool Crop Overlays utilizes both wheel and touch buttons – dials are not used in crop mode. Wheel contains most-used crop adjustments immediately, as Crop Overlay has been activated. Turn the wheel to adjust crop angle – or tap the wheel screen once to change to Crop Size adjustment. The main touch page contains most used aspect ratios (2:3, 5:7 for portrait and 16:10 for landscape) and actions to adjust crop overlay type or orientation. The rest of the aspect ratios are on the next touch page with aspect ratio lock and reset actions.
LOCAL TOOL ACTIONS, ADJUSTMENTS,
WHAT CAN YOU DO WITH IT?
Wheel Fine Rotate Crop, Crop Size
Rotate wheel counterclockwise to rotate image left. Rotate wheel clockwise to rotate image right. Tap wheel screen once to change adjustment function Crop Size.
Copyright (c) 2017 Loupedeck Ltd. All rights reserved.
20
When crop size is selected, rotate wheel counterclockwise to decrease crop size. Rotate wheel clockwise to increase crop size.
Touch Screen: Crop Main Page (1st page)
Apply Changes, 2x3, 5x7, 16x10. Toggle Crop Aspect, Crop Grid Overlay, Crop Grid Orientation, Crop Guidelines. Previous Photo, Next Photo, Reset Crop, Page Link: More Aspect Ratios
Bottom Row Press Apply Changes to apply tool changes and exit to previous workspace. Press 2x3, 5x7 (portrait) or 16:10 (landscape) to change crop aspect ratio. Second touch page contains more aspect ratios. Middle Row Press Toggle Crop Aspect to switch between horizontal and vertical crop orientation. Press Grid Overlay to select crop overlay type (e.g., golden ratio, golden lines, square grid). Press Grid Orientation to change the grid overlay direction. Press Crop Guidelines to toggle Grids visibility. Top Row Press Previous Photo or Next photo to navigate on the filmstrip without exiting Crop Overlay. Press Reset Crop to undo changes in crop angle and size. Press More Aspect Ratios page link to navigate to the second touch page. TIP 1! You can also swipe the touch screen horizontally for navigating between pages. TIP 2! These are the available aspect ratios and what they are good for:

Copyright (c) 2017 Loupedeck Ltd. All rights reserved.
21
1x1 – 6x6 film ratio / square (e.g., Instagram) 2x3 – Full frame / kino ratio (landscape) 3x4 – Digital FourThirds ratio (portrait) 4x5 – Studio portrait photo 5x7 – Portrait photo 8.5x11 – North America / letter (portrait) 16x9 – Wide Scr. (1920x1080)(landscape) 16x10 – Wide Scr. (1920x1200) (landscape)
Touch Screen: More Aspect Ratios (2nd page)
Apply Changes, 1x1, 4x3, 4x5. Reset Crop, 8,5x11, 16x9, Lock. Crop Tool Main Page
Bottom Row Press Apply Changes to apply tool changes and exit to previous workspace. Press 1x1 (square), 4x3 or 4x5 (portrait) to change crop aspect ratio. Middle Row Press Reset Crop to undo changes in crop angle and size. Press 8.5x11 (portrait) or 16:9 (wide screen) to change crop aspect ratio. Press Lock to toggle aspect ratio lock on/off. Top Row Press Crop Tool Main Page page link to navigate back to the first touch page.
Spot Removal Tool Spot Removal Tool action is mainly for activating the tool, as the tool is primarily used with a mouse. However, Loupedeck’s powerful Mouse Tool helps with setting Spot Removal tools position and changing the spot area size very precisely.
Copyright (c) 2017 Loupedeck Ltd. All rights reserved.
22
FUNCTIONS ACTION, ADJUSTMENT
WHAT CAN YOU DO WITH IT?
Wheel Tool Mover Tap on wheel screen to change selected adjustment between Mouse Up/Down or Mouse Left/Right. Set spot removal tool approximately on the spot you want to remove:
1) Move mouse cursor in the middle of the spot area. Rotate Mouse Left/Right or Mouse Up/Down with the wheel to adjust tool position.
2) Move mouse cursor to the border of the spot area. Rotate Mouse Left/Right or Mouse Up/Down to adjust tool size.
After making the adjustment, wait 0.5 sec for mouse tool to release the tool before moving mouse cursor.
Touch Buttons
Apply Changes, Shortcut: A, Shortcut: H, Delete
Press Apply Changes to apply tool changes and exit to previous workspace. Press Shortcut A to hide/reveal spot mask (helps on locating spots). Press Shortcut H to hide/reveal spot removal tool markers. Move mouse on top of a spot tool marker and press Delete to remove that spot tool.
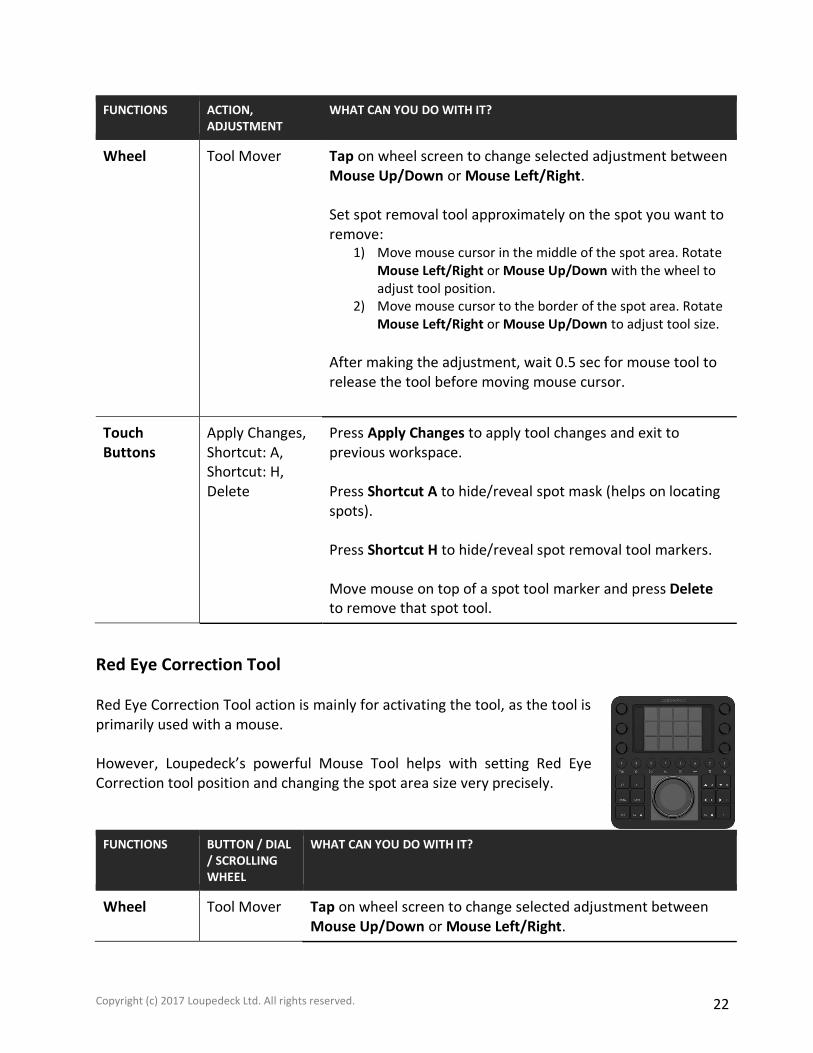
Red Eye Correction Tool Red Eye Correction Tool action is mainly for activating the tool, as the tool is primarily used with a mouse. However, Loupedeck’s powerful Mouse Tool helps with setting Red Eye Correction tool position and changing the spot area size very precisely.
FUNCTIONS BUTTON / DIAL / SCROLLING WHEEL
WHAT CAN YOU DO WITH IT?
Wheel Tool Mover Tap on wheel screen to change selected adjustment between Mouse Up/Down or Mouse Left/Right.
Copyright (c) 2017 Loupedeck Ltd. All rights reserved.
23
Set red eye correction tool approximately on the spot you want to remove:
1) Move mouse cursor in the middle of the spot area. Rotate Mouse Left/Right or Mouse Up/Down with the wheel to adjust tool position.
2) Move mouse cursor to the border of the spot area. Rotate Mouse Left/Right to adjust tool width or Mouse Up/Down to adjust tool height.
After making the adjustment, wait 0.5 sec for mouse tool to release the tool before moving mouse cursor.
Touch Buttons
Press Apply Changes to apply tool changes and exit to previous workspace. Press Shortcut H to show/hide red eye correction tool overlays. Move mouse on top of a spot tool marker and press Delete to remove that tool spot.
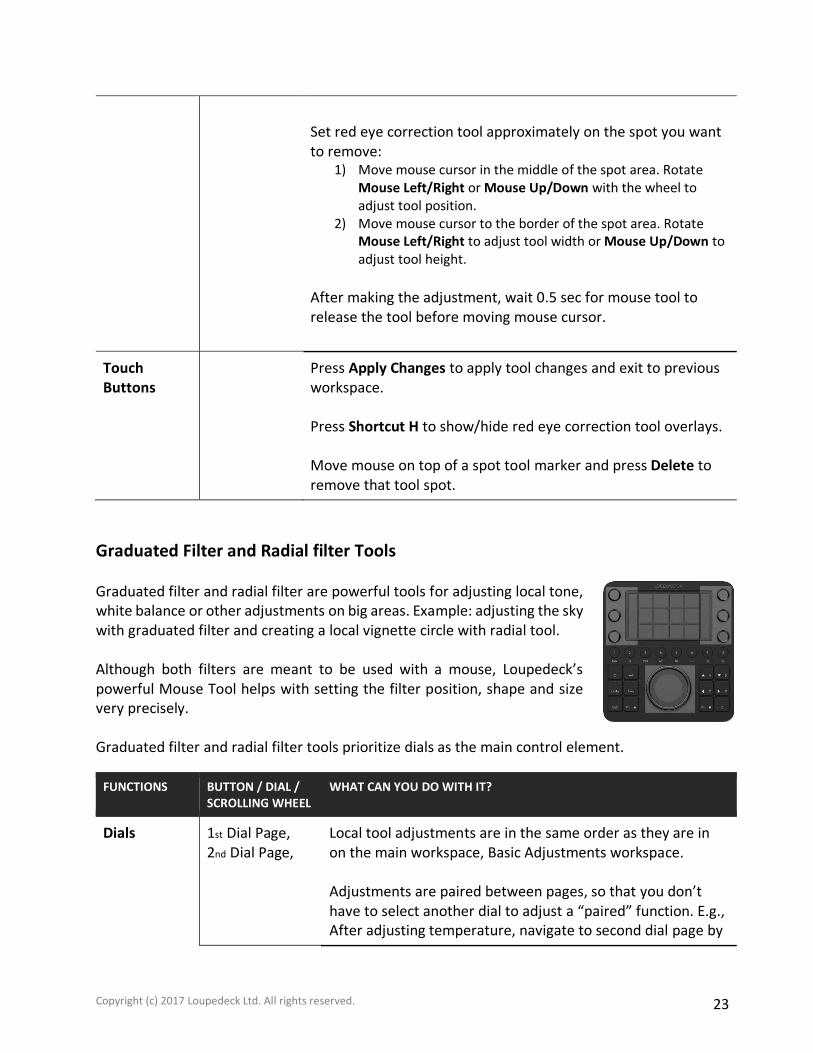
Graduated Filter and Radial filter Tools Graduated filter and radial filter are powerful tools for adjusting local tone, white balance or other adjustments on big areas. Example: adjusting the sky with graduated filter and creating a local vignette circle with radial tool. Although both filters are meant to be used with a mouse, Loupedeck’s powerful Mouse Tool helps with setting the filter position, shape and size very precisely. Graduated filter and radial filter tools prioritize dials as the main control element.
FUNCTIONS BUTTON / DIAL / SCROLLING WHEEL
WHAT CAN YOU DO WITH IT?
Dials 1st Dial Page, 2nd Dial Page,
Local tool adjustments are in the same order as they are in on the main workspace, Basic Adjustments workspace. Adjustments are paired between pages, so that you don’t have to select another dial to adjust a “paired” function. E.g., After adjusting temperature, navigate to second dial page by
Copyright (c) 2017 Loupedeck Ltd. All rights reserved.
24
swiping touch screen vertically and rotate the same dial to adjust tint. Paired local adjustments (1st page / 2nd page):
- Temperature / Tint - Exposure / Saturation - Contrast / Dehaze
- Highlights / Whites - Shadows / Blacks - Texture / Clarity
NOTE! Exposure is paired with saturation, as vibrance does not exist in local tool adjustments. Vibrance is otherwise recommended to be used over saturation, as vibrance’s color adjustment has a better balance between vibrant and less vibrant colors.
Touch Buttons
Apply Changes, Shortcut O, Shortcut H, Delete, Show Clipping
Bottom Row Press Apply Changes to apply tool changes and exit to previous workspace. Press Shortcut O to hide/reveal mask. Press Shortcut H to hide/reveal filter’s marker. Move mouse on top of a filter’s marker and press Delete to remove the filter. Press Show Clipping to hide/reveal areas that are too bright or too dark and over the clipping point.
Wheel Wheel Selector Both filters have a menu selector assigned to the wheel. This selector is a link to different sets of tools. Press Tool Mover to activate Mouse Tool for moving and adjusting filter size and position precisely. Press Local Details to adjust local noise reduction, sharpness, moiré or defringe. Press Global Adj. to adjust global basic panel adjustments (e.g., global exposure, contrast) without exiting local tool.

Copyright (c) 2017 Loupedeck Ltd. All rights reserved.
25
Tool Mover Tap on wheel screen to change selected adjustment between Mouse Up/Down or Mouse Left/Right. Graduated Filter Set gradual filter approximately over the area that needs adjusting:
1) Move mouse cursor to the graduated filter spot. Rotate Mouse Left/Right or Mouse Up/Down to relocate graduated filter.
2) Move mouse cursor to the middle line of graduated filter. Rotate Mouse Left/Right or Mouse Up/Down to rotate graduated filter angle.
3) Move mouse cursor to the top or bottom line of graduated filter. Rotate Mouse Left/Right or Mouse Up/Down to adjust graduated filter’s feather area size.
Radial Filter Set radial filter approximately over the area that needs adjusting:
1) Move mouse cursor in the middle of the spot area. Rotate Mouse Left/Right or Mouse Up/Down with the wheel to adjust tool position.
2) Move mouse cursor to the top/bottom border marker of the radial filter circle. Rotate Mouse Up/Down to adjust radial filter height.
3) Move mouse cursor to the left/right border marker of the radial filter circle. Rotate Mouse Left/Right to adjust radial filter width.
After making the adjustment, wait 0.5 sec for mouse tool to release the tool before moving mouse cursor. TIP! You can assign graduated filter with Mouse tool by moving mouse cursor on top of the image and rotating the wheel – that will set graduated filter and start resizing the feather area size.
Local Details Select Noise Reduction (tool) and rotate the wheel to increase or decrease local noise reduction.

Copyright (c) 2017 Loupedeck Ltd. All rights reserved.
26
Select Sharpness (tool) and rotate the wheel to increase or decrease local sharpness. Select Moiré and rotate the wheel to adjust decrease or increase local Moiré. Select Defringe and rotate the wheel to increase or decrease local fringing.
Global Adjustments
Swipe wheel screen vertically to select basic panel adjustment. Rotate wheel to increase or decrease selected adjustment value.
Adjustment Brush Tool Adjustment Brush is a powerful tool to adjust local tone, white balance or other adjustments on specific, small or big areas. Example: adding light to face or darkening areas around the primary target. Adjustment brush prioritize dials as the main control element.
FUNCTIONS BUTTON / DIAL / SCROLLING WHEEL
WHAT CAN YOU DO WITH IT?
Dials 1st Dial Page, 2nd Dial Page,
Local tool adjustments are in the same order as they are in on the main workspace, Basic Adjustments workspace. Adjustments are paired between pages, so that you don’t have to select another dial to adjust a “paired” function. E.g., after adjusting temperature, navigate to second dial page by swiping touch screen vertically and rotate the same dial to adjust tint. Paired local adjustments (1st page / 2nd page):
- Temperature / Tint - Exposure / Saturation
Copyright (c) 2017 Loupedeck Ltd. All rights reserved.
27
- Contrast / Dehaze
- Highlights / Whites - Shadows / Blacks - Texture / Clarity
NOTE! Exposure is paired with saturation, as vibrance does not exist in local tool adjustments. Vibrance is otherwise recommended to be used over saturation, as vibrance’s color adjustment has a better balance between vibrant and less vibrant colors.
Touch Buttons
Apply Changes, Shortcut O, Shortcut H, Delete, Show Clipping
Bottom Row Press Apply Changes to apply tool changes and exit to previous workspace. Press Shortcut O to hide/reveal mask. Press Shortcut H to hide/reveal graduated filter marker. Move mouse on top of a graduated filter marker and press Delete to remove the filter. Press Show Clipping to hide/reveal areas that are too bright or too dark and over the clipping point.
Wheel Wheel Selector Adjustment brush has a menu selector assigned to the wheel. This selector is a link to different sets of tools. Press Brush Adj. to adjust brush size or feather. Press Local Details to adjust local noise reduction, sharpness, moiré or defringe. Press Global Adj. to adjust global basic panel adjustments (e.g., global exposure, contrast) without exiting local tool.
Brush Adj. Rotate wheel to increase or decrease brush size. Tap on wheel screen to change selected adjustment between Brush Size and Brush Feather
Copyright (c) 2017 Loupedeck Ltd. All rights reserved.
28
When Brush Feather is selected, Rotate wheel to increase or decrease brush feather.
Local Details Select Noise Reduction (tool) and rotate the wheel to increase or decrease local noise reduction. Select Sharpness (tool) and rotate the wheel to increase or decrease local sharpness. Select Moiré and rotate the wheel to adjust decrease or increase local Moiré. Select Defringe and rotate the wheel to increase or decrease local fringing.
Global Adjustments
Swipe wheel screen vertically to select basic panel adjustment. Rotate wheel to increase or decrease selected adjustment value.
LIGHTROOM HELP MENU OPTIONS Some of Loupedeck’s operations that are related to Lightroom can be accessed and controlled via Lightroom. In Lightroom, click Help menu and click Plug-in Extras to see different options.
SUB MENU ITEM WHAT CAN YOU DO WITH IT?
Plug-in Extras (in Help menu)
Loupedeck Console Setup
Click Loupedeck Setup to enter Loupedeck Configuration software.
Loupedeck Plugin Settings
Enable Show Plugin Settings if you want Loupedeck to show notifications within Lightroom (e.g., “Loupedeck Thinks You Look Great Today”)
Copyright (c) 2017 Loupedeck Ltd. All rights reserved.
29
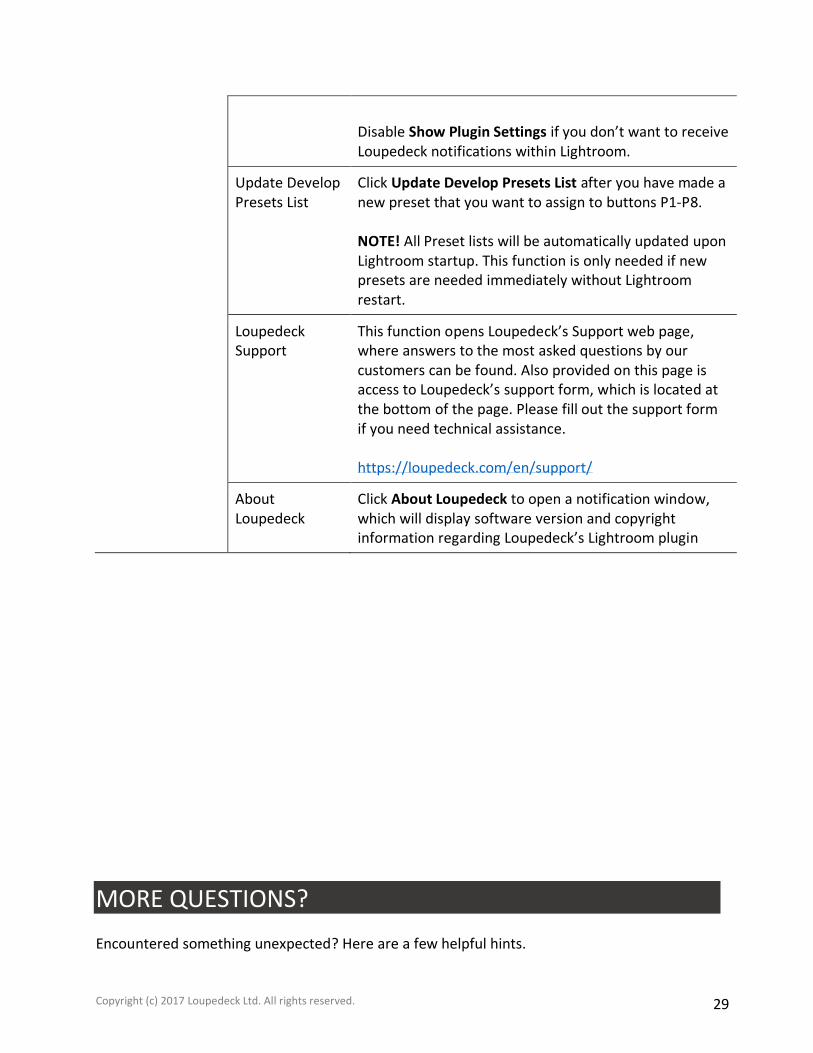
Disable Show Plugin Settings if you don’t want to receive Loupedeck notifications within Lightroom.
Update Develop Presets List
Click Update Develop Presets List after you have made a new preset that you want to assign to buttons P1-P8. NOTE! All Preset lists will be automatically updated upon Lightroom startup. This function is only needed if new presets are needed immediately without Lightroom restart.
Loupedeck Support
This function opens Loupedeck’s Support web page, where answers to the most asked questions by our customers can be found. Also provided on this page is access to Loupedeck’s support form, which is located at the bottom of the page. Please fill out the support form if you need technical assistance. https://loupedeck.com/en/support/
About Loupedeck
Click About Loupedeck to open a notification window, which will display software version and copyright information regarding Loupedeck’s Lightroom plugin
MORE QUESTIONS? Encountered something unexpected? Here are a few helpful hints.

Copyright (c) 2017 Loupedeck Ltd. All rights reserved.
30
My develop presets are not visible in Loupedeck Setup. Start Lightroom Classic. Locate Loupedeck icon on your task bar, right-click it and select “restart Loupedeck”. If Develop presets are still not visible: Close Loupedeck Setup window, Open Lightroom Help menu, select Plugin Extras and activate “Update Develop Presets List”. This pushes develop presets to Loupedeck setup manually. My Lightroom doesn’t seem to work with Loupedeck CT. Check your Lightroom version. Loupedeck CT is compatible with Adobe® Lightroom® Classic (most recent version). Older Lightroom versions (e.g., Lightroom Classic CC 6.14 / 2015) are not supported. I am unable to install Loupedeck Setup. Loupedeck setup is compatible with Windows® 10 or later and Mac® OS 10.12 or later. Loupedeck software also requires a 64-bit OS version. Loupedeck software is not specifically developed for Windows 7 or 8, but it might work normally, as the OS base is very similar. You can find FAQs and support at www.loupedeck.com/support.

Copyright (c) 2017 Loupedeck Ltd. All rights reserved.
31
www.loupedeck.com