crane merchandising systems multi product (mlc)
TRANSCRIPT

Crane Merchandising Systems
Multi Language Product Configurator (MLC)
User Guide

25‐May‐08 Page 2 of 17
Welcome to the Crane Merchandising System MultiLanguage Product Configurator (MLC). .............................................................. 3
Logging into the MLC. ........................................................................... 3
Configuring a Machine. ........................................................................ 4
The Product Configurator Basket ..................................................... 8
Create a New User for an Existing Configurator Account holding company via the main online registration form ........ 10
Create a New Configurator Company Account: .......................... 12
Guest User Access ................................................................................ 15
Forgotten Password ............................................................................ 15

25‐May‐08 Page 3 of 17
Welcome to the Crane Merchandising Systems MultiLanguage Product Configurator (MLC).
1. The MLC has been designed to make the process of ordering a vending machine from Crane Merchandising Systems as straightforward as possible.
2. If, after reading this guide, you would like more assistance then please contact your CMS Account Manager.
Logging into the MLC.
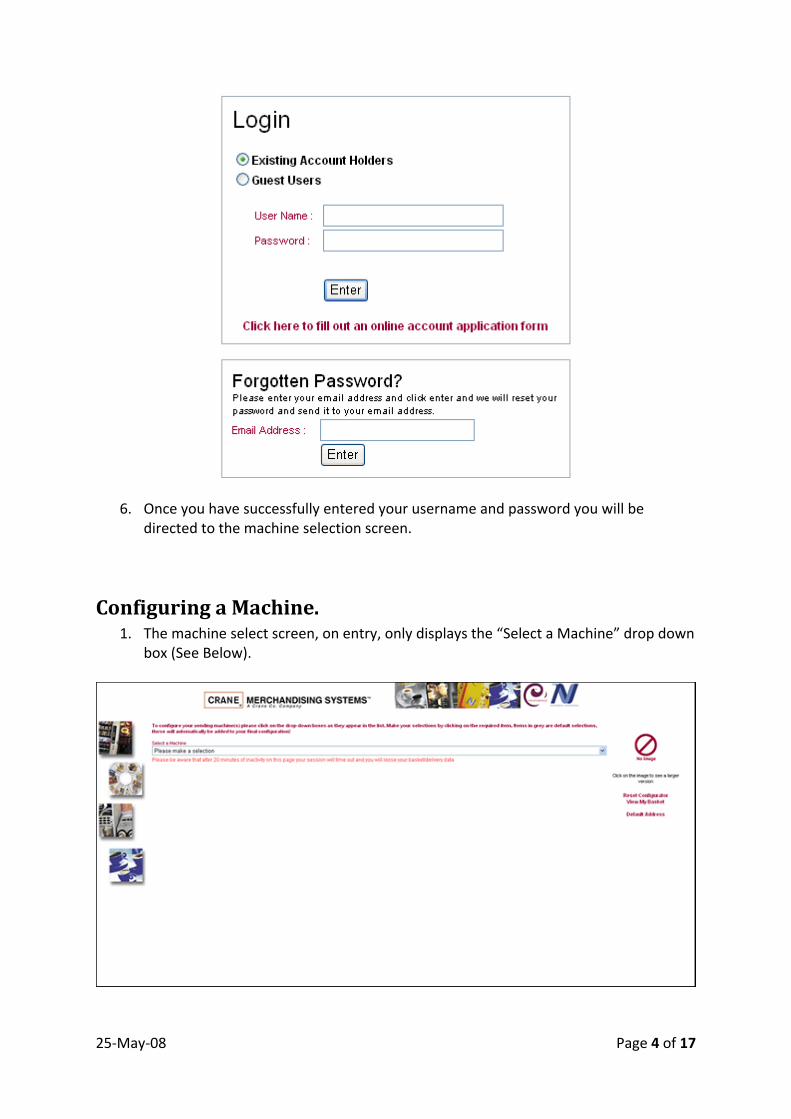
1. The CMS MLC can be found at the following web address: http://www.craneconfig.eu/
2. Select the relevant country flag. 3. If you already have a Configurator company account then complete the login form
(shown overleaf): 4. To request a Configurator company account please proceed to the section “Create a
new Configurator company account” 5. If you would like to add a new user to an existing Configurator company account
then please proceed to the section “Create a new user for an existing Configurator account holding company”
25‐May‐08 Page 4 of 17
6. Once you have successfully entered your username and password you will be directed to the machine selection screen.
Configuring a Machine. 1. The machine select screen, on entry, only displays the “Select a Machine” drop down
box (See Below).

25‐May‐08 Page 5 of 17
2. Click on the arrow and you will see the full machine range available. For this example we will use the Evolution machine.
3. Once any machine is selected it will activate the specific configurations from which you will be able to build up your required machine.
4. Select your required Ingredient Specification, for instance, Bean 2 Cup.
5. The next selection is the Door and Graphics options. When you make a selection here you will notice that the image will change to reflect the colour chosen. We have also created graphics exclusions – for instance you cannot select Bean 2 Cup graphics with an instant machine.

25‐May‐08 Page 6 of 17
6. Work your way through the drop down menus, ensuring that you have made a
selection from each menu, if a selection has not been made you will be prompted to complete any missing options when you select Add to Basket. Default options are in grey text, these cannot be selected or configured.
7. Optional Extras: Where optional extras are available you can select them by checking the relevant boxes. Please note that all optional extras come at an additional charge.
8. Water Filter:
Please use this drop down menu to select your desired water filter. If you are in any doubt, select the recommended option or consult a member of our Customer Services team.
9. Quantity:
Enter the quantity of machines required in this box. The default is one. To change this number simply click in the box and add a new number.
10. The screen shot below shows a completed configuration (without any notes).

25‐May‐08 Page 7 of 17
11. Add to Basket: When you have completed your configuration, and you are sure that everything that you have selected is correct, click on the Add to Basket button.
12. Reset Configurator:
Selecting this option will reset the current configuration; it will not clear anything that you may have in your basket.
13. View My Basket: Selecting this option will display anything that you have previously configured and added to your basket.
14. Default Address:
If you select this option you will be able to assign an invoice address and up to five delivery addresses. These can be changed by you whenever you need to.

25‐May‐08 Page 8 of 17
The Product Configurator Basket
1. When you have added your machine(s) to the basket you will be taken to the following screen.
2. The basket screen displays the machine that you have configured and the quantity required. From here you can also edit the configuration, delete the configuration, add another machine and complete the delivery information.
3. Machine Description: This area displays the machine(s) that you have just configured in text format. You will also notice that it produces a code. This code is what Crane Merchandising Systems requires to identify the vending machine’s configuration. This code is extremely important, as when we receive it, the machine will be built according to that code number.
4. Quantity:
This area displays the quantity of machines that you have ordered. There will be a separate quantity for each machine type.
5. Edit Button:
If you have made a mistake with the configuration, or simply change your mind, you can click the Edit button. This will take you back to that particular machine configuration within the main Configurator screen. Simply edit your selection and then click on the Update Basket button.
6. Add another Machine:
When you are in the basket you can add more machines at any time, these will just get added to your basket.

25‐May‐08 Page 9 of 17
7. Complete Delivery Information: When you are completely satisfied that the machines you have configured are correct, click on the tick box to confirm the configurations are correct, this will unlock the Complete Delivery Info area (See below).
For Existing Customers this will take you to the online order and site survey forms.
For Guest users this will allow you to submit your configuration to Crane Merchandising Systems as an enquiry.
25‐May‐08 Page 10 of 17
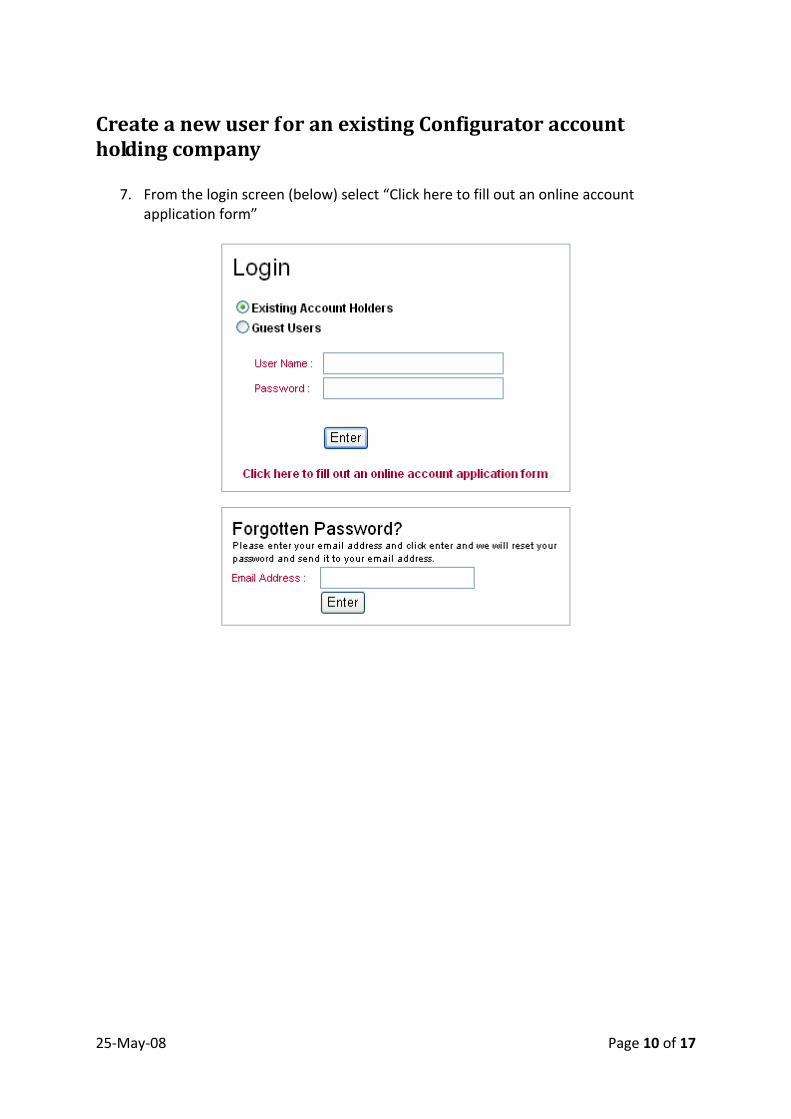
Create a new user for an existing Configurator account holding company
7. From the login screen (below) select “Click here to fill out an online account application form”

25‐May‐08 Page 11 of 17
8. Complete all the details below. The company account number must be included.
9. The image box (above) that contains circles, squares and triangles is a non‐language specific CAPTCHA system (1) that we have developed at Crane Merchandising Systems. Simply follow the instructions – in this case click the three circles, once the check box has been ticked a red border will appear around the image selected.
10. Once you have selected the relevant images click on enter and you will get the
following message.
1 CAPTCHA stands for "Completely Automated Public Turing test to tell Computers and Humans Apart". This type of system helps to provide online forms protection from automated attacks.

25‐May‐08 Page 12 of 17
11. Click on OK and you will be taken to the login page. Your CMS Account manager will receive notification to activate the account and you will receive an email to the address specified in the registration form which will contain the following: “Your request for a Crane Configurator account has been received. Your request will be processed and we will send you your login details when your account has been activated by your Account Manager”
Create a new Configurator company account:
1. From the Login screen select “Click here to fill out an online application form” 2. If you are a company that does not currently have a Configurator account with Crane
Merchandising Systems you will need to select “No” to “Do you have a Configurator account with Crane Merchandising Systems?”
3. This will alter the registration form. See overleaf.

25‐May‐08 Page 13 of 17
4. Complete all of the form details and the CAPTCHA, then select “Enter”. See overleaf.

25‐May‐08 Page 14 of 17
5. You will then get a pop‐up message advising you that a member of the CMS Sales team will contact you regarding your request. See Below.
6. You will also receive a confirmation email to the address specified on the registration form.

25‐May‐08 Page 15 of 17
Guest User Access
1. Guests can log into the Configurator as a “guest user” which will allow them to configure a machine without requiring a Crane Merchandising Systems account number. This will then send the order details through to the Sales team who will contact the user to discuss their requirements.
Forgotten Password
1. Enter your email address that you used for registration into the box (below) and select enter.
2. You will see the following pop‐up box: Click OK.

25‐May‐08 Page 16 of 17
3. You will receive an email message (below) containing a link which will take you to the change password page.
4. Click on the link in the email and you will be taken to the “change password page” (overleaf).

25‐May‐08 Page 17 of 17
5. Enter a new password into the boxes and try to make your password as strong as possible for security reasons. We have included a strength gauge to assist with this. Click on the change password button.
6. You will now be redirected to the machine selection area.