course - nwacc - faculty web pagesfaculty.nwacc.edu/east_original/spring2014/engineering and...
TRANSCRIPT

Course
GNEG 1103 Introduction to Engineering
Assignment
Team Design Project
Project Selected
Solar Powered Stereo Cooler
Project Presentation
April 23, 2014
Team Members
Kenny Callis
Ronny Akhaphong
Alfredo Lopez
Instructor
A. Stratigakis

Requirements and Constraints
Be able to play audio while holding ice, water , and beverages
The design must have marine grade speakers and stereo ( amp with auxiliary and / or USB
inputs).
Power must maintain a constant flow for up to five hours for having music at the beach or
lake.
Must have a niche (something to set it off from the rest)
Option : solar panel
Must have a water tight lid so that the battery can be taken out to get recharged for more us-
es

Engineering Design Method
Step 1: Identify the need and define the problem.
The customer will want a water cooler that will safely play their music at a beach, lake,
or anywhere they may want to gather with friends and family to enjoy a beautiful day.
Step 2: Assemble Design Team.
Kenny- Original concept creator, team manager, and in charge of research and develop-
ment.
Ronny- Electrical engineer, research and development, and team salesman.
Alfredo- Financial manager, electrical engineer, and in charge of marketing.
Step 3: Identify constraints and criteria for success.
Budget-
o $90 from school project funds.
o Additional resources must come from team members. Additional resources in-
cludes private funding, upgraded parts, and special tools.
Materials and Tools-
o Water cooler
o Solar panel
o Brackets
o Screws, nuts, and bolts
o Rechargeable battery

o Waterproof silicone
o Wood panels
o Marine grade stereo
o Marine grade speakers
o Waterproof gasket
Time-
o Project should be designed and created within 2 months.
Performance-
o The cooler should run off a battery that places high-quality music from an auxil-
iary cord through marine grade speakers.
o Cooler should be waterproof in order to protect the battery, amp, and wiring.
o The battery, that powers the stereo, should be charged through a solar panel,
making the cooler self-sufficient.
o Along with the solar panel, the battery will have an option for a DC charger,
which is a wall plugin, making it more convenient for the customer.
Safety-
o Cooler should be completely sealed using the clear silicone in order to protect
the battery and amp, preventing and chance of electrocution.
Effect on surrounding-
o Cooler will be completely self-sufficient using the solar panel to generate power
to charge the battery.
Availability-
o Cooler battery will run for a maximum of six hours when volume is at the high-
est level. However, when the sun is out, the cooler will have an endless amount
of power due to the solar panel constantly charging the battery.
o If the sun is not out to charge the battery through the solar panel, then the DC
charger will be useful to plug into a wall charger or car outlet.

Step 4: Search for solutions.
May want to use to car audio speakers and stereo in order to reduce the cost of produc-
tion.
Use scrap pieces of wood to build section inside of cooler that will house the battery and
amp.
Step 5: Feasibility Study.
Potential Solutions-
o Option A-
Large 120qt. cooler
Marine grade speakers
Marine grade amp.
Plexiglas housing
All-terrain wheels
PVC wire housing

Evaluation Matrix A:
Score Value
Cost 4 1
Aesthetics/Sound 5 5
Manufacturing Difficulty 4 2
Waterproof 4 4
Durability 4 5
Total score: 73
Though the product looks great and sounds even better, the product is ex-
tremely expensive and not cost-efficient. The silicone worked very well
when sealing the battery and wiring housing. The cooler is the right size
when using a large battery. However, there is not much volume left for
drinks or food. The all-terrain wheels seem to add a bit of value, howev-
er, smaller, standard wheels would work just as well.
o Option B-
Medium 75qt. cooler
Standard car speakers
Smaller battery
Wood housing
Standard wheels

Evaluation Matrix B:
Score Value
Cost 2 5
Aesthetics/Sound 5 5
Manufacturing Difficulty 2 4
Waterproof 4 4
Durability 4 5
Total Score: 79
The product looks very good and preforms equally as well. The wood
housing when sealed up supported the battery housing just as well as the
Plexiglas but reduced our manufacturing cost significantly. The addition
of car audio speakers worked extremely well and played music with a
great sound quality. Overall, Option B was much more cost efficient and
provided an equal product to Option A.

Step 6: Preliminary Design.
When Solar Sound decided to produce a stereo cooler that was powered by solar panel.
The team thought to keep the design relatively simple, while still being aesthetically
pleasing. To do this we looked to which end of the market segment we were going to
target. Looking towards the lower cost segment we knew would have to keep the manu-
facturing costs as low as possible. Knowing that the whole point of a cooler was to store
drinks and other items we had to maximize the internal volume while still producing
enough sound. Since there are not many products already in the market that are based
off solar power the team looked to stereo coolers that were powered through a battery
for a general idea. Then once the design idea was selected for the speakers and amp, the
team added a solar panel in order to be completely self-sufficient and make our product
superior to any of our competitors.
The original design called for: a standard cooler with enough volume to still hold drinks
once the battery housing was put in, several pieces of plywood, clear silicone, an ampli-
fier, car speakers, a solar panel, some metal brackets to attach the solar panel, and seal-
ant for the plywood.
The key in the solar powered stereo cooler was not in the design but in the materials
themselves. In order to have a better product the team would have needed to use more
expensive parts, which would have reduced the profit margins. However, given the
product’s current parts it is still extremely functioning with excellent returns on the in-
vestment.
Option B provided the team with a very reliable product. Using the plywood proved to
have no problems when sealed and housing the battery. The car speakers worked ex-
tremely well on both the sound aspect and the cost of manufacturing. The solar panel it-
self was perfect for the project—it generated enough power to recharge the battery and
keep it charged. The placement of the solar panel is not ideal however given the time
constraint, it suits the project fine. Overall, the costs to produce this project were low
and the possible returns are outstanding.
Step 7: Detail design.
Based off the constraints, Option B is the superior choice. Option A proved to be expen-
sive and unnecessary.
Materials:
o One 75qt. cooler

o One solar panel
o Car audio speakers
o One amplifier
o Four metal brackets to support the solar panel
o Screws to attach the battery housing
o Screws to attach the solar panel and brackets on to the cooler
o One battery
o Clear silicone to seal the battery housing
o Two pieces of ¼’’ plywood to create the battery housing
o One solar panel controller—convert the solar energy to DC and regulate the
amount of energy produced by the solar panel
Tools:
o Screw driver
o Drill bits to cut holes for the speakers
o Zip ties to reduce the amount of stray wires and improve the aesthetics of the
project
Steps:
1. Drill holes to fit the radio, solar panel controller, and speakers. Insert the radio,
solar panel controller, and speakers into their designated spots with wires feeding
into the cooler. In the case of Solar sound a simple auxiliary plug and volume ad-
justment knob were used due to time constraints.
2. Put the amplifier inside the cooler and screw into place. Note, must be on the
same side as the speakers. An example of the cooler with the speakers, stereo,

and solar panel controller is provided:
3. Place the battery inside the cooler.
4. Wire the speakers and radio to the amplifier. Then wire the amplifier to the bat-
tery. Leave some slack between the amplifier and the battery. Do not wire the so-
lar panel controller yet. An example of the wiring used for the Solar Sound pro-
ject is provided:
5. Using the metal brackets, create an L-shaped platform on the inside of the cooler
for the battery to rest on. Make sure the battery is secure. The battery should not
shift when the cooler is in transport.

6. Once the battery is in place take the plywood and place inside the cooler. Make
sure the plywood is perfectly vertical and leave enough space for the top of the
cooler to close with about one inch of clearance. This will be crucial when seal-
ing the wiring housing.
7. Then take another metal bracket and place along the top of the plywood so that
another piece of plywood can be placed directly on top of the bracket. Then,
screw into place the bracket. Make sure the bracket is snug and will not move.
An example of the bracket used is provided:
8. Once the bracket is secured, place the second piece of plywood on top of the
bracket and screw into place.
9. After placing the top of the wiring housing make sure there are no large gaps be-
tween the cooler and the plywood. If there are you may want to consider cutting
the plywood again for a more secure fit.
10. Once the wiring housing is checked for gaps remove the plywood completely
and coat the both sides of each piece in a sealant. Color does not matter, though
white was chosen for the Solar Sound project in order to be more aesthetic.
11. After applying several coats (you can never have too many coats) place back on-
to the bracket and screw into place. Do not put the top on quite yet.
12. Once the sealed plywood is in place, seal the edges between the plywood and the
cooler using the clear silicone. Make sure to do the side that is facing outward
towards the contents of the cooler first.
13. After the first layer has dried, apply another layer on the inside of the wiring
bracket. Too much silicone is never enough. Just make sure the silicone does not
dry touching any wires.
14. Once the second layer of silicone has dried, repeat steps 12 and13. This will en-
sure that the side facing the contents of the cooler is perfectly sealed and water-
proof.
15. After the vertical wall of the wiring housing is sealed, place the top to the wiring
housing on top of the bracket and screw into place.
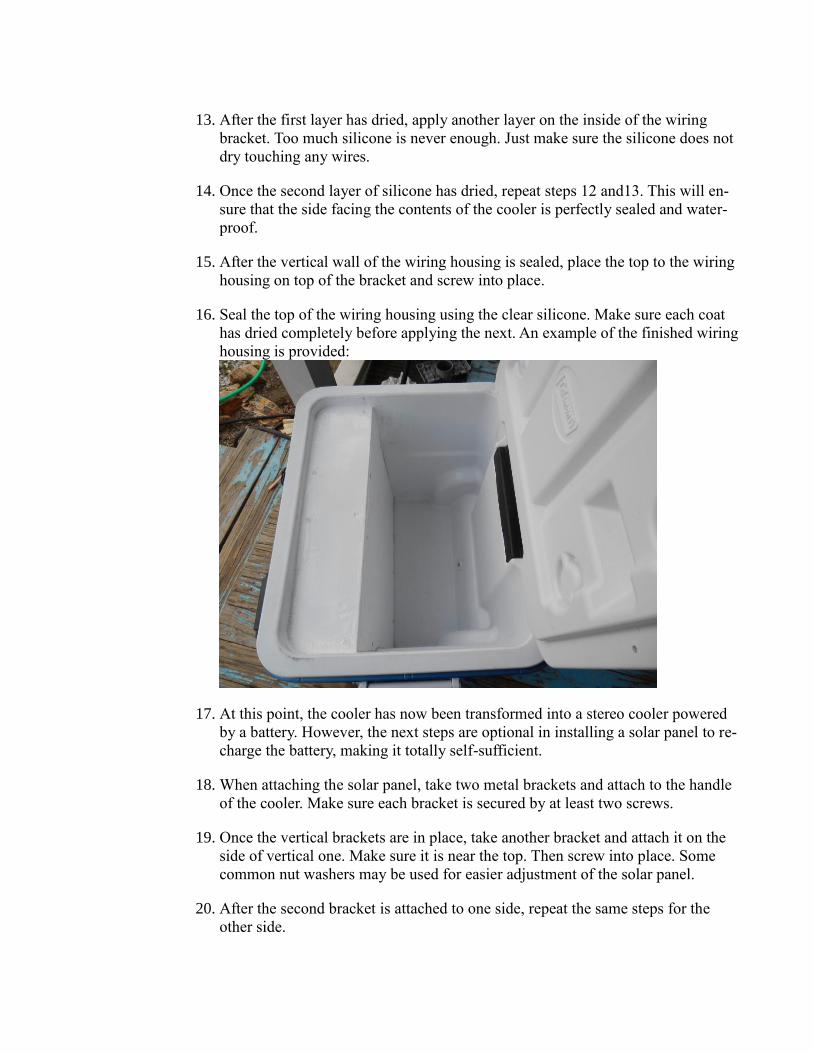
16. Seal the top of the wiring housing using the clear silicone. Make sure each coat
has dried completely before applying the next. An example of the finished wiring
housing is provided:
17. At this point, the cooler has now been transformed into a stereo cooler powered
by a battery. However, the next steps are optional in installing a solar panel to re-
charge the battery, making it totally self-sufficient.
18. When attaching the solar panel, take two metal brackets and attach to the handle
of the cooler. Make sure each bracket is secured by at least two screws.
19. Once the vertical brackets are in place, take another bracket and attach it on the
side of vertical one. Make sure it is near the top. Then screw into place. Some
common nut washers may be used for easier adjustment of the solar panel.
20. After the second bracket is attached to one side, repeat the same steps for the
other side.

21. Once both brackets are attached and easy to adjust screw the solar panel on to
the two adjustable brackets. Here is an example of the attached solar panel:
22. Then drill a hole in the top of the handle bar large enough to feed the solar panel
cord through.
23. Once the hole in the handle bar has drilled, move to the front of the cooler and
beneath the solar panel controller drill another hole at the same size as the handle
bar hole.
24. After both holes have been drilled, feed the solar panel cord through the handle
bar and down the pole on the side of the solar panel controller. Because all cool-
ers are hollow between the interior and the outer shell the cord should feed
through easily with plenty of ease.
25. Pulling the cord through may be a bit difficult, so the use of needle nose pliers
may be helpful. Once the end of the cord has been pulled through attach the end
to the solar panel controller.
26. After the solar panel is connected to the controller, attach the DC end of the con-
troller to the battery.
27. Now, let the cooler with the solar panel attached sit in the sun for an entire day.
Make sure cooler is on and that the solar panel controller is on to regulate the
amount of energy transferred from the solar panel to the battery.
28. Finally, once the battery is charged the Solar Sound Cooler is ready for a fun day
on the lake or a relaxing day tanning.

Prototype Problems and Solutions
Cutting the plywood to fit inside the cooler can be a bit difficult so a recommendation
would be to buy an identical cooler and saw it in half, then trace the shape onto the ply-
wood. Another solution would be to go to a local hardware store that cuts Plexiglas and
have the store cut a custom piece to fit inside the cooler. Along with a much more secure fit,
the Plexiglas would add some very cool aesthetics to the cooler.
Another difficulty faced when constructing the Solar Sound Cooler was the electrical wir-
ing. A very simple solution used was to simply google connected Part A to Part B and gen-
erally there were some helpful diagrams, and or forums used for guidance on the issue.
Future Design Adjustments
Using custom cut fiberglass or Plexiglas instead of plywood would add aesthetics to
the project, as well as reducing some cost in sealant and paint for the plywood.
Using marine grade speakers would add to the reliability of the product. Making sure
the speakers never go out due to being submerged in water.
Using a smaller, more efficient solar panel that could fit onto the top of the cooler
with a piece of Plexiglas covering it would add to the accessibility of the product
while also making it much more efficient.
Also, using a marine grade radio would be a great addition to the product. It would
help to ensure the reliability of the project and also would increase our profit mar-
gins.

Solar Sound vs. The Market
A majority of Solar Sound’s feasibility concerns were not focused on the constraints given
but also would there be a market for to sell the finished product in. After conducting a ridic-
ulous amount of research, Solar Sound has been able to determine the profit margins for in-
vestment opportunities. Solar Sound has also been able to determine the sigma level optimi-
zation by predicting through comparison profit returns vs. capital investments. From there
Solar Sound was able to establish where the product lies on the diminishing returns scale.

Financial Review Sheet
Car Stereo $20.00
Car Speakers $20
Solar Panel $99.95
Labor ($10/Hour) $20
Brackets $20
Screws $7
Clear Silicone $10
Rechargeable Bat-tery $33
Cooler $55
Plywood $15
The chart shows that the highest expenses are: the cooler itself, the solar panel, and the re-
chargeable battery. As a product that is always striving to be at the lead of the pack, Solar Sound
is constantly looking into alternatives to reduce manufacturing costs. As shown by the chart, the
total cost of production for the Solar Sound product is $299.95.
Manufacturing Costs
Car Stereo
Car Speakers
Solar Panel
Labor ($10/Hour)
Brackets
Screws
Clear Silicone
Rechargeable Battery
Cooler
Plywood

Out of 36 competitors’ products, the average price was around $456. However, not one of the
competitors in the market uses a solar panel. On average for a 75qt. cooler that had at least four
speakers that were not marine grade, the product sold for between $500 and $550. With marine
grade speakers in a 75qt. cooler the price increased dramatically to over $600. Yet still none of
the competitors thought of the idea to use a solar panel.
With the solar panel attached to our product we could expect an average price to be around
$600. If Solar Sound were to add marine grade speakers to the product the average price per
unit would increase to around $750. Along with the marine grade speakers, if Solar Sound were
to add a few additional upgrades—Plexiglas interior, remote control radio, and a music accesso-
ry charging station—as well as get a majority of the parts for under market value, the average
price per unit would be well over $900.
As the current product, Solar Sound could expect 53.6% profit margins. If Solar Sound were to
expand, as it should with—the addition of new technology, upgraded materials, and lower man-
ufacturing costs—the company will see an increase to 23.7% profit margins.
0
1
2
3
4
5
6
7
8
9
$200.00 $250.00 $300.00 $350.00 $400.00 $450.00 $500.00 $550.00 $600.00
Competitors in the Market
Competitors

Recommendations To The Board
A few things about humans as a species, people will always enjoy a bright sunny day if even for
a few minutes, and people always want the next new technology. This is an excellent time to in-
vest and take hold on a market that has longevity and room for adapting to the new technology
trends. An excellent idea would to be invest in a large factory building and purchasing capital
for production—machines to expedite the manufacturing process, labor to man the machines
and fine tune the products, and additional engineers to create new ideas for the next Solar
Sound cooler. Another excellent idea would be to invest in marketing and advertising; this
would increase the amount of sales, allowing for greater net revenue. Along with increasing
revenue, Solar Sound should look to expand into other markets for example, solar powered
phone accessories, heating and cooling systems, and additional solar powered technologies. The
last recommendation is for Solar Sound to seek investors but without giving up more than 35%
of the company with absolutely no royalty deals.