course information and instructor preparation title: … · a. cleveland police ordnance unit b....
TRANSCRIPT

TITLE: 2018 Semi-Automatic Pistol In-Service Training
HOURS: 8 Hours
GOAL: Provide marksmanship and handling training to all members of the Division
along with ensuing each member qualifies in accordance with O.P.O.T.A. Semi-
Automatic Pistol standards
TEACHING AIDS:
Lectern
Dry Erase Board
Red Handle Glock Training Pistol
OPOTA RQT-2 targets
Pistol cleaning supplies
Pistol range
Ammunition (@400 rounds/student)
One (1) Instructor per every four (4) students plus one (1) additional instructor to run the target
system
Computer / Projector / Screen
INSTRUCTIONAL TECHNIQUES:
Lecture
Classroom demonstrations
Live fire demonstrations
STUDENT MATERIALS:
Uniform of the Day
City issued service weapon (Glock Pistol) w/ 3 magazines
Belt, holster, magazine pouch used during the course of their duties on a daily basis, and City
issued ballistic protection
Hearing and eye protection
COURSE INFORMATION AND INSTRUCTOR PREPARATION

OPOTA Semi-Automatic Pistol Qualification Course: OPOTA Firearms Instructor Manual.
(01/01/2013) www.ohioattorneygeneral.gov/Law-enforcement/Services-for-Law-Enforcement
Glock “Safe Action” Pistol Armorer’s Manual (2011), section VII pistol nomenclature, section IX
field stripping, section XVII maintenance. www.glocktraining.com
REFERENCES

1. Using the Glock Semi-Automatic Pistol the student will successfully qualify by passing the O.P.O.T.A. requalification course of fire effective January 1, 2016
2. The student will understand and follow all safety rules when handling firearms
3. The student will demonstrate proper use of stance, grip, sight alignment, sight picture,
trigger management and after action while using the Glock Semi-Automatic Pistol
4. The student will demonstrate proper loading of the Glock Semi-Automatic Pistol
5. The student will demonstrate proper unloading of the Glock Semi-Automatic Pistol
STUDENT PERFORMANCE OBJECTIVES

I. INTRODUCTION
A. Cleveland Police Ordnance Unit
B. 2018 Pistol In-Service
C. Purpose of Course
1. To familiarize the student with the proper use
of the Glock semi-auto pistol and to have them
successfully requalify as per OPTOA standards
D. Student Performance Objectives
II. PRESENTATION
A. Four primary firearms safety rules
1. Treat all firearms as if they were loaded / know
the status of your firearm
2. Keep your finger off the trigger and outside the
trigger guard until you have made the conscious
decision to shoot
3. Keep your firearm pointed in a safe direction,
predetermined by your environment and situation.
4. Be aware of your surroundings, target,
backstop, and beyond
B. Clearing Process for the Semi-Automatic Pistol
1. Students will ensure their service weapon is
safe and clear upon handling it utilizing the safety
mantra of Safety, Ammo, Action, Inspect
C. Safety
1. Student will:
a) Treat all firearms as if they were loaded
INSTRUCTOR(S) Slide #1 SEE SPOs CLASSROOM Slide #2 Slide #3 Slide #4

/ know the status of your firearm
b) Keep your finger off the trigger and
outside the trigger guard until you have made
the conscious decision to shoot
c) Keep your firearm pointed in a safe
direction, predetermined by your environment
and situation
d) Be aware of your surroundings, target,
backstop, and beyond
D. Ammo
1. Remove the source of ammunition, which for
the semi-auto pistol is the magazine
E. Action
1. Student will:
a) “Run” the action (slide) several times (3
to 5) while observing the ejection port
b) Only one cartridge should be ejected (if
chamber is loaded)
(1) Multiple cartridges being ejected
indicates an error of not removing the
magazine and the student needs to stop
and remove the magazine
c) Lock the slide to the rear using the slide
stop located on the left side of the pistol
d) Right handed students will use their
right thumb
e) Left handed students can use their right
thumb or left index finger
F. Inspect
1. Student will:
Slide #5 Slide #6

a) Visibly/physically inspect the chamber
and magazine well to ensure they are clear
b) Break their focal attention by looking
away
c) Visibly/physically inspect the chamber
and magazine well to ensure they are clear a
second time to confirm they are both clear
d) Verbally announce clear if the pistol is
determine to be safe and clear
G. Ammunition Collection (Classroom)
1. Upon instruction student will:
a) Remove the magazine from their
weapon while the weapon remains in the
holster
b) Remove their two additional magazines
from their magazine pouch
c) Empty the ammunition from all three
magazines placing it into the provided trays,
bullet head facing for collection and inspection
d) Discrepancies shall be brought to the
attention of the Officer-in-Charge
H. Unload and Show Clear Process (Pistol Range)
1. Students will form a line where instructed on
the pistol range at which time the students will follow
the safety mantra of Safety, Ammo, Action, Inspect to
unload and clear their Glock pistols
2. Students will be asked if down range is clear
a) It will be emphasized to the students
that it is their responsibility to also ensure
down range, the target and backstop are safe
Slide #7 Slide #8 Close attention shall be given to ensure no student draws their weapon form their holster Slide #9 & 10

to draw and handle firearms
b) It will be emphasized to the students
that they are administratively unloading their
service weapons and that there is no need for
their finger to be on the trigger
3. Students will be given the command of
“Unload and Show Clear” and will be expected to
follow the safety mantra
I. Safety:
1. Students will:
a) Look down range to ensure it is to safe
draw their pistol
b) Draw their pistol making sure it is
pointed in a safe direction and their finger is
OFF the trigger
J. Ammo:
1. Students will remove the source of
ammunition by removing the magazine and placing it
into a pocket or checking the magazine well to ensure
that it is empty
K. Action:
1. Student will:
a) “Run” the action (slide) a minimum of
three times and a maximum of five times while
observing the ejection port
b) Only one cartridge should be ejected (if
chamber is loaded)
(1) Multiple cartridges being ejected
indicates an error of not removing the
magazine and the student needs to stop
and remove the magazine

c) Lock the slide to the rear using the slide
stop located on the left side of the pistol
(1) Right handed students will use
their right thumb
(2) Left handed students can use
their right thumb or left index finger
L. Inspect:
1. Student will:
a) Visibly/physically inspect the chamber
and magazine well to ensure they are clear
b) Break their focal attention by looking
away
c) Visibly/physically inspect the chamber
and magazine well to ensure they are clear a
second time to confirm they are both clear
d) Verbally announce clear if the pistol is
determine to be safe and clear
M. Disassemble the Glock pistol (Range)
1. Students will be given the command of
“Disassemble your Weapon”
2. The student will:
a) Ensure the pistol is safe and clear
b) Keep the pistol pointed in a safe
direction
c) Apply appropriate pressure to the
trigger
(1) It will be emphasized to the
students that the ONLY reason the
trigger is being depressed at this point is
Assistance shall be given to students experiencing difficulty with the proper disassemble of their Glock pistol

to disassemble the weapon and that the
must always be made safe and clear
prior to
d) Keeping the pistol pointed in a safe
direction, wrap their strong hand over top of
the slide while keeping their thumb behind the
grip at the top of the backstrap
e) Draw the slide to the rear
approximately 1/8 of an inch
f) With their reactionary hand grasp the
slide lock on both sides of the frame and pull
straight down.
g) Continue to apply downward pressure
on the both sides of the slide lock
h) Push the slide forward approximately a
½ inch releasing it past the slide stop
i) Grasp the frame with strong hand
(normal shooting grip)
j) Grasp the slide over the top with
reactionary hand
k) Pull the slide forward and off the frame
l) While apply slight pressure to the
trigger with the strong hand index finger if
resistance is felt
m) Holster the frame
n) While holding the slide upside down,
grasp the spring guide rod assembly and pull it
upward, removing it
o) Grasp the locking lugs of the barrel and
pull the barrel up and out of the slide
(1) Explain to the students that this

is as far as they are permitted to
disassemble the Glock pistol
p) Be instructed recover any live
ammunition from the ground and to place it
into appropriate containers
(1) It will be emphasized to the
students that no live ammunition is
permitted in the classroom and that all
ammunition must be purged prior to
returning to the classroom
q) Be instructed to return to the classroom
N. Classroom PowerPoint Presentation
O. Inspection of the Glock pistol
1. Discrepancies will be brought to Ordnance Unit
staff and be immediately rectified
P. Serial Numbers
1. The student will ensure the serial numbers on
the frame, slide and barrel match
Q. Slide
1. The Student will inspect:
a) For unusual wear and tear, cracks,
metal shavings and overall cleanliness
b) The front and rear sights for tightness
and alignment
c) For the firing pin pushing past the firing
pin safety by applying rearward and then
forward pressure to the firing pin lug
(1) The firing pin should not push
past the firing pin safety and protrude
through the hole in the breech face
Slide #11 Slide #12 Slide #13

d) For free movement of the firing pin by
depressing the firing pin safety and moving the
slide back and forth aggressively
(1) While holding the firing pin
safety in and moving the slide the
student firing pin should move freely
making a “clicking” sound
R. Barrel
1. The student will inspect:
a) For unusual wear and tear, cracks,
metal shavings and overall cleanliness
S. Spring Guide Rod Assembly
1. The student will inspect:
a) For unusual wear and tear, cracks,
metal shavings and overall cleanliness
2. The Spring Guide Rod Assembly should be dry
and clean of lubricant
3. The ends of the rod should be clear of any
damage such as cracks or pieces of plastic missing
T. Frame
1. The Student will inspect:
a) For unusual wear and tear, cracks,
metal shavings and overall cleanliness
U. Lubrication of the Glock pistol
1. Each area or item instructed to lubricate shall
only require one droplet of oil
a) Oil should be seen and felt, but if
gravity is affecting it, you have over lubricated
and some should be wiped back off
Slide #14 Slide #15 & 16

b) Over lubrication or lubrication of areas
meant to remain dry may cause contamination
of primers or powder and possible failure to
fire
V. Slide
1. One lubrication point
2. One drop on the inside of the “hood”
a) Area just forward of the ejection port
opening where the top of the barrel makes
contact
b) Spread the oil forward toward the
barrel opening
c) Caution should be used not to over oil
the slide and/or allow oil to get inside the
firing pin channel
d) The holes in the slide are NOT meant to
be lubricated
W. Barrel
1. Three lubrication points
2. One drop between the locking lugs
3. One drop on the 90 degree ledge just forward
of the hood
4. One drop an inch from the muzzle
a) Spread the oil all around the top,
bottom and sides of the barrel
X. Frame
1. Five lubrication points
2. One drop on each of the four rails
DEMONSTRATE: Students properly lubricate after demonstration Slide #17 Slide #18 Slide #19 & 20
3. One drop on the minus connector
Y. Reassemble the Glock pistol with a safety barrel block
in place
1. Prior to reassembling the Glock pistol a safety
barrel block will be inserted into the barrel
2. Safety barrel blocks allow the functioning of
the Glock pistol while ensuring no ammunition can be
loaded into the Glock pistol
3. Student will:
a) Insert the appropriate length safety
barrel block into the barrel from the chamber
end
b) Reinsert the barrel (with the safety
barrel block) back into the slide
c) Reinsert the spring guide rod ensuring it
is properly seated in the forward notch in front
of the locking lugs
d) Grasp the frame with strong hand
(normal shooting grip)
e) Grasp the slide over the top with
reactionary hand
f) Align the slide rail cutouts with the
forward frame rails
g) Slowly and carefully pull the slide
rearward ensuring the slide rail cutouts are
aligned with the rear frame rails
h) Pull the slide backward to its most
rearward point of travel and release it
Z. Function test
1. Done every time the Glock is disassembled and
Slide #21 Slide #22
reassemble to ensure the pistol is functioning properly
a) The student will:
(1) Ensure the pistol is safe and clear
using the safety mantra of safety, ammo,
action, inspect
(2) Observe the orange safety barrel
block in the barrel
(3) Release the slide forward
(4) Keep the pistol pointed in a safe
direct
(5) Apply appropriate pressure to
the trigger
(6) Hold the trigger to the rear
(7) While still holding the trigger to
the rear cycle the slide one time
(8) Slowly release the trigger hearing
and feeling a click as the trigger is reset
AA. Drawing or Deploying a Weapon
1. Consider the totality of the circumstances
a) What is the nature of the call?
b) Has the subject committed a
misdemeanor or felony?
c) Is the subject known to you?
(1) History of violence
(2) Mental disabilities
d) What is the subject’s demeanor?
(1) Angry
Slide #23 & 24 Slide #25 Slide 26
(2) Aggressive
(3) Yelling
(4) Depressed
(5) Sad
(6) Crying
(7) Silent
(8) Suicidal
(9) Distant
e) What level of cooperation are you
receiving from the subject?
(1) Are they ignoring you?
(2) Are they argumentative?
(3) Are they discarding lawful
orders?
f) Are weapons present?
(1) Does the subject possess a
weapon?
(2) Is a weapon within reach of the
subject?
g) Are the subject’s hands in view?
h) Number of subjects compared to
officer(s)
i) Proximity of the subject
j) Age of the subject
k) Size of subject
BB. Loading the Glock Semi-Automatic Pistol
Slide #27 Slide #28 Slide 29

1. Administrative Load
a) Completed when the weapon needs to
be loaded and there is no threat present
b) Students will be asked if down range is
clear
(1) It will be emphasized to the
students that it is their responsibility to
also ensure down range, the target and
backstop are safe to draw and handle
firearms
(2) It will be emphasized to the
students that they are administratively
loading their service weapons and that
there is no need for their finger to be on
the trigger
c) The shooter will:
(1) Be given the command of “Load
and Make Ready”
(2) Draw their weapon from their
holster bringing it to their “Workspace”
(a) Workspace is high chest,
to eye lever
(3) Retrieve a magazine from where
they normally store spare ammunition
(a) Usually their magazine
pouch
(4) Insert the retrieved magazine
into the magazine well and ensure it is
seated
(5) Charge the weapon by releasing
or charging the slide
Slide #30

(a) Right hand shooter:
(i) Slingshot
(a) Reach over
top of the slide
grasping it with
their left hand,
pulling backwards
and releasing it,
allowing it to
move forward on
its own
(ii) Depress the Slide
Stop
(a) Release the
slide by depressing
the slide stop with
their right or left
thumb
(b) Left hand shooter:
(i) Slingshot
(a) Reach over
top of the slide
grasping it with
their left hand,
pulling backwards
and releasing it,
allowing it to
move forward on
its own
(ii) Depress the Slide
Stop
(a) Release the
slide by depressing

the slide stop with
their left index
finger
2. Emergency Load
a) Completed when the weapon is
depleted of ammunition and the slide is locked
back
b) Should be done with a since of urgency
c) The shooter will:
(1) Recognize that the gun is empty
(2) Immediately eject the empty
magazine
(3) Bring the weapon to their
“Workspace”
(a) Workspace is high chest
to eye lever
(4) Retrieve a magazine from where
they normally store spare ammunition
(5) Usually their magazine pouch
(6) Insert the retrieved magazine
into the magazine well and ensure it is
seated
(7) Charge the weapon by releasing
the slide
(a) Right hand shooter:
(i) Slingshot
(a) Reach over
top of the slide
grasping it with
their left hand,
Slide #31 & #32
pulling backwards
and releasing it,
allowing it to
move forward on
its own
(ii) Depress the Slide
Stop
(a) Release the
slide by depressing
the slide stop with
their right or left
thumb
(b) Left hand shooter:
(i) Slingshot
(a) Reach over
top of the slide
grasping it with
their left hand,
pulling backwards
and releasing it,
allowing it to
move forward on
its own
(ii) Depress the Slide
Stop
(a) Release the
slide by depressing
the slide stop with
their left index
finger
(8) If a threat still remains reacquire
a perfect sight picture
3. Reload with Retention
a) Completed when the shooter has
addressed a threat with an unknown amount
of ammunition, there is a lull, and they are
concerned as to how much ammunition is left
in the weapon should the threat reattack or
another threat appear
(1) It should be emphasized to the
shooter that barring exigent
circumstances this should be done from
a place of cover
b) Should be done with a since of urgency
c) The shooter will:
(1) Recognize the threat is at least
temporarily stopped and no other threat
currently exists
(2) Remove their finger off the
trigger
(3) Move to cover (if available)
(4) Bring the weapon to their
“Workspace”
(a) Workspace is high chest,
to eye lever
(5) Retrieve a magazine from where
they normally store spare ammunition
ensuring they leave space in their hand
to grasp the ejected magazine from the
weapon
(a) Usually their magazine
pouch
(6) Bring the magazine up to the
weapon
Slide #34 & #35

(7) Depress the magazine release
button allowing the ejected magazine
from the weapon to fall into the palm of
their hand
(8) Insert the retrieved magazine
into the magazine well and ensure it is
seated
(9) Store the partial magazine
4. Reload without Retention
a) Completed when the shooter has
addressed a threat with an unknown amount
of ammunition, there is a lull, and they are
concerned as to how much ammunition is left
in the weapon should the threat reattack or
another threat appear
(1) It should be emphasized to the
shooter that barring exigent
circumstances this should be done from
a place of cover
b) Due to a true since of urgency or the
amount of ammunition that has been
discharged the magazine in the weapon is not
retained
c) The shooter will:
(1) Recognize the threat is at least
temporarily stopped and no other threat
currently exists
(2) Remove their finger off the
trigger
(3) Move to cover (if available)
(4) Bring the weapon to their
“Workspace”
Slide #36 & #37

(a) Workspace is high chest,
to eye lever
(5) Retrieve a magazine from where
they normally store spare ammunition
(a) Usually their magazine
pouch
(6) Bring the magazine up to the
weapon
(7) Depress the magazine release
button allowing the ejected magazine
from the weapon to fall to the ground
(8) Insert the retrieved magazine
into the magazine well and ensure it is
seated
CC. After Action
1. Once the shooter has determined the threat is
no longer a threat they shall ensure of 360 degree
awareness
a) Shooter shall:
(1) Bring the weapon back to high
ready position
(2) Scan and assess the area to the
right and left while taking and releasing
a deep breath
(3) Lower the muzzle to the Sul
position
(a) Modified hand position is
permitted as long as the shooter
maintains control of the weapon
(4) Check muzzle to ensure it is
Slide #38

pointed straight down between feet
(5) Continue to breathe slowly and
controlled while pivoting either back or
forward 180 degrees with one foot to
assess the entire area for additional
threats
(6) Remain in position sul while
scanning unless you encounter a threat
(7) After situational assessment
return to your original position at the
high ready
(8) If no other threats remain,
reluctantly holster
DD. Dry Fire Trigger Reset Drills (Classroom)
1. Done to assist the shooter in understanding
proper trigger manipulation and reset
2. The goal is to apply appropriate pressure to the
trigger and rest it during recoil
3. The trigger finger should remain in contact
with the face of the trigger
4. The student will:
a) Ensure the pistol is safe and clear using
the safety mantra of safety, ammo, action,
inspect
b) Observe the orange safety barrel block
in the barrel
c) Release the slide forward
5. Upon completion of the dry fire drills the Glock
pistol will be disassembled, the safety barrel block
removed and reassembled
Slide #40

EE. Dry fire drill
1. Keep the pistol pointed in a safe direct
2. Apply appropriate pressure to the trigger
3. Hold the trigger to the rear
4. While still hold the trigger to the rear cycle the
slide one time
5. Slowly release the trigger hearing and feeling a
click as the trigger is reset, noting the distance they
had to release trigger to allow it to reset
6. While keeping their trigger finger in contact
with the face of the trigger, apply appropriate
pressure to the trigger again
7. Hold the trigger to the rear
8. While still hold the trigger to the rear cycle the
slide one time
9. Slowly release the trigger hearing and feeling a
click as the trigger is reset, noting the distance they
had to release trigger to allow it to reset
FF. Live Fire Training (Pistol Range)
1. Ball and Dummy Live Fire Drill
a) The student will:
(1) Be issued twelve dummy training
cartridges to be loaded throughout their
three magazines
(2) Be assigned a partner who will
load their magazines while they load
their partner’s magazines
(3) Be instructed to fully load all
three magazines with both live and
Start with a new OPOTA-RQT2 Target and replace as needed

dummy cartridges
(a) It will be emphasized to
the students to evenly distribute
the dummy cartridges amongst
all three magazines
(4) Be instructed to return the
magazines to their assigned partner
once loaded
(5) Instructed to place two
magazines in their magazine pouch and
one in their pocket
(6) Be instructed to fall in on the 18
foot firing line
(7) Will be asked if down range is
clear
(a) It will be emphasized to
the students that it is their
responsibility to also ensure down
range, the target and backstop
are safe for live fire training
(8) Will be given the command of
“Load and Make Ready”
(a) It will be emphasized to
the students that they are
administratively loading their
service weapons and that there is
no need for their finger to be on
the trigger
(b) It will be emphasized to
the students that once they have
loaded and made ready their
weapons they are to complete
after action checks and return to

the holster
b) Will be instructed to
(a) Shoot the amount of
rounds instructed
(b) Treat a failure to fire as
an opportunity to observe any
misaligning of the sights as they
apply trigger pressure
(c) Treat the failure to fire as
a phase one malfunction by:
(d) Taking a flanking step
(e) Removing their finger off
the trigger
(f) Tapping the bottom of the
magazine well
(g) Racking the slide once
(h) Reobtain a proper sight
alignment and sight picture
(i) Cover the target until the
target turns away or shoot again
if instructed to shoot more than
one round
(2) Complete after action to the
holster
c) Instructors will pay close attention to
the shooter and target to observe errors in
regard to:
(1) Stance
(2) Grip
(3) Sight Alignment
(4) Sight Picture
(5) Trigger management
d) Instructors will provide instruction,
guidance and assistance to ensure any errors
are corrected
2. First Magazine (Singles)
a) On the turning of the target the shooter
will:
(1) Properly draw while
simultaneously taking a flanking step
(2) Obtain a proper stance
(3) Obtain a proper grip
(4) Obtain proper sight alignment
and sight picture
(5) Apply appropriate pressure to
the trigger
(a) If the weapon discharges
a live cartridge the shooter will:
(i) Recover from the
recoil
(ii) Reobtain a proper
sight alignment and sight
picture
(iii) Cover the target
until the target turns
away
(b) If the weapon fails to fire
treat, it as a phase one
malfunction
b) Complete after action to the holster
3. Second Magazine (Controlled Pairs)
a) On the turning of the target the shooter
will:
(1) Properly draw while
simultaneously taking a flanking step
(2) Obtain a proper stance
(3) Obtain a proper grip
(4) Obtain proper sight alignment
and sight picture
(5) Apply appropriate pressure to
the trigger for the first shot
(a) If the weapon discharges
a live cartridge the shooter will:
(i) Recover from the
recoil
(ii) Reobtain a proper
sight alignment and sight
picture
(iii) Apply appropriate
pressure to the trigger for
the second shot
(iv) Recover from the
recoil
(v) Reobtain a proper
sight alignment and sight
picture
(vi) Cover the target
until the target turns
away

(b) If the weapon fails to fire
treat, it as a phase one
malfunction
(6) Apply appropriate pressure to
the trigger for the second shot
(a) If the weapon discharges
a live cartridge the shooter will:
(i) Recover from the
recoil
(ii) Reobtain a proper
sight alignment and sight
picture
(iii) Apply appropriate
pressure to the trigger for
the second shot
(iv) Recover from the
recoil
(v) Reobtain a proper
sight alignment and sight
picture
(vi) Cover the target
until the target turns
away
(b) If the weapon fails to fire,
treat it as a phase one
malfunction
b) Complete after action to the holster
4. Third Magazine (Controlled Triples)
a) On the turning of the target the shooter
will:

(1) Properly draw while
simultaneously taking a flanking step
(2) Obtain a proper stance
(3) Obtain a proper grip
(4) Obtain proper sight alignment
and sight picture
(5) Apply appropriate pressure to
the trigger for the first shot
(a) If the weapon discharges
a live cartridge the shooter will:
(i) Recover from the
recoil
(ii) Reobtain a proper
sight alignment and sight
picture
(iii) Apply appropriate
pressure to the trigger for
the second shot
(iv) Recover from the
recoil
(v) Reobtain a proper
sight alignment and sight
picture
(vi) Cover the target
until the target turns
away
(b) If the weapon fails to fire
treat, it as a phase one
malfunction
(6) Apply appropriate pressure to
the trigger for the second shot
(a) If the weapon discharges
a live cartridge the shooter will:
(i) Recover from the
recoil
(ii) Reobtain a proper
sight alignment and sight
picture
(iii) Apply appropriate
pressure to the trigger for
the second shot
(iv) Recover from the
recoil
(v) Reobtain a proper
sight alignment and sight
picture
(vi) Cover the target
until the target turns
away
(b) If the weapon fails to fire,
treat it as a phase one
malfunction
(7) Apply appropriate pressure to
the trigger for the third shot
(a) If the weapon discharges
a live cartridge the shooter will:
(i) Recover from the
recoil
(ii) Reobtain a proper
sight alignment and sight
picture

(iii) Apply appropriate
pressure to the trigger for
the second shot
(iv) Recover from the
recoil
(v) Reobtain a proper
sight alignment and sight
picture
(vi) Cover the target
until the target turns
away
(b) If the weapon fails to fire,
treat it as a phase one
malfunction
b) Complete after action to the holster
5. Intermediate Distance (30’) Live Fire Drill
a) The student will:
(1) Be instructed to load fully load all
three magazines
(2) Be instructed to place two
magazines in their magazine pouch and
one in their pocket
(3) Instructed to fall in on the 30 foot
firing line
(4) Be asked if down range is clear
(a) It will be emphasized to
the students that it is their
responsibility to also ensure down
range, the target and backstop
are safe for live fire training

(5) Be given the command of “Load
and Make Ready”
(a) It will be emphasized to
the students that they are
administratively loading their
service weapons and that there is
no need for their finger to be on
the trigger
(b) It will be emphasized to
the students that once they have
loaded and made ready their
weapons they are to complete
after action checks and return to
the holster
b) Be instructed to:
(a) Shoot random amounts of
rounds within random time limits
c) Instructors will pay close attention to
the shooter and target to observe errors in
regard to:
(1) Stance
(2) Grip
(3) Sight Alignment
(4) Sight Picture
(5) Trigger management
d) Instructors will provide instruction,
guidance and assistance to ensure any errors
are corrected
6. Long Distance (50’) Live Fire Drill
a) The student will:

(1) Be instructed to load fully load all
three magazines
(2) Be instructed to place two
magazines in their magazine pouch and
one in their pocket
(3) Instructed to fall in on the 50 foot
firing line
(4) Be asked if down range is clear
(a) It will be emphasized to
the students that it is their
responsibility to also ensure down
range, the target and backstop
are safe for live fire training
(5) Be given the command of “Load
and Make Ready”
(a) It will be emphasized to
the students that they are
administratively loading their
service weapons and that there is
no need for their finger to be on
the trigger
(b) It will be emphasized to
the students that once they have
loaded and made ready their
weapons they are to complete
after action checks and return to
the holster
b) Be instructed to:
(a) Shoot random amounts of
rounds within random time limits
c) Instructors will pay close attention to
the shooter and target to observe errors in
regard to:
(1) Stance
(2) Grip
(3) Sight Alignment
(4) Sight Picture
(5) Trigger management
d) Instructors will provide instruction,
guidance and assistance to ensure any errors
are corrected
7. One Hand Shooter Live Fire Drill
a) The student will:
(1) Be instructed to load fully load all
three magazines
(2) Be instructed to place two
magazines in their magazine pouch and
one in their pocket
(3) Instructed to fall in on the 12 foot
firing line
(4) Be asked if down range is clear
(a) It will be emphasized to
the students that it is their
responsibility to also ensure down
range, the target and backstop
are safe for live fire training
(5) Be given the command of “Load
and Make Ready”
(a) It will be emphasized to
the students that they are
administratively loading their
service weapons and that there is

no need for their finger to be on
the trigger
(b) It will be emphasized to
the students that once they have
loaded and made ready their
weapons they are to complete
after action checks and return to
the holster
b) Be instructed to:
(a) Shoot random amounts of
rounds within random time limits
initially with the Strong Hand and
then their Support Hand
c) Instructors will pay close attention to
the shooter and target to observe errors in
regard to:
(1) Stance
(2) Grip
(3) Sight Alignment
(4) Sight Picture
(5) Trigger management
d) Instructors will provide instruction,
guidance and assistance to ensure any errors
are corrected
8. Failure to Stop / Body Armory Live Fire Drill
a) The purpose of this drill is for the
student to understand that well placed rounds
to the preferred area (high center mass) of the
target may not always stop or incapacitate a
threat and that the student will be required to
change their aiming point and delivery an
accurate shot to another area (head or pelvic
socket) to stop or incapacitate the threat
b) The student will:
(1) Be instructed to load fully load all
three magazines
(2) Be instructed to place two
magazines in their magazine pouch and
one in their pocket
(3) Instructed to fall in on the 12 foot
firing line
(4) Be asked if down range is clear
(a) It will be emphasized to
the students that it is their
responsibility to also ensure down
range, the target and backstop
are safe for live fire training
(5) Be given the command of “Load
and Make Ready”
(a) It will be emphasized to
the students that they are
administratively loading their
service weapons and that there is
no need for their finger to be on
the trigger
(b) It will be emphasized to
the students that once they have
loaded and made ready their
weapons they are to complete
after action checks and return to
the holster
c) Be instructed to:
(a) Shoot two rounds to the
high center mass

(b) Transition and aim in at
the center of the head
(c) Shoot one well aimed shot
to the head within random time
limits
d) Instructors will pay close attention to
the shooter and target to observe errors in
regard to:
(1) Stance
(2) Grip
(3) Sight Alignment
(4) Sight Picture
(5) Trigger management
(6) Proper sight transition to the
head
e) Instructors will provide instruction,
guidance and assistance to ensure any errors
are corrected
9. Reload (12’) Live Fire Drill
a) The purpose of this drill is to simply
understand the proper reload process
b) Students will not fire again after the
weapon has been reloaded
c) The student will:
(1) Be instructed to load fully load
two of their three magazines, leaving
one completely empty
(2) Be instructed to place two
magazines in their magazine pouch and

the empty one in their pocket
(3) Instructed to fall in on the 12 foot
firing line
(4) Be asked if down range is clear
(a) It will be emphasized to
the students that it is their
responsibility to also ensure down
range, the target and backstop
are safe for live fire training
d) Be instructed to:
(a) Load random amounts of
rounds into their empty magazine
and to insert that magazine into
their holstered weapon, ensuring
it is seated
(b) Address their target upon
its turning until they run empty
(c) Conduct a safe, effective
and efficient reload
(d) Cover their target until
the target turns away
(e) Complete after action to
the holster
e) Instructors will pay close attention to
the shooter and target to observe errors in
regard to:
(1) Stance
(2) Grip
(3) Sight Alignment
(4) Sight Picture

(5) Trigger management
(6) Proper reload procedures
f) Instructors will provide instruction,
guidance and assistance to ensure any errors
are corrected
10. Reload (18’) Live Fire Drill
a) The purpose of this drill is to be able to
fire a random amount of rounds until the
weapon runs empty, realize the weapon is
empty, conduct a proper reload and fire one
additional round after the reload
b) The student will:
(1) Be instructed to load fully load
two of their three magazines, leaving
one completely empty
(2) Be instructed to place two
magazines in their magazine pouch and
the empty one in their pocket
(3) Instructed to fall in on the 18 foot
firing line
(4) Be asked if down range is clear
(a) It will be emphasized to
the students that it is their
responsibility to also ensure down
range, the target and backstop
are safe for live fire training
(5) Be given the command of “Load
and Make Ready”
(a) It will be emphasized to
the students that they are
administratively loading their

service weapons and that there is
no need for their finger to be on
the trigger
(b) It will be emphasized to
the students that once they have
loaded and made ready their
weapons they are to complete
after action checks and return to
the holster
c) Be instructed to:
(a) Address their target upon
its turning until they run empty,
conduct a proper reload and
address the target with one
additional round
(b) Cover their target until
the target turns away
(c) Complete after action to
the holster
d) Instructors will pay close attention to
the shooter and target to observe errors in
regard to:
(1) Stance
(2) Grip
(3) Sight Alignment
(4) Sight Picture
(5) Trigger management
(6) Proper reload procedures
e) Instructors will provide instruction,
guidance and assistance to ensure any errors
are corrected

11. Reload (20’) Live Fire Drill
a) The purpose of this drill is to be able to
fire three rounds, realize the weapon is empty,
conduct a proper reload and fire three more
rounds within 12 seconds as required during
the OPOTA qualification course
b) The student will:
(1) Be instructed to load fully load
two of their three magazines, leaving
one completely empty
(2) Be instructed to place two
magazines in their magazine pouch and
the empty one in their pocket
(3) Instructed to fall in on the 20 foot
firing line
(4) Be asked if down range is clear
(a) It will be emphasized to
the students that it is their
responsibility to also ensure down
range, the target and backstop
are safe for live fire training
(5) Be given the command of “Load
and Make Ready”
(a) It will be emphasized to
the students that they are
administratively loading their
service weapons and that there is
no need for their finger to be on
the trigger
(b) It will be emphasized to
the students that once they have
loaded and made ready their
weapons they are to complete
after action checks and return to
the holster
c) Be instructed to:
(a) Address their target upon
its turning until they run empty,
conduct a proper reload and
address the target with three
additional rounds within 12
seconds
(b) Cover their target until
the target turns away
(c) Complete after action to
the holster
d) Instructors will pay close attention to
the shooter and target to observe errors in
regard to:
(1) Stance
(2) Grip
(3) Sight Alignment
(4) Sight Picture
(5) Trigger management
(6) Proper reload procedures
e) Instructors will provide instruction,
guidance and assistance to ensure any errors
are corrected
III. OPOTA QUALIFICATION PISTOL PRACTICE TEST
A. Stage 1
1. 4 foot line

2. 5 seconds
3. 3 rounds
4. Glock pistol fully loaded in the holster
5. On the turning of the target the shooter shall:
a) Draw to the close quarter’s retention
position
b) Ensure their reactionary hand is up out
of the way and protecting them
c) Fire 3 rounds into the preferred area of
the target
d) Upon firing the third shot create
distance by taking one step back
e) Obtain an appropriate sight alignment
and sight picture and cover the target until it
turns away
f) Complete after action to the holster
B. Stage 2
1. 9 foot line
2. 6 seconds
3. 3 rounds
4. Glock pistol loaded in the holster
5. On the turning of the target the shooter shall:
a) Flanking step while simultaneously
drawing their pistol to full presentation
b) Obtain proper sight alignment / sight
picture
c) Fire 2 rounds into the preferred area of
the target
d) Transition the pistol and obtain proper
sight alignment / sight picture to the head
e) Fire 1 well aimed shot to the head
f) Reobtain an appropriate sight
alignment and sight picture and cover the
target until it turns away
g) Complete after action to the holster
C. Stage 3A
1. 12 foot line
2. 8 seconds
3. 4 rounds
4. Glock pistol loaded in the holster
5. Reaction hand is placed across the chest
6. On the turning of the target the shooter shall:
a) Flanking step while simultaneously
drawing their pistol to full presentation with
their strong hand only
b) Obtain proper sight alignment / sight
picture
c) Fire 4 rounds into the preferred area of
the target
d) Reobtain an appropriate sight
alignment and sight picture and cover the
target until it turns away
e) Complete after action to the holster
D. Stage 3B
1. 12 foot line
2. 7 seconds
3. 4 rounds
4. Glock pistol loaded and in the reaction hand
5. Strong hand is placed across the chest
6. On the turning of the target the shooter shall:
a) Flanking step while presenting their
pistol to full presentation with their reaction
hand only
b) Obtain proper sight alignment / sight
picture
c) Fire 4 rounds into the preferred area of
the target
d) Reobtain an appropriate sight
alignment and sight picture and cover the
target until it turns away
e) Transfer the pistol back to their strong
hand
f) Complete after action to the holster
E. Stage 4
1. 20 foot line
2. 12 seconds
3. 6 rounds total (3 rounds prior to reload and 3
rounds after the reload)
4. Glock pistol loaded in the holster (staged with
1 round in the chamber and 2 additional rounds in the
magazine
5. On the turning of the target the shooter shall:
a) Flanking step while simultaneously
drawing their pistol to full presentation
b) Obtain proper sight alignment / sight
picture
c) Fire 3 rounds into the preferred area of
the target
d) Conduct a proper reload
e) Reobtain an appropriate sight
alignment and sight picture
f) Fire 3 additional rounds into the
preferred area of the target
g) Reobtain an appropriate sight
alignment and sight picture and cover the
target until it turns away
h) Complete after action to the holster
F. Stage 5
1. 30 foot line
2. 8 seconds
3. 3 rounds
4. Glock pistol loaded in the holster
5. On the turning of the target the shooter shall:
a) Flanking step while simultaneously
drawing their pistol to full presentation
b) Obtain proper sight alignment / sight
picture
c) Fire 3 rounds into the preferred area of
the target
d) Reobtain an appropriate sight
alignment and sight picture and cover the
target until it turns away
e) Complete after action to the holster
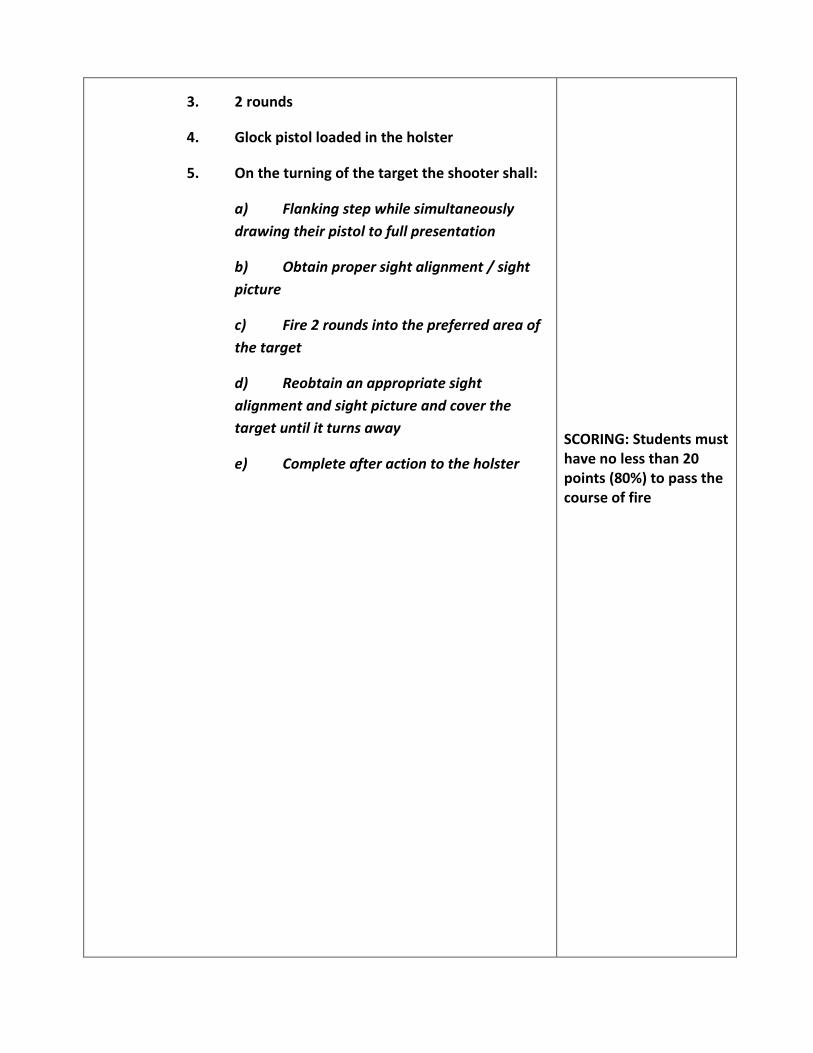
G. Stage 6
1. 50 foot line
2. 8 seconds
3. 2 rounds
4. Glock pistol loaded in the holster
5. On the turning of the target the shooter shall:
a) Flanking step while simultaneously
drawing their pistol to full presentation
b) Obtain proper sight alignment / sight
picture
c) Fire 2 rounds into the preferred area of
the target
d) Reobtain an appropriate sight
alignment and sight picture and cover the
target until it turns away
e) Complete after action to the holster
IV. OPOTA QUALIFICATION PISTOL TEST
A. Stage 1
1. 4 foot line
2. 5 seconds
3. 3 rounds
4. Glock pistol fully loaded in the holster
5. On the turning of the target the shooter shall:
a) Draw to the close quarter’s retention
position
New OPOTA RQT2 target to be used for test

b) Ensure their reactionary hand is up out
of the way and protecting them
c) Fire 3 rounds into the preferred area of
the target
d) Upon firing the third shot create
distance by taking one step back
e) Obtain an appropriate sight alignment
and sight picture and cover the target until it
turns away
f) Complete after action to the holster
B. Stage 2
1. 9 foot line
2. 6 seconds
3. 3 rounds
4. Glock pistol loaded in the holster
5. On the turning of the target the shooter shall:
a) Flanking step while simultaneously
drawing their pistol to full presentation
b) Obtain proper sight alignment / sight
picture
c) Fire 2 rounds into the preferred area of
the target
d) Transition the pistol and obtain proper
sight alignment / sight picture to the head
e) Fire 1 well aimed shot to the head
f) Reobtain an appropriate sight
alignment and sight picture and cover the
target until it turns away

g) Complete after action to the holster
C. Stage 3A
1. 12 foot line
2. 8 seconds
3. 4 rounds
4. Glock pistol loaded in the holster
5. Reaction hand is placed across the chest
6. On the turning of the target the shooter shall:
a) Flanking step while simultaneously
drawing their pistol to full presentation with
their strong hand only
b) Obtain proper sight alignment / sight
picture
c) Fire 4 rounds into the preferred area of
the target
d) Reobtain an appropriate sight
alignment and sight picture and cover the
target until it turns away
e) Complete after action to the holster
D. Stage 3B
1. 12 foot line
2. 7 seconds
3. 4 rounds
4. Glock pistol loaded and in the reaction hand
5. Strong hand is placed across the chest
6. On the turning of the target the shooter shall:
a) Flanking step while presenting their
pistol to full presentation with their reaction
hand only
b) Obtain proper sight alignment / sight
picture
c) Fire 4 rounds into the preferred area of
the target
d) Reobtain an appropriate sight
alignment and sight picture and cover the
target until it turns away
e) Transfer the pistol back to their strong
hand
f) Complete after action to the holster
E. Stage 4
1. 20 foot line
2. 12 seconds
3. 6 rounds total (3 rounds prior to reload and 3
rounds after the reload)
4. Glock pistol loaded in the holster (staged with
1 round in the chamber and 2 additional rounds in the
magazine
5. On the turning of the target the shooter shall:
a) Flanking step while simultaneously
drawing their pistol to full presentation
b) Obtain proper sight alignment / sight
picture
c) Fire 3 rounds into the preferred area of
the target
d) Conduct a proper reload

e) Reobtain an appropriate sight
alignment and sight picture
f) Fire 3 additional rounds into the
preferred area of the target
g) Reobtain an appropriate sight
alignment and sight picture and cover the
target until it turns away
h) Complete after action to the holster
F. Stage 5
1. 30 foot line
2. 8 seconds
3. 3 rounds
4. Glock pistol loaded in the holster
5. On the turning of the target the shooter shall:
a) Flanking step while simultaneously
drawing their pistol to full presentation
b) Obtain proper sight alignment / sight
picture
c) Fire 3 rounds into the preferred area of
the target
d) Reobtain an appropriate sight
alignment and sight picture and cover the
target until it turns away
e) Complete after action to the holster
G. Stage 6
1. 50 foot line
2. 8 seconds
3. 2 rounds
4. Glock pistol loaded in the holster
5. On the turning of the target the shooter shall:
a) Flanking step while simultaneously
drawing their pistol to full presentation
b) Obtain proper sight alignment / sight
picture
c) Fire 2 rounds into the preferred area of
the target
d) Reobtain an appropriate sight
alignment and sight picture and cover the
target until it turns away
e) Complete after action to the holster
SCORING: Students must have no less than 20 points (80%) to pass the course of fire

HANDOUT #1 – FOUR PRIMARY FIREARMS SAFETY RULES
FOUR PRIMARY FIREARMS SAFETY RULES
Treat all firearms as if they were loaded / know the
status of your firearm
Keep your finger off the trigger and outside the trigger
guard until you have made the conscious decision to
shoot
Keep your firearm pointed in a safe direction,
predetermined by your environment and situation.
Be aware of your surroundings, target, backstop, and
beyond

Safety / Ammo / Action / Inspect
Safety
Treat all firearms as if they were loaded / know the status of your firearm
Keep your finger off the trigger and outside the trigger guard until you have
made the conscious decision to shoot
Keep your firearm pointed in a safe direction, predetermined by your
environment and situation
Be aware of your surroundings, target, backstop, and beyond
Ammo
Remove the source of ammunition, which for the semi-auto pistol is the
magazine
Action
“Run” the action (slide) several times (3 to 5) while observing the ejection
port
Only one cartridge should be ejected (if chamber is loaded)
Multiple cartridges being ejected indicates an error of not removing the
magazine and the student needs to stop and remove the magazine
Lock the slide to the rear using the slide stop located on the left side of the
pistol
Right handed students will use their right thumb
Left handed students can use their right thumb or left index finger
Inspect
Visibly/physically inspect the chamber and magazine well to ensure they
are clear
Break their focal attention by looking away
Visibly/physically inspect the chamber and magazine well to ensure they
are clear a second time to confirm they are both clear
Verbally announce clear if the pistol is determine to be safe and clear
HANDOUT #2 – SAFETY MANTRA

Various Live Fire Drills
OPOTA State Requalification Course of Fire Semi-Automatic Pistol
PRACTICE EXERCISE

TEST
OPOTA State Requalification Course of Fire Semi-Automatic Pistol