comsoft testo 174 · software - rs components...
TRANSCRIPT
ComSoft testo 174 · Software
Instruction manual

2
1 Contents
3
Pos: 1 /TD/Überschriften/1. Inhalt @ 0\mod_1177587817070_79.doc @ 1243 @ 1
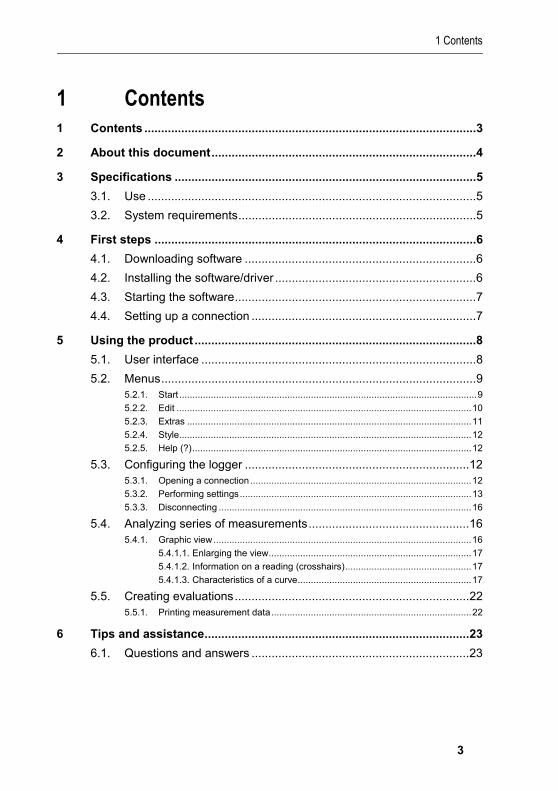
1 Contents 1 Contents ...................................................................................................3
2 About this document...............................................................................4
3 Specifications ..........................................................................................5 3.1. Use ..................................................................................................5 3.2. System requirements.......................................................................5
4 First steps ................................................................................................6 4.1. Downloading software .....................................................................6 4.2. Installing the software/driver ............................................................6 4.3. Starting the software........................................................................7 4.4. Setting up a connection ...................................................................7
5 Using the product ....................................................................................8 5.1. User interface ..................................................................................8 5.2. Menus..............................................................................................9
5.2.1. Start .................................................................................................................9 5.2.2. Edit ................................................................................................................10 5.2.3. Extras ............................................................................................................11 5.2.4. Style...............................................................................................................12 5.2.5. Help (?)..........................................................................................................12
5.3. Configuring the logger ...................................................................12 5.3.1. Opening a connection ....................................................................................12 5.3.2. Performing settings........................................................................................13 5.3.3. Disconnecting ................................................................................................16
5.4. Analyzing series of measurements................................................16 5.4.1. Graphic view..................................................................................................16
5.4.1.1. Enlarging the view.............................................................................17 5.4.1.2. Information on a reading (crosshairs)................................................17 5.4.1.3. Characteristics of a curve..................................................................17
5.5. Creating evaluations......................................................................22 5.5.1. Printing measurement data............................................................................22
6 Tips and assistance...............................................................................23 6.1. Questions and answers .................................................................23
Pos: 2 /TD/--- Seitenwechsel --- @ 0\mod_1173774430601_0.doc @ 283 @

2 About this document
4
Pos: 3 /TD/Überschriften/2. (Software) Zu diesem Dokument @ 0\mod_1190270753109_79.doc @ 4962 @ 1
2 About this document Pos: 4 /TD/Sicherheit und Umwelt/Zu diesem Dokument/Verwendung (Standard) @ 0\mod_1173775068554_79.doc @ 337 @ 5
Use
> Please read this documentation through carefully and familiarize yourself with the product before putting it to use. Pay particular attention to the safety instructions and warning advice in order to prevent injuries and damage to the products.
> Keep this document to hand so that you can refer to it when necessary.
> Hand this documentation on to any subsequent users of the product.
Pos: 5 /TD/(Warn-)Hinweise/Software/Hinweis: Windows-Kenntnisse @ 0\mod_1187693861218_79.doc @ 2450 @
Knowledge of Windows® operating systems is required when working with the software.
Pos: 6 /TD/Sicherheit und Umwelt/Zu diesem Dokument/Symbole und Schreibkonv. Software [Standard] @ 0\mod_1190203332543_79.doc @ 4883 @ 5
Symbols and writing standards
Representa-tion
Explanation
Note: Basic or further information.
1. ...
2. ...
Action: more steps, the sequence must be followed.
> ... Action: a step or an optional step.
- ... Result of an action.
Menu Elements of the program interface.
[OK] Buttons of the program interface.
... | ... Functions/paths within a menu.
“...” Example entries Pos: 7 /TD/--- Seitenwechsel --- @ 0\mod_1173774430601_0.doc @ 283 @

3 Specifications
5
Pos: 8 /TD/Überschriften/3. Leistungsbeschreibung @ 0\mod_1173774791554_79.doc @ 301 @ 1
3 Specifications Pos: 9 /TD/Überschriften/3.1 Verwendung @ 0\mod_1176211016437_79.doc @ 695 @ 2
3.1. Use Pos: 10 /TD/Leistungsbeschreibung/Verwendung/testo ComSoft 4-174 @ 5\mod_1267452186083_79.doc @ 59165 @
The ComSoft testo 174 software is used for storing, reading out and evaluating individual readings and series of measurements. The graphical presentation of readings is the main task of this program.
Readings are measured with Testo measuring instruments and transmitted via the serial interface to the PC.
They are read out using the ComSoft testo 174 software, which activates the interfaces and provides all functions.
Pos: 11 /TD/Überschriften/3.2 Systemvoraussetzungen @ 0\mod_1187269645125_79.doc @ 2385 @ 2
3.2. System requirements Pos: 12 /TD/Leistungsbeschreibung/Systemvoraussetzungen/Systemvoraussetzungen ComSoft t174 @ 6\mod_1270109527006_79.doc @ 60983 @ 55
Operating system
The software can be run on all operating systems as of Windows®2000 SP4.
Computer
The computer must meet the requirements of the respective operating system. In addition, the following requirements must be met:
• USB 1.1 or higher interface
• Internet Explorer 5.0 SP1 or higher Pos: 13 /TD/--- Seitenwechsel --- @ 0\mod_1173774430601_0.doc @ 283 @

4 First steps
6
Pos: 14 /TD/Überschriften/5. Erste Schritte @ 0\mod_1173774895039_79.doc @ 319 @ 1
4 First steps Pos: 15 /TD/Erste Schritte/Comfort Software/ComSoft 4-174/Software herunterladen @ 5\mod_1267521355454_79.doc @ 59460 @
4.1. Downloading software
The ComSoft testo 174 software can be ordered on CD (article no. 0572 0580) if the download from the Internet is not desired.
1. Download ComSoft testo 174 software in the Internet free of charge at www.testo.com, International, Service&Support | Download Center (registration required).
2. Save Zip file with software. Pos: 16 /TD/Überschriften/5.1 Software / Treiber installieren @ 0\mod_1187269789390_79.doc @ 2394 @ 2
4.2. Installing the software/driver Pos: 17 /TD/(Warn-)Hinweise/Software/Hinweis: Adminrechte zur Installation @ 0\mod_1187694128421_79.doc @ 2461 @
Administrator rights are required for installation.
Pos: 18 /TD/Erste Schritte/Comfort Software/ComSoft 4-174/Software installieren_2Treiber @ 6\mod_1270732674153_79.doc @ 61043 @ 55
Installing the software
1. Select the folder in which the downloaded Zip file was saved.
2. Extract Zip file.
3. Start Setup.exe file.
4. Follow the directions of the installation wizard.
When installing under Vista, note the following steps during the installation procedure:
• The User Account Control window opens.
> Click on [Continue].
• The Windows Security window opens.
> Select Install this driver software anyway.
5. To finish the software installation, click on [Finish].
Installing the driver
1. Select the folder in which the extracted Zip file was saved.
2. Start Setup USB Driver.exe file.
3. Follow the directions of the installation wizard.
4. To finish the driver installation, click on [Finish].

4 First steps
7
Pos: 19 /TD/Überschriften/5.2 Software starten @ 0\mod_1187269829421_79.doc @ 2403 @ 2
4.3. Starting the software Pos: 20 /TD/Erste Schritte/Comfort Software/ComSoft 4-174/Software starten @ 5\mod_1267521322533_79.doc @ 59396 @ 5
Starting ComSoft
The user interface of the software is opened in the language of the operating system if this is supported. If the operating system language is not supported, the user interface is in English.
IF you have already installed a ComSoft version (e.g. ComSoft V4 Basic) on the computer, you can also use this with the loggers testo 174T and testo 174H after the installation of ComSoft testo 174.
> Click on [Start] | Programs (Windows XP) or All Programs (Windows Vista) | Testo | Comfort Software.
Under Windows Vista, the User Account Control window is opened during the initial start of the software.
> Click on Allow. Pos: 21 /TD/Erste Schritte/testo 174-neu/Verbindung einrichten @ 5\mod_1263212180290_79.doc @ 54279 @
4.4. Setting up a connection ✓ Software ComSoft testo 174 is installed, see Installing the
software/driver page 6.
✓ Data logger is connected to the PC via interface, see separate
instruction manual.
1. Start ComSoft testo 174 software.
2. Select Start > New device.
- The New device setup wizard window opens.
3. Select testo 174-2010 in the list of instruments and click on Continue.
4. Enter names for the connection and click on Finish.
- The connection to the data logger is set up. The name of the connection appears in the Archive window.
5. Confirm with OK. Pos: 22 /TD/--- Seitenwechsel --- @ 0\mod_1173774430601_0.doc @ 283 @

5 Using the product
8
Pos: 23 /TD/Überschriften/6. Produkt verwenden @ 0\mod_1173774928554_79.doc @ 328 @ 1
5 Using the product Pos: 24 /TD/Produkt verwenden/ComSoft Basic_Software /ComSoft V4-t174/Bedienoberfläche @ 5\mod_1267458525980_79.doc @ 59231 @
5.1. User interface In this chapter, you learn how the user interface of the ComSoft testo 174 is designed.
1 Ribbon
The ribbon helps you to carry out modifications and settings and to find the relevant functions and commands quickly.
Menu Explanation
All functions that you require to open, close, save, delete and print.
Using this menu, the program can also be ended.
Saves the current selection in a file.
Prints the current view.
Setting options for the menu bar.
The functions and commands are divided into different groups on the following tabs: Start, Edit and Extras.
Start Functions for editing the measurement data records, for the evaluation and for the view

5 Using the product
9
Edit Functions for evaluating the graphics or tables and possible settings for the curves in the graphic view.
Extras Setting options for the font in the tables and graphics and display of the service data.
2 Data range
The measurement data are managed in the data range.
3 Display range
The readings are displayed as diagrams and tables in the display range.
Pos: 25 /TD/Produkt verwenden/ComSoft Basic_Software /ComSoft V4-t174/Menüs @ 5\mod_1267458854445_79.doc @ 59327 @
5.2. Menus In this chapter you will learn which menus are available to you.
5.2.1. Start
Start | Edit menu
Menu function
Description
Open Opens the marked element; e.g. the data from a group.
Rename Renames the marked element.
Delete Deletes the marked element.
Close Closes the marked element; e.g. the data from a group.
New Instrument
Set up new instrument.
Start | Instrument menu
Menu function
Description
Instrument control
The configuration page corresponding to the selected instrument is shown. These are tuned to the respective instruments and provide the respective setting options.
Read out data and open
Save a created protocol in the display range to the hard disk and open it.

5 Using the product
10
Start | View menu
Menu function
Description
Graph Activate/deactivate the graphic representation of the data.
Table Activate/deactivate the tabular representation of the data.
5.2.2. Edit
Edit in the graphic view
The Edit (graphic) menu is only shown if the graphic is activated by clicking in the window.
Edit | Tools (graphic) menu
Menu function
Description
Zoom in Drag to form a rectangle in the graphic window to zoom in on the highlighted area.
Click on [Original size] to display the graphic in its total size again.
Crosshairs Crosshairs with which the curve can be followed are shown by clicking on a point of the measurement curve. The date, time, reading number and reading are shown in the process.
Edit pattern Is used in graphics to set the background and gridline colour as well as to change the line type of the grid.
Edit | Curves (graphic) menu
Menu function
Description
K:1 [°C] Legend for the graphic. Click on the entry of a curve and the dialogue for the characteristics of the curve is opened.
5 Using the product
11
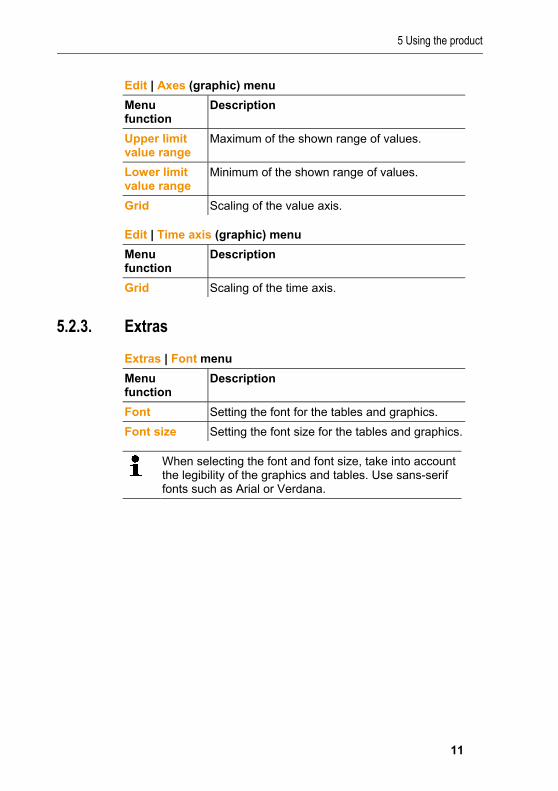
Edit | Axes (graphic) menu
Menu function
Description
Upper limit value range
Maximum of the shown range of values.
Lower limit value range
Minimum of the shown range of values.
Grid Scaling of the value axis.
Edit | Time axis (graphic) menu
Menu function
Description
Grid Scaling of the time axis.
5.2.3. Extras
Extras | Font menu
Menu function
Description
Font Setting the font for the tables and graphics.
Font size Setting the font size for the tables and graphics.
When selecting the font and font size, take into account the legibility of the graphics and tables. Use sans-serif fonts such as Arial or Verdana.

5 Using the product
12
Item: 116 /TD/Produkt verwenden/testo Saveris/02 Menüs und Befehle der Ribbon-Leiste/03 Extras/05 Servicedaten @ 0\mod_1189606938750_6.doc @ 4625
Extras | Service menu
Menu function
Description
Display service data
Creates a text file with the required information for Customer Service if servicing is required.
If the service data cannot be displayed under Windows® Vista, start the WordPad program and save, for example, an empty file of your choice in *.wri format. To do so, manually enter the file extension behind the file name.
A link is thus formed between the file and the service data and WordPad.
5.2.4. Style Selection of the colour scheme for the program window.
5.2.5. Help (?) Display copyright, program information and version number.
Pos: 26 /TD/Produkt verwenden/testo 174-neu/Datenlogger programmieren 174-neu+Comsoft Basic V4 @ 5\mod_1263223743764_79.doc @ 54724 @
5.3. Configuring the logger
5.3.1. Opening a connection ✓ Software ComSoft testo 174 must be installed and started.
> In the Archive window, double click on the connection that is to be opened.
- If a measurement protocol is stored in the data logger, the
stored data are transferred and the protocol icon and the short name of the protocol will appear under the opened connection.

5 Using the product
13
Use one connection for several data loggers
You can connect various data loggers via a set-up connection. When changing the data logger, the connection must be disconnected and then reopened for the new data logger, as otherwise this cannot be identified by the software (see Disconnecting page 16)
5.3.2. Performing settings > Select Start > Instrument control.
This function is only activated if the name of the connection is highlighted in colour. If this is not the case:
> First click on the name of the connection so that this is highlighted in colour and then select Start > Instrument control.
- The window for programming the data logger opens.
Instrument
You can read general information about the data logger in the Instrument window.
This window serves as an information window. No programming can be carried out here.
We recommend first performing the programming in the Settings window and then in the Program window.

5 Using the product
14
Settings
> Select Settings.
• Temperature:
> Select the desired temperature unit (°C or °F).
Measurement program
> Select Program.
• Start criterion:
> Select the desired criterion for starting the measurement program:
◦ Date/time
◦ Button start
◦ PC start.
5 Using the product
15
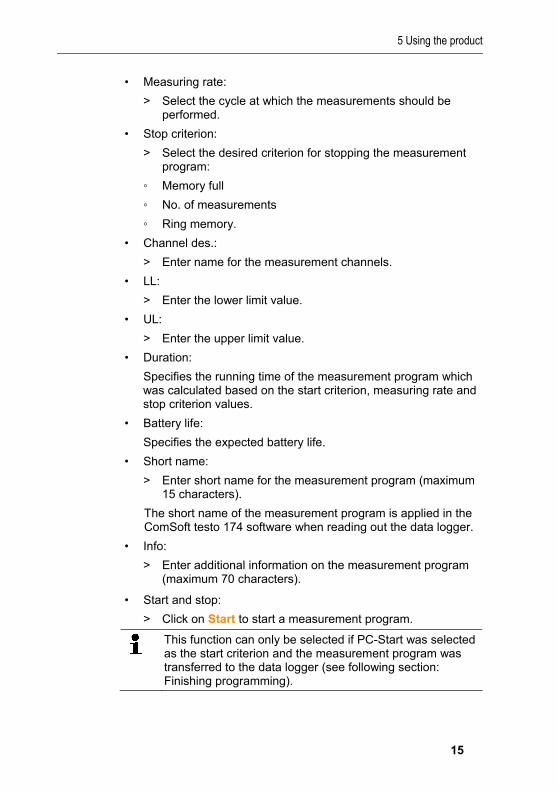
• Measuring rate:
> Select the cycle at which the measurements should be performed.
• Stop criterion:
> Select the desired criterion for stopping the measurement program:
◦ Memory full
◦ No. of measurements
◦ Ring memory.
• Channel des.:
> Enter name for the measurement channels.
• LL:
> Enter the lower limit value.
• UL:
> Enter the upper limit value.
• Duration:
Specifies the running time of the measurement program which was calculated based on the start criterion, measuring rate and stop criterion values.
• Battery life:
Specifies the expected battery life.
• Short name:
> Enter short name for the measurement program (maximum 15 characters).
The short name of the measurement program is applied in the ComSoft testo 174 software when reading out the data logger.
• Info:
> Enter additional information on the measurement program (maximum 70 characters).
• Start and stop:
> Click on Start to start a measurement program.
This function can only be selected if PC-Start was selected as the start criterion and the measurement program was transferred to the data logger (see following section: Finishing programming).

5 Using the product
16
> Click on Stop to end a measurement program.
This function can only be selected if a measurement is being performed (data logger in operating status Rec).
Finishing programming
✓ The data logger is in the operating status Wait or End.
1. Click on Apply to transfer the measurement program to the data logger.
If a measurement is in progress (status Rec):
> End measurement: Click on Stop.
- The LED of the interface lights up red during the data exchange.
- The Programming data window opens to confirm the programming performed.
2. Click on OK.
- The programming is completed.
5.3.3. Disconnecting 1. In the Archive window, click on the connection that is to be
disconnected.
2. Select Close.
- The connection to the data logger is disconnected. Pos: 27 /TD/Produkt verwenden/testo Saveris/05 Messreihen analysieren @ 0\mod_1190895859625_79.doc @ 5163 @ 2
5.4. Analyzing series of measurements You can represent series of measurements as a diagram or a table.
> In the Start | View menu, select the
• Diagram function if the data should be displayed graphically or
• Table function if the data should be displayed as a table. Pos: 28 /TD/Produkt verwenden/ComSoft Basic_Software /Ansicht Diagramme 0501 0453 @ 3\mod_1239005247085_79.doc @ 30823 @
5.4.1. Graphic view In this view, the readings are shown as line diagrams.
In the Start | View menu, the Graphics command is activated.
> If necessary, deactivate channels via the checkboxes for the display.

5 Using the product
17
You can show or hide the gridlines for the corresponding axis by clicking on the time axis or the value axis.
Pos: 29 /TD/Produkt verwenden/testo Saveris/05a Diagramme analysieren/01 Vergrößern @ 0\mod_1188996582156_79.doc @ 3494 @ 4
5.4.1.1. Enlarging the view Zoom in on a detail of the diagram to check the behavior of the readings within a specific time span, for example.
1. Click on Edit | Tools | Zoom in.
2. In the diagram, use the left mouse button, pressed and held, to highlight the area that should be shown enlarged.
Click on [Original size] and the entire diagram is shown again.
Pos: 30 /TD/Produkt verwenden/testo Saveris/05a Diagramme analysieren/02 Fadenkreuz @ 0\mod_1188996582421_79.doc @ 3504 @ 4
5.4.1.2. Information on a reading (crosshairs) If you move your crosshairs along a curve, you will quickly receive detailed information on the individual readings.
1. Click on Edit | Tools | Crosshairs.
2. In the diagram, click on the point for which the details should be shown.
- A dialogue with the following information on the reading is shown:
• date on which the reading was recorded,
• time at which the reading was recorded,
• number of the reading and
• reading.
You can move along the curve with the left mouse button pressed and held and thereby see the individual information for the readings.
In doing this, it is not necessary to exactly follow the course of the curve; the crosshairs does this automatically if you move the mouse to the right or left.
Pos: 31 /TD/Produkt verwenden/testo Saveris/05a-2 Kurveneigenschaften/00 Kurveneigenschaften @ 0\mod_1188996704171_79.doc @ 3636 @ 45
5.4.1.3. Characteristics of a curve You can adapt the representation of a measurement series to your requirements. For example, you can change the line weight of a curve or the representation of the limit values in the diagram.
1. Change to the diagram view of the measurement series, the characteristics of which are to be displayed.

5 Using the product
18
2. Click in the Edit | Curves menu on the entry of the curve, the characteristics of which are to be displayed.
- The Characteristics of (name of curve) dialogue is opened.
The following tabs are available in the dialogue:
• Curve tab
• Range limits tab
• Data sequence tab
• Statistical computation tab.
Buttons of the dialogue
Button Explanation
[OK] Applies the changed settings. The dialogue is closed.
[Cancel] Closes the dialogue without applying the changes.
Pos: 32 /TD/Produkt verwenden/testo Saveris/05a-2 Kurveneigenschaften/01 Register Kurve bearbeiten @ 0\mod_1188996705609_79.doc @ 3666 @ 5
Curve tab
Designation Explanation
Smooth The measurement points are connected by an interpolated curve; the plot-points on the curve between two measurement points are estimated mathematically.

5 Using the product
19
Designation Explanation
Mark measuring points
The individual measurement points are represented by a symbol.
The value shown only corresponds to the exact measured value at these points. The measurement points are connected with straight lines during the measurement. When the measurement is paused the curve can be smoothed.
Colour Line colour of curve.
Width Line weight of curve.
Style Line pattern of curve.
Marker Symbol for the measurement points.
Degree of regression
Possible values "0" to "7". The "0" degree represents a pure mean calculation, the "1" degree of regression the linear trend, a higher value helps in the event of curves with several extreme values.
Pos: 33 /TD/Produkt verwenden/testo Saveris/05a-2 Kurveneigenschaften/02 Register Grenzwertanzeige @ 0\mod_1188996705265_79.doc @ 3656 @ 5
Range limits tab
Designation Explanation
Display area limit Specification as to whether the limit values should be shown in the diagram.

5 Using the product
20
Designation Explanation
Add limit labels Specification as to whether the limit values should be labelled (Upper/Lower limit value: name of curve).
Area fill Specification as to whether the areas outside of the limit values should be marked by means of an area fill.
Selection list for area fill
Selection of the fill.
Line fill Specification as to whether the limit values should by means of horizontal lines.
Selection lists for line fill
Selection lists for line type and line thickness.
Overshoot Colour selection for the fill of the area above the upper limit value.
Undershoot Colour selection for the fill of the area below the lower limit value.
Pos: 34 /TD/Produkt verwenden/testo Saveris/05a-2 Kurveneigenschaften/03 Register Datenreihe @ 0\mod_1188996704453_79.doc @ 3646 @ 5
Data sequence tab
Designation Explanation
Upper limit values Specification of the upper limit value.
Lower limit values Specification of the lower limit value.
Name Designation of curve.

5 Using the product
21
Designation Explanation
Decimal places number representation
Number of the decimal places; e.g. for the data table. Possible values "0" to "6".
[Convert unit] Opens a dialogue for converting the unit of the curve.
Pie chart Graphical representation for the distribution of the readings:
• green: readings that are within the limit values.
• blue: readings that are below the lower limit value.
• red: readings that are above the upper limit value.
Pos: 35 /TD/Produkt verwenden/testo Saveris/05a-2 Kurveneigenschaften/04 Register Stat. Berechnung @ 0\mod_1188996705906_79.doc @ 3676 @ 5
Statistical computation tab
Designation Explanation
Min. value Smallest reading of the curve.
Max. value Largest reading of the curve.
Mean value Arithmetically-determined average value.
Std. deviation Measure of the scattering of the readings around the average.
Calculating the complete data area
Specification that the given values are valid for the entire measurement curve.
5 Using the product
22
Designation Explanation
Calculation in section area
An alternative to Calculating the complete data area, if an area was marked.
Specification that the given values are only valid for the selected area of the measurement curve.
Pos: 36 /TD/Produkt verwenden/ComSoft Basic_Software /Auswertungen erstellen 0501 0453 @ 3\mod_1238576419911_79.doc @ 30715 @ 2
5.5. Creating evaluations You can print out series of measurements.
Pos: 37 /TD/Produkt verwenden/ComSoft Basic_Software /ComSoft V4-t174/Messdaten drucken @ 5\mod_1267516321525_79.doc @ 59363 @
5.5.1. Printing measurement data Measurement data can be printed in graphic or table form.
1. In the Start | View menu, select the
• Graphics command if the table view is activated but the graphic view should be printed.
• Table command if the graphic view is activated but the table view should be printed.
Open the preview of the report using the File (Testo logo) | Print preview command.
Use portrait format for printing a table and landscape format for printing a graphic.
You can determine the format under File | Page Setup....
2. Select the Print command in the File menu.
- The Print dialogue for selecting the printing options is shown.
3. Change printing options, if needed, and click on [OK].
- The report is printed. Pos: 38 /TD/--- Seitenwechsel --- @ 0\mod_1173774430601_0.doc @ 283 @

6 Tips and assistance
23
Pos: 39 /TD/Überschriften/8. Tipps und Hilfe @ 0\mod_1173789887985_79.doc @ 406 @ 1
6 Tips and assistance Pos: 40 /TD/Überschriften/8.1 Fragen und Antworten @ 0\mod_1177402017078_79.doc @ 1093 @ 2
6.1. Questions and answers Pos: 41 /TD/Tipps und Hilfe/Fragen und Antworten/Basic-Software_174 @ 6\mod_1268132039584_79.doc @ 59723 @
Question Possible causes/solution
Instrument is not responding...
This message appears if the PC program cannot communicate with the connected measuring instrument or if the measuring instrument does not respond.
• Make sure that the device is switched on.
• Check the connecting cable.
• Check whether the drivers are installed.
Invalid name: The symbols: !,?,*,:,\ cannot be used in measurement location and folder names.
Rename it and do not use these characters.
An instrument setting with this name already exists: Please select a new name.
Different names should be used when setting up new instruments. The same name should not be used for different instruments.
=== Ende der Liste für Textmarke Inhalt ===

0970 0469 en 01 V01.00-0 en-GB