colorado space grant consortium foam core class #05 foam core class #05
Post on 21-Dec-2015
218 views
TRANSCRIPT
Colorado Space Grant ConsortiumColorado Space Grant Consortium
Foam Core
Class #05
Foam Core
Class #05
2
- BalloonSats are commonly made of foam core
- Foam core is a simple, low cost composite panel
- You will use hot glue and Xacto knives to create your box
- There is a OK way of building with foam core
- Cut individual pieces and glue them together
- This way works but is not the best and requires more “belts and suspenders”
Hands-on: Construction and Integration

BalloonSat Construction:
- There is a BETTER way of building with foam core- Requires algebra and geometry
- See paper on the class website

BalloonSat Construction:
- When cutting foam core, remember you are cutting through three layers
- Best to cut each layer individually
- Go slow, use metal edge ruler
- Be mindful
BalloonSat Construction:
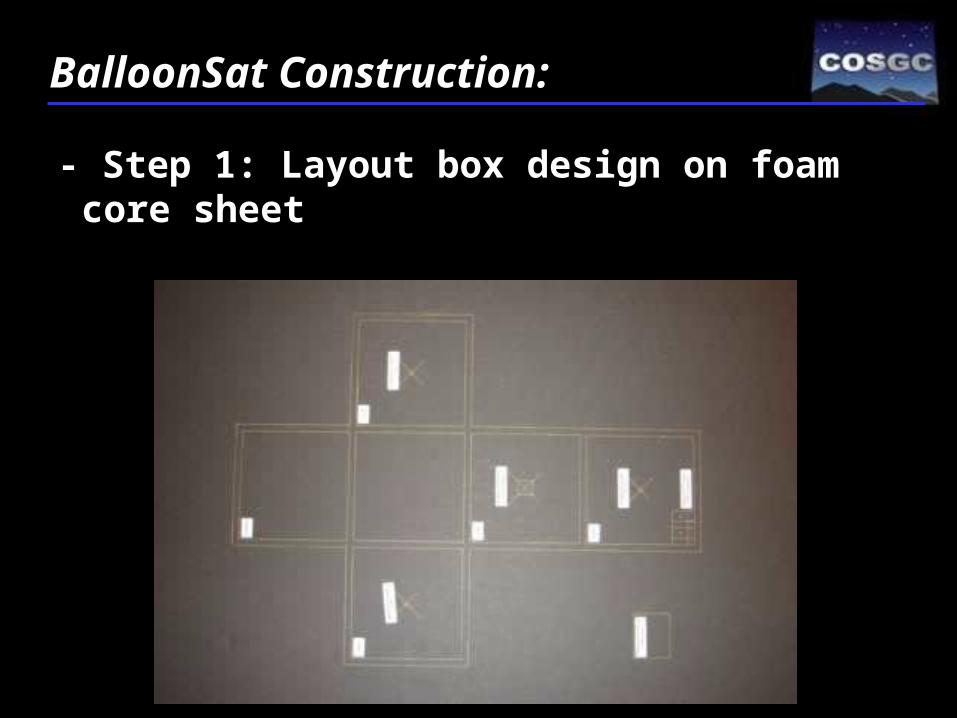
- Step 1: Layout box design on foam core sheet

BalloonSat Construction:
- Step 2: Cut it out

- Draw center lines between inner and outer lines
- All edge cuts are at 45 degree angles to the centerline
- Cut inside edges first and only through top paper and foam not bottom paper (hinge)
- Cut outside edges last but all the way through
- Go Slow
Hands-on: Construction and Integration
Video here

Hands-on: Construction and Integration

- Cut holes for solar cell, switches, and temp probe
- Cut hole through center for balloon attachment tube
- Tube hole should not be on open side
Hands-on: Construction and Integration

BalloonSat Construction:
- Step 3: Practice integration and make modifications
Hold box together and figure out how much insulation you want to use. Will affect how your components sit in box

BalloonSat Construction:
- Step 4: Glue it together and strengthen corners
- Your template was designed using the “Better Method”
- After gluing, cover you seams with aluminum tape
- Please don’t go overboard, weight is still an issue

BalloonSat Construction:
- Step 4: Glue it together and strengthen corners

BalloonSat Construction:
- Camera aperture and sensors

BalloonSat Construction:
Things to remember:
- Switches

- Install switches to box and glue switches in place from back side before making electrical connections
- Keep switches on both sides and label ON/OFF positions
- Make sure to re-connect to heater, camera, and 12 V
Hands-on: Construction and Integration

BalloonSat Construction:
Things to remember:
- Switches

- Install switches to box and glue switches in place from back side before making electrical connections
- Keep switches on both sides and label ON/OFF positions
- Make sure to re-connect to heater and 12 V
Hands-on: Construction and Integration
BalloonSat Construction:
Things to remember:
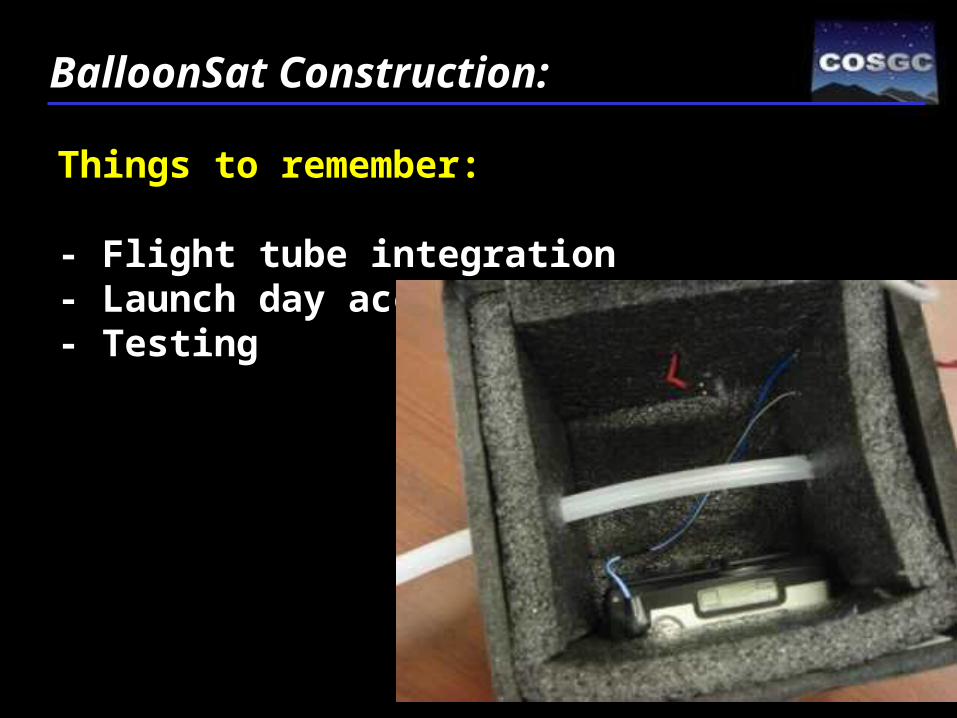
- Flight tube integration- Launch day access- Testing

- Balloon attachment tube hole should run through center of box on non-opening side
- Make hole diameter as close to tube diameter as possible
- Secure with paper clip
- Make sure paper clip does not interfere with inner diameter
Hands-on: Construction and Integration

- Install Solar Cell, must disconnect from HOBO
Hands-on: Construction and Integration

Hands-on: Construction and Integration

- Integrate camera system and verify camera settings
- Integrate Flight String attachment tube and test clearance with sample string
- Integrate HOBO system
- Install temp probe (channel 4), metal tip must extend beyond wall of structure
- American Flag
Hands-on: Construction and Integration

- Install voltage cable (channel 3)
- Install Heater
- Test switches (will use one picture)
- Tape in off position
- Team label and reward label on outside of box
Hands-on: Construction and Integration