cisco vcs starter pack express deployment guide (x8.5)
TRANSCRIPT

Cisco TelePresenceVCS Starter Pack Express
Deployment Guide
Cisco VCS X8.5
December 2014
Contents
Introduction 3Purpose of this guide 4
Configuring the VCS 5Opening firewall ports 5Verifying the option key 5Configuring the routable address of the VCS 6Configuring a SIP domain 6Enabling FindMe 7Configuring device authentication 7Configuring a DNS zone 9Configuring DNS zone search rules 10Enabling Presence Server (optional) 12Creating user accounts 12
Creating authentication credentials for the user 14Configuring bandwidths provisioned to endpoints (optional) 15
Installing and configuring Jabber Video 17
Testing the Starter Pack installation 19Local system testing 19Public network testing 19Behind home/hotel firewall testing 20
Checking the status of the Provisioning Server 21
Appendix 1: Troubleshooting 22Jabber Video sign in messaging 22Signaling level troubleshooting 24
Appendix 2: Basic VCS configuration 28
Appendix 3: Additional information 29Characters allowed in SIP URIs 29Determining the FindMe ID for a caller 29Known limitations 29
Modifying a user’s display name 29
Appendix 4: Jabber Video and Active Directory (NTLM) authentication 30
Appendix 5: Starter Pack and Cisco TMSPE provisioning comparison 32
Related documents 34
Document revision history 35
Cisco TelePresence VCS Starter Pack Express Deployment Guide (X8.5) Page 2 of 36

IntroductionA Cisco TelePresence Video Communication Server (VCS) with the Starter Pack option key creates a VCS Starter Pack Express which acts as a standalone provisioning server, registrar and proxy server for endpoint devices, such as Jabber Video and Cisco Jabber for iPad.
The VCS Starter Pack Express may have endpoints register to it locally or register to it from behind a home, small business or hotel firewall.
If the VCS Starter Pack Express services endpoints that are behind a firewall, the VCS could be configured with a public IP address and the local (DMZ) firewall would have to be configured to pass the specific public IP address traffic to the VCS.
However, it is usually preferable to deploy the VCS in a NATed DMZ, rather than having the VCS configured with a publicly routable IP address. This can be achieved by enabling static NAT mode on selected network interfaces on the VCS. To use the static NAT mode feature you must install the Dual Network Interfaces option key. You can then enable static NAT mode on the externally-facing LAN port and configure it with a private address and a static NAT address (the public IP address of the DMZ NAT firewall). This means that when the VCS communicates with other devices it appears as an Internet routable device despite being behind the local NAT firewall.
Note that the Dual Network Interfaces option key allows the use of two network interfaces (LAN1 and LAN2), and allows static NAT mode to be enabled on one or both of these interfaces. It is not compulsory to use both interfaces, even though they have been enabled; you may use only a single interface and enable Static NAT mode on that single interface.
You must ensure that sufficient bandwidth is available when making calls through firewalls and other infrastructure. For example, five simultaneous calls using 512kbps in each direction will require 2.5Mbps bandwidth for this video traffic on top of its normal operation.
Cisco TelePresence VCS Starter Pack Express Deployment Guide (X8.5) Page 3 of 36
Introduction

Purpose of this guideThis deployment guide describes the configuration steps required to configure a VCS Starter Pack Express, including basic configuration, provisioning, device authentication and also how to configure user accounts so that Jabber Video clients are provisioned when users sign on to them.
Cisco TelePresence VCS Starter Pack Express Deployment Guide (X8.5) Page 4 of 36
Introduction

Configuring the VCSThis deployment guide assumes that the VCS is accessible on an IP network and has had a basic configuration implemented. This means that the VCS has been configured with:
n IP details n DNS details n NTP server details
Brief instructions about how to perform this configuration are available in Appendix 2: Basic VCS configuration [p.28].
If the system needs to support calling to non-registered endpoints, configure a DNS zone with a search rule that sends any calls that are not for the VCS’s local SIP domain to that DNS zone.
Opening firewall portsIf the VCS is placed in a DMZ, to enable SIP calls to be received the following IP ports must be open to the VCS through the firewall:
n 5060 (if basic SIP connection is required) n 5061 (for SIP over TLS) n 36000 to 59999 (for media)
Verifying the option keyEnsure that the Starter Pack option key is listed on the Option keys page (Maintenance > Option keys):
Call licenses
By default, the Starter Pack supports up to 5 simultaneous calls. Extra traversal call license option keys can be added if required; however the Starter Pack has a maximum limit of 25 simultaneous calls.
The Starter Pack can only be licensed for traversal calls. It does support non-traversal calls but will consume a traversal license when a non-traversal call occurs.
Cisco TelePresence VCS Starter Pack Express Deployment Guide (X8.5) Page 5 of 36
Configuring the VCS

Configuring the routable address of the VCSThe routable address of the VCS (its FQDN) is the address supplied by the provisioning system to the provisioned device for it to use as its SIP registrar (the address to which it sends registration requests).
1. Go to System > Clustering. 2. Configure the Cluster name to the routable address of the VCS: ideally the DNS SRV address of the
VCS, alternatively a DNS A record or an IP address.Typically your IT department will supply the FQDN for this VCS and ensure that the network is configured to route SIP calls, HTTPS and other IP traffic to this VCS when addressed to the FQDN.You must configure the Cluster name regardless of whether the VCS is part of a cluster.
3. Click Save.
Configuring a SIP domainThe VCS must be configured with the SIP domain to be used for this installation.
To configure a SIP domain:
1. Go to Configuration > Domains. 2. Click New. 3. Enter the domain name into the Name field, such as example.com. 4. Click Create domain. 5. The Domains page displays all configured SIP domain names.
Cisco TelePresence VCS Starter Pack Express Deployment Guide (X8.5) Page 6 of 36
Configuring the VCS

Enabling FindMeFindMe must be enabled and configured for use.
1. Go to Applications > FindMe. 2. Configure the fields as follows:
FindMe mode
On
Caller ID FindMe ID: the caller ID of a call being made through this VCS is replaced with the relevant FindMe ID.
Restrict users from configuring their devices
Controls if users are restricted from adding, deleting or modifying their own devices. The default is Off.
By default FindMe users are allowed to configure further devices in addition to any principal or provisioned devices assigned to them by the system administrator. This setting can be used to stop users from adding their own devices and restrict them to being able to only maintain their locations and their associated devices.
Device creation message
Only visible when FindMe mode is On. The text entered here is displayed to users when they add a device to their FindMe configuration. A limited set of HTML markup is supported in the message which is previewed in the window at the bottom of the page when you click Save. Refer to the online help for more information on the tags supported.
An example message might be:
Phone numbers: use the prefix <b>9</b>
3. Click Save.
For more details on the use of Caller ID and FindMe ID, see Determining the FindMe ID for a caller [p.29].
Configuring device authenticationYou are recommended to use device authentication – verifying that endpoints can identify themselves with a username and password known to the VCS.
The VCS supports 3 different methods of verifying authentication credentials:
Cisco TelePresence VCS Starter Pack Express Deployment Guide (X8.5) Page 7 of 36
Configuring the VCS

n against an on-box local database n via an LDAP connection to an external H.350 directory service n via direct access to an Active Directory server using a Kerberos connection (NTLM challenges only)
The VCS attempts to verify the credentials presented to it by first checking against its on-box local database of usernames and passwords. If the username is not found in the local database, the VCS may then attempt to verify the credentials via a real-time LDAP connection to an external H.350 directory service. The directory service, if configured, must have an H.350 directory schema for either a Microsoft Active Directory LDAP server or an OpenLDAP server.
Along with one of the above methods, for those devices that support NTLM challenges, the VCS can alternatively verify credentials via direct access to an Active Directory server using a Kerberos connection. The direct Active Directory authentication via Kerberos method is only supported by a limited range of endpoints – at the time of writing, only Cisco Jabber for iPad and Jabber Video. If used, other non-supported endpoint devices will continue to authenticate using one of the other two authentication methods. See Appendix 4: Jabber Video and Active Directory (NTLM) authentication [p.30] for more information.
Note that appropriate prompts are given to set up the user’s endpoint authentication credentials in the local database when configuring user accounts.
See Device Authentication on VCS Deployment Guide for more information about device authentication in general.
Configure the Default Zone to check credentials
This ensures that the VCS checks the credentials of provisioning requests, and call requests from unregistered endpoints.
1. Go to Configuration > Zones > Zones. 2. Click on DefaultZone to go to the Default Zone page. 3. Set Authentication policy to Check credentials.
Note that Jabber Video users will not be able to sign in if the Authentication policy setting is Do not check credentials
4. Click Save.
Configure the Default Subzone to check credentials
This ensures that the VCS checks the credentials of messages received through the Default Subzone. This includes registration requests, phone book requests and presence messages.
Cisco TelePresence VCS Starter Pack Express Deployment Guide (X8.5) Page 8 of 36
Configuring the VCS

1. Go to Configuration > Local Zone > Default Subzone. 2. Set Authentication policy to Check credentials.
Note that endpoints will not be able to publish presence or use phone books if the Authentication policy setting is Do not check credentials.
3. Click Save.
If you configure additional subzones, you are recommended to set the authentication policy of each of those subzones to also check credentials.
Configuring a DNS zoneThe DNS zone is used to search for externally hosted systems (which are not locally registered, such as for business to business calling). Destination aliases are searched for by a name using a DNS lookup.
To configure the DNS zone:
1. Go to Configuration > Zones > Zones. 2. Click New.
Cisco TelePresence VCS Starter Pack Express Deployment Guide (X8.5) Page 9 of 36
Configuring the VCS

3. Configure the fields as follows (leave all other fields with default values):
Field name Value
Name Enter DNSZone for example
Type DNS
H.323 Mode On
SIP Mode On
Fallback transport protocol TCP
Include address record Off
4. Click Create zone.
Configuring DNS zone search rulesThe DNS search rule defines when the DNS zone should be searched.
A specific regular expression is configured which will prevent searches being made using the DNS zone (i.e. on the public internet) for destination addresses (URIs) using any SIP domains which are configured on the local network (local domains).
To create the search rules to route via DNS:
Cisco TelePresence VCS Starter Pack Express Deployment Guide (X8.5) Page 10 of 36
Configuring the VCS

1. Go to Configuration > Dial plan > Search rules. 2. Click New. 3. Configure the fields as follows:
Field name Value
Rule name Enter DNS zone search rule for example
Description Enter Search DNS zone (external calling) for example
Priority 150
Protocol Any
Source All zones
Request must be authenticated No
Mode Alias pattern match
Pattern type Regex
Pattern string Enter (?!.*@%localdomains%.*$).*
Pattern behavior Leave
On successful match Continue
Target DNSZone
State Enabled
4. Click Create search rule.
Cisco TelePresence VCS Starter Pack Express Deployment Guide (X8.5) Page 11 of 36
Configuring the VCS

Note that the regular expression used to prevent local domains being searched via the DNS zone can be broken down into the following components:
(.*) = match all pattern strings
(?!.*@%localdomains%.*$).* = do not match any pattern strings ending in @localdomains
In the deployment example, calls destined for @cisco.com would be searched via the DNS zone, whereas calls destined for @example.com would not.
Enabling Presence Server (optional)The Presence Server allows provisioned clients to see the presence status (Online, Away, Busy in a call and Offline) of other clients.
1. Go to Applications > Presence. 2. Configure SIP SIMPLE Presence Server to On. 3. Click Save.
Creating user accountsYou must configure an account for each user:
1. Go to Users > FindMe accounts and click New. 2. Configure the fields as follows:
Username The username for logging into this user account, for example name.surname.
Note that from X7.1 and later, the username is case insensitive. This same username must be used as the name in the local authentication database if device authentication is enabled.
This username is also used to create the FindMe default device URI and the provisioned device URI. To create these as a valid SIP URI, the username must consist of alphanumeric characters but not spaces, the @ sign or extended characters (such as ö or â). For the full set of allowed characters, see Characters allowed in SIP URIs [p.29].
Display name
The user’s name without formatting restrictions. It is displayed on the user search page and used in phone books. For example Name Surname
Cisco TelePresence VCS Starter Pack Express Deployment Guide (X8.5) Page 12 of 36
Configuring the VCS

Phone number(optional)
The E.164 caller ID to be presented on outdialed H.323 calls, e.g. to ISDN gateways. It must only contain digits – do not include any spaces, hyphens or brackets.
If calls may be placed to an ISDN gateway, ensure that the format of this phone number matches the requirements of the ISDN provider.
FindMe ID The FindMe ID is a unique alias through which the user can be contacted on all of their endpoints. It can be a URI, an H.323 ID or an E.164 number.
For use with SIP devices such as Jabber Video, the FindMe ID must be in the form of a SIP URI, for example, [email protected].
Initial and Confirm password
The password to log into the user’s account on the VCS.
The password entries are only displayed if FindMe authentication source is set to Local (Users > LDAP configuration).
Principal devices
This section identifies the principal devices that can be provisioned for this user. These are also the devices that can be called when somebody dials the user’s FindMe ID.
Enable (set to On) all of the device types that apply to this user.
The URI of each selected device is generated automatically based on a combination of the Username, FindMe ID and device type. It takes the format <username>.<device type>@<domain portion of FindMe ID>.
You can also specify the URI of an additional Other device, such as a cell phone, to include in the user’s FindMe.
3. When a principle device is selected (set to On), an Authentication field is displayed with a link to the Local authentication database page. If you are using the local database as the authentication credentials store, click on the link to add or edit the user’s credentials in the local authentication database. See Creating authentication credentials for the user [p.14] below for details.
4. Click Save. 5. Repeat these steps to create accounts for all users.
Cisco TelePresence VCS Starter Pack Express Deployment Guide (X8.5) Page 13 of 36
Configuring the VCS

Additional users can be added later, as and when required, by returning to the User accounts page and clicking New.
The VCS Starter Pack Express supports a maximum of 50 registered users.
After an account has been set up, its details (except the Username) can be edited by selecting the user on the Users > FindMe accounts page and then clicking View/Edit.
Creating authentication credentials for the userWhen device authentication (credential checking) has been enabled, the credentials entered into the VCS’s local database must exactly match those used to sign on to Jabber Video – otherwise provisioning requests, registration requests, call requests and phone book requests will be rejected.
In a typical installation you are recommended to use the same password for both the user’s Jabber Video authentication credentials and for their user account login (where users access their FindMe details).
1. From near the bottom of the Create user account or Edit user account pages, click on Add/Edit user account in local authentication database. Alternatively using the menu go to Configuration > Authentication > Devices > Local database.
2. Click New. 3. Configure the fields as follows:
Cisco TelePresence VCS Starter Pack Express Deployment Guide (X8.5) Page 14 of 36
Configuring the VCS

Name The credential name must be the same as the user account username – as indicated by the link on the Create user account and Edit user account pages.
It is also the same as the Jabber Video sign in username. All the usernames must match.
Note that from X7.1 and later, usernames are case insensitive.
Password The password must be the same as the Jabber Video sign in password.(Typically this is also the same as the user account password used for accessing FindMe details.)
4. Click Create credential. 5. If appropriate, close any new window or tab that was opened to create this credential.
Configuring bandwidths provisioned to endpoints (optional)The VCS can provision bandwidth limits to Jabber Video clients and other endpoints. This configures the client with default values for it to use for incoming and outgoing bandwidth control.
1. Go to Applications > Provisioning. 2. Set Movi bandwidth to On.
a. Check and set the maximum incoming bandwidth to, for example, 512kbps. a. Check and set the maximum outgoing bandwidth to, for example, 384kbps.
3. Enable bandwidth provisioning for other device types as required. 4. Set Movi ClearPath to On. 5. Click Save.
Cisco TelePresence VCS Starter Pack Express Deployment Guide (X8.5) Page 15 of 36
Configuring the VCS

Note that VCS links and pipes can also be used for more advanced bandwidth control.
Cisco TelePresence VCS Starter Pack Express Deployment Guide (X8.5) Page 16 of 36
Configuring the VCS

Installing and configuring Jabber VideoAs part of the VCS Starter Pack Express solution, the latest version of the Cisco Jabber Video for TelePresence software client can be downloaded from www.cisco.com. Jabber Video can be installed by IT administrators, or more typically will be supplied to end users for them to install.
After Jabber Video has been installed, it must be configured with user credentials and connection details for the VCS Starter Pack Express:
1. Start Jabber Video. 2. Click on the tools menu (above the Sign in button) and select Sign-in settings. 3. Configure the fields as follows:
Start Jabber Video when I log on to my computer
Select this if you want Jabber Video to run automatically when you log on to your computer.
Sign in automatically Select this if you want Jabber Video to sign in automatically when the application starts.
Internal Server The DNS name or IP address of the private side of the VCS.
External Server The DNS name or IP address of the public side of the VCS.
SIP Domain The SIP domain should be the same as configured on the VCS’s Configuration > Domains page.
4. Click OK to return to the sign in page. 5. Configure the fields as follows:
Username The same username as entered on the VCS in the Create user account page (Users > FindMe accounts) and as stored in the local database (Configuration > Authentication > Devices > Local database).
Password This must be the same password as the authentication credential password entered for this user (Configuration > Authentication > Devices > Local database).
Typically this will be the same as the user’s account password on the VCS.
Remember me
Select this to save you from typing in your username and password every time you start Jabber Video.
Cisco TelePresence VCS Starter Pack Express Deployment Guide (X8.5) Page 17 of 36
Installing and configuring Jabber Video

6. Click Sign in.
Making calls
When you are signed in to Jabber Video, calls can be made by entering the FindMe ID of another user in the Type name, number or address field and then pressing Enter.
Cisco TelePresence VCS Starter Pack Express Deployment Guide (X8.5) Page 18 of 36
Installing and configuring Jabber Video

Testing the Starter Pack installation
Local system testingStart by testing Jabber Video devices locally registered to the VCS Starter Pack Express.
1. Configure three users, including their associated credentials. 2. Install three Jabber Video clients. 3. Connect the three Jabber Video PCs to the same network as the VCS Starter Pack Express. 4. With each of the Jabber Video clients, sign in as a different user (for example User1, User2 and User3):
a. Ensure that sign in is successful. b. Ensure that each Jabber Video user can call the others by entering another user’s FindMe ID in the
Type name, number or address field and then pressing Enter.
Result matrix – local only Receiving Jabber Video
User1(local)
User2(local)
User3(local)
Calling Jabber Video
User1(local) n/a
User2(local)
n/a
User3(local)
n/a
Public network testingWhen local system testing is successful, test Jabber Video in the public network.
1. Sign out of two of the Jabber Video clients (User2 and User3) and connect these two Jabber Video PCs to the public internet.
2. With the public internet Jabber Video clients, sign in as User2 and User3: a. Ensure that sign in is successful. b. Ensure that each Jabber Video user can call the others by entering another user’s FindMe ID in the
Type name, number or address field and then pressing Enter.
Result matrix – local and internet Receiving Jabber Video
User1(local)
User2(internet)
User3(internet)
Calling Jabber Video
User1(local) n/a
User2(internet)
n/a
User3(internet)
n/a
Cisco TelePresence VCS Starter Pack Express Deployment Guide (X8.5) Page 19 of 36
Testing the Starter Pack installation
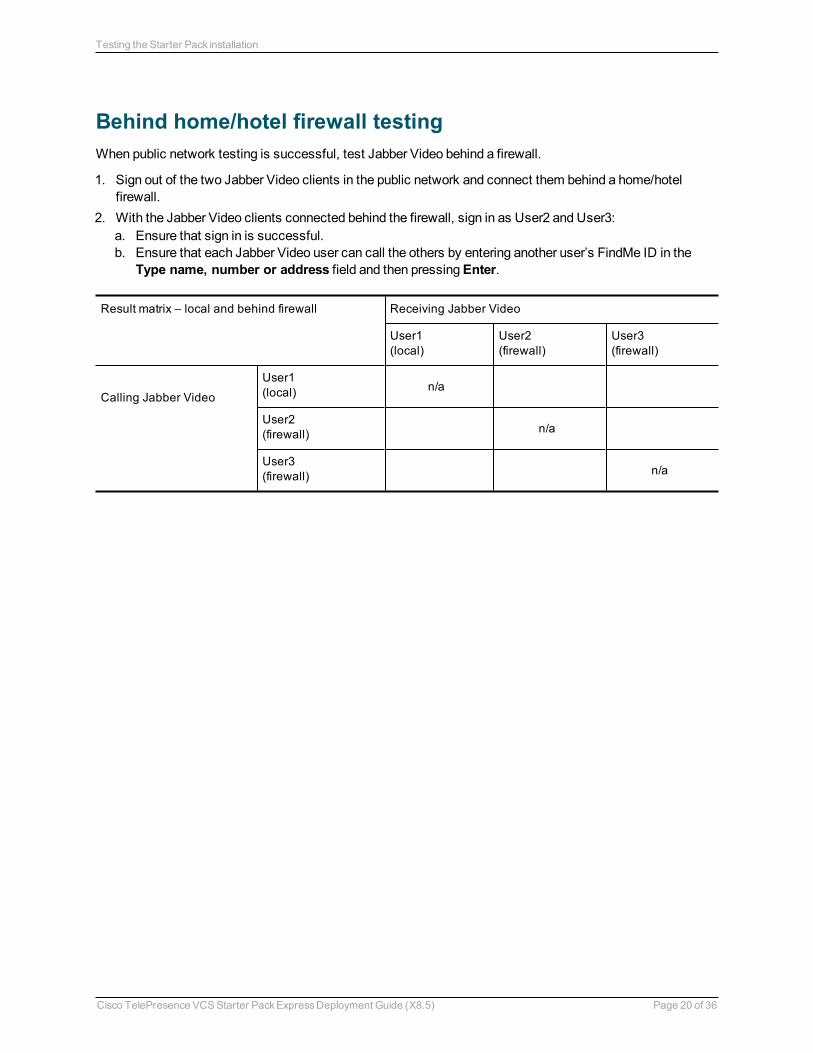
Behind home/hotel firewall testingWhen public network testing is successful, test Jabber Video behind a firewall.
1. Sign out of the two Jabber Video clients in the public network and connect them behind a home/hotel firewall.
2. With the Jabber Video clients connected behind the firewall, sign in as User2 and User3: a. Ensure that sign in is successful. b. Ensure that each Jabber Video user can call the others by entering another user’s FindMe ID in the
Type name, number or address field and then pressing Enter.
Result matrix – local and behind firewall Receiving Jabber Video
User1(local)
User2(firewall)
User3(firewall)
Calling Jabber Video
User1(local) n/a
User2(firewall)
n/a
User3(firewall)
n/a
Cisco TelePresence VCS Starter Pack Express Deployment Guide (X8.5) Page 20 of 36
Testing the Starter Pack installation

Checking the status of the Provisioning ServerYou can check the status of the Provisioning Server to monitor the provisioning requests received, and to see a list of the devices that have been provisioned.
Checking the Provisioning Server
Go to Status > Applications > Starter Pack > Starter Pack status to check on the status of the Provisioning Server and to view how many devices are currently being provisioned (per device type).
Checking provisioned devices
Go to Status > Applications > Starter Pack > Provisioned device status to see a list of all of the devices that have submitted provisioning requests to the Provisioning Server.
Cisco TelePresence VCS Starter Pack Express Deployment Guide (X8.5) Page 21 of 36
Checking the status of the Provisioning Server

Appendix 1: Troubleshooting
Jabber Video sign in messagingIf there are problems signing in to Jabber Video, a status message is displayed, for example:
Possible messages include:
Login failed – Wrong username, domain, and / or password
n Check and correct these items either at the Jabber Video sign in, or on the VCS. Mistyped domain names are a common cause of this problem (see Configuration > Domains). The Jabber Video SIP domain must match a SIP domain on the VCS that is provisioning the Jabber Video and to which Jabber Video will register.
n Check that VCS allow / deny lists are not preventing the registration. n Check that the Default Zone is configured with an Authentication policy of Check credentials or Treat as
authenticated. l Jabber Video sign ins will fail if the Authentication policy is Do not check credentials. l If authentication is set to Check credentials (recommended) the appropriate username and password
must be configured in the local authentication database. n Check that the account username, the authentication credential name, and the Jabber Video sign in
username all match (note that from X7.1 or later, usernames are case insensitive). l If the Jabber Video sign in username and the authentication credential name do not match then the initial
Subscribe will be rejected as unauthorized. l If the Jabber Video sign in username and the account username do not match then the Subscribe is
authenticated but the Notify is sent with Reason: rejected; Content length: 0.
Cisco TelePresence VCS Starter Pack Express Deployment Guide (X8.5) Page 22 of 36
Appendix 1: Troubleshooting

Login failed – Out of licenses
n Check the number of registered users; a maximum of 50 simultaneous registrations is supported. n Make sure that Jabber Video is trying to connect to the correct IP address for the VCS.
Login failed – The server did not respond in time
This means the provisioning request was acknowledged by the server, but no provisioning message was received by Jabber Video.
n Make sure that no firewalls are blocking communication from the VCS to Jabber Video. n Make sure that the VCS can contact the IP address of Jabber Video (or if behind a home, small business or
hotel firewall, the outside IP address of that firewall).
Login failed – Could not find server in DNS
The term “server” refers to the provisioning server before Jabber Video is provisioned, and the VCS after Jabber Video is provisioned.
n Check that the Internal Server and External Server names on the Jabber Video Sign-in Settings dialog are resolvable by the Jabber Video PC, for example by attempting to ping the DNS names. (These are the addresses Jabber Video uses when requesting to be provisioned.)
n Check that the Cluster name (FQDN for provisioning) on the System > Clustering page of VCS is resolvable by the Jabber Video PC, for example by attempting to ping the DNS name.
Login failed – Unable to connect to server
The term “server” refers to the provisioning server before Jabber Video is provisioned, and the VCS after Jabber Video is provisioned.
n Check that the Internal Server and External Server names on the Jabber Video Sign-in Settings dialog are resolvable by the Jabber Video PC and resolve to the VCS Starter Pack Express address, for example by attempting to ping the DNS names. (These are the addresses Jabber Video uses when requesting to be provisioned.)
n Check that the Cluster name on the System > Clustering page of VCS is resolvable by the Jabber Video PC and resolves to the VCS Starter Pack Express address, for example by attempting to ping the DNS name.
n Check that TCP mode and TLS mode are both set to On. (Check this on the Configuration > Protocols > SIP page.)
n Make sure the VCS is configured to listen on the ports Jabber Video is trying to access, by default TCP port = 5060 and TLS port = 5061. (Check this on the Configuration > Protocols > SIP page.)
Call failed – The user could not be found. The user is offline or does not exist.
Check the called ID entered in the Type name, number or address field (past entries are available under the Recent calls tab).
If this is correct, check:
n Is the called party offline? n Is the called party dialable on this network?
Cisco TelePresence VCS Starter Pack Express Deployment Guide (X8.5) Page 23 of 36
Appendix 1: Troubleshooting

Call failed – The user could not be found
Check the called ID entered in the Type name, number or address field (past entries are available under the Recent calls tab).
If this is correct, check:
n Is the called party offline? n Is the called party dialable on this network?
Call failed – The user could not be reached. Please try again later.
The user did not respond.
Call failed – An error was received from the server
The call was rejected by the VCS. The error message received from the server is in the user’s Audit.log.
Call failed – Not enough call licenses
All available licenses may be in use. Check the call licenses usage on the VCS Overview page.
Phone book searches do not return any entries
Phone book search requests are rejected if the Default Subzone is configured with an Authentication policy of Do not check credentials.
You are recommended to set the Default Subzone authentication to Check credentials and configure the appropriate usernames and passwords in the local authentication database.
Failed to update presence
Jabber Video displays a “Failed to update Presence” message if the Default Subzone is configured with an Authentication policy of Do not check credentials.
You are recommended to set the Default Subzone authentication to Check credentials and configure the appropriate usernames and passwords in the local authentication database.
Signaling level troubleshootingTroubleshooting is usually best carried out in the first instance by taking a Wireshark (a free, open-source packet analyzer) trace on the PC running Jabber Video.
Note, however, that if Jabber Video is communicating over TLS, then messages will be encrypted and not decodable. If possible, turn off TLS or use SIP logging.
On the Wireshark trace check that the following sequence is observed:
Jabber Video VCS
Subscribe
To:provisioning@<domain>
From: <Username>@<domain>Event: ua-profile
Unauthorized
To:provisioning@<domain>
From: <Username>@<domain>www-authenticate: Digest nonce
Cisco TelePresence VCS Starter Pack Express Deployment Guide (X8.5) Page 24 of 36
Appendix 1: Troubleshooting

Jabber Video VCS
Subscribe
To:provisioning@<domain>
From: <Username>@<domain>Authorization: Digest nonce
OK (to Subscribe)
Notify
To: <Username>@<domain>
From: provisioning@<domain>Content-Type:text/xml
<xml><ProvData>
… Jabber Videoprovisioning data
OK (to Notify)
To: <Username>@<domain>
From: provisioning@<domain>
Publish
To: <Username>.ep@<domain>To: <Username>.ep@<domain>
<xml <tuple <status> <basic> open
Register
To: <Username>.ep@<domain>To: <Username>.ep@<domain>
OK (to publish)
To: <Username>.ep@<domain>To: <Username>.ep@<domain>
OK (to register)
To: <Username>.ep@<domain>To: <Username>.ep@<domain>
Subscribe
To:provisioning@<domain>
From: <Username>@<domain>Event: ua-profile
OK (to subscribe)
Cisco TelePresence VCS Starter Pack Express Deployment Guide (X8.5) Page 25 of 36
Appendix 1: Troubleshooting

Jabber Video VCS
To:provisioning@<domain>
From: <Username>@<domain>Event: ua-profile
Subscribe
… may be any time
To:<contactname>@<contactdomain>
From: <Username>.ep@<domain>Event: presence
… if any ‘My Contacts’
OK (to subscribe)
… may be any time after … repeat Subscribe
subscribe for presenceTo:<contactname>@<contactdomain>
From: <Username>.ep@<domain>and OK for all contacts
Notify
… Phonebook
To: <Username>@<domain>
From: provisioning@<domain>Content-Type:text/xml
<xml><ProvData><services><PhoneBook> <Presence>
OK (to notify)
To: <Username>@<domain>
From: provisioning@<domain>
Notify
To: <Username>@<domain>
From: provisioning@<domain>Event: presence
Content-Type: application/pidf+xml<xml><presence<tuple<basic> open|closed
OK (to notify)
To: <Username>@<domain>
From: provisioning@<domain>
When Jabber Video requests phone book information the message flow is:
Jabber Video VCS
INFO
Cisco TelePresence VCS Starter Pack Express Deployment Guide (X8.5) Page 26 of 36
Appendix 1: Troubleshooting

Jabber Video VCS
To: sip:phonebook@<domain>From: <Username>@<domain>
Content-Type: application/tandberg-phonebook+xml
<xml><searchstring><character(s)></searchstring>
Unauthorized
To: phonebook@<domain>
From: <Username>@<domain>www-authenticate: Digest nonce
INFO
To: sip:phonebook@<domain>From: <Username>@<domain>
Authorization: Digest nonceContent-Type: application/tandberg-
phonebook+xml<xml><searchstring><character(s)>
</searchstring>
OK
To: sip:phonebook@<domain>
From: <Username>@<domain>Content-Type: application/tandberg-
phonebook+xml<xml><searchResponse>
<DisplayName>
As more characters are typed in Jabber Video’s Type name, number or address field, further INFO messages (with Authorization header) are sent with more searchstring characters specified. For each INFO message an OK comes back with the first 10 phone book entries that match that searchstring.
Note that: 401 Unauthorized or 407 Proxy authentication required responses may extend the trace.
n Failure to get any response to the initial subscribe: the wrong Internal Server / External Server values may have been configured (or DNS is wrongly converting the name to IP address).
n 401 Unauthorized for a second time to the initial subscribe: the Username / Password credentials on Jabber Video do not match those configured in the authentication page of VCS.
n No OK to Register: check that the SIP domain configured in Jabber Video matches the SIP domain configured on VCS. l Check that Allow and Deny lists are not blocking this registration. l Check the VCS Event Log (Status > Logs > Event Log).
Cisco TelePresence VCS Starter Pack Express Deployment Guide (X8.5) Page 27 of 36
Appendix 1: Troubleshooting

Appendix 2: Basic VCS configurationFollow the process specified in VCS Getting Started Guide to connect, power up, configure the IP address, change passwords and gain access to the VCS via the web browser.
System name
1. Go to System > Administration and set System name to a name that represents this VCS, for example “VCS server”.
2. Enable or disable Telnet, SSH, HTTP and HTTPS as required.
Note that HTTP is just a redirect to HTTPS; turning off HTTPS will prevent web access to the VCS.
DNS
1. Go to System > DNS and configure a default DNS server address in the Default DNS server Address 1 field. If other DNS servers are available, they can be added for DNS server resilience.
2. Set Local host name to be the DNS hostname for this VCS; this name must not have any spaces in it. 3. Set Domain name to be the suffix which when added to an unqualified DNS name makes it into an
FQDN.
Note that <Local host name>.<DNS domain name> = FQDN of this VCS.
NTP
1. Go to System > Time and configure the NTP server 1 address and Time zone in which the VCS is located.
2. Check that after clicking Save and returning to this page the State shows Synchronized.
Further information
For further details on the configuration and operation of VCS, see VCS Administrator Guide.
Cisco TelePresence VCS Starter Pack Express Deployment Guide (X8.5) Page 28 of 36
Appendix 2: Basic VCS configuration

Appendix 3: Additional information
Characters allowed in SIP URIsThe following character set is allowed in SIP URIs (further details may be found in RFC 3261):
a-z / A-Z / 0-9 / "-" / "_" / "." / "!" / "~" / "*" / "'"/ "(" / ")" "&" / "=" / "+" / "$" / "," / ";" / "?" / "/"
If other characters are needed they must be “escaped” using "%" followed by a pair of hexadecimal digits that represents the ASCII value for the required character.
For example, "alice [email protected]" must be encoded as alice%[email protected] (where %20 represents the space character).
Determining the FindMe ID for a callerVCS can only overwrite the Caller ID with a FindMe ID if:
n the call signaling passes through the VCS (or VCS cluster) where the FindMe data is held n the VCS can identify a FindMe as the owner of the endpoint caller ID
If either of these conditions are not met, the incoming caller ID will be passed through unchanged.
The VCS identifies a FindMe as the owner of the endpoint caller ID if the incoming caller ID provided in the call:
n matches a FindMe device which is only found in a single FindMe account
or
n matches a single principal FindMe device (if the same device address is associated with more than one FindMe profile)
Principal devices
Note that principal devices are designed to be key devices for the user who owns them:
n A device is identified as a principal device if it has been configured by the VCS administrator in the Principal devices section of the user account page (Users > FindMe accounts), then select or create an account).
n Users cannot delete principal devices from the list of FindMe devices in an account.
Known limitations
Modifying a user’s display nameAny change to a user account Display name is immediately reflected in phone books and the display name returned in FindMe searches.
However, the caller ID display name in SIP messaging is only updated after the relevant Jabber Video is re-provisioned (for example, after signing out and signing back in again).
Cisco TelePresence VCS Starter Pack Express Deployment Guide (X8.5) Page 29 of 36
Appendix 3: Additional information

Appendix 4: Jabber Video and Active Directory (NTLM) authenticationThis section provides summary details about how to configure the VCS so that Jabber Video can authenticate via direct access to an Active Directory server (using NTLM challenges).
It also configures the VCS user account (FindMe) authentication source to use an LDAP connection to the remote directory service.
Note that this section only provides summary details. For full information, see:
n Device Authentication on VCS Deployment Guide n Authenticating VCS Accounts using LDAP Deployment Guide
Configure Active Directory server details in Cisco VCS
1. Go to Configuration > Authentication > Devices > Active Directory Service. 2. Set Connect to Active Directory Service to On. 3. Set NTLM protocol challenges to Auto. 4. Enter the configuration details for the Active Directory Service:
AD domain This must be the fully qualified domain name (FQDN) of the AD domain.
Short domain name This is also known as the NetBIOS domain name.
Username and Password
Enter the AD domain administrator username and password. The password is case sensitive.
5. Click Save to store the configuration and join the AD domain.The VCS should join the AD domain. If you receive an error message, check the following: l the configuration settings on this page, including the username and password l the VCS’s CA certificate, private key and server certificateYou can also check the Status area at the bottom of the Active Directory Service page for more information about the status of the connection to the AD domain.
Configure the user login account (FindMe) authentication source
1. Go to Users > LDAP configuration. 2. Set FindMe authentication source to Remote.
This means that when users log in to the VCS to configure their FindMe account, they will be authenticated against a remote directory service over LDAP.
3. Configure the details of the LDAP connection to the remote directory service.See Authenticating VCS Accounts using LDAP Deployment Guide for more information.
Create user accounts
Set up a user account as described in "Creating user accounts [p.12]" for each user in Active Directory that requires a Jabber Video account: Note that:
n The Username must be the same name as configured in Active Directory.(Account password details are not requested because the login account FindMe authentication source is set to Remote.)
Cisco TelePresence VCS Starter Pack Express Deployment Guide (X8.5) Page 30 of 36
Appendix 4: Jabber Video and Active Directory (NTLM) authentication

n The FindMe ID must be in the form of a SIP URI, such as [email protected]. n In the Principal devices section, set Jabber Video device to On. n It is not necessary to configure each user's FindMe user account / authentication credentials in the local
authentication database (if the login account FindMe authentication source is set to Remote).
Sign in to Jabber Video
Users should now be able to sign in to Jabber Video using their Active Directory credentials. Ensure that their Jabber Video is set up as described in Installing and configuring Jabber Video [p.17].
1. Sign in to Jabber Video: a. In the Username field, configure <AD Short Domain Name>\username
(this field is not case sensitive). b. In the Password field, enter the password as configured in the Active Directory database for the
chosen user. 2. Click Sign in.
A successful registration confirms that authentication of provisioning and registration of Jabber Video to a VCS now works using Active Directory database (direct) authentication.
Cisco TelePresence VCS Starter Pack Express Deployment Guide (X8.5) Page 31 of 36
Appendix 4: Jabber Video and Active Directory (NTLM) authentication

Appendix 5: Starter Pack and Cisco TMSPE provisioning comparisonThe following table provides a feature comparison between Starter Pack provisioning and Cisco TMSPE provisioning.
VCS Starter Pack Express VCS with Cisco TMSPE
Jabber Video provisioning
Cisco Jabber for iPad provisioning
E20 provisioning
Ex60 / Ex90 provisioning
MX200 provisioning
Architecture Centralized Centralized/Distributed
Registrations 50 2500 per VCS
Cluster support X
Failover X
No of concurrent calls 5 (but additional traversal call licenses can be added)
Up to 500 non-traversal and 100 traversal calls per VCS
Registration capacity 50 2,500 per VCS,
10,000 per cluster
Presence Server 50 registrations 10,000 registrations
Interworking gateway X
FindMe™ 50 users Optional
Group FindMe™ X
Multiway support X
SIP support
ICE support
Provisioning of Jabber Video Basic Advanced
Cisco TMS management X
AD import of user details X
Individual settings per user (bandwidth, phone books, encryption setting)
X(Global, Group and/or User)
Phone books Local only
Multiple user groups X
Cisco TelePresence VCS Starter Pack Express Deployment Guide (X8.5) Page 32 of 36
Appendix 5: Starter Pack and Cisco TMSPE provisioning comparison

VCS Starter Pack Express VCS with Cisco TMSPE
Reporting X
Scheduling and booking X
Endpoint management X
Automatic Jabber Video software update alert
X
Cisco TelePresence VCS Starter Pack Express Deployment Guide (X8.5) Page 33 of 36
Appendix 5: Starter Pack and Cisco TMSPE provisioning comparison

Related documentsDocument number Title
D14049 VCS Administrator Guide
D14088 FindMe Express User Guide
D14525 VCS FindMe Deployment Guide
D14819 VCS Authenticating Devices Deployment Guide
D14410 Cisco TelePresence Jabber Video Administrator Guide
D14526 Authenticating VCS Accounts Using LDAP Deployment Guide
Cisco TelePresence VCS Starter Pack Express Deployment Guide (X8.5) Page 34 of 36
Related documents

Document revision historyThe following table summarizes the changes that have been applied to this document.
Date Description
December 2014 Republished for X8.5.
June 2014 Updated for X8.2. Added information about configuring a DNS zone.
December 2013 Updated for VCS X8.1.
November 2012 Updated for VCS X7.2.1. Added support for Cisco Jabber for iPad.
August 2012 Updated for VCS X7.2.
June 2012 Updated for VCS X7.1.
January 2012 Updated for VCS X7.0.
November 2011 Updated for VCS X6.1.
November 2010 New document styles applied.
March 2010 Initial release.
Cisco TelePresence VCS Starter Pack Express Deployment Guide (X8.5) Page 35 of 36
Document revision history

THE SPECIFICATIONS AND INFORMATION REGARDING THE PRODUCTS IN THIS MANUAL ARE SUBJECT TO CHANGE WITHOUT NOTICE. ALL STATEMENTS, INFORMATION, AND RECOMMENDATIONS IN THIS MANUAL ARE BELIEVED TO BE ACCURATE BUT ARE PRESENTED WITHOUT WARRANTY OF ANY KIND, EXPRESS OR IMPLIED. USERS MUST TAKE FULL RESPONSIBILITY FOR THEIR APPLICATION OF ANY PRODUCTS.
THE SOFTWARE LICENSE AND LIMITED WARRANTY FOR THE ACCOMPANYING PRODUCT ARE SET FORTH IN THE INFORMATION PACKET THAT SHIPPED WITH THE PRODUCT AND ARE INCORPORATED HEREIN BY THIS REFERENCE. IF YOU ARE UNABLE TO LOCATE THE SOFTWARE LICENSE OR LIMITED WARRANTY, CONTACT YOUR CISCO REPRESENTATIVE FOR A COPY.
The Cisco implementation of TCP header compression is an adaptation of a program developed by the University of California, Berkeley (UCB) as part of UCB's public domain version of the UNIX operating system. All rights reserved. Copyright © 1981, Regents of the University of California.
NOTWITHSTANDING ANY OTHER WARRANTY HEREIN, ALL DOCUMENT FILES AND SOFTWARE OF THESE SUPPLIERS ARE PROVIDED "AS IS" WITH ALL FAULTS. CISCO AND THE ABOVE-NAMED SUPPLIERS DISCLAIM ALL WARRANTIES, EXPRESSED OR IMPLIED, INCLUDING, WITHOUT LIMITATION, THOSE OF MERCHANTABILITY, FITNESS FOR A PARTICULAR PURPOSE AND NONINFRINGEMENT OR ARISING FROM A COURSE OF DEALING, USAGE, OR TRADE PRACTICE.
IN NO EVENT SHALL CISCO OR ITS SUPPLIERS BE LIABLE FOR ANY INDIRECT, SPECIAL, CONSEQUENTIAL, OR INCIDENTAL DAMAGES, INCLUDING, WITHOUT LIMITATION, LOST PROFITS OR LOSS OR DAMAGE TO DATA ARISING OUT OF THE USE OR INABILITY TO USE THIS MANUAL, EVEN IF CISCO OR ITS SUPPLIERS HAVE BEEN ADVISED OF THE POSSIBILITY OF SUCH DAMAGES.
Cisco and the Cisco Logo are trademarks of Cisco Systems, Inc. and/or its affiliates in the U.S. and other countries. A listing of Cisco's trademarks can be found at www.cisco.com/go/trademarks. Third party trademarks mentioned are the property of their respective owners. The use of the word partner does not imply a partnership relationship between Cisco and any other company. (1005R)
Any Internet Protocol (IP) addresses and phone numbers used in this document are not intended to be actual addresses and phone numbers. Any examples, command display output, network topology diagrams, and other figures included in the document are shown for illustrative purposes only. Any use of actual IP addresses or phone numbers in illustrative content is unintentional and coincidental.
© 2014 Cisco Systems, Inc. All rights reserved.
Cisco TelePresence VCS Starter Pack Express Deployment Guide (X8.5) Page 36 of 36