cic cookbook - pbworkspavelgk.pbworks.com/w/file/fetch/106456773/cic_cookbook_en.pdf5 1 introduction...
TRANSCRIPT

SAP AG
CIC Cookbook
Release 464
SAP UtilitiesSAP Media
Copyright
Copyright 2001 SAP AG All rights reserved
No part of this documentation may be reproduced or transmitted in any form or for any purposewithout the express permission of SAP AG
SAP reserves the right to change the information contained in this document without prior notice
Contents
1 Introduction 5
2 Structure of the Customer Interaction Center (CIC) 5
21 Framework 6
22 Components 7221 Selecting Visible Components7222 Selecting Invisible Components 8
23 Component Profiles 9
24 CIC Profile10241 Defining CIC Profiles 10242 Assigning CIC Profiles10
3 Component Configuration 11
31 Data Search 12311 Data Search in IS-U12312 Data Search in IS-M 12
32 Application Area and Navigation Area13321 Functions in the Application Area14322 Functions in the Navigation Area 22
33 Action Box 24
34 Toolbars (GUI Status Active Functions) 24341 User-Defined GUI Status25
35 Selection Function in IS-U25
36 Autocall Component in IS-U26
37 Configuring the CTI Component 26
38 Maintaining the Call Center Profile 27
39 Other Activities27
4 Front Office Processes in IS-U 27
41 Defining Front Office Processes 28
42 Defining Front Office Editor Steps 29
5 Customer-Specific System Modifications for the CIC 30
6 Administrative Settings 30
4
7 HTML Templates 30
71 Prerequisites 30
72 Setting Up Services 31721 Setting Up Services Using SAPWeb Studio 31722 Setting Up Services Using the Object Navigator (SE80) 31
73 Creating Your Own HTML Templates32
74 URL Structure32
75 Template Structure 33
76 Debugging Functions 33
77 ewhv_functions 33
78 Sample Templates34781 EXAMPLE1html34782 EXAMPLE2html35
5
1 IntroductionThe Customer Interaction Center (CIC) is the working interface used by agents who have directcontact with customers The CIC is fully integrated into the SAP System for the industry solutions SAPUtilities and SAP Media All standard and customer-specific business processes can be called up inthe CIC The CIC interface can be customized to fit any companyrsquos various business areas andprocesses and the components it uses
The CIC can be connected to external telephone systems and subsequently used as a call centerCallers can be identified by their telephone numbers (Automatic Number Identification ANI) The CICprovides the agents with call center functions such as telephone consulting transfer queue logins andlogouts call processing for both ingoing and outgoing calls using a function bar or Quick Keys Thecustomerrsquos call status is displayed as is the number they dialed (Dialed Number Identification DNIS)
The CIC can display information (all relevant customer data) in HTML-based format You can accessthe Internet marketplaces business-to-business scenarios and the intranet and receive e-mails andfax documents
EMBED
The CIC for the industry solutions SAP Utilities and SAP Media contains a number of functionsthat are not not included in the R3 standard CIC This cookbook describes these additionalfunctions in detail The R3 standard functions are described in detail in the SAP Library underLogistics rarr Customer Service (CS) rarr CS ndash Customer Interaction rarr Customer InteractionCenter
2 Structure of the Customer Interaction Center (CIC)The structure of the Customer Interaction Center resembles an assembly system that enables everyenterprise to meet their particular requirements for the user interface You can also configure the CICdifferently for different groups of agents
This section explains the principles and elements of the assembly system These are the starting pointfor implementing a new Customer Interaction Center or adapting an existing one
The CIC assembly system is based on a framework architecture The most significant elements of thisassembly system that is of the framework architecture are as follows
bull The frameworkYou use the framework to define which components you want to use in the CIC and how theyshould be structured You can define several frameworks
bull The componentsFunctions used in the CIC are provided as components
bull The component profilesThe set of characteristics for each component is called the component profile Here you canspecify for example which processes can be called in the action box You can define severalcomponent profiles for each component
bull The CIC profilesIn the CIC profile you can assign component profiles to the components selected in theframework You then assign the CIC profiles to the appropriate employees
You can use the CIC either with or without a telephony connection The graphic shows the structure ofa system with a telephony connection
6
R3
Telephone system
CTI Middleware IVR
CIC SAPphone
Applications (IS-U CS SDhellip)
Optional use
SAPconnectInternet
MailFax
21 FrameworkA framework serves as a placeholder for the screen structure When you define a new framework youdetermine which functions (components) you need and how they should be structured You canstructure components in the framework without modifying anything in the system Components thathave already been shipped can be changed or not included at all
The framework provides a structure for all the components that you can use in the CIC Defining aframework (framework ID) is the same as providing a screen on which you can select variousfunctions for agents in various screen areas One framework can provide several views of a screenonly the components (screen areas) have the same structure The framework enables interactionbetween the selected components by dividing the system functions into visible (on-screenpresentation) and invisible (background processing) components and by using an event mechanism
Use the followingis path to customize the front office framework
SAP Utilities SAP Utilities rarr Customer Service rarr Customer Interaction Center rarr Maintain FrontOffice Framework ID and Parameters
EMBED
This activity summarizes the three R3 standard activities under Customer service Customer Interaction Center Defining the Front Office Framework (creating a frameworkselecting visible components selecting invisible components) into one common interface
SAP Media Customer Service rarr Customer Interaction Center rarr Define Front Office Framework
First select a screen layout for the framework Your selection of a layout determines the basic screenlayout for the CIC You have various selection options
bull Screen with six horizontal screen areas
bull Screen divided into L-shape (large) number 8101
bull Screen divided into L-shape (small) number 8100
bull Screen with two tab pages in a vertical relationship number 7100 (IS-M only)
For the L-shape screens the slots are structured as follows
7
Slot 2 Telephone
Slot 4 Action box
Slot 1Businesspartnersearch
Slot 5Navigation area
Slot 6 Application area
Slot 7 not used
Slot 3 not used
Your choice of screen layouts will depend on the companyrsquos requirements and which Release you areusing
SAP Utilities The L-shaped screen structures are only available from Release 461 the screenlayout containing the slots displayed one above the other is available from Release451
SAP Media The Customer Interaction Center with the L-shaped screen structures is availablefrom Release 463 The classic screen structure (slots arranged vertically) and ascreen that is divided into two tab pages in a vertical relationship have been availablesince Release 461
22 Components The functions that are used in the CIC and that can therefore be called in one of the screen areas(slots) are called components We differentiate between visible and invisible components A visiblecomponent is mapped as a subscreen in one of the seven screen areas or slots An invisiblecomponent provides background functionality that does not require its own screen area
221 Selecting Visible Components
You can determine the content of some of the slots in the framework yourself by assigningcomponents Some components can only be used in horizontal frameworks while others can only beused for L-shaped frameworks The functions of the individual components complement each otherand the components themselves are sized specially for specific slots in the framework
When you are assigning visible components to the slots in your framework use the possible entrieshelp whenever possible to select components and variants The choice of components that can beselected depends on the screen layout you are using
If you are using the framework with the six horizontal slots then you can assign the following visiblecomponents to any slot
bull ACTION_BOX Calls started displayed as a table
8
bull ABOX_SLIM Calls started displayed as pushbutton bar with drop-down menus
bull BD_DISPLAY object repository (for example various documents)
bull CALL_STATE Display of current business partner (if telephone integration is available)
bull CCONT Component container to enable you to include more components
bull ISUFINDER IS-U search criteria (IS-U only)
bull QUICK_KEYS Function keys
bull SCRIPT_DISP Reminder scripting display
bull SOL_SEARCH Entry screen for solution database
bull APPL_AREA Standard application area for HTML configuration calls that are started in the actionbox
bull ISM_CCON Component container (IS-M)
bull ISMAM_ORDERLIST Order overview IS-M Advertising Management
bull ISMSD_ORDERLIST Order overview IS-M Media Sales and Distribution
bull ISM_NOTE Notes for forwarding in IS-M
bull ISM_SCRIPT Scripting texts in IS-M
bull ISM_TEXTS Business partner texts in IS-M
If you are using an L-shaped framework you do not have a free choice of the components and theirarrangement You can assign the components as follows
bull Slot 1 ISUSDPART Business partner identification in IS-U
CSEARCH_DISP Business partner identification in IS-M
bull Slot 2 and 4 ABOX_SLIM CALL_STATE QUICK_KEYS
bull Slot 5 NAV_AREA Navigation area
bull Slot 6 APPL_AREA_2 Application area
You can use several special components simultaneously in the navigation and application areas inslots 5 and 6 You make these settings in Customizing under lsquoMaintain Standard Settings forNavigation and Application Areasrsquo (see section 32)
Slots 3 and 7 are not part of the standard However you can use one of these slots for example tointegrate the solution database For more information on the solution database look in the IMG underCustomer Service Solution Database
222 Selecting Invisible Components
There are three types of invisible components
1 Independent components
bull AUTOCALL (automatic action)
bull CALLBACK (calls back)
bull CIC_TOOLBAR (tool and menu bar) mandatory if the CIC_TOOLBAR2 is not used
bull CIC_TOOLBAR2 (tool and menu bar) only for use if you need your own functions andfunction key settings
bull HLOG (logging)
2 Components without which certain visible components will not work
bull CTI (telephone integration) for CALL_STATE
9
bull HIDDEN SCRPT (scripting) for SCRIPT_DISP
bull ISM_HSCRIPT (scripting IS-M only)
3 Components that can be used in combination with visible components
bull BD_MARK (selection function) with BD_DISPLAY
bull CALLCTR (Call Center) with CALL_STATE
If you are not using telephone integration you do not need the components CALL_STATE SCRIPT_DISP HIDDEN SCRPT CALLCTR and CTI
SAP Utilities The components CSEARCH_DISP and CSEARCH_HIDE are not used in IS-U Wealso no longer recommend use of the component HTML-based customer overview(CUST_OVIEW) because of its effect on system performance
23 Component ProfilesThe set of characteristics for a component is defined in the component profile
EMBED
For example in the profile for the action box ACTION_BOX_CONFIGURATION youdetermine which activities the action box contains You define the availability of the action boxin the CIC by selecting the component ACTION_BOX
You need profiles for most visible and invisible components See the table below for a summary of themost important assignments to standard profiles
Visible component(technical name)
Component profile required (profile types)
ACTION_BOXABOX_SLIM
ACTION_BOX_CONFIGURATION andor
ACTION_BOX_CONFIGURATION_SLIM
CCONT COMPCONT_PROF
CSEARCH_DISP CONTACT_SEARCH_CONFIGURATION
QUICK_KEYS QUICK_KEYS_CONFIGURATION
SCRIPT_DISP SCRIPT_PROFILE
BD_DISPLAY No profile required
CALL_STATE No profile required
SOL_SEARCH No profile required
APPL_AREA_2 DEFAULT_WORKSPACES
NAV_AREA DEFAULT_WORKSPACES
ISM_CCONT ISM_COMPCONT_PROF
Invisible component(technical name)
Component profile required (profile types)
CALLBACK CALLBACK_ASSIGN_QUEUE_PROFILE
CALLBACK_CONFIGURATION
CALLBACK_PROCESS_QUEUE_PROFILE
10
CALLCTR CALL_CENTER_COMP_CONFIGURATION
CIC_TOOLBARCIC_TOOLBAR2
TBAR_PROFTBAR2_PROF
CTI CTIADM_PROFCTIQA_PROF
HLOG ACTIVITY_LOGGING_PROFILE
HIDDEN_SCRPT No profile required
HIDDEN_ABOX No profile required
ISM_HSCRIPT No profile required
ISM_HSEARCH No profile required
Section 3 explains how to define individual component profiles
24 CIC Profile
241 Defining CIC Profiles
The customer interaction profile (CIC profile) is the collective profile containing all the settings madefor individual components within a framework
You can create a CIC profile using the customizing menu path Customer service rarr CustomerInteraction Center (CIC) rarr CIC Profile Carry out the following steps
1 First define the CIC profile ID This ID is used to assign the CIC profile to an agent or group ofagents
2 Then assign a valid framework ID to the CIC profile ID
3 Then select component profiles as attributes of the CIC profile These component profileshave been assigned in the framework as visible or invisible components
242 Assigning CIC Profiles
Once you have created the CIC profiles assign them to groups of agents In order to assign the CICprofile to users you need the HR-PD organizational structure The HR-PD organizational structuremaps your company as a hierarchical structure with organizational units positions jobs and theirholders You can assign user names or personnel numbers to positions One user can hold severalpositions in various organizations for example one user may be a member of both the sales andservice departments
EMBEDYou can find the complete documentation for Organizational Management in the SAPLibrary under Human Resources rarr Personnel Management rarr Organizational Management
This section describes how to assign a CIC profile to a user if you have already created anorganizational structure for your company To get to the organizational structure choose transactionPPOMW or Logistics rarr Customer Service rarr Customer Interaction Center rarr Administration rarr CICStructure rarr Organizational Structure rarr Change in the SAP Easy Access Menu
You can assign a CIC profile on the following levels
bull Organizational unit
bull Position
11
bull Job
To do this proceed as follows
1 Call up the organizational unit job or position to which you would like to assign the CIC profile
2 Choose Goto rarr Detail object rarr Enhanced object description
3 Scroll down through the list of infotype names and choose CIC ProfileYou can use an infotype to describe or define various attributes or characteristics for objects
4 Choose Create infotype or Change infotype
5 In the next screen click on the CIC profile ID field and press F4 A list of the CIC profilesavailable in Customizing is displayed
6 Select the CIC profile required from the F4 list and choose Save
EMBEDProfile 00000001 is defined as the default profile This ensures that users who are notassigned to an organizational unit position or job can still call up the CIC If your user nameis assigned to several organizational units or positions with different CIC profiles when youcall the CIC a window will appear for you to select one of these profiles
If a CIC profile on a lower level does not contain component profiles for all components in theframework then the system will search higher levels of the organizational structure for another CICprofile with the same framework and take the additional profiles from there This is useful if you areassigning specific components to new employees or if you want to get standard default settings ifCustomizing on the lower levels is not comprehensive
EMBEDFor example a new agent does not need so many calls in the action box whereasanother agent requires change functionality as well as the information display In this situationyou can use the same framework for both with the same components but with differentcomponent profiles stored in the CIC profile The requirements can easily be met by creatingan additional component profile that only contains the profile of the relevant component andassigning this profile to a lower level (for example position)
EMBEDYou cannot use several identical components with different component profiles withinone framework In other words each component can only be used once within any oneframework
EMBEDIn the CIC you can display the framework used through the CIC profile with Agent rarrFramework status
3 Component ConfigurationThis unit describes in detail the individual components and their component profiles and thecustomizing settings that you need to make for these components
12
31 Data SearchWorking in the CIC generally requires you to first identify business partners (as well as other dataobjects in IS-U) using data such as name address and so on
311 Data Search in IS-U
Two visible components are available for data searches in IS-U that is for identifying data objectsNeither of these components requires a profile
bull ISUFINDER (IS-U Datafinder)
The ISUFINDER component can only be used in conjunction with a framework with horizontalslots This is because the data search is always related to the other components used and isintegrated into the flow logic
The ISUFINDER is a general search function that can search for different kinds of data objectswithin IS-U (for example contract accounts contracts devices and so on) The data objectsfound can then be passed to the other components When defining the action box you cantherefore access data found by the ISUFINDER (see section 33)
bull ISUSDPART (Business partner search in IS-U)
The ISUSDPART component is specifically intended for use with the L-shaped frameworkThis is a specialized search function that searches exclusively for ISUSD business partnersWe recommend that once you have run a business partner search you immediately call upthe customer environment so that you can display the relevant subordinate data objects thereand process them further if necessary
EMBEDIf you would like to change the search or display fields for the data search then youcan use the SAP enhancement ECSFO001 for the ISUFINDER component To change theISUSDPART component see Note 369458 (customer enhancements for the CIC componentISUSDPART)
312 Data Search in IS-M
You can use the visible component CSEARCH_DISP to search for business partners in IS-M Thisrequires the profile type CONTACT_SEARCH_CONFIGURATION You can use the component bothwith the L-shaped framework and with the classic framework (slots arranged vertically)
The component CSEARCH_DISP is used to identify business partners The business partner can bedetermined using a variety of search criteria such as name city and document number
Once a business partner has been identified their data environment is determined automatically andmade available for further processing
In the profile for profile type CONTACT_SEARCH_CONFIGURATION a function module is used todefine which search subscreen is used
bull L-shaped layout ISM_CIC_SEARCH_CREATE_SMALL
bull Classic layout ISM_CIC_SEARCH_CREATE
The function module also determines how the search is performed
bull When data is entered manually on the search subscreen
bull When searching using the data related to a telephone call
bull Search category ANI for searches using the caller number
bull Search category IVR for searches using IVR data
13
32 Application Area and Navigation AreaThe components available for the L-shaped framework include the following
bull Navigation area (NAV_AREA)
bull Application area (APPL_AREA_2)
These areas are a kind of container for applications that you can use in the CIC with an L-shapedframework To use these areas you must create corresponding profiles as described in this sectionOnce you have created the profiles add the NAV_AREA and APPL_AREA_2 components to yourframeworkCIC profile as described in the sections above
You can also assign components to the application and navigation areas The special feature of thesetwo areas is that each screen area can be subdivided into a maximum of 10 tab pages Everyassigned application can then easily be accessed by clicking on one of the tab pages This layout alsogives users a good overview of what is available on the screen
You can find the settings for the application and navigation areas in the IMG under
SAP Utilities SAP Utilities rarr Customer Service rarr Customer Interaction Center rarr Maintain StandardSettings for Navigation and Application Areas
SAP Media SAP Media rarr Customer Interaction Center rarr Maintain Standard Settings for Navigationand Application Areas
In this activity you can define which components are loaded in the application and navigation areaswhen the CIC is started You can fill the 10 tab pages of the application and navigation areas with thefollowing content
bull HTML configurations such as account overview or account balance maintenance (for IS-U)and IAC customer overview (for IS-U and IS-M)
bull Special components that are available for use in the application and navigation areas Theseinclude the business data display contact processing customer overview data environmentand order overviews
EMBEDAlways use the input help to select the HTML configurations components and theirprofiles (if required) that you want to use Invalid entries will not be rejected but may lead tounexpected system behavior at runtime
EMBEDUse the business data display component in the navigation area it is required for theaction box calls
Only use the contact processing component in the application area
HTML pages among other things are displayed in the application area You start these pages in theaction box or in the data environment of the navigation area These could be HTML pages from theInternetintranet from the file system or the SAP Web Repository If you call several HTML pagesthen a separate tab page is created for every HTML page called
You can also call up an HTML page from another HTML page that is already in the application areaTo do this however you must adapt the HTML page accordingly You can find instructions on how todo this in section 7
EMBEDYou include the definition of the application and navigation areas as a profile ofcomponent profile type DEFAULT_WORKSPACES in your CIC profiles You must also includethe components Application Area (APPL_AREA_2) and Navigation Area (NAV_AREA) in yourframework
14
EMBEDIf you have forgotten to assign the application area component to your currentframework the HTML page will be displayed in the browser control of a repositionable dialogbox
Some of the components that you can use in the application and navigation areas require specialcustomizing The procedure is described in sections 321 to 326
321 Functions in the Application Area
3211 Maintaining the HTML Configuration of the Application AreaIf you want to use HTML configurations in the application area you need to make certain settings inthe IMG under Customer Service rarr Customer Interaction Center rarr Component Configuration rarrApplication Area rarr Maintain HTML Configuration for Application Area In this activity you canconfigure the HTML pages that are executed in the application area
In the HTML configuration you need to enter the name of the configuration an explanatory text andthe source of the HTML page (URL or path in the file system) If you want to pass parameters to theHTML page when it is started then you must maintain them as external parameters
A URL with external parameters has the following format
ltURL addressgt ltSeparator1gt ltArgName1gt = ltValue1gt[lt Separator 2gt[ltArgName1gt =ltValue1gt]]
EMBEDA URL may look like this
httpserver1ABoxCallsCustomerRequesthtmlCustomer=0000815ampSD_Bel=000000000002305
In this example ltSeparator1gt has the value and ltSeparator2gt has the value ampltSeparator1gt separates the URL address from the argument block ltSeparator2gt separatesthe pairs consisting of argument name and argument value Since different pages can usedifferent separators for argument processing these values can be configured SAPrecommends that you use the separators and amp since the ITS (Internet TransactionServer) requires these characters
You can start other HTML pages workflows action box calls and front office processes (in IS-U) froman HTML page that you have called up (= internal call) To do this enter the configuration descriptionrequired in the Configuration field If you want to start a transaction from an HTML page you first needto define a configuration profile in the activity Define Configuration Profile for Transactions from HTMLand create a configuration (see section 32111) You also need to define which parameters shouldbe made available for internal calls You can maintain these parameters with the internal parametersfor the first HTML page called
You choose a description for the external and internal parameters that corresponds to the parametersthat are expected in the URL for the HTML page You also need to enter an explanatory text and thescreen element for the parameters
bull Import parameters are imported into the HTML page
bull Export parameters can be passed back to the object repository when the page is closed Thisdoes not work however if you close the page by deleting it
Next you need to establish the editing sequence This determines in which part of the parameterdialog the parameter appears For external parameters you can also define the parameter asmandatory
You can use the following transactions to maintain the data flow for both internal and externalparameters
bull For external parameters the activities Define Configuration Profiles for Action Box or DefineData Environments for the Navigation Area (sections 33 and 3221)
15
bull For internal parameters the transaction Define Configuration Profile for Transactions fromHTML (section 32111)
When an HTML page is called the external parameters can be filled with values from the objectrepository If the objects required are not in the object repository a dialog is started in which you canmanually enter the external parameters required HTML pages that are called internally can onlyreceive parameters from the HTML page called up
You can assign Web objects to an HTML page You first need to create these objects using the R3transaction Web Development rarr Web Repository (SMW0) If you enter several objects the first objectmust be an HTML page The objects are passed to the page when it is called You do not need tomaintain parameters for Web objects You can find more detailed information in the online help for thistransaction
Finally define which functions are to be enabled on the tab page by activating the buttons provided(stop navigation refresh and delete buttons) If you do not activate the delete button you will not beable to close the tab page
The Customer overview (CUSTINFO) component is also an HTML configuration It is always calledwhen a business partner is identified When customizing this HTML configuration ensure that you dothe following
bull Assign editing sequence 1 to the external parameter that is to be filled with the object typeISUPARTNER (this Customizing setting is not required for IS-M)
bull Assign editing sequence 2 to the external parameter to be filled with the key (current businesspartner number)
Choose names for the parameters that match the names expected by the HTML page called up Youcan additionally define another HTML configuration that is always displayed if no business partner iscurrently identified The name of this HTML configuration is made up of the name of the customeroverview HTML configuration with the suffix _INIT
32111 Maintaining the Configuration Profile for Transactions Started from HTML
Once you have called up an HTML page you can then start other HTML pages workflows front officeprocesses (IS-U only) and so on from there (see section 321) You can maintain the configurationprofile for these transactions using the path Customer Service rarr Customer Interaction Center rarrComponent Configuration rarr Application Area rarr Define Configuration Profile for Transactions fromHTML
Once you have entered the name create the individual groups and then create transactions within thegroups These transactions can have the types HTML operation workflow method and so on Thenyou need to configure the data flow for each transaction The maintenance interface for creatinggroups and transactions corresponds to the maintenance interface for creating an action boxconfiguration (see section 33)
16
Defining an HTML Customer Overview
IS-U Customer Overview
You can use the IMG activity SAP Utilities rarr Customer Service rarr Customer Interaction Center rarrDefine HTML Customer Overview to customize the HTML customer overview in IS-U This activityenables you to edit the HTML data selection (view) for customer information The HTML data selectionspecifies which levels (nodes) and which data should be displayed from the maximum data pool on the
Device
Utility installation
Utility contract
Premise
Print document
Account information level 1
IM Account balances
IM Budget billing plan 1
IM Budget billing plan 2
IM Budget billing plan 3
IM Credit history
IM Customer payments
IM Dunning items
IM Paid items
Contract account
Customer contact
Service order
Service notification
Sales order
Customer quotation
Business partner
Graphic 2 Hierarchy node if you select thelsquofirst according to premisersquo structure TheACCOUNT HTML data selection is based onthis structure
Device
Utility installation
Print document
Account information level 1
Utility contract
IM Account balances
IM Budget billing plan 1
IM Budget billing plan 2
IM Budget billing plan 3
IM Credit history
IM Customer payments
IM Dunning items
IM Paid items
Contract account
Premise
Customer contact
Service order
Service notification
Sales order
Customer quotation
Business partner
Graphic 1 Hierarchy node if youselect the lsquofirst according to contractaccountrsquo structure The PARTNERHTML data selection is based on thisstructure
17
levels available The above graphics 1 and 2 give a hierarchical representation of the nodes Thenodes whose attributes are used in the templates are selected
When you are selecting your structure you can define the order in which the nodes lsquoContract accountrsquoand lsquoPremisersquo appear The only possible orders are ldquofirst according to contract accountrdquo or ldquofirstaccording to premiserdquo
If you want to display fields from a hierarchy node you must carry out the following steps
1 Activate the ldquoDisplay Activerdquo field in the ldquoCharacteristicsrdquo box
EMBEDYou must choose the display type ldquoDisplayrdquo objects in the ldquoCharacteristicsrdquo box forcertain nodes You can also specify the maximum number of objects that can be created andtheir maximum age for certain objects
2 Activate fields as required in the ldquoPresentationrdquo box (tab title ldquoActivate fieldrdquo)You can also suppress the display of certain attributes (tab title ldquoSuppress fieldrdquo) This can beuseful if you do not want to display all attributes for a given node If no attributes are selectedfor an object then all attributes for that object are automatically active
EMBEDThe function module field is not yet in use
You can also select a CB (Cluster Builder) profile for the node ldquoAcct info level 1rdquo In thisprofile you can enter the list category and the line layout for the underlying account balancedisplay The standard profile here is ACC_HTML This profile contains the list categoryCIC_HTML and the line layout CIC for the account balance display
You can maintain the CB profile for the account balance display using Financial Accounting rarrContract Accounts Receivable and Payable rarr Basic Functions rarr Account Balance Display rarrDefine Settings for Account Balance Display in Front Office
EMBEDYou can also limit the attributes displayed using the line layout although theldquoPresentationrdquo box will still show that all attributes will be displayed
EMBEDYou must set all data objects that you do not want to be displayed to inactive forperformance reasons
In order to use the HTML customer overview you now need to set up a service on the ITS (seesection 7)
EMBEDYou can integrate the HTML customer overview for example into the application areain the CIC To do this in Customizing select SAP Utilities rarr Customer Service rarr CustomerInteraction Center rarr Maintain Standard Settings for Navigation and Application Areas andinclude the component CUSTINFO Then create in Customizing a configuration for theCUSTINFO component using Customer Service rarr Customer Interaction Center rarrComponent Configuration rarr Application Area rarr Maintain HTML Configuration for ApplicationArea (see section 321)
18
IS-M Customer Overview
You make the Customizing settings for the HTML customer overview in IS-M under SAP Media rarrCustomer Interaction Center (CIC) rarr Define HTML Customer Overview You can edit the HTML dataselection (view) for customer information in this step The HTML data selection determines whichlevels (nodes) and data from the maximum list of available levels are to be displayed The nodes aredisplayed hierarchically in the following diagrams
Overview Graphic of IS-M Customer Overview
Business partner
IS-M
IS-MAM
IS-MSD
19
Detailed View of IS-M Customer OverviewThe nodes with attributes used in the standard templates are marked
IS-M IS-MAM IS-MSDBusiness partner
Order item
Sales area
Bank data
Credit cards
Contact person
Customer contact
Advertiser
Sales agent
Contact person
Agency
Product
Product
Business partner
MAM order
Ad spec
Sched line
Ad spec
Billg dataset
Complaint
Contract
Billing document
Item
Order billing doc
Item
Receivables charge-off
Item
Business partner
MSD order
Order item
Limiteditem
Complaint
Sub-item
Limitedsub-item
Complaint
MSD billing docMedia mix contract
CRM contact
CAS contact
Billing docsfor item
MSD complaint
MSD shipping order
Complaint
To display fields from a hierarchy node please proceed as follows
1 Choose the desired structure
2 Choose the data objects in the structure that you want to display Deactivate data objects that youdo not want to use
3 Activate the attributes you want to use in your HTML template for each object type To do thisselect the Selection field
If you do not activate any attributes all the attributes of the object type are activeautomatically Instead of activating individual attributes on the first tab page you can also usethe second tab page and deactivate individual attributes The Function module field is notused at present
You can restrict display of the data objects to certain sales area groups or to a salesorganization distribution channel and division for some nodes
You must choose the display type Display objects in the Characteristics box for certain nodesYou can also specify the maximum number of objects that can be created and their maximumage for certain objects
20
You should deactivate data objects that you do not want to display for performance reasons
To use the HTML customer overview in IS-M you must first set up a service on the ITS (see section72)
Before you can use the HTML customer overview you must integrate the componentCUSTINFO in the CIC application area To do this choose SAP Media rarr CustomerInteraction Center rarr Maintain Standard Settings for Navigation and Application Areas in theImplementation Guide You must also create a configuration for this component CUSTINFOunder Customer Service rarr Customer Interaction Center rarr Component Configuration rarrApplication Area rarr Maintain HTML Configuration for Application Area (see section 321)
3212 The Workflow InboxYou can use the Workflow Inbox to integrate the SAP Business Workplace Workflow inbox into theCIC application area
You maintain the profile for the Workflow Inbox (WF_INBOX) component in Customizing as follows
SAP Utilities SAP Utilities rarr Customer Service rarr Customer Interaction Center rarr Establish Settingsfor Workflow Inbox Component
SAP Media SAP Media rarr Customer Interaction Center rarr Workflow Inbox Component rarr Settings forWorkflow Inbox Component
You also need to include the WF_INBOX component with the profile you have just maintained on a tabpage in the application area
You can enter the profile name and an explanatory text on the Workflow Inbox Profile level of the viewcluster On the Task filter level you can enter tasks of your choice (single-step or multistep tasks) orgroups of tasks as filters If you do this then only work items whose underlying tasks correspond tothese criteria will be displayed in the Inbox If you do not maintain the filter settings then all work itemsthat are displayed in the general SAP Business Workplace Workflow Inbox will also be displayed here
EMBEDTask group TG20500002 (for IS-U) and task group TG26000001 (for IS-M) contain allthe tasks supplied by SAP that are intended for use in the CIC
EMBEDUsers can in any case only see work items that they have authorization to processThe task filter is simply intended as a supplementary way of limiting these work items
Inbound documents (for example e-mails) or customer requests for callbacks can also be displayed inthe Workflow Inbox You can make the relevant settings in the IMG
SAP Utilities SAP Utilities rarr Customer Service rarr Customer Interaction Center rarr Define Processfor Inbound Documents or Define Process for Customer Callbacks
SAP Media SAP Media rarr Customer Interaction Center rarr Workflow Inbox Component rarr DefineProcess for Inbound Documents or Define Process for Customer Callbacks
The activities required are described in detail in the IMG
3213 Defining Control Data for Web GUI CallsThe Internet Transaction Server (ITS) is used to call up Action Box calls (methods workflows and inIS-U front office calls) in the application area in the CIC instead of in full-screen mode Calls are onlycalled up in the application area if the Run in application area if possible field is checked on call levelin the action box profile
21
You can maintain the basic address (URL) of the ITS for the current logical system in Customizing asfollows
SAP Utilities SAP Utilities rarr Customer Service rarr Customer Interaction Center rarr Define ControlData for Web GUI Calls
SAP Media SAP Media rarr Customer Interaction Center Define Control Data for Web GUI Calls
The ITS must be able to use the EWB_WEBGUI service
You can enter various user-specific ITS addresses andor a default value ndash without specifying a username You can deactivate the inplace calls either temporarily or for specific users as required usingthe field lsquoSuppress inplcersquo (suppress inplace)
EMBEDIf you do not maintain an ITS basic address then the calls are automatically called upin full-screen mode
3214 Recording Customer ContactsYou can use the component customer contract recording to create a customer contact for examplefor a current call You can access the contact for maintenance by confirming the caller (businesspartner) When you do this default values are copied from a contact profile and the caller is copied asthe contact partner
Before you can use customer contact recording you must assign the Contact maintenancecomponent CONTACT_MAINTENANCE in the IMG under
SAP Utilities SAP Utilities rarr Customer Service rarr Customer Interaction Center rarr MaintainStandard Settings for the Navigation and Application Areas
SAP Media SAP Media rarr Customer Interaction Center rarr Maintain Standard Settings for Navigationand Application Areas
Contact maintenance should only be assigned to the application area
You can define default values for contact recording in Customizing under Financial Accounting rarrContract Accounts Receivable and Payable rarr Business Transactions rarr Customer Contacts rarrDefine Configurations You can record the defined configuration for the program contextCL_ISU_CONTACT_WORKSPACE======CP 0001 in the IMG step Define ConfigurationDetermination
3215 Business Partner Texts in IS-MYou can use this component to display business partner texts
Before you can use the business partner texts you must maintain the component ISMAM_TEXTS inthe IMG step SAP Media rarr Customer Interaction Center rarr Maintain Standard Settings for Navigationand Application Areas
3216 Forwarding Notes in IS-MThis component is used to create display and forward notes
Before you can use the notes you must maintain the component ISM_NOTES in the IMG step SAPMedia rarr Customer Interaction Center rarr Maintain Standard Settings for Navigation and ApplicationAreas
3217 Ad Item Entry in IS-M Advertising Management
You can use this component to record simple ad items using fast access in the application area
Before you can use ad item entry (component ISMAM_ORDER) you must create a profile inCustomizing under SAP Media rarr Customer Interaction Center rarr Make Settings for Ad Item EntryComponent Maintain a meaningful short and long text and default values for item entry in this IMGstep
The default values include
bull Sales area
22
bull Order type
bull If applicable indicator Ad spec editor active in CIC (see 3223)
Before you can use ad item entry you must define the component ISMAM_ORDER in the IMG stepSAP Media rarr Customer Interaction Center rarr Maintain Standard Settings for Navigation andApplication Areas
The component ISMAM_ORDER should only be assigned to the application area
3218 Order Overviews in IS-MThe Advertising Management component ISMAM_ORDERLIST provides you with an overview ofMAM order items
Similarly the component ISMSD_ORDERLIST provides an overview of MSD order items for MediaSales and Distribution
In addition to these two order overviews the components contain a variety of processing functionssuch as canceling and creating items
Before you can use the order overviews you must create a profile in the relevant IMG step
SAP Media rarr Customer Interaction Center rarr Make Settings for MAM Order Overview Component or
SAP Media rarr Customer Interaction Center rarr Define Settings for the MSD Order OverviewComponent
You must assign a meaningful short and long text and define other settings for example for selectioncriteria and variant maintenance
Before you can use the order overviews you must define the component ISMAM_ORDERLIST orISMSD_ORDERLIST in the IMG step SAP Media rarr Customer Interaction Center rarr MaintainStandard Settings for Navigation and Application Areas
You should only assign the components to the application area
322 Functions in the Navigation Area
3221 Define Data EnvironmentYou define your own data environments for the CIC navigation area in Customizing
SAP Utilities SAP Utilities rarr Customer Service rarr Customer Interaction Center rarr Define DataEnvironments for the Navigation Area
SAP Media SAP Media rarr Customer Interaction Center rarr Define Data Environments for theNavigation Area
You can use the data environments defined here in the navigation area of the L-shaped CICframework Alternatively you can integrate the data environments in the application area for the CIC
You have the following options in profile maintenance
bull Choose the structure you want to use for the data environment Predefined structures areavailable for selection
bull Choose the object types you want to display
bull Define additional selection parameters such as the maximum number or maximum ageof the objects to be selected (for example customer contacts) for each object type
bull Maintain the presentation default which determines the attributes that are to be displayedfor an object type SAP delivers default presentations for most object types and you canuse and change these
23
Choose Maintain action profile on the initial screen of the activity to access maintenance of the actionprofile that is linked to your data environment You specify here which transactions can be accessedby a double click or via the context menu (accessed by clicking the right mouse button) duringprocessing The maintenance interface for the action profile is the same as that for creating an actionbox configuration
For further information see 33
The action groups are generated automatically in your action profile and correspond to the objecttypes displayed in the data environment assigned The following objects can be used for the data flowto be defined
bull ltNODEOBJECTgt object selected during runtime
bull ltROOTOBJECTgt business partner at runtime
SAP delivers a number of examples which you can use or copy Use the customer name range X Yand Z when doing this
Then add your data environment to one of the components NAV_AREA (navigation area) orAPPL_AREA (application area) in the IMG step Maintain Standard Settings for Navigation andApplication Areas by assigning the component NAV_VIEW and the profile of your data environment
3222 Contact HistoryYou can use the Contact History component to display the last contacts for an agent You can useselection criteria defined in Customizing to display certain contacts only You define these criteria inthe IMG step
SAP Utilities SAP Utilities rarr Customer Service rarr Customer Interaction Centerrarr DefineSettings for Contact History
SAP Media SAP Media rarr Customer Interaction Center rarr Make Settings for Contact HistoryComponent
Define a profile name and an explanatory text You can determine whether or not the name of the userwho created the contracts can be changed for selection The other criteria are used to restrict the listof contracts displayed
You should define simple criteria to ensure good performance
Before you can use the contact history you must define the component CONT_HIST and the relevantprofile in the IMG step SAP Media rarr Customer Interaction Center rarr Maintain Standard Settings forNavigation and Application Areas
3223 Ad Spec Editor in IS-M Advertising Management
You can use the ad spec editor to design ad specs for a MAM item created using ad item entry Youcan also display ad specs for MAM items selected from the order overview
You can integrate editors in the navigation area which can be reproduced on an HTML page forexample as Java applets
You create the profile for the component Ad Spec Editor ISMAM_EDITOR in the IMG step SAPMedia rarr Customer Interaction Center rarr Make Settings for Ad Spec Editor Component
Maintain a meaningful short and long text You should also record a URL in the profile that is used tocall up the editor
To activate the ad spec editor add the component ISMAM_EDITOR with its profile to a tab page in thenavigation area in the IMG step Maintain Standard Settings for Navigation and Application Areas
You must also make the following Customizing settings
bull The indicator Ad spec editor active in CIC must be selected in the IMG step SAP Mediararr Customer Interaction Center rarr Make Settings for Ad Spec Editor Component
24
bull You must define a technical system for ad design in the CIC in the IMG step SAP Mediararr Advertising Management rarr Connection of Media Technical Systems rarr Assign AdOrder Entry System
bull You must assign a destination for the technical system under SAP Media rarr AdvertisingManagement rarr Connection of Media Technical Systems rarr Assign RFC Destination
Action BoxThe action box or activity bar (component ACTION_BOX and ABOX_SLIM) enables access to R3functionality Users can start calls from here You can create the calls and functions that you want tomake available in the action box in the IMG activity Customer Service rarr Customer Interaction Center(CIC) rarr Component Configuration rarr Action Box Settings rarr Define Configuration Profiles for ActionBox
You can call all required data overviews transactions and processes in the action box You need togroup these calls into transaction groups in Customizing A call could for example be a method aworkflow a front office process (IS-U only) or an HTML operation You can define as many transactiongroups as you like each containing as many calls as you need You define the descriptions and iconsfor each transaction group in Customizing
You also need to define the data flow from the CIC to the calls The calls can for example use thecurrent business partner data data objects from the Business Data Display or constants that you havedefined Naturally you also have the option of entering missing data at the start of a call in a parameterscreen
You can find a detailed description of how to customize the action box in the SAP LibraryunderLogistics rarr Customer Service (CS) rarr CS ndash Customer Interaction rarr Customer InteractionCenter
EMBEDYou can also start calls in the CIC navigation area (see section 3221)
EMBEDOnce you have created the action box configuration profile include it in your CICprofiles using the component profile type ACTION_BOX_CONFIGURATION_SLIM orACTION_BOX_CONFIGURATION Also include the component ABOX_SLIM orACTION_BOX in the framework you are using
34 Toolbars (GUI Status Active Functions)You must use the toolbar component CIC_TOOLBAR for both the L-shaped CIC and the horizontallystructured CIC This component determines the CICrsquos GUI status and enables you to deactivatecertain functions in the function bar
You can create your toolbar profile in the IMG activity Customer Service rarr Customer InteractionCenter (CIC) rarr Component Configuration rarr Toolbars (GUI Status Active Functions) This sectionenables you to set toolbar features You have two IMG activities at your disposal
1 Define Toolbars and GUI StatusYou assign a GUI status to the toolbar profile that you define here This GUI status determinesthe menu bar the function keys and pushbuttons and the active functions GUI statuses areprovided by SAP Currently available
bull PFS100 ndash with telephony integration (CTI)
bull PFS300 - without telephony integration
There are no other GUI statuses currently available
25
2 Deactivate Function Codes in ToolbarsYou can use this activity to deactivate function keys for individual profiles This is particularlyuseful if you do not want to include one or more functions in specific profiles
EMBEDInclude the toolbar profile in your CIC profiles using the component profile typeTBAR_PROF You also need to include the CIC_TOOLBAR component in yourframework
341 User-Defined GUI Status
You can use a user-defined GUI status This allows you to make function key settings without havingto define an action box call
You create the individual GUI status by copying a status from function groupSAPLEE_CIC_TOOLBAR to the customer enhancement function group SAPLXEECICTOOLBAR Youcan change the copied status in this function group
You store the profile with the user-defined GUI status in Customizing as follows
SAP Utilities Use transaction SM30 and table EECICTOOLBAR to make settings IMG node tofollow
SAP Media SAP Media rarr Customer Interaction Center rarr Define Standard Toolbars and User-Defined GUI Status
bull You assign the profile with the user-defined GUI status to profile type TBAR2_PROF inthe IMG step Customer Service rarr Customer Interaction Center rarr CIC Profile rarr MaintainCIC Profile
bull You assign the component CIC_TOOLBAR2 in the IMG step Customer Service rarrCustomer Interaction Center rarr Definition of Front Office Framework rarr Assignment ofHidden Components to Framework IDs
bull If you use the component CIC_TOOLBAR2 you should no longer use the componentCIC_TOOLBAR
35 Selection Function in IS-UIn the CIC for the industry component SAP Utilities the business objects involved in a process can beplaced in the object repository once the process is complete You can use the selection function todetermine which objects in the list (for example business partner contract account and so on) shouldbe sorted in ascending order or selected automatically This enables you start another process for therelevant object from the object repository without having to reenter the data object The selectionfunction is considered an invisible component as it does not require its own screen area
You can create a profile for the component lsquoSelection Functionrsquo (BD_MARK) in the IMG activity SAPUtilities rarr Customer Service rarr Customer Interaction Center rarr Define Selection Function
In this activity you define the relevant business object for display and sorting for each configuration(CIC profile) You must not change the entries supplied You may use the following namespaces 9X Y Z (customer namespaces)
Since you can only use the selection function together with the object repository (the objects to beselected are in the object repository) you must first activate the BusinessDataDisplay (BDD)component in CIC Customizing
26
EMBEDYou must include the selection function profile in your CIC profiles using thecomponent profile type BD_MARK_PROF You also need to include the BD_MARKcomponent in your framework
36 Autocall Component in IS-UYou can use the (invisible) autocall component to configure the Customer Interaction Center (CIC) inthe industry component SAP Utilities in such a way that at certain points in time for example when acustomer is identified or a telephone call is received automatic calls are triggered from the action boxYou can also make the start of these action box calls dependent on the content of the Business DataDisplay (object repository) if required
EMBEDYou would like the customer overview to be displayed automatically once the businesspartner has been identified in the CIC
EMBEDYou can only use the autocall component with the horizontal CIC not with the L-shaped CIC In the L-shaped CIC the customer environment and customer overview are inany case displayed automatically on identification
The new component reacts to activities named in the log component or in the scripting component Ifan activity is named in the CIC and the autocall component contains a call start for this activity thenthe autocall component evaluates the conditions stored with the call start against elements from theBusiness Data Display (object repository) and if the conditions are fulfilled starts the correspondingcalls from the current action box configuration
In order to map the above example using the autocall component execute the IMG activity SAPUtilities rarr Customer Service rarr Customer Interaction Center rarr Define Autocall Component Definethe autocall component profile required using a key of your choice Then go to the activities Enter thekey ISUPARTNER_ID (business partner identified) in the field lsquoAct codersquo Enter the value OP as thecall code for the action box The value OP links to the customer overview method Once you havedone this you have therefore linked the activity and the call
EMBEDYou must include the autocall component profile in your CIC profiles using thecomponent profile type AUTOCALL_PROFILE You also need to include the invisiblecomponent AUTOCALL in your framework
37 Configuring the CTI ComponentThe CTI component is the central component that administers the data interchange and theconsistency between the CIC functions and SAPphone APIs to the telephone system (CTI) The CTIcomponent is therefore notified of all processor sessions and all telephone operations from theapplication The component runs in the background and does not contain any visible elements orscreens
You can make the necessary settings in the IMG node Customer Service rarr Customer InteractionCenter (CIC) rarr Component Configuration rarr Configuration of CTI Component There are twoactivities at your disposal here
bull Maintain Profile of CTI ComponentHere you can define the ID and configure parameters for the CTI component (telephoneconnection)
27
For example you can determine the behavior of the login and logout processes when the frontoffice transaction is called from full automation right through to a manual procedure
bull Assign Telephone Queues to CTI ProfilesHere you can define a CTI profile and assign queuestelephone numbers to this profileProcessors can then log on to these queues when they call up the front office
EMBEDYou must include the CTI component profile in your CIC profiles using thecomponent profile type CTIADMI_PROF or CTIQA_PROF You also need to include theCTI component in your framework
38 Maintaining the Call Center ProfileThe call center component also runs in the background of the framework and compares information forincoming and outgoing call processes This component forms a bridge between CTI and the rest of theapplication
This component carries out various tasks for example identifying the caller using the callerrsquos number(Automatic Number Identification or ANI) The data retrieved on the customer contact is displayed forthe processor The fields for the number dialed (Dialed Number Identification Service DNIS) and theDNIS description are also filled with relevant information
You can customize the call center component so that caller identification includes ANI data on the calland certain function calls If automatic caller identification is not possible the processor needs to starta contact search using the search and display functions for contact data
You can make the necessary settings for this component using the IMG node Customer Service rarrCustomer Interaction Center (CIC) rarr Component Configuration rarr Maintain Call Center Profile
39 Other ActivitiesYou can find information on further CIC activities such as Quick Keys or callback settings in the IMGor in the SAP Library underLogistics rarr Customer Service (CS) rarr CS ndash Customer Interaction rarr Customer Interaction Center
4 Front Office Processes in IS-UThe front office process in the industry component SAP Utilities enables you to include R3functionality in a predefined process The front office process was developed with the aim of enablingthe mapping of those business processes in the system that a processor can work through from thefront officeCIC It differs from a workflow in that processors do not receive work items in their inboxesbut rather can call up activities to be executed directly on their screens
You can execute front office processes from the CIC action box or from the navigation area dataenvironment
Customizing front office processes allows you integrate complex business processes in the IS-Usystem in the front officeCIC This section describes in more detail exactly how to customize theseprocesses
28
41 Defining Front Office ProcessesA front office process consists of one or more process steps that can in turn consist of processes Tocreate a front office process execute the following IMG activity SAP Utilities rarr Customer Service rarrCustomer Interaction Center rarr Define Front Office Processes
A front office process basically consists of the following two components
bull The process container
bull One or more process steps
You can define both components in Customizing
The process container contains all data that is used or processed within the front office process Firstdefine all the container elements required for your process To do this position the cursor on thelsquoProcess containerrsquo line and choose Edit Create container element
You will get a dialog box in which you can determine whether the container element contains areference to an ABAP Dictionary field or whether it is a business object
In the parameter characteristics you can determine whether the container element is an importparameter or an export parameter
bull Import parameterThis means that the value is provided externally (usually by the CIC)
bull Export parameterOnce the process is complete the value can be passed back to the calling instance (usuallythe CIC)
If you check the lsquoMandatoryrsquo field then data must be imported for the process flow to work
The editing sequence defines the location of the field within the parameter dialog
The process steps represent the actual tasks carried out during the process To create a new processstep position the cursor on the lsquoProcess stepsrsquo line and choose Edit Create step
You will get a dialog box in which you can determine which call is triggered when the step is executed
bull Business object method
bull Workflow
bull Front office subprocess (processes can also be nested)
bull CATT test run
bull Editor step (see the next section lsquoDefining front office editor stepsrsquo)
Every call regardless of its category has an interface that is possible import and export parametersthat must either be filled with data from the process container or that must return values to the processcontainer To enable this you must define a data flow for each step To do this position the cursor onthe process step and choose Edit Data Flow
The data flow dialog consists of two sections In the top half you can specify the export data flow fromthe process container to the call interface (step container) All import parameters defined in the stepinterface are displayed on the left Use the possible entries help on the right to view all processcontainer elements If the process container element category corresponds to the target elementcategory in the step container then the element has a green background A dark green backgroundmeans that the categories are identical a light green background means that they are related
The same principles apply to the lower half of the screen for the import data flow from the stepcontainer to the process container You can use the possible entries help on the right (data source) toview all export parameters for the step container while all process container elements are displayedon the left (target element)
29
There is a predefined element ltMAINOBJgt in the data flow that has a particular significance If thecall relates to an object method then ltMAINOBJgt always contains the object reference to which themethod refers For example if you want to maintain business partner data in one step then it wouldbe appropriate to choose a call for the lsquoEditrsquo method for the ISUPARTNER object category TheltMAINOBJgt element therefore has the ISUPARTNER category and must be filled with acorresponding value You can recreate this example in the process in BPCHAN01 in defaultCustomizing This is also valid for export parameters If for example the lsquoCreatersquo method creates anobject first then in the import data flow the newly created object will also be in the ltMAINOBJgtelement (see for example process BPCHAN05) ltMAINOBJgt corresponds to the _WI_Object_Idelement in a workflow task definition
You must not change the default entries provided by SAP You may use the following namespacesX Y Z (customer namespaces) Check the default entries provided by SAP You may find it helpfulto copy the default entries or to add new front office processes
EMBEDIn order to call up the front office process from the CIC you must first integrate it intothe action box To do this follow the procedure as described in section 33
42 Defining Front Office Editor StepsAn editor step is generally part of a front office process and it may also be part of a workflow Itrepresents a simple way of enabling users to input data during a process without having to program adialog specifically for that purpose
To create an editor step execute the IMG activity SAP Utilities rarr Customer Service rarr CustomerInteraction Center rarr Define Front Office Editor Steps
This activity enables to you have a dialog generated on the basis of an interface that you defineyourself This interface consists of parameters that are defined in the same way as process containerelements in the activity Define Front Office Processes A dialog (a report with a corresponding screen)is generated based on this interface This dialog enables the fields described in the interface to beprocessed
To define the interface position the cursor on the line lsquoEditor parameterrsquo and choose Edit CreateParameters
You will get a dialog box in which you can determine whether the parameter refers to an ABAPDictionary field or whether it is a business object
In the parameter attribute section you can see that all parameters are by default defined as importand export parameters This together with an appropriate data flow enables you on the one hand toensure that the field is always filled with a default value and on the other to ensure that user entriesare imported into your process container or workflow container The attribute lsquoMandatoryrsquo defines thefield as a required entry field
If you set the attribute lsquoMultilinersquo then the field appears on the screen as a table The editing sequencedefines the location of the field within the parameter dialog
Use the command Edit Generate screen to generate a report with a screen in a reservednamespace You can specify the report name suffix and the screen number in the header informationEvery time your editor step is saved the reportscreen is automatically regenerated
To view the dialog generated choose Edit Test dialog
Check the default entries provided by SAP You may find it helpful to copy the default entries or to addnew front office editor steps You must not change the default entries You may use the customernamespaces X Y Z
EMBEDTo use the editor step as a front office step proceed as described in section 41lsquoDefining Front Office Processesrsquo
30
5 Customer-Specific System Modifications for the CICCustomers can implement specific modifications and enhancements that enable completely newcomponents to be defined for use in the CIC or new activities to be established for processors Youcan make the relevant settings in the IMG under Customer Service rarr Customer Interaction Center(CIC) rarr Customer-Specific System Modifications for CIC You can also find further documentation onsystem modifications there
6 Administrative SettingsA range of settings that you do not make in Customizing is located at Logistics rarr Customer Service rarrCustomer Interaction Center rarr Administration These settings include
bull Assigning user IDs to the HR-PD organizational structure (organizational unit position or job)see section 24
bull Assigning CIC profiles to individual users or user groups see section 24
bull SAPphone work center and customer-specific settings
bull Defining CTI queues
bull Maintaining and assigning DNIS descriptions and scripting texts
You can evaluate profiles and logged data on call center group and user levels under CustomerInteraction Center rarr Info system and use the results of these evaluations to optimize your businessprocesses You can also analyze contact histories for individual users
7 HTML TemplatesThe standard way of representing customer information in the CIC (L-shaped framework) is using anHTML template To use this template you first need to set up a service as described in section72REF
You also have the option of defining your own layouts in HTML templates To do this proceed asdescribed in section 73REF
71 PrerequisitesThe following services must be available on the ITS if you want to use the HTML customerinformation
bull EWHV (layout templates)
bull ISU_GLOBAL (HTMLBusiness functions for reading node data ewhv_functionshtmldebugging functions ewhv_debughtml and ewhv_debugfunctionshtml)
bull ITS system libraries
You must use the latest ITS (46c) and the current HTML Library if you want the HTML customeroverview view to be displayed correctly IS-U Release 461 contains templates with a layout adjustedto match the restricted options available with the Release However you can (and should) alwayswork with the current versions in addition to your R3 IS-U System
31
72 Setting Up ServicesIn Release 461 you need to publish the services on your ITS using SAPWeb Studio This meansthat the files required will be copied to the correct locations on the ITS server
EMBEDAs of Release 462 you can also publish the services directly from the ObjectNavigator (transaction SE80) see 722
721 Setting Up Services Using SAPWeb Studio
Procedure
1 First check that you are connected to the R3 System under ProjectSite Definition Use theonline help if you have difficulties setting up the site definition
Graphic 1 Example of how the Web serverITS host can be defined in the Web Studio
2 Set up a new ITS project EWHV or ISU_GLOBAL
3 Connect to the R3 System ToolsSource ControlConnect to R3
4 Right mouse click on the relevant service and choose lsquoGetrsquo from the context menu
5 Select all files and click OK
6 Choose the File View tab from the object selection list right mouse click the service folder andchoose lsquoPublishrsquo from the context menu
722 Setting Up Services Using the Object Navigator (SE80)
Check the prerequisites
1 Go to Utilities rarr Settings and on the ITS tab check that the Web server and targets forpublishing are set correctly
Then proceed as follows
1 Choose the category Internet Service from the object list selection
2 Enter the name of the service you want to create EWHV or ISU_GLOBAL
3 Right mouse click on the corresponding service
4 Choose Publish rarr Complete Service from the context menu
If errors occur during publishing to an ITS server then the system displays an error log
32
with the relevant message textsIf no errors occur then the message The object was published successfully is displayed inthe status bar
Please also consult the online documentation for SE80 To do this in the Object Navigator chooseHelp -gt Application help -gt Integration of Internet Services
73 Creating Your Own HTML TemplatesYou have the option of creating your own view of your data by defining your own HTML templates
To use your own HTML templates you need to set up a new template on the ITS that corresponds tothe EWHV naming convention that is it must be called ltviewnamegthtml You can create thistemplate using transaction HYPERLINK SE80
EMBEDYou can also edit the template in the ITS file system using NT means particularly asregards renaming the file in accordance with the naming conventions
EMBEDHYPERLINKIf you are working with SAPWeb-Studio under 461 you do not need tocheck the template in to the R3-System as it is only used from the ITS server However ifyou do attempt to check the template in to the R3-System you will receive an error messagesince the name does not adhere to the usual R3-conventions If you do for any reason needto check in a template then rename it accordingly beforehand (naming convention must beginwith Z not SAP) Do not however publish the template under this name (beginning with Z) onthe ITS server because the service only recognizes templates named in accordance with thenaming convention SAPLEWHV_ltviewnamegthtml
74 URL StructureThe URL that you can use among other things to access the HTML customer information with abrowser from outside the R3 System has the following structure
SAP UtilitieshttpltITS-URLgtltServicenamegt~okcode=+ampview=ltProfilgtampobjkey=ltPartnernummergtampclassid=isupartner
SAP Media
httpltITS-URLgtltServicenamegt~okcode=+ampview=ltProfilgtampobjkey=ltPartnernummergtampclassid=busism007
The placeholders marked by ltgt should be replaced with the following content
ltITS-URLgt URL of your companyrsquos ITS for example ITS1companycom
ltServicenamegt scripswgateewhv
ltProfilegt Name of the HTML data selection for example PARTNER
ltPartnernumbergt Business partner number (always starting with zeros where business partners areidentified numerically) for example 0000004711
1 The naming conventions have been adhered to for 462
33
You can also add ampdebug=1 or ampdebug=2 to this URL if you want to use the debugging optionsdescribed in section 76REF We recommend that you use these debugging functions when creatingyour own templates so that you can get an overview of the objects and fields that can be displayed
75 Template StructureThe main HTML customer information template is saplewhv_100html You load the libraries used inthis template make the debugging functions available and dynamically include the HTML template forthe layout (VIEWNAMEhtml)
76 Debugging FunctionsThe HTML customer information templates provide two debugging modes You activate these modesby adding the parameter debug=1 or debug=2 to the URL Mode 1 displays an overview of the objectsdisplayed with their (hierarchical) dependencies and the descriptions of the object categories andclasses Mode 2 displays an overview of the objects and the field attributes transported (content)
To activate debugging add the parameter ampdebug=2 to your URL
HYPERLINKYou can also use the debugging function with templates that you have created yourselfYou must simply adhere to the convention as described in section 75REF
77 ewhv_functionsA range of special HTMLBusiness functions is provided in the file ewhv_funktionshtml for the serviceISU_GLOBAL to enable the data in the templates to be addressed
You will also need to be familiar with general HTMLBusiness functions if you want to create your owntemplates
Function Descriptionobject = root() Returns the initial object with which the cluster builder starts In the
case of the HTML customer information this object is lsquoBusinesspartnerrsquo
Example `partner = root()`
value = attrib(obj attr) Returns the value (value) of the attribute (attr) of the object (obj)Example `value=attrib(partnerDESCRIPTION)`
object = child( obj ind ) Returns the subobject with index (ind) for the object (obj)
Example child1 = child(partner 1)
num = child_dim( obj ) Returns the number (num) of subobjects of the object (obj)
Example num = child_dim(partner)
object = childoftype( objtypeid ind )
Returns the subobject (object) with type (typeid) and index (ind)for the object (obj)
Example acct = childoftype(partner ACCOUNT 1)
num = childoftype_dim(objtypeid )
Returns the number (num) of subobjects of type (typeid) for theobject (obj)
object = father( obj ) Returns the parent of the object (obj)
34
Function Descriptionid = typeid( obj ) Returns the type ID (typeid) for the object (obj)clsid = classid( obj ) Returns the class ID (clsid) for the object (obj)cls = class( obj ) Returns the class (cls) for the object (obj)object = ObjectOfClass( clsidind )
Returns the object with the index (ind) of class ID (clsid)
num = ObjectOfClass_Dim( clsid)
Returns the number of objects in a class
name = attrib_name( cls ind ) Returns the attribute name with index (ind) of class (cls) (Onlyworks when the metainfo parameter is set)
text = attrib_text( cls ind ) Returns the text of the attribute with index (ind) of class (cls)(Only works when the metainfo parameter is set)
num = attrib_dim( cls ) Returns the number of attributes of class (cls) (Only works whenthe metainfo parameter is set)
key_atr =class_key( cls ind ) Returns the key attributes with index (ind) of class (cls) (Onlyworks when the metainfo parameter is set)
num = class_key_dim( cls ) Returns the number of key attributes of class (cls) (Only workswhen the metainfo parameter is set)
There is a sample HTML template for the industry component SAP Utilities below These examplesillustrates how you can address objects and their data The template is delivered as EXAMPLE1htmlwith the EWHV service or you can enter it yourself using the example below
The HTML data selection EXAMPLE1 must be available in the IMG You must ensure that you haveselected ldquofirst according to contract accountrdquo for the structure selection and that you have activated thedisplay for the business partner and the contract account Do not select any fields under lsquoPresentationBusiness partnerrsquo or lsquoPresentation Contract accountrsquo so that all fields are available for display
78 Sample Templates
781 EXAMPLE1html
lt-- include ewhv_functions--gt`include (~service=isu_global ~language= ~theme=99 ~name=ewhv_functionshtml)`
lt-- 1 set root object --gt`partner = root()`lt-- display some root (partner) attributes (field-values) --gtName `attrib(partnerDESCRIPTION)`ltbrgtStreet `attrib(partnerSTREET)`ltbrgtlt-- evaluate class and classid of partner --gtPartner `attrib(partnerNAME1)` has class `class(partner)` and classid `classid( partner)`ltbrgt
lt-- evaluate number of child objects --gtObject partner has `child_dim( partner )` child object(s)ltbrgt
lt-- get first child with typeid ACCOUNT --gt`acct = childoftype(partner ACCOUNT 1)`
lt-- loop over all child objects with typeid ACCOUNT --gt`repeat with id from 1 to childoftype_dim(partner ACCOUNT)` `acct = childoftype(partner ACCOUNT id)` `typeid(acct)` `attrib(acctVKONT)`
35
`end`
782 EXAMPLE2html
The above example is extended below to explain the HTMLBusiness layout functions You can finddocumentation on these functions in SAPNet httpmysapwdfsap-agde2080 - SAP BusinessHTML Cookbook
lt-- Example2 Page Layout with SAP-Business-HTML-Templates --gtlt--Example2 extends Example1 to illustrate the use of SAP layout templates
--gt
lt-- include template library --gt`include (~service=system ~language= ~theme=dm ~name=templateLibrarydhtmlhtml)`lt-- include ewhv_functions--gt`include (~service=isu_global ~language= ~theme=99 ~name=ewhv_functionshtml)`
lt-- put everything in a group box --gt`SAP_TemplateGroupboxBegin(groupBoxLabel=Data Box width=600)`lt-- 1 set root object --gt`partner = root()`lt-- display some root (partner) attributes (field-values) --gtName `attrib(partnerDESCRIPTION)`ltbrgtStreet `attrib(partnerSTREET)`ltbrgtlt-- evaluate class and classid of partner --gtPartner `attrib(partnerNAME1)` has class `class(partner)` and classid `classid( partner)`ltbrgt
lt-- evaluate number of child objects --gtObject partner has `child_dim( partner )` child object(s)ltbrgt
lt-- get first child with typeid ACCOUNT --gt`acct = childoftype(partner ACCOUNT 1)`
lt-- display account data in table --gt`SAP_TemplateTableBegin(title=Accounts)`lt-- row with headings --gt`SAP_TemplateTableRowBegin()`
`SAP_TemplateTableCellBegin(subtype=TEXT)` TypeID `SAP_TemplateTableCellEnd()``SAP_TemplateTableCellBegin(subtype=TEXT)` Account `SAP_TemplateTableCellEnd()`
`SAP_TemplateTableRowEnd()`
lt-- loop over all child objects with typeid ACCOUNT --gt`repeat with id from 1 to childoftype_dim(partner ACCOUNT)`
`acct = childoftype(partner ACCOUNT id)`lt-- row with account data --gt`SAP_TemplateTableRowBegin()SAP_TemplateTableCellBegin(subtype=NONEDIT1) typeid(acct) SAP_TemplateTableCellEnd()SAP_TemplateTableCellBegin(subtype=NONEDIT1) attrib(acctVKONT)
SAP_TemplateTableCellEnd()SAP_TemplateTableRowEnd()`
`end`
`SAP_TemplateTableEnd()``SAP_TemplateGroupboxEnd()`
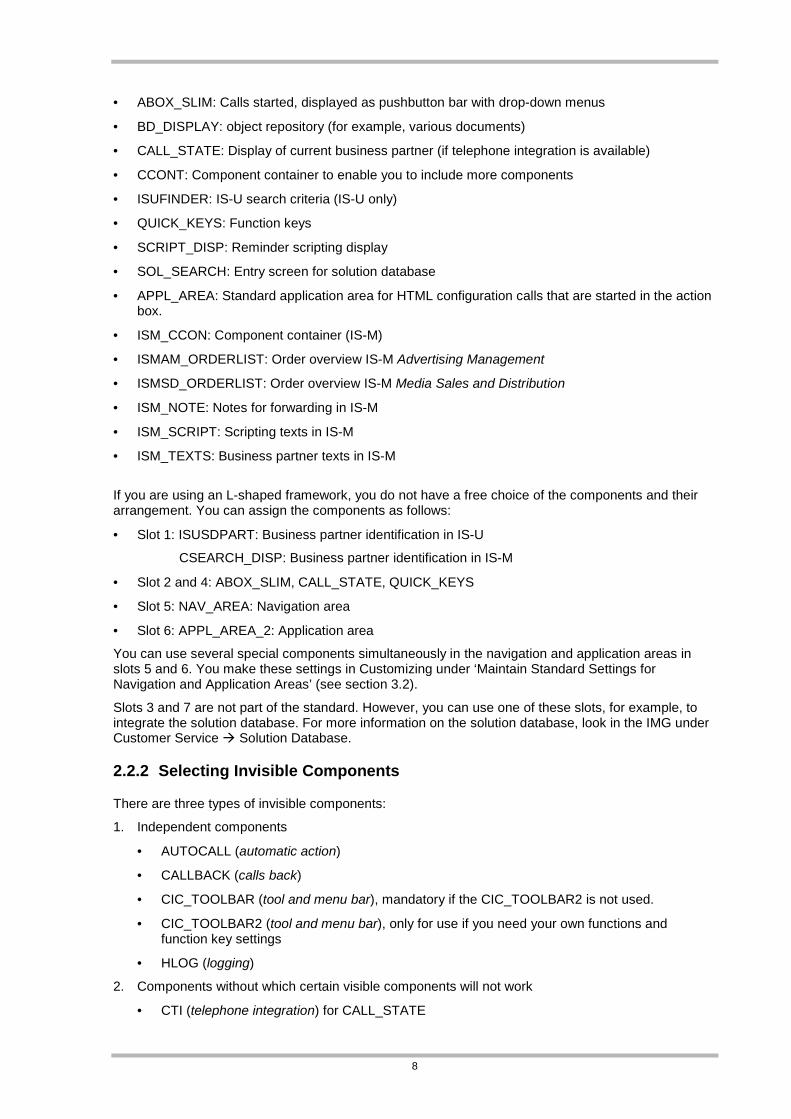
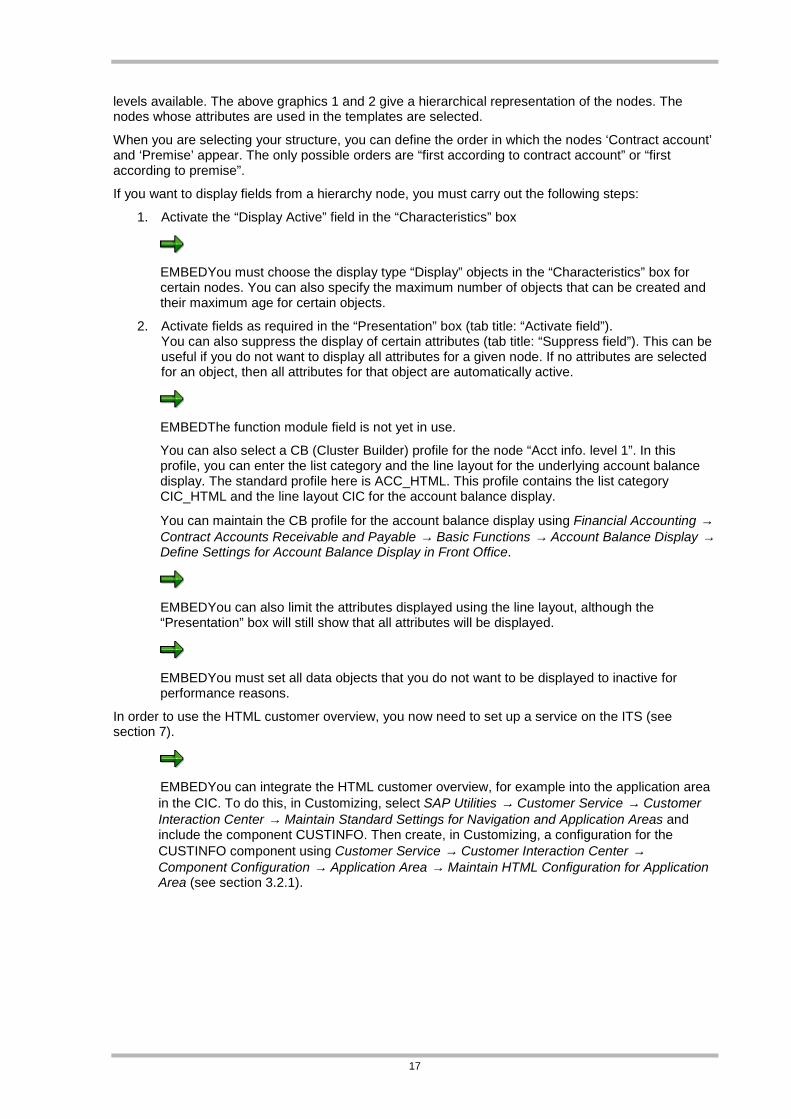
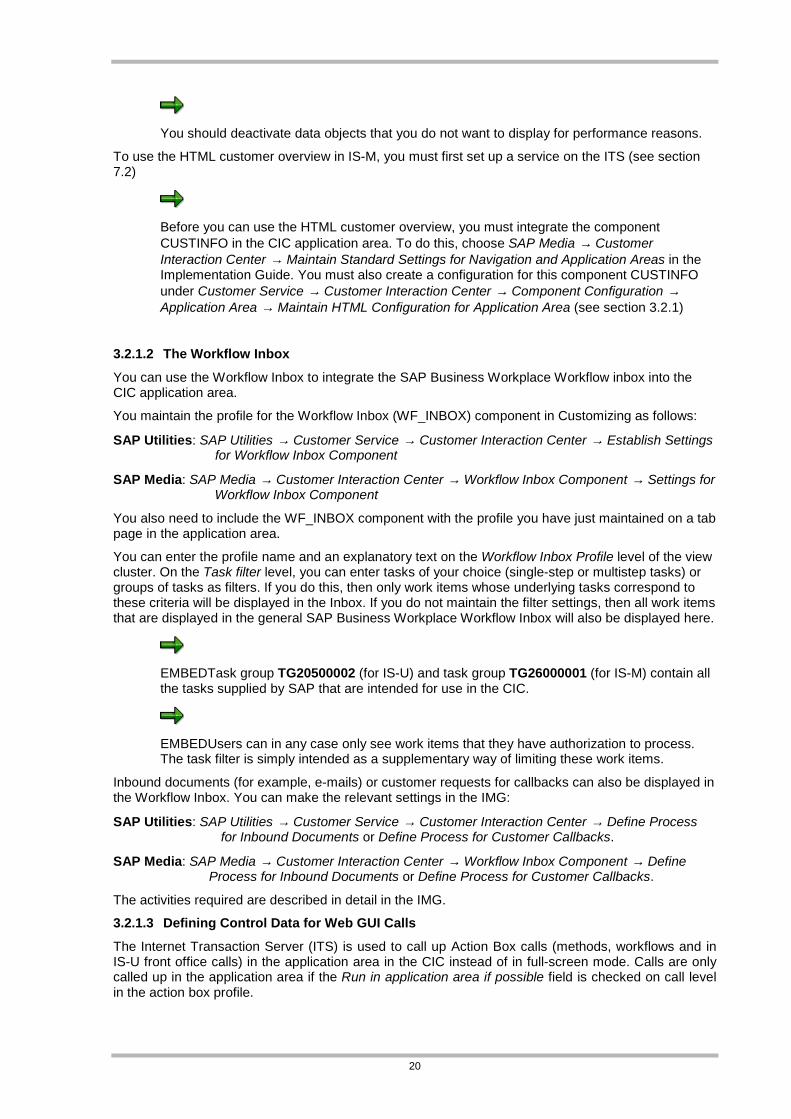