chucks pattern
DESCRIPTION
Free Crochet pattern for converse slipper socksTRANSCRIPT

Chucks Slipper Socks
by Amy Dutsch
THIS is merely a guide for how to make the slippers. You
WILL have to adjust per your foot size and your crochet
tension. Try different weight yarns and hook sizes. You will
need to remove or add rows for various size feet. This
pattern is being tested, if you find any errors, suggestions,
changes, etc, please feel free to message me at http://www.ravelry.com/people/mamaslilmonkeys
Materials:
G Hook
Worsted Weight Yarn in white/cream, black and main shoe
color
Shoelaces
LOW TOP VERSION
Women's Size 9-12/Men's Size 7-9
Make TWO
In White:
Row 1: In Magic Ring, dc 13. Join with slst
Row 2: Ch 3, 2 dc in each st. Join with slst
Row 3 & 4: Ch 3, dc in each st. Join with slst
Change to Main Color (red or chosen color)
Rows 5-8: Repeat row 3
Rows 9-19: Working in ROWS now. Ch 3, dc 13 (make sure to dc
in the starting ch of previous row). Turn. Repeat row 9 until row
19.
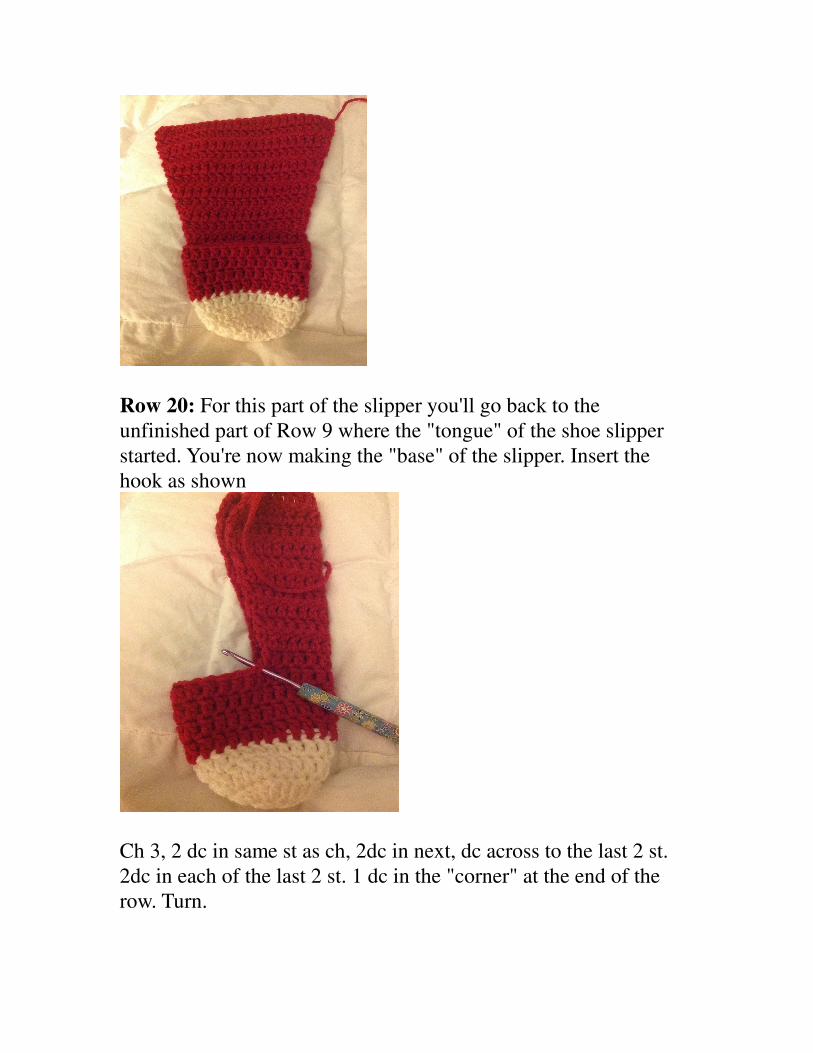
Row 20: For this part of the slipper you'll go back to the
unfinished part of Row 9 where the "tongue" of the shoe slipper
started. You're now making the "base" of the slipper. Insert the
hook as shown
Ch 3, 2 dc in same st as ch, 2dc in next, dc across to the last 2 st.
2dc in each of the last 2 st. 1 dc in the "corner" at the end of the
row. Turn.

Row 21-40: ch 3, dc in each st across. Repeat until you reach row
40.
Finishing the Slipper Sock:
Turn the ends of Row 40 right sides together and stitch together to
make a back seam of the shoe. Finish and weave in ends.
Adding Embellishments:
Weave in white shoelaces just as you would lace up a pair of shoes,
slipping in the stitches.
Make the White Circle:
With G Hook
Round 1: make a magic ring, dc 12 in ring, join with slst
Round 2: ch 3, dc in same st as ch. 2 dc in each st around. Join
with slst, leave a long tail for sewing onto slipper sock.
Embroider a black star and stitching on to the white circle. Sew the
circle on to the outside side of the shoe.
To make it a high top version:
Working in ROWS:
Starting at your BACK SEAM, count 8 stitches or so over from the
center seam. Mark with a stitch marker.
Repeat for the other side.
Starting at your marker, join same color yarn, ch3 and dc across to
the other stitch marker. Turn, ch 3, dc across again.
Repeat this until the 'high top' is the length you want, usually 3
rows or so. Try on and see how it feels.


**PLEASE let me know of ANY errors, corrections, or
suggestions, this pattern is in progress of being tested. High top
version coming. Please email me at http://www.ravelry.com/people/mamaslilmonkeys
**