caniviz user guide - free 3d cad viewer | stl step … · 2017-11-13 · user guide clari3d free,...
TRANSCRIPT

User guideClari3D Free, Light et Pro 2.0.0
(Update November 20, 2016)
http://www.clari3d.com
Andéor, SASSIRET 520 295 643 00016. R.C.S Nice
Le Sonora B. 71, avenue de la Lanterne - 06200 - Nice – FRANCE
Clari3d User guide © Andéor, SAS 1/51
Summary
1-About.................................................................................................................................................61.1-Requirements.............................................................................................................................61.2-Conventions...............................................................................................................................61.3-Support...................................................................................................................................... 6
2-Purchase............................................................................................................................................ 82.1-Buy in the CaniVIZ Store..........................................................................................................8
Installation...................................................................................................................................9Activation....................................................................................................................................9Deactivation.............................................................................................................................. 11Manual activation......................................................................................................................11
2.2-Buy in the other Web Stores.................................................................................................... 132.3-Web Plug-ins............................................................................................................................13
3-Modules...........................................................................................................................................144-User interface.................................................................................................................................. 15
4.1-Basic and expert modes........................................................................................................... 155-DocMGR: the document manager.................................................................................................. 16
5.1-Open a file............................................................................................................................... 16WaveFront (.obj) reader options............................................................................................... 18DXF/DWG (.dxf, .dwg) reader options .................................................................................. 183D Studio (.3ds) reader options................................................................................................ 18Points (.asc, .pts) reader options............................................................................................... 19Stereo Lithographic (.stl) reader options...................................................................................19
5.2-Save a file................................................................................................................................ 195.3-HTML export...........................................................................................................................20
6-UIGL : Moving in the scene............................................................................................................216.1-Rotation................................................................................................................................... 216.2-Translation............................................................................................................................... 216.3-Zoom........................................................................................................................................216.4-Fly ...........................................................................................................................................216.5-Selection.................................................................................................................................. 226.6-Point of view ..........................................................................................................................226.7-Undo........................................................................................................................................ 226.8-Sensibility................................................................................................................................ 22
7-3D Connexion SpaceMouse............................................................................................................238-3Dinfo: Information on the 3D model............................................................................................ 24
8.1-Display the hierarchy...............................................................................................................248.2-Option inheritance................................................................................................................... 258.3-Settings of the objects ............................................................................................................25
Default.......................................................................................................................................25Visible....................................................................................................................................... 26Two sides...................................................................................................................................26Textured.....................................................................................................................................26Lighted...................................................................................................................................... 26Mode......................................................................................................................................... 26
Clari3d User guide © Andéor, SAS 2/51

Line width................................................................................................................................. 27Line color.................................................................................................................................. 27Solid color................................................................................................................................. 28Opacity...................................................................................................................................... 28Smoothing................................................................................................................................. 28
8.4-Changing the scene display settings ...................................................................................... 288.5-Options.................................................................................................................................... 28
Highlight ................................................................................................................................. 28Picking .................................................................................................................................... 29Animate ................................................................................................................................... 29Hierarchy...................................................................................................................................30
8.6-Information.............................................................................................................................. 31Model........................................................................................................................................ 31File............................................................................................................................................ 31
9-3DScene: scene staging...................................................................................................................339.1-Base......................................................................................................................................... 33
Color..........................................................................................................................................33Square........................................................................................................................................33Lighted...................................................................................................................................... 33Bitmap .....................................................................................................................................33Options...................................................................................................................................... 34
9.2-Light........................................................................................................................................ 34Fixed..........................................................................................................................................35Ambient.....................................................................................................................................35Diffuse.......................................................................................................................................35Specular.....................................................................................................................................35Options...................................................................................................................................... 35
9.3-Background..............................................................................................................................35Color..........................................................................................................................................35Bitmap .....................................................................................................................................353D environment .......................................................................................................................36
10-RGL: OpenGL rendering engine...................................................................................................3710.1-Rendering mode.....................................................................................................................37
Antialiasing............................................................................................................................... 37Anaglyph...................................................................................................................................37Orthogonal................................................................................................................................ 38Smooth...................................................................................................................................... 38Gray scale..................................................................................................................................38Shadow......................................................................................................................................39Fog .......................................................................................................................................... 39Linear fog.................................................................................................................................. 39Exponential fog......................................................................................................................... 39Square exponential fog..............................................................................................................40
10.2-Effects ...................................................................................................................................40Cartoon......................................................................................................................................40Gray scale..................................................................................................................................40Phong........................................................................................................................................ 41
10.3-Optimization.......................................................................................................................... 41
Clari3d User guide © Andéor, SAS 3/51

Fast move.................................................................................................................................. 41Degradation............................................................................................................................... 41Remove details.......................................................................................................................... 42Simplification ..........................................................................................................................43True transparency ....................................................................................................................43
10.4-Display FPS........................................................................................................................... 4311-3Dcut: interactive cut plan .......................................................................................................... 44
11.1-Color of the plan.................................................................................................................... 44Option Opacity.......................................................................................................................... 44
11.2-Color of the arrows................................................................................................................ 44Option Opacity.......................................................................................................................... 44
11.3-Color of the borders...............................................................................................................45Option Opacity.......................................................................................................................... 45
11.4-Color of the handles...............................................................................................................45Option Opacity.......................................................................................................................... 45
11.5-Color of the cut...................................................................................................................... 4511.6-Sliced .................................................................................................................................... 4511.7-Filled .....................................................................................................................................4511.8-Auto resize.............................................................................................................................45
12-3DSkin: the skin tool ....................................................................................................................4612.1-Modes of skin........................................................................................................................ 46
Wireframe.................................................................................................................................46 Outlined....................................................................................................................................46 Solid......................................................................................................................................... 46 Outlined solid...........................................................................................................................46 Cut............................................................................................................................................47 Skinned.....................................................................................................................................47
12.2-Options.................................................................................................................................. 47Skin all...................................................................................................................................... 47Fill color....................................................................................................................................47Around color............................................................................................................................. 47Border color.............................................................................................................................. 47
12.3-Configuration.........................................................................................................................47Fill opacity................................................................................................................................ 47Around opacity..........................................................................................................................48Border opacity...........................................................................................................................48Icon opacity...............................................................................................................................48Skin width................................................................................................................................. 48
13-3DShow: The demonstration mode...............................................................................................4913.1-Show...................................................................................................................................... 4913.2-Rotation................................................................................................................................. 49
Altitude......................................................................................................................................4913.3-Highlight................................................................................................................................49
Move on.................................................................................................................................... 49Object name.............................................................................................................................. 49XRay......................................................................................................................................... 49Line........................................................................................................................................... 49Hide...........................................................................................................................................49
Clari3d User guide © Andéor, SAS 4/51

13.4-Random..................................................................................................................................5013.5-Speed..................................................................................................................................... 50
Fast............................................................................................................................................ 50Medium..................................................................................................................................... 50Slow.......................................................................................................................................... 50
13.6-See below...............................................................................................................................5014-FAQ............................................................................................................................................... 52
14.1-Why CaniVIZ Free has a price?............................................................................................ 5214.2-How to change the rendering mode to wireframe for the whole scene?...............................5214.3-What are the differences between the AppleStore and the CaniVIZ Store version ofCaniVIZ?....................................................................................................................................... 5214.4-How can I send a file to a customer of mine and let him review the file freely?.................53
Clari3d User guide © Andéor, SAS 5/51

1- About...
Clari3d® is a collaborative 3D viewer. It allows to display wide 3D files on common systems by
non-specialist users.
The viewer works on Windows®, Mac® and Linux®, and in the main Web browsers such as
Internet Explorer® (Windows), Safari® (Windows, Mac), FireFox® (Windows, Mac), Google
Chrome® (Windows, Mac)
Clari3d is published by Andéor, SAS, which is headquartered at:
Andéor, SAS
Sonora B - 71 avenue de la Lanterne
06200 – Nice - France
1.1- Requirements
Clari3d the viewer does not require particularly powerful systems: a computer with a processor
running at least 1Ghz with 200MB of RAM and an OpenGL-compatible video card with 64MB of
RAM is sufficient.
The Web plug-in works with Internet Explorer version 6 and later, Firefox version 9 and later, Safari
4 and later.
1.2- Conventions
In this user guide, we present examples from different operating system. Indeed, Clari3d works on
multiple systems, and the ergonomics is the same on different systems.
Important information is identified with the logo against.
The logos , and indicates a feature that is only available for the
identified version of Clari3d.
1.3- Support
For any question, support, idea, please feel free to contact our support line at:
• www.clari3d.com/index.html#contact, a user account is needed
• support “at” clari3d “dot” com, this our support mailbox,
Clari3d User guide © Andéor, SAS 6/51
PROPRO LIGHTLIGHT FREEFREE

• From the Clari3d menu “/Help/Bug report”,
• To our surface mail address above.
Clari3d User guide © Andéor, SAS 7/51

2- Purchase
Clari3d is a commercial software that can be purchased from online stores such as Apple Store®,
Ubuntu Store®, the Windows Store®, Google Chrome Store® for Web plug-in and online Clari3d
Store. The Web plug-ins are available for free, but the right to use the plug-in in a third party
Website must be acquired.
2.1- Buy in the Clari3d Store
Figure 1: Purchase of Clari3d Light for Windows in our Web Store.
To open our Web Store, visit the http://www.clari3d.com site, create a user account, if it is not
already created, and identify yourself. This user account also allows you to enjoy a free workshop.
Then go to the store page via the menu “Clari3d Solutions / Online Store”. Choose the product you
wish to purchase by clicking on the button “Add to cart”; when a product is in the basket, it appears
in the “Purchase (s)” tab of the product. In addition, when the cart is not empty, a small cart is
displayed at the top right of the site. By clicking on this small icon, a summary of the cart is
displayed with a button “Checkout”
Clari3d User guide © Andéor, SAS 8/51

The cart is automatically saved in the database, if you reconnect later, you will find it unchanged.
To change the currency, click on the price: the system then allows you to change the currency.
The extensions of a product (for example, the Step reader is an extension of Clari3d Pro) can be
added in the cart with the menu of the product.
Note that only the price in euros is the reference, the other prices are indicative, and the rate
is gotten every day to the National Bank.
To purchase an order, simply click on the small cart at the top of the page. The basket is then
displayed and lists the items in order:
Figure 2: The cart summary that is displayed by clicking onthe cart logo in the page header.
The button “Checkout” opens an estimate that can be printed, and actually allows to proceed the
checkout.
Our system is based on the Paypal technology (www.paypal.com) which is a well
known and very reliable online payment solution. Payment is made on this site,
without interaction with our own site, therefore, we have absolutely no access to your
confidential information. When payment is confirmed by Paypal, it sends us a
notification with an order number provided by our site, that validate the order.
Installation
Once the payment confirmed by PayPal, the Store page offers download link as a button with the
proposed installer; for example , , , , or
, for, respectively, Windows, Windows, Mac, Mac, Linux, Linux and Linux. Once it is
downloaded, the installer can be open.
Activation
When the software is purchased from the Clari3d Store, it must be activated. This procedure links
Clari3d User guide © Andéor, SAS 9/51
**
EXEEXE MSIMSI PKGPKG DMGDMG RPMRPM DEBDEB
TGZTGZ

the software to the installation computer.
On the first launch, Clari3d will display a message that invites the user to register.
Figure 3: Invitation to register the software.
Press to acknowledge, to display the message the next time. To activate Clari3d,
open the “Help / Registration” menu, a dialog box is opened:
Figure 4: Activation of Clari3d.
Enter the login name used on the Clari3d Store and the password; the system name can also be
provided in order to differentiate the activations each other.
Once activated, you have the access to all the functionalities of the software. Notice that a software
Clari3d User guide © Andéor, SAS 10/51
OKOK CancelCancel

can only be installed in one computer.
Deactivation
You may wish to deactivate a software in order to reinstall it in another system, for example. In this
case, the procedure is to open the software and select the “Help / Unregister".
Figure 5: Deactivation of the software.
A dialog box prompts you to enter your user name and your password. After entering the
information, click on the “Unregister” button.
This places the software in its initial state, just after installation and informs the license manager on
the Clari3d Web site that the license is available to be installed on a new system.
In case you would not be able to start the software in order to unregister it, please contact
our support.
2.2- Buy in the other Web Stores
The procedure to buy Clari3d in the other stores depends on the considered Store.
With a Mac, for example, open the “App Store” application, and search for the software by writing
“Clari3d” in the search box:
Clari3d User guide © Andéor, SAS 11/51

Figure 6: Clari3d Pro in the Apple Store.
When the searched application is displayed, clic on the price in order to purchase the software; the
installation procedure is automatic.
2.3- Web Plug-ins
The installation of Web plug-ins is automatically in Windows, but to overcome potential problems,
a MSI setup program proposed in the page www.clari3d.com#webgl. For the other platforms, an
installer or an archive is available for download. The link to the installation setup is displayed in
place of the plug-in area.
Clari3d User guide © Andéor, SAS 12/51
3- Modules
Clari3d has a modular software structure. In some versions of Clari3d or some other tools, these
modules are physical DLL (Dynamic Linked Library).
This modular structure is in the form of a software bus (by analogy to a hardware bus) to which are
connected the various modules.
Each module provides a specific software function, for example, the “cutting plane” function is
provided by the 3DCut module. It would be perfectly possible to have the same function
implemented in different a way coexist within Clari3d because the modules are completely
independent of each other.
This User Guide will follow this modular software structure.
Clari3d User guide © Andéor, SAS 13/51

4- User interface
Clari3d is a software designed to run on multiple operating systems. Particular care has been taken
to ensure that the different versions of Clari3d are very similar between the different platforms
while using the specificities of each system as shown in the following synopsis:
Figure 7: Design of the User Interface.
4.1- Basic and expert modes
By default, the user interface is in a basic mode. In this mode, only the most current functionalities
are displayed. In the expert mode, all the options are proposed. The current mode is saved in the
VIZ files in a such way that the user to whom you will send the file are in the expected mode.
Clari3d User guide © Andéor, SAS 14/51
menu
toolbar
Display area
tree-view
Status and notification
Config box

5- DocMGR: the document manager
The document manager in Clari3d is very simple and only allows in its current version to handle
one file at a time. It will be improved in its further versions...
5.1- Open a file
A file can be opened by several ways, either from the startup screen, or with the menu “File /
Open”, or with the toolbar button . During the installation of Clari3d, the installer links the VIZ
files to Clari3d; this way, clicking on a VIZ file from the system file manager launches Clari3d on
the file.
When the user opens a file from Clari3d, it displays a dialog box prompting the user to select the
file to open. This dialog can also select files based on their type and choose the type of file to open.
Certain file types are can be opened only if a corresponding purchasable option is installed. This is
the case for example of the DXF / DWG files. Andéor sells these readers separately because they
are based on software components marketed by third party company.
Figure 8: The Open File dialog box.
Some file formats have additional options that can be accessed by clicking on the “Options” button.
This button is displayed only if there is such options and if the *.* filter is not selected.
The application bought from the AppleStore have an efficient protection system that move
on startup the applications in a virtual environment called SandBox. In this environment, the
Clari3d User guide © Andéor, SAS 15/51

applications are allowed to open only the files selected by the user in the Open File dialog
box. Thus, the files associated to a 3D file such as the textures cannot be opened.
As a workaround, Clari3d proposes to the user to select a directory that contains the 3D
files; This way, all the files I this directory can be opened by Clari3d. Of course, the user can
refuse to select this directory...
Figure 9: Selection of the Documents directory when Clari3d starts.
This dialog box proposes the following choices:
• Select once: The selected directory will be accessible only during this working
session; this choice will be forgotten when Clari3d will be stopped.
• Bypass: No directory will be selected.
• Store selection: The chosen directory will be saved and re-selected on the next
working sessions.
At any time, the user can choose the working directory with the menu “Option/Documents
directory”.
Clari3d User guide © Andéor, SAS 16/51

WaveFront (.obj) reader options
Number of decimals
Specify the number of decimals of the vertex coordinates. This is a technic to optimize the number
of vertices by merging very similar vertices. The vertex coordinates are not rounded by default.
Invert Y & Z
Invert the Y and the Z values of the coordinates. Some models are not correctly positioned and this
option allows to put the model on the ground.
Invert the triangles
Some files do not have their triangles well oriented; they are displayed as holes. With this option,
the triangle are inverted.
DXF/DWG (.dxf, .dwg) reader options
Merge the entities
By default, DWG files have numerous very small objects and this is not well supported by Clari3d.
And slow down the rendering. This options allows to merge these small entities in bigger object,
keeping their display properties such as the solid color...
Ask for the texture path
The DWG files often refers the standard AutoCad® textures. These textures are not saved in the file
itself. This option allows Clari3d to ask for these textures path.
Use instantiation
If an object is duplicated in AutoCad® at several position in the scene, it is instantiated. With this
option, the instantiation is kept in the VIZ files; otherwise, the object is actually duplicated.
Tolerance
This is the tolerance to use to tessellate the 3D model into 3D triangles. More the tolerance is low,
the model is more accurate, but also large.
3D Studio (.3ds) reader options
Import the textures
This option allows Clari3d to import the textures.
Clari3d User guide © Andéor, SAS 17/51
PROPRO

Points (.asc, .pts) reader options
Read the colors
If selected, the colors are read; the vertices are black otherwise...
Sort the colors
Sort the colors in a such way that they can be reused. The reading time is longer but the generated
VIZ file is smaller.
Invert Y & Z
Invert the Y and the Z values of the coordinates. Some models are not correctly positioned and this
option allows to put the model on the ground.
Bypass vertices
Sub-sample the input file by reading only X vertices, where X is the value of this option.
Stereo Lithographic (.stl) reader options
Number of decimals
Specify the number of decimals of the vertex coordinates. This is a technic to optimize the number
of vertices by merging very similar vertices. The vertex coordinates are not rounded by default.
Maximal number of facets
Specifies the maximal number of facets per Clari3d entity.
Read the facet normals
With this option, the normals of the facets in the file are read; if not set, Clari3d will compute them.
These normals will be also saved in the VIZ file, making its loading time shorter because the
normals do not need to be computed, and its size highter.
Read the colors
Read the colors from the file; without this option, the objects are mono-chromic.
Sort the facets
Sort the facets and merge the identical vertices; this option slows down the reading time, but the file
is smaller and it is displayed faster.
5.2- Save a file
When a file is opened, it can be saved. Clari3d saves in the VIZ file format in order to avoid to
compromise the original files. It can also export the file in STL.
Clari3d User guide © Andéor, SAS 18/51

In order to save the current file, open the menu “File/save” in order to keep the original file name,
of the menu “File/Save as” in order to change the file name or the file format.
Due to the Apple SandBox protection, the AppleStore Mac version of Clari3d has only the
menu ”File/Save as”.
If the user quits the application or if he opens another file when the current file is modified, Clari3d
ask him if he wants to save the current file.
As in the Open File dialog box, specific options can be changed with the “Options” button in the
Save File dialog box.
5.3- HTML export
Clari3d Pro allows to export a 3D file in a standalone HTML file that contains all the 3D data. This
file is openable with any supported Web browser in any supported OS. If the Web plug-in is not yet
installed, the Web browser indicates to the user how to install it.
This way of exchanging 3D files is very convenient because it is based on a neutral HTML and the
3D viewer will always be up to date, as maintained by the browser.
Clari3d User guide © Andéor, SAS 19/51

6- UIGL : Moving in the scene
The first thing to do when a file is loaded is to discover it by moving in the scene. The movement
mode are selectable with the buttons in the toolbar:
6.1- Rotation
In this mode, the scene rotates around the vertical axis when the user clic and move the
mouse.
Option:
If the clic occurs over an object of the scene and if the key is pressed the clicked
point becomes the rotation center.
6.2- Translation
This mode allows a parallel translation of the scene on the screen.
Option:
The horizontal mouse wheel also allows translations. When a horizontal translation is
initiated, the vertical wheel performs a vertical translation. Therefore, if the wheel is
inactive for a short period of time, the vertical wheel performs a zoom action...
6.3- Zoom
In this mode, the scene is zoomed in or zoomed out.
Option:
The vertical mouse wheel also perform a zoom action when it is activated.
6.4- Fly
This button activates the Fly mode. The fly can be automatic or manual.
In automatic mode, the vertical mouse wheel is user to set the fly speed, forward or
backward. The arrow keys or the mouse drags change the direction of the fly. To stop the
fly, press the key.
Clari3d User guide © Andéor, SAS 20/51
PROPRO
SPACESPACE
ALTALT
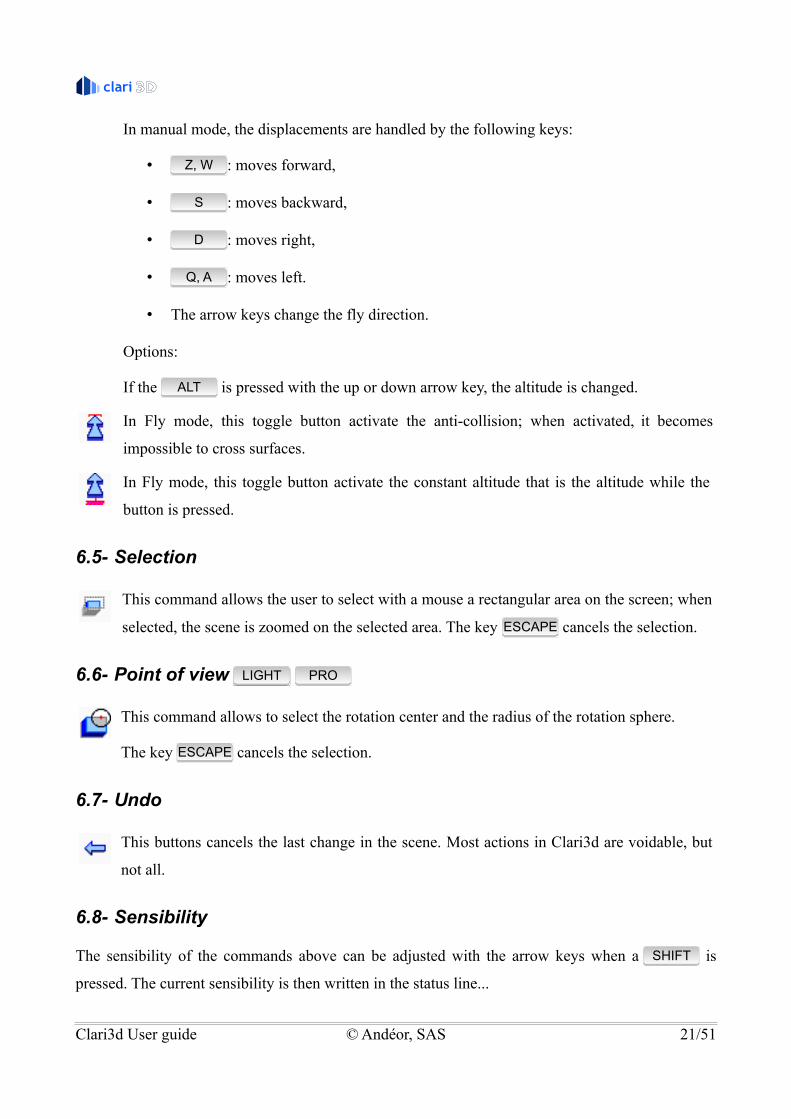
In manual mode, the displacements are handled by the following keys:
• : moves forward,
• : moves backward,
• : moves right,
• : moves left.
• The arrow keys change the fly direction.
Options:
If the is pressed with the up or down arrow key, the altitude is changed.
In Fly mode, this toggle button activate the anti-collision; when activated, it becomes
impossible to cross surfaces.
In Fly mode, this toggle button activate the constant altitude that is the altitude while the
button is pressed.
6.5- Selection
This command allows the user to select with a mouse a rectangular area on the screen; when
selected, the scene is zoomed on the selected area. The key cancels the selection.
6.6- Point of view
This command allows to select the rotation center and the radius of the rotation sphere.
The key cancels the selection.
6.7- Undo
This buttons cancels the last change in the scene. Most actions in Clari3d are voidable, but
not all.
6.8- Sensibility
The sensibility of the commands above can be adjusted with the arrow keys when a is
pressed. The current sensibility is then written in the status line...
Clari3d User guide © Andéor, SAS 21/51
LIGHTLIGHT PROPRO
Z, WZ, W
SS
DD
Q, AQ, A
ALTALT
ESCAPEESCAPE
SHIFTSHIFT
ESCAPEESCAPE

7- 3D Connexion SpaceMouse
C l a r i 3 d n o w h a n d l e s t h e 3 D m o u s e s f r o m 3 D C o n n e x i o n
(www.3dconnexion.com). The 3D mouse is used to either change the position of
the objects in the scene (Object Mode) or to change the scene point of view
(Scene Mode).
The right button is used to remove the changes made with the mouse, and the left button is used to
switch between the ObjectMode and the Scene Mode.
The recognized 3D mouse events are:
Figure 10: 3D mouse events.
On Linux, an open-source driver should be installed. It is named spacenav
(spacenav.sourceforge.net/). It can be installed from the Ubuntu Store easily.
Clari3d User guide © Andéor, SAS 22/51

8- 3Dinfo: Information on the 3D model
This modules offers several functionalities:
1. display the hierarchy of the 3D objects in the scene,
2. change the display settings of the scene, ,
3. change the display settings of the objects. .
8.1- Display the hierarchy
The object hierarchy is available in the tree-view, “Doc” tab, as shown in the following screenshot:
Figure 11: Display the hierarchy of the objects.
The checkbox in front of the name of each object can hide or show the object. Like all configuration
controls of the module, this box has three states: by default, the state is “inherited”; in this state, the
controls are grayed and stay active.
Clari3d User guide © Andéor, SAS 23/51
PROPRO
PROPRO
LIGHTLIGHT
LIGHTLIGHT

8.2- Option inheritance
By default, the settings are inherited from the parent object. In this case, the control is grayed. As
soon as an option is modified, it is un-grayed, and its display depends on the type of the control.
Figure 12: Setting 1°) by default, 2°) selected, 3°) unselected.
8.3- Settings of the objects
In expert mode (cf : £14), a config box appears in the bottom of the tree-view when the user clicks
on the name of an object:
Figure 13: Settings of an object.The display settings of the object can be changed with this config box:
Default
All the settings are deleted and they are all inherited when this checkbox is checked.
Clari3d User guide © Andéor, SAS 24/51
PROPROLIGHTLIGHT

Visible
The object is visible is this checkbox is checked and hidden when it is unchecked.
Two sides
When this checkbox is selected, the two sides of an object is rendered. By default, only the faces
oriented toward the user are rendered, but some models have their facets wrongly oriented; with this
option, they are correctly displayed with a small slow down rendering time.
By default, this setting is unchecked.
Textured
If this option is unchecked, the textures are not displayed. By default, the textures are displayed.
Lighted
If this checkbox is checked, the object is lighted (as by default). Otherwise, it is only lighted by the
ambient light.
Mode
The rendering mode is selected by this list box:
• point: the object is rendered by its vertices,
• wireframe: the object is rendered in wireframe,
Clari3d User guide © Andéor, SAS 25/51
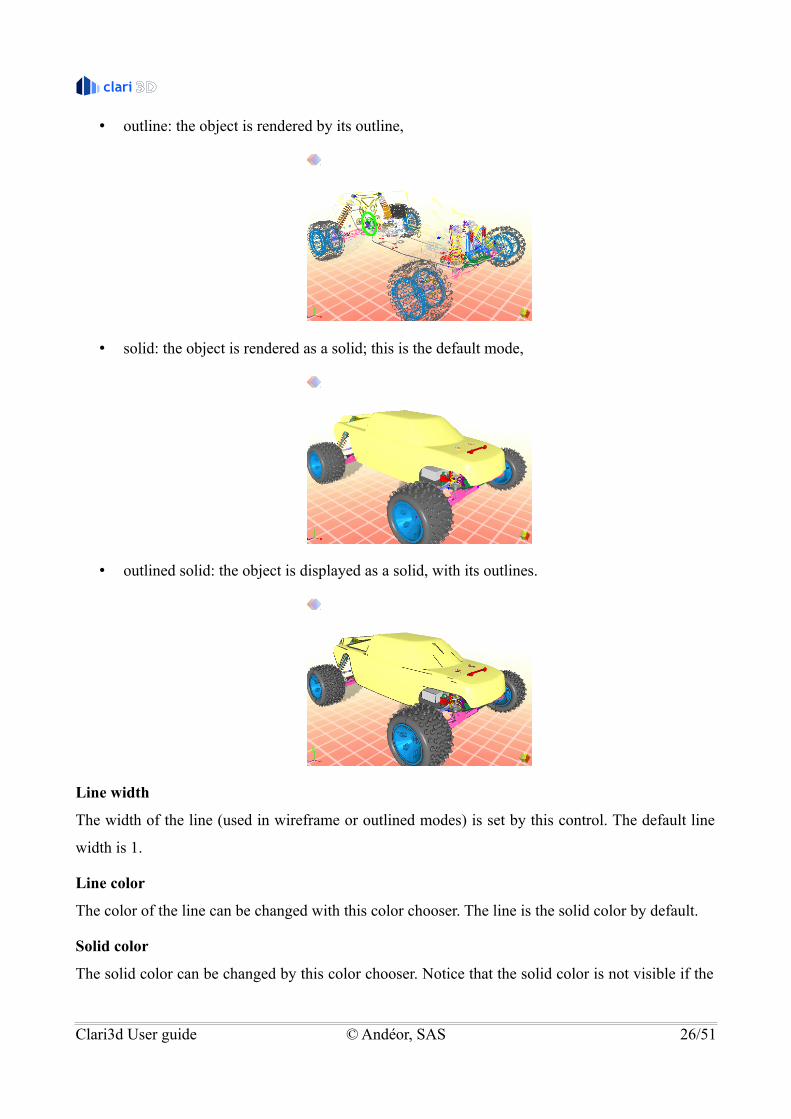
• outline: the object is rendered by its outline,
• solid: the object is rendered as a solid; this is the default mode,
• outlined solid: the object is displayed as a solid, with its outlines.
Line width
The width of the line (used in wireframe or outlined modes) is set by this control. The default line
width is 1.
Line color
The color of the line can be changed with this color chooser. The line is the solid color by default.
Solid color
The solid color can be changed by this color chooser. Notice that the solid color is not visible if the
Clari3d User guide © Andéor, SAS 26/51

object as a texture applied, expected it the texture has an alpha channel.
Opacity
The transparency of the object can be changed with this range control.
Smoothing
This control allows to change the angle used to detect the edges between the facets; bigger is the
angle, mode the edge are sharpen to be detected.
This option is not inherited because it needs a significant computation time for wide models.
8.4- Changing the scene display settings
In order to change the display settings of the whole scene, display it in wireframe for example, the
root object display settings should be changed. Thus, all the child objects that inherits the setting are
altered, excepted if the child object has this setting specified.
8.5- Options
Highlight
Highlighting links the objet hierarchy in the tree-view with the objects in the scene: when an object
is selected in the tree-view, it is highlighted in the scene.
The highlight mode is activated by the checkbox or with the button of the toolbar is toggled; the
mode is active while the checkbox is checked and the button is toggled.
Several modes of operations are allowed:
Hide
When this radio button is checked, the unselected object are hidden. The selected object is
displayed with its display option. If the options of the selected object are changed when it is
highlighted, these settings becomes the setting for all the further highlighted objects.
Ray
When this radio button is checked, the unselected object are display transparently.
Outline
When this radio button is checked, the unselected object are display with their outlines.
Clari3d User guide © Andéor, SAS 27/51
PROPROLIGHTLIGHT
LIGHTLIGHT PROPRO

Move on
When this checkbox is checked, Clari3d move the point of view near the highlighted object.
Center of rotation
When this option is checked, the selected object becomes the center of rotation of the whole 3D
scene.
Invert selection
When this checkbox is checked, the highlighted object and the non- highlighted objects settings are
inverted.
Picking
The picking links the object in the scene with the object hierarchy in the tree-view. This mode is
activated when the Picking checkbox is checked. An object is picked when it is clicked on in the 3D
scene.
Highlight
Picked objects are also highlighted with the Highlight options described above.
Show in tree-view
When an object is picked, the tree-view is opened and the object is shown.
Display tip
When the mouse is moved over an object in the scene, a tooltip is displayed with the name of the
object.
Display tip hierarchy
As above, when the mouse is moved over an object in the scene, a tooltip is displayed with the
name of the object, but the tooltip message contains all the object hierarchy.
Animate
When the animate button is checked, the changes in the scene are animated. This can be costly in
CPU time for wide scene, but this is a very nice option.
Option
Step
This options represents the number of steps of the animation. More steps involves nicer animation
and more CPU computations.
Clari3d User guide © Andéor, SAS 28/51
LIGHTLIGHT PROPRO
LIGHTLIGHT PROPRO

Speed
This options changes the duration of the animation, in mili-seconds. If there is too many steps, some
of them are bypassed in order to reach the required animation time.
Update delay
When an option is changed in the scene, this option delays the scene display refresh.
Hierarchy
These options acts on the object hierarchy in the tree-view.
Display
Entities
If selected, the object entities are represented in the tree-view. Entities are the lowest 3D object in
Clari3d. An Object is build with one or more entities.
Options
If selected, the object rendering options are displayed in the config box of the tree-view when an
object is selected in the tree-view.
Materials
If selected, the material used by the entities are displayed per object. The material can be edited in
Clari3d Pro.
Sort
This selector allows to change the sorting order of the object hierarchy in the tree-view.
By name
If selected, the objects are sorted by their name.
By size
If selected, the objects are sorted by their size.
By color
If selected, the objects are sorted by their color.
8.6- Information
Informations on the currently loaded 3D model are displayed when an item of these options is
selected.
Clari3d User guide © Andéor, SAS 29/51
PROPRO

Model
This item displayed the information on the 3D model:
Object
This is the number of objects.
Entities
This is the number of entities.
Faces
This the number of triangles, or polygons. Clari3d uses the memory very carefully; thus, it is able to
load very huge 3D model. For example, a 15M polygons file can be loaded on a 2008 MacBook
with a standard Intel GMA 800 OpenGL.
Vertices
This is the number of vertices.
Materials
This is the number of materials.
Memory
This is the amount of memory needed to store the model in the RAM memory.
File
Size
This is the size of the file.
Creation
This is the creation date of the file.
Modification
This is the last modification date of the file.
Access
This is the last access date to the file.
With Microsoft windows®, the modification and the access date are the same.
Clari3d User guide © Andéor, SAS 30/51

9- 3DScene: scene staging
With module, the scene staging can be changed, such as the background, the base color or the main
light settings.
9.1- Base
The base represents the ground in the models where it is not present.
Color
This control opens a color chooser for the color of the base.
Square
Figure 14: Uniform base and squared base.
If this option is checked, the base will be in the form of a chessboard, otherwise it will be of
uniform color. In chess, a lighter color than the one chosen for the base is used.
Lighted
If this option is checked, the base reacts to light and its color is changed according to the incidence
of light. If this option is not checked, the base does not react to light.
Bitmap
Figure 15: Bitmapped base.
With this option, it is possible to choose a bitmap and to put it on the base.
Clari3d User guide © Andéor, SAS 31/51
LIGHTLIGHT PROPRO

A number of predefined bitmaps are proposed, but it is possible to choose any image from
the menu “Options / Load base”. Recognized image formats are JPEG, PNG and BMP. Note that
the alpha channel of the PNG is taken into account.
Options
When any base item in the tree-view is selected, the base configuration box is displayed:
altitude
Adjust the height of the base, as a percentage of the 3D scene height, where 0% is located at the
lowest point.
Note that it is possible to automatically place the base at the altitude 0 by double clicking it; then its
size is also changed to the default size.
Size
This option changes the size of the base, as a percentage of the size of the bounding sphere of the
scene.
Note that it is possible to automatically position the base size to 110% by double clicking it, and its
altitude is then replaced as 0.
Tile
This options changes the number of rows of the base; if the number of rows is 0, the base is
displayed in a uniform way.
Opacity
This option changes the opacity of the base, from 0% (transparent) to 100% (opaque).
9.2- Light
These options change the settings of the main light (Clari3d can manage several lights). The main
light is considered as the sun, and it is represented by the little yellow sphere in the interactive logo
in the bottom-right corner:
The main light is represented by the widget at the bottom right of the scene: the cube represents the
scene and the small sphere represents the sun. The sun can be clicked and moved freely in order to
Clari3d User guide © Andéor, SAS 32/51
PROPRO

changes the position of the light. It is also possible to put the mouse over the gadget and use the
arrow keys to cause the change of the position of the light.
The faces of the cube are also interactive and allow you to change in one click viewing angle: for
example, by clicking on the top of the cube, the view at the top is selected.
The following options are available in the tree options:
Fixed
If checked, the light position is relative to the scene; if the scene is rotated, the light is rotated too. If
unchecked, the light is relative to the camera; if the scene rotate, the light is not rotated, but if the
camera is rotated, the light is rotated too.
Ambient
With this option thats open a color chooser, the ambient light of the 3D scene can be adjusted.
Diffuse
This control change the color diffused by the main light with a color chooser.
Specular
The specular color can be changed with this color chooser.
Options
Shininess
This range option allows to change the size of the specular.
9.3- Background
This group of option allows to change the background settings of the 3D scene.
Color
This control opens a color chooser; the chosen color becomes the uniform background of the scene.
Bitmap
These radio button allows to specify on of the pre-defined background images.
With Clari3d Pro, it is possible to choose an external background image in the menu
“Option / Load cubemap”; if the selected image is not a cube map, it will be considered as a single
background image.
Clari3d User guide © Andéor, SAS 33/51
PROPRO
LIGHTLIGHT PROPRO

3D environment
3D environments are cubic images representing the six faces of a cube that encompasses the 3D
scene. The interest of these environments is that the background image is not static, increasing the
perception of realism.
This option is available in expert mode.
Figure 16: 3D Environment.
In this options, pre-defined cube maps are proposed.
Clari3d Pro allows to use an external cube map environment with the menu “Options / load cube
map”. The images that form the cube map have their name postfixed by _ top, _bottom, _front,
_back, _left et _right as in mybkg_top.png, mybkg_bottom.png, etc. One of these images
has to be selected, Clari3d detects the other images and load them as a cube map.
Options
Rotation
A rotation is applied with this option to the 3D environment; this way, it is possible to adjust a detail
of the background for a specific point of view in the 3D scene.
Locked
With this option, the 3D environment is locked to the specified position, such as front, or top, what
ever is the point of view in the scene.
Keep the ratio
If this option is checked, the ratio between the width and the height of the images in the cube map
environment is kept unchanged if the application window is resized.
Clari3d User guide © Andéor, SAS 34/51
PROPRO

10- RGL: OpenGL rendering engine
Andéor has developed its own OpenGL renderer engine in order to have a tool perfectly suited to its
needs and very efficient. This rendering engine is responsible for sending the 3D scene and its
options to the OpenGL 3D accelerator. Very close to the hardware, RGL exploits the physical ability
of the computer to provide the best compromise between quality and display speed.
The RGL engine has a number of options available in the GL tab of tree-view.
10.1- Rendering mode
These options affect the rendering mode, IE the quality of the display, and propose options able toobtain quality displays.
Antialiasing
Figure 17: Detail of a non-antialiased and an antialiased rendering.
This option enables the smooth display of the scene. As shown in the figure above it, a staircase
effect may appear on the oblique parts of the 3D model with a display without smoothing. With
smoothing, the staircase effect has almost disappeared.
Anti-aliasing has the option desired level: the higher the level, the greater the scene is smoothed, but
the display time is longer...
Anaglyph
Figure 18: Stereoscopic display
The anaglyph mode enables to display a stereoscopic perception in 3D model, using red-blue
colored glasses.
Clari3d User guide © Andéor, SAS 35/51

Orthogonal
Figure 19: Perspective and orthogonal displays.
Orthogonal mode, there is no vanishing point, and the size of objects is met, whether they are near
or far. This method is widely used in computer-aided design (CAD). The perspective mode is closer
to the eye perception...
Smooth
Figure 20: Raw display and Gouraud Shading smoothing display.
Softening smoothes rendering facets, it is known as Gouraud shading. Without this softening, each
facet has a unique color, but the rendering speed is faster.
Gray scale
Figure 21: Grayed rendering.
With this option, the rendering is done in grayscale, not color. This mode is used to get a glimpse of
Clari3d User guide © Andéor, SAS 36/51

reports for printing monochrome paper.
Shadow
Figure 22: Projected shadow.
Clari3d is able to create the shadow of the 3D model that is projected into the base. It is possible to
adjust the darkness and the smoothing of the shadow in the options. The shadow is calculated
according to the position of the main light which represents the sun.
Fog
Figure 23: The fog in a scene.
The fog adds a realistic effect by blurring the back of the scene. The fog can be set in three modes:
Linear fog
The linear fog has the following parameters:
• a color,
• a starting distance from where the fog starts, as a percentage of the size of the scene,
• and an ending distance to where the fog stops.
Exponential fog
The exponential fog is computed on the whole scene, with the following parameters:
• a color,
Clari3d User guide © Andéor, SAS 37/51
PROPRO

• a density expressed as a percentage.
Square exponential fog
The exponential fog is computed on the whole scene, with the following parameters:
• a color,
• a density expressed as a percentage.
10.2- Effects
The effect options are based on the OpenGL shaders and they change the way the scene is
displayed. The effect can be combined.
Cartoon
Figure 24: Cartoon rendering.
In this mode, the scene is rendered as in a cartoon. In the options, the color of the cartoon and the
number of used colors can be adjusted.
Gray scale
With this effect, the scene is rendered in gray-scale. The darkness can be adjusted in the options.
Phong
Figure 25: Gouraud Shading versus Phong Shading.
Clari3d User guide © Andéor, SAS 38/51
PROPRO

The Phong lighting system is more realist that the Gouraud shading.
10.3- Optimization
These options change the rendering time.
Fast move
The fast move mode is a very useful options for displaying large 3D models with an acceptable
rendering time. The principle is to display the 3D scene in a simplified manner and therefore faster
when the user interacts with it, and in full quality otherwise. The user receives fluid motion when
moving in the scene.
The system assumes that the user interacts with the scene when the left button is clicked in the
display area.
Degradation tends to reach a maximum speed set in the given parameters.
There are several optimization modes:
Degradation
The scene degradation mode tends to degrade rendering opting for faster display options. For
example, shadows, smoothing will be deleted, and the lighting will be simplified, rendering wire
will eventually be used.
Figure 26: Wireframe degradation.
• The “Ideal time” is the ideal rendering time to reach; the scene rendering is degraded while
the rendering time is over this ideal time.
Clari3d User guide © Andéor, SAS 39/51

Remove details
Figure 27: Detail removing degradation(look at the windshield).
The detail removing will suppress the small detail in the screen; this is the degradation mode that
less alter the visual aspect of the scene. The size of the details is computed to regular intervals.
• The “Ideal time” is the ideal rendering time to reach; the scene rendering is degraded while
the rendering time is over this ideal time.
• The “classes” option represents the number of classes to use to classify the object size on the
screen. More classes causes more accuracy in the detail removal, but also more computation
time.
• The “bypass” option is the number of rendering to bypass before compute the object size
classification.
Simplification
Figure 28: Simplification degradation.
Simplification is very suitable for 3D display on mobile devices. It is also known by the LOD
acronym that means Level of details: several simplified versions of 3D objects are pre-computed (3
in Clari3d) and used when the display requires acceleration.
• The “Ideal time” is the ideal rendering time to reach; the scene rendering is degraded while
Clari3d User guide © Andéor, SAS 40/51
LIGHTLIGHT PROPRO

the rendering time is over this ideal time.
True transparency
When this checkbox is checked the rendering of scene with transparent objects is greatly improved;
without this option, the rendering is faster, but some object behind transparent objects can be
hidden.
Figure 29: Without true transparency on the left, some objects are hidden when they are visible with truetransparency, on the right.
10.4- Display FPS
When this control is checked, the speed is displayed in mili-seconds and in Frame Per Seconds.
With the FPS, the user can have a direct feedback of the impact on the speed of a rendering option.
For example, the shadow rendering renders the scene several time for the shadow (depending on the
required smoothing) with one final rendering the actual scene...
Clari3d User guide © Andéor, SAS 41/51
LIGHTLIGHT PROPRO

11- 3Dcut: interactive cut plan
This tool allows to cut the scene with a cutting plane. The cutting plane is an object that is placed in
the 3D scene, and can be manipulated directly by clicking on it, as shown in the figure below:
Figure 30: Interactive cut plan in action.
The handles on the four corners of the square, in the center of the borders and the center of the
square are represented by small black triangles; when the mouse is positioned over these handles, a
yellow 3D arrow is displayed.
The handles can be clicked and dragged; the cutting plane is then moved in following the
movements of the mouse. It is possible to click the handles so as to cause rotation of 45 °.
The options of the cut plan are visible in the tree-view only if the cut plan button in the
toolbar is toggled on.
11.1- Color of the plan
This color chooser allows to change the color of the cut plan itself.
Option Opacity
In the config box, the opacity of the cut plan can be adjusted as a percentage.
11.2- Color of the arrows
The color os the arrows that are displayed when the mouse is over a handle can be changed with
this control.
Option Opacity
The opacity of the arrows can be adjusted here as a percentage where 0% means entirely transparent
and 100% means entirely opaque.
Clari3d User guide © Andéor, SAS 42/51
LIGHTLIGHT PROPRO

11.3- Color of the borders
The border of the cut plan can be adjusted with this color selector control.
Option Opacity
The opacity of the borders can be adjusted here as a percentage where 0% means entirely
transparent and 100% means entirely opaque.
11.4- Color of the handles
The color handles placed around the cut plan is adjustable with this control.
Option Opacity
The opacity of the handles can be adjusted here as a percentage where 0% means entirely
transparent and 100% means entirely opaque.
11.5- Color of the cut
The cut plan cuts the scene objects; at the location of the cut, the color of the cut can be adjusted
here.
11.6- Sliced
If this checkbox is checked, the cut is colored by the color described just above.
11.7- Filled
If this checkbox is checked, the cut is filled.
11.8- Auto resize
When this checkbox is checked, the cut plan is automatically resized in a such way that its handles
are always visible.
Clari3d User guide © Andéor, SAS 43/51
PROPRO
PROPRO
12- 3DSkin: the skin tool
This tool allows to “see inside” a 3D model. It is activated with the toolbar button .
12.1- Modes of skin
Several modes are proposed, depending to the option displayed on the top of the skin tool:
Wireframe
In this mode, the skinned part is displayed in wireframe.
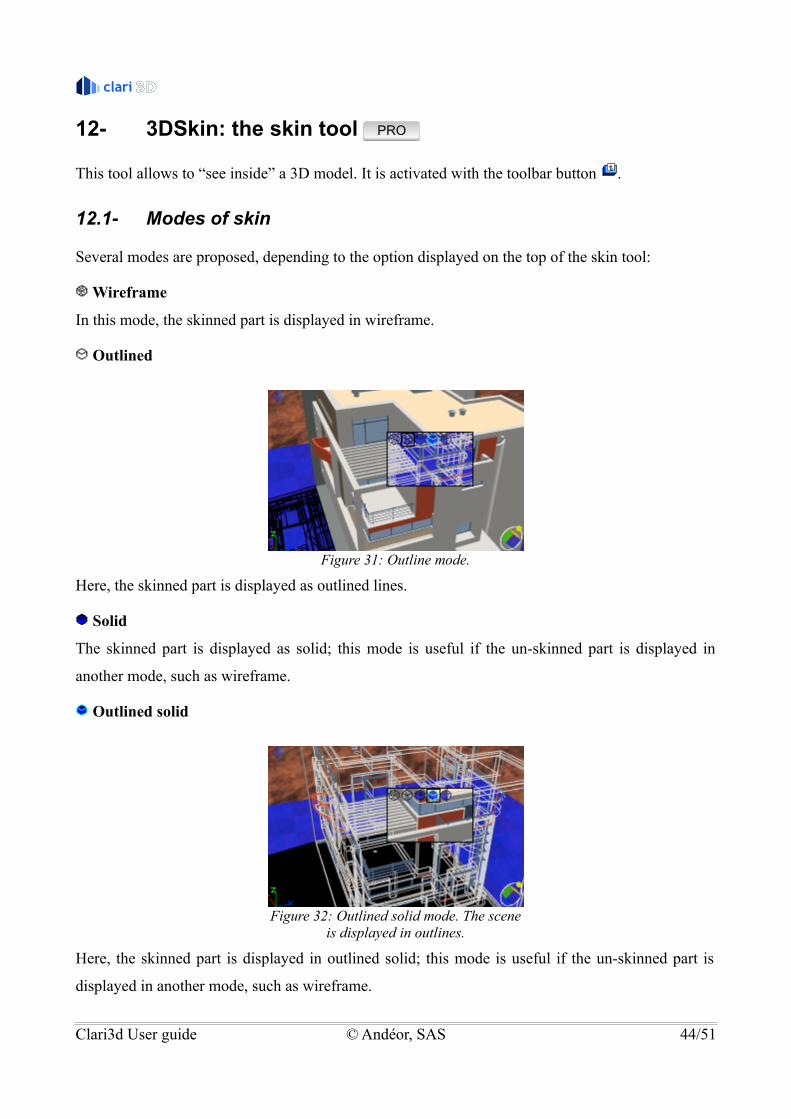
Outlined
Figure 31: Outline mode.
Here, the skinned part is displayed as outlined lines.
Solid
The skinned part is displayed as solid; this mode is useful if the un-skinned part is displayed in
another mode, such as wireframe.
Outlined solid
Figure 32: Outlined solid mode. The sceneis displayed in outlines.
Here, the skinned part is displayed in outlined solid; this mode is useful if the un-skinned part is
displayed in another mode, such as wireframe.
Clari3d User guide © Andéor, SAS 44/51
PROPRO

Cut
Figure 33: Cutting mode.
The skinned part is cut as if the skin tool was a hole. The / buttons allow to move the cut depth.
Skinned
The skinned objects are displayed in full by removing the object in front of them. The / buttons
allow to remove more or less front objects.
12.2- Options
Skin all
If this checkbox is checked, the whole scene is skinned, not only the part inside the skin tool.
Fill color
With this option, the color of the part inside the skin tool can be configured. Its opacity can be
changed too as explained below below.
Around color
This is the color of the part outside of the skin tool. Its opacity can be changed too as explained
below below.
Border color
This is the color of the border of the skin tool. Its opacity can be changed too as explained below
below.
12.3- Configuration
Fill opacity
This option can change the opacity of the part inside the skin tool, as a percentage.
Clari3d User guide © Andéor, SAS 45/51

Around opacity
This option changes the opacity of the part outside the skin tool.
Border opacity
Here, the opacity of the border of the skin tool can be adjusted.
Icon opacity
The icons of the skin tool toolbar is changeable here.
Skin width
This option can change the width of the skin that is the transition part.
Clari3d User guide © Andéor, SAS 46/51

13- 3DShow: The demonstration mode
The button in the toolbar activates the attractive demonstration mode of Clari3d. In this mode,
Clari3d works alone and shows the current 3D model. The showroom is configuration in the “show”
tab in the tree-view:
13.1- Show
This checkbox starts or stops the demonstration; it has the same effect than the toolbar button.
13.2- Rotation
In this mode, a perpetual rotation is performed around the model.
Altitude
If this option is checked, the altitude of the point of view is also cyclicly changed during the
rotation. If this option is not selected, the rotation is performed at a constant altitude; in this case, it
is allowed to change the altitude with the mouse.
13.3- Highlight
In this demonstration mode, the objects in the 3D scene are automatically highlighted. Notice that
this mode is not suited for a model with a few objects, such as the result of a 3S a scan, for example.
The highlighted object is displayed as is, the other objects are displayed with the following options.
Move on
The point of view is moved near the highlighted object in order to see it bigger.
Object name
If this option is checked, the name of the highlighted object is displayed in a tooltip.
XRay
With this option, the other objects are displayed with some transparency.
Line
Here, the other objects are displayed with their outlines; it is less costly than Xray for wide scene.
Hide
In this mode, the other objects are simply hidden.
Clari3d User guide © Andéor, SAS 47/51

13.4- Random
In this mode, the point of view is moved around the scene a stops at random positions.
13.5- Speed
The speed of the animations can be set with these options:
Fast
The animations are very quick.
Medium
The animations are pleasant to see, not too quick, not to slow.
Slow
The animations are slow.
13.6- See below
With this option, the point of view can be bellow the scene in the “rotation” and “Random” modes.
Clari3d User guide © Andéor, SAS 48/51

Clari3d User guide © Andéor, SAS 49/51

14- FAQ
14.1- Why Clari3d Free has a price?
The development and the deployment an application is not free, and costs a lot. There are plenty of
yearly costs such as certificates, Web site storage, partner programs, etc.
We have decided to apply a very small price the Clari3d Free in order to cover our expenses.
Generally, CAD softwares are very expensive and the Clari3d products are somewhat affordable.
14.2- How to change the rendering mode to wireframe for the whole
scene?
There is not a global button to change the scene aspects in Clari3d in order to keep the user
interface as simple as possible. The way the main object is displayed is controlled by its own
rendering options that can be changed in the 3Dinfo tree-view tab in expert mode, when the name of
an object is clicked.
14.3- What are the differences between the AppleStore and the
Clari3d Store version of Clari3d?
The softwares sold on the Apple Store are not the same than those sold on our Clari3d Store. These
differences are imposed by Apple to sold software on their store...
Difference Apple Store Clari3d Store
Number of installations per license sold 3 1
Integration in the Apple AppStore application yes no
Limited access to the companion files yes1 no
Option purchases Only by InApp purchases2 External modules
Price Higher Lower
1-Apple SandBox
The AppStore applications cannot open a file by themselves, without an action from the user; for
example, the textures associated to a 3D file cannot be opened by Clari3d.
As a work around, Clari3d proposes to the user to select the Documents (or any other) folder on
Clari3d User guide © Andéor, SAS 50/51

startup.
2-InApp Purchases
The Apple Store softwares must contain all the components ; it is not allowed to add other
components afterwards.
The Clari3d Store softwares can be extended with the installation of optional components.
14.4- How can I send a file to a customer of mine and let him review
the file freely?
Indeed, Clari3d Free has a cost, even very affordable.
But all the Clari3d versions are able to export a 3D file in HTML, the Web page language. This
single file can be sent to the customer and he will be able to open it with his favorite Web browser;
the browser will invite him to install the Clari3d Web plug-in that is available for free.
Clari3d User guide © Andéor, SAS 51/51