build and deploy a multi-container application in azure ... · build and deploy a multi-container...
TRANSCRIPT

Build and deploy a multi-container
application in Azure Container Service
By Paolo Salvatori
Azure Customer Advisory Team (AzureCAT)
March 2018

Build and deploy a multi-container application
2
Contents Overview ......................................................................................................................................................... 4
In this guide ................................................................................................................................................... 4
Prerequisites for the development computer................................................................................... 5
Contents of this project............................................................................................................................. 5
Architecture ................................................................................................................................................... 7
Configuration ..................................................................................................................................................... 8
TodoApi service configuration ............................................................................................................... 8
TodoWeb service configuration .......................................................................................................... 10
How configuration works in ASP.NET Core .................................................................................... 11
Define the Docker images and containers ........................................................................................... 11
Push the Docker images to Docker Hub or Azure Container Registry ...................................... 13
Push Docker images to Docker Hub ................................................................................................. 13
Create and push to an Azure Container Registry ......................................................................... 14
Deploy the application on a Kubernetes cluster................................................................................ 15
Create an ACS–Kubernetes cluster .................................................................................................... 15
Create an AKS cluster .............................................................................................................................. 17
Use a ConfigMap in Kubernetes to define non-sensitive configuration data ................... 17
Use a secret in Kubernetes to define sensitive configuration data ....................................... 18
Deploy to ACS–Kubernetes from a local machine ....................................................................... 20
Configure Kubernetes with the services and deployments ...................................................... 23
Load balancer service type for the Kubernetes cluster .............................................................. 24
Assign a custom DNS to the public IP of the front-end service .................................................. 27
Deploy the application to AKS from Cloud Shell............................................................................... 30
Create a ConfigMap using a YAML file ............................................................................................ 31
Create a secret using a YAML file ....................................................................................................... 32
Deploy the application ........................................................................................................................... 33
Configure NGINX ingress controller for TLS termination on Kubernetes ................................ 38
Install the multi-container application to Kubernetes ................................................................ 40
Package and deploy the application using Helm ......................................................................... 44
Azure services used by this project......................................................................................................... 51
Learn more ....................................................................................................................................................... 52

Build and deploy a multi-container application
3
List of figures
Figure 1. Simplified architecture for deploying the multi-container application to ACS or AKS. ........ 7
Figure 2. Web interface for managing Kubernetes entities. ............................................................................ 16
Figure 3. Kubectl output showing services and deployments. ....................................................................... 24
Figure 4. Configuration of the front-end load balancers for the Kubernetes cluster. ........................... 25
Figure 5. Load balancing rules for the Kubernetes cluster. .............................................................................. 26
Figure 6. Nodes in the Azure Container Service–Kubernetes cluster. .......................................................... 26
Figure 7. Command line information about the nodes in the cluster. ......................................................... 27
Figure 8. Using GoDaddy to replace the NS records with the Azure DNS names servers................... 29
Figure 9. Web interface for TodoWeb service. ...................................................................................................... 30
Figure 10. External IP address exposed by the NGINX ingress controller. ................................................. 44
Figure 11. TodoWeb front end in a browser. ......................................................................................................... 44
Figure 12. Todolist directory in a Helm chart......................................................................................................... 45
Authored by Paolo Salvatori. Edited by Nanette Ray.
© 2018 Microsoft Corporation. This document is for informational purposes only. MICROSOFT MAKES NO WARRANTIES, EXPRESS OR
IMPLIED, IN THIS SUMMARY. The names of actual companies and products mentioned herein may be the trademarks of their
respective owners.

Build and deploy a multi-container application
4
Overview
To run a multi-container application on Azure, you have several deployment choices. This guide and the
accompanying GitHub scripts demonstrate how to create a multi-container application using ASP.NET Core
and Docker, then deploy it on an Azure Container Service Kubernetes cluster on Linux.
The multi-container application adopts a microservices architecture that consists of a collection of small,
autonomous services. Each service is self-contained and implements a single business capability.
Microservices have the following characteristics:
• In a microservices architecture, services are small, independent, and loosely coupled.
• Each microservice is a defined by a separate code base, configuration data, and data package that can
be managed by a small development team.
• Each microservice can be built using different programming languages, technology stacks, libraries,
and frameworks.
• Microservices communicate with each other using well-defined application programming interfaces
(APIs). Internal implementation details of each service are hidden from other services.
• Microservices can be versioned and deployed independently. A team can update an existing service
without rebuilding and redeploying an entire application.
• Services are responsible for persisting their own data or external state. This approach differs from the
traditional model, where a separate data layer handles data persistence.
For detailed guidance about building a microservices architecture on Azure, see Designing, building, and
operating microservices on Azure.
In this guide
This guide is intended for software developers with some familiarity with multi-container applications and
includes a sample multi-container application created with ASP.NET Core. This guide shows you how to
deploy it on Azure in two ways:
• To Azure Container Service–Kubernetes (ACS–Kubernetes) cluster.
• To Azure Container Service with Managed Kubernetes (AKS) cluster.
In each of these scenarios, the cluster can pull images from either Docker Hub or Azure Container Registry.
These alternatives are described and sample configuration files are provided on GitHub.
The guide also shows how to:
• Use environment variables in a Dockerfile, Docker Compose file, or Kubernetes templates to specify
application settings.
• Set up the deployment for monitoring using Azure Application Insights.
• Delegate a public domain to Azure DNS.
Build and deploy a multi-container application
5
• Use the Azure Cloud Shell to create an app on Kubernetes.
The sample application, scripts, and command files are included in a GitHub repository so you can
experiment.
Prerequisites for the development computer
• Install Microsoft Visual Studio 2017 with .NET Core workload. For more information, see Visual Studio
Tools for Docker.
• Install Docker for Windows and configure it to use Linux containers.
• Clone or download this container solution into a directory on your local machine.
• Replace the values of the scripts’ placeholder parameters as described throughout this guide.
Contents of this project
The GitHub repository contains the projects, code, templates, and scripts used to build and deploy the
Todolist multi-container application to ACS–Kubernetes and AKS. Additional projects and scripts in the
repository are intended to be used to deploy the multi-container application to Azure Service Fabric.
The Visual Studio solution available in the GitHub repository is composed of the following contents that
can be used to build and deploy the sample multi-container application to a an ACS–Kubernetes or AKS
cluster:
• TodoWeb: This project is an ASP.NET Core Web application that represents the front end of the
solution. The user interface is composed of a set of Razor pages that can be used to browse, create,
delete, update, and see the details about a collection of to-do items stored in an Azure Cosmos DB
collection. The front-end service is configured to send logs, events, traces, requests, dependencies, and
exceptions to Application Insights.
• TodoApi: This project contains an ASP.NET Core Web API service that is invoked by the TodoWeb
front-end service to access the data stored in an Azure Cosmos DB SQL API database. Each time a
CRUD operation is performed by any of the methods exposed by the TodoController, the back-end
service sends a notification message to a Service Bus queue. You can use Service Bus Explorer to read
messages from the queue. The back-end service is configured to send logs, events, traces, requests,
dependencies and exceptions to Application Insights. The back-end service adopts Swagger to expose
a machine-readable representation of its RESTful API.
\Scripts
• ACS-Kubernetes-Cluster folder contains the create-kubernetes-acs-cluster.cmd command file used to
create an Azure Container Service Kubernetes cluster.
• AKS-Kubernetes-Cluster folder contains the create-kubernetes-aks-cluster.cmd command file used to
create an Azure Container Service Kubernetes managed cluster. For more information, see Azure
Container Service (AKS).
• Azure-Container-Registry folder contains the create-azure-container-registry.cmd command file used
to create an Azure Container Registry repository. Azure Container Registry can be used to store images
for container deployments in Azure Container Service, Azure App Service, Azure Batch, Azure Service

Build and deploy a multi-container application
6
Fabric, and other Azure services. For more information, see Introduction to private Docker container
registries in Azure.
• Azure-DNS folder contains the create-azure-dns-for-kubernetes-todoapi-service.cmd command file
used to create an Azure DNS service. It is used to resolve a website or service name to its IP address.
For more information, see Azure DNS overview.
• Push-Docker-Images-Scripts contains the push-images-to-azure-container-registry.cmd command
file used to push Docker images to an Azure Container Registry. It also contains the push-images-to-
docker-hub.cmd script is used to push Docker images to a Docker Hub repository. For more
information, see Deploy and use Azure Container Registry.
\Scripts\Kubernetes
These scripts are used to compose and deploy the multi-container application.
• create-application-in-kubernetes-from-azure-container-service.cmd: This command file creates the
services and deployments that compose the multi-container application. It pulls the Docker images
from an Azure Container Registry using the definitions contained in the todolist-deployments-and-
services-from-azure-container-registry.yml file. For more information, see Run applications in
Kubernetes.
• create-application-in-kubernetes-from-docker-hub.cmd: This command file creates the services and
deployments that compose the multi-container application. It pulls the Docker images from Docker
Hub using the definitions contained in the todolist-deployments-and-services-from-docker-hub.yml
file. For more information, see Run applications in Kubernetes.
• create-todolist-configmap.cmd: this command file can be used to create the todolist-configmap
object in the Kubernetes cluster using the todolist-configmap.yml that contains non-sensitive
configuration data used by the multi-container application.
• create-todolist-secret.cmd: This command file can be used to create the todolist-secret object in the
Kubernetes cluster using the todolist-secret.yml that contains sensitive configuration data used by the
multi-container application.
• delete-kubernetes-pods-and-services-and-deployments.cmd: This command file deletes pods,
services, and deployments from the Kubernetes cluster using the kubectl command line interface (CLI).
• install-helm.sh: This bash script is used to install and initialize Helm, a tool for managing Kubernetes
charts.
• install-nginx-ingress-controller.sh: This bash script is used to install the NGINX ingress controller in
your Kubernetes cluster.
• scale-nginx-ingress-controller-replicas.sh: This bash script is used to scale out the number of replicas
used by the NGINX ingress controller.
• install-open-ssl.sh: This bash script is used to install the OpenSSL utility.
• create-certificate.sh: This bash script is used to create a test certificate for Kubernetes.
• create-tls-secret.sh: This bash script is used to create a secret in your Kubernetes cluster using the self-
signed certificate.

Build and deploy a multi-container application
7
NOTE: Both the front-end (TodoWeb) and back-end (TodoApi) containerized services use the
microsoft/aspnetcore:2.0 image as the base Docker image. For more information, see Official .NET
Docker images.
Architecture
The GitHub repository includes scripts for deploying the TodoList multi-container application using an
ACS–Kubernetes or AKS cluster as shown in Figure 1.
Figure 1. Simplified architecture for deploying the multi-container application to ACS or AKS.
For more information about Kubernetes, see Kubernetes Services in the Kubernetes documentation.

Build and deploy a multi-container application
8
Configuration
In ASP.NET Core, the configuration API provides a way of configuring an app based on a list of name-value
pairs. Configuration is read at runtime from multiple sources. The name-value pairs can be grouped
hierarchically. ASP.NET Core includes configuration providers for:
• File formats (INI, JSON, and XML)
• Command-line arguments
• Environment variables
• In-memory .NET objects
• An encrypted user store
• Azure Key Vault
• Custom providers that you install or create
NOTE: To manage sensitive configuration data, the application uses Kubernetes secrets objects.
TodoApi service configuration
The configuration of the TodoApi service is defined in the appsettings.json file using the following
elements.
• The RepositoryService element contains the CosmosDb element containing the EndpointUri,
PrimaryKey, DatabaseName, and CollectionName of the Azure Cosmos DB database holding the data.
• The NotificationService element contains the ServiceBus element, which in turn contains the
ConnectionString of the Service Bus namespace used by the notification service, and the QueueName
setting, which holds the name of the queue where the back-end service sends a message any time a
CRUD operation is performed on a document.
• The DataProtection element contains the BlobStorage element, which in turn contains the
ConnectionString of the storage account used by the data protection and the ContainerName setting,
which holds the name of the container where the data protection system stores the key. For more
information, see Data Protection in ASP.NET Core.
• The Application Insights element contains the instrumentation key of the Application Insights
resource used by the service for diagnostics, logging, performance monitoring, analytics, and alerting.
• The Logging element contains the log level for the various logging providers.
NOTE: Ignore the AzureKeyVault section. It is available for use only when storing secret values
in Key Vault but is not used in this deployment.
The \ToDoApi\appsettings.json code is shown below.
{
"AzureKeyVault": {
"Certificate": {

Build and deploy a multi-container application
9
"CertificateEnvironmentVariable": "",
"KeyEnvironmentVariable": ""
},
"ClientId": "",
"Name": ""
},
"RepositoryService": {
"CosmosDb": {
"EndpointUri": "",
"PrimaryKey": "",
"DatabaseName": "",
"CollectionName": ""
}
},
"NotificationService": {
"ServiceBus": {
"ConnectionString": "",
"QueueName": ""
}
},
"DataProtection": {
"BlobStorage": {
"ConnectionString": "",
"ContainerName": ""
}
},
"ApplicationInsights": {
"InstrumentationKey": ""
},
"Logging": {
"IncludeScopes": false,
"Debug": {
"LogLevel": {
"Default": "Information"
}
},
"Console": {
"LogLevel": {
"Default": "Information"
}
},
"EventSource": {
"LogLevel": {
"Default": "Warning"
}
},
"ApplicationInsights": {
"LogLevel": {
"Default": "Information"
}
}

Build and deploy a multi-container application
10
}
}
TodoWeb service configuration
The configuration of the TodoWeb service is defined in the \ToDoApi\appsettings.json file using the
following elements.
• The TodoApiService element contains the EndpointUri of the TodoApi. This setting is used to contain
the name of the TodoApi service.
• The DataProtection element contains the BlobStorage element, which in turn contains the
ConnectionString of the storage account used by the data protection and the ContainerName setting,
which holds the name of the container where the data protection system stores the key.
• The Application Insights element contains the instrumentation key of the Application Insights
resource used by the service for diagnostics, logging, performance monitoring, analytics, and alerting.
• The Logging element contains the log level for the various logging providers.
NOTE: Ignore the AzureKeyVault section. It is available for use when storing secret values in
Key Vault but is not used in this deployment.
The appsettings.json code for the TodoWeb service is shown below.
{
"AzureKeyVault": {
"Certificate": {
"CertificateEnvironmentVariable": "",
"KeyEnvironmentVariable": ""
},
"ClientId": "",
"Name": ""
},
"TodoApiService": {
"EndpointUri": ""
},
"DataProtection": {
"BlobStorage": {
"ConnectionString": "",
"ContainerName": ""
}
},
"Logging": {
"IncludeScopes": false,
"LogLevel": {
"Default": "Warning"
},
"ApplicationInsights": {
"LogLevel": {
"Default": "Information"
}
}

Build and deploy a multi-container application
11
},
"ApplicationInsights": {
"InstrumentationKey": ""
}
}
How configuration works in ASP.NET Core
The CreateDefaultBuilder extension method in an ASP.NET Core 2.x app adds configuration providers for
reading JSON files and system configuration sources:
• appsettings.json
• appsettings.<EnvironmentName>.json
• environment variables
Configuration consists of a hierarchical list of name-value pairs in which the nodes are separated by a
colon. To retrieve a value, access the Configuration indexer with the corresponding item's key. For example,
if you want to retrieve the value of the QueueName setting from the configuration of the TodoApi service,
you have to use the following format.
var queueName = Configuration["NotificationService:ServiceBus:QueueName"];
If you want to create an environment variable to provide a value for a setting defined in the
appsettings.json file, you can replace : (colon) with __ (double underscore).
NotificationService__ServiceBus__QueueName=todoapi
The CreateDefaultBuilder helper method specifies environment variables last, so that the local environment
can override anything set in deployed configuration files. This allows you to define settings in the
appsettings.json file, but leave their value empty, and specify their value using environment variables.
For more information on configuration, see the following resources:
• Configuration in ASP.NET Core
• Managing ASP.NET Core App Settings on Kubernetes
• ASP.NET Core and Docker Environment Variables
Define the Docker images and containers
For this solution, we used Visual Studio Tools for Docker to build an image based on the
microsoft/aspnetcore:2.0 standard image. The tool creates the Dockerfiles that automate the steps to
create an image for both the front-end and back-end service. For example, the Dockerfile instructions set
up the environment inside your container, load the application you want to run, and map the ports. You
can customize the Dockerfile as needed. Then you use it as the input to the docker build command, which
creates the image.
For example, here is the Dockerfile of the TodoApi service:
FROM microsoft/aspnetcore:2.0
ARG source

Build and deploy a multi-container application
12
WORKDIR /app
EXPOSE 80
COPY ${source:-obj/Docker/publish} .
ENTRYPOINT ["dotnet", "TodoApi.dll"]
The Dockerfile of the TodoWeb service shows the different entry point:
FROM microsoft/aspnetcore:2.0
ARG source
WORKDIR /app
EXPOSE 80
COPY ${source:-obj/Docker/publish} .
ENTRYPOINT ["dotnet", "TodoWeb.dll"]
Visual Studio Tools for Docker also creates the docker-compose.yml and docker-compose-override.yml
files that you can use to test the application locally.
Here is docker-compose.yml:
version: '3'
services:
todoapi:
image: todoapi
build:
context: ./TodoApi
dockerfile: Dockerfile
todoweb:
image: todoweb
build:
context: ./TodoWeb
dockerfile: Dockerfile dockerfile: Dockerfile
Here is docker-compose-override.yml:
version: '3'
services:
todoapi:
environment:
- ASPNETCORE_ENVIRONMENT=Development
- RepositoryService__CosmosDb__EndpointUri=COSMOS_DB_ENDPOINT_URI
- RepositoryService__CosmosDb__PrimaryKey=DOCUMENT_DB_PRIMARY_KEY
- RepositoryService__CosmosDb__DatabaseName=TodoApiDb
- RepositoryService__CosmosDb__CollectionName=TodoApiCollection
- NotificationService__ServiceBus__ConnectionString=SERVICE_BUS_CONNECTIONSTRING
- NotificationService__ServiceBus__QueueName=todoapi
- DataProtection__BlobStorage__ConnectionString=STORAGE_ACCOUNT_CONNECTION_STRING
- DataProtection__BlobStorage__ContainerName=todoapi
- ApplicationInsights__InstrumentationKey=APPLICATION_INSIGHTS_INSTRUMENTATION_KEY
ports:

Build and deploy a multi-container application
13
- "80"
todoweb:
environment:
- ASPNETCORE_ENVIRONMENT=Development
- TodoApiService__EndpointUri=todoapi
- DataProtection__BlobStorage__ConnectionString=STORAGE_ACCOUNT_CONNECTION_STRING
- DataProtection__BlobStorage__ContainerName=todoweb
- ApplicationInsights__InstrumentationKey=APPLICATION_INSIGHTS_INSTRUMENTATION_KEY
ports:
- "80"
Before debugging the application in Visual Studio, make the following changes to the docker-compose-
override.yml file:
• Replace COSMOS_DB_ENDPOINT_URI with your Azure Cosmos DB endpoint URI.
• Replace COSMOS_DB_PRIMARY_KEY with your Azure Cosmos DB primary key.
• Replace SERVICE_BUS_CONNECTION_STRING with the connection string of your Service Bus Messaging
namespace.
• Replace STORAGE_ACCOUNT_CONNECTION_STRING with the connection string of the Storage
Account used by ASP.NET Core Data Protection.
• Replace APPLICATION_INSIGHTS_INSTRUMENTATION_KEY with the instrumentation key of the
Application Insights resource used to monitor the multi-container application.
Push the Docker images to Docker Hub or
Azure Container Registry
You can register and deploy your Docker images using repositories from either Docker Hub or Azure
Container Registry. This solution includes the scripts for both services.
Push Docker images to Docker Hub
To push to Docker Hub, execute the push-images-to-docker-hub.cmd command shown below. Make sure
to replace the DOCKER_HUB_REPOSITORY and DOCKER_HUB_PASSWORD placeholders with your Docker
Hub username and password.
REM login to docker hub
docker login -u DOCKER_HUB_REPOSITORY -p DOCKER_HUB_PASSWORD
REM tag the local todoapi:v1 image with the name of the DOCKER_HUB_REPOSITORY
docker tag todoapi:latest DOCKER_HUB_REPOSITORY/todoapi:v1
REM push the image DOCKER_HUB_REPOSITORY/todoapi:v1 to the DOCKER_HUB_REPOSITORY
docker push DOCKER_HUB_REPOSITORY/todoapi:v1

Build and deploy a multi-container application
14
REM tag the local todoweb:v1 image with the name of the DOCKER_HUB_REPOSITORY
docker tag todoweb:latest DOCKER_HUB_REPOSITORY/todoweb:v1
REM push the image DOCKER_HUB_REPOSITORY/todoweb:v1 to the DOCKER_HUB_REPOSITORY
docker push DOCKER_HUB_REPOSITORY/todoweb:v1
REM browse to https://hub.docker.com/r/DOCKER_HUB_REPOSITORY/
start chrome https://hub.docker.com/r/DOCKER_HUB_REPOSITORY/
Create and push to an Azure Container Registry
Azure Container Registry is a managed Docker registry service based on the open-source Docker Registry
2.0. This repository can store images for container deployments in Azure Container Service, Azure App
Service, Azure Batch, Service Fabric, and others. For more information, see Introduction to private Docker
container registries in Azure.
To create an Azure Container Registry, run the create-azure-container-registry.cmd script.
REM Create a resource group for the Azure Container Registry
az group create --name ContainerRegistryResourceGroup --location westus2 --output jsonc
REM Create an Azure Container Registry. The name of the Container Registry must be unique
az acr create --resource-group ContainerRegistryResourceGroup --name AZURE_CONTAINER_REGISTRY --sku Basic --admin-enabled true
REM Login to the newly created Azure Container Registry
az acr login --name AZURE_CONTAINER_REGISTRY
To tag and register the images in your repository on Docker Hub, execute the push-images-to-azure-
container-registry.cmd command file. Make sure to replace the AZURE_CONTAINER_REGISTRY placeholder
with the name of your Azure Container Registry.
REM Login to the newly created Azure Container Registry
call az acr login --name AZURE_CONTAINER_REGISTRY
REM Each container image needs to be tagged with the loginServer name of the registry.
REM This tag is used for routing when pushing container images to an image registry.
REM Save the loginServer name to the AKS_CONTAINER_REGISTRY environment variable.
for /f "delims=" %%a in ('call az acr list --resource-group ContainerRegistryResourceGroup --query "[].{acrLoginServer:loginServer}" --output tsv') do @set AKS_CONTAINER_REGISTRY=%%a
REM tag the local todoapi:v1 image with the loginServer of the container registry
docker tag todoapi:v1 %AKS_CONTAINER_REGISTRY%/todoapi:v1
REM publish <container registry>/todoapi:v1 to the container registry on Azure
docker push %AKS_CONTAINER_REGISTRY%/todoapi:v1
REM tag the local todoweb:v1 image with the loginServer of the container registry
docker tag todoweb:v1 %AKS_CONTAINER_REGISTRY%/todoweb:v1
REM publish <container registry>/todoweb:v1 to the container registry on Azure
docker push %AKS_CONTAINER_REGISTRY%/todoweb:v1

Build and deploy a multi-container application
15
REM List images in the container registry on Azure
call az acr repository list --name AZURE_CONTAINER_REGISTRY --output table
Deploy the application on a Kubernetes cluster
To deploy the multi-container application, you first need to create the cluster on Azure using Azure CLI.
You can either set up ACS–Kubernetes or use the new AKS service, which offers an improved developer
interface and other benefits.
Either way, to run commands on the cluster, use the kubectl command line interface. You can download
Azure CLI 2.0 from GitHub.
Create an ACS–Kubernetes cluster
The create-kubernetes-acs-cluster.cmd command file shows how you can create an ACS–Kubernetes
cluster.
REM Create a resource group for Kubernetes
az group create --name AcsKubernetesResourceGroup --location WestEurope --tags orchestrator=kubernetes
REM Create a Kubernetes cluster using ACS
az acs create --orchestrator-type kubernetes --name AcsKubernetes --resource-group AcsKubernetesResourceGroup --generate-ssh-keys --output jsonc
REM Install kubectl on the local machine
az acs kubernetes install-cli
REM Get credentials to connect to Kubernetes cluster using kubectl
az acs kubernetes get-credentials --name AcsKubernetes --resource-group AcsKubernetesResourceGroup
REM Show the dashboard for a Kubernetes cluster in a web browser
az acs kubernetes browse --name AcsKubernetes --resource-group AcsKubernetesResourceGroup
To manage Kubernetes entities such as services, pods, and deployments, you use the Kubernetes web
interface shown in the following figure. The last command in the script is used to launch a proxy and
browse the Kubernetes web UI.

Build and deploy a multi-container application
16
Figure 2. Web interface for managing Kubernetes entities.
For more information, see Deploy a Kubernetes cluster in Azure Container Service

Build and deploy a multi-container application
17
.
Create an AKS cluster
The create-kubernetes-aks-cluster.cmd command file below shows how you can create an AKS cluster.
REM Create a resource group for Kubernetes
az group create --name AksKubernetesResourceGroup --location westus2 --output jsonc
REM Create a Kubernetes cluster using ACS
az aks create --resource-group AksKubernetesResourceGroup --name AksKubernetes --agent-count 3 --generate-ssh-keys --output jsonc
REM Install kubectl on the local machine
az aks install-cli
REM Get credentials to connect to Kubernetes cluster using kubectl
az aks get-credentials --name AksKubernetes --resource-group AksKubernetesResourceGroup
REM Show the dashboard for a Kubernetes cluster in a web browser
az aks browse --name AksKubernetes --resource-group AksKubernetesResourceGroup
You can also create the cluster from the Azure Cloud Shell. In this case, you can skip the az aks install-cli
command, because the kubectl command line interface is already installed in your shell.
For more information, see Azure Container Service (AKS).
Use a ConfigMap in Kubernetes to define non-sensitive configuration data
ConfigMaps are entities that can be used in Kubernetes to decouple non-sensitive configuration data from
images and templates used to deploy an application. You can create a ConfigMap object to specify
application paremeters, and then map the environment variables in the pod specification to the keys
defined the ConfigMap. For more information, see Configure a Pod to Use a ConfigMap.
The first step is to create a YAML file to define a ConfigMap. The multi-container sample uses a ConfigMap
to define a value for the following parameter/environment variable pairs:
• aspNetCoreEnvironment/ASPNETCORE_ENVIRONMENT
• todoApiServiceBusQueueName/NotificationService__ServiceBus__QueueName
• todoApiServiceEndpointUri/TodoApiService__EndpointUri
• todoWebDataProtectionBlobStorageContainerName/DataProtection__BlobStorage__ContainerName
• todoApiDataProtectionBlobStorageContainerName/DataProtection__BlobStorage__ContainerName
The following YAML file can be used to create a ConfigMap object named todolist-configmap that
contains a value for the above parameters.
todolist-configmap.yml
apiVersion: v1
kind: ConfigMap
metadata:
Build and deploy a multi-container application
18
name: todolist-configmap
namespace: default
data:
aspNetCoreEnvironment: Development
todoApiServiceBusQueueName: todoapi
todoApiServiceEndpointUri: todoapi
todoWebDataProtectionBlobStorageContainerName: todoweb
todoApiDataProtectionBlobStorageContainerName: todoapi
The create-todolist-configmap.cmd command can be used to create the todolist-configmap object in the
Kubernetes cluster.
kubectl create --filename todolist-configmap.yml --record
You can use one of the following commands to read the value of the keys from the todolist-configmap:
# Get todolist-configmap
kubectl get configmaps todolist-configmap -o yaml
# Describe todolist-configmap
kubectl describe configmap todolist-configmap
Use a secret in Kubernetes to define sensitive configuration data
In Kubernetes, a secret is an object that contains a small amount of sensitive data such as passwords,
connection strings, OAuth tokens, and SSH keys. Sensitive information can be added to a pod specification
or stored in an image, but storing it in a ecret object provides several advantages:
• You get more control over how sensitive data is defined.
• Unique values can be used for different deployments of the same application—particularly useful in a
multitenant environment where the same Kubernetes cluster hosts multiple instances of the same
application, each with different configuration settings.
• Reduces the risk of accidental exposure.
For more information, see Secrets in the Kubernetes documentation.
The first step is to create a YAML file to define a secret. Each item in the file must be base64-encoded. The
multi-container sample uses a secret to define a value for the following parameter/environment variable
pairs:
• cosmosDbEndpointUri/RepositoryService__CosmosDb__EndpointUri
• cosmosDBPrimaryKey/RepositoryService__CosmosDb__PrimaryKey
• cosmosDbDatabaseName/RepositoryService__CosmosDb__DatabaseName
• cosmosDbCollectionName/RepositoryService__CosmosDb__CollectionName
• serviceBusConnectionString/NotificationService__ServiceBus__ConnectionString
• dataProtectionBlobStorageConnectionString/DataProtection__BlobStorage__ConnectionString
• applicationInsightsInstrumentationKey/ApplicationInsights__InstrumentationKey

Build and deploy a multi-container application
19
The following YAML file can be used to create a secret object named todolist-secret that contains a value
for the above parameters.
todolist-secret.yml
apiVersion: v1
kind: Secret
metadata:
name: todolist-secret
type: Opaque
data:
cosmosDbEndpointUri: BASE64-ENCODED-COSMOS-DB-ENDPOINT-URI
cosmosDBPrimaryKey: BASE64-ENCODED-COSMOS-DB-PRIMARY-KEY
cosmosDbDatabaseName: BASE64-ENCODED-COSMOS-DB-DATABASE-NAME
cosmosDbCollectionName: BASE64-ENCODED-COSMOS-DB-COLLECTION-NAME
serviceBusConnectionString: BASE64-ENCODED-SERVICE-BUS-CONNECTION-STRING
dataProtectionBlobStorageConnectionString: BASE64-ENCODED-BLOB-STORAGE-CONNECTION-STRING
applicationInsightsInstrumentationKey: BASE64-ENCODED-APP-INSIGHTS-INSTRUMENTATION-KEY
On Windows, you can use the following command to translate a value into a base64 format.
powershell "[convert]::ToBase64String([Text.Encoding]::UTF8.GetBytes(\"value\"))"
In a Linux bash shell, you can use the base64 command line utility to encode a value to a base64
format.
echo -n "value" | base64
The create-todolist-secret.cmd command can be used to create the todolist-secret object in the
Kubernetes cluster:
kubectl create --filename todolist-secret.yml --record
You can use kubectl to read the value of a setting defined from a secret object. For example, you can
use the following bash command to read the value of cosmosDbCollectionName parameter.
# Get secret kubectl get secret todolist-secret -o jsonpath="{.data.cosmosDbCollectionName}" | base64 --decode; echo
Option: Use Open Service Broker for Azure
The previous section showed how to:
• Define the endpoint URI, primary key, database name, and collection name of an existing Azure
Cosmos DB used by the application in a secret object in Kubernetes.
• Map secret data to environment variables in the pod specification.
To create an instance of Azure Cosmos DB and pass its coordinates and credentials to the application via
environment variables, you can use Open Service Broker for Azure (OSBA), an implementation of the Open
Service Broker API for Azure services. OSBA provides an effective and flexible mechanism to connect a
Kubernetes application to a suite of the most popular Azure services, including Azure Cosmos DB. For a
complete list of Azure Services currently supported by OSBA, see Open Service Broker for Azure. Open
Service Broker for Azure can be deployed to any OSB-compatible platform running in any environment,
including Azure Container Service.
Build and deploy a multi-container application
20
For more information about how to deploy OSBA in your Kubernetes cluster and how to provision and bind
services, please see the following resources:
• Integrate with Azure-managed services using Open Service Broker for Azure (OSBA)
• Connect your applications to Azure with Open Service Broker for Azure
• Open Service Broker for Azure
• Service Broker on Kubernetes up and running video
Deploy to ACS–Kubernetes from a local machine
On Kubernetes, the multi-container application is composed of the front-end service (TodoApi), the back-
end service (TodoWeb), and five pods for each service. Each pod holds just a container of one of the
ASP.NET Core apps (TodoApi or TodoWeb).
The Docker images can be pulled from an Azure Container Registry or from Docker Hub. The GitHub
solution contains scripts and YAML files to accomplish both tasks in the Scripts/Kubernetes-Scripts folder.
For example, when Docker Hub is the repository, the todolist-deployments-and-services-from-docker-
hub.yml file (shown below) contains the definition for the necessary services and deployments.
Before deploying the application to your ACS-Kubernetes cluster, open the YAML file and replace the
DOCKER_HUB_REPOSITORY placeholder with the name of your Docker Hub repository.
todolist-deployments-and-services-from-docker-hub.yml
apiVersion: apps/v1beta1
kind: Deployment
metadata:
name: todoapi
labels:
app: todoapi
spec:
replicas: 3
selector:
matchLabels:
app: todoapi
strategy:
rollingUpdate:
maxSurge: 1
maxUnavailable: 1
minReadySeconds: 5
template:
metadata:
labels:
app: todoapi
spec:
containers:
- name: todoapi
image: paolosalvatori/todoapi:v2
ports:
- containerPort: 80

Build and deploy a multi-container application
21
env:
- name: ASPNETCORE_ENVIRONMENT
valueFrom:
configMapKeyRef:
name: todolist-configmap
key: aspNetCoreEnvironment
- name: RepositoryService__CosmosDb__EndpointUri
valueFrom:
secretKeyRef:
name: todolist-secret
key: cosmosDbEndpointUri
- name: RepositoryService__CosmosDb__PrimaryKey
valueFrom:
secretKeyRef:
name: todolist-secret
key: cosmosDBPrimaryKey
- name: RepositoryService__CosmosDb__DatabaseName
valueFrom:
secretKeyRef:
name: todolist-secret
key: cosmosDbDatabaseName
- name: RepositoryService__CosmosDb__CollectionName
valueFrom:
secretKeyRef:
name: todolist-secret
key: cosmosDbCollectionName
- name: NotificationService__ServiceBus__ConnectionString
valueFrom:
secretKeyRef:
name: todolist-secret
key: serviceBusConnectionString
- name: NotificationService__ServiceBus__QueueName
valueFrom:
configMapKeyRef:
name: todolist-configmap
key: todoApiServiceBusQueueName
- name: DataProtection__BlobStorage__ConnectionString
valueFrom:
secretKeyRef:
name: todolist-secret
key: dataProtectionBlobStorageConnectionString
- name: DataProtection__BlobStorage__ContainerName
valueFrom:
configMapKeyRef:
name: todolist-configmap
key: todoApiDataProtectionBlobStorageContainerName
- name: ApplicationInsights__InstrumentationKey
valueFrom:
secretKeyRef:
name: todolist-secret
key: applicationInsightsInstrumentationKey

Build and deploy a multi-container application
22
---
apiVersion: v1
kind: Service
metadata:
name: todoapi
labels:
app: todoapi
spec:
type: LoadBalancer
ports:
- protocol: TCP
port: 80
selector:
app: todoapi
---
apiVersion: apps/v1beta1
kind: Deployment
metadata:
name: todoweb
labels:
app: todoweb
spec:
replicas: 3
selector:
matchLabels:
app: todoweb
strategy:
rollingUpdate:
maxSurge: 1
maxUnavailable: 1
minReadySeconds: 5
template:
metadata:
labels:
app: todoweb
spec:
containers:
- name: todoweb
image: paolosalvatori/todoweb:v2
ports:
- containerPort: 80
env:
- name: ASPNETCORE_ENVIRONMENT
valueFrom:
configMapKeyRef:
name: todolist-configmap
key: aspNetCoreEnvironment
- name: TodoApiService__EndpointUri
valueFrom:
configMapKeyRef:
name: todolist-configmap

Build and deploy a multi-container application
23
key: todoApiServiceEndpointUri
- name: DataProtection__BlobStorage__ConnectionString
valueFrom:
secretKeyRef:
name: todolist-secret
key: dataProtectionBlobStorageConnectionString
- name: DataProtection__BlobStorage__ContainerName
valueFrom:
configMapKeyRef:
name: todolist-configmap
key: todoWebDataProtectionBlobStorageContainerName
- name: ApplicationInsights__InstrumentationKey
valueFrom:
secretKeyRef:
name: todolist-secret
key: applicationInsightsInstrumentationKey
---
apiVersion: v1
kind: Service
metadata:
name: todoweb
labels:
app: todoweb
spec:
type: LoadBalancer
ports:
- protocol: TCP
port: 80
selector:
app: todoweb
NOTE: To map a secret to an environment variable in a pod specification, create a secret object
in Kubernetes, modify the pod definition for the appropriate containers, and then make sure the
code looks for values in the right environment variables. For details, see Using secrets as
environment variables in the Kubernetes documentation.
Configure Kubernetes with the services and deployments
To set up the services and deployments on Kubernetes, you can use the kubectrl command line interface to
execute your YAML configuration file. For example, to use the create-application-to-kubernetes-from-
docker-hub.cmd script:
kubectl create --filename todolist-deployments-and-services-from-docker-hub.yml --record
To list the newly created services and deployments, use the kubectl command line interface to run the
following commands:
REM Get services
kubectl get services
REM Get deployments
kubectl get deployments

Build and deploy a multi-container application
24
As the following figure shows, you can see the TodoApi and TodoWeb services and the TodoApi and
TodoWeb deployments.
Figure 3. Kubectl output showing services and deployments.
Load balancer service type for the Kubernetes cluster
Both the TodoApi and TodoWeb services define LoadBalancer as the service type. When you run the
deployment script, ACS–Kubernetes cluster creates two load balancing rules using the public IP of both
services.
Kubernetes service types allow you to specify the kind of service you want. The default is ClusterIP. A
service of type LoadBalancer also has a cluster IP, the virtual, internal IP used by the kube-proxy running on
each node of the cluster. It’s worth noting that if you define the service type as ClusterIP, no public IP is
exposed over the Internet, and consequently, no load balancing rule is created.
The following service types are available:
• ClusterIP: Default. Exposes the service on a cluster-internal IP. The service can be reached from within
the cluster only.
• NodePort: Exposes the service on each node’s IP at a static port (the NodePort). A ClusterIP service, to
which the NodePort service will route, is automatically created. You can contact the NodePort service
from outside the cluster by sending a request.
• LoadBalancer: Exposes the service externally using a cloud provider’s load balancer. NodePort and
ClusterIP services, to which the external load balancer will route, are automatically created.
• ExternalName: Maps the service to the contents of the externalName field (for example,
foo.bar.example.com) by returning a CNAME record with its value. No proxying of any kind is set up.
This type requires kube-dns version 1.7 or later.
Build and deploy a multi-container application
25
In our example, if you want to provide the ability to call the REST services exposed by the TodoApi service
to external applications running outside of the Kubernetes cluster, and not only to the TodoWeb service
running on the same cluster, you have to specify LoadBalancer as a service type.
As the following figure shows, you can use Azure portal to see the front-end IP configuration for the Azure
Load Balancer used by Azure Container Service in front of the Kubernetes cluster nodes.
Figure 4. Configuration of the front-end load balancers for the Kubernetes cluster.
Key:
The first row contains an IP address corresponding to the public IP of the azure-vote-front service,
a Quickstart sample deployed on the same Kubernetes cluster.
The second row contains an IP address corresponding to the Public IP of the TodoApi service.
The third row contains an IP address corresponding to the Public IP of the TodoWeb service.

Build and deploy a multi-container application
26
You can also use Azure portal to see the load balancing rules defined for the load balancer used in front of
the cluster nodes. Note that there is a rule for each public IP on the port 80, all sharing the same backend
pool.
Figure 5. Load balancing rules for the Kubernetes cluster.
Azure portal also displays information about the back-end pools. As Figure 9 shows, in this topology, the
Azure Container Service–Kubernetes cluster uses a single back-end pool composed of just three nodes.
Figure 6. Nodes in the Azure Container Service–Kubernetes cluster.

Build and deploy a multi-container application
27
As Figure 10 shows, you can retrieve information about cluster nodes by running the following command:
REM Get nodes
kubectl get nodes
Figure 7. Command line information about the nodes in the cluster.
Alternatively, if you want to use the TodoApi service only as a back-end service from the TodoWeb service,
and you don't want to expose it publicly, you can specify ClusterIP as its service type. This value makes the
service accessible only from within the cluster.
For more information, see:
• Kubernetes Services
• Kubernetes on Azure
• Microsoft Azure Container Service Engine - Kubernetes
Assign a custom DNS to the public IP of the
front-end service
One way to access the web UI for the sample application is to use the public IP exposed by the front-end
service (13.93.46.58) as shown earlier. However, you can also register a public domain using a domain
registrar like GoDaddy, then use the Azure DNS service to associate the domain with the address exposed
by the Kubernetes service. With Azure DNS, you can even host a DNS zone and manage the DNS records
for a domain in Azure.
For a custom domain’s DNS queries to reach Azure DNS, the domain must be delegated to Azure DNS
from the parent domain. Keep in mind Azure DNS is not the domain registrar.
For example, to deploy babosbird.com, a sample domain created by the author, the steps are as follows:
1. Create a public domain using a domain registrar such as GoDaddy. For this example, babosbird.com
was created.

Build and deploy a multi-container application
28
2. To create the Azure DNS and related record, run the create-azure-dns-for-kubernetes-todoapi-
service.cmd script:
REM Create a resource group for the DNS Zone and records
az group create --name DnsResourceGroup --location westeurope
REM Create a DNS zone called babosbird.com in the resource group DnsResourceGroup
az network dns zone create --name babosbird.com --resource-group DnsResourceGroup --tags environment=K8s type=DNS
REM Create an A record for the public ip exposed by the public load balancer created for the TodoApi service in Kubernetes
az network dns record-set a add-record --resource-group DnsResourceGroup --zone-name babosbird.com --record-set-name www --ipv4-address 13.93.46.58
az network dns record-set a add-record --resource-group DnsResourceGroup --zone-name babosbird.com --record-set-name * --ipv4-address 13.93.46.58
REM View records
az network dns record-set list --resource-group DnsResourceGroup --zone-name babosbird.com
REM View records records at the top of the zone
az network dns record-set list --resource-group DnsResourceGroup --zone-name babosbird.com --query "[?name=='@' && ends_with(type, 'NS')]|[0]"
REM Retrieve the name servers for your zone. These name servers should be configured with
REM the domain name registrar where you purchased the domain name
az network dns zone list --resource-group DnsResourceGroup --query "[?name=='babosbird.com']|[0].nameServers" --output json
The last command in particular can be used to retrieve the name servers. Azure DNS automatically
creates authoritative NS records in your zone containing the assigned name servers. You need these
name servers to delegate the custom domain to Azure DNS.
3. When the DNS zone is created and you have the name servers, update the parent domain with the
Azure DNS name servers. Each registrar has its own DNS management tools to change the name server
records for a domain. In the registrar's DNS management page, edit the NS records and replace the NS
records with the ones Azure DNS created. Figure 8 shows how this is done in GoDaddy.

Build and deploy a multi-container application
29
Figure 8. Using GoDaddy to replace the NS records with the Azure DNS names servers.
4. To verify, execute the following command:
nslookup -type=A www.babosbird.com
This command verifies the front-end service IP that is responding to the public domain you delegated
to your Azure DNS.

Build and deploy a multi-container application
30
5. Browse to the front-end web site using the custom domain I registered as Figure 9 shows.
Figure 9. Web interface for TodoWeb service.
For more information about how to create an Azure DNS service and use the Azure CLI to manage zones
and records, please see the following resources:
• How to manage DNS Zones in Azure DNS using the Azure CLI 2.0
• Manage DNS records and recordsets in Azure DNS using the Azure CLI 2.0
For more information to delegate a public domain to Azure DNS, see the following articles:
• Delegation of DNS zones with Azure DNS
• Delegate a domain to Azure DNS
Deploy the application to AKS from Cloud Shell
You can deploy the multi-container application from Cloud Shell, an interactive, browser-accessible shell
for managing Azure resources. Cloud Shell uses Azure file storage to persist files across sessions.
You use a YAML file to define the services and deployments of the multi-container application and run it
from Cloud Shell. The first step is to run a command file from your local computer using the Azure CLI. The
command file sets up the Azure environment as follows:
• Creates a resource group.
• Creates a storage account in the new resource group.
Build and deploy a multi-container application
31
• Creates a file share in the storage account.
• Copies a YAML file containing the definition of the services and deployments of the multi-container
application to the file share.
Command file
REM Create a resource group for the storage account
az group create --name RESOURCE_GROUP --location LOCATION --output jsonc
REM Create a storage account for clouddrive
az storage account create --name STORAGE_ACCOUNT_NAME --resource-group RESOURCE_GROUP --sku Standard_RAGRS --location LOCATION
REM Create a file share in the storage account
az storage share create --name SHARE_NAME --account-name STORAGE_ACCOUNT_NAME --account-key STORAGE_ACCOUNT_PRIMARY_KEY --resource-group RESOURCE_GROUP
REM upload the YAML containing the definition of services and deployments to the clouddrive from a command-prompt on the local machine
az storage file upload --account-name STORAGE_ACCOUNT_NAME --account-key STORAGE_ACCOUNT_PRIMARY_KEY --share-name SHARE_NAME --source PATH_TO_YAML_FILE
Before runnng the command file, change the placeholders as follows:
• Replace RESOURCE_GROUP with the name of the new resource group.
• Replace LOCATION with the location of the resource group and storage account.
• Replace STORAGE_ACCOUNT_NAME with the name of the new storage account.
• Replace STORAGE_ACCOUNT_PRIMARY_KEY with the primary key of the new storage account.
• Replace SHARE_NAME with the name of the new file share in the storage account.
• Replace PATH_TO_YAML_FILE with the path to the YAML containing the definition of the services and
deployments of the multi-container application.
For more information about how to mount a file share from an Azure Cloud Shell, see Persist files in Azure
Cloud Shell.
Create a ConfigMap using a YAML file
The next step is to create a YAML file to define a ConfigMap. The multi-container sample uses a ConfigMap
to define a value for the following parameter/environment variable pairs:
• aspNetCoreEnvironment/ASPNETCORE_ENVIRONMENT
• todoApiServiceBusQueueName/NotificationService__ServiceBus__QueueName
• todoApiServiceEndpointUri/TodoApiService__EndpointUri
• todoWebDataProtectionBlobStorageContainerName/DataProtection__BlobStorage__ContainerName
• todoApiDataProtectionBlobStorageContainerName/DataProtection__BlobStorage__ContainerName

Build and deploy a multi-container application
32
The following YAML file can be used to create a ConfigMap object named todolist-configmap that
contains a value for the above parameters.
todolist-configmap.yml
apiVersion: v1
kind: ConfigMap
metadata:
name: todolist-configmap
namespace: default
data:
aspNetCoreEnvironment: Development
todoApiServiceBusQueueName: todoapi
todoApiServiceEndpointUri: todoapi
todoWebDataProtectionBlobStorageContainerName: todoweb
todoApiDataProtectionBlobStorageContainerName: todoapi
The create-todolist-configmap.cmd command can be used to create the todolist-configmap object in the
Kubernetes cluster.
kubectl create --filename todolist-configmap.yml --record
You can use one of the following commands to read the value of the keys from todolist-configmap:
# Get todolist-configmap kubectl get configmaps todolist-configmap -o yaml # Describe todolist-configmap kubectl describe configmap todolist-configmap
Create a secret using a YAML file
The next step is to create a YAML file to define a secret object. Each item in the file must be base64-
encoded. The multi-container sample uses a secret to define a value for the following
parameter\environment variable pairs:
• cosmosDbEndpointUri\RepositoryService__CosmosDb__EndpointUri
• cosmosDBPrimaryKey\RepositoryService__CosmosDb__PrimaryKey
• cosmosDbDatabaseName\RepositoryService__CosmosDb__DatabaseName
• cosmosDbCollectionName\RepositoryService__CosmosDb__CollectionName
• serviceBusConnectionString\NotificationService__ServiceBus__ConnectionString
• dataProtectionBlobStorageConnectionString\DataProtection__BlobStorage__ConnectionString
• applicationInsightsInstrumentationKey\ApplicationInsights__InstrumentationKey
The following YAML file can be used to create a secret object named todolist-secret that contains the
values for these parameters. Before running the script, make sure to replace the placeholders in the
todolist-secret.yml file with the corresponding base64-encoded value for each configuration setting.

Build and deploy a multi-container application
33
todolist-secret.yml
apiVersion: v1
kind: Secret
metadata:
name: todolist-secret
type: Opaque
data:
cosmosDbEndpointUri: BASE64-ENCODED-COSMOS-DB-ENDPOINT-URI
cosmosDBPrimaryKey: BASE64-ENCODED-COSMOS-DB-PRIMARY-KEY
cosmosDbDatabaseName: BASE64-ENCODED-COSMOS-DB-DATABASE-NAME
cosmosDbCollectionName: BASE64-ENCODED-COSMOS-DB-COLLECTION-NAME
serviceBusConnectionString: BASE64-ENCODED-SERVICE-BUS-CONNECTION-STRING
dataProtectionBlobStorageConnectionString: BASE64-ENCODED-BLOB-STORAGE-CONNECTION-STRING
applicationInsightsInstrumentationKey: BASE64-ENCODED-APP-INSIGHTS-INSTRUMENTATION-KEY
On Windows, you can use the following command to translate a value into a base64 format:
powershell "[convert]::ToBase64String([Text.Encoding]::UTF8.GetBytes(\"value\"))"
In a Linux bash shell, you can use the base64 command line utility to encode a value to a base64 format:
echo -n "value" | base64
The create-secret-in-kubernetes.cmd script can be used to create the todolist-secret object in the
Kubernetes cluster.
create-secret-in-kubernetes.cmd
kubectl create --filename todolist-secret.yml --record
Deploy the application
After setting up the Azure environment and creating the secret object, you can now deploy the application.
The project includes the todolist-deployments-and-services-from-azure-container-registry.yml file, which is
configured to pull Docker images from an Azure Container Service repository. Using this configuration file,
you can deploy the multi-container application to AKS.
To deploy the multi-container application:
1. Open the todolist-deployments-and-services-from-azure-container-registry.yml file.
apiVersion: apps/v1beta1
kind: Deployment
metadata:
name: todoapi
labels:
app: todoapi
spec:
replicas: 3
selector:
matchLabels:
app: todoapi
strategy:

Build and deploy a multi-container application
34
rollingUpdate:
maxSurge: 1
maxUnavailable: 1
minReadySeconds: 5
template:
metadata:
labels:
app: todoapi
spec:
containers:
- name: todoapi
image: AZURE_CONTAINER_REGISTRY_NAME.azurecr.io/todoapi:v1
ports:
- containerPort: 80
env:
- name: ASPNETCORE_ENVIRONMENT
valueFrom:
configMapKeyRef:
name: todolist-configmap
key: aspNetCoreEnvironment
- name: RepositoryService__CosmosDb__EndpointUri
valueFrom:
secretKeyRef:
name: todolist-secret
key: cosmosDbEndpointUri
- name: RepositoryService__CosmosDb__PrimaryKey
valueFrom:
secretKeyRef:
name: todolist-secret
key: cosmosDBPrimaryKey
- name: RepositoryService__CosmosDb__DatabaseName
valueFrom:
secretKeyRef:
name: todolist-secret
key: cosmosDbDatabaseName
- name: RepositoryService__CosmosDb__CollectionName
valueFrom:
secretKeyRef:
name: todolist-secret
key: cosmosDbCollectionName
- name: NotificationService__ServiceBus__ConnectionString
valueFrom:
secretKeyRef:
name: todolist-secret
key: serviceBusConnectionString
- name: NotificationService__ServiceBus__QueueName
valueFrom:
configMapKeyRef:
name: todolist-configmap
key: todoApiServiceBusQueueName
- name: DataProtection__BlobStorage__ConnectionString

Build and deploy a multi-container application
35
valueFrom:
secretKeyRef:
name: todolist-secret
key: dataProtectionBlobStorageConnectionString
- name: DataProtection__BlobStorage__ContainerName
valueFrom:
configMapKeyRef:
name: todolist-configmap
key: todoApiDataProtectionBlobStorageContainerName
- name: ApplicationInsights__InstrumentationKey
valueFrom:
secretKeyRef:
name: todolist-secret
key: applicationInsightsInstrumentationKey
---
apiVersion: v1
kind: Service
metadata:
name: todoapi
labels:
app: todoapi
spec:
type: LoadBalancer
ports:
- protocol: TCP
port: 80
selector:
app: todoapi
---
apiVersion: apps/v1beta1
kind: Deployment
metadata:
name: todoweb
labels:
app: todoweb
spec:
replicas: 3
selector:
matchLabels:
app: todoweb
strategy:
rollingUpdate:
maxSurge: 1
maxUnavailable: 1
minReadySeconds: 5
template:
metadata:
labels:
app: todoweb
spec:
containers:

Build and deploy a multi-container application
36
- name: todoweb
image: AZURE_CONTAINER_REGISTRY_NAME.azurecr.io/todoweb:v1
ports:
- containerPort: 80
env:
- name: ASPNETCORE_ENVIRONMENT
valueFrom:
configMapKeyRef:
name: todolist-configmap
key: aspNetCoreEnvironment
- name: TodoApiService__EndpointUri
valueFrom:
configMapKeyRef:
name: todolist-configmap
key: todoApiServiceEndpointUri
- name: DataProtection__BlobStorage__ConnectionString
valueFrom:
secretKeyRef:
name: todolist-secret
key: dataProtectionBlobStorageConnectionString
- name: DataProtection__BlobStorage__ContainerName
valueFrom:
configMapKeyRef:
name: todolist-configmap
key: todoWebDataProtectionBlobStorageContainerName
- name: ApplicationInsights__InstrumentationKey
valueFrom:
secretKeyRef:
name: todolist-secret
key: applicationInsightsInstrumentationKey
---
apiVersion: v1
kind: Service
metadata:
name: todoweb
labels:
app: todoweb
spec:
type: LoadBalancer
ports:
- protocol: TCP
port: 80
selector:
app: todoweb
2. Replace AZURE_CONTAINER_REGISTRY_NAME with the name of your Azure container registry.
3. Run the following command from the Azure Cloud Shell to deploy the multi-container application to
your Kubernetes cluster:
kubectl create --filename todolist-deployments-and-services-from-azure-container-registry.yml --record

Build and deploy a multi-container application
37
4. To display EXTERNAL-IP of the TodoWeb front-end service, run the following command:
kubectl get services
The output looks like this:
5. To verify that the application works as expected, browse to the public IP of the TodoWeb front-end
service. It should look like this:

Build and deploy a multi-container application
38
Configure NGINX ingress controller for TLS
termination on Kubernetes
So far, we have seen how to configure both the TodoWeb front-end service and TodoApi back-end service
and expose a public HTTP endpoint for each. But what if you want to expose only the TodoWeb front-end
service? And configure it to use an HTTPS endpoint instead of an HTTP endpoint? You can implement TLS
termination in the Kubernetes cluster using an ingress object and the NGINX ingress controller.
The NGINX ingress controller is a daemon deployed as a Kubernetes pod that watches the API server's
/ingresses endpoint for updates to the ingress resource. Using this controller, you can implement several
patterns such as path-based fanout, SSL passthrough, TLS termination, and basic or digest HTTP
authentication.
You can deploy the NGINX ingress controller to your Kubernetes cluster in Azure using either the kubectl
CLI or Helm, a tool for managing Kubernetes configurations.
The following steps install Helm, install NGINX, and create a secret containing the certificate and private
key used for TLS termination:
1. Use the \Scripts\Helm\install-helm.sh bash script below to install and initialize Helm.
#!/bin/bash # Install helm on the local machine # Download Helm curl https://raw.githubusercontent.com/kubernetes/helm/master/scripts/get > get_helm.sh # Make get_helm executable $ chmod 700 get_helm.sh # Execute get_helm.sh $ ./get_helm.sh # Initialize helm helm init
NOTE: The helm init command is used to install Helm components in a Kubernetes cluster and
make client-side configurations. For more information, see Use Helm with Azure Container Service
(AKS) and the Helm documentation.
2. Install the NGINX ingress controller in your Kubernetes cluster using the following bash script:
# Installs nginx-ingress using helm helm install stable/nginx-ingress -n nginx-ingress
3. Scale out the number of replicas used by the NGINX ingress controller to from 1 to 3 using the
following bash script:
# Scale the number of replicas of the nginx-ingress-controller to 3 kubectl scale deployment nginx-ingress-controller --replicas=3 # Scale the number of replicas of the nginx-ingress-default-backend to 3 kubectl scale deployment nginx-ingress-default-backend --replicas=3

Build and deploy a multi-container application
39
4. Install the OpenSSL utility using the following bash script:
# Install openssl utility sudo apt update && sudo apt install openssl
5. Create a self-signed certificate suitable for testing using the following bash script:
# Create a self-signed certificate. Note: private and public keys are saved locally openssl req -x509 -nodes -days 3650 -newkey rsa:2048 -keyout tls.key -out tls.crt -subj "/CN=nginxsvc/O=nginxsvc"
6. Create a secret in your Kubernetes cluster using the self-signed certificate and its private key. Run the
following bash script:
# Use the private and public key to create a secret used for SSL termination kubectl create secret tls tls-secret --key tls.key --cert tls.crt
IMPORTANT: The data keys must be named tls.crt and tls.key. In a production environment,
you should replace the self-signed certificate with a valid certificate issued by a trusted certificate
authority.
As an alternative to step 6, you can also use the following YAML file to define the tls-secret:
apiVersion: v1
kind: Secret
type: kubernetes.io/tls
metadata:
name: tls-secret
data:
tls.crt: [BASE64_ENCODED_CERT]
tls.key: [BASE64_ENCODED_KEY]
Then, to create the tls-secret in your Kubernetes cluster based on this YAML file, run the following bash
command:
# Create tls-secret using YAML file kubectl create -f /mnt/c/[PATH-TO-YAML-FILE]/tls-secret.yml
For more information about Helm, see The Kubernetes Package Manager on GitHub. For more information
about NGINX ingress controller, see the Readme file for its deployment.
Option: Generate certificates with kube-lego
This guide shows how to manually create and deploy a certificate for TLS termination to a Kubernetes
cluster. However, you can use kube-lego for automatic certificate generation. The open source kube-lego
app acquires certificates for Kubernetes Ingress resources from Let's Encrypt, which issues certificates for
free.
For more information about kube-lego, see Configure Https / TLS / SSL on Kubernetes with Kube-Lego
hosted on Azure Container Service.

Build and deploy a multi-container application
40
Install the multi-container application to Kubernetes
Now you are ready to install the multi-container application to Kubernetes. In this section, you will see how
to use the kubectl CLI to create services and deployments based on the definitions in a YAML file. In the
next section, you will see how to create a Helm chart and use it to deploy the application to Kubernetes.
The todolist-deployments-and-services-from-docker-hub-ssl.yml file is used in deploying the application to
your managed Kubernetes service. Before deployment, make sure to replace DOCKER_HUB_REPOSITORY
with the name of your Docker Hub repository.
todolist-deployments-and-services-from-docker-hub-ssl.yml
apiVersion: apps/v1beta1
kind: Deployment
metadata:
name: {{.Values.backend}}
labels:
app: {{.Values.backend}}
spec:
replicas: 3
selector:
matchLabels:
app: {{.Values.backend}}
strategy:
rollingUpdate:
maxSurge: 1
maxUnavailable: 1
minReadySeconds: 5
template:
metadata:
labels:
app: {{.Values.backend}}
spec:
containers:
- name: {{.Values.backend}}
image: {{.Values.imageRegistry}}/{{.Values.backendImage}}:{{.Values.backendTag}}
ports:
- containerPort: 80
env:
- name: ASPNETCORE_ENVIRONMENT
valueFrom:
configMapKeyRef:
name: todolist-configmap
key: aspNetCoreEnvironment
- name: RepositoryService__CosmosDb__EndpointUri
valueFrom:
secretKeyRef:
name: todolist-secret
key: cosmosDbEndpointUri
- name: RepositoryService__CosmosDb__PrimaryKey
valueFrom:

Build and deploy a multi-container application
41
secretKeyRef:
name: todolist-secret
key: cosmosDBPrimaryKey
- name: RepositoryService__CosmosDb__DatabaseName
valueFrom:
secretKeyRef:
name: todolist-secret
key: cosmosDbDatabaseName
- name: RepositoryService__CosmosDb__CollectionName
valueFrom:
secretKeyRef:
name: todolist-secret
key: cosmosDbCollectionName
- name: NotificationService__ServiceBus__ConnectionString
valueFrom:
secretKeyRef:
name: todolist-secret
key: serviceBusConnectionString
- name: NotificationService__ServiceBus__QueueName
valueFrom:
configMapKeyRef:
name: todolist-configmap
key: todoApiServiceBusQueueName
- name: DataProtection__BlobStorage__ConnectionString
valueFrom:
secretKeyRef:
name: todolist-secret
key: dataProtectionBlobStorageConnectionString
- name: DataProtection__BlobStorage__ContainerName
valueFrom:
configMapKeyRef:
name: todolist-configmap
key: todoApiDataProtectionBlobStorageContainerName
- name: ApplicationInsights__InstrumentationKey
valueFrom:
secretKeyRef:
name: todolist-secret
key: applicationInsightsInstrumentationKey
---
apiVersion: v1
kind: Service
metadata:
name: {{.Values.backend}}
spec:
type: {{.Values.backendServiceType}}
ports:
- protocol: TCP
port: 80
selector:
app: {{.Values.backend}}
---

Build and deploy a multi-container application
42
apiVersion: apps/v1beta1
kind: Deployment
metadata:
name: {{.Values.frontend}}
labels:
app: {{.Values.frontend}}
spec:
replicas: 3
selector:
matchLabels:
app: {{.Values.frontend}}
strategy:
rollingUpdate:
maxSurge: 1
maxUnavailable: 1
minReadySeconds: 5
template:
metadata:
labels:
app: {{.Values.frontend}}
spec:
containers:
- name: {{.Values.frontend}}
image: {{.Values.imageRegistry}}/{{.Values.frontendImage}}:{{.Values.frontendTag}}
ports:
- containerPort: 80
env:
- name: ASPNETCORE_ENVIRONMENT
valueFrom:
configMapKeyRef:
name: todolist-configmap
key: aspNetCoreEnvironment
- name: TodoApiService__EndpointUri
valueFrom:
configMapKeyRef:
name: todolist-configmap
key: todoApiServiceEndpointUri
- name: DataProtection__BlobStorage__ConnectionString
valueFrom:
secretKeyRef:
name: todolist-secret
key: dataProtectionBlobStorageConnectionString
- name: DataProtection__BlobStorage__ContainerName
valueFrom:
configMapKeyRef:
name: todolist-configmap
key: todoWebDataProtectionBlobStorageContainerName
- name: ApplicationInsights__InstrumentationKey
valueFrom:
secretKeyRef:
name: todolist-secret

Build and deploy a multi-container application
43
key: applicationInsightsInstrumentationKey
---
apiVersion: v1
kind: Service
metadata:
name: {{.Values.frontend}}
spec:
type: {{.Values.frontendServiceType}}
ports:
- protocol: TCP
port: 80
selector:
app: {{.Values.frontend}}
In the todolist-deployments-and-services-from-docker-hub-ssl.yml file, note that the name of deployments
and services includes is now prefixed with ssl-. In addition, the type of both ssl-todoapi and ssl-todoweb
services is now ClusterIP instead of LoadBalancer. As discussed earlier, if you adopt the ClusterIP service
type, a service is exposed only on a cluster-internal IP and can be reached only from within the cluster. This
is the default service type. If you adopt the LoadBalancer service type instead, a service is exposed
externally using a cloud provider’s load balancer. For AKS, the Azure Load Balancer is used in front of the
cluster nodes. For more information, see Services in the Kubernetes documentation.
Deploy services to the cluster
You can now run the following bash script to deploy the ssl-todoapi and ssl-todoweb services to your
Kubernetes cluster:
# Deploy the TodoList application using kubectl or helm
kubectl create -f /mnt/c/[PATH-TO-YAML-FILE]/todolist-deployments-and-services-from-docker-hubtodolist-deployments-and-services-from-docker-hub-ssl.yml --record
To expose the ssl-todoweb front-end service with a HTTPS public endpoint, you have to create an ingress
object in the same namespace as the tls-secret object.
nginx-ingress.yml
apiVersion: extensions/v1beta1
kind: Ingress
metadata:
name: nginx-ingress
spec:
tls:
- secretName: tls-secret
backend:
serviceName: ssl-todoweb
Then, to create the nginx-ingress object in your Kubernetes cluster based on this YAML file, run the
following bash command:
create-nginx-ingress.sh
# Create nginx-ingress using a YAML file kubectl create -f /mnt/c/[PATH-TO-YAML-FILE]/nginx-ingress.yml

Build and deploy a multi-container application
44
Now the NGINX ingress controller is configured to implement SSL termination and route traffic to the ssl-
todoweb service via HTTPS. To display the external IP address exposed by the NGINX ingress controller
service, run the following bash command as Figure 10 shows:
kubectl get service nginx-ingress-nginx-ingress-controller
Figure 10. External IP address exposed by the NGINX ingress controller.
With this information, you can now verify that the application works as expected. Browse to the external IP
address of the NGINX ingress controller front-end service. You should see the application as Figure 11
shows.
Figure 11. TodoWeb front end in a browser.
Package and deploy the application using Helm
You can use Helm to package and deploy the application to Kubernetes. Helm is a packaging format used
to manage Kubernetes charts. A chart is a collection of files that describe a related set of Kubernetes
resources and organized in a directory tree. Then they can be packaged into versioned archives to be
deployed.

Build and deploy a multi-container application
45
Charts help simplify a several tasks:
• Share your applications as Kubernetes charts.
• Create reproducible builds of your Kubernetes applications.
• Intelligently manage your Kubernetes manifest files.
• Manage releases of Helm packages.
As Figure 10 shows, a single chart can be used to create the services and deployments that compose the
Todolist multi-container application.
Figure 12. Todolist directory in a Helm chart.
The directory name is the name of the chart—in this case, Todolist. The Todolist chart is organized as a
collection of the following files in this directory:
• Chart.yaml: A YAML file containing the chart name, version, keywords, description, and other
information.
• LICENSE: An optional plain text file containing the license for the chart.
• README.md: A markdown file with notes and instructions.
• requirements.yaml: An optional YAML file listing any dependencies on other charts. This file is not
used in this deployment. The Todolist application has no chart dependencies.
• values.yaml: A mandatory file containing the default configuration values for this chart.
• charts/: An optional directory containing any charts upon which this chart depends. This directory is
not used in this deployment. Todolist has no chart dependencies.
• templates/: An optional directory of templates that, when combined with values, will generate valid
Kubernetes manifest files.
• templates/Deployment.yaml: A YAML file containing the definition of the TodoApi and TodoWeb
services and deployments.
• templates/NOTES.txt: An optional plain text file containing short usage notes.

Build and deploy a multi-container application
46
For more information about charts, see Charts in the Helm documentation.
Helm deployment files in this project
The \Scripts\Helm folder in the project contains the files used by the Helm chart. The main files are
Chart.yaml, values.yaml, Deployment.yaml. As you can see from the code below, Helm chart templates are
written in the Go template language, which uses actions to describe data evaluations or control structures.
Actions are delimited within pairs of curly brackets ({{ and }}). Text outside of the actions is copied to the
output unchanged.
metadata:
name: {{.Values.backend}}
This project uses actions as placeholders for values defined in the values.yaml file. This technique is
extremely powerful, because you can parametrize an entire template, including the service type, container
image location, and service and deployment name.
Chart.yaml
name: TodoList
version: 1.0.0
description: todolist multi-container app
keywords:
- todoapi
home: https://github.com/paolosalvatori/service-fabric-acs-kubernetes-multi-container-app
sources:
- https://github.com/paolosalvatori/service-fabric-acs-kubernetes-multi-container-app
maintainers: # (optional)
- name: Paolo
url: https://github.com/paolosalvatori
engine: gotpl
appVersion: 1.0.0
values.yaml
imageRegistry: "paolosalvatori"
frontendImage: "todoweb"
backendImage: "todoapi"
frontendTag: "v2"
backendTag: "v2"
frontend: "todoweb"
backend: "todoapi"
frontendServiceType: "LoadBalancer"
backendServiceType: "LoadBalancer"
templates/Deployment.yaml
apiVersion: apps/v1beta1
kind: Deployment
metadata:
name: {{.Values.backend}}
labels:
app: {{.Values.backend}}
spec:

Build and deploy a multi-container application
47
replicas: 3
selector:
matchLabels:
app: {{.Values.backend}}
strategy:
rollingUpdate:
maxSurge: 1
maxUnavailable: 1
minReadySeconds: 5
template:
metadata:
labels:
app: {{.Values.backend}}
spec:
containers:
- name: {{.Values.backend}}
image: {{.Values.imageRegistry}}/{{.Values.backendImage}}:{{.Values.backendTag}}
ports:
- containerPort: 80
env:
- name: ASPNETCORE_ENVIRONMENT
valueFrom:
configMapKeyRef:
name: todolist-configmap
key: aspNetCoreEnvironment
- name: RepositoryService__CosmosDb__EndpointUri
valueFrom:
secretKeyRef:
name: todolist-secret
key: cosmosDbEndpointUri
- name: RepositoryService__CosmosDb__PrimaryKey
valueFrom:
secretKeyRef:
name: todolist-secret
key: cosmosDBPrimaryKey
- name: RepositoryService__CosmosDb__DatabaseName
valueFrom:
secretKeyRef:
name: todolist-secret
key: cosmosDbDatabaseName
- name: RepositoryService__CosmosDb__CollectionName
valueFrom:
secretKeyRef:
name: todolist-secret
key: cosmosDbCollectionName
- name: NotificationService__ServiceBus__ConnectionString
valueFrom:
secretKeyRef:
name: todolist-secret
key: serviceBusConnectionString
- name: NotificationService__ServiceBus__QueueName

Build and deploy a multi-container application
48
value: {{.Values.queueName}}
- name: DataProtection__BlobStorage__ConnectionString
valueFrom:
secretKeyRef:
name: todolist-secret
key: dataProtectionBlobStorageConnectionString
- name: DataProtection__BlobStorage__ContainerName
valueFrom:
configMapKeyRef:
name: todolist-configmap
key: todoApiDataProtectionBlobStorageContainerName
- name: ApplicationInsights__InstrumentationKey
valueFrom:
secretKeyRef:
name: todolist-secret
key: applicationInsightsInstrumentationKey
---
apiVersion: v1
kind: Service
metadata:
name: {{.Values.backend}}
spec:
type: {{.Values.backendServiceType}}
ports:
- protocol: TCP
port: 80
selector:
app: {{.Values.backend}}
---
apiVersion: apps/v1beta1
kind: Deployment
metadata:
name: {{.Values.frontend}}
labels:
app: {{.Values.frontend}}
spec:
replicas: 3
selector:
matchLabels:
app: {{.Values.frontend}}
strategy:
rollingUpdate:
maxSurge: 1
maxUnavailable: 1
minReadySeconds: 5
template:
metadata:
labels:
app: {{.Values.frontend}}
spec:
containers:
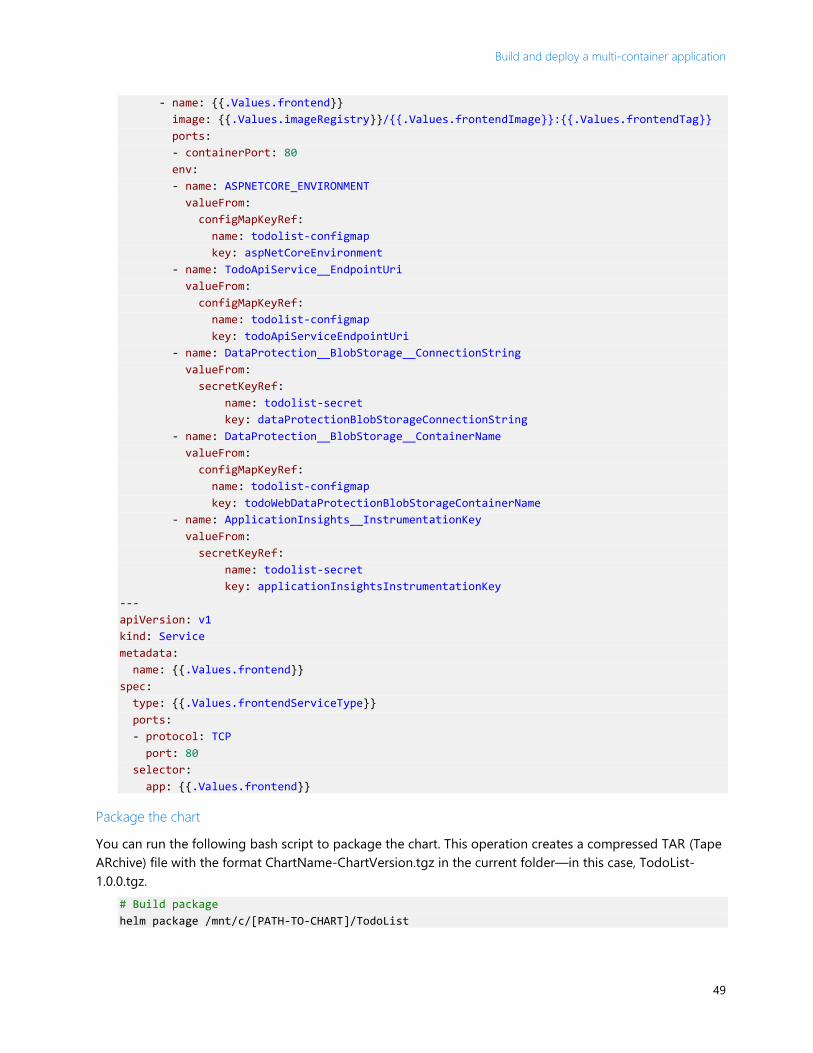
Build and deploy a multi-container application
49
- name: {{.Values.frontend}}
image: {{.Values.imageRegistry}}/{{.Values.frontendImage}}:{{.Values.frontendTag}}
ports:
- containerPort: 80
env:
- name: ASPNETCORE_ENVIRONMENT
valueFrom:
configMapKeyRef:
name: todolist-configmap
key: aspNetCoreEnvironment
- name: TodoApiService__EndpointUri
valueFrom:
configMapKeyRef:
name: todolist-configmap
key: todoApiServiceEndpointUri
- name: DataProtection__BlobStorage__ConnectionString
valueFrom:
secretKeyRef:
name: todolist-secret
key: dataProtectionBlobStorageConnectionString
- name: DataProtection__BlobStorage__ContainerName
valueFrom:
configMapKeyRef:
name: todolist-configmap
key: todoWebDataProtectionBlobStorageContainerName
- name: ApplicationInsights__InstrumentationKey
valueFrom:
secretKeyRef:
name: todolist-secret
key: applicationInsightsInstrumentationKey
---
apiVersion: v1
kind: Service
metadata:
name: {{.Values.frontend}}
spec:
type: {{.Values.frontendServiceType}}
ports:
- protocol: TCP
port: 80
selector:
app: {{.Values.frontend}}
Package the chart
You can run the following bash script to package the chart. This operation creates a compressed TAR (Tape
ARchive) file with the format ChartName-ChartVersion.tgz in the current folder—in this case, TodoList-
1.0.0.tgz.
# Build package
helm package /mnt/c/[PATH-TO-CHART]/TodoList
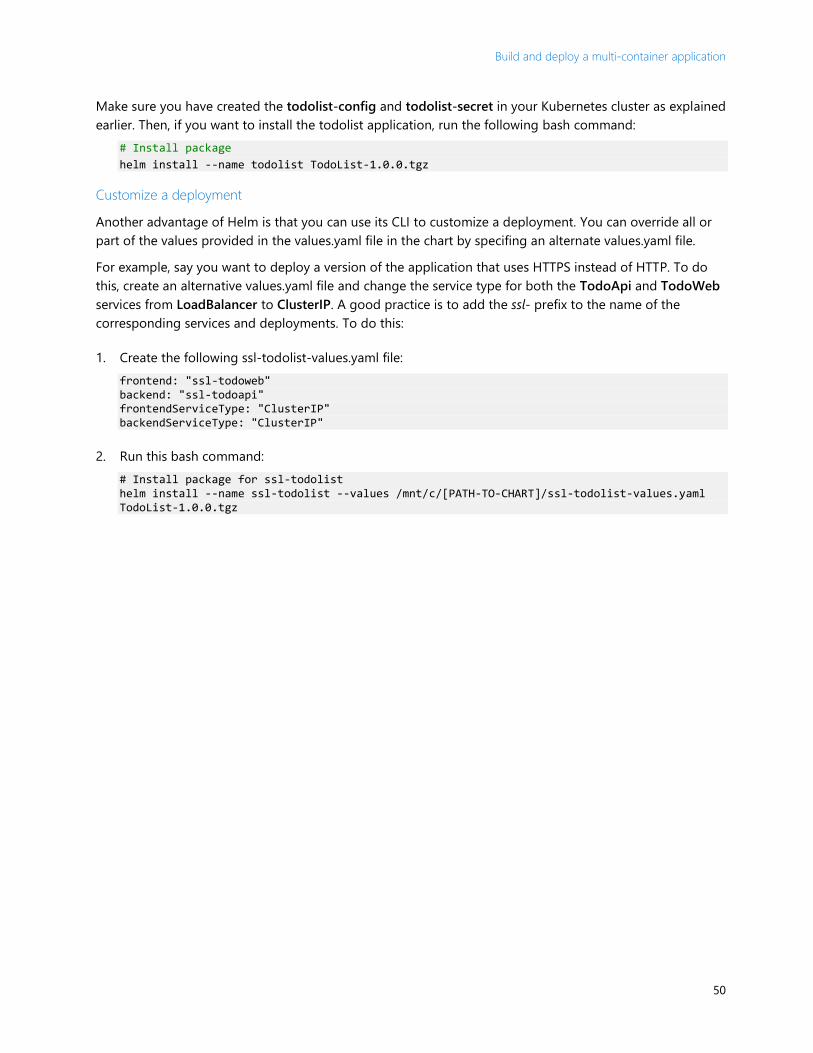
Build and deploy a multi-container application
50
Make sure you have created the todolist-config and todolist-secret in your Kubernetes cluster as explained
earlier. Then, if you want to install the todolist application, run the following bash command:
# Install package
helm install --name todolist TodoList-1.0.0.tgz
Customize a deployment
Another advantage of Helm is that you can use its CLI to customize a deployment. You can override all or
part of the values provided in the values.yaml file in the chart by specifing an alternate values.yaml file.
For example, say you want to deploy a version of the application that uses HTTPS instead of HTTP. To do
this, create an alternative values.yaml file and change the service type for both the TodoApi and TodoWeb
services from LoadBalancer to ClusterIP. A good practice is to add the ssl- prefix to the name of the
corresponding services and deployments. To do this:
1. Create the following ssl-todolist-values.yaml file:
frontend: "ssl-todoweb" backend: "ssl-todoapi" frontendServiceType: "ClusterIP" backendServiceType: "ClusterIP"
2. Run this bash command:
# Install package for ssl-todolist helm install --name ssl-todolist --values /mnt/c/[PATH-TO-CHART]/ssl-todolist-values.yaml TodoList-1.0.0.tgz
Build and deploy a multi-container application
51
Azure services used by this project
Kubernetes is a powerful system for managing containerized applications in a clustered environment.
Kubernetes is an open-source platform designed to automate deploying, scaling, and operating application
containers. It aims to provide better ways of managing related, distributed components across varied
infrastructure.
Azure Container Service for Kubernetes (ACS–Kubernetes) makes it simple to create, configure, and manage
a cluster of virtual machines that are preconfigured to run containerized applications. You can draw upon a
large and growing body of community expertise to deploy and manage container-based applications on
Azure.
Azure Container Service with Managed Kubernetes Service (AKS) manages your hosted Kubernetes
environment, making it quick and easy to deploy and manage containerized applications without container
orchestration expertise. It also eases ongoing operations and maintenance by provisioning, upgrading, and
scaling resources on demand, without taking your applications offline.
Application Insights is an extensible Application Performance Management (APM) service for monitoring
live web applications. It detects performance anomalies and includes powerful analytics tools to help you
diagnose issues and to understand what users do with your apps. It works for apps on a wide variety of
platforms including .NET, Node.js, and J2EE, hosted on-premises or in the cloud.
Service Bus Messaging is a reliable message delivery service for brokered or third-party communications
that connect applications through the cloud. Service Bus messaging with queues, topics, and subscriptions
can be thought of as asynchronous, or temporally decoupled. Producers (senders) and consumers
(receivers) do not have to be online at the same time. The messaging infrastructure reliably stores
messages in a "broker" (for example, a queue) until the consuming party is ready to receive them.
Azure Cosmos DB is a globally distributed, multi-model database that can elastically and independently
scale throughput and storage across any number of Azure's geographic regions. Azure Cosmos DB
supports multiple data models and popular APIs for accessing and querying data. The sample in this
solution uses the Azure Cosmos DB SQL API, which provides a schema-less JSON database engine with SQL
querying capabilities.
Azure Container Registry is a managed Docker registry service based on the open-source Docker Registry
2.0. You can create and maintain Azure container registries to store and manage your private Docker
container images. Container registries in Azure work with your existing container development and
deployment pipelines and draw on the body of Docker community expertise.
Azure Domain Name System (DNS) is responsible for translating (or resolving) a website or service name to
its IP address. Azure DNS is a hosting service for DNS domains, providing name resolution using the Azure
infrastructure. By hosting your domains in Azure, you can manage your DNS records using the same
credentials, APIs, tools, and billing as your other Azure services.

Build and deploy a multi-container application
52
Learn more
The Azure Container Service with Kubernetes Documentation provides details on the container features
and scenarios. The following useful links contain more in depth information:
• Deploy Kubernetes cluster for Linux containers
• Using the Kubernetes web UI with Azure Container Service
• Tutorial: how to create and deploy a a multi-container application on ACS and Kubernetes
For more information about Docker, see the following resources:
• Introduction to Containers and Docker
• What is Docker?
• Building Docker Images for .NET Core Applications
• Docker File Reference
• Docker Compose
• Securing .NET Microservices and Web Applications
For more information about ASP.NET, see the following resources:
• Configuration in ASP.NET Core
• Introduction to Logging in ASP.NET Core
• Introduction to Error Handling in ASP.NET Core
• Introduction to Razor Pages in ASP.NET Core
• Securing .NET Microservices and Web Applications