backpacking guide for the less traveled trails€¦ · web viewless traveled trails, llc. santa...
TRANSCRIPT

Spring 2017
Seek out the Less Traveled Trails of New Mexico! |by Brian Johnson, Owner & Chief Guide
New Mexico Backcountry Experiences
Backpacking Guide for the Less Traveled Trails


Less Traveled Trails, LLCSanta Fe, NM
Backpacking Guide for the Less Traveled TrailsBrian Johnson
2017
1. Weight – pack light, be light
The Purpose of Evaluating Pack Weight
Reducing your pack weight opens up the camping experience to more enjoyment because you can:
feel better physically; feel better mentally; really see, hear, and feel the
wilderness you are in; hike farther if you want to; experience new wilderness areas; take a favorite luxury item—
camera, binoculars, tablet, bird book;
understand better what you really need.
These benefits, in turn, give you more flexibility to take on challenges that may arise, like:
unexpected weather—rain, lightning, snow, wind;
unexpected wildlife or livestock; unexpected trail conditions; first aid emergencies.
Remember to: let friends/family know where you
are going and your schedule; be aware of the seasons; plan a safe route.
Get your pack weight down to a reasonable level. Cost and practicality may be factors too. For example, spending $1,000 on new equipment to reduce your pack weight from 20 to 19 pounds may be not right for your pocket book or the best use of your time. Gradually
trying out new pack weight-reducing ideas is a good approach. Thinking lighter equipment as you replace your current gear is fine. The main idea here is to get outside to experience the wilderness, rather than spending all your time thinking about gear.
The On-Trail Whole-Pack Approach
Lighten up both what you carry and what you wear. Become aware of your entire pack weight, both durables (e.g., sleeping bag) and expendables (e.g., food). Focusing on the big three—sleeping bag, shelter, pack—may divert your attention from weight issues with smaller, less noticeable items. Wear comfortable but carefully selected clothing that also considers weight. Try to combine several items into one—hats for instance—and use footwear that is right for the trail and camping conditions.
Ultralight Strategies – use them all!
There are many sources of information now on ultralight backpacking. Use what works best for you. Overall, the strategies are:
If money is no object, buy the latest & lightest equipment;
If money is an obstacle and you stay with your current equipment, use your lightest choices of what you have, eliminate duplicated gear, and leave behind optional items;
If you have a limited budget for purchasing equipment, combine new with your current gear and continue to upgrade over time.
www.facebook.com/LessTraveledTrails 1

Less Traveled Trails, LLCSanta Fe, NM
Use the same approach with new, used, or a combination of new/used gear.
Every ounce matters; The bottom line is how much the
whole pack weighs when hitting the trail—“On-Trail Whole-Pack;”
Use absolute weight for “The Big Three” gear items—sleeping bag, shelter, pack;
Use net weight for all other small gear items.
Helpful Tools for Weight Evaluation
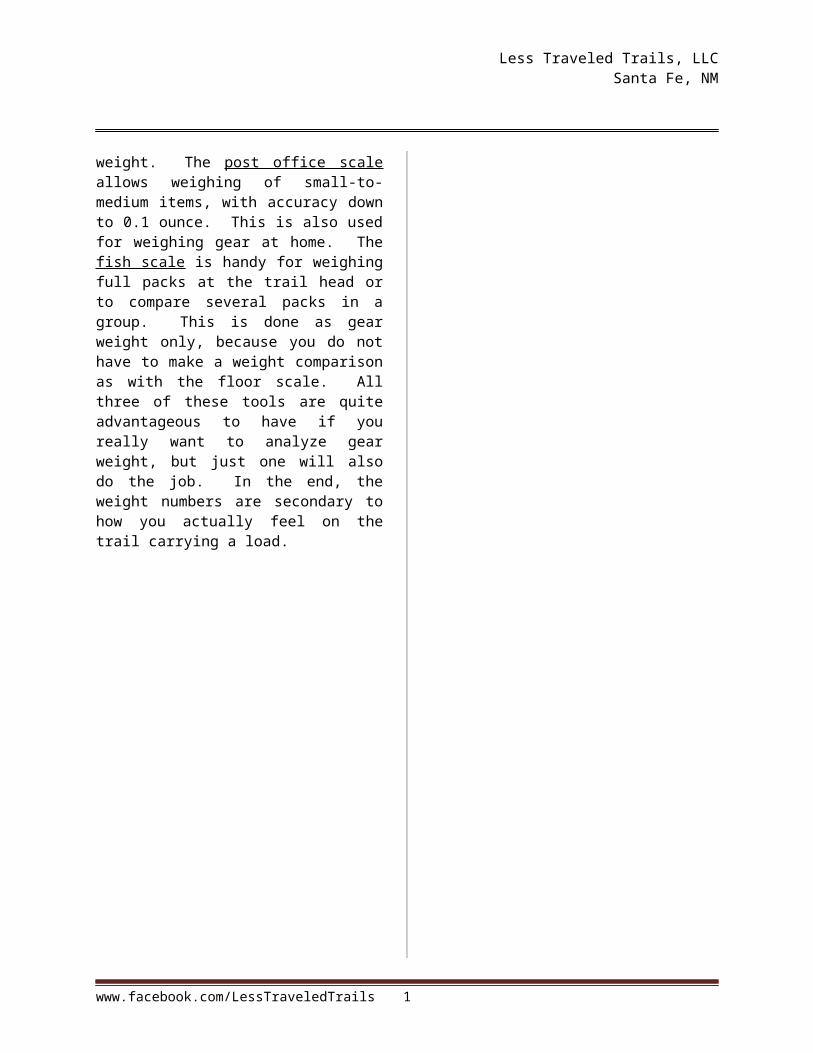
It is helpful to have at least one tool for actually weighing gear, so that you can make comparisons and know how much you are carrying. This equipment can help you evaluate the weight of your gear: floor scale, post office scale, and fish scale. With the everyday floor scale you are able to weigh larger gear items and a full pack, when you are at home assembling your gear. This is accurate to 1-2 pounds and is usually done on a comparison basis, where you are comparing your body weight to body + gear weight. The post office scale allows weighing of small-to-medium items, with accuracy down to 0.1 ounce. This is also used for weighing gear at home. The fish scale is handy for weighing full packs at the trail head or to compare several packs in a group. This is done as gear weight only, because you do not have to make a weight comparison as with the floor scale. All three of these tools are quite advantageous to have if you really want to analyze gear weight, but just one will also do the job. In the end, the weight numbers are secondary to how you actually feel on the trail carrying a load.
www.facebook.com/LessTraveledTrails 1
Less Traveled Trails, LLCSanta Fe, NM
2. Food – this keeps us going!
Making a Menu
It makes sense to plan ahead for the food needed on a backpack trip. One approach is to have prepared meals for breakfast and dinner, with lunch being anytime between the two. Make a menu list for each day and take it with you on the trip. Stick to the menu from day-to-day so that you know each meal is covered.
Clelland’s food quantity formula [Clelland, 2011. Ultralight Backpackin’ Tips, FALCONGUIDES] Don’t run out of food, but also don’t take too much! A key ratio to guide menu planning is this:
1.4 pounds per person per day (“lbs/p-d”).
This formula works quite well! Along with wise menu planning, it provides for your basic food needs, but also places a limit on your “mobile pantry” so that you are not overloaded with food weight. For longer multi-week excursions, bump this up slightly to 1.5 or 1.6 lbs/p-d to account for strenuous activity over a longer time period.
In simple terms, a one-week trip for three backpackers would mean carrying a total of 29 lbs, 6.4 ounces (oz) of food (7 days x 3 people x 1.4 lbs/p-d = 29.4 lbs = 29 lbs, 6.4 oz). Take into account fractional days of food needs. Here is another example: a solo backpacker is going out for three days, but will eat the first day’s breakfast at home, then on the way home at the end of the third day will grab dinner at a restaurant. The food quantity formula would yield 3 lbs, 4.3 oz (2.333 days x 1 person x 1.4 lbs/p-d = 3.266 lbs = 3 lbs, 4.3 oz). Yes, take the weight precision down to the tenth of an ounce, just like with your gear!
Nutrition and Diets
Food of high caloric content and an adequate amount is a good idea, but do not leave out the nutritional value in planning the menu. With starchy foods being so prevalent in the common trail cooking recipes—rice, pasta, beans, oats—it is easy to account for the carbohydrates your body needs. It is harder to accommodate healthy amounts of fruit and vegetables. Be sure to take dried fruit, such as apricots, apples, papaya, raisins, cherries, mango, and even pineapple. Eat them along with energy snacks in the middle of the day, or supplement your morning and evening meals. Add dried cherries to that oatmeal, or add dried peas to that freeze-dried bag of curried couscous. You can even get your own food dehydrator and prepare dried fruits and vegetables yourself. Make your own fruit leather from applesauce; it can be eaten straight as a leather or rehydrated in a cup or pot if you would like to add it as a sauce to your mug of morning cereal.
Protein? It’s a good idea to have adequate protein on your adventures. Of course you need it to be in a form that can be preserved. The easiest form is beef jerky, an icon food of backpacking, which stays preserved almost forever. Now days it comes in all kinds of “flavors.” There are also other “jerked” meats, turkey being a common one. Jerky could be the sole source of meat on the trail, or it could be supplemented with hard, dry salami. Be sure to get this salami in a form that does not require refrigeration. It will “keep” for a multi-day backpack, but should not be considered as being forever preserved, as with jerky. So either eat it all on the trip or use it up completely soon after. Don’t just put it in the bottom of your pack, waiting for the next trip three months later!
www.facebook.com/LessTraveledTrails 11

Less Traveled Trails, LLCSanta Fe, NM
Cheese can be used as a good source of protein usually in combination with other sources. It will also keep for many days out in the wild.
What about other diets: vegetarian, vegan, gluten-free? Yes, these and other diets can be accommodated in the great outdoors. Plan your menu to meet your specific diet’s requirements as you would at home. For freeze-dried packaged meals, read the labels to find what you need. Commercial freeze-dried food companies usually offer a wide assortment of vegetarian meals. With a little more checking you will be able to find vegan and gluten-free meals.
As with shopping for food for the home kitchen, also read the labels of backpacking food, if you care about what you eat on the trail. This applies to commercially-packaged food specifically for backpacking (e.g., freeze-dried meals) and also the usual packaged items you may pick up at the local grocery store. Any type of commercially-processed food may have an array of interesting and questionable ingredients. For one, hydrogenated oils are found in many freeze-dried packaged meals.
If you are concerned about any ingredients on a label, there may be alternatives to consider:
pick freeze-dried meals with a list of ingredients that you are willing to tolerate;
prepare your own meals at home, from scratch, using a dehydrator where needed;
only use food that has no or minimal processing.
The commercial freeze-dried food companies that use ingredients that may be of concern also usually offer other meals that may be more acceptable. So if the curried chicken and rice contains hydrogenated oils or other interesting ingredients, maybe the southwest chili has
fewer or none of those ingredients. Or look for a freeze-dried food company that features organic and otherwise natural, basic food ingredients in all of its meals.
Other tips you might find interesting: Another backpacking food icon is hot
chocolate…definitely check the ingredients if you include this beverage…get some with real cocoa, not just sugar with who knows what;
cook up foods that are easy on your pot and utensils to clean up…if you do it right, all you need is your fingers and some warm water to clean up…with freeze-dried meals, eat it directly from the pouch;
don’t bother with buying packaged breakfast meals for oatmeal or granola…it’s super easy to make it up yourself at home…quick oats with boiled water is ready in a minute or two;
if bagels are in your menu, get them pre-sliced…sometimes they crumble if they have been in your pack for a few days and you need to slice them on the trail;
don’t just throw out the warm water when you are done cooking and cleaning pots…use it for washing up, cleaning your glasses, or simply drink it.
Water
We all need water for sure and, in general, the more we can drink of it, the better. Stay hydrated! Water is a definite weight factor. At 8.34 lbs per gallon, a full one-quart (32 oz) water bottle will weigh-in at 2 lbs, 1.4 oz (plus a few more ounces for the container itself). In dry country with little or uncertain water availability, you may need to carry a lot more. On the other hand, if your trail is along a
www.facebook.com/LessTraveledTrails 11

Less Traveled Trails, LLCSanta Fe, NM
stream, maybe you can get by carrying a lot less.
Besides the water and container a method of treatment is recommended. Yes, the beautiful creeks, streams, and rivers of the high country are the repositories of wildlife waste, which should be respected and dealt with by simple treatment. The result is crystal clear water carrying Giardi cysts. Only the most pure seeps and springs that by their location would not be contaminated should be trusted. To be sure, even treat these sources. An inspiring backpack trip followed by weeks of intestinal agony is not that inspiring!
What treatment is best? There are many methods and each comes with a weight factor: boiling, pumping, chemicals, and even ultraviolet light disinfection are used. For water on the trail, one of the lightest weight approaches is to use chemicals in tablet form. The tablets come conveniently in small bottles that do not weigh much, with the capacity to treat a lot of water. For the purist in ultralight backpacking, the ounces can be shaved off by using the direct chemical form of treatment, and only taking exactly the amount of chemicals that you will need.
Iodine is a key component needed to kill the Giardi (chlorine is another). The directions with the tablets need to be followed to allow the treatment to become effective. What about the iodine taste? Now there are also tablets for follow-up treatment on the iodine, so we can enjoy the fresh water taste of the mountain streams.
In camp, it makes sense to take advantage of boiling water, often used in making our meals, to treat water. If there is an evening campfire, there would be a lot of opportunity for purifying water for the next day (also for a warm, cozy
bottle to place in your sleeping bag during the night!).
Heating Food and Water
The campfire as your heating mode. Using a campfire can be advantageous to ultralight backpacking. If you can depend solely on natural materials in the wilderness for fueling your heat, there is no need to bring with you a stove and fuel. A campfire uses renewable energy, plus may offer you the enjoyment of its radiant heat and ambiance that can be fun in a group setting. If you intend to use a campfire for cooking, be sure you know in advance how to set it up, maintain it, and clean it up, or reclaim the campfire ring. It does take time that could otherwise be spent directly experiencing and enjoying your natural environment.
Always attend to the campfire when it is in use. Do not leave a campfire burning overnight. Completely extinguish a campfire with water or soil. Have water or soil at the campfire ready to quickly extinguish it in an emergency. Have the first aid supplies and knowledge to be prepared for burn injuries. The campfire may be used as the “kitchen” area and a group gathering spot, but do not place it right next to shelters or other gear.
Make a campfire in an area devoid of natural fuel. Mark the campfire ring with rocks, if available, perhaps about three feet in diameter. In the middle of the ring place your best available fire starter materials. Build a “tee-pee” of kindling over the fire starter. Keep the kindling pieces as small as possible and allow space between the pieces to allow for good air flow. Take the time and patience to build a good size tee-pee so that you are sure that the campfire will ignite and begin to burn on its own. Light the fire starter next to the driest, smallest kindling. The goal should be to get the
www.facebook.com/LessTraveledTrails 11

Less Traveled Trails, LLCSanta Fe, NM
fire going with no more than two attempts with matches or a lighter. Once the tee-pee is burning on its own, patiently add wood of gradually larger size. Maintain air space to allow good air flow.
Good fire starter material can be crucial to getting a campfire going without much hassle. For natural fire starter, look for the tiniest woody materials near your campsite. The driest twigs, pine needles, and shavings of dead and down wood can be the best. If it has been raining, look for the more sheltered places, perhaps next to trees, shrubs, and cliff faces. Toilet paper or newspaper? If you are truly going ultralight on your trip, don’t depend on having it with you!
Now we are ready to cook. When the campfire can be easily maintained to continue burning, you can place pots around the edge in the heat. It is easiest to simply heat water for adding to freeze-dried and other meals outside of the campfire ring. Other more creative and time-intensive use of the campfire for cooking—e.g., foil-wrapped potatoes or corn, biscuits in a Dutch oven, steak on hot coals—are up to you, but may not be agreeable with keeping weight down on your backpacking adventures.
Here are a few tips that may make the campfire experience a lot more enjoyable:
use tree sap (“pitch”) as a starter fuel; carry a length of tubing with you to
remotely blow into the fire (instead of having your face down in it);
from the moment you arrive at the campsite, maintain a stash of wood under your shelter, in case of rain;
use an existing campfire ring (but also reclaim it before leaving);
coat the outside of the pots entirely with soap before putting in the fire (makes it easy to clean off all the carbon afterwards).
Be diligent in reclaiming the campfire ring before you leave. Try to burn down the wood to small pieces before extinguishing the fire. Be sure the fire is out, using water or soil. Scatter the rocks. Scatter the charred wood. Spread out the ash. “Rake” the campfire area with a branch. If soil is available, spread it over the ash and rake it to mix it together. Use your own judgment to make the area look as natural and untouched as possible.
(Exception: if you use an existing campfire and it obviously is a prominent-large-established campfire ring, perhaps part of an outfitter’s camping spot, leave it in place.)
The campfire mode of cooking may not work for these reasons:
not comfortable or knowledgeable about building and maintaining campfires;
camping in an area without a lot of dead and down fuel;
limited time in daily routine to make campfires (and reclaim them);
wet fuel makes it difficult to light the campfire;
not safe or practical due to high winds; cannot be attended to at all times; fire safety or environmental restrictions
prevent use of campfires (be prepared to bring a stove or have a lightweight one with you anyway);
do not want the smoky smell on clothing and body.
As you can see, I like campfires. They can be challenging and I am still learning. Beware: campfires can be fun, or they can be a drag!
Stove options. Now there are stove and fuel combinations that are so light, you might as well bring it even if you plan to use campfires. Maybe one evening you get into camp late, quite tired out, making a stove the quicker
www.facebook.com/LessTraveledTrails 11

Less Traveled Trails, LLCSanta Fe, NM
option for getting a hot meal and into your sleeping bag. Use these stoves in the warmer spring-summer-fall weather; winter backpacking will require more specialized stoves.
An alcohol stove is simply a small metal reservoir for fuel with precisely-sized holes. You can even make your own out of a soda can. The denatured alcohol fuel is easy to work with, just needing a light plastic bottle for storage and being fairly benign if it spills on you. Pocket stoves are simply a fold-up metal base for your pot, with a fuel tablet receptacle in the middle. The tablets are solid fuel and can be lit with regular matches.
These stoves can heat water in a 1 or 2 person pot to boiling in 8-12 minutes. The fuel can be lit with regular matches; allow a few minutes for the stoves to get going.
www.facebook.com/LessTraveledTrails 11

Less Traveled Trails, LLCSanta Fe, NM
3. Gear – start with what you already have
“The Big Three” should take up most of your weight and volume if you are packing truly ultralight: sleeping bag, shelter, pack. In this first area of talking about gear, thankfully we are only talking about three items, but the decisions made can easily affect total weight in the pounds range, not just ounces.
Sleeping Bag
We all know why a sleeping bag is so important. To keep you warm at night! It also is a great backup to keep in mind in case the weather turns colder on your adventure and the clothing with you cannot keep you warm. At 2-to-5 pounds, The sleeping bag may take up to 25% of an ultralight backpacker’s total pack weight. Consider taking a good pad, either foam (cheap) or air-filled (pricey), to cushion your body on the ground.
There are two general types of bags: down and synthetic fill. Cotton car camping bags are not an option! Down bags are lighter and compress into smaller volume, but are more expensive and lose their insulation properties if they get soaked wet. Synthetic bags are cheaper and do better if they get wet, but are heavier and bulkier. The temperature ratings are a basic index of how warm they will keep you, but are not based on a uniform standard of warmth. A good, warm bag is essential if you are planning to use a tarp shelter or no shelter at all.
Shelter
There are four ways you can go with a shelter: tent, tarp, bivouac bag, or none at all. A tent provides a full enclosure, offering privacy, a good sense of security from wildlife, and about a 15-degree Fahrenheit temperature boost above natural outdoor conditions. Because of the latter attribute, take a tent on winter
excursions; you definitely want that 15 degree bump! During rainy seasons, a separate group rain-fly tarp with cords may also be needed, should there be a downpour while you are trekking during the day. Be aware of this, because it adds weight to the tent option. A tent may weigh in at 2-to-7 pounds; sharing this weight is the best way to go ultralight with a tent. Sharing the tent space with your fellow backpackers may be a plus or minus. Seemingly harmless issues they we thought we left at home—e.g., snoring, restlessness—can bring an otherwise great wilderness experience down a notch.
Speaking of leaving things at home, I once forgot the tent poles on a family trip. Take inventory before you go! Make sure everything is in the tent bag: stakes, poles, tent body, rain fly, ground cloth, and guy lines. (Oh yeah, leave the tent bag at home to save weight.)
The standard tent is not the only approach. Consider the simplicity of a tarp shelter. It keeps the rain off. One can be assembled using the basic components of the tarp, cord, and stakes. Yes, you are somewhat exposed, but this option is cheap, light, and may allow you to connect more with the environment. Components that break or wear out can be easily replaced. It also becomes multiple use equipment by doubling as a mid-day rain-fly. A good sleeping bag is needed in combination with a tarp, because you will be open to natural outdoor conditions. A tarp shelter can be sized for solo use or sharing with fellow backpackers.
Also, have a ground cloth to protect your pad and bag from vegetation moisture build-up; abrasive rocks, twigs, and soil; and rain. A 6-mil plastic sheet is all you need. Fold all four edges of the ground cloth under itself for a few inches, to encourage surface accumulation of rainwater to go around or under you and your gear.
www.facebook.com/LessTraveledTrails 11

Less Traveled Trails, LLCSanta Fe, NM
I use a tarp shelter and encourage you to try it. Just as with a tent, you need to learn how to set it up. With a tree-to-tree ridge line above and corner cords pulled tight to the ground, it is quite simple.
A bivouac bag has become a popular for backpackers that want to be totally contained and self-sufficient, either solo or with a group. The “bivi” bag option offers a waterproof layer over and around your sleeping bag and is light, but expensive. You may need to still have a rain-fly tarp that the group shares for mid-day storms during rainy seasons.
Going without? This is quite possible, and would mean that the shelter portion of what you carry comes in at zero pounds. If you do this, be aware of the seasonal weather patterns for the area. Also think about wildlife and privacy, for both you and the group. A longer trip means more chance of precipitation. But on a short trip, try it out sometime to heighten your wilderness experience!
Backpack
A backpack can be a significant factor in total weight carried, even though it is somewhat ironic serving as the carrier of your lightened load. Isn’t a backpack just a backpack and they are all the same? No. Backpacks themselves can weigh up to 6 pounds; compare that to the latest ultralight backpack at one pound. That difference is comparable in weight to a tent or sleeping bag.
Look at your backpack with fresh eyes and notice all of the straps, pouches, buckles, cords, and accessories, both on the outside and inside. There may be a pound or two of unneeded features that just add to the load.
More about this in a classroom session.
The Rest of Your Stuff
Here we are talking about shaving off the ounces, even tenths of an ounce. This usually uses a quite practical approach of going through your gear and making choices. But occasionally a Zen approach is the way to go.
More about this in a classroom session.
www.facebook.com/LessTraveledTrails 11

Less Traveled Trails, LLCSanta Fe, NM
4. Trip Planning – where do we want to go? how do we get there?
So you have figured out what gear to take and your load is the lightest it’s ever been. Right? Now where do I go? Anywhere your heart desires! From a weekender at the local state park to an extended thru-hike, there is a way to plan for any type of backpack trip.
Before the Trip
It’s exciting to start planning for a trip to a new place! Gather information from all the sources out there:
online there is tons of information; get guide books and maps from the
bookstore or library; contact the US Forest Service or US
Bureau of Land Management; connect with the local Sierra Club
chapter; talk to friends; drive to the trailhead yourself and go
for a short hike.
Calendar/Weather/People
Whatever you do, be sure you know the weather conditions expected, account for timing of the entire trip, schedule your trip well in advance, inform your family/work/friends of the time and place for your trip, and invite your trip partners well in advance.
At the Trailhead
Include this aspect in your trip planning. Park your car in a safe place. Is there a history of vandalism here? If there is a lot of snow or rain while you are on the trail, would you still be able to get out of the parking lot? Have a check available to write out for any kind of parking or usage fee, so you can pay the exact amount. Connect with the camp host if this is at a
campground, so they are aware your car is there. Share a car key with another trail partner or at least have someone else who knows where the key is, in case something happens to the car owner on the trip. If you are not doing a loop route, plan out the vehicle shuttle in advance. Eat a good brown bag meal at the car before you head down the trail. Leave a fresh change of clothes that you can wear on the return drive home. Have extra water in the car so you will be sure to have some when you come off the trail.
ePlanning
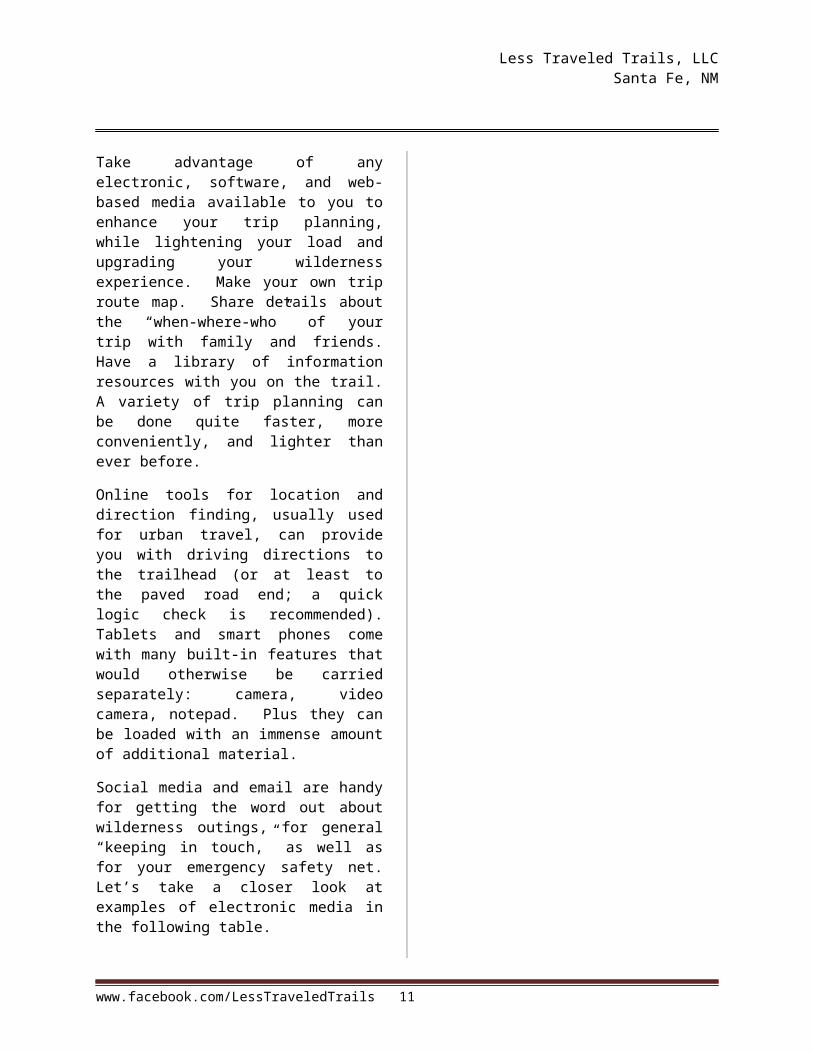
Take advantage of any electronic, software, and web-based media available to you to enhance your trip planning, while lightening your load and upgrading your wilderness experience. Make your own trip route map. Share details about the “when-where-who” of your trip with family and friends. Have a library of information resources with you on the trail. A variety of trip planning can be done quite faster, more conveniently, and lighter than ever before.
Online tools for location and direction finding, usually used for urban travel, can provide you with driving directions to the trailhead (or at least to the paved road end; a quick logic check is recommended). Tablets and smart phones come with many built-in features that would otherwise be carried separately: camera, video camera, notepad. Plus they can be loaded with an immense amount of additional material.
Social media and email are handy for getting the word out about wilderness outings, for general “keeping in touch,” as well as for your emergency safety net. Let’s take a closer look at examples of electronic media in the following table.
www.facebook.com/LessTraveledTrails 11

Less Traveled Trails, LLCSanta Fe, NM
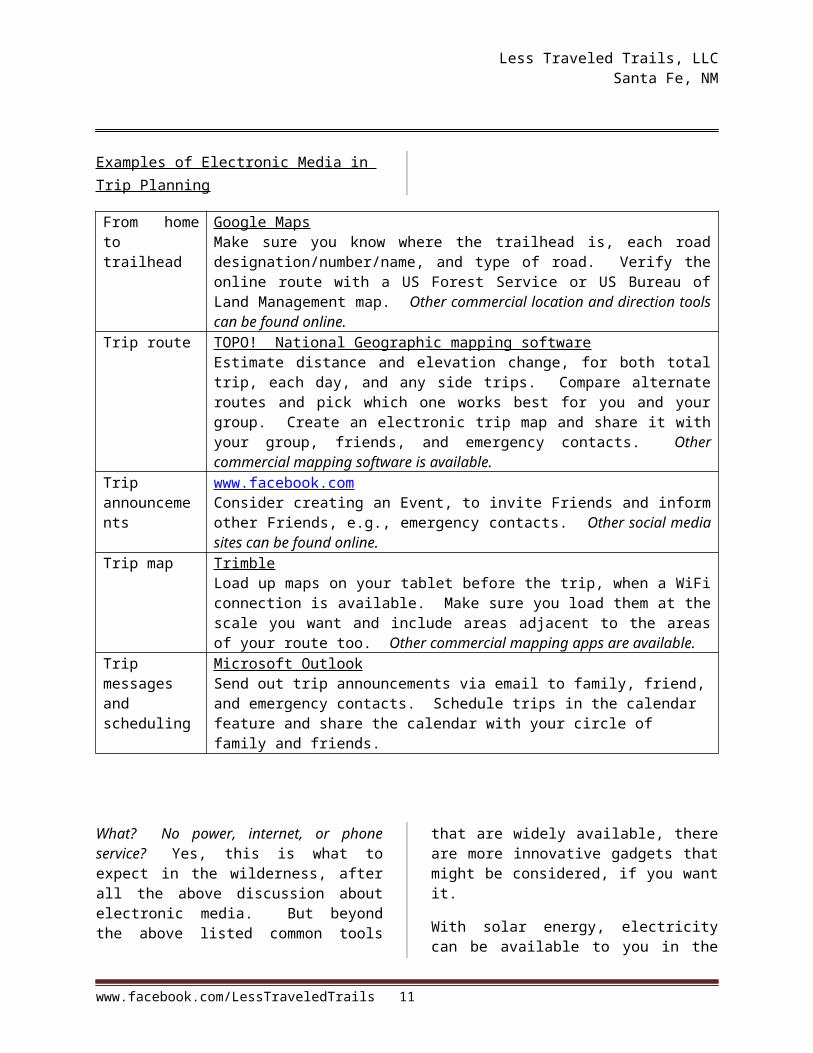
Examples of Electronic Media in Trip Planning
From home to trailhead
Google MapsMake sure you know where the trailhead is, each road designation/number/name, and type of road. Verify the online route with a US Forest Service or US Bureau of Land Management map. Other commercial location and direction tools can be found online.
Trip route TOPO! National Geographic mapping softwareEstimate distance and elevation change, for both total trip, each day, and any side trips. Compare alternate routes and pick which one works best for you and your group. Create an electronic trip map and share it with your group, friends, and emergency contacts. Other commercial mapping software is available.
Trip announcements
www.facebook.comConsider creating an Event, to invite Friends and inform other Friends, e.g., emergency contacts. Other social media sites can be found online.
Trip map TrimbleLoad up maps on your tablet before the trip, when a WiFi connection is available. Make sure you load them at the scale you want and include areas adjacent to the areas of your route too. Other commercial mapping apps are available.
Trip messages and scheduling
Microsoft OutlookSend out trip announcements via email to family, friend, and emergency contacts. Schedule trips in the calendar feature and share the calendar with your circle of family and friends.
What? No power, internet, or phone service? Yes, this is what to expect in the wilderness, after all the above discussion about electronic media. But beyond the above listed common tools that are widely available, there are more innovative gadgets that might be considered, if you want it.
With solar energy, electricity can be available to you in the wild. Small solar module kits are now available to power tablets and smart phones. The kits also have electricity storage, either a dedicated battery pack or actual batteries that can be used in headlamps and other powered accessories you may have. If a tablet or smart phone is used on a trip for electricity-intensive functions—e.g., photos, videos—you will notice a significant power drain. There may only be enough power for 1-2 days. With a solar
module kit and smart management of your power needs, it is possible to extend electricity availability to much longer trips.
It is now possible to connect with the outside world via satellite when you are deep in the wilderness. Not necessarily by cell phone, but by dedicated communication devices especially designed to handle basic communications. On the simple end, there are out-going beacons that send out a programmed alert, either an emergency code or a check-in notice that “everything’s fine.” At a higher level, enhanced communication devices enable you to send out data in the form of customized messages or photos, perhaps even the ability to make posts on social media sites (ah, maybe someday?!?!). The ultimate in sophistication (and cost!) would be a satellite phone, allowing you to call out
www.facebook.com/LessTraveledTrails 11

Less Traveled Trails, LLCSanta Fe, NM
from almost anywhere in the world. From beacon to satellite phone, there are communication plan charges, just as with regular cell phones. So when you see the selling price of a device, there is likely a plan behind it with its own price tag.
All of these electronic tools are there if you want them, but they do not by themselves make for a wonderful wilderness experience. That is primarily up to you (and somewhat dependent on what Mother Nature throws at you!). If you do embrace electronics, consider occasional trips where you leave them behind and truly “go primitive.”
www.facebook.com/LessTraveledTrails 11

Less Traveled Trails, LLCSanta Fe, NM
5. Safety – the excitement and challenge of being at the end of our supply line!
Backpacking means freedom, but stay aware of the risks. Trip planning addresses much of the risks involved. Obvious safety practices that may first come to mind are being prepared for first aid on the trail and having a trip plan. Beyond being aware of these particular risks, take action by stocking your first aid kit, know how to give first aid, give your friends/family a written trip plan, and stick to your plan. The following are ten “best practices” for you to consider; you may think up more on your own.
Ten Best Practices
1. Be aware of wildlife. In wilderness areas, you are entering the habitat and home of other living creatures. They will normally give you a wide berth and choose not to interact with you, both on the trail and in camp. On the trail, be mindful about surprise encounters and how to quickly, calmly address the situation. In camp, select spots for your shelter, gear, and outdoor kitchen that are not close to active habitat.
2. Hang all food and trash. Besides ripping up your gear, your trip could be greatly compromised by losing valuable stores of food. At any point in a trip where food and trash is left behind or does not have your full attention, store it securely and safely to prevent wildlife from getting into it. This includes overnight and day hikes from an established camp. Never store food/trash in or near your shelter; place
it away from your camp and kitchen areas. (Food/trash should also be stored while on the trail when taking exploratory side trips; however, if you are practicing ultralight techniques, it should not be a hardship to simply take your entire pack with you.) The bag-and-line technique on a tree branch in high country forests is a common way to keep food stores out of reach. Other techniques may be needed if trees are not a part of the habitat you are traveling through. Another alternative, often required by federal agencies in sensitive habitat, is to use a specialized container that is impermeable to wildlife (be sure you have a container approved by the agency).
3. Stay low and protected in lightning storms. When rain storms come along with lightning, you need to be below the high points in the terrain and away from geographical features that may conduct lightning. Observe the weather developing during your trip and be pro-active in planning where you are. Stay below or away from the highest points, such as peaks, ridgelines, prominent rock outcroppings, and isolated tall trees. Also stay out of streams and lakes.
4. Eat and drink. Stay hydrated with water and energized with food during your daytime explorations. Between breakfast and dinner, keep your water bottle and energy snacks handy on the trail and on side trips. Plan ahead for
www.facebook.com/LessTraveledTrails 15

Less Traveled Trails, LLCSanta Fe, NM
collecting fresh water and treating it. During the night in your sleeping bag, water is fine to have with you, but all food must be safely stored as discussed previously.
5. Keep the group together. During the entire trip, know the general whereabouts and schedule of all party members, within reason. Individuals getting lost or the group splintering into smaller groups can lead to emergency situations. In a closely-knit small group without a defined leader, this could be a collective responsibility. In other groups, there should be an acknowledged leader to take on this responsibility. Likewise, party members must keep the leader informed. Allow for solitary experiences and freedom that most people want by always communicating about plans for the next trail segment, the next hour, or the next day.
6. Watch out for hypothermia. Overnight, you should have a sleeping bag adequate for the ambient conditions, plus all your clothing, to stay warm. During the day, as you travel the trails or take exploratory side trips, is when your body’s defense mechanism to cool down may hit. Having adequate clothing to keep warm, drinking hot fluids, and eating regularly between breakfast and dinner should avoid hypothermia. But the conditions ripe for hypothermia are not just cold weather; it could also come up
unexpectedly during a strenuous day spent in mild temperatures, but also with rain, fog, and cloud cover blocking out the sun. Be aware of your own conditions while also checking in with your trip mates. Watch for slurred speech and dull thinking that would indicate it’s time to get all your clothes, eat, drink hot liquids and make camp (or get back to it).
7. Protect yourself from the sun. Enjoying the sunshine in good weather could be the essence of a wonderful backpack trip; however, extended exposure to the sun could lead to uncomfortable skin burns (second-degree burns with blistering is possible). Use sunscreen with a high SPF rating liberally, perhaps applying more than once during the day. Use clothing as your first line of sun protection, or as a backup. Have full-length pants, a long-sleeved shirt, and brimmed hat in your gear. In combination with effects of the sunlight, the sun’s heat can drive your body to heat exhaustion and heat stroke. These conditions need to be treated immediately with the appropriate first aid.
8. Be careful at river crossings. Falling down in the middle of a river could be disastrous to your trip. As you plan a route before the trip, note the river crossings that might be challenging and consult with guide books or the local agencies about the conditions. When you are on the trail, take the time to
www.facebook.com/LessTraveledTrails 16

Less Traveled Trails, LLCSanta Fe, NM
find a safe place to cross. Water depth can be deceiving; do not cross where the running water could be boiling up above your knees. Use a walking stick to create a tripod effect to get more stability as you head to the opposite bank, or pair up with a trip buddy and go across together. Consider leaving your hiking shoes on during summer outings; they will dry out, plus your feet get wet anyway from sweating. (In fact, using lightweight running shoes and nylon socks works great; just cross the river and keep walking!)
9. Be realistic with your hiking plan. We all want to see the inspiring sights on our backpack, but keep the trail mileage reasonable! Appreciate what you are doing and consider coming back another time to check out more of the same wilderness area. This applies both to daily trail time and the overall trip. Ultralight techniques will enable you to go farther, perhaps even over 10 miles in a long summer day, but be considerate to your body. In your trip planning, be conservative in estimating trail distance; good rules of thumb are 2 miles per hour with a full pack and 1 hour for each 1,000 feet of elevation gain. Your body will thank you!
10. Have an evacuation plan. In case of an emergency where a decision must be made to evacuate, have a way to get back in touch with civilization. This is usually a combination of walking, communicating, and driving. It is quite
helpful to have a vehicle parked at the trailhead (or trailend) that you can drive to get help after getting off the trail. In today’s age of mobile communication, it is possible to contact someone from the trail or at least from the trailhead vehicle (cell or satellite phone). For intra-group communication during a developing evacuation, it would be advantageous to have two-way radios (“walkie-talkies”). It is also likely that an evacuation would require outside help for which you cannot plan ahead; most fellow backpackers and outdoor-loving people that you encounter will provide help, so gratefully take it, knowing that someday you will help out someone else in need. On extended trips, it is smart to know which trails lead to help in the form of small towns nearby, so you are not stuck with going all the way back to the trailhead, or grimly continuing the trip all the way to the trailend.
www.facebook.com/LessTraveledTrails 17
Less Traveled Trails, LLCSanta Fe, NM
6. Information Resources – there is so much to know and experience!
Ultralight and Wilderness Information
With the worldwide web, bookstores, libraries, magazines, camping equipment stores, and environmental/outdoor organizations, there is an abundance of information about almost any place to where you want to go and any piece of gear you would ever need. But do not feel like there is nothing left to discover in the natural world. What matters is for you to be outdoors carrying only what you need, experiencing an inspiring favorite place of yours, or getting to a new place that you have always wondered about.
I have been backpacking since 1972, yet I have never set foot in the Grand Canyon. Disappointing? No! I have experienced many other wild places that I will never forget. And there are many more to come.
The following table provides information resources you might want to check out. For gear, it is nice to have a lot of options for where to intelligently spend your money. Should I get the latest and lightest equipment at a retail store or might a thrift shop have close to what I need? Remember, the best option may be to make it yourself, which is not shown on the table. For wilderness area information, get the government agency’s map of the area and start from there. Gradually add on to your body of knowledge about an area by finding guidebooks at the library or bookstore. There are also historical accounts, wildlife books, geological guides, and agency planning documents that may catch your interest. Keep an eye out for local experts or organizations that have information that cannot be found elsewhere.
www.facebook.com/LessTraveledTrails 18
Less Traveled Trails, LLCSanta Fe, NM
Ultralight Backpacking Gear Resources
GLOBALOnlinewww.amazon.com Online shopping giant Camping gear from retailers all over
the USwww.BackpackingLight.com www.LiteTrail.com www.thru-hiker.com www.wild-ideas.net Ultralight, bearproof storage
containers.www.GoLite.com www.nols.edu www.outsideonline.com Outside magazine Gear buyer’s guideswww.backpacker.com Backpacker magazine Gear reviewswww.patagonia.com Clothing and gear designer Outdoor clothing and gearwww.TheNorthFace.com Clothing and gear retailer Outdoor clothing and gear
Retail/Online StoresREI www.rei.com and
www.rei.com/outlet GoLite www.GoLite.com CAMPMOR www.campmor.com Piragis Northwoods Company
www.piragis.com Camping gear and resources with an orientation towards fishing and canoeing
Second-Hand Gear & ClothingSierra Trading Post www.sierratradingpost.com Camping gear and clothing
BooksUltralight Backpackin’ Tips Mike Clelland, 2011.
FALCONGUIDES, Globe Pequot Press, Guilford CT.
How to Shit in the Woods Kathleen Meyer, 1989 (3rd edition 2011). Ten Speed Press, Berkeley CA.
The Trail Hound’s Handbook
Ellen Eastwood, 2012. Wilderness Press, Birmingham AL
www.facebook.com/LessTraveledTrails 19

Less Traveled Trails, LLCSanta Fe, NM
Backpackers’ Ultra Food Cinny Green, 2013.Western Edge Press,Santa Fe NM
LOCALRetail Camping/Travel StoresREI 500 Market Street, Suite 100
Santa Fe, NM 87501 505-982-3557
GoLite Fashion Outlets at Santa Fe8380 Cerrillos Rd., #406Santa Fe, NM 87507505-471-9030
Big 5 Sporting Goods 2860 Cerrillos Rd.Santa Fe, NM 87505505-474-4260
The Travel Bug 839 Paseo de PeraltaSanta Fe, NM 87501505-992-0418
www.mapsofnewmexico.com
Second-Hand Gear & ClothingKellstedt Trading Company 1101 Harrison Rd.
Santa Fe, NM 87507505-471-7077
Talk to Kelly Kellstedt505-603-7982 (cell)Call in advance for appointment
Barkin Boutique 510 N Guadalupe St.Santa Fe, NM 87501 505-986-0699
Community Thrift Store 1306 Clark Rd.Santa Fe, NM 87507505-473-0972
Doubletake 321 Guadalupe St.Santa Fe, NM 87501505-989-8886
Goodwill Industries 3060 Cerrillos Rd.Santa Fe, NM 87507505-424-9726
927 Baca St.Santa Fe, NM 87505(505) 881-6401
Hospice Center Thrift Store 1303 Cerrillos Rd.Santa Fe, NM 87505505-995-9901
Look What the Cat Dragged In
2570-A Camino EntradaSanta Fe, NM 87507 505-474-6300
541 W Cordova St.Santa Fe, NM 87505
www.facebook.com/LessTraveledTrails 20

Less Traveled Trails, LLCSanta Fe, NM
Salvation Army 1202 Camino Carlos ReySanta Fe, NM 87507505-473-7735
LOCAL (cont’d)Gear RentalREI 1550 Mercantile Ave NE
Albuquerque, NM 87107 505-247-1191
www.rei.com/stores/albuquerque
call in advance to reserve
www.facebook.com/LessTraveledTrails 21