aveva lfm server 5.0 - user interface faq · aveva lfm server 5.0 – user interface faq 1....
TRANSCRIPT
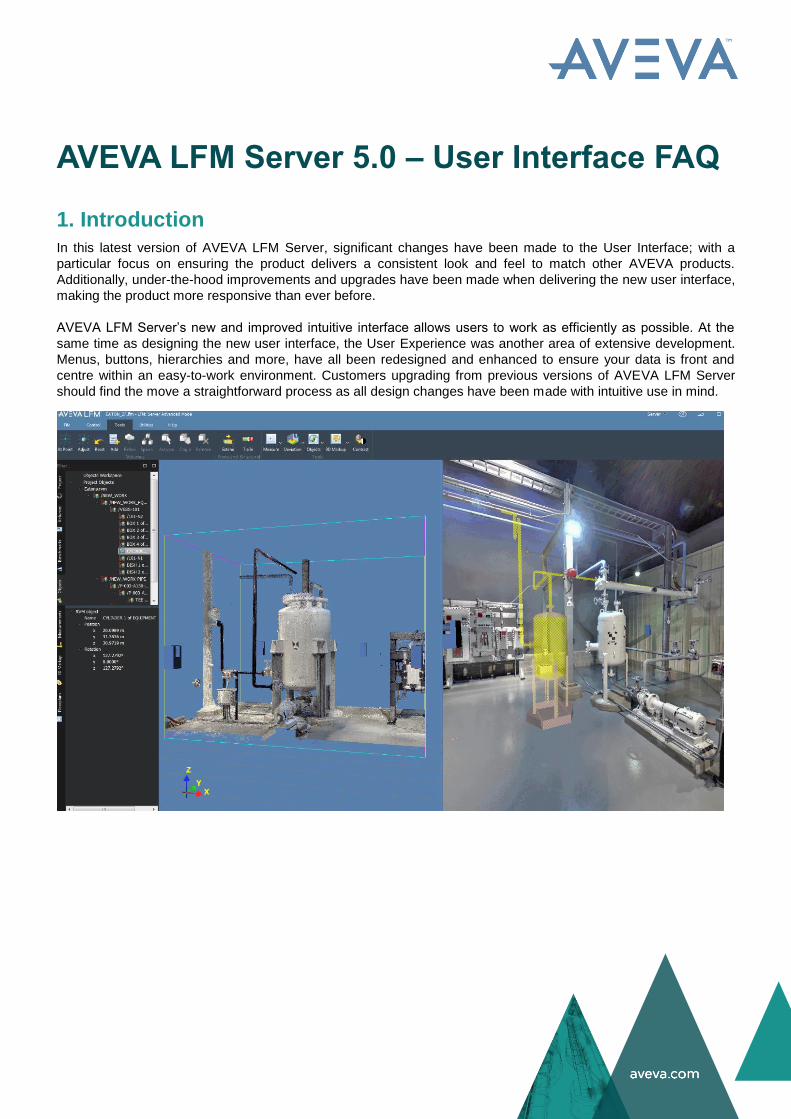
AVEVA LFM Server 5.0 – User Interface FAQ
1. Introduction
In this latest version of AVEVA LFM Server, significant changes have been made to the User Interface; with a
particular focus on ensuring the product delivers a consistent look and feel to match other AVEVA products.
Additionally, under-the-hood improvements and upgrades have been made when delivering the new user interface,
making the product more responsive than ever before.
AVEVA LFM Server’s new and improved intuitive interface allows users to work as efficiently as possible. At the
same time as designing the new user interface, the User Experience was another area of extensive development.
Menus, buttons, hierarchies and more, have all been redesigned and enhanced to ensure your data is front and
centre within an easy-to-work environment. Customers upgrading from previous versions of AVEVA LFM Server
should find the move a straightforward process as all design changes have been made with intuitive use in mind.

2. Controlling the Contents of the Main Window
The LFM Server 4 series controlled the contents of the main window via tabs along the top of the main window as
highlighted below.
The contents of the main window are now controlled by a series of buttons in the top right of the main window as
highlighted below. Which buttons are visible will depends on what view you currently have and what is loaded within
the project.

PAGE 3 OF 11
Icon Operation Description
Switch to the 3D points view - perspective -
Switch to the 3D points view - orthographic -
Tile Orthographic windows horizontally
Clicking this button will tile the orthographic view
horizontally. This button can be found in the bottom right
hand corner of the main window. This button is only visible
if the orthographic view is active and currently tiled vertically.
Tile Orthographic windows vertically
Clicking this button will tile the orthographic view vertically.
This button can be found in the bottom right hand corner of
the main window. This button is only visible if the
orthographic view is active and currently tiled horizontally.
Switch to a BubbleView
Clicking on this icon will present you with a list of loaded
BubbleViews. Click on the scan name to switch to that
BubbleView. This button is only visible if there is a
BubbleView(s) loaded.
Switch to a .pdf floorplan
Clicking on this icon will present you with a list of loaded
floorplans. Click on the desired floorplan name to switch to
that floorplan. This button is only visible if there is a
floorplan(s) loaded.
Switch to the clash report This button is only visible if the clash report is loaded.
Switch to a panoramic photo
Clicking on this icon will present you with a list of loaded
panoramic photos. Click on the desired panoramic photo
name to switch to that panoramic photo. This button is only
visible if there is a panoramic photo(s) loaded.
Switch to the registration status report
This button is only visible if the registration status report is
loaded.
Detach the current view
Clicking this icon will detach the current view into a separate
window. This option is only available in certiain views such
as the BubbleView, Clash Report and panoramic photos.
Reattach the current view
Clicking on this icon will reattach the window to the main
LFM Server interface. This option is only available in
detached windows.
Expand the current view
When in the Tile View, clicking this button will expand the
view in the current tile to fill the main window.

PAGE 4 OF 11
Note that clicking on the BubbleView button will now present you with the option to
see an overview of all currently loaded BubbleViews.
This will populate the main window with a thumbnail view of all the currently loaded
BubbleViews. Simply click on a thumbnail to make that BubbleView full screen.
3. Switching Between Gateway Mode and Server Mode
The LFM Server 4 series allowed the user to swtich between Gateway Mode and Server Mode via the small LFM
logo at the top left of the interface as shown below.
The user can now switch modes by clicking on the drop-down box at the top right of the LFM Server interface as
highlighted below. Simply click on the mode you wish to enter.
PAGE 5 OF 11
4. Interactive UCS
The Universal Coordinates System (UCS) is a tool used for quick navigation and orientation within AVEVA LFM
Server. Before the UCS, users would rely purely on their knowledge of the asset to orientate themselves – within
large assets this can be a challenging task and leads to delays in work due to the extended time required for each
task.
With the UCS in AVEVA LFM Server 5, users can rotate a point cloud and HyperBubble view based on the 3D cube
within the UCS controls. Additionally, users can snap to set viewpoints by clicking on the UCS in key areas e.g. North.
The UCS will continuously update itself based on the user’s interactions with the point cloud and HyperBubble,
meaning that the UCS will always show an accurate representation of view direction and orientation.
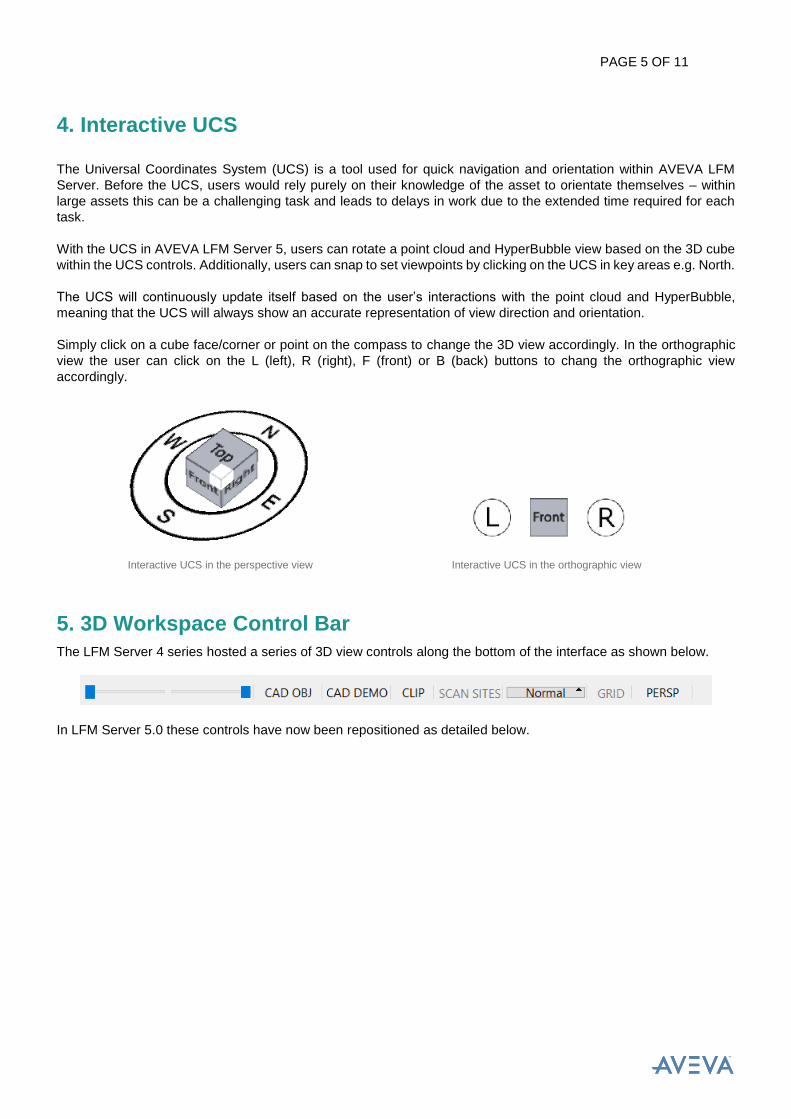
Simply click on a cube face/corner or point on the compass to change the 3D view accordingly. In the orthographic
view the user can click on the L (left), R (right), F (front) or B (back) buttons to chang the orthographic view
accordingly.
Interactive UCS in the perspective view Interactive UCS in the orthographic view
5. 3D Workspace Control Bar
The LFM Server 4 series hosted a series of 3D view controls along the bottom of the interface as shown below.
In LFM Server 5.0 these controls have now been repositioned as detailed below.

PAGE 6 OF 11
5.1. Scan Range Sliders
The scan range sliders are now visible in the
bottom centre of the 3D points view. Note that they
are only visible when the mouse cursor is hovered
in this region.
5.2. Toggle CAD Objects
The Toggle CAD Objects button is now visible on the Visualisation part of the Tools toolbar at the top of the LFM
Server interface. This can be used to toggle objects shown or clashed via one of LFM Server’s CAD links.
5.3. Toggle CAD Demolition Objects
The Toggle CAD Demolition Objects button is now visible on the Visualisation part of the Tools toolbar at the top of
the LFM Server interface. This can be used to toggle CAD demolition objects shown via the LFM Server links to
MicroStation or AutoCAD.
PAGE 7 OF 11
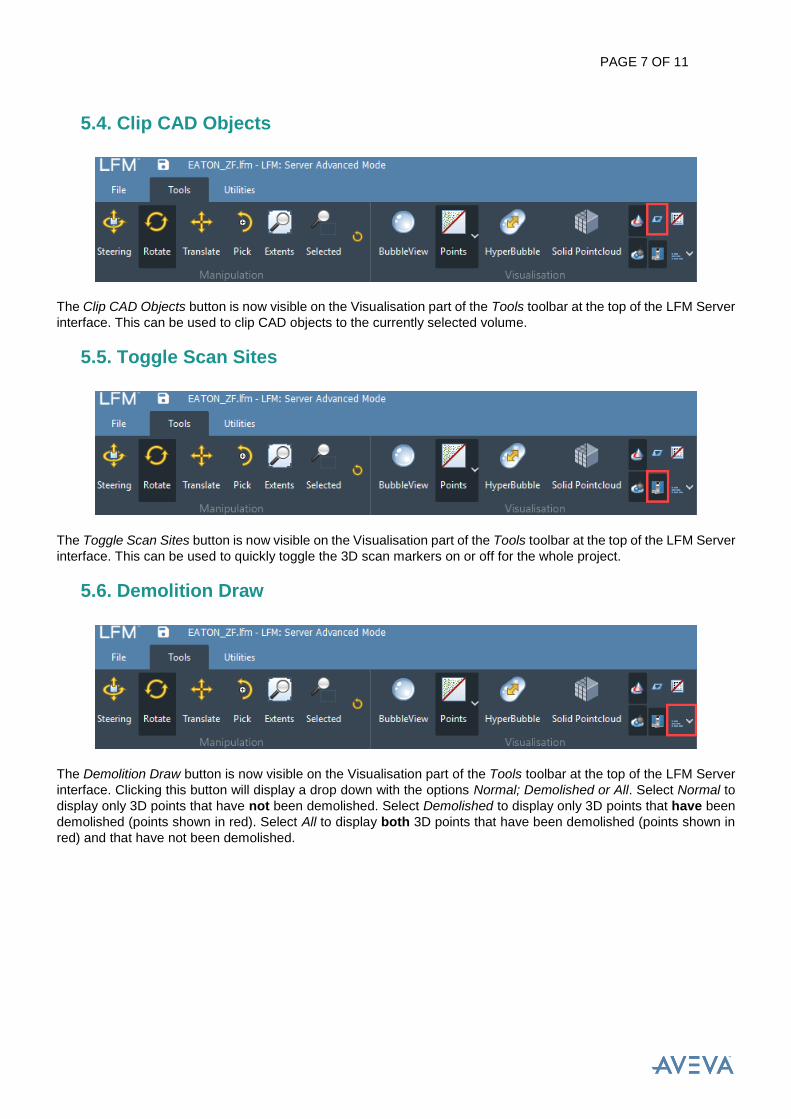
5.4. Clip CAD Objects
The Clip CAD Objects button is now visible on the Visualisation part of the Tools toolbar at the top of the LFM Server
interface. This can be used to clip CAD objects to the currently selected volume.
5.5. Toggle Scan Sites
The Toggle Scan Sites button is now visible on the Visualisation part of the Tools toolbar at the top of the LFM Server
interface. This can be used to quickly toggle the 3D scan markers on or off for the whole project.
5.6. Demolition Draw
The Demolition Draw button is now visible on the Visualisation part of the Tools toolbar at the top of the LFM Server
interface. Clicking this button will display a drop down with the options Normal; Demolished or All. Select Normal to
display only 3D points that have not been demolished. Select Demolished to display only 3D points that have been
demolished (points shown in red). Select All to display both 3D points that have been demolished (points shown in
red) and that have not been demolished.

PAGE 8 OF 11
5.7. Toggle Grid
The Toggle Grid button is now visible on the Visualisation part of the Tools toolbar at the top of the LFM Server
interface. This can be used to quickly toggle the grid in the 3D view on or off.
5.8. 3D View – Perspective/Orthographic Switch
The button to switch the 3D view between perspective and orthographic can now be found in the top right of the main
window as highlighted above.
6. Clash Report
The clash reports is accessed from the Utilities tab at the top of the LFM Server interface. This will open the
clash report in the Tile View to allow simiultaneous viewing of the clash report and the 3D pointcloud. If you
wish to expand the clash report to fill the main window, click the Expand button at the top right of the clash
report.
PAGE 9 OF 11
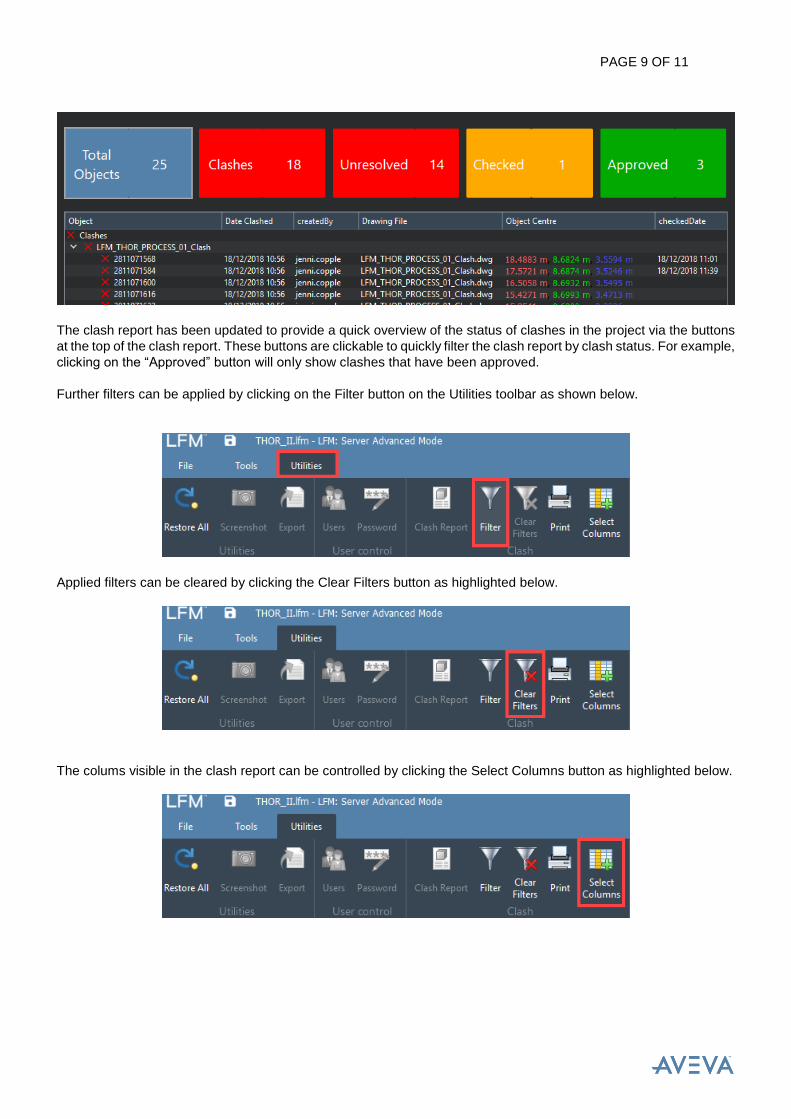
The clash report has been updated to provide a quick overview of the status of clashes in the project via the buttons
at the top of the clash report. These buttons are clickable to quickly filter the clash report by clash status. For example,
clicking on the “Approved” button will only show clashes that have been approved.
Further filters can be applied by clicking on the Filter button on the Utilities toolbar as shown below.
Applied filters can be cleared by clicking the Clear Filters button as highlighted below.
The colums visible in the clash report can be controlled by clicking the Select Columns button as highlighted below.
PAGE 10 OF 11
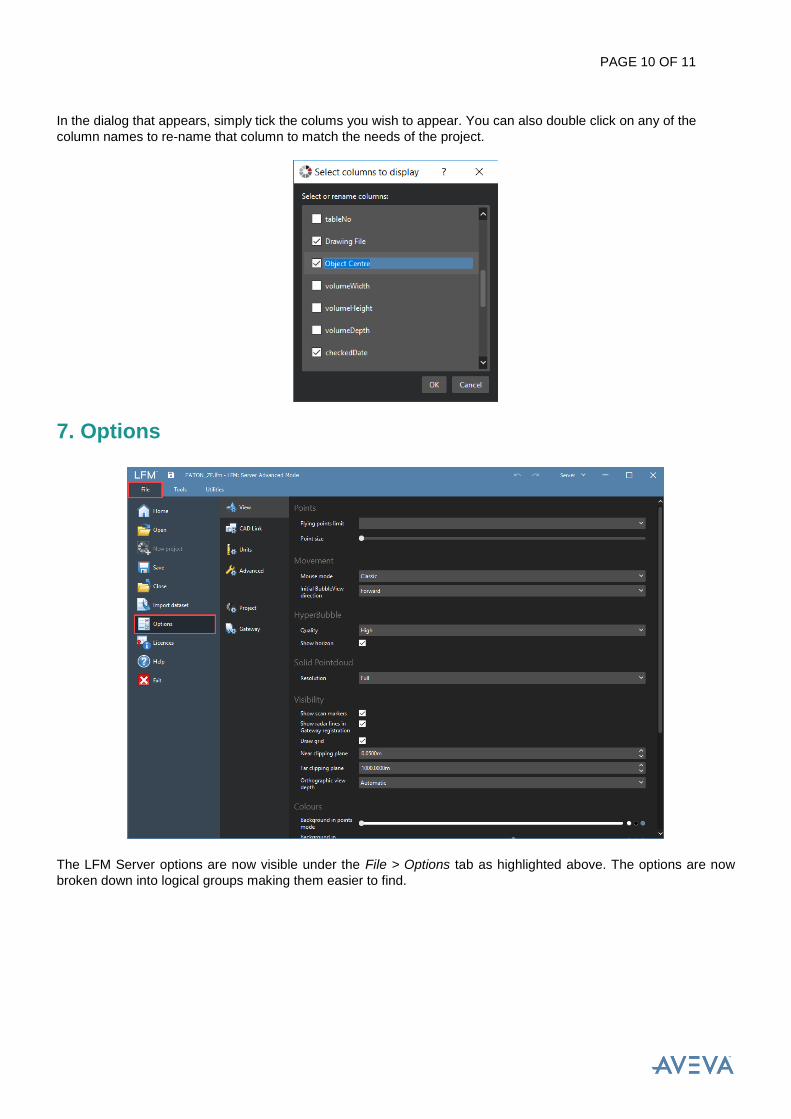
In the dialog that appears, simply tick the colums you wish to appear. You can also double click on any of the
column names to re-name that column to match the needs of the project.
7. Options
The LFM Server options are now visible under the File > Options tab as highlighted above. The options are now
broken down into logical groups making them easier to find.
PAGE 11 OF 11
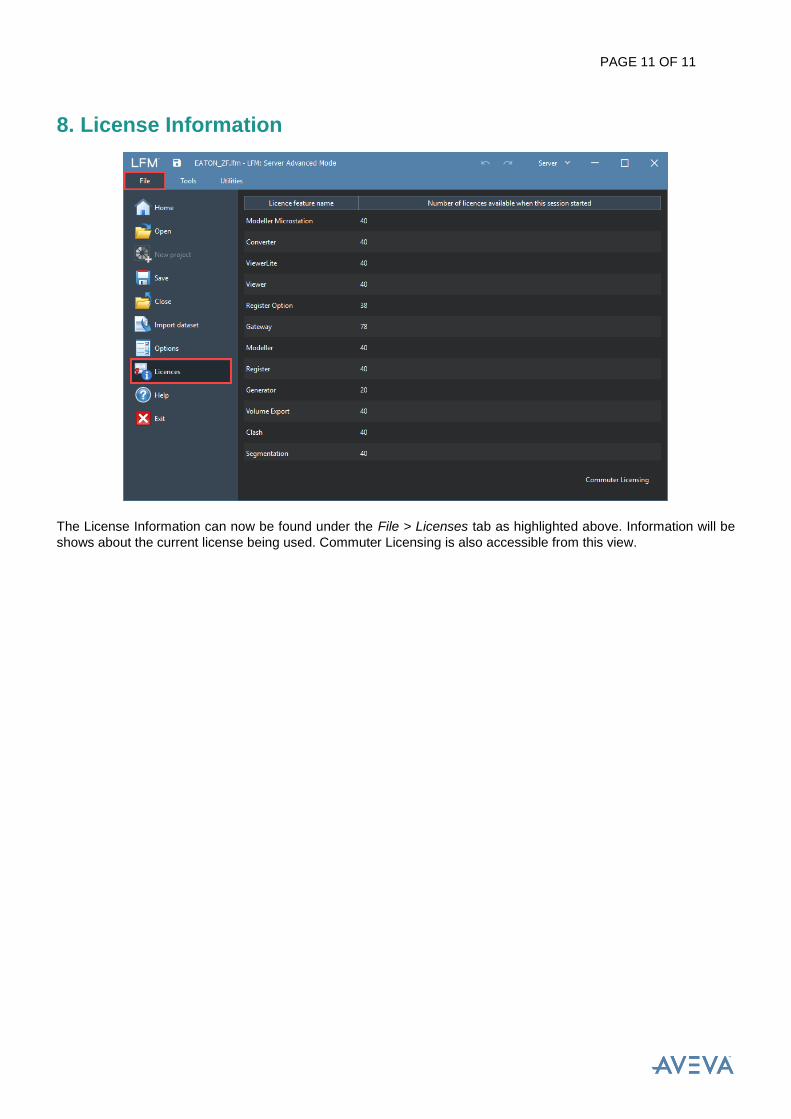
8. License Information
The License Information can now be found under the File > Licenses tab as highlighted above. Information will be
shows about the current license being used. Commuter Licensing is also accessible from this view.