application guide for mastertop levelling v5 - basf documents... · september 2017 page 1 of 11...
TRANSCRIPT

May 2018
Page 1 of 11
Application Guide for
MasterTop® Levelling Products
MasterTop® 1600 MasterTop® P 1604
MasterTop® 505 MasterTop® 508 MasterTop® 510 MasterTop® 515 MasterTop® 530 MasterTop® 540 MasterTop® 550
May 2018
Page 2 of 11
1. Good Practice 1.1.1. All BASF materials are to be installed in accordance with the current published
Technical Data Sheets. 1.1.2. Users are required to make their own evaluation as to the suitability and
performance of the BASF material. 1.2. Job set up prior to application: 1.2.1. A level survey should be conducted to determine how much material should be
applied to certain area. The floor should be gridded and levelling indicators applied as required. These levelling indicators make it simpler for the applicator to know that he has achieved the desired level. An alternate to the level indicators is to use a height adjustable gauging rake to ensure an even coverage.
1.2.2. Expansion joints should be reflected through the topping. 2. Preparation
2.1. Dry floors or suspended slabs: 2.1.1. Remove all grease, oil, dust, adhesives, residual curing compound or other
contaminant that could impair adhesion. Laitance should preferably be removed by light shot blasting or grinding to achieve ICRI CSP 3
2.1.2. MasterTop 1600 should be diluted 3 parts water to one part MasterTop 1600 and apply by spreading with stiff bristled broom or squeegee at approximately 5m2/L.
2.1.3. For porous substrates two priming layers the first diluted 4 parts water and 1 part MasterTop 1600 (the second at 3 parts water and 1 part MasterTop 1600) and apply by spreading with stiff bristled broom or squeegee at approximately 5m2/L.
2.1.4. Allow to dry (the material will lose its milky look and be clear and will still be slightly tacky to the touch). The second coat is applied by spreading with stiff bristled broom or squeegee at a dilution of 3 parts water and 1 part MasterTop 1600 and apply by spreading with stiff bristled broom or squeegee at approximately 5m2/L. Allow to dry and begin application of the floor levelling material. If the primer has been left for more than 48 hours or been subject to some construction traffic re-priming will be necessary.
2.2. Damp floors or slab on ground or green concrete:
2.2.1. Australian Standard 1884:2012 deals with the installation of resilient floor coverings, such as vinyl tiles, vinyl and vinyl planks. BASF’s range of floor levelling compounds and ancillary products are often used between the floor covering material and the structural concrete slab. AS1884:2012 has specific detailing where: for dealing with moisture when tested in accordance with Appendix A or for dealing with pH when tested in accordance with Appendix B.
2.2.2. Green concrete is concrete that is between 7 and 28 days old. Such slabs should be prepared as follows prior to installing floor covering materials. Concrete that tests above 75% Relative Humidity (ASTM F2170 Probe Method) or 70% (ASTM F2420 Hood Method) Concrete floors with Relative Humidity greater than the limits defined above (whether they be steady or falling), is to be prepared as follows
2.2.3. Laitance should be removed by light shot blasting or grinding to achieve ICRI CSP 3.
2.2.4. Vacuum away any loose material
May 2018
Page 3 of 11
2.2.5. Apply two coats of MasterTop 1116 at the rate of 3m2 per mixed litre. Mixing MasterTop 1116: pre-condition both A and B components to between 10 to 29°C. Pour the entire contents of Part B into the container of Part A. DO NOT MIX BY HAND. Mix with a mechanical drill and paddle at a very low speed (ca. 300rpm) until homogeneous. Scrape the sides and the bottom of the container several times to ensure complete mixing.
2.2.6. Allow the first coat to become touch dry, typically 4 to 6 hours is sufficient before proceeding with the second coat. Care must be taken to ensure the material is applied evenly and worked into any pinholes / divots etc a stiff broom is best for this
2.2.7. Into the still wet second coat broadcast evenly MasterTop F5 aggregate at approximately 0.5kg/m2. Allow the broadcasted second coat to cure until such time as the surface will not be marred by traffic and then vacuum away any loose broadcast.
2.2.8. Do not exceed 5 days before covering MasterTop 1116. 2.2.9. Prime the cured MasterTop 1116 surface with MasterTop 1600 and install
selected MasterTop levelling material as required. 2.2.10. In circumstances where MasterTop 505 is used as a skim coat additional priming
is not required.
2.3. Concrete treated with Colloidal Silica Compounds 2.3.1. BASF does not produce such material, and is unable to comment on the
suitability of these types of materials as moisture barriers. 2.3.2. However, if such material is selected for use based on industry acceptance
and/or the user’s own evaluation 2.3.3. Concrete that has been treated with colloidal silica moisture barriers, must be
clean, dry and free from any residue or other deleterious matter. 2.3.4. Prime the mechanically prepared surface (ICRI CSP 3) with MasterTop 1600,
then install MasterTop levelling material. 2.3.5. Priming over colloidal silica is required when using MasterTop 505.
2.4. pH of MasterTop Levelling Materials
2.4.1. All MasterTop levelling materials, including MasterTop 505 and 546 achieve a pH of less than 10 in 24 to 30 hours from installation.
2.5. Priming (MasterTop P 1604 only)
2.5.1. Porous (Concrete floors) 2.5.1.1. Sand Cement and Magnesite screeds: Prime with MasterTop P 1604,
diluted 1:3 with water, in two applications and apply by spreading with stiff bristled broom or squeegee at approximately 3m2/L.
2.5.2. Non-porous
2.5.2.1. Tiles, terrazzo, epoxy coatings: MasterTop P 1604 should be used without dilution in one application and apply by spreading with stiff bristled broom or squeegee or roller at approximately 4m2/L. Allow to become tack free and apply levelling material.

May 2018
Page 4 of 11
2.5.3. Timber: 2.5.3.1. Apply one coat of MasterTop 1116 and apply by spreading with roller
or squeegee at approximately 3m2/L and allow to dry for 4-6 hours (Tack free) and then apply a second coat and apply at approximately 3m2/L and whilst still wet lightly broadcast (about 500 g/m2) MasterTop F5 filler and allow to dry overnight. MasterTop 1600 should be diluted 3 parts water to one part MasterTop 1600 and apply by spreading with stiff bristled broom or squeegee at approximately 4m2/L.
2.6. MasterTop 508, 510, 513, 515, 530, 540
2.6.1. Mixing: 2.6.1.1. Festo: Add all the mixing water to a bucket large enough to take a full
mix of material and mix with a paddle mixer with a birdcage mixing head. A helical mixer is not as efficient as it will require longer mixing times and entrain more air to achieve the same level of flow. Add the powder continuously whilst mixing and mix for a total of 3-4 minutes at 600 rpm.
2.6.1.2. Porta Mix (Hippo): Add all the mixing water for up to 4 bags to the Porta Mix bucket and mix with the paddle mixer and head supplied. Add the powder continuously whilst mixing and mix for a total of 2-3 minutes at 600 rpm.
2.6.1.3. Pump: Putzmeister MP 25 is recommended although other pumps have been used successful operation instructions.
2.6.1.4. See operation manual of the machine your using for details of how to use.
2.6.1.5. It has been found that a long hose 50m is required with the pumps for the material to have a long enough residence time to activate the polymers. Short hoses can result in undispersed lumps in the final product giving a rough surface that will need sanding and defects filled with MasterTop 505.
2.6.2. Application: Application should take place continuously into the proceeding wet
material to ensure even thickness and flow. Do not make new edges and ‘fill in’ the middle.
2.6.3. The people applying the material will need to move into the material and the use of spiked shoes is advised. Spreading using a stand up trowel is recommended to ensure the material is able to find its way to all parts of the floor.
2.6.4. Only MasterTop 515 edges may be feather edged using a steel trowel if required. Progress should be steady and even with the application hose discharge point approximately 200mm from the floor.
2.7. MasterTop 505
2.7.1. Mixing: 2.7.2. Festo: Add the required mixing water to the small tub and mix the quantity needed
until a smooth free flowing paste (generally 1-2 minutes) is obtained. Do not mix large quantities as the product has a short open time and it needs to be applied as soon as possible to the floor. A small drill with a mixer can be used for quantities less than a litre.
2.7.3. Porta Mix (Hippo): Not suitable for this product. 2.7.4. Application: MasterTop 505 is applied with a straight edge steel trowel to fill small
divots and craters and create an edge free flat surface.

May 2018
Page 5 of 11
2.8. MasterTop 546
2.8.1. Mixing: 2.8.2. Festo: Add all the mixing water to a bucket large enough to take a full mix of
material and mix with a paddle mixer with a helical mixing head. A birdcage mixer is not as efficient as it will require longer mixing times. Add the powder continuously whilst mixing and mix for a total of 3-4 minutes at 600 rpm or until a lump free mortar is produced.
2.8.3. Application: MasterTop 546 is applied like most mortars with a trowel. It will hold its shape so minimal formwork is needed.
2.9. Curing: MasterTop floor levelling products are self-curing and generally do not require
curing compounds. Fast hardening and drying is the key attribute of the product and thus slowing the exit of unwanted moisture is to the products detriment.
Figure 1 Grinding or shotblasting the preferred methods to prepare the floor

May 2018
Page 6 of 11
Figure 2 Once prepared and vacuumed the primer can be applied to seal the surface
Figure 3 Using the Putzmeister (or other suitable pump to mix continuously)

May 2018
Page 7 of 11
Figure 4 A "Hippo" style mixer is also very good for multiple bag mixes
Figure 5 After pouring from Hippos spread over the floor to ensure it is gets to all corners
May 2018
Page 8 of 11
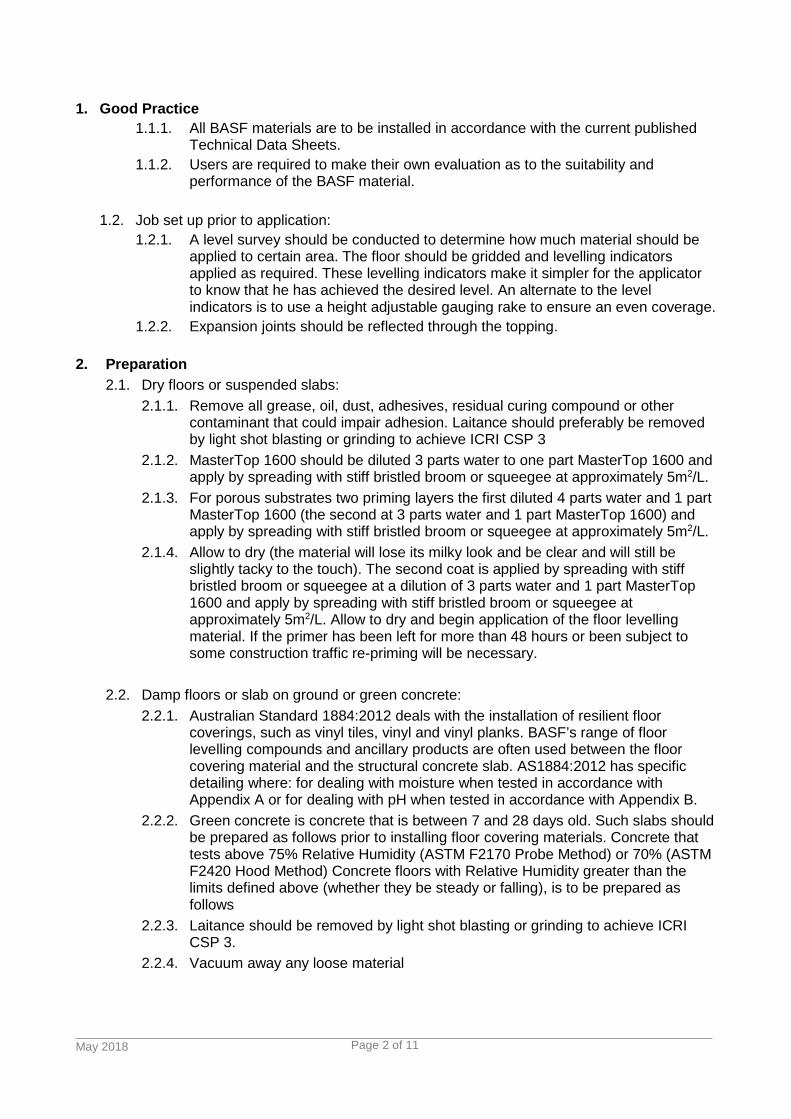
Figure 6 Application from a pump keeping a wet edge
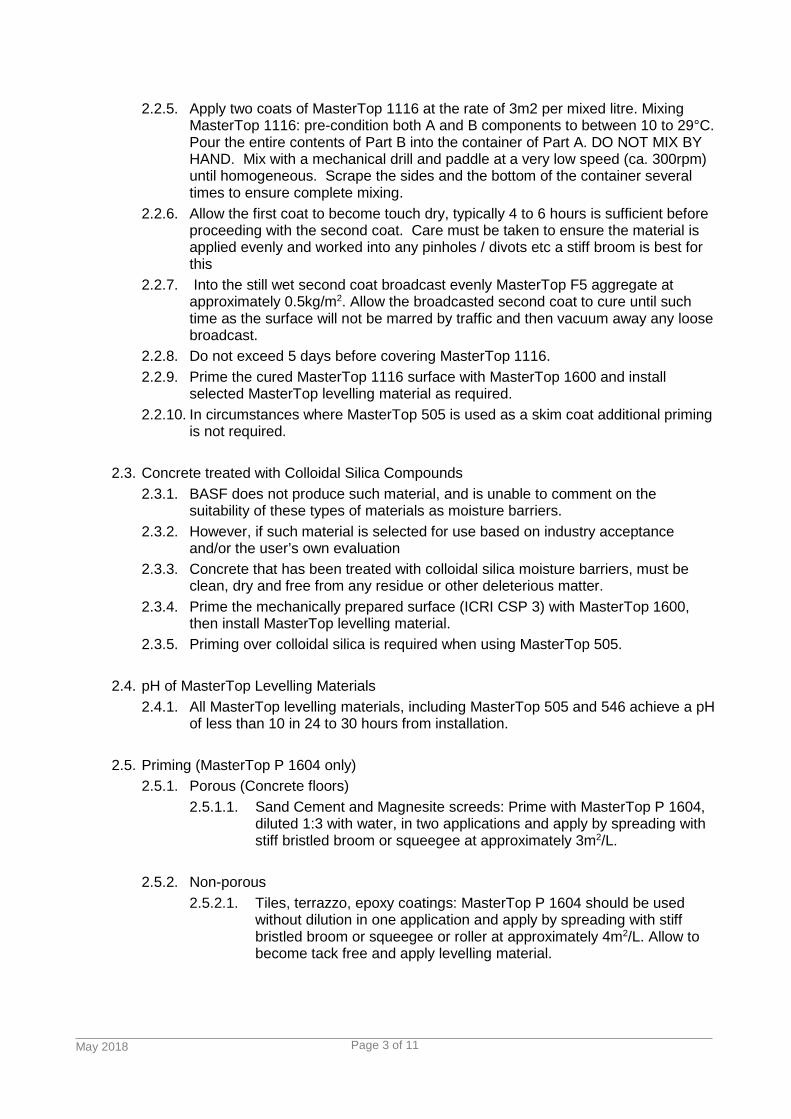
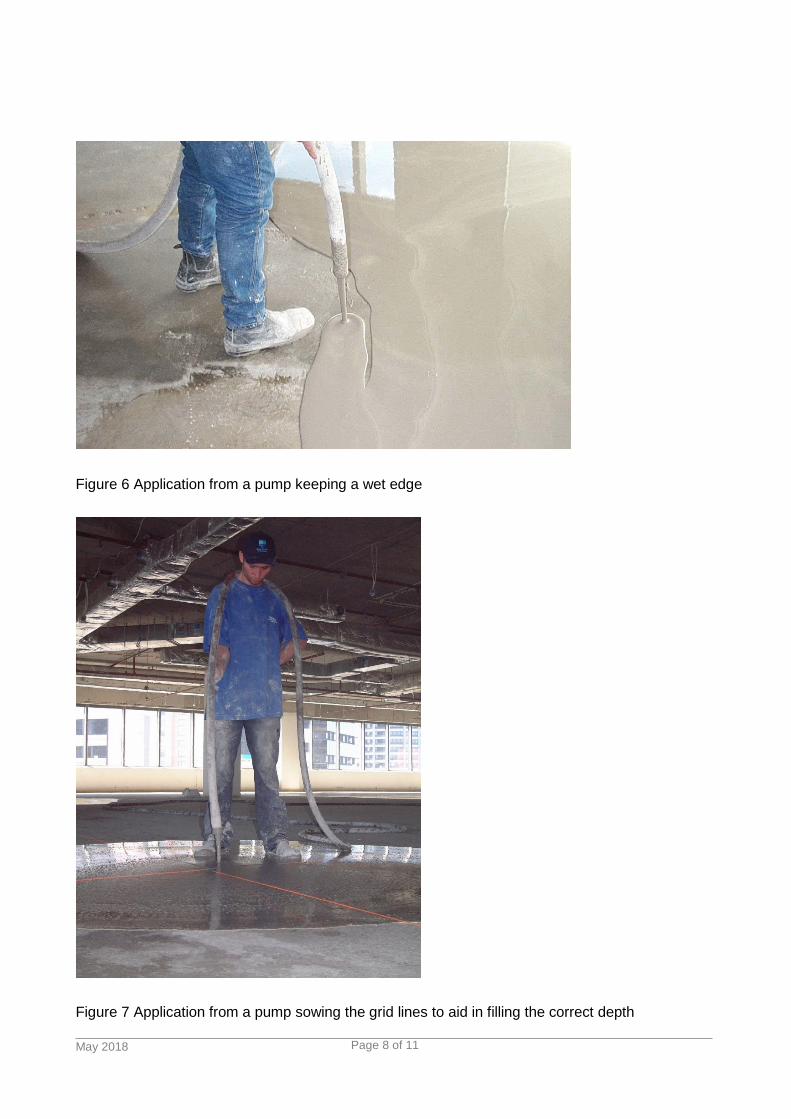
Figure 7 Application from a pump sowing the grid lines to aid in filling the correct depth

May 2018
Page 9 of 11
Figure 8 Use of a sock to catch any small lumps coming through the hose
Figure 9 Doing a large area using a pump

May 2018
Page 10 of 11
Figure 10 Levelling product on floor
Figure 11 Height tags

May 2018
Page 11 of 11
Application Guide for MasterTop Floor Levelling V6 0518
STATEMENT OF RESPONSIBILITY
The technical information and application advice given in this BASF publication are based on the present state of our best scientific and practical knowledge. As the information herein is of a general nature, no assumption can be made as to a product's suitability for a particular use or application and no warranty as to its accuracy, reliability or completeness either expressed or implied is given other than those required by law. The user is responsible for checking the suitability of products for their intended use.
NOTE Field service where provided does not constitute supervisory responsibility. Suggestions made by BASF either orally or in writing may be followed, modified or rejected by the owner, engineer or contractor since they, and not BASF, are responsible for carrying out procedures appropriate to a specific application.
BASF Australia Ltd ABN 62008437867 Level 12 28 Freshwater Place Southbank VIC 3006 Freecall: 1300 227 300 www.master-builders-solutions.basf.com.au
BASF New Zealand Ltd Level 4, 4 Leonard Isitt Drive Auckland Airport 2022 Auckland, New Zealand Freecall: 0800 334 877 www.master-builders-solutions.basf.co.nz
BASF Emergency Advice: 1800 803 440 within Australia (24hr) 0800 944 955 within New Zealand