amgraf forms portal user guide
TRANSCRIPT

AMGRAF
FORMS PORTAL
User Guide March 2012
OneForm Designer Plus Forms Portal © 2012 by Amgraf, Inc. All rights reserved. These specifications are subject to change without notice. OneForm is a trademark of Amgraf, Inc. All other brand and product names are or may be trademarks used to identify products or services of their respective owners.
1501 Oak Street • Kansas City, MO 64108-1424 Phone (816) 474-4797 • Fax: (816) 842-4477 Email: [email protected] • Internet: www.amgraf.com

Amgraf, Inc. Forms Portal User Guide
3/28/2012 i
TABLE OF CONTENTS
Page
INTRODUCTION Portal Description .................................................................................................... 1 Log In ...................................................................................................................... 1 CLIENT HOME PAGE Start New Button ...................................................................................................... 2 List E-Forms Button ................................................................................................. 2 Print Blank Form Button ......................................................................................... 3 Start a New Form .................................................................................................... 4 Navigation Frame ................................................................................................. 5 Print A Blank Form ................................................................................................. 6 LIST SAVED E-FORMS PAGE List Filled-in E-Forms ............................................................................................. 7 Select a Form Record for Editing ............................................................................ 8 Edit Form ................................................................................................................. 9 OTHER OPTIONS Client Home Page Options .................................................................................... 10 Find Templates ...................................................................................................... 11 Search Records ....................................................................................................... 12 WORKFLOW Simple Workflow .................................................................................................. 13 Workflow Inboxes ................................................................................................. 14
Amgraf, Inc. Forms Portal User Guide
ii 3/28/2012
FIGURES
Page
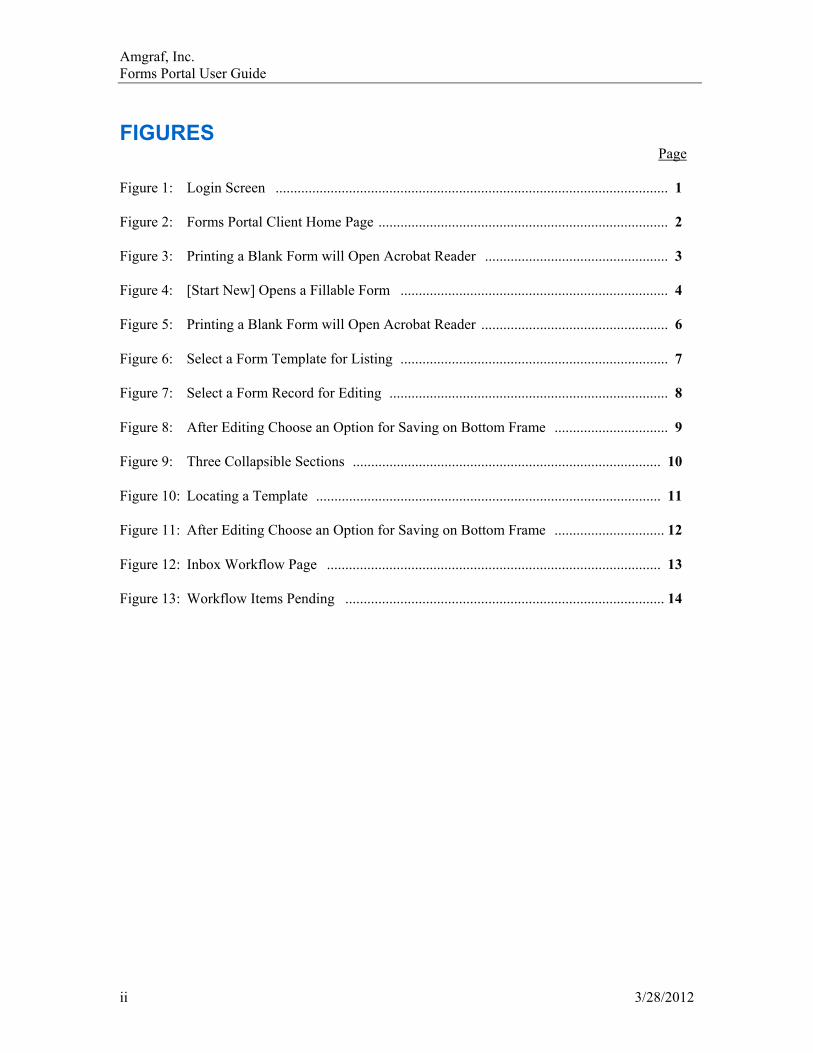
Figure 1: Login Screen ........................................................................................................... 1 Figure 2: Forms Portal Client Home Page ............................................................................... 2 Figure 3: Printing a Blank Form will Open Acrobat Reader .................................................. 3 Figure 4: [Start New] Opens a Fillable Form ......................................................................... 4 Figure 5: Printing a Blank Form will Open Acrobat Reader ................................................... 6 Figure 6: Select a Form Template for Listing ......................................................................... 7 Figure 7: Select a Form Record for Editing ............................................................................ 8 Figure 8: After Editing Choose an Option for Saving on Bottom Frame ............................... 9 Figure 9: Three Collapsible Sections .................................................................................... 10 Figure 10: Locating a Template .............................................................................................. 11 Figure 11: After Editing Choose an Option for Saving on Bottom Frame .............................. 12 Figure 12: Inbox Workflow Page ........................................................................................... 13 Figure 13: Workflow Items Pending ....................................................................................... 14
Amgraf, Inc. Forms Portal User Guide
3/28/2012 1
INTRODUCTION Portal Description The Amgraf Forms Portal is a browser based user interface designed to simplify and manage access to electronic forms. The portal is accessible to those who have access to the hosting server through an Intranet or Internet.
Log In
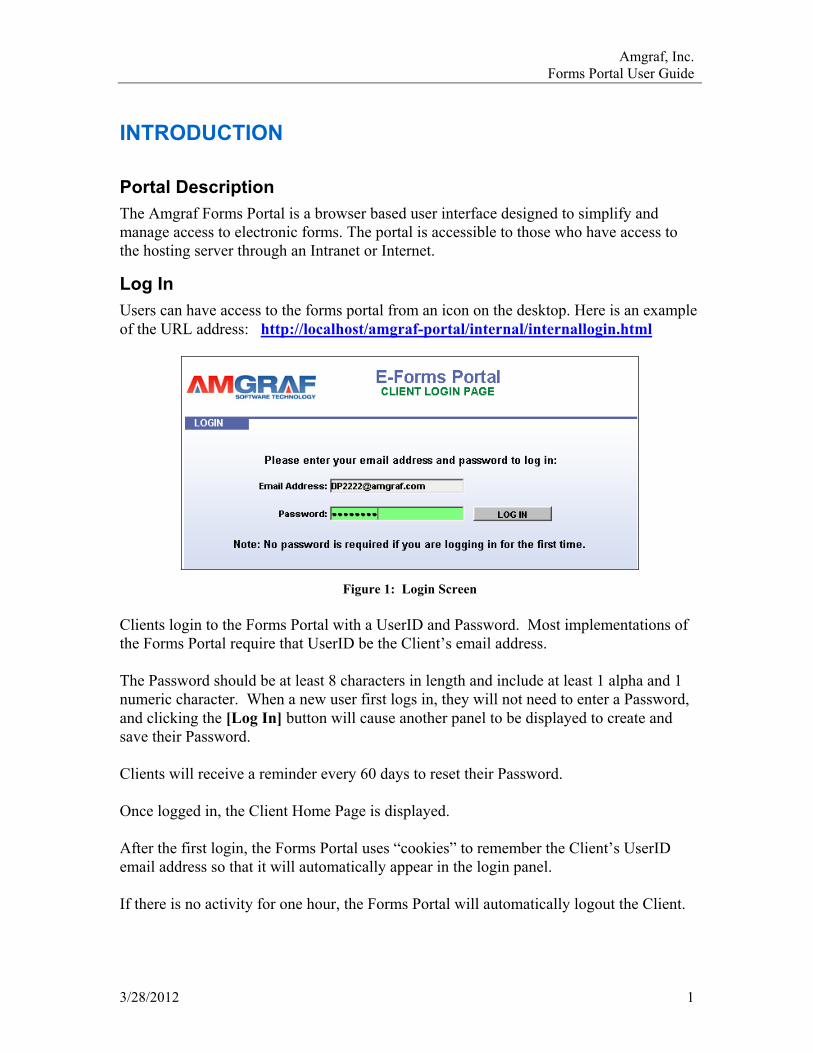
Users can have access to the forms portal from an icon on the desktop. Here is an example of the URL address: http://localhost/amgraf-portal/internal/internallogin.html
Figure 1: Login Screen
Clients login to the Forms Portal with a UserID and Password. Most implementations of the Forms Portal require that UserID be the Client’s email address. The Password should be at least 8 characters in length and include at least 1 alpha and 1 numeric character. When a new user first logs in, they will not need to enter a Password, and clicking the [Log In] button will cause another panel to be displayed to create and save their Password. Clients will receive a reminder every 60 days to reset their Password. Once logged in, the Client Home Page is displayed. After the first login, the Forms Portal uses “cookies” to remember the Client’s UserID email address so that it will automatically appear in the login panel. If there is no activity for one hour, the Forms Portal will automatically logout the Client.

Amgraf, Inc. Forms Portal User Guide
2 3/28/2012
CLIENT HOME PAGE The Client Home Page is the starting point for all Forms-related activities. Forms are organized in named classification “folders”. The first thing a Client does to find a form is to select a folder from the Classifications window on the left side of the Home Page. Clicking on a folder shows a corresponding list of Form Templates in the center window. Every Client has these folders:
Figure 2: Forms Portal Client Home Page
The Client Home Page displays the login name for the current user. This lists all forms and classifications that can be selected and opened by that user.
It also has a Search option for assisting the user in finding forms within a large library by entering search criteria.

Amgraf, Inc. Forms Portal User Guide
3/28/2012 3
Every Client has these folders:
• Favorites – A list of the most often used Form Templates • My Draft Forms – A list of the Client’s partially filled in e-forms • My Finalized Forms – A list of the Client’s completed e-forms • All Forms – A list of all the Form Templates available to the Client • Workflow – A list of Inboxes where other Forms Portal users can send and
share filled e-forms Clicking on a Form Template name from the center window highlights the form name and enables the [Start New] and [Print Blank Form] buttons on the right side of the Home Page. If there are any previously filled-in saved e-forms created from the highlighted Form Template, the [List E-Forms] button will also be enabled. To launch a new fillable Form Template, click the [Start New] button. To edit a previously filled Form Template, click the [List E-Forms] button. To print a blank paper Form Template, click the [Print Blank Form] button.
Figure 3: Printing a Blank Form will Open Acrobat Reader
Amgraf, Inc. Forms Portal User Guide
4 3/28/2012
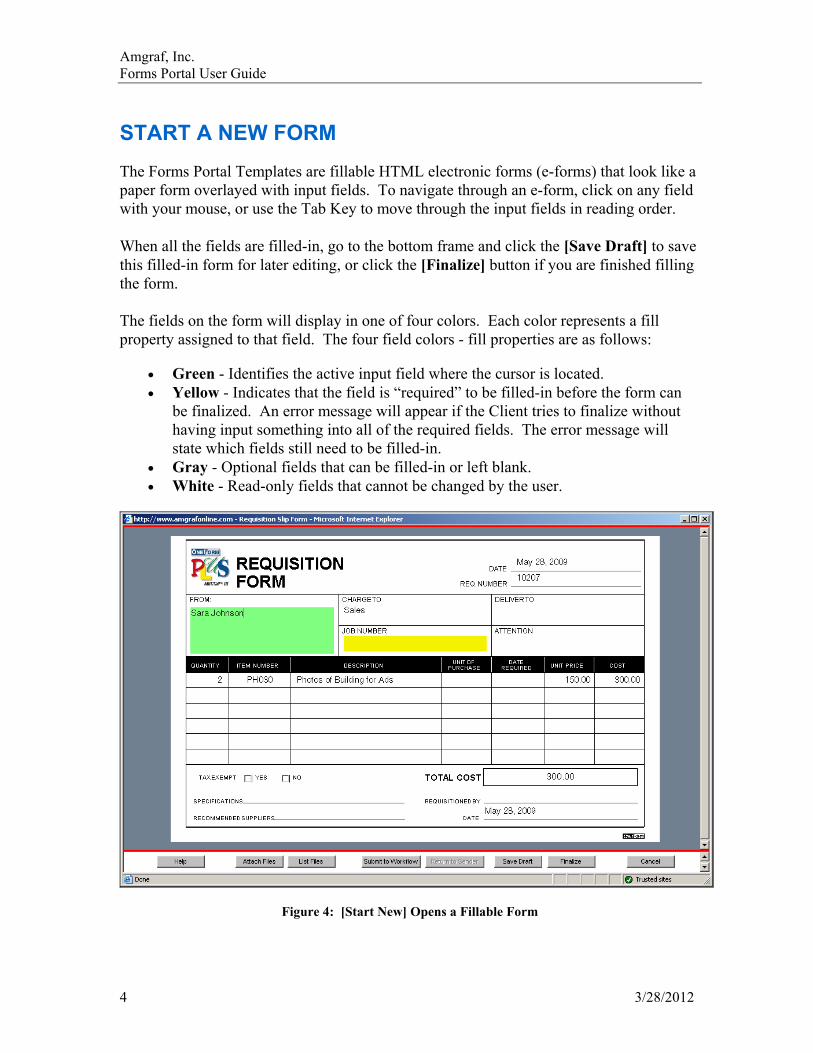
START A NEW FORM The Forms Portal Templates are fillable HTML electronic forms (e-forms) that look like a paper form overlayed with input fields. To navigate through an e-form, click on any field with your mouse, or use the Tab Key to move through the input fields in reading order. When all the fields are filled-in, go to the bottom frame and click the [Save Draft] to save this filled-in form for later editing, or click the [Finalize] button if you are finished filling the form. The fields on the form will display in one of four colors. Each color represents a fill property assigned to that field. The four field colors - fill properties are as follows:
• Green - Identifies the active input field where the cursor is located. • Yellow - Indicates that the field is “required” to be filled-in before the form can
be finalized. An error message will appear if the Client tries to finalize without having input something into all of the required fields. The error message will state which fields still need to be filled-in.
• Gray - Optional fields that can be filled-in or left blank. • White - Read-only fields that cannot be changed by the user.
Figure 4: [Start New] Opens a Fillable Form

Amgraf, Inc. Forms Portal User Guide
3/28/2012 5
THE BOTTOM NAVIGATION FRAME On the bottom navigation frame, there are a series of buttons used to process the filled e-form. The button functions are as follows: [Help] – Open the help documentation for the current forms template. [Attach Files] – Attach an external file (photo, spreadsheet, etc.) to this filled-in e-form. [List Files] – Show all of the attached files associated with this filled-in e-form. [Submit to Workflow] – Send this filled-in e-form to another Client or Inbox for more input. [Return to Sender] – Return this filled-in e-form to the person who sent it to you. [Save Draft] – Save this filled-in e-form for later editing. [Finalize] – All input is complete and this filled-in e-form is finished. [Cancel] – Return to the Forms Portal Client Home Page without saving the filled-in e-form.

Amgraf, Inc. Forms Portal User Guide
6 3/28/2012
PRINT A BLANK FORM All the Forms Portal Templates are also available as PDF form files that can be opened using the free Adobe Reader. Once a form is displayed in the Reader, you can print hard copies to any local printer device. You can also save the PDF file on your local hard drive. The PDF files are not electronically fillable.
Figure 5: Printing a Blank Form will Open Acrobat Reader
Amgraf, Inc. Forms Portal User Guide
3/28/2012 7
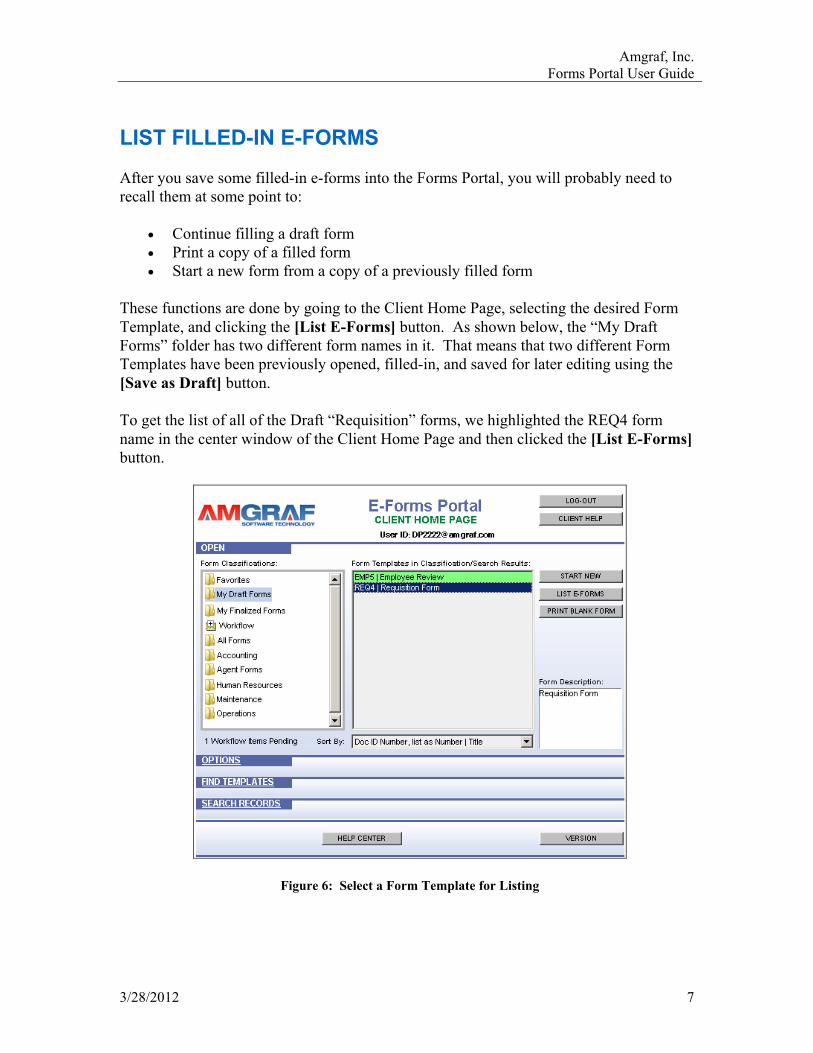
LIST FILLED-IN E-FORMS After you save some filled-in e-forms into the Forms Portal, you will probably need to recall them at some point to:
• Continue filling a draft form • Print a copy of a filled form • Start a new form from a copy of a previously filled form
These functions are done by going to the Client Home Page, selecting the desired Form Template, and clicking the [List E-Forms] button. As shown below, the “My Draft Forms” folder has two different form names in it. That means that two different Form Templates have been previously opened, filled-in, and saved for later editing using the [Save as Draft] button. To get the list of all of the Draft “Requisition” forms, we highlighted the REQ4 form name in the center window of the Client Home Page and then clicked the [List E-Forms] button.
Figure 6: Select a Form Template for Listing

Amgraf, Inc. Forms Portal User Guide
8 3/28/2012
The “List Saved E-Forms” page is displayed as shown below showing all saved draft forms for the Requisition.
Figure 7: Select a Form Record for Editing
Highlight a form from the list to Copy, Edit, or Print a specific filled e-form. To Print or Export many filled e-forms, click the Checkboxes. To search within the list of filled e-forms, use the Search List features at the bottom of the “List Saved E-Forms” page.

Amgraf, Inc. Forms Portal User Guide
3/28/2012 9
EDIT FORM Highlight a form from the list to re-edit the previously filled e-form. When all the fields are filled-in, go to the bottom frame and click the [Save Draft] to save this filled-in e-form for later editing, or click the [Finalize] button if you are finished filling the e-form.
Figure 8: After Editing Choose an Option for Saving on Bottom Frame Or, click the [Submit to Workflow] if you need to send this to someone else for their input.

Amgraf, Inc. Forms Portal User Guide
10 3/28/2012
OTHER SECTIONS OF THE CLIENT HOME PAGE
The Client Home Page has three collapsible sections for special functions:
Figure 9: Three Collapsible Sections
OPTIONS The Options section is used to Add and Remove form template names from your Favorites folder. By default, the Favorites folder form templates are displayed in the center form list window when you login to the Forms Portal. Click the [Favorites: Add] button to place a highlighted Form Template name into the Favorites folder. Click the [Favorites: Delete] button to remove a highlighted Form Template name from the Favorites folder. The [Suggestion Box] button is for you to make recommendations or criticisms about the Forms Portal. These suggestions are anonymous unless you choose to identify yourself. The [Form Info] button displays historical and document management information about the highlighted Form Template, such as the version number. There is also a [Client Profile] button for you to enter common identity information (Last Name, First Name, Address, etc.) that you would like to be used when Form Templates have input fields that need that data.

Amgraf, Inc. Forms Portal User Guide
3/28/2012 11
FIND TEMPLATES The Forms Portal may have hundreds of Forms Templates in dozens of Classifications, so this section is provided for you to search for a Forms Template from the repository. Key in anything that you know about a Form Template, and the Forms List will show the matches. Once you find the desired Form Template, you can open it or add it to your Favorites folder if it will be frequently needed.
Figure 10: Locating a Template
To search for forms, the Client enters information in one or more of the search criteria fields and clicks the [Find] button. The search results list will display all forms that match the criteria.
To clear the list, click [Refresh List].
Form Number/Name: – The first field is for locating a form by its Form Number; the second is for locating a form by its Form Name. The wild card character (*) can be used within these fields.
Key Word(s) in Form Info: – This searches through the Form Description for any key words entered into this field. The wild card character (*) can be used within this field.
(*) Asterisk Wild Card – The asterisk (*) character is used as a wild card to mean “any other characters”. A Client can use the wild card character when the entire Form Number or Form Name is not known. For example: You know the number starts with “65”. You would input the Form Number as “65*”. The program will then list all forms starting with “65”. If the Form Number ends with “54”, you would input “*54”.
The asterisk can be used before and after words to mean “any Form Name that has the letters shown”. For example: Searching for “*work*” finds both “Work Schedule” and “Worksheet”. Note: All searches ignore the difference between upper and lower case characters.

Amgraf, Inc. Forms Portal User Guide
12 3/28/2012
SEARCH RECORDS Every time any Client saves, submits, or finalizes a filled-in e-form, a data record is created or updated. The Search Records Section provides an easy way to search through the database of filled-in e-forms to find what you are looking for. To find all the filled e-forms records that have specific data, key in the desired criteria and click the [Search] button. If any matches are found, the field labeled “Search Results” will show a record count. Click the [Display] button to show the list of e-forms with matching data, as shown below:
Figure 11: After Editing Choose an Option for Saving on Bottom Frame Now you can highlight a record to copy, print, or export.

Amgraf, Inc. Forms Portal User Guide
3/28/2012 13
SIMPLE WORKFLOW Every Forms Portal Client has a Personal Inbox that can be used for Simple Workflow. When one Client needs to send a filled e-form specifically to another Client (so that additional input can be done,) it can be sent via the [Submit to Workflow] button to the other Client’s Personal Inbox. The [Submit to Workflow] button is located on the bottom navigation frame of every fillable e-form. Some Clients also have one or more named Group Inboxes that many other Client’s also have shared access to. When one Client needs to send a filled e-form to another team or department (so that additional input can be done,) it can be sent via Workflow to a Group Inbox. Using this method, any authorized Client with access to the named Group Inbox can open and edit any filled forms that are sent to that Inbox. There are no limitations on the number of times a filled e-form can be Submitted to Workflow.
Figure 12: Inbox Workflow Page
Amgraf, Inc. Forms Portal User Guide
14 3/28/2012
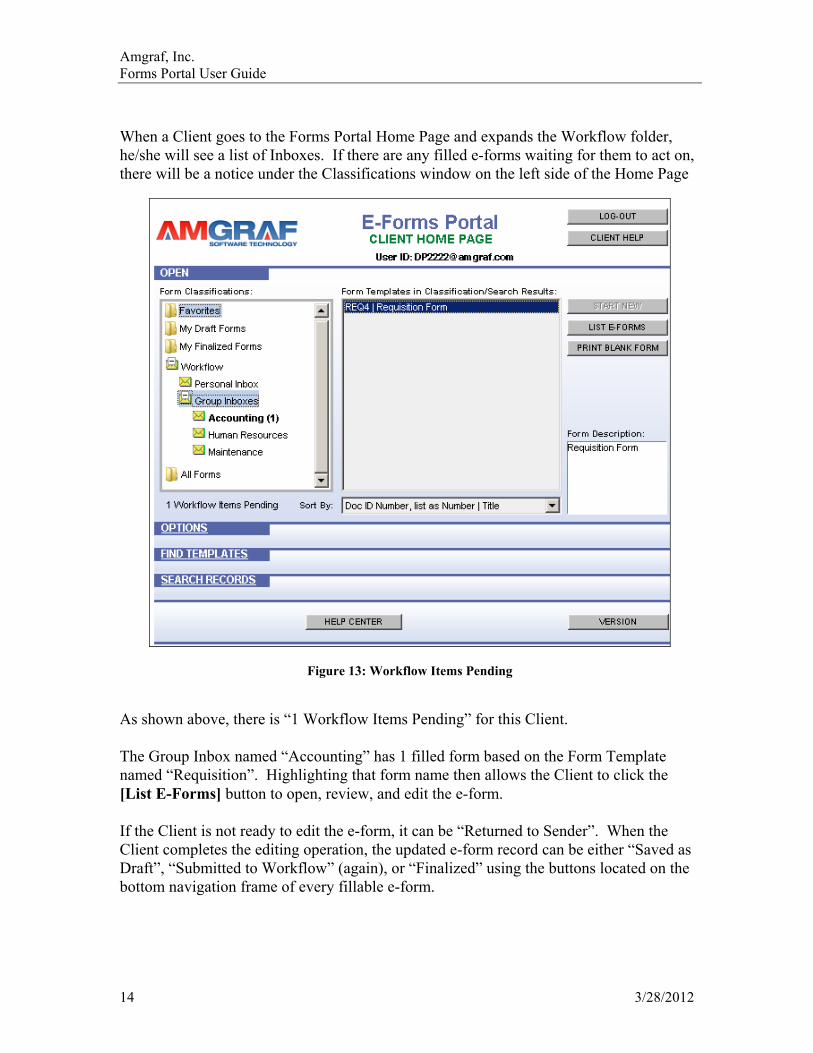
When a Client goes to the Forms Portal Home Page and expands the Workflow folder, he/she will see a list of Inboxes. If there are any filled e-forms waiting for them to act on, there will be a notice under the Classifications window on the left side of the Home Page
Figure 13: Workflow Items Pending
As shown above, there is “1 Workflow Items Pending” for this Client. The Group Inbox named “Accounting” has 1 filled form based on the Form Template named “Requisition”. Highlighting that form name then allows the Client to click the [List E-Forms] button to open, review, and edit the e-form. If the Client is not ready to edit the e-form, it can be “Returned to Sender”. When the Client completes the editing operation, the updated e-form record can be either “Saved as Draft”, “Submitted to Workflow” (again), or “Finalized” using the buttons located on the bottom navigation frame of every fillable e-form.