advanced image processing lab msc project. project description the advanced image processing lab...
TRANSCRIPT

Advanced Image Processing LabMSc Project

Project description
• The Advanced Image processing Lab project is a GUI interface encapsulates all the lab experiment, algorithms and theoretical background of the Advanced Image processing Lab Course.• Algorithms and UI are based on Matlab and Matlab Image processing
Tool box• GUI was built using Matlab “guide” tool for UI interface construction• Based on Prof. Yaroslavsky’s book “Theoretical Foundations of Digital
Imaging Using MATLAB”.
Purpose
• Easy and interactive experiments execution• Single interface which provide a gateway to all of the Lab related
materials• To link between theory and practice• To constitute an easy comparison tool of different image processing
algorithms• To constitute fast parameter effect on an algorithm evaluation platform• To be the basis of a more in depth learning of advanced image
processing lab topics
Project Structure
• 12 folders (one for each topic) - contains the lab experiments• ‘htm’ folder– contains the lab documentation and theoretical
background• ‘Data’ folder – contains input images and signals• ‘utils’ folder – contains common scripts and database files• Two main files:• AdvancedImageProcessingLab_mb.fig – Matlab figure which defines the UI• AdvancedImageProcessingLab_mb.m – Matlab function with main and
callback functions

GUI description
• There are two variations of the GUI: • main topic navigation window – created by the ‘guide’ tool, and constitute as
the basis to all of the experiment window UIs• Experiment window – each experiment function defines a unique experiment
window
Main topic navigation window
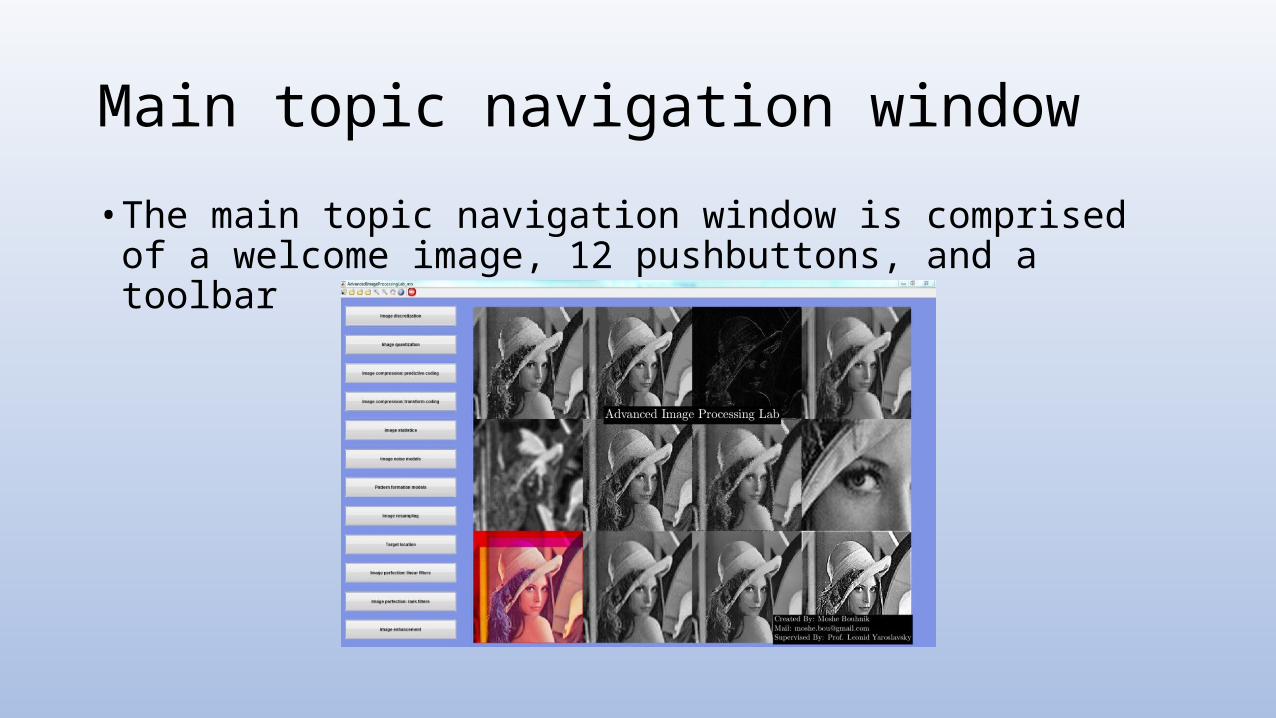
• The main topic navigation window is comprised of a welcome image, 12 pushbuttons, and a toolbar

Toolbar
The tool bar contains tool which helps the user to inquire and investigate each experiment results. The toolbar consists of 9 buttons:• Data cursor – enables inquiries of pixel or plot values at a certain positions.• Load image\ load auxiliary image \ load 2nd auxiliary image – allows the user to change the input signal\image used by current
experiment. For experiments with more than one input, load auxiliary image \ load 2nd auxiliary image buttons should be used. All experiments have default input image \signal, however it is possible to use user’s images \ signals. All image formats supported by matlab “imread” function are supported - ( 'bmp', 'cur’, ‘fts’, ‘fits’, ‘gif’, ‘hdf’, ‘ico’, ‘j2c’, ‘j2k’, ‘jp2’, ‘jpf’, ‘jpx’, ‘jpg’, ‘jpeg’, ‘pbm’, ‘pcx', 'pgm’, ‘png’, ‘pnm’, ‘ppm’, ‘ras’, ‘tif’, ‘tiff’, ‘xwd’), and raw ‘mat’ gray scale image files, for which the user will be prompt to provide the image size. It is possible to load an image of any size, but each image is resized to the size of 256x256. If the image is a color image, it will transform to gray. If the aspect ratio is not 1x1, the center of the image is cropped, to avoid distorting the image.
• Zoom in\out - allows the user to inspect image\signal by zooming in or out.• Pan – allows the user to shift the image/signal right, left up or down.• Help – upon pressing this button while in experiment, a detailed help document will be opened, with experiment tasks,
questions, theoretical background and algorithm descriptions. Upon pressing this button while in main window, this chapter will appear.
• Interactive mode – This button controls the behavior of the program, when user changes the experiment setting. If it is set to ‘off’, then only once the user presses “run experiment’ will the experiment will be executed. If it is set to ‘on’, then whenever the user changes the experiment settings, immediately, the experiment is executed.

Topics list
The twelve topics are:• Image discretization• Image quantization• Image compression: predictive coding• Image compression: transform coding• Image statistics• Image noise models • Pattern formation models• Image resampling• Target location• Image perfection: linear filters• Image perfection: rank filters• Image enhancement

GUI description: experiment window
• The experiment window is experiment result display, control panel, experiment selector, toolbar, and a ‘Back’ button
Matlab GUIDE tool
• The project was built using Matlab built-in tool ‘GUIDE’, the Open GUI Layout Editor tool for gui infrastructures• Matlabs ‘GUIDE’ stores the GUI in two files:• A FIG-file, with extension .fig, that contains a complete description of the GUI
layout and each UI component, such as push buttons, axes, panels, menus, and so on. The FIG-file is a binary file and which cannot be modified except by changing the layout in GUIDE. FIG-files are specializations of MAT-files. • A code file, with extension .m, that initially contains initialization code and
templates for some callbacks that control GUI behavior. The code file contains the call back of the main FIG file UI components.

Matlab GUIDE tool

Main code file
The code file structure is built of:• Comments - Displayed at the command line in response to the help command. • Initialization - GUIDE initialization tasks. Needed for proper operation of the code.• Opening function - Performs your initialization tasks before the GUI user has access to
the GUI.• Output function - Returns outputs to the MATLAB command line after the opening
function returns control and before control returns to the command line.• Component and figure callbacks - Control the behavior of the GUI figure and of
individual components. MATLAB software calls a callback in response to a particular event for a component or for the figure itself.
• Utility/helper functions - Perform miscellaneous functions not directly associated with an event for the figure or a component.
The guidata function and handles struct• The guidata Matlab function store or retrieve GUI data - the ‘handles’
struct• The ‘handles’ struct contains all the handles of the UI as well as other
program parameters.• All communication and data sharing between the different
components are done with the ‘guidata’ function

Example top program flow
Program checks validity of key folders, loads data base and upload the
interface
User run the AdvancedImageProcessingLab_mb function Program change current directory
to the topics folder, execute the first default experiment and
removes main window UI and image
User select a topic by pressing the corresponding button
Experiment program loads default UI, image\signal and
algorithms parameters a displays the control panel and (mostly)
test image
Remove experiment UI and loads main
window UI
User pressed the ‘Back’ button

Example topic program flow
Using the radio button, user change the current experiment
Using change experiment parameters using the control panel
Update the changed parameter, save current
experiment status in ‘handles’
Experiment algorithms executed, results are displayed
User press ‘Run experiment’

Experiment functions
• A standard experiment function file structure consists of:• Comments• Main function – defines the look of the experiment window, have similar
name as the experiment• Callbacks functions – for different UI tasks• A “process_image” function to execute the algorithms and display the results• Supplementary functions – for various tasks such as minimization of error etc

Common functions used
• DeployAxes - calculates the location of each axes position, and create those axes.
• SetSliderParams - defines a struct which describes a slider for a parameter. This struct is the passed to the SetInteractiveInterface function, which sets the sliders and other UIs.
• SetInteractiveInterface - This function creates the control panel, and all the UI (sliders, pushbuttons, radio buttons). It also gives tags to each of control panel components to allow easy location of those components for later use.
• process_image – runs the experiments and display the results
• update_sliders – handles UI when there is a dependency between two parameters. Calles to run_process_image if interactive mode is on.
• run_process_image – change a handle struct to an explicit function call of process_image. Used by Uis which are not sliders and update_sliders function.
• SetParam – the default callback of all the sliders. Update the GUIs and sliders related strings
‘TopicList’ struct
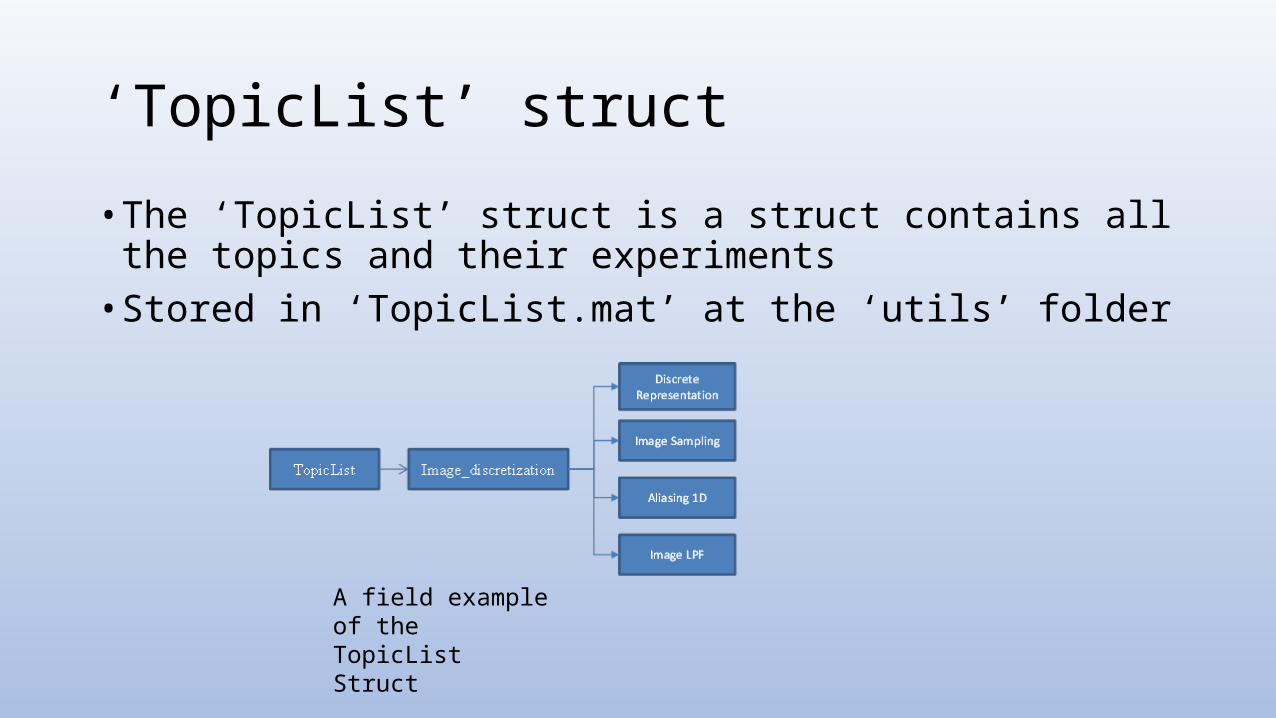
• The ‘TopicList’ struct is a struct contains all the topics and their experiments• Stored in ‘TopicList.mat’ at the ‘utils’ folder
A field example of the TopicList Struct

‘default’ struct
• The ‘default’ struct is a struct contains all the default signals\images filename, sizes etc of each experiment• Stored in ‘Defaults.mat’ at the ‘utils’ folder• Filenames are relative to ‘utils’ folder
A field example of the default Struct

Algorithmic implementation
• The Matlab program language, while very versatile and convenient, is aimed at vector and matrix processing, and has a major drawback in the form of execution time of loops commonly used when performing local operation on images.
• To enhance speed, matrix operations are preferred over loops • Using im2col function of Maltab loop operations transformed to matrix operations• Im2col(im, [WndY, WndX]) function takes an image with size WxH, and creates a new
matrix with size of (WndY* WndX)x(W*H). Which means that for 5x5 window, this function creates 24 more replicas of the image. But this cost in memory benefits in execution time
• Empirical result shows improvement of over 50 times• In conclusion, many local image operation were implemented using im2col operation,
however, in some cases for memory and educational purposes, a loop implementation was used.

Conclusions
• The “advanced Image Processing Lab” project presents a new platform of teaching the lab• It enables a more in-depth learning and experimenting• Gives a good comparison between different algorithms and same
algorithms with different parameters• Can be easily modified to hold more\ different topics