aa implementation guide - avaya support · programming ports ... programming a call vector ... this...
TRANSCRIPT
Implementation Guide
Version 8.2

Document history
NoticeCopyright © 1997-2004 by ScanSoft, Inc. All rights reserved.
ScanSoft, Inc. provides this document without representation or warranty of any kind. ScanSoft, Inc. reserves the right to revise this document and to change the information contained in this document without further notice.ETI-Eloquence, MultiAdmin, OpenSpeech, Productivity Without Boundaries, RealSpeak, ScanSoft, the ScanSoft logo, SpeechAttendant, SpeechAuthenticator, SpeechCare, SpeechContacts, Speechify, and SpeechWorks are trademarks of ScanSoft, Inc. or its licensors in the United States and/or other countries. This document may also contain other trademarks, which are the property of their respective owners.Portions of the OpenSpeech Recognizer software are subject to copyrights of AT&T Corp., E-Speech Corporations, Bell Communications Reserach, Inc., European Telecommunications Standards Institute, and GlobeTrotter Software, Inc.Portions of the SpeechAttendant software are subject to copyrights of Apache Software Foundation and Seagate Software.Without limiting the rights under copyright reserved above, no part of this document may be reproduced, stored in or introduced into a retrieval system or transmitted in any form or by any means, including, without limitation, electronic, mechanical, photocopying, recording, or otherwise, without the prior written permission of ScanSoft, Inc.Published by: ScanSoft, Inc.Worldwide Headquarters9 Centennial DrivePeabody, MA 01960United States
Publication date Release name
October 2004 1st edition, for SpeechAttendant version 8.2

Implementation Guide iii
Table of Contents
Preface.................................................................................................viiWho should read this guide ........................................................................... viiiAbout this guide ............................................................................................. viii
What’s new .................................................................................................. xConventions ................................................................................................ xRelated documentation .............................................................................. xi
About us ........................................................................................................... xiiSupport ...................................................................................................... xiiDocumentation ......................................................................................... xii
Chapter 1 Implementation Process.....................................................1Introduction ....................................................................................................... 2Checklist ............................................................................................................. 3
Chapter 2 Getting Started ..................................................................7Setting up the SpeechAttendant computer ..................................................... 8
Required equipment .................................................................................... 8Location ....................................................................................................... 9
Connecting to the network ............................................................................. 10Activating the license ...................................................................................... 11
Table of Contents
iv SpeechAttendant™
Chapter 3 PBX/KSU Preparation ...................................................... 13Introduction .....................................................................................................14Programming the PBX/KSU ..........................................................................14
Hunting method ........................................................................................15Phantom number .......................................................................................15Port attributes ............................................................................................16Class of service ..........................................................................................17Modem .......................................................................................................17Fallback plan ..............................................................................................18
Testing the PBX/KSU ....................................................................................18Installing the ATAs .........................................................................................19Connecting the PBX/KSU .............................................................................20
Analog integration .....................................................................................20Avaya, Meridian or Mitel digital integration ...........................................22NEC digital integration .............................................................................24
Chapter 4 ACD Environment ............................................................ 27Meridian ............................................................................................................28
Introduction ...............................................................................................28Identifying the ACD software ..................................................................29Programming the ACD queue ..................................................................30Programming ports ...................................................................................31Setting ACD parameters in the configuration panel ..............................32
Avaya ................................................................................................................33Introduction ...............................................................................................33Creating a hunt group ...............................................................................33Programming agents .................................................................................34Programming stations ...............................................................................34Programming a call vector ........................................................................35Programming a vector directory number (VDN) ...................................35Setting ACD parameters in the configuration panel ..............................36
Voice files for call centers ...............................................................................37
Table of Contents
Implementation Guide v
Chapter 6 Business Communications Manager (BCM)......................47Introduction ..................................................................................................... 48
PBX, voice card and transfer mode ........................................................ 48Analog lines ............................................................................................... 48Information needed .................................................................................. 49
Downloading and installing Unified Manager Client ................................... 51Validating the directory numbers ................................................................... 54Defining a hunt group for SpeechAttendant ................................................ 57Configuring LAN CTE ................................................................................... 59Downloading and installing LAN CTE Client .............................................. 61Records ............................................................................................................ 63
Chapter 8 Multi-server application ...................................................71Introduction ..................................................................................................... 72Programming the PBX .................................................................................... 73Removing the database from the slave server ............................................... 74Configuring replication ................................................................................... 75
Configuring the publisher ........................................................................ 75Configure the subscriber .......................................................................... 81
Identifying servers and defining port assignment ......................................... 85About configuration settings in a server cluster ........................................... 86
Chapter 9 SpeechAttendant Configuration ......................................87Configuration panel ........................................................................................ 88Setting descriptions ......................................................................................... 89Configuring Windows parameters ............................................................... 113Connecting to a printer ................................................................................. 114Modifying passwords .................................................................................... 114
Locus and Windows administrator ........................................................ 115Level 1 and level 2 .................................................................................. 116
Table of Contents
vi SpeechAttendant™
PIN, maintenance mode and name recorder ........................................117Admin .......................................................................................................117
Chapter 10 pcAnywhere................................................................. 119Introduction ...................................................................................................120Verifying the remote system .........................................................................120Creating a DUN file ......................................................................................121Configuring pcAnywhere ..............................................................................126Logging on to SpeechAttendant ...................................................................127
Chapter 11 Testing......................................................................... 129PBX integration .............................................................................................130SpeechAttendant functions ...........................................................................135
Index.................................................................................................. 143

Implementation Guide vii
Preface
SpeechAttendant™ integrates the latest innovations in speech technology and lends itself to a variety of telephony applications, including speech-activated call routing, call dispatching in a call center environment, access to personal contacts, the provision of self-service information and call forward.This guide explains the procedures for implementing a new SpeechAttendant application.
Preface
viii SpeechAttendant™
Who should read this guide
Implementing SpeechAttendant involves the collaboration of several people: the ScanSoft project manager, the distributor representative, the telecommunications technician, the network administrator, the SpeechAttendant system administrator, etc.This guide is intended for all these people. However, first and foremost, it is intended for specialists duly certified by ScanSoft who are responsible for installing and configuring SpeechAttendant at the client site. Readers of this guide should:
Have taken the Implementing SpeechAttendant courseHave a working knowledge of computer systemsBe familiar with Windows operating systemsBe familiar with PBXs and other telephone systems
About this guide
This Implementation Guide explains how to implement SpeechAttendant and includes the following chapters:1 Implementation Process—Describes all the steps in the
implementation process and contains a practical checklist to make sure that you are performing all the necessary tasks.
2 Getting Started—Explains the first steps of the installation process, which include computer setup, network connection, and license activation.
3 PBX/KSU Preparation—Explains how to configure the PBX/KSU and connect it to SpeechAttendant for a standard analog or digital application.
4 ACD Environment—Contains the necessary procedures for integrating SpeechAttendant in a call center environment (Meridian or Avaya).
Preface
Implementation Guide ix
6 Business Communications Manager (BCM)—Explains how to integrate SpeechAttendant with Nortel Networks BCM.
7 Multi-server application—Contains all the information pertaining to a multi-server application, including how to configure data replication.
8 SpeechAttendant Configuration—Explains how to configure the SpeechAttendant system according to customer needs.
9 pcAnywhere—Explains how to prepare the pcAnywhere connection, which makes it possible to manage the application from a remote computer.
10 Testing—Explains how to test PBX/KSU integration and SpeechAttendant functions.
An index and a feedback form complete the guide.
Preface
x SpeechAttendant™
What’s new
As with each new version of the product, we have made certain changes to the system. In the present manual, pay particular attention to the following changes:
D/42 and D/82 boards are now supported in digital Avaya environments, as they are in digital Meridian and Mitel environments. To know how to connect those systems to the PBX, see page 22.
Conventions
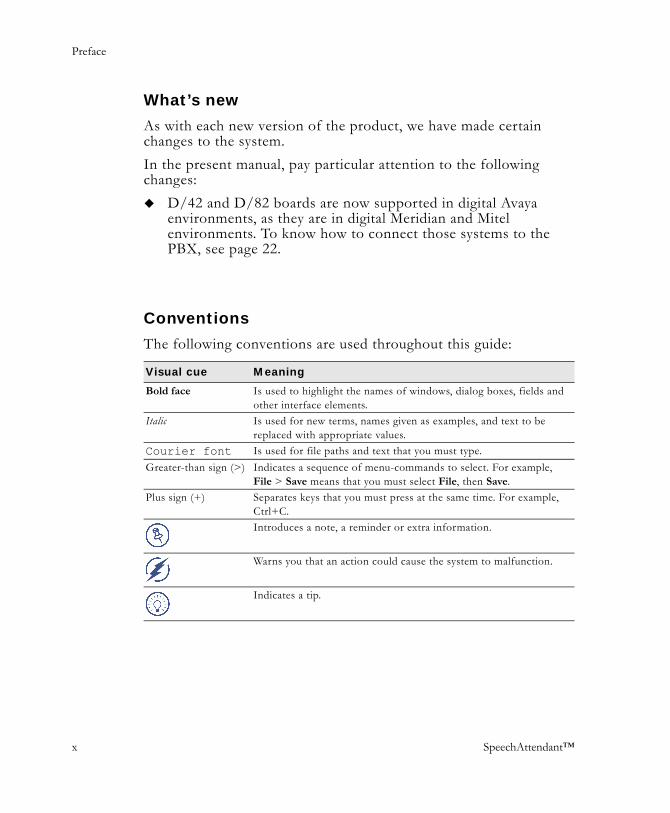
The following conventions are used throughout this guide:
Visual cue Meaning
Bold face Is used to highlight the names of windows, dialog boxes, fields and other interface elements.
Italic Is used for new terms, names given as examples, and text to be replaced with appropriate values.
Courier font Is used for file paths and text that you must type.Greater-than sign (>) Indicates a sequence of menu-commands to select. For example,
File > Save means that you must select File, then Save.Plus sign (+) Separates keys that you must press at the same time. For example,
Ctrl+C.Introduces a note, a reminder or extra information.
Warns you that an action could cause the system to malfunction.
Indicates a tip.
Preface
Implementation Guide xi
Related documentation
In addition to the Implementation Guide, the following documentation is also available:
The Site Preparation Document lays the groundwork for the visit by the project manager on customer site. It describes the requirements of system implementation and allows to gather customer preferences.The Installation Handbook explains how to install the software components of a SpeechAttendant application: OpenSpeech Recognizer, Speechify (if included in the license), the companion programs, and the SpeechAttendant software itself.The various Telephony Integration Documents are extracted from the present Implementation Guide. They explains to the telephony technician how to program the customer’s PBX and connect it to SpeechAttendant. There is a document for each type of integration: analog, digital (Avaya, Meridian, Mitel, and NEC), ACD queue (Meridian and Avaya), and Nortel Networks BCM.
The Administration Guide covers all aspects of the day-to-day operation of SpeechAttendant.
Preface
xii SpeechAttendant™
About us
ScanSoft offers advanced network technologies through automatic speech recognition (ASR), text-to-speech (TTS), and speaker verification solutions to leading corporations, telecommunications providers and government organizations worldwide. Through the power of ScanSoft’s speech recognition products and related technologies, the human voice is all a person needs to access instant information and conduct transactions from any landline or wireless phone, car or other handheld device. Around the world, customer service innovators are realizing returns on ScanSoft applications that consistently delight and serve customers 24 hours a day.For more information about ScanSoft, visit our Web site at www.scansoft.com.
Support
By phone:From Montreal : (514) 390-3922Elsewhere in Canada or the United States : 1 866 434-2564Outside Canada or the United States : (514) 390-3922
By fax: (514) 954-1588By email: [email protected]
Documentation
We appreciate your feedback on our documentation. Please fill out the feedback form at the end of this guide and fax it to the Documentation department at (514) 954-3805.
Implementation Guide 1
7
Implementation Process
This chapter outlines the principal steps in implementing SpeechAttendant on the client site. It also contains a checklist that you can use to make sure that you have remembered everything.

Chapter 1 Implementation Process
2 SpeechAttendant™
4
Introduction
The SpeechAttendant software is shipped installed on a dedicated computer. The system must now be implemented at the client site. To do so, you must:1 Set up the SpeechAttendant computer (see page 8).2 Connect the computer to the network (see page 10).3 Activate the SpeechAttendant license (see page 11).4 Program the PBX/KSU and connect it to SpeechAttendant,
referring to the appropriate chapter:
5 Configure the SpeechAttendant system (see Chapter 7, page 73).6 Prepare the pcAnywhere connection, if desired (see Chapter 8,
page 105).7 Create the menu structure and perform the initial load of the
directory (refer to the Administration Guide).8 Test the PBX integration and SpeechAttendant functionality (see
Chapter 9, page 115).In the case of a multi-server application, the implementation process is similar, except that you must also program data replication. See Chapter 6, page 57 for specific guidelines.
Integration type Reference
Analog Chapter 3, page 13Digital (Avaya, Meridian, Mitel, or NEC) Chapter 3, page 13Meridian ACD queue Chapter 4, page 28Avaya ACD queue Chapter 4, page 33Nortel Networks BCM Chapter 5, page 39
Chapter 1 Implementation Process
Implementation Guide 3
7
Checklist
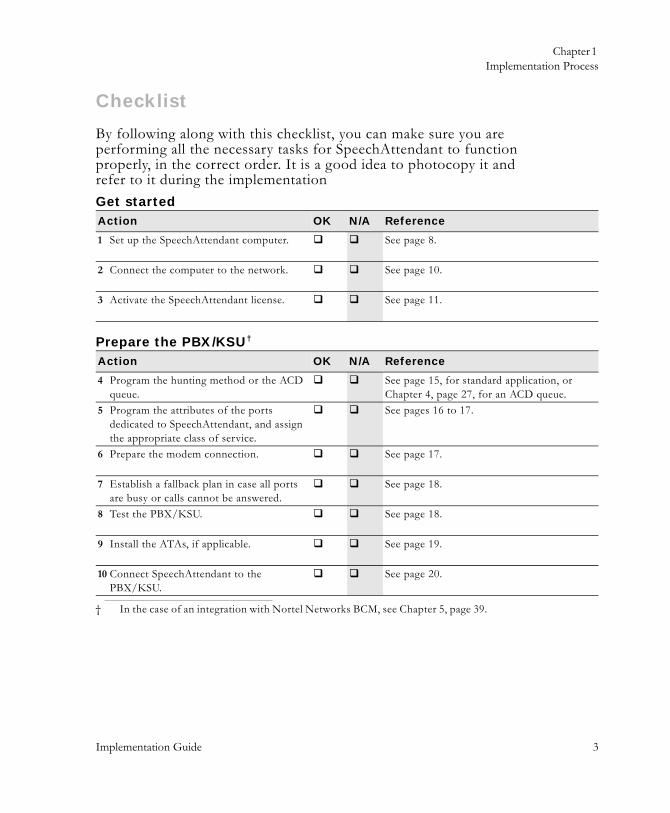
By following along with this checklist, you can make sure you are performing all the necessary tasks for SpeechAttendant to function properly, in the correct order. It is a good idea to photocopy it and refer to it during the implementation Get startedAction OK N/A Reference
1 Set up the SpeechAttendant computer. See page 8.
2 Connect the computer to the network. See page 10.
3 Activate the SpeechAttendant license. See page 11.
Prepare the PBX/KSU†
Action OK N/A Reference
4 Program the hunting method or the ACD queue.
See page 15, for standard application, or Chapter 4, page 27, for an ACD queue.
5 Program the attributes of the ports dedicated to SpeechAttendant, and assign the appropriate class of service.
See pages 16 to 17.
6 Prepare the modem connection. See page 17.
7 Establish a fallback plan in case all ports are busy or calls cannot be answered.
See page 18.
8 Test the PBX/KSU. See page 18.
9 Install the ATAs, if applicable. See page 19.
10 Connect SpeechAttendant to thePBX/KSU.
See page 20.
† In the case of an integration with Nortel Networks BCM, see Chapter 5, page 39.
Chapter 1 Implementation Process
4 SpeechAttendant™
4
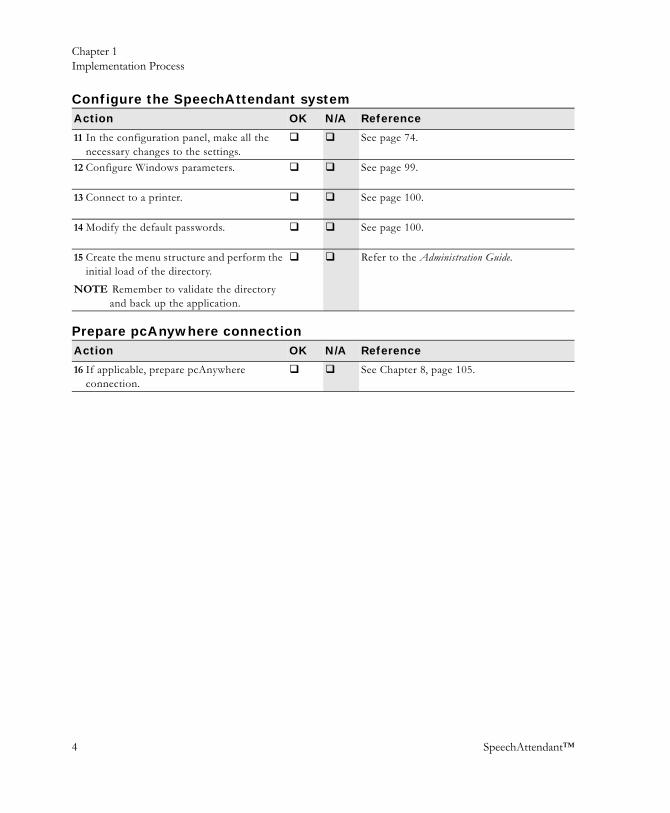
Configure the SpeechAttendant systemAction OK N/A Reference
11 In the configuration panel, make all the necessary changes to the settings.
See page 74.
12 Configure Windows parameters. See page 99.
13 Connect to a printer. See page 100.
14 Modify the default passwords. See page 100.
15 Create the menu structure and perform the initial load of the directory.
NOTE Remember to validate the directory and back up the application.
Refer to the Administration Guide.
Prepare pcAnywhere connectionAction OK N/A Reference
16 If applicable, prepare pcAnywhere connection.
See Chapter 8, page 105.
Chapter 1 Implementation Process
Implementation Guide 5
7
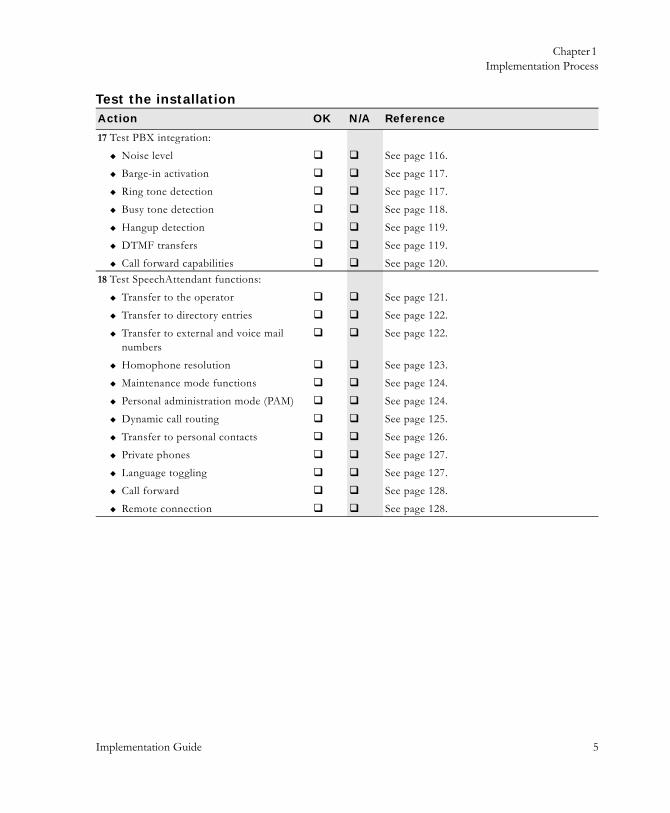
Test the installationAction OK N/A Reference
17 Test PBX integration:Noise levelBarge-in activationRing tone detectionBusy tone detectionHangup detectionDTMF transfersCall forward capabilities
See page 116.See page 117.See page 117.See page 118.See page 119.See page 119.See page 120.
18 Test SpeechAttendant functions:Transfer to the operatorTransfer to directory entriesTransfer to external and voice mail numbersHomophone resolutionMaintenance mode functionsPersonal administration mode (PAM)Dynamic call routingTransfer to personal contacts
Private phonesLanguage togglingCall forwardRemote connection
See page 121.See page 122.See page 122.
See page 123.See page 124.See page 124.See page 125.See page 126.See page 127.See page 127.See page 128.See page 128.
Chapter 1 Implementation Process
6 SpeechAttendant™
4
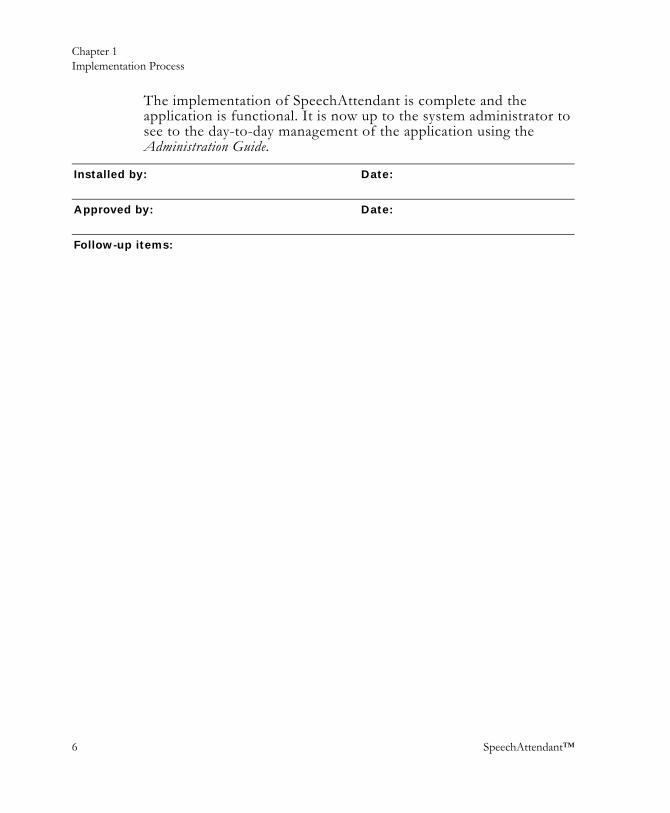
The implementation of SpeechAttendant is complete and the application is functional. It is now up to the system administrator to see to the day-to-day management of the application using the Administration Guide.
Installed by: Date:
Approved by: Date:
Follow-up items:
Implementation Guide 7
7
Getting Started
The first steps in implementing SpeechAttendant are:Setting up the SpeechAttendant computerConnecting to the networkActivating the license
The instructions to do so are provided in this chapter.

Chapter 2 Getting Started
8 SpeechAttendant™
4
Setting up the SpeechAttendant computer
Before setting up the SpeechAttendant computer, verify all the items shipped against the shipping list. Advise the Customer Service Center if anything is missing.
Required equipment
The following equipment is needed to set up the SpeechAttendant computer(s).
A Phillips screwdriverA static-safe kit (dissipative mat, wrist strap and groundwire)One RJ11 cable for each port in the license, plus one for the modem1
One analog terminal adapter (ATA) for each SpeechAttendant port2, plus one for the modem (for Norstar integrations only)A network cable (if a network connection is required)Up to three analog or digital telephones, depending on the system (or two analog telephones and a butt set), for testing
1. Required cables are provided with the system.
2. ATAs are provided when required.
Chapter 2 Getting Started
Implementation Guide 9
7
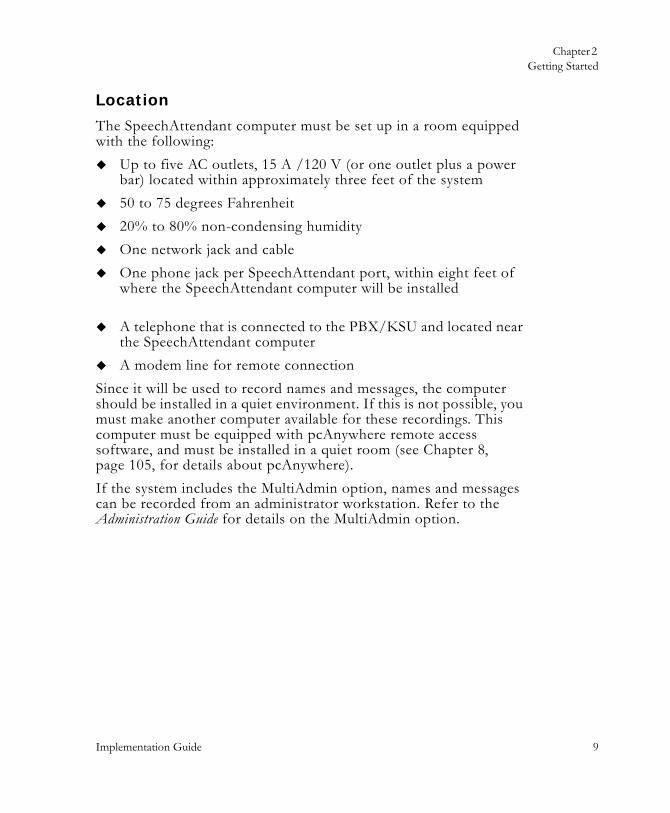
Location
The SpeechAttendant computer must be set up in a room equipped with the following:
Up to five AC outlets, 15 A /120 V (or one outlet plus a power bar) located within approximately three feet of the system50 to 75 degrees Fahrenheit20% to 80% non-condensing humidityOne network jack and cableOne phone jack per SpeechAttendant port, within eight feet of where the SpeechAttendant computer will be installed
A telephone that is connected to the PBX/KSU and located near the SpeechAttendant computerA modem line for remote connection
Since it will be used to record names and messages, the computer should be installed in a quiet environment. If this is not possible, you must make another computer available for these recordings. This computer must be equipped with pcAnywhere remote access software, and must be installed in a quiet room (see Chapter 8, page 105, for details about pcAnywhere).If the system includes the MultiAdmin option, names and messages can be recorded from an administrator workstation. Refer to the Administration Guide for details on the MultiAdmin option.

Chapter 2 Getting Started
10 SpeechAttendant™
4
Connecting to the network
Connecting SpeechAttendant to the LAN is highly recommended, and it is mandatory if the system includes (or must allow) the following:
Statistics (log files) transmittal to ScanSoftAccess to ScanSoft FTP server
A multi-server application (see Chapter 6, page 57)The corporate directory interface option (refer to the Administration Guide)SpeechContacts option (refer to the Administration Guide)
The SpeechAttendant computer includes a PCI Ethernet card with an RJ45 (100BaseT) jack. You need to provide a Category 5 cable, terminated in a “male” RJ45 connector to connect the SpeechAttendant system to the network.The network administrator or IT specialist is best positioned to configure the network connection.When connecting to the network:
Make sure the locus administrator retains its administration rights.Do not change the name of the SpeechAttendant computer. If you have done so by mistake, contact the Customer Service Center. To know the name of the computer, click Help > About SpeechAttendant in the Menu Editor window.Provide an IP address (a static address is recommended).Set the DNS suffix for the Apache server.
The SpeechAttendant computer is not meant to be a part of the customer domain. This provides security for the customer by ensuring ScanSoft can only access the SpeechAttendant computer.
Chapter 2 Getting Started
Implementation Guide 11
7
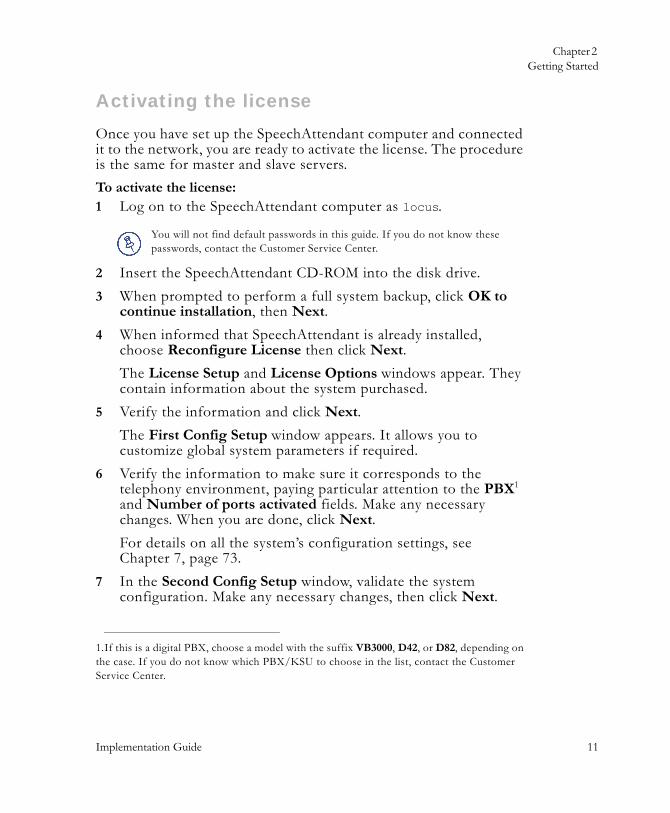
Activating the license
Once you have set up the SpeechAttendant computer and connected it to the network, you are ready to activate the license. The procedure is the same for master and slave servers.To activate the license:1 Log on to the SpeechAttendant computer as locus.
2 Insert the SpeechAttendant CD-ROM into the disk drive.3 When prompted to perform a full system backup, click OK to
continue installation, then Next.4 When informed that SpeechAttendant is already installed,
choose Reconfigure License then click Next.The License Setup and License Options windows appear. They contain information about the system purchased.
5 Verify the information and click Next.The First Config Setup window appears. It allows you to customize global system parameters if required.
6 Verify the information to make sure it corresponds to the telephony environment, paying particular attention to the PBX1 and Number of ports activated fields. Make any necessary changes. When you are done, click Next.For details on all the system’s configuration settings, see Chapter 7, page 73.
7 In the Second Config Setup window, validate the system configuration. Make any necessary changes, then click Next.
You will not find default passwords in this guide. If you do not know these passwords, contact the Customer Service Center.
1.If this is a digital PBX, choose a model with the suffix VB3000, D42, or D82, depending on the case. If you do not know which PBX/KSU to choose in the list, contact the Customer Service Center.
Chapter 2 Getting Started
12 SpeechAttendant™
4
8 Call the Customer Service Center at:1 866 434-2564
or(514) 390-3922
Say “Technical support,” then tell the technician that you need a valid serial ID.
9 In the Serial ID window, enter the serial number that was given to you, then click Validate.
10 When prompted to stop the SpeechAttendant services, click Yes.11 When asked if the current system is connected to a network,
click Yes or No depending on the case.12 When informed that the configuration is complete, click OK.13 In the case of a multi-server application, repeat the entire
procedure on the slave server.You are ready to continue with the implementation of SpeechAttendant.
All letters in the serial ID are capitalized, and there are never any zeroes.
Implementation Guide 13
7
PBX/KSU Preparation
For SpeechAttendant to be able to receive and route calls, it must be connected to a PBX/KSU that you have programmed according to the customer’s needs (refer to the signature pages of the Site Preparation Document).This chapter contains all the information necessary to integrate SpeechAttendant with a standard analog or digital environment.For any other type of integration, refer to the relevant chapter:
Integration type Reference
Meridian ACD queue Chapter 4, page 28Avaya ACD queue Chapter 4, page 33Nortel Networks BCM Chapter 5, page 39Multi-server application Chapter 6, page 573
Chapter 3 PBX/KSU Preparation
14 SpeechAttendant™
4
Introduction
For the PBX/KSU to interact with SpeechAttendant, you must:1 Program the PBX/KSU (see below).2 Test the SpeechAttendant ports (see page 18).3 Install the ATAs (if this is a Norstar integration; see page 19).4 Connect SpeechAttendant to the PBX/KSU (see page 20).The requirements for each of these steps are described in the following pages. For details about programming the PBX/KSU, refer to the manufacturer’s documentation.
Programming the PBX/KSU
For SpeechAttendant to be eventually integrated with the PBX/KSU, you must program:1 The hunting method (see page 15)2 A phantom number (only in digital environments, see page 15)3 The SpeechAttendant port attributes (see page 16)4 The class of service for each port (see page 17)5 The modem connection (see page 17)6 The fallback plan, in the event of a system failure or if all
SpeechAttendant ports are busy (see page 18)
It is recommended to test the application internally for a few weeks before activating it on the company’s external line.
Chapter 3 PBX/KSU Preparation
Implementation Guide 15
7
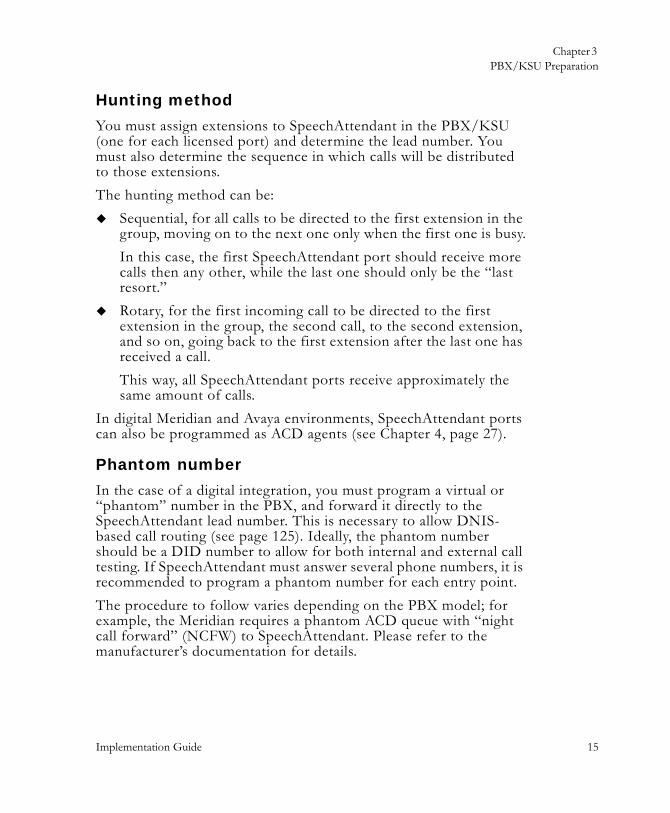
Hunting method
You must assign extensions to SpeechAttendant in the PBX/KSU (one for each licensed port) and determine the lead number. You must also determine the sequence in which calls will be distributed to those extensions.The hunting method can be:
Sequential, for all calls to be directed to the first extension in the group, moving on to the next one only when the first one is busy.In this case, the first SpeechAttendant port should receive more calls then any other, while the last one should only be the “last resort.”Rotary, for the first incoming call to be directed to the first extension in the group, the second call, to the second extension, and so on, going back to the first extension after the last one has received a call.This way, all SpeechAttendant ports receive approximately the same amount of calls.
In digital Meridian and Avaya environments, SpeechAttendant ports can also be programmed as ACD agents (see Chapter 4, page 27).
Phantom number
In the case of a digital integration, you must program a virtual or “phantom” number in the PBX, and forward it directly to the SpeechAttendant lead number. This is necessary to allow DNIS-based call routing (see page 125). Ideally, the phantom number should be a DID number to allow for both internal and external call testing. If SpeechAttendant must answer several phone numbers, it is recommended to program a phantom number for each entry point.The procedure to follow varies depending on the PBX model; for example, the Meridian requires a phantom ACD queue with “night call forward” (NCFW) to SpeechAttendant. Please refer to the manufacturer’s documentation for details.
Chapter 3 PBX/KSU Preparation
16 SpeechAttendant™
4
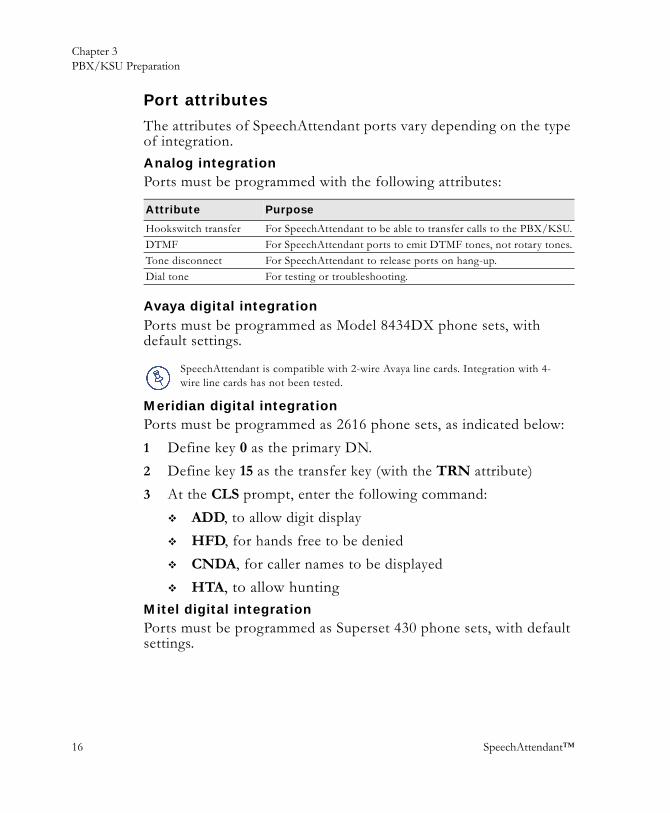
Port attributes
The attributes of SpeechAttendant ports vary depending on the type of integration.Analog integrationPorts must be programmed with the following attributes:
Avaya digital integrationPorts must be programmed as Model 8434DX phone sets, with default settings.
Meridian digital integrationPorts must be programmed as 2616 phone sets, as indicated below:1 Define key 0 as the primary DN.2 Define key 15 as the transfer key (with the TRN attribute)3 At the CLS prompt, enter the following command:
ADD, to allow digit displayHFD, for hands free to be deniedCNDA, for caller names to be displayedHTA, to allow hunting
Mitel digital integrationPorts must be programmed as Superset 430 phone sets, with default settings.
Attribute Purpose
Hookswitch transfer For SpeechAttendant to be able to transfer calls to the PBX/KSU.DTMF For SpeechAttendant ports to emit DTMF tones, not rotary tones.Tone disconnect For SpeechAttendant to release ports on hang-up.Dial tone For testing or troubleshooting.
SpeechAttendant is compatible with 2-wire Avaya line cards. Integration with 4-wire line cards has not been tested.
Chapter 3 PBX/KSU Preparation
Implementation Guide 17
7
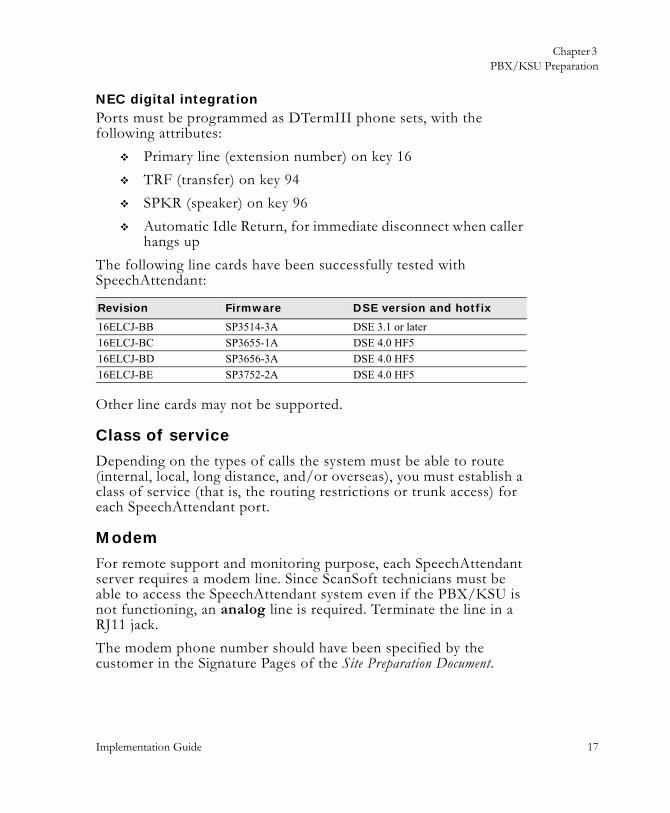
NEC digital integrationPorts must be programmed as DTermIII phone sets, with the following attributes:
Primary line (extension number) on key 16TRF (transfer) on key 94SPKR (speaker) on key 96Automatic Idle Return, for immediate disconnect when caller hangs up
The following line cards have been successfully tested with SpeechAttendant:
Other line cards may not be supported.
Class of service
Depending on the types of calls the system must be able to route (internal, local, long distance, and/or overseas), you must establish a class of service (that is, the routing restrictions or trunk access) for each SpeechAttendant port.
Modem
For remote support and monitoring purpose, each SpeechAttendant server requires a modem line. Since ScanSoft technicians must be able to access the SpeechAttendant system even if the PBX/KSU is not functioning, an analog line is required. Terminate the line in a RJ11 jack.The modem phone number should have been specified by the customer in the Signature Pages of the Site Preparation Document.
Revision Firmware DSE version and hotfix
16ELCJ-BB SP3514-3A DSE 3.1 or later16ELCJ-BC SP3655-1A DSE 4.0 HF516ELCJ-BD SP3656-3A DSE 4.0 HF516ELCJ-BE SP3752-2A DSE 4.0 HF5
Chapter 3 PBX/KSU Preparation
18 SpeechAttendant™
4
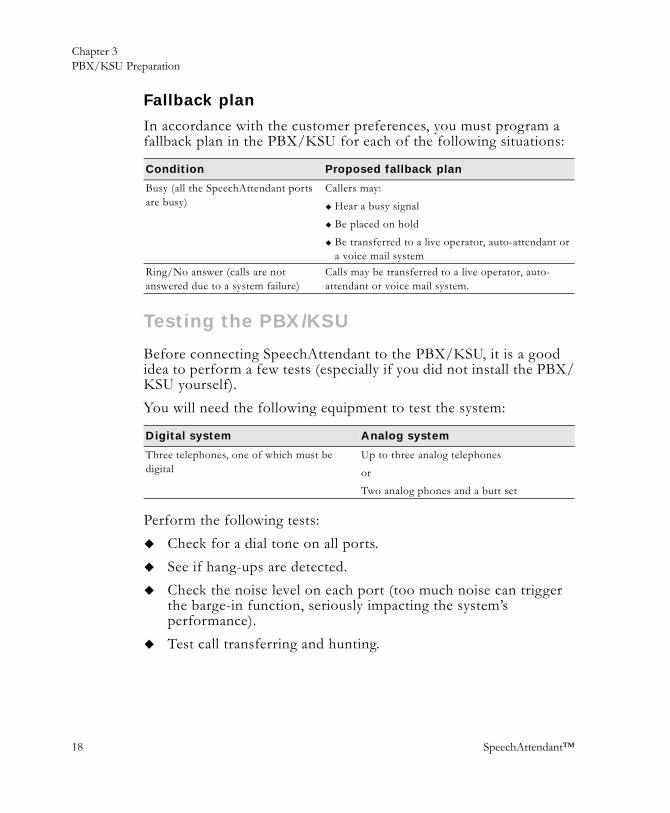
Fallback plan
In accordance with the customer preferences, you must program a fallback plan in the PBX/KSU for each of the following situations:
Testing the PBX/KSU
Before connecting SpeechAttendant to the PBX/KSU, it is a good idea to perform a few tests (especially if you did not install the PBX/KSU yourself).You will need the following equipment to test the system:
Perform the following tests:Check for a dial tone on all ports.See if hang-ups are detected.Check the noise level on each port (too much noise can trigger the barge-in function, seriously impacting the system’s performance).Test call transferring and hunting.
Condition Proposed fallback plan
Busy (all the SpeechAttendant ports are busy)
Callers may:Hear a busy signalBe placed on holdBe transferred to a live operator, auto-attendant or a voice mail system
Ring/No answer (calls are not answered due to a system failure)
Calls may be transferred to a live operator, auto-attendant or voice mail system.
Digital system Analog system
Three telephones, one of which must be digital
Up to three analog telephonesorTwo analog phones and a butt set
Chapter 3 PBX/KSU Preparation
Implementation Guide 19
7
Installing the ATAs
SpeechAttendant systems that must be integrated into Norstar1 environments require special adapters. ScanSoft supplies those ATAs, but you must make sure that there are enough outlets to connect them.
To install an ATA:1 Plug the ATA into an electrical outlet.2 Plug the line from the Norstar KSU into the wall jack of the
ATA.3 Plug the digital phone line into the phone jack of the ATA.4 Plug the analog telephone into the analog device jack of the
ATA.The LED (power indicator) on the front of the ATA box flashes quickly while the ATA synchronizes with the Norstar KSU. The LED then turns solid, indicating that it is in shared mode.
5 If the LED does not stop flashing, connect a 7310 or 7308 phone set to the ATA and make sure that it is programmed as follows:
Auto Set Relocate must be No.Handsfree must be Off.Prime Line must be Intercom.Number of intercom keys must be 2.
1. Norstar software MICS (version 3.0 and up) and DR5 are compatible with SpeechAttendant. Older versions are not supported.
You can connect ATAs to a power bar, but keep in mind that each ATA takes up the space of two outlets on a regular power bar. There are power bars especially designed for ATAs.
Chapter 3 PBX/KSU Preparation
20 SpeechAttendant™
4
Then, without picking up the handset, dial #*#00 on the digital phone connected to the ATA. The LED should stop flashing and remain lit.
6 Without picking up the handset, dial #*#91 on the digital phone connected to the ATA. Flash to Feature Y appears on the display of the digital phone, confirming that both shared and Liaison modes are active.
Repeat steps this procedure for each ATA to be installed.
Connecting the PBX/KSU
After you have programmed the PBX/KSU and tested the ports assigned to SpeechAttendant, you are ready to connect the systems to each other (remembering the modem).
Analog integration
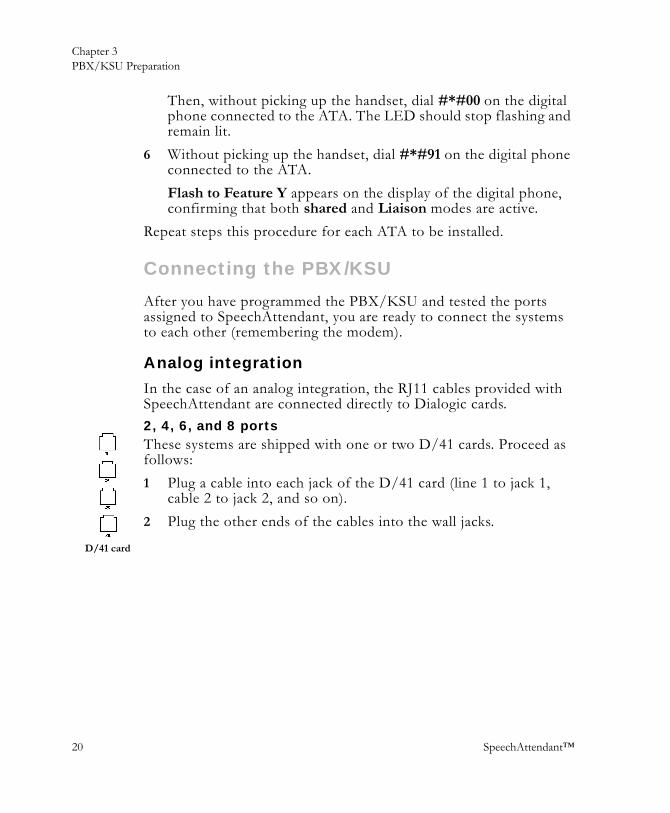
In the case of an analog integration, the RJ11 cables provided with SpeechAttendant are connected directly to Dialogic cards.2, 4, 6, and 8 portsThese systems are shipped with one or two D/41 cards. Proceed as follows:1 Plug a cable into each jack of the D/41 card (line 1 to jack 1,
cable 2 to jack 2, and so on).2 Plug the other ends of the cables into the wall jacks.
D/41 card

Chapter 3 PBX/KSU Preparation
Implementation Guide 21
7
10 ports and moreThese systems are shipped with one, two or three D/120 cards and splitters. Even if they only have six jacks, D/120 cards can accommodate up to twelve lines. Proceed as follows:If the wall jacks are RJ11:
1 Connect a splitter to each jack of the D/120 card, and plug two cables to each splitter.
2 Plug the other ends of the cables into the wall jacks.If the wall jacks are RJ14, splitters are not necessary, since each of these jacks can accommodate two lines:1 Connect one cable in each jack of the D/120 card.2 Plug the other ends of the cables into the wall jacks.
D/120 card
Splitter
Chapter 3 PBX/KSU Preparation
22 SpeechAttendant™
4
Avaya, Meridian or Mitel digital integration
New SpeechAttendant systems1 that must be integrated with a digital Avaya, Meridian or Mitel PBX are equipped with D/42 JCT-U or D/82 JCT-U universal boards. A D/42 board can accommodate up to 4 ports, while a D/82 board can accommodate up to 8 ports. Systems with more than 8 ports are delivered with two D/82 boards (or more), or a combination of D/42 and D/82 boards.For each D/42 or D/82 board, you should receive a 25-pair cable with a male amphenol connector and a breakout box.You can use one of the following methods to connect to the PBX:
Amphenol to amphenol (see below)With the breakout box (mini-patch panel; see page 23)
Connecting amphenol to amphenolThis method is recommended for systems with eight ports or more.
1 Connect the 25-pair cable provided with SpeechAttendant to the D/42 or D/82 board.
2 Connect the male amphenol connector of that cable with your female amphenol connector.
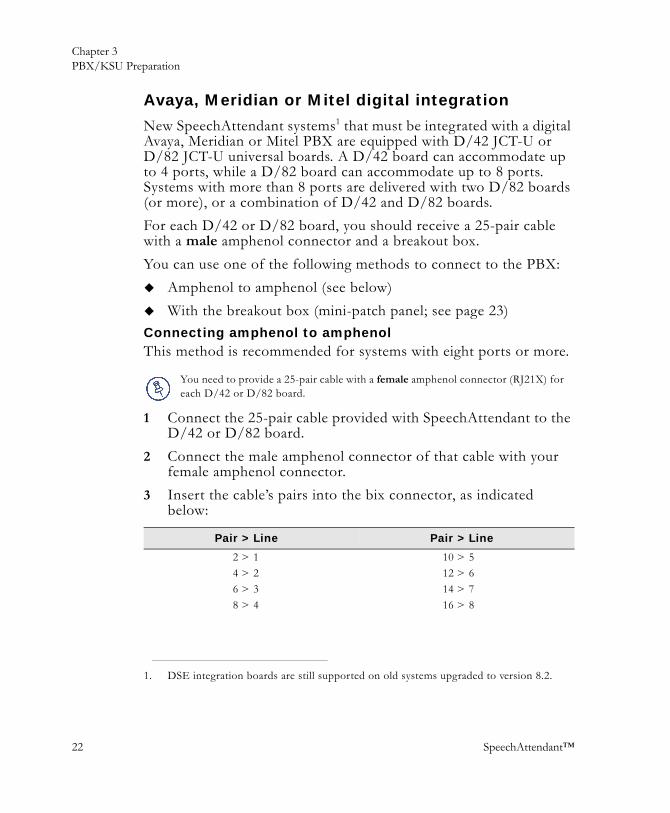
3 Insert the cable’s pairs into the bix connector, as indicated below:
1. DSE integration boards are still supported on old systems upgraded to version 8.2.
You need to provide a 25-pair cable with a female amphenol connector (RJ21X) for each D/42 or D/82 board.
Pair > Line Pair > Line
2 > 1 10 > 54 > 2 12 > 66 > 3 14 > 78 > 4 16 > 8

Chapter 3 PBX/KSU Preparation
Implementation Guide 23
7
4 If SpeechAttendant has more than 8 ports, connect a second 25-pair cable to a second D/42 or D/82 board, connect amphenols together, then connect pairs 2, 4, 6, 8, etc. to lines 9, 10, 11, 12, etc. on the same bix connector.
Connecting with a breakout box1 Connect the 25-pair cable provided with
SpeechAttendant to the D/42 or D/82 board.
2 Connect the amphenol connector of that cable to the breakout box.
3 Plug the RJ11 cables provided with SpeechAttendant into the jacks of the breakout box (line 1 in jack 2, line 2 in jack 4, line 3 in jack 6, and so on).
4 Plug the other end of each RJ11 cable into a wall jack.
Even if the breakout box has 25 jacks, you cannot plug more lines to it than the number of ports supported by the corresponding board (i.e., 4, for an D/42 board, or 8 for a D/82 board).
Chapter 3 PBX/KSU Preparation
24 SpeechAttendant™
4
NEC digital integration
In the case of a NEC digital integration, SpeechAttendant is delivered with a DSE DL3009 integration board, a 25-pair cable with a female amphenol connector, and a breakout box. If the SpeechAttendant system has more than 16 ports, it will be delivered with two DSE boards, two 25-pair cables, and two breakout boxes.You can use one of the following methods to connect to the PBX:
Amphenol to amphenol (see below)With the breakout box (mini-patch panel; see page 25)
Connecting amphenol to amphenolThis method is recommended for systems with eight ports or more.
1 Connect the 25-pair cable provided with SpeechAttendant to the DSE integration board.
2 Connect the female amphenol connector of that cable with your male amphenol connector.
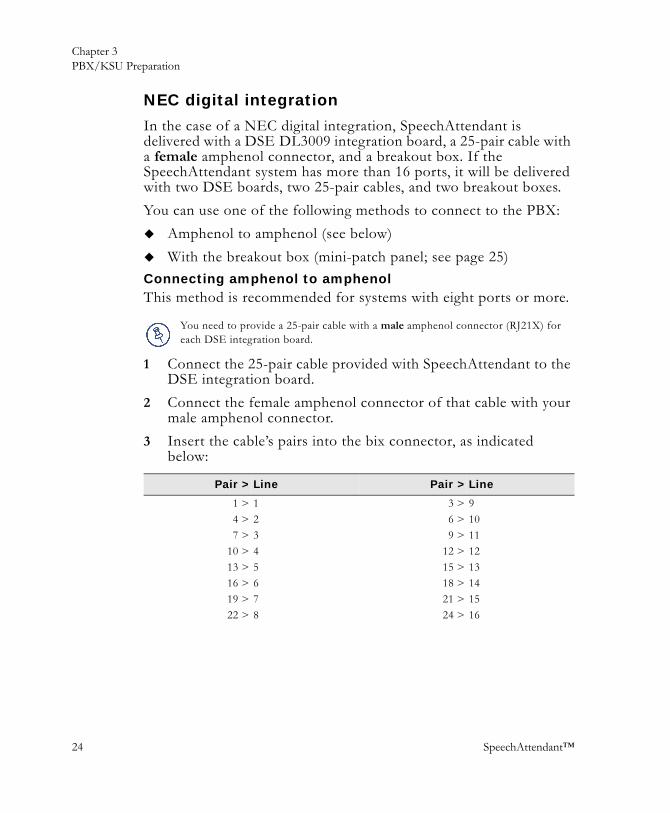
3 Insert the cable’s pairs into the bix connector, as indicated below:
You need to provide a 25-pair cable with a male amphenol connector (RJ21X) for each DSE integration board.
Pair > Line Pair > Line
1 > 1 3 > 94 > 2 6 > 107 > 3 9 > 11
10 > 4 12 > 1213 > 5 15 > 1316 > 6 18 > 1419 > 7 21 > 1522 > 8 24 > 16
Chapter 3 PBX/KSU Preparation
Implementation Guide 25
7
4 If SpeechAttendant has more than 16 ports, connect the second 25-pair cable provided with the system to the second DSE integration board, connect the amphenols together, then plug the remaining lines to a second bix connector as indicated in the previous table.
Connecting with a breakout box1 Connect the 25-pair cable provided with
SpeechAttendant to the DSE integration board.
2 Connect the amphenol connector of that cable to the breakout box.
3 Plug the RJ11 cables provided with SpeechAttendant into the jacks of the breakout box as indicated below:
4 Plug the other end of each RJ11 cable into a wall jack.
Line > Jack Line > Jack
1 > 1 9 > 32 > 4 10 > 63 > 7 11 > 94 > 10 12 > 125 > 13 13 > 156 > 16 14 > 187 > 19 15 > 218 > 22 16 > 24

4

Implementation Guide 27
7
ACD Environment
In Meridian and Avaya digital environments, SpeechAttendant ports can be programmed as ACD agents (as opposed to a hunt group; see page 15). This allows the customer to benefit from the advantages of speech-recognition and automatic call distribution, even if SpeechAttendant is not actually installed in a call center.This chapter contains indications on how to integrate SpeechAttendant in an ACD environment. It also explains how to replace some of the default voice files with other ones that are more suitable for call centers.
Chapter 4 ACD Environment
28 SpeechAttendant™
4
Meridian
This section explains how to integrate SpeechAttendant in a digital Meridian ACD environment. It assumes that you are familiar with programming a Meridian 1 PBX. Refer to the Nortel Networks documentation for more information.
Introduction
Integrating SpeechAttendant in a Meridian ACD environment involves the following steps:
1 Identifying the ACD software package included with the PBX (see below)
2 Programming the ACD queue (see page 30)3 Programming the ports as ACD agents (see page 31)4 Configuring the settings related to automatic call
distribution (see page 32)
In the PBX
In the SpeechAttendant
configuration panel
Chapter 4 ACD Environment
Implementation Guide 29
7
Identifying the ACD software
Meridian 1 PBXs may be shipped with basic ACD, ACD-A, ACD-B, ACD-C, ACD-D, EOVF, and NACD packages.As the method for programming the ACD queue can vary accordingly, you must first determine which ACD package is installed.To do so:1 Load overlay program 22.2 At the REQ prompt, enter PRT, then at the TYPE prompt, enter
ISS.This will tell you the release and issue of the software package.
3 At the REQ prompt, enter PRT, then at the TYPE prompt, enter PKG.This will tell you which package is installed.
4 At the REQ prompt, enter PRT, then at the TYPE prompt, enter SLT.This will tell you the number of licenses purchased for TNs, ACD, DChannel, etc.
5 Load overlay program 23.6 At the REQ prompt, enter PRT, then at the TYPE prompt, enter
SCB.If you get an SCH0721 code, you know that the “Position ID” mode is used.If the “Agent ID” mode is used, you get the lower and upper boundaries for agent IDs (see “Nortel-M1 Agent ID Mode” and “Agent ID -Port x” on page 32).
For the “Agent ID” mode to be available, the PBX must be equipped with the ACD-C or ACD-D package.
Chapter 4 ACD Environment
30 SpeechAttendant™
4
Programming the ACD queue
Programming an ACD queue is done in overlay program 23. Enter the responses indicated for the prompts listed below (certain prompts may not appear depending on the package installed). Leave the default value for prompts that do not appear in the list (simply press Enter to skip over them).
Prompt Response
REQ NEWTYPE ACDACDN Enter up to 4 digits for the ACD queue directory number, for example, 5555.MAXP Enter the number of ports.NCFW Enter the directory number that calls should be transferred to when all the ports are logged
off or in case of a system failure.RTQT Specify a number of rings (3 to 5 is recommended) after which ports should be automatically
logged off.RTQO MSBOVTH Enter the number of calls waiting that will trigger overflow.TOFT Enter a number from 2 to 1800. This is the time, in seconds, that the call waiting in queue
will go to overflow.OVDN Enter the overflow directory number.IFDN Enter the interflow directory number.AENI YESHOML NO, otherwise the SpeechAttendant port will log off after each hang-up.
Note that the HOML prompt only appears if a schedule block (SCB) exists.RPRT YES, if customer wants to capture statistics on Meridian MAX; otherwise, NO.
Chapter 4 ACD Environment
Implementation Guide 31
7
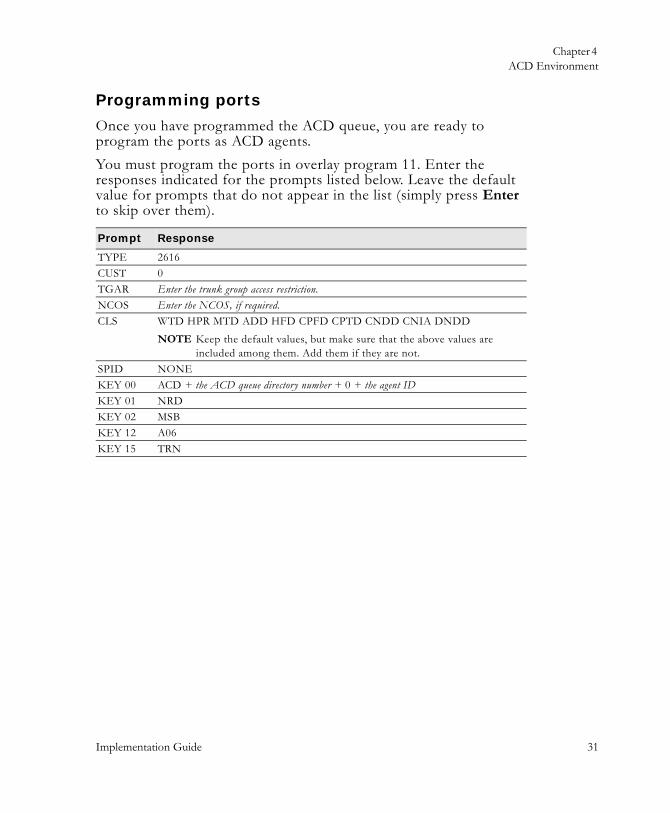
Programming ports
Once you have programmed the ACD queue, you are ready to program the ports as ACD agents.You must program the ports in overlay program 11. Enter the responses indicated for the prompts listed below. Leave the default value for prompts that do not appear in the list (simply press Enter to skip over them).
Prompt Response
TYPE 2616CUST 0TGAR Enter the trunk group access restriction.NCOS Enter the NCOS, if required.CLS WTD HPR MTD ADD HFD CPFD CPTD CNDD CNIA DNDD
NOTE Keep the default values, but make sure that the above values are included among them. Add them if they are not.
SPID NONEKEY 00 ACD + the ACD queue directory number + 0 + the agent IDKEY 01 NRDKEY 02 MSBKEY 12 A06KEY 15 TRN
Chapter 4 ACD Environment
32 SpeechAttendant™
4
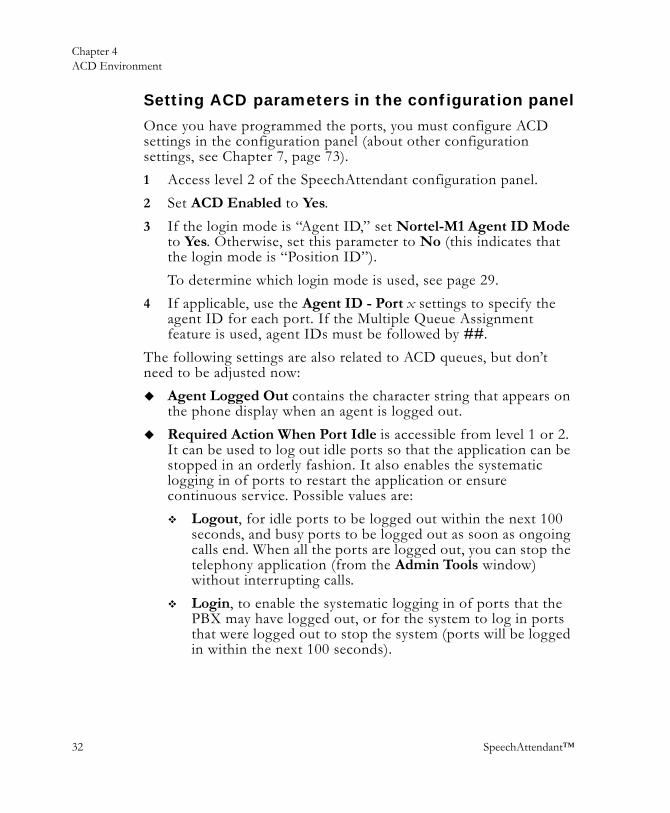
Setting ACD parameters in the configuration panel
Once you have programmed the ports, you must configure ACD settings in the configuration panel (about other configuration settings, see Chapter 7, page 73).1 Access level 2 of the SpeechAttendant configuration panel.2 Set ACD Enabled to Yes.3 If the login mode is “Agent ID,” set Nortel-M1 Agent ID Mode
to Yes. Otherwise, set this parameter to No (this indicates that the login mode is “Position ID”).To determine which login mode is used, see page 29.
4 If applicable, use the Agent ID - Port x settings to specify the agent ID for each port. If the Multiple Queue Assignment feature is used, agent IDs must be followed by ##.
The following settings are also related to ACD queues, but don’t need to be adjusted now:
Agent Logged Out contains the character string that appears on the phone display when an agent is logged out.Required Action When Port Idle is accessible from level 1 or 2. It can be used to log out idle ports so that the application can be stopped in an orderly fashion. It also enables the systematic logging in of ports to restart the application or ensure continuous service. Possible values are:
Logout, for idle ports to be logged out within the next 100 seconds, and busy ports to be logged out as soon as ongoing calls end. When all the ports are logged out, you can stop the telephony application (from the Admin Tools window) without interrupting calls.Login, to enable the systematic logging in of ports that the PBX may have logged out, or for the system to log in ports that were logged out to stop the system (ports will be logged in within the next 100 seconds).

Chapter 4 ACD Environment
Implementation Guide 33
7
Avaya
This section explains how to integrate SpeechAttendant in a digital Avaya ACD environment with expert agent selection (EAS) enabled1. It assumes that you are familiar with programming an Avaya Definity PBX. Refer to the Avaya documentation for more information.
Introduction
Integrating SpeechAttendant in an Avaya ACD environment involves the following steps:
1 Creating a hunt group (see below)2 Programming agents (see page 34)3 Programming stations (see page 34)4 Programming a call vector (see page 35)5 Programming a vector directory number (see
page 35)6 Configuring the settings related to automatic
call distribution (see page 36)
Creating a hunt group
You must create a hunt group for SpeechAttendant. To do so:1 In the ACD, Queue, and Vector fields, type y.2 In the Group type field, type ead-mia.3 In the Skill field, type y.4 Set Timed ACW interval to 1 second.
1. SpeechAttendant is compatible with 2-wire Avaya line cards. Integration with 4-wire line cards has not been tested.
In the PBX
In the SpeechAttendant
configuration panel
Chapter 4 ACD Environment
34 SpeechAttendant™
4
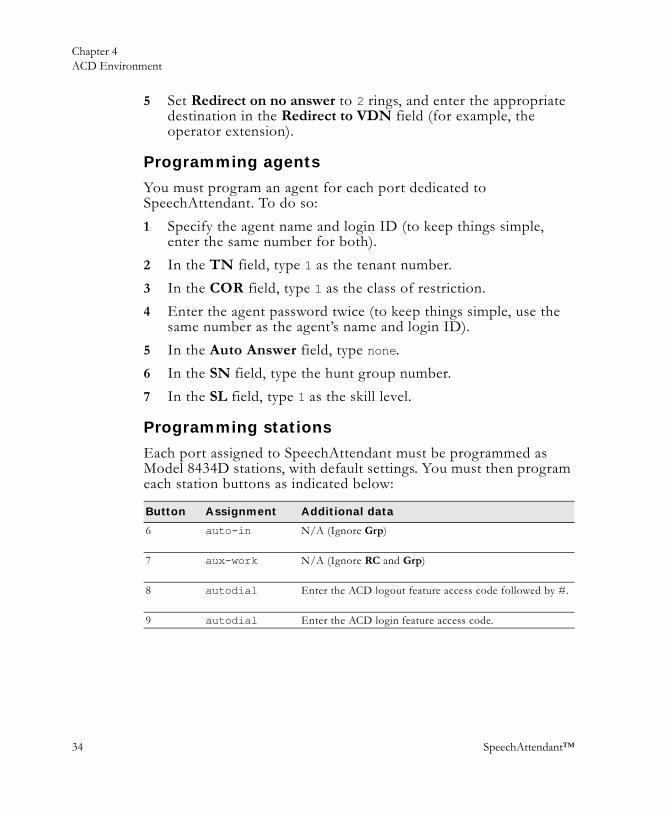
5 Set Redirect on no answer to 2 rings, and enter the appropriate destination in the Redirect to VDN field (for example, the operator extension).
Programming agents
You must program an agent for each port dedicated to SpeechAttendant. To do so:1 Specify the agent name and login ID (to keep things simple,
enter the same number for both).2 In the TN field, type 1 as the tenant number.3 In the COR field, type 1 as the class of restriction.4 Enter the agent password twice (to keep things simple, use the
same number as the agent’s name and login ID).5 In the Auto Answer field, type none.6 In the SN field, type the hunt group number.7 In the SL field, type 1 as the skill level.
Programming stations
Each port assigned to SpeechAttendant must be programmed as Model 8434D stations, with default settings. You must then program each station buttons as indicated below:
Button Assignment Additional data
6 auto-in N/A (Ignore Grp)
7 aux-work N/A (Ignore RC and Grp)
8 autodial Enter the ACD logout feature access code followed by #.
9 autodial Enter the ACD login feature access code.
Chapter 4 ACD Environment
Implementation Guide 35
7
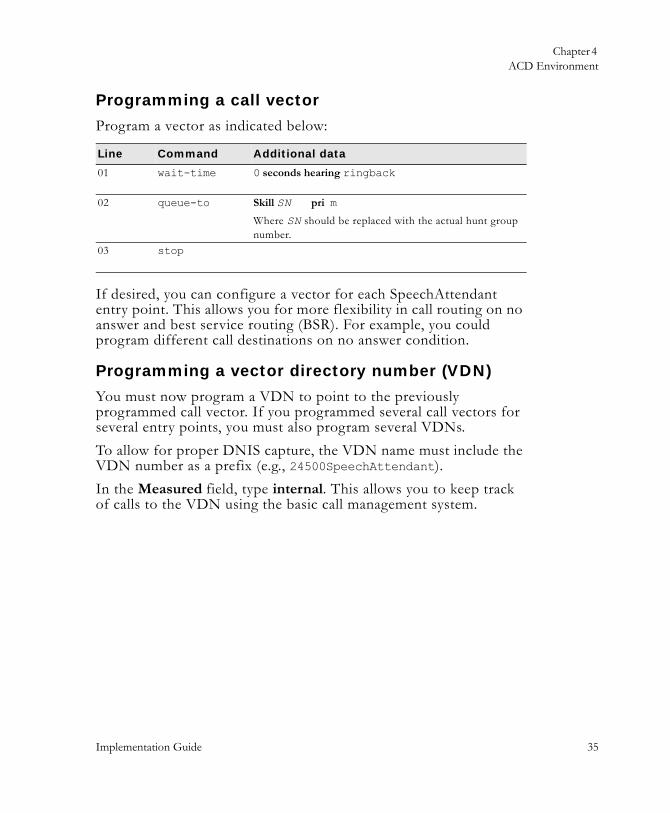
Programming a call vector
Program a vector as indicated below:
If desired, you can configure a vector for each SpeechAttendant entry point. This allows you for more flexibility in call routing on no answer and best service routing (BSR). For example, you could program different call destinations on no answer condition.
Programming a vector directory number (VDN)
You must now program a VDN to point to the previously programmed call vector. If you programmed several call vectors for several entry points, you must also program several VDNs.To allow for proper DNIS capture, the VDN name must include the VDN number as a prefix (e.g., 24500SpeechAttendant).In the Measured field, type internal. This allows you to keep track of calls to the VDN using the basic call management system.
Line Command Additional data
01 wait-time 0 seconds hearing ringback
02 queue-to Skill SN pri m
Where SN should be replaced with the actual hunt group number.
03 stop
Chapter 4 ACD Environment
36 SpeechAttendant™
4
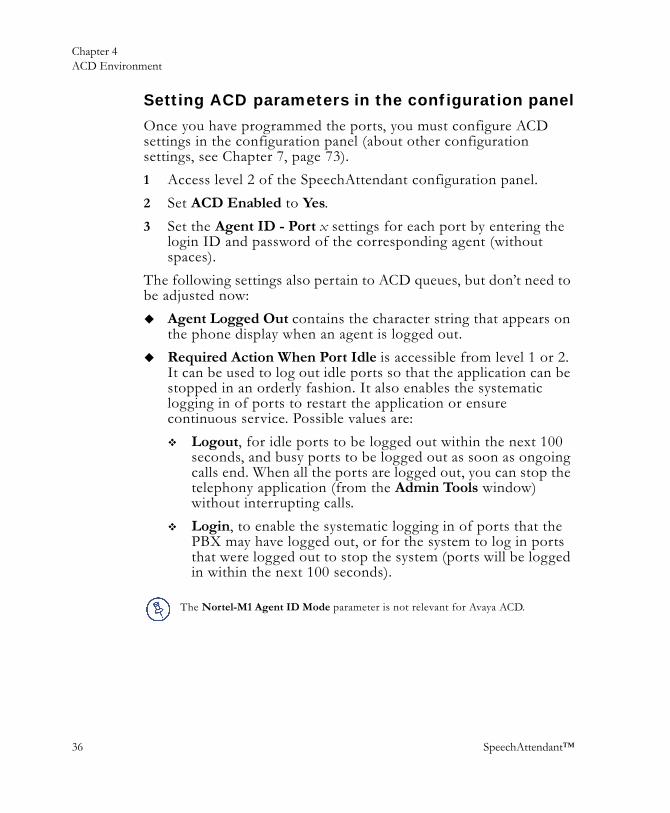
Setting ACD parameters in the configuration panel
Once you have programmed the ports, you must configure ACD settings in the configuration panel (about other configuration settings, see Chapter 7, page 73).1 Access level 2 of the SpeechAttendant configuration panel.2 Set ACD Enabled to Yes.3 Set the Agent ID - Port x settings for each port by entering the
login ID and password of the corresponding agent (without spaces).
The following settings also pertain to ACD queues, but don’t need to be adjusted now:
Agent Logged Out contains the character string that appears on the phone display when an agent is logged out.Required Action When Port Idle is accessible from level 1 or 2. It can be used to log out idle ports so that the application can be stopped in an orderly fashion. It also enables the systematic logging in of ports to restart the application or ensure continuous service. Possible values are:
Logout, for idle ports to be logged out within the next 100 seconds, and busy ports to be logged out as soon as ongoing calls end. When all the ports are logged out, you can stop the telephony application (from the Admin Tools window) without interrupting calls.Login, to enable the systematic logging in of ports that the PBX may have logged out, or for the system to log in ports that were logged out to stop the system (ports will be logged in within the next 100 seconds).
The Nortel-M1 Agent ID Mode parameter is not relevant for Avaya ACD.
Chapter 4 ACD Environment
Implementation Guide 37
7
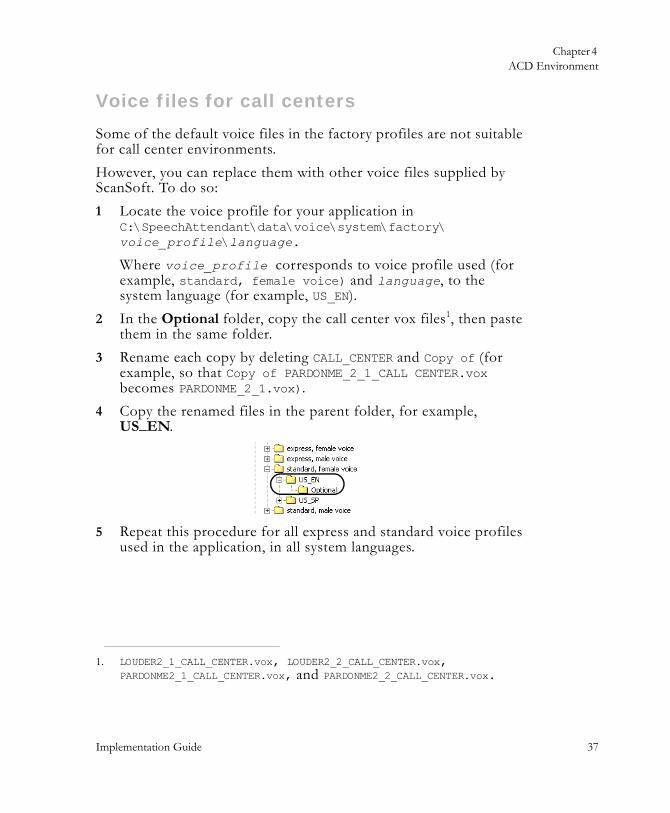
Voice files for call centers
Some of the default voice files in the factory profiles are not suitable for call center environments.However, you can replace them with other voice files supplied by ScanSoft. To do so:1 Locate the voice profile for your application in
C:\SpeechAttendant\data\voice\system\factory\voice_profile\language.
Where voice_profile corresponds to voice profile used (for example, standard, female voice) and language, to the system language (for example, US_EN).
2 In the Optional folder, copy the call center vox files1, then paste them in the same folder.
3 Rename each copy by deleting CALL_CENTER and Copy of (for example, so that Copy of PARDONME_2_1_CALL CENTER.vox becomes PARDONME_2_1.vox).
4 Copy the renamed files in the parent folder, for example, US_EN.
5 Repeat this procedure for all express and standard voice profiles used in the application, in all system languages.
1. LOUDER2_1_CALL_CENTER.vox, LOUDER2_2_CALL_CENTER.vox, PARDONME2_1_CALL_CENTER.vox, and PARDONME2_2_CALL_CENTER.vox.

4

Implementation Guide 39
7
Business Communications
SpeechAttendant can be integrated to Nortel Networks BCM. This chapter contains all the necessary information to do so.
Manager (BCM)
Chapter 55 Business Communications Manager (BCM)
400 SpeechAttendant™
4
Introduction
Integration to Nortel BCM requires a Dialogic voice card, analog lines to BCM, and LAN connectivity to BCM. The whole process involves the following steps:1 Gathering the information needed and connecting
SpeechAttendant to its dedicated analog lines (see below)2 Downloading and installing Unified Manager Client on the BCM
server (see page 43)3 Checking the configuration of the directory numbers dedicated
to SpeechAttendant (see page 46)4 Programming a hunt group for SpeechAttendant (see page 49)5 Configuring LAN CTE (see page 51)6 Downloading and installing LAN CTE Client on the
SpeechAttendant server (see page 53)
PBX, voice card and transfer mode
SpeechAttendant must be equipped with a Dialogic voice card such as D/41 JCT-LS. When activating the system’s license (see page 11), verify that the PBX and telephony card selected in the Config Setup windows are correct (respectively BCM_TAPI and D/41JCT-LS), and set Default Transfer Mode to Unsupervised.
Analog lines
To enable BCM connection, you must provide one analog line per SpeechAttendant port.The analog lines may come either from an internal ATA line card or from Nortel ATA-2 adapters. The internal ATA line card is installed in the BCM chassis and provides 8 analog lines that can be connected to the Dialogic card. The ATA-2 adapters are small modem-like boxes with 2 RJ-11 connectors. One of them connects to a digital line card in the BCM and the other one provides an analog line that can be connected to the Dialogic card.
Chapter 5 Business Communications Manager (BCM)
Implementation Guide 411
7
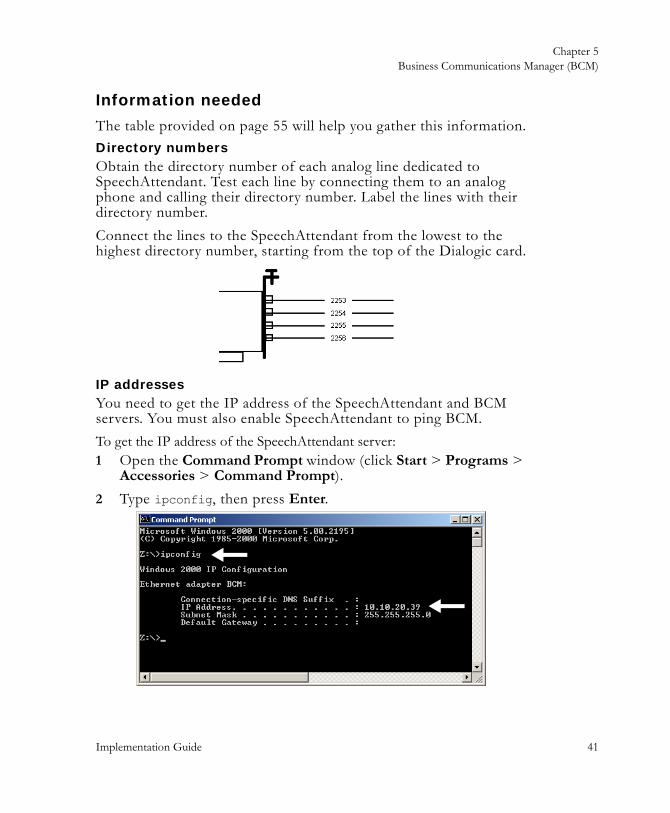
Information needed
The table provided on page 55 will help you gather this information.Directory numbersObtain the directory number of each analog line dedicated to SpeechAttendant. Test each line by connecting them to an analog phone and calling their directory number. Label the lines with their directory number.Connect the lines to the SpeechAttendant from the lowest to the highest directory number, starting from the top of the Dialogic card.
IP addressesYou need to get the IP address of the SpeechAttendant and BCM servers. You must also enable SpeechAttendant to ping BCM.To get the IP address of the SpeechAttendant server:1 Open the Command Prompt window (click Start > Programs >
Accessories > Command Prompt).2 Type ipconfig, then press Enter.
Chapter 55 Business Communications Manager (BCM)
422 SpeechAttendant™
4
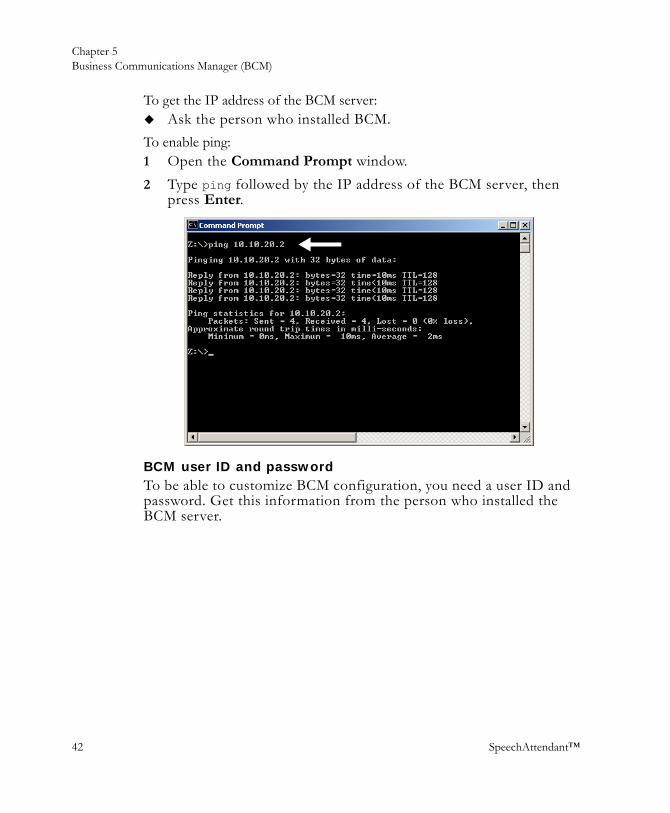
To get the IP address of the BCM server:Ask the person who installed BCM.
To enable ping:1 Open the Command Prompt window.2 Type ping followed by the IP address of the BCM server, then
press Enter.
BCM user ID and passwordTo be able to customize BCM configuration, you need a user ID and password. Get this information from the person who installed the BCM server.
Chapter 55 Business Communications Manager (BCM)
Implementation Guide 433
7
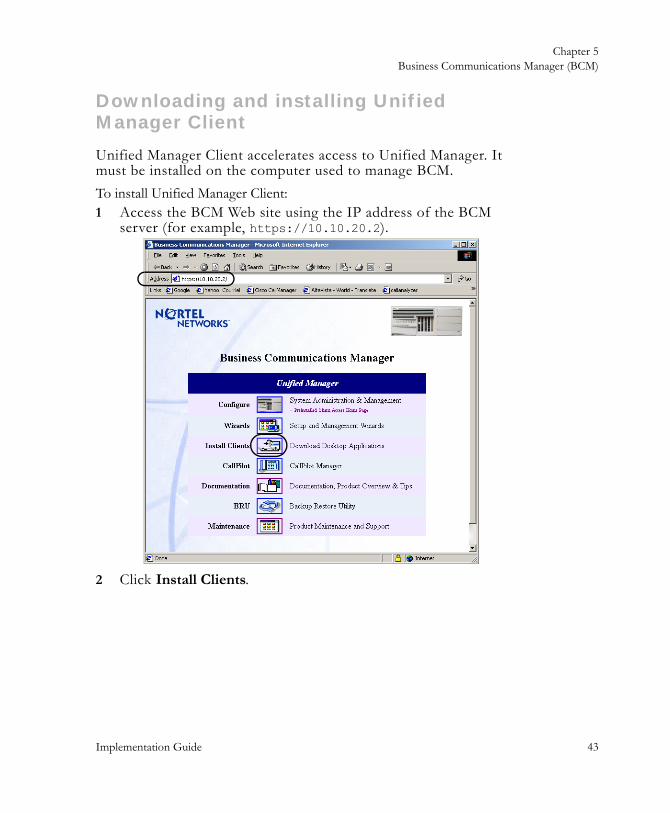
Downloading and installing Unified Manager Client
Unified Manager Client accelerates access to Unified Manager. It must be installed on the computer used to manage BCM.To install Unified Manager Client:1 Access the BCM Web site using the IP address of the BCM
server (for example, https://10.10.20.2).
2 Click Install Clients.

Chapter 55 Business Communications Manager (BCM)
44 SpeechAttendant™
4
3 Click Unified Manager Java Class Library.
Chapter 55 Business Communications Manager (BCM)
Implementation Guide 455
7
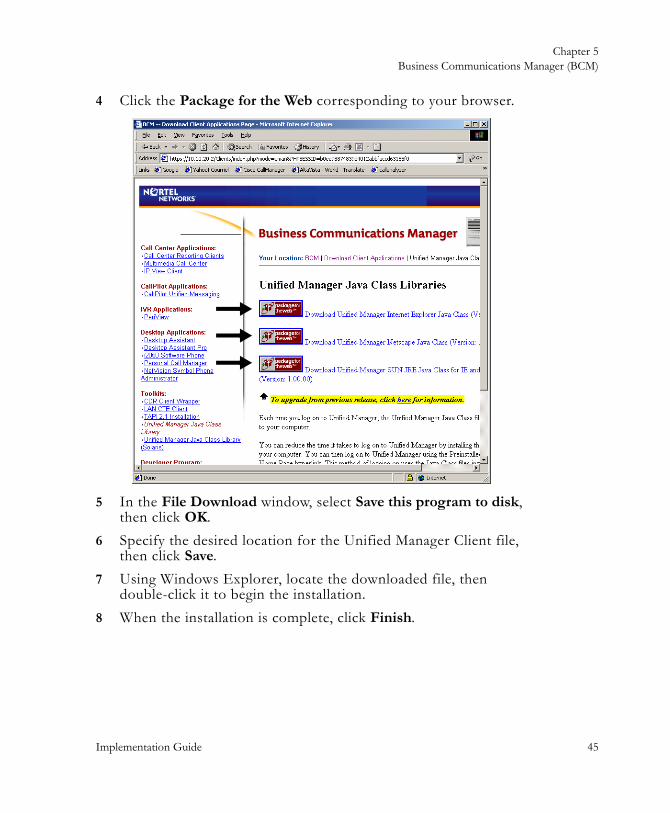
4 Click the Package for the Web corresponding to your browser.
5 In the File Download window, select Save this program to disk, then click OK.
6 Specify the desired location for the Unified Manager Client file, then click Save.
7 Using Windows Explorer, locate the downloaded file, then double-click it to begin the installation.
8 When the installation is complete, click Finish.
Chapter 55Business Communications Manager (BCM)
46 SpeechAttendant™
4
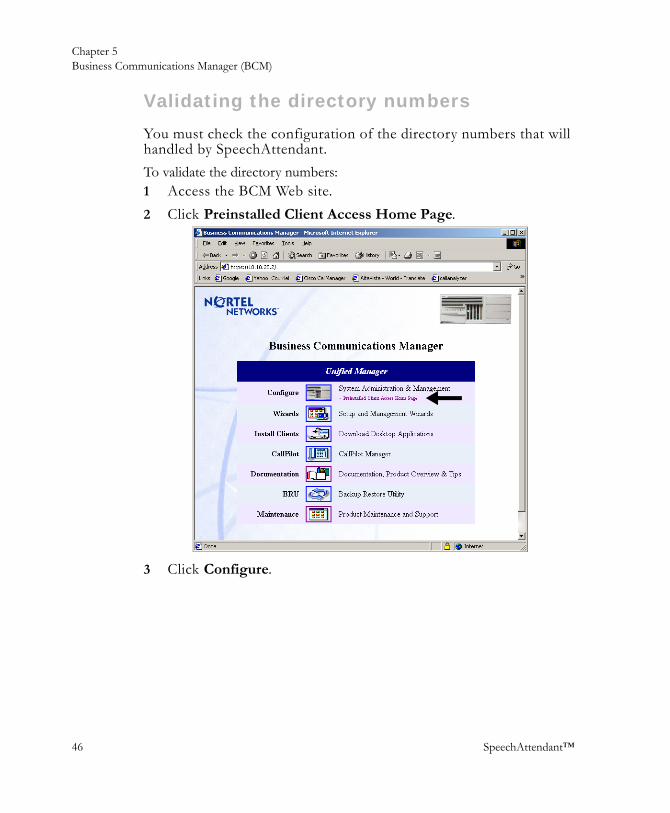
Validating the directory numbers
You must check the configuration of the directory numbers that will handled by SpeechAttendant.To validate the directory numbers:1 Access the BCM Web site.2 Click Preinstalled Client Access Home Page.
3 Click Configure.
Chapter 55 Business Communications Manager (BCM)
Implementation Guide 47
7
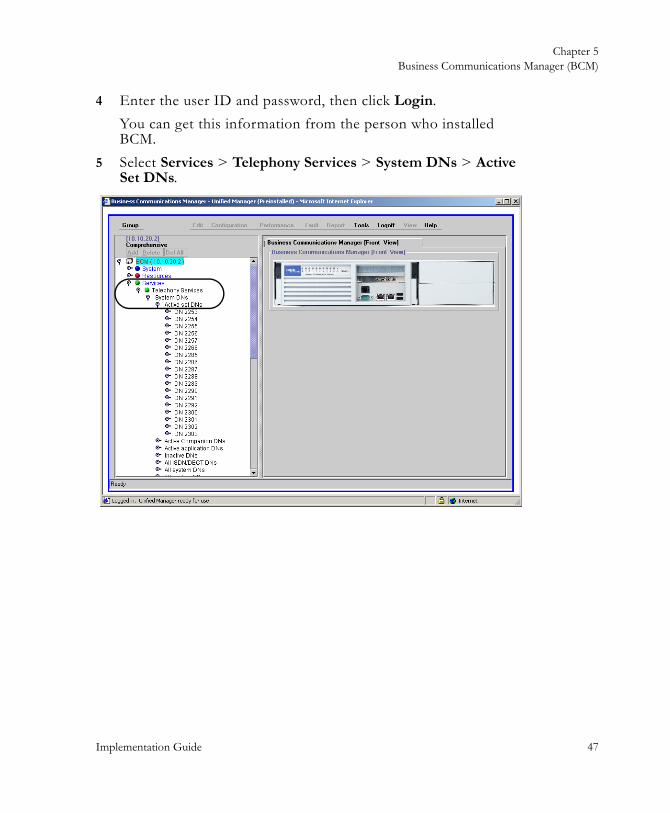
4 Enter the user ID and password, then click Login.You can get this information from the person who installed BCM.
5 Select Services > Telephony Services > System DNs > Active Set DNs.
Chapter 55 Business Communications Manager (BCM)
488 SpeechAttendant™
4
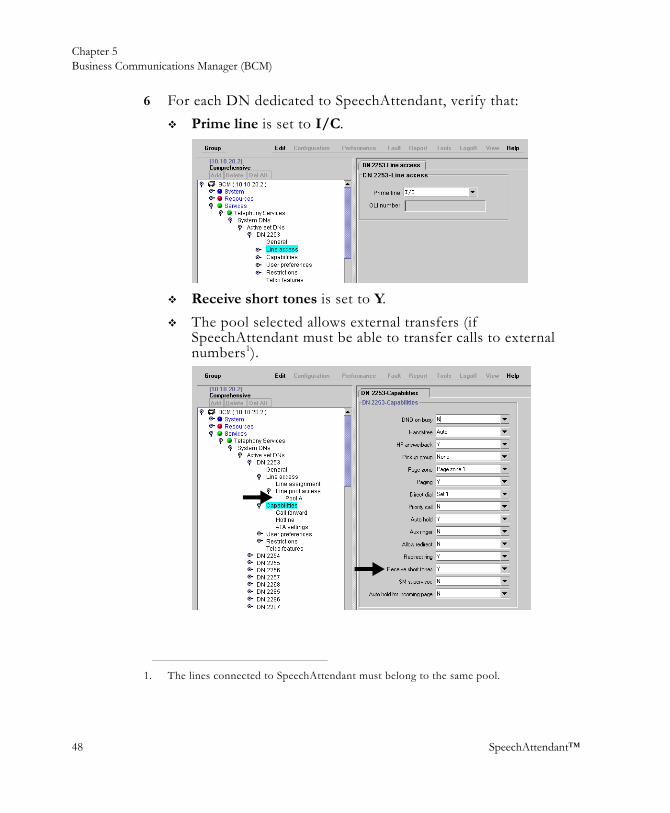
6 For each DN dedicated to SpeechAttendant, verify that:Prime line is set to I/C.
Receive short tones is set to Y.The pool selected allows external transfers (if SpeechAttendant must be able to transfer calls to external numbers1).
1. The lines connected to SpeechAttendant must belong to the same pool.
Chapter 55Business Communications Manager (BCM)
Implementation Guide 499
7
Defining a hunt group for SpeechAttendant
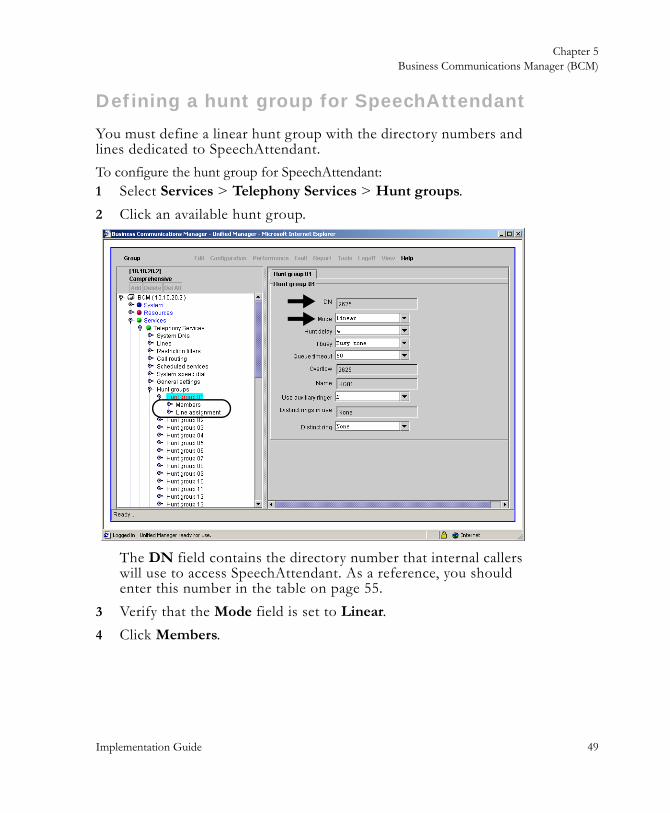
You must define a linear hunt group with the directory numbers and lines dedicated to SpeechAttendant.To configure the hunt group for SpeechAttendant:1 Select Services > Telephony Services > Hunt groups.2 Click an available hunt group.
The DN field contains the directory number that internal callers will use to access SpeechAttendant. As a reference, you should enter this number in the table on page 55.
3 Verify that the Mode field is set to Linear.4 Click Members.
Chapter 55 Business Communications Manager (BCM)
500 SpeechAttendant™
4
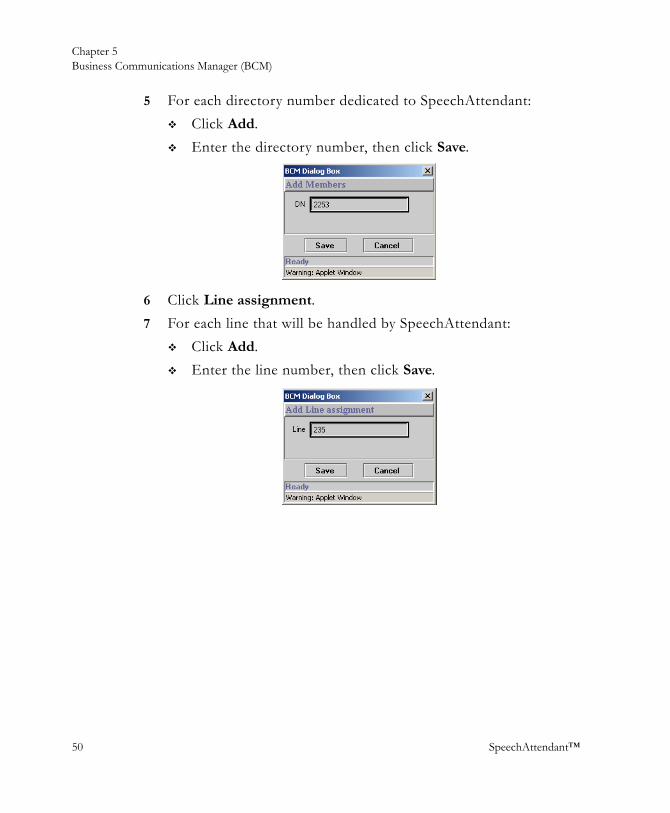
5 For each directory number dedicated to SpeechAttendant:Click Add.Enter the directory number, then click Save.
6 Click Line assignment.7 For each line that will be handled by SpeechAttendant:
Click Add.Enter the line number, then click Save.
Chapter 5 Business Communications Manager (BCM)
Implementation Guide 511
7
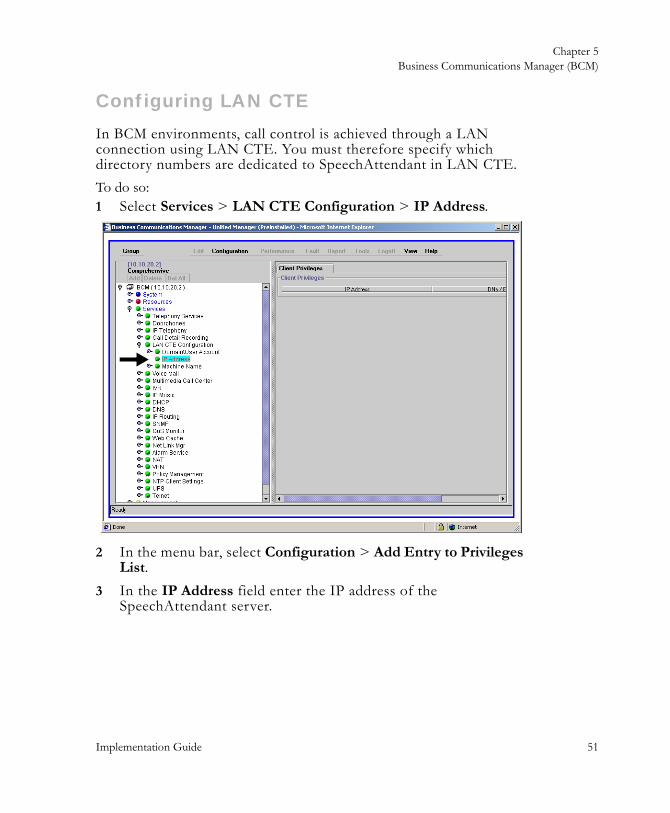
Configuring LAN CTE
In BCM environments, call control is achieved through a LAN connection using LAN CTE. You must therefore specify which directory numbers are dedicated to SpeechAttendant in LAN CTE.To do so:1 Select Services > LAN CTE Configuration > IP Address.
2 In the menu bar, select Configuration > Add Entry to Privileges List.
3 In the IP Address field enter the IP address of the SpeechAttendant server.
Chapter 55Business Communications Manager (BCM)
5252 SpeechAttendant™
4
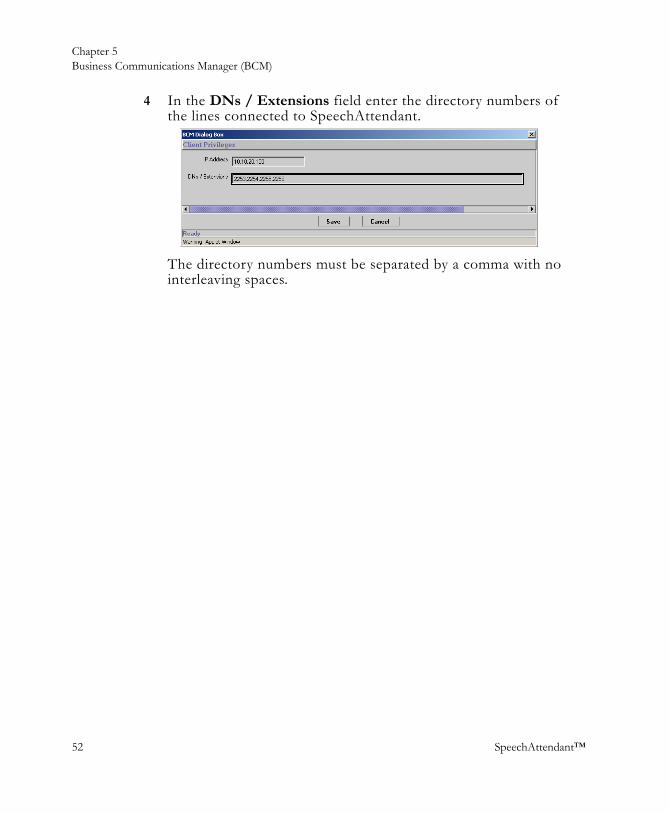
4 In the DNs / Extensions field enter the directory numbers of the lines connected to SpeechAttendant.
The directory numbers must be separated by a comma with no interleaving spaces.
Chapter 5 5Business Communications Manager (BCM)
Implementation Guide 5353
7
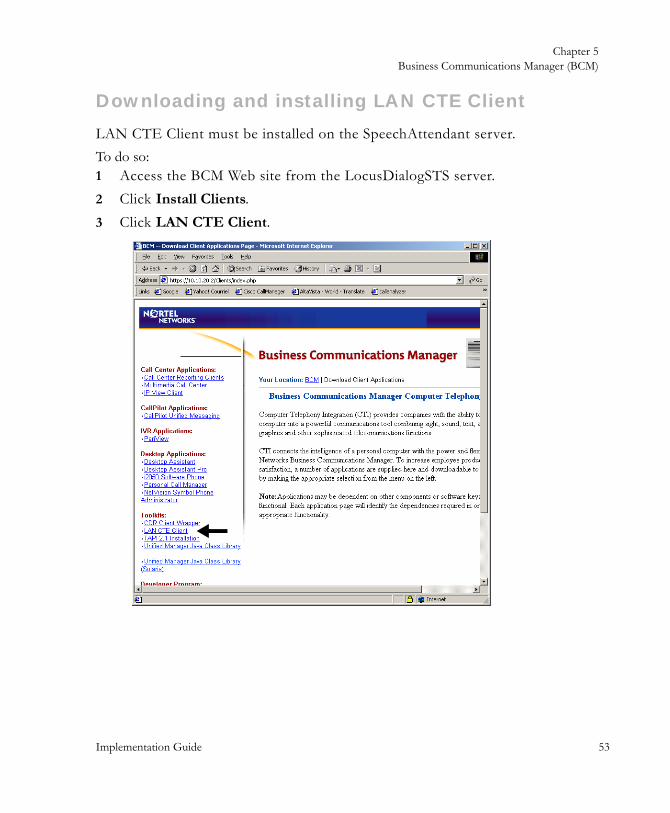
Downloading and installing LAN CTE Client
LAN CTE Client must be installed on the SpeechAttendant server.To do so:1 Access the BCM Web site from the LocusDialogSTS server.2 Click Install Clients.3 Click LAN CTE Client.
Chapter 55 Business Communications Manager (BCM)
554 SpeechAttendant™
4
4 Click Package for the Web.5 In the File Download window, select Save this program to disk,
then click OK.6 Specify the desired location for the LAN CTE Client file, then
click Save.7 Using Windows Explorer, locate the downloaded file, then
double-click it.8 Accept the terms in the license agreement, then click Next.9 Click Next again, then click Yes.10 Click Yes again for the Telephony Service Provider to be
installed on your system.11 Enter the IP address of the BCM server, then click Yes.12 Click Yes again to confirm the IP address of the BCM server.13 Select Yes, I want to restart my computer now, then click Finish.14 Click Next.15 Click Yes.16 Select Yes, I want to restart my computer now, then click Finish.You can now proceed with the implementation of SpeechAttendant.
Chapter 55 Business Communications Manager (BCM)
Implementation Guide 5555
7
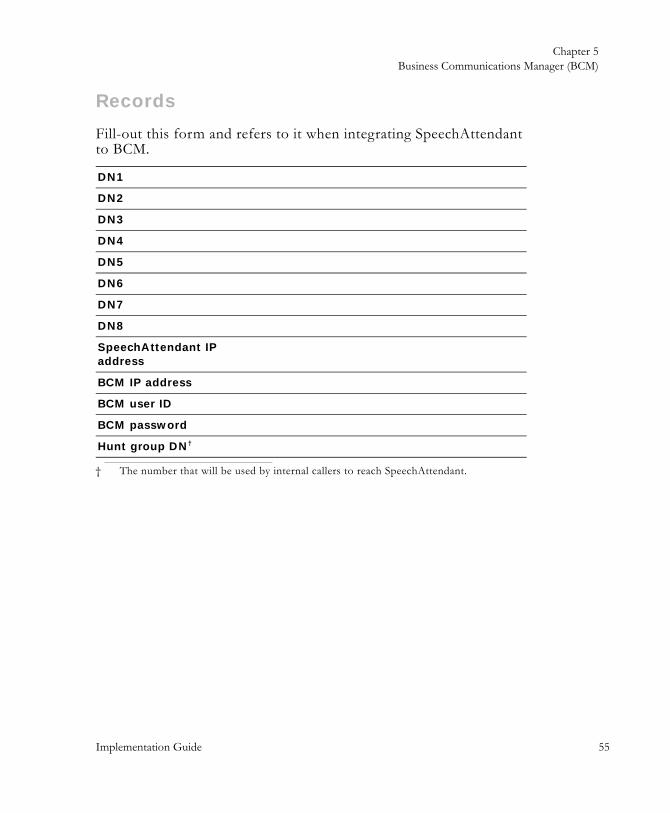
Records
Fill-out this form and refers to it when integrating SpeechAttendant to BCM.
DN1
DN2
DN3
DN4
DN5
DN6
DN7
DN8
SpeechAttendant IP address
BCM IP address
BCM user ID
BCM password
Hunt group DN†
† The number that will be used by internal callers to reach SpeechAttendant.

4
Implementation Guide 557
7
Multi-server application
A SpeechAttendant application can consist of two or more computers connected so that they operate together.
Server clustering ensures that calls will be answered withoutinterruption in the event of a system failure. Clustering also allows for call sharing between servers.
This chapter contains all the information pertaining to the implementation of a multi-server environment.
Chapter 6 Multi-server application
5588 SpeechAttendant™
4
Introduction
The computers to be connected in a cluster must be equipped with: Windows 2000 Server operating system, service pack 4SQL Server 2000 Standard Edition, service pack 3
If MSDE is installed on those computers, you must un-install it and install SQL Server instead.The global procedure for configuring a server cluster involves:1 Connecting the master and slave servers to the network, with
write access rights to each other1
2 Programming the PBX for a multi-server environment (see page 59)
3 Activating the license on each server (see page 11)4 Removing the SpeechAttendant database from the slave server
(see page 60)5 Configuring replication (see page 61)6 Identifying servers and defining port assignment (see page 71)You can then proceed with the application design and initial load of the directory, as explained in the Administration Guide. This can be done on any server: all changes made to the application are automatically reflected on the other server within seconds.It is then recommended to test PBX integration and SpeechAttendant functions as explained in Chapter 9, page 115.
1. It is also possible to connect the slave server to the master using a network crossover cable.
Chapter 6 Multi-server application
Implementation Guide 5959
7
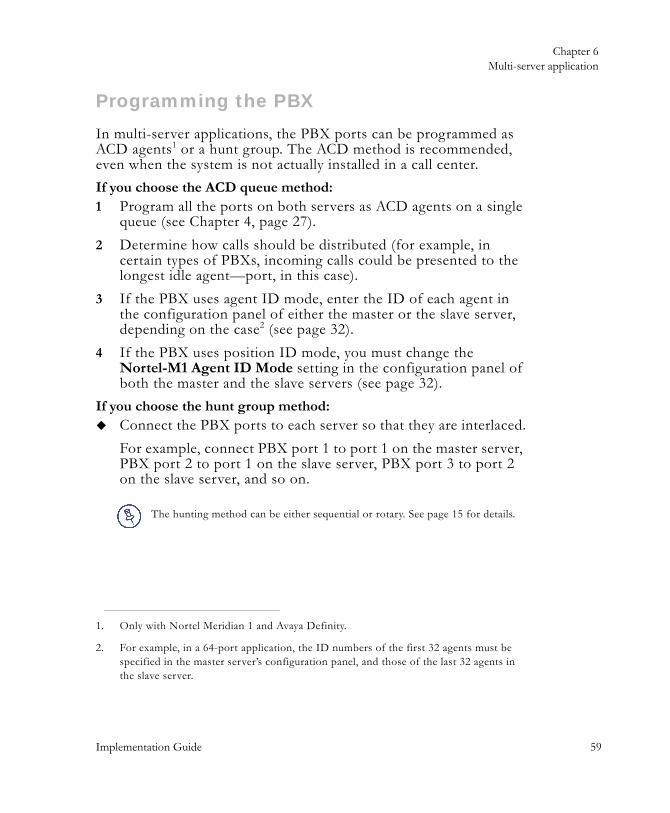
Programming the PBX
In multi-server applications, the PBX ports can be programmed as ACD agents1 or a hunt group. The ACD method is recommended, even when the system is not actually installed in a call center.If you choose the ACD queue method:1 Program all the ports on both servers as ACD agents on a single
queue (see Chapter 4, page 27).2 Determine how calls should be distributed (for example, in
certain types of PBXs, incoming calls could be presented to the longest idle agent—port, in this case).
3 If the PBX uses agent ID mode, enter the ID of each agent in the configuration panel of either the master or the slave server, depending on the case2 (see page 32).
4 If the PBX uses position ID mode, you must change the Nortel-M1 Agent ID Mode setting in the configuration panel of both the master and the slave servers (see page 32).
If you choose the hunt group method:Connect the PBX ports to each server so that they are interlaced.For example, connect PBX port 1 to port 1 on the master server, PBX port 2 to port 1 on the slave server, PBX port 3 to port 2 on the slave server, and so on.
1. Only with Nortel Meridian 1 and Avaya Definity.
2. For example, in a 64-port application, the ID numbers of the first 32 agents must be specified in the master server’s configuration panel, and those of the last 32 agents in the slave server.
The hunting method can be either sequential or rotary. See page 15 for details.
Chapter 6 Multi-server application
600 SpeechAttendant™
4
Removing the database from the slave server
Once you have installed the companion programs, OpenSpeech Recognizer, Speechify TTS (if included in the license) and SpeechAttendant core software on the slave server, you must remove the SpeechAttendant database from this server.To do so:1 Make sure that you are on the slave server.2 Stop the telephony application from the Admin Tools window.3 Open the Command Prompt window (click Start > Programs >
Accessories > Command Prompt).4 Type osql -Usa -Pdatabase_password, then press Enter.
Where database_password must be replaced with the actual password for accessing the SQL Server databases. If you don’t know this password, contact the Customer Service Center.
5 At 1> command prompt, type drop database liaison, then press Enter.
6 At 2> command prompt, type go, then press Enter.7 At 1> command prompt, type drop database sum_sts_db, then
press Enter.8 At 2> command prompt, type go, then press Enter.9 At 1> command prompt, type quit, then press Enter.10 Close the Command Prompt window.

Chapter 6 Multi-server application
Implementation Guide 611
7
Configuring replication
The two main steps of this procedure consist in configuring the publisher (that is, the master server) and configuring the subscriber (the slave server).
Configuring the publisher
This involves the following tasks:1 Publishing liaison database (see below)2 Publishing sum_sts_db database (see page 64)3 Publishing files from the master server (see page 66)Publishing liaison database1 Make sure that you are on the master server.2 Click Start > Programs > Microsoft SQL Server > Enterprise
Manager.3 In Console Root\Microsoft
SQL Servers\SQL Server Group\(local) (WindowsNT)\Replication, right-click Publications, then select New Publication.The Create Publication Wizard appears.
4 Check Show advanced options in this wizard, then click Next.
5 When prompted to select a distributor, select Make ‘name_of_master’ its own Distributor, then click Next.Where name_of_master stands for the actual name of the master server.
Chapter 6 Multi-server application
622 SpeechAttendant™
4
6 Select Yes, configure the SQL Server Agent service to start automatically, then click Next.
7 Without modifying the proposed snapshot folder (\\Computer_Name\C$\Program File\Microsoft SQL Server\MSSQL\ReplData), click Next.
8 Select liaison as “the database that contains the data or objects you want to publish,” then click Next.
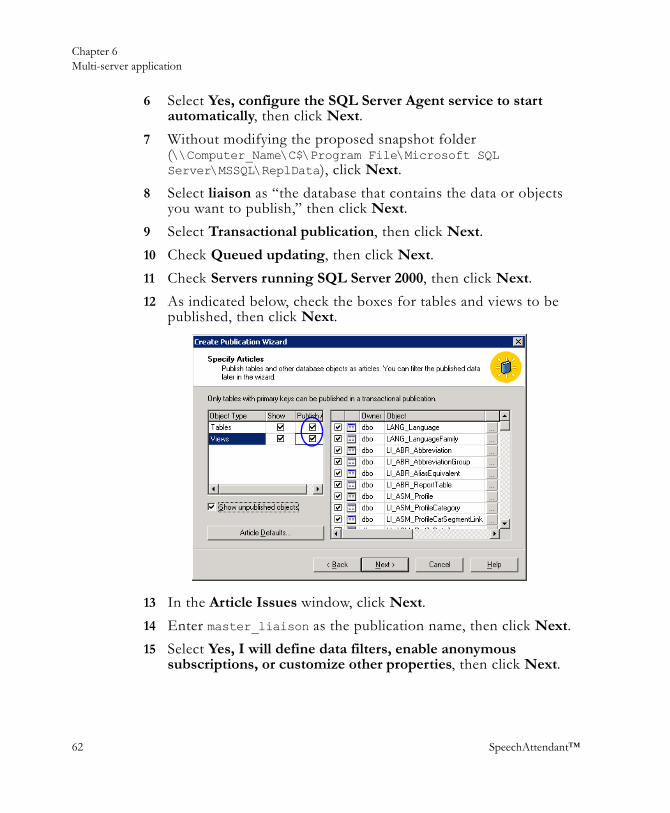
9 Select Transactional publication, then click Next.10 Check Queued updating, then click Next.11 Check Servers running SQL Server 2000, then click Next.12 As indicated below, check the boxes for tables and views to be
published, then click Next.
13 In the Article Issues window, click Next.14 Enter master_liaison as the publication name, then click Next.15 Select Yes, I will define data filters, enable anonymous
subscriptions, or customize other properties, then click Next.
Chapter 6 Multi-server application
Implementation Guide 63
7
16 In the Filter Data window, click Next, leaving the checkboxes empty.
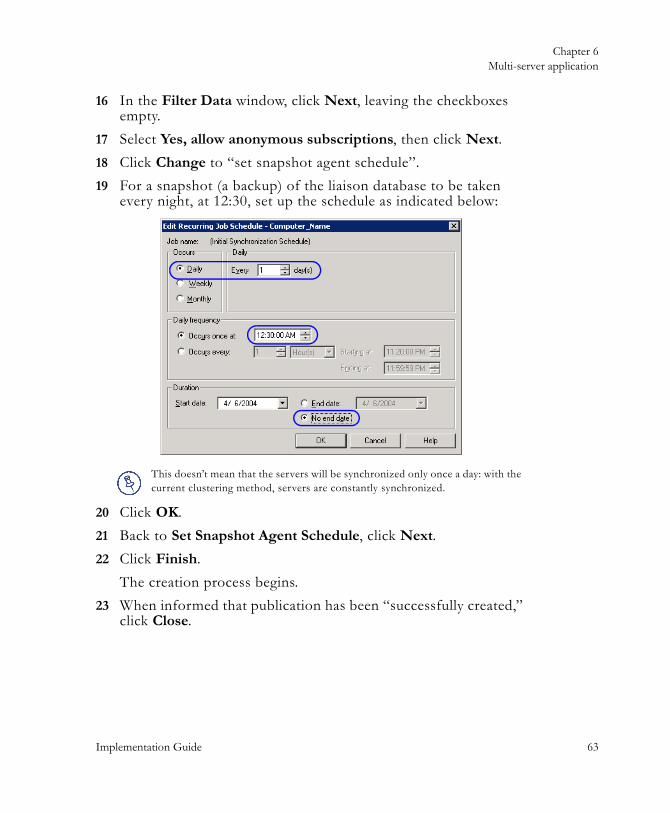
17 Select Yes, allow anonymous subscriptions, then click Next.18 Click Change to “set snapshot agent schedule”.19 For a snapshot (a backup) of the liaison database to be taken
every night, at 12:30, set up the schedule as indicated below:
20 Click OK.21 Back to Set Snapshot Agent Schedule, click Next.22 Click Finish.
The creation process begins.23 When informed that publication has been “successfully created,”
click Close.
This doesn’t mean that the servers will be synchronized only once a day: with the current clustering method, servers are constantly synchronized.
Chapter 6 Multi-server application
64 SpeechAttendant™
4
Publishing sum_sts_db database1 In Console Root\Microsoft SQL Servers\SQL Server
Group\(local) (WindowsNT)\Replication, right-click Publications, then select New Publication.
2 When the Create Publication Wizard appears, check Show advanced options in this wizard, then click Next.
3 Select sum_sts_db as “the database that contains the data or objects you want to publish,” then click Next.
4 Select Transactional publication, then click Next.5 Check Queued updating, then click Next.6 Check Servers running SQL Server 2000, then click Next.7 Check the boxes for tables and views to be published, then click
Next. 8 In the Article Issues window, click Next.9 Enter master_sum_sts_db as the publication name, then click
Next.10 Select Yes, I will define data filters, enable anonymous
subscriptions, or customize other properties, then click Next.11 In the Filter Data window, click Next, leaving the checkboxes
empty.12 Select Yes, allow anonymous subscriptions, then click Next.13 Click Change to “set snapshot agent schedule”.
Chapter 6 Multi-server application
Implementation Guide 655
7
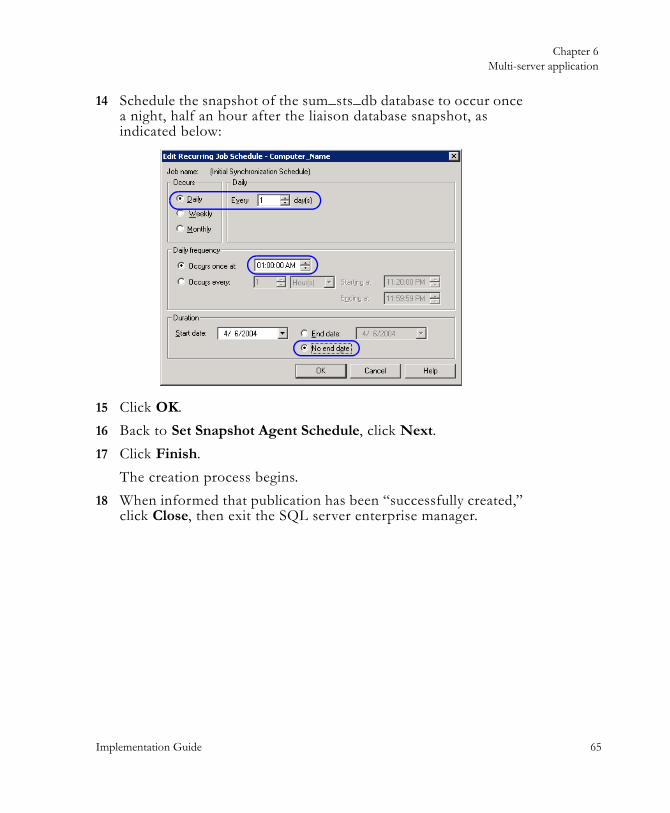
14 Schedule the snapshot of the sum_sts_db database to occur once a night, half an hour after the liaison database snapshot, as indicated below:
15 Click OK.16 Back to Set Snapshot Agent Schedule, click Next.17 Click Finish.
The creation process begins.18 When informed that publication has been “successfully created,”
click Close, then exit the SQL server enterprise manager.
Chapter 6 Multi-server application
66 SpeechAttendant™
4
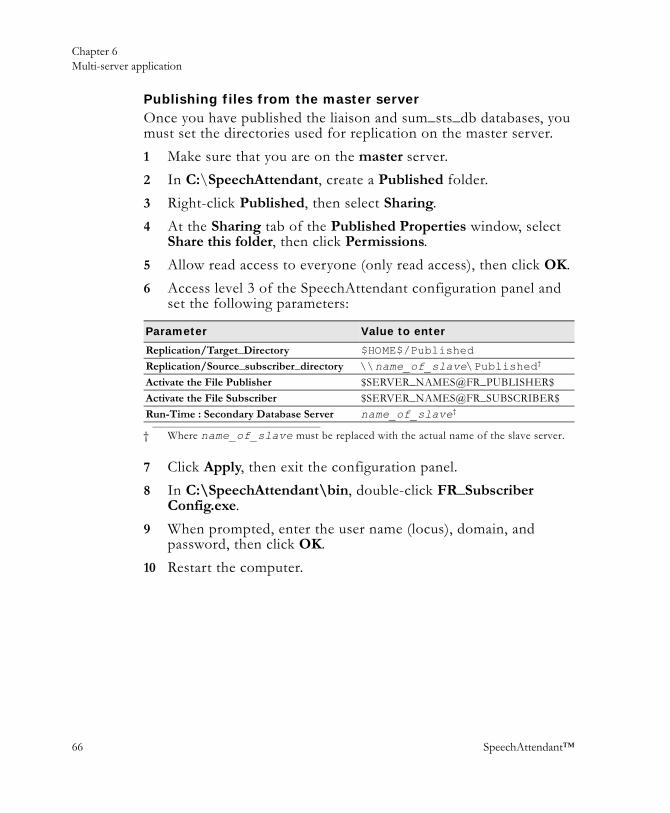
Publishing files from the master serverOnce you have published the liaison and sum_sts_db databases, you must set the directories used for replication on the master server.1 Make sure that you are on the master server.2 In C:\SpeechAttendant, create a Published folder.3 Right-click Published, then select Sharing.4 At the Sharing tab of the Published Properties window, select
Share this folder, then click Permissions.5 Allow read access to everyone (only read access), then click OK.6 Access level 3 of the SpeechAttendant configuration panel and
set the following parameters:
7 Click Apply, then exit the configuration panel.8 In C:\SpeechAttendant\bin, double-click FR_Subscriber
Config.exe.9 When prompted, enter the user name (locus), domain, and
password, then click OK.10 Restart the computer.
Parameter Value to enter
Replication/Target_Directory $HOME$/PublishedReplication/Source_subscriber_directory \\name_of_slave\Published†
† Where name_of_slave must be replaced with the actual name of the slave server.
Activate the File Publisher $SERVER_NAMES@FR_PUBLISHER$Activate the File Subscriber $SERVER_NAMES@FR_SUBSCRIBER$Run-Time : Secondary Database Server name_of_slave†
Chapter 6 Multi-server application
Implementation Guide 67
7
Configure the subscriber
This involves the following tasks:1 Connecting to the slave server from the master (see below)2 Subscribing to liaison database (see page 68)3 Subscribing to sum_sts_db database (see page 69)4 Publishing files from the slave server (see page 70)Connecting to the slave server from the master1 Make sure that you are on the master server. 2 Click Start > Programs > Microsoft SQL Server > Enterprise
Manager.3 In Console Root\Microsoft SQL Servers, right-click SQL Server
Group, then select New SQL Server Registration.The Register SQL Server Wizard appears.
4 Click Next.5 In the list of available servers, select the slave server, click Add,
then click Next.6 Select The SQL Server login information that was assigned to
me by the system administrator as the authentication mode, then click Next.
7 Select Login automatically using my SQL Server account information, enter the login name (sa) and corresponding password, then click Next.
8 Select Add the SQL Server(s) to an existing SQL Server group, then click Next.
9 Click Finish.10 When informed that server registration is completed, click Close.

Chapter 6 Multi-server application
688 SpeechAttendant™
4
Subscribing to liaison database1 In Console Root\Microsoft
SQL Servers\SQL Server Group\name_of_master (WindowsNT)\Replication\Publications, right-click master_liaison : liaison, then select Push New Subscription.Where name_of_master stands for the actual name of the master server.The Push Subscription Wizard appears.
2 Check Show advanced options in this wizard, then click Next.
3 When prompted to choose subscribers, select the slave server, then click Next.
4 When prompted to choose the destination database, enter liaison, then click Next.
5 Select Run the agent at the Distributor, then click Next.6 When prompted to set the distribution agent schedule, select
Continuously, then click Next.7 Select Yes, initialize the schema and data, then click Next.8 Select Queued updating, then click Next.9 Click Next again to start required service, then click Finish.
The process begins.10 When informed that the subscriptions were successfully created,
click OK.
Chapter 6 Multi-server application
Implementation Guide 699
7
Subscribing to sum_sts_db database1 In Console Root\Microsoft SQL Servers\SQL Server
Group\name_of_master (WindowsNT)\Replication\ Publications, right-click master_sum_sts_db : sum_sts_db, then select Push New Subscription.The Push Subscription Wizard appears.
2 When prompted to choose subscribers, select the slave server, then click Next.
3 When prompted to choose the destination database, enter sum_sts_db, then click Next.
4 Select Run the agent at the Distributor, then click Next.5 When prompted to set the distribution agent schedule, select
Continuously, then click Next.6 Select Yes, initialize the schema and data, then click Next.7 Select Queued updating, then click Next.8 Click Next again to start required service, then click Finish.
The process begins.9 When informed that the subscriptions were successfully created,
click OK.
Chapter 6 Multi-server application
700 SpeechAttendant™
4
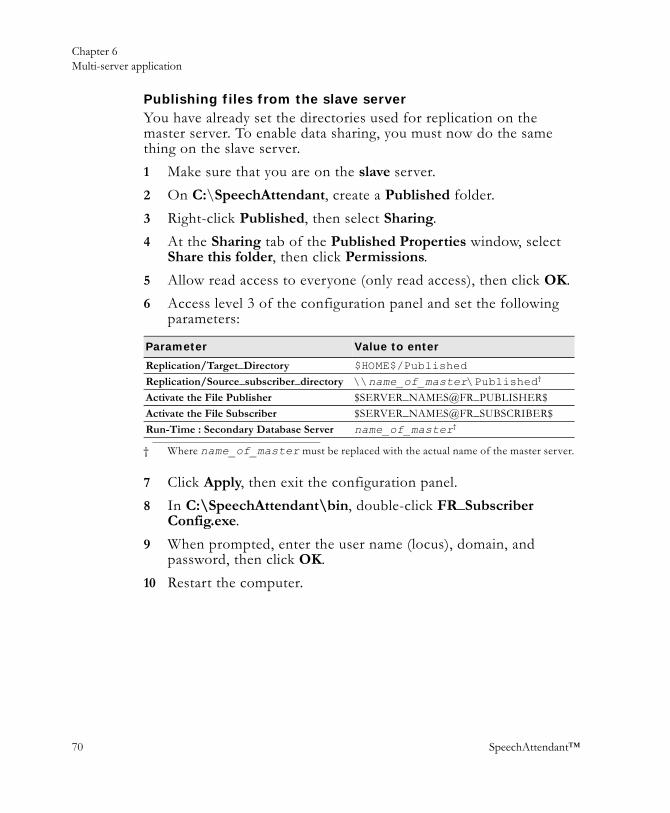
Publishing files from the slave serverYou have already set the directories used for replication on the master server. To enable data sharing, you must now do the same thing on the slave server.1 Make sure that you are on the slave server.2 On C:\SpeechAttendant, create a Published folder.3 Right-click Published, then select Sharing.4 At the Sharing tab of the Published Properties window, select
Share this folder, then click Permissions.5 Allow read access to everyone (only read access), then click OK.6 Access level 3 of the configuration panel and set the following
parameters:
7 Click Apply, then exit the configuration panel.8 In C:\SpeechAttendant\bin, double-click FR_Subscriber
Config.exe.9 When prompted, enter the user name (locus), domain, and
password, then click OK.10 Restart the computer.
Parameter Value to enter
Replication/Target_Directory $HOME$/PublishedReplication/Source_subscriber_directory \\name_of_master\Published†
† Where name_of_master must be replaced with the actual name of the master server.
Activate the File Publisher $SERVER_NAMES@FR_PUBLISHER$Activate the File Subscriber $SERVER_NAMES@FR_SUBSCRIBER$Run-Time : Secondary Database Server name_of_master†
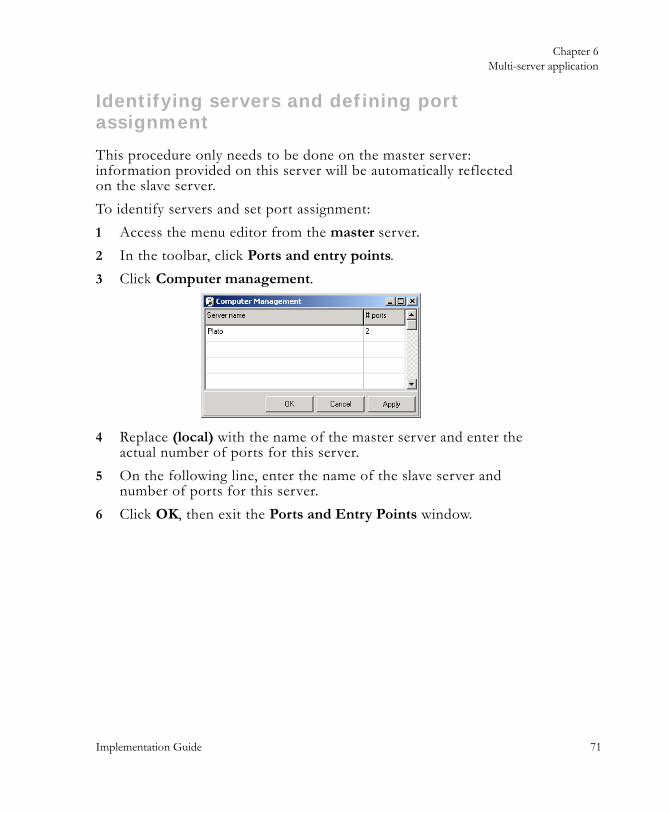
Chapter 6 Multi-server application
Implementation Guide 711
7
Identifying servers and defining port assignment
This procedure only needs to be done on the master server: information provided on this server will be automatically reflected on the slave server.To identify servers and set port assignment:1 Access the menu editor from the master server.2 In the toolbar, click Ports and entry points.3 Click Computer management.
4 Replace (local) with the name of the master server and enter the actual number of ports for this server.
5 On the following line, enter the name of the slave server and number of ports for this server.
6 Click OK, then exit the Ports and Entry Points window.
Chapter 6 Multi-server application
722 SpeechAttendant™
4
About configuration settings in a server cluster
In a multi-server environment, most of the configuration settings only need to be adjusted on the master server. As any other change made to the application, new setting values are automatically reflected on the slave server.However, you must adjust settings pertaining to ACD queues on both servers (unless you prefer to create a hunt group). For details on how to program an ACD queue in a multi-server environment, see page 59.There are other settings that are not synchronized and that can be adjusted differently on each server. They are:
Prefixes for External Numbers (see page 76) CLID Available (see page 82)Flash Length (see page 79) Volume (see page 87)Pause Length (see page 79) Default Account Code (see page 88)Ring On Time (see page 79) Max. Number of Unauthorized Requests (see
page 88)Ring Off Time (see page 79) Show Menu Editor IDs (see page 98)SWI Server Trace Level (see page 80)
Implementation Guide 73
7
SpeechAttendantConfiguration
This chapter explains how to configure SpeechAttendant to suit the organization’s needs. Configuring SpeechAttendant involves:
Customizing the settings in the configuration panelu
Configuring Windows parametersu
Connecting to a printeru
u Changing default passwords
Subsequently, you can define schedules, create the menu structure, perform the initial load of the directory and define entry points (refer to the Administration Guide for details).
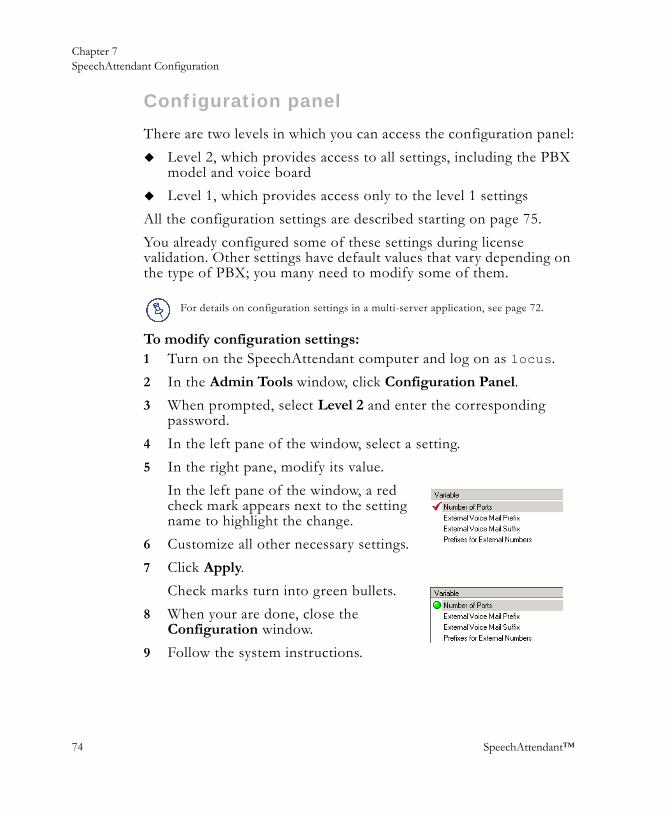
Chapter 7 SpeechAttendant Configuration
74 SpeechAttendant™
4
Configuration panel
There are two levels in which you can access the configuration panel:Level 2, which provides access to all settings, including the PBX model and voice boardLevel 1, which provides access only to the level 1 settings
All the configuration settings are described starting on page 75.You already configured some of these settings during license validation. Other settings have default values that vary depending on the type of PBX; you many need to modify some of them.
To modify configuration settings:1 Turn on the SpeechAttendant computer and log on as locus.2 In the Admin Tools window, click Configuration Panel.3 When prompted, select Level 2 and enter the corresponding
password. 4 In the left pane of the window, select a setting.5 In the right pane, modify its value.
In the left pane of the window, a red check mark appears next to the setting name to highlight the change.
6 Customize all other necessary settings.7 Click Apply.
Check marks turn into green bullets.8 When your are done, close the
Configuration window.9 Follow the system instructions.
For details on configuration settings in a multi-server application, see page 72.
Chapter 7 SpeechAttendant Configuration
Implementation Guide 75
7
Once you have customized the configuration settings, you are ready to proceed with the creation of the menu structure and the initial directory upload (refer to the Administration Guide).
Setting descriptions
The settings are presented in the order in which they appear in the configuration panel, with the exception of settings pertaining to call accounting, which are grouped together. The level (1 or 2) of each setting is always specified.For settings pertaining to ACD queues, see Chapter 4, page 27.
PBX and voice board
The PBX and Voice board fields appear at the top of the configuration panel. They contain the information that you specified during license validation.You can change the values of these fields, but only in level 2 and only if:
You are switching from an analog to a digital integration (this change has an impact on both field values).The PBX with which SpeechAttendant must be integrated has changed.A new type of voice board is installed following an increase in the number of system ports.
Number of Ports
This level 2 setting corresponds to the number of active ports in the system (that is, ports able to receive calls). The number of active ports can be less than the number listed in the license or that are physically installed.
Chapter 7 SpeechAttendant Configuration
76 SpeechAttendant™
4
External Voice Mail Prefix
This level 2 setting corresponds to the string that SpeechAttendant must dial before a voice mailbox number. It must contain the usual transfer string (see page 78), followed by the guest access mailbox number or, in a Meridian environment, the express messaging access number.
External Voice Mail Suffix
This level 2 setting corresponds to the string that SpeechAttendant must dial after the voice mailbox number. It can be used to enable other options.
Prefixes for External Numbers
If SpeechAttendant will be used to transfer calls to external numbers, this level 2 setting corresponds to the access code (or codes) to place external calls (9 is the common access code). If there is more than one prefix, type the digits one after the other, without spaces or commas.
Number of Digits in Area Code
This level 2 setting corresponds to the number of digits in area codes.
Number of Digits in External Phone Numbers
This level 2 setting corresponds to the number of digits in external local phone numbers.
Chapter 7 SpeechAttendant Configuration
Implementation Guide 77
7
Default Transfer Mode
This level 2 setting allows you to determine one of the following as the default transfer mode:
Supervised (this mode is recommended, see below) Unsupervised (see page 78)
About Supervised ModeOne advantage of the supervised mode is that it gives callers the choice of asking for someone else when the desired party’s line is busy.In supervised mode, when the called party is either an internal extension, a voice mail or fax/modem number, SpeechAttendant waits for a ring signal before releasing the call to the PBX. If it detects a busy signal, it will ask if the caller wants to speak to another person or tell the caller to call back later (depending on the value of the System Behavior on Busy setting; see page 98). If SpeechAttendant detects neither a ring nor a busy signal after five seconds, it will release the port automatically as in the unsupervised mode.In supervised mode, the called party is an external phone number on the public switched telephone network (PSTN), SpeechAttendant waits up to five seconds for a ring signal before releasing the port. If it detects a busy signal, it will ask if the caller wants to speak to another person or tell the caller to call back later. If, after five seconds, SpeechAttendant detects neither a ring nor a busy signal, it will release the port automatically as in the unsupervised mode.
Chapter 7 SpeechAttendant Configuration
78 SpeechAttendant™
4
About Unsupervised ModeIn unsupervised mode, SpeechAttendant performs a blind transfer, that is, it releases the port after sending the digits to the PBX without waiting to hear a ring or busy signal. This mode is used when ring or busy detection is problematic. For example, on Norstar systems where the ring tone on the calling line is not synchronized with the one on the called station, the user might pick up before the call is released.This mode can be used for extensions equipped with a voice mail system. Since these extensions are usually programmed to forward calls to the called party’s voice mail on a busy signal, SpeechAttendant does not need to offer callers another choice.It can also be used for devices that have no dial tone, such as pagers and voice mailboxes, or for overseas and other destination numbers whose ring or busy signals differ from those in North America.Because of a connection limitation in certain telephone systems, there could be a delay between the time the called party answers and when the connection with the caller is made. If the called party actually answers the phone, this delay is not apparent. However, the delay might clip the beginning of the called person’s voice mail message. Users with voice mail should record a personal greeting rather than just their name.
Transfer String
This level 2 setting corresponds to the string required to initiate a transfer.
Flashback String
This level 2 setting corresponds to the string required to initiate a flashback.
Chapter 7SpeechAttendant Configuration
Implementation Guide 79
7
Flash Length
In an analog environment, this level 2 setting corresponds to the desired duration of a hookflash, in hundredths of a second (1/100 s).
Pause Length
This level 2 setting determines how long, in hundredths of a second (1/100 s), SpeechAttendant will pause when interpreting commas between transfer strings.
Ring On Time
SpeechAttendant answers a call when it detects a ring tone of a certain length followed by a silent interval of a certain length (ring off time, see below). The Ring On Time setting (level 2) determines the ring tone duration in tenths of a second (1/10 s) of the calls SpeechAttendant must answer. This value should only be changed when SpeechAttendant must detect short ring tones or to match other ring/no ring patterns defined in PBX configuration.
Ring Off Time
SpeechAttendant answers a call after it detects a ring tone of a certain length (see ring on time, above), followed by a silent interval of the length specified here. This level 2 setting determines the length in tenths of a second (1/10 s) of the silent interval.
Short ring on times may cause erroneous ring tone detection.
If the ring off time specified is longer than as delivered by the PBX, SpeechAttendant will not answer the call.
Chapter 7 SpeechAttendant Configuration
80 SpeechAttendant™
4
SpeechAttendant Trace Level
This level 2 setting determines the level of detail recorded in the log files for the application. Prod (production) is recommended for normal operations. Dev (development) or Beta (beta monitoring) generate greater log file detail, but can cause memory problems. Change this setting only under the direction of the Customer Service Center.
SWI Server Trace Level
This level 2 setting determines the level of detail recorded in the log files for the OpenSpeech recognition engine. Prod (production) is recommended for normal operations. Dev (development) or Beta (beta monitoring) generate greater log file detail, but can cause memory problems. Change this setting only under the direction of the Customer Service Center.
Barge-In Mode
This level 2 setting determines if callers will be allowed to interrupt greetings and prompts.The value selected in the configuration panel applies to the entire application, but the barge-in function can be set differently in certain menus or entry points. For details, refer to the Administration Guide.
Call Analyzer Call Filter
This level 2 setting should not be modified. For more information, contact the Customer Service Center.
Call Analyzer Recorded Channels
This level 2 setting determines from which ports call data should be gathered (notably for the call analyzer; refer to the Administration Guide for details). Change this setting only under the direction of the Customer Service Center.
Chapter 7 SpeechAttendant Configuration
Implementation Guide 81
7
Transfer Connect Prefix
If your company already uses AT&T’s Transfer Connect service, you can activate it in a SpeechAttendant entry point. This is useful for handling calls to toll free numbers. If that is the case, you must configure this level 2 setting so that it corresponds to the string that SpeechAttendant must dial before external phone numbers to access the Transfer Connect service.
System Languages
This level 2 setting determines which language or language combination the system can recognize (according to the license). The possible languages are:
US English (US_EN)Canadian French (CA_FR)
US Spanish (US_SP))
US English can be combined with one of the other languages to create a bilingual system. Using the appropriate speed-dial key (by default, 9; see page 89), callers can then choose the language in which the system addresses them.
To specify default languages for menus and entry points, consult the Administration Guide.
Chapter 7 SpeechAttendant Configuration
82 SpeechAttendant™
4
CLID Available
This level 2 setting only concerns analog installations1. It allows you to specify whether the telephone system is capable of transmitting CLID. If that is the case, choose On; otherwise, choose Off. For details about dynamic call routing, see below.SpeechAttendant uses CLID to identify callers when the application includes secured features and menus or to allow dynamic call routing and call accounting. For details, refer to the Administration Guide.
DNIS and CLID Masks
To enable dynamic call routing and caller identification, SpeechAttendant must extract the DNIS and CLID from a character string transmitted by the PBX with each call received2. Since the syntax of this character string varies from one system to another, masks are needed to identify the DNIS and CLID within the character string.Default DNIS and CLID masks are defined in level 2 of the configuration panel for all supported digital PBXs. These masks correspond to the different types of calls: external, internal, or calls where a specific number was dialed.
1. Digital PBXs are all capable of transmitting CLID as well as DNIS, which enables dynamic call routing.
2. Analog systems cannot transmit DNIS; some cannot even transmit CLID (see the previous procedure).
In analog systems allowing dynamic call routing, these masks are not visible. If you have a digital PBX and corresponding DNIS and CLID masks are not displayed, call the Customer Service Center.

Chapter 7 SpeechAttendant Configuration
Implementation Guide 83
7
For some of the PBXs, there are no masks selected by default, but you can select masks from the drop-down list. In some cases, masks are selected by default, but you must verify that they are the correct ones. To do so, you need to understand their syntax.
All these elements appear in curly brackets, except for the DNIS and CLID, which appear between greater than and less than signs.
Character Description
C An alphabetical character, capitalized or not, with or without accents. If preceded by a number, this indicates a sequence of that number of alphabetical characters (4C means a sequence of four alphabetical characters).C= followed by a space indicates a space.
N A number from 0 to 9. If preceded by a number, this indicates a sequence of that number of digits (4N means a sequence of four digits).
A Same as C, plus any number from 0 to 9. T A character belonging to a telephone number, such as a hyphen, a
parenthesis or a number from 0 to 9.S A character not included in C or A, such as a comma, a period or
hyphen (S=, would therefore mean a comma, S=. would mean a period, and so on).
Z Any character or symbol.* Any number of characters belonging to the category that follows it
(*C would therefore mean any number of alphabetical characters and/or spaces).
@ A range of characters comprised between the preceding and following values (4N=1000@1999 would therefore mean a number between 1000 and 1999).
a, b, c (where a, b, c can be replaced by any value)
Any of the indicated values in the group (3C= sep, oct, nov would therefore signify one of the abbreviations from the group).
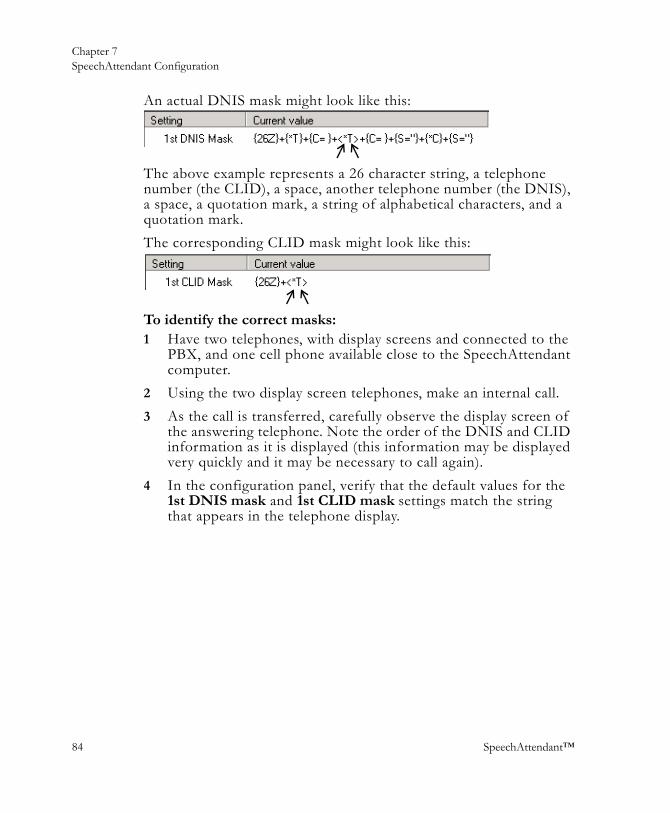
Chapter 7 SpeechAttendant Configuration
84 SpeechAttendant™
4
An actual DNIS mask might look like this:
The above example represents a 26 character string, a telephone number (the CLID), a space, another telephone number (the DNIS), a space, a quotation mark, a string of alphabetical characters, and a quotation mark.The corresponding CLID mask might look like this:
To identify the correct masks:1 Have two telephones, with display screens and connected to the
PBX, and one cell phone available close to the SpeechAttendant computer.
2 Using the two display screen telephones, make an internal call. 3 As the call is transferred, carefully observe the display screen of
the answering telephone. Note the order of the DNIS and CLID information as it is displayed (this information may be displayed very quickly and it may be necessary to call again).
4 In the configuration panel, verify that the default values for the 1st DNIS mask and 1st CLID mask settings match the string that appears in the telephone display.
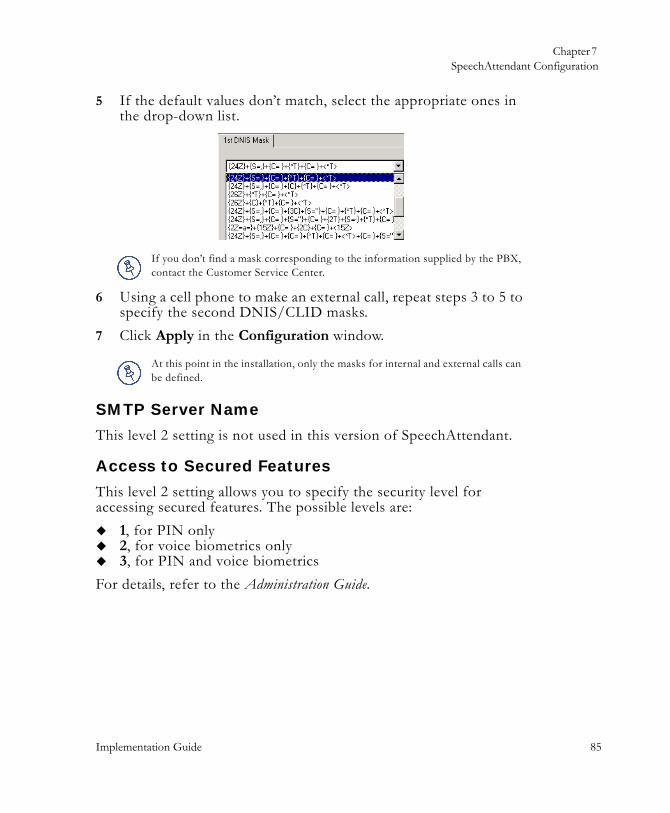
Chapter 7 SpeechAttendant Configuration
Implementation Guide 85
7
5 If the default values don’t match, select the appropriate ones in the drop-down list.
6 Using a cell phone to make an external call, repeat steps 3 to 5 to specify the second DNIS/CLID masks.
7 Click Apply in the Configuration window.
SMTP Server Name
This level 2 setting is not used in this version of SpeechAttendant.
Access to Secured Features
This level 2 setting allows you to specify the security level for accessing secured features. The possible levels are:
1, for PIN only2, for voice biometrics only3, for PIN and voice biometrics
For details, refer to the Administration Guide.
If you don’t find a mask corresponding to the information supplied by the PBX, contact the Customer Service Center.
At this point in the installation, only the masks for internal and external calls can be defined.
Chapter 7 SpeechAttendant Configuration
86 SpeechAttendant™
4
Beep During ASR Processing
This level 2 setting determines whether SpeechAttendant will play beep tones while it processes requests. This lets callers know that they are not expected to say anything at that moment and avoids dead air in applications with large directories. It is not activated by default.
Beep Interval
This level 2 setting determines the duration, in seconds, of the interval between the beeps that play when the system is processing a request (see above). The possible values are 1 through 6.
Chapter 7 SpeechAttendant Configuration
Implementation Guide 87
7
Volume
This level 2 setting is used to adjust the sound level of the Dialogic cards, and consequently, the volume of SpeechAttendant greetings and prompts.0 or -8 are the default values, depending on the card. If the volume of the prompts is too high, choose a lower setting.
Refusal and Request Together
This level 2 setting determines whether SpeechAttendant can handle one-step corrections (when callers reject a suggestion and repeat their request in the same utterance). For example:
This option is not activated by default. In applications with large directories, one-step corrections may hinder voice recognition.
SpeechAttendant: Do you wish to talk to... Mary Lipton?Caller : No, Larry Benton!SpeechAttendant: Thank you. Transferring your call to... Larry Benton.

Chapter 7SpeechAttendant Configuration
88 SpeechAttendant™
4
Call Accounting Settings
SpeechAttendant can be integrated with the Avotus Professional call accounting system (in Meridian environments). If that is the case, you must configure the following settings.
When SpeechAttendant is integrated with a call accounting system and an employee uses it to make a call, the system first establishes the employee’s identity (with CLID) to determine what type of call the employee can make and which account code to use.The employee can then make a request. If the system recognizes the request, it transmits a sequence to the PBX containing the following information, in this order: prefix for authorization codes, employee’s authorization code, prefix for account codes, employee’s account code and requested phone number.
Setting Level Description
Account Code Prefix 2 The value of this setting must correspond to the SPRE,—or special prefix number— programmed in the PBX, followed by 5. For example, if the SPRE is 11, the account code prefix would be 115.
Number of Digits in Account Codes 2 This setting determines the number of digits account codes can contain.
Authorization Code Prefix 2 The value of this setting must correspond to the SPRE—or special prefix number—programmed in the PBX, followed by 6. For example, if the SPRE is 11, the authorization code prefix would be 116.
Default Account Code 1 Certain directory entries must be associated with a specific account code, while others can be associated with a generic one.This setting corresponds to the account code used for entries that do not have a specific account code.
Max. Number of Unauthorized Requests
1 This setting determines how many times employees can attempt to make a call they are not authorized to make. When this number is reached, the system will hang up.
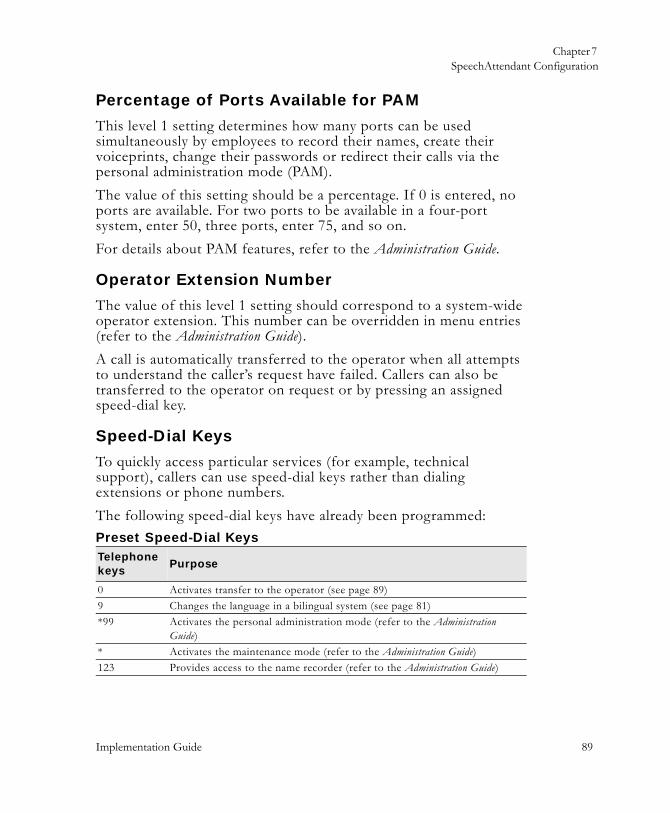
Chapter 7SpeechAttendant Configuration
Implementation Guide 89
7
Percentage of Ports Available for PAM
This level 1 setting determines how many ports can be used simultaneously by employees to record their names, create their voiceprints, change their passwords or redirect their calls via the personal administration mode (PAM).The value of this setting should be a percentage. If 0 is entered, no ports are available. For two ports to be available in a four-port system, enter 50, three ports, enter 75, and so on. For details about PAM features, refer to the Administration Guide.
Operator Extension Number
The value of this level 1 setting should correspond to a system-wide operator extension. This number can be overridden in menu entries (refer to the Administration Guide).A call is automatically transferred to the operator when all attempts to understand the caller’s request have failed. Callers can also be transferred to the operator on request or by pressing an assigned speed-dial key.
Speed-Dial Keys
To quickly access particular services (for example, technical support), callers can use speed-dial keys rather than dialing extensions or phone numbers.The following speed-dial keys have already been programmed:Preset Speed-Dial KeysTelephone keys Purpose
0 Activates transfer to the operator (see page 89)9 Changes the language in a bilingual system (see page 81)*99 Activates the personal administration mode (refer to the Administration
Guide)* Activates the maintenance mode (refer to the Administration Guide)123 Provides access to the name recorder (refer to the Administration Guide)

Chapter 7 SpeechAttendant Configuration
90 SpeechAttendant™
4
You can program other speed-dial keys according to your organization’s needs.To program a speed-dial key:1 Select the corresponding setting in the left pane of the
configuration panel.2 In the Speed-Dial Key field, specify the telephone pad key you
want to assign to the selected setting.
3 In the Speed-Dial Key Extension field, enter the extension or external phone number you want to assign to the speed-dial key, or select one of the following commands in the list:
Operator, to transfer calls to the operator.Goto Maintenance, to activate the maintenance mode, allowing callers to choose between the name recorder or system administration functions. Toggle Language, to switch to the other language of a bilingual system.Goto Name Recorder, to activate the name recorder directly.Goto System Admin, to activate the system administration functions of the maintenance mode directly.Goto Personal Admin, to activate the personal administration mode.
External phone numbers must contain any required prefix, pause (represented by a comma) or area code. In bilingual systems, an extension or phone number must be specified for each language, in the appropriate field.
The number of the speed-dial key does not have to be the same as the telephone key. For example, default Speed-Dial Key 1 is associated with telephone key 0.
Chapter 7 SpeechAttendant Configuration
Implementation Guide 91
7
4 In the Speed-Dial Key Timer field, specify how much time (in tenths of a second) the system must wait before dialing the extension number.If any extensions begin with the number of the assigned key, or if the speed-dial key is associated with a combination of digits1, a delay of 20 tenths of a second is required to let the caller press another key.If the speed-dial key is associated with a single digit, and no extensions begin with this digit, set the timer to 0 to have calls transferred as soon as the key is pressed.
5 In the Speed-Dial Prefix field, enter any string the system must dial before the extension number, instead of the usual transfer string.
6 In the Speed-Dial Suffix field, enter any string the system must dial after the extension number.
To deactivate a preset speed-dial key:1 Select it in the left pane of the Configuration window.2 Delete the contents of the Speed-Dial Key field.
1. A combination of digits can be associated to a command such as Toggle Language or Goto NameRecorder, but not to an external phone number.
Chapter 7 SpeechAttendant Configuration
92 SpeechAttendant™
4
Homophone Resolution Method
This level 1 setting offers three different methods for dealing with homophones (names or aliases that have the same pronunciation):
With the Operator method, each time a homophone is requested, SpeechAttendant plays a message saying that there is more than one person with that name, then transfers the call to the operator (for details on the operator extension, see page 89).With the Name method, the recording associated to each homophone entry must contain a distinctive element in addition to the person’s name; for example, “John Smith, sales manager” and “John Smith, webmaster.” When a homophone is requested, the system suggests one of the homophones using the recording (for example, “Do you wish to speak to... John Smith, sales manager?”). If the caller rejects the first suggestion, SpeechAttendant suggests the second homophone. For details on name recordings, refer to the Administration Guide.With the Department method, the department to which each homophone employee belongs should be specified in their respective entries (refer to the Administration Guide). When a homophone is requested, SpeechAttendant suggests one of the homophones using the requested name plus that person’s department; for example, “Do you wish to speak to... Jane Wyatt, Customer Service Center?” If the caller rejects the first suggestion, SpeechAttendant suggests the second homophone (for example, “Then, do yo wish to speak to... Jane Wyatt, Marketing Department?”).This method only works for employees with like-sounding names who work in different departments.If this method is selected but no department is specified for a requested homophone, SpeechAttendant transfers calls to the operator.

Chapter 7SpeechAttendant Configuration
Implementation Guide 93
7
Homophone Resolution Threshold
This level 1 setting determines the maximum number of names forming a group of homophones that SpeechAttendant can attempt to handle using either the Name or Department homophone resolution method (see page 92). If the number of homophones corresponding to a caller’s request exceeds the number specified here, the call is transferred to the operator.
For example, if the value is 2, SpeechAttendant attempts to handle homophones (based on either departments or recorded names) if there are only two names involved. If there are three or more, SpeechAttendant transfers the call to the operator.
Confirmation Before Homophone Listing
This level 1 setting determines whether SpeechAttendant must confirm that the name recognized is correct before suggesting homophones (if the homophone resolution threshold has not been reached and homophone resolution method is Name or Department). This will also apply when the caller didn’t specify the first name of the person he wants to reach and the requested last name corresponds to several people.By default, the system ask for confirmation each time that the voice recognition result is uncertain. This allows to avoid the following scenario:
This setting does not concern the number of homophone groups listed in the directory, but the number of names in each group.
SpeechAttendant: Welcome to XYZ. Which person or...Caller : Bob Corey!SpeechAttendant: Do you want to talk to John Murray from Purchasing?Caller : No.SpeechAttendant: Then, do you want to talk to John Murray from Registrar’s Office?Caller : No!SpeechAttendant: Which person or service would you like to reach?
And so on.
Chapter 7 SpeechAttendant Configuration
94 SpeechAttendant™
4
Instead, you will get the following call flow:
Consecutive Rejections
When SpeechAttendant is totally unable to understand an utterance, it rejects it and asks the caller to repeat it. Rejection can be caused by background noise, coughing, inaudible speech, line noise, or prolonged silence. The Consecutive Rejections setting (level 1) allows you to determine how many consecutive rejected utterances the system will allow before either transferring the call to the operator or hanging up (based on the value of the Transfer to Operator on Silence setting, described on page 96).
Invalid Password Counter
The value of this level 1 setting indicates the number of times someone has tried to access the maintenance mode with an invalid password in one day. When this counter reaches 4, access is denied for 24 hours, unless you restore it.To restore access after it has been disabled:
Set the counter to 0.
Maintenance Mode Password
This level 1 setting contains the maintenance mode password, which provides access to the name recorder and system administration functions (refer to the Administration Guide). The maintenance mode password can contain up to 12 digits, and it must not contain a star or pound sign.
SpeechAttendant: Welcome to XYZ. Which person or...Caller : Bob Corey!SpeechAttendant: Did you say John Murray?Caller : No.SpeechAttendant: Then, do you want to talk to Bob Corey?Caller : Yes!SpeechAttendant: Thank you! Transferring your call.
Chapter 7SpeechAttendant Configuration
Implementation Guide 95
7
You can modify the maintenance mode password from the configuration panel or directly in the maintenance mode using a touch-tone phone (see page 103). See also “Name Recorder Password” on page 96.
Maximum Number of Digits in Extensions
The value of this level 1 setting indicates what is the maximum number of digits internal extensions can contain according to the numbering plan. It must be set high enough to accommodate the longest extension number in the system. The default setting is 3 or 4, depending on the PBX type.Some extensions may be shorter than the maximum. When dialing short extensions, callers can press the # key to indicate that they have finished.
Announce Destination Number
This level 1 setting determines whether or not SpeechAttendant announces the destination phone number when transferring a call. For example: “Transferring your call to... Wilma Patterson, extension 3321.” Possible values for this setting are:
No, for SpeechAttendant not to announce destination numbers.Extension, for SpeechAttendant to announce only local extensions (excluding voice mailbox numbers).External, for SpeechAttendant to announce only external numbers (such as off-site employees’ office numbers, home and cell phone numbers). Voice mail, for SpeechAttendant to announce only voice mailbox numbers.All, for SpeechAttendant to announce extensions, external numbers and voice mailbox numbers, depending on the case.
Ports are in use for longer periods of time when this value is selected.

Chapter 7 SpeechAttendant Configuration
96 SpeechAttendant™
4
Transfer to Operator on Silence
This level 1 setting determines the system behavior when no utterance is received. To have silent calls transferred to the operator:
Select Yes.This allows you to create prompts such as: “If you know the name of the employee you want to reach, say it now. Otherwise, please hold the line and your call will be transferred to the operator.” This also gives a chance to intimidated callers to speak to someone.For SpeechAttendant to hang up on silent calls:
Select No.
Name Recorder Password
This setting contains the password providing direct access to the name recorder. It can contain up to twelve digits, and it must not contain a star or pound sign.The name recorder is also accessible from the maintenance and personal administration modes (refer to the Administration Guide for details).
Emergency Barge-in Mode
This level 1 setting determines whether the barge-in function is enabled or not during the emergency greeting. For the emergency greeting to be played completely before any interaction is possible:
Select Off.To allow callers to make their requests before the emergency message is finished:
Select On.
Chapter 7 SpeechAttendant Configuration
Implementation Guide 97
7
GUI Language
This setting determines the language of the graphical tools allowing system administration. Two languages are available: English and French. To change the GUI language:
Select Fr for French, and En for English.Open windows are not automatically refreshed.
LDAP Server Timeout
This level 1 setting determines how many seconds SpeechAttendant should wait before abandoning its attempt to connect to the LDAP server in order to perform a directory update by interface (refer to the Administration Guide).
Single Access to Name Recorder
This level 1 setting determines whether the name recorder should be disabled for entries whose names have been recorded. By default, it is not possible to rerecord a name unless the name recorder access is reset (for details, refer to the Administration Guide).To allow multiple uses of the name recorder:
Select No.To limit name recorder use to one attempt:
Select Yes.
Default PIN
This level 1 setting allows you to specify a starting PIN that will be assigned to all employees, until they modify it in the PAM1. The default PIN should consist of at least four digits and should not contain a star or pound sign.
Some of the windows, error messages and options that are used in SpeechAttendant are generated by the Windows 2000 operating system and are therefore not affected by this setting: their language is determined by the language of the operating system.
Chapter 7 SpeechAttendant Configuration
98 SpeechAttendant™
4
Reminder for Name Recorder
This level 1 setting determines whether employees who have not recorded their names should be systematically given the opportunity to do so each time they access SpeechAttendant from their default phone number.To disable the reminder:
Select Off.
Show Menu Editor IDs
This level 1 setting determines if menu editor IDs must systematically appear along with entry names in the directory.By default, only entry names appear in the phone directory or in the menu editor. Displaying the menu editor IDs can be useful if your application contains several entries with the same name.For menu editor IDs to appear along with their corresponding entry names:
Set the variable to Yes.
System Behavior on Busy
This level 1 setting only applies to supervised transfers (see page 77). It determines what the system does when it has recognized the caller’s request, but cannot perform the transfer because the line is busy. By default, it gives the caller the option of asking for someone else. It can also hang up after having told the caller to call back later.To prompt callers to call back later:
Select Hang up.To allow callers to ask for another person or service:
Select Ask for someone else.
1. It is also possible to assign a specific PIN in an individual’s entry. Refer to the Administration Guide for details.
Chapter 7SpeechAttendant Configuration
Implementation Guide 99
7
Verify Caller Identity by Default
This level 1 setting determines whether the system should validate (using voice biometrics or a PIN) the identity of callers trying to access secured features or menus from any phone number contained in the directory.
If most of the phones associated with your application are private (that is, each phone is used by a specific employee), it may not be necessary for the system to validate caller identity. If that is the case, the value of this setting should be False.The Verify Caller Identity by Default setting determines the default value of the Private phone attribute in transfer entries. You can always change this attribute manually for any phone number (refer to the Administration Guide for details).
Configuring Windows parameters
Verify that the two following parameters are set in the operating system:
Date and timeKeyboard language
If the calling number is not contained in the directory or if the PBX is not capable of transmitting the CLID, SpeechAttendant will systematically verify the identity of anyone trying to access a secured feature or menu.
Do not change the display settings. This can significantly reduce the display quality for people accessing the system remotely (especially for troubleshooting).

Chapter 7 SpeechAttendant Configuration
100 SpeechAttendant™
4
Connecting to a printer
SpeechAttendant can be connected to a printer, which can be useful for printing reports or using other diagnostic features related to the system’s performance. Refer to the Windows documentation or follow the installation procedures supplied by the printer’s manufacturer for details.
Modifying passwords
For security reasons, you should change all the default passwords:Locus accountWindows Administrator Level 1 of the configuration panelLevel 2 of the configuration panelMaintenance modeName recorder Default PINAdmin (in a multi-administrator environment)
Note the new passwords, keep them in a safe place, and above all, remember to notify the Customer Service Center.
The default passwords don’t appear in this guide. If you don’t know them, contact the Customer Service Center at 1 866 434-2564 or (514) 390-3922.
Chapter 7 SpeechAttendant Configuration
Implementation Guide 101
7
Locus and Windows administrator
There are two user accounts on a SpeechAttendant computer:Locus, which will be used by the system manager to run SpeechAttendant after it has been installed. Windows Administrator, which is part of the operating system and has the highest authority.
To change the Locus or Windows Administrator account password:1 Log on to SpeechAttendant as:
locus, if changing the Locus account passwordAdministrator, if changing the Windows Administrator password
2 Press Ctrl+Alt+Delete.3 Click Change Password. 4 Type the current password.5 Type the new password.6 Type the new password again in the Confirm Password field.7 Press Enter.
In the case of a multi-server environment, if you change the Locus account password on the master server, you must also change it on the slave server.
Chapter 7 SpeechAttendant Configuration
102 SpeechAttendant™
4
Level 1 and level 2
Configuration settings can be defined by the system administrator (level 1) or telephony distributor (level 2). Level 1 settings deal mainly with the day-to-day operation and maintenance of the system, while level 2 settings are set at installation time according to the customer’s needs (refer to the signature pages of the Site Preparation Document).To change the level 1 or 2 password:1 In the Admin Tools window, click Configuration.2 When prompted, select Level 2 and enter the corresponding
password.3 From the Tools menu, choose:
Change Password > Level 2
orChange Password > Level 1
The Change Password window appears.4 Type the current password.5 Type the new password.6 Type the new password again in the Confirm password field.7 Click Update.
Chapter 7 SpeechAttendant Configuration
Implementation Guide 103
7
PIN, maintenance mode and name recorder
These three passwords are registered and can be modified in the configuration panel. See page 97, page 94, and page 96.You can also modify the maintenance mode password from any touch-tone phone.To modify the maintenance mode password by phone:1 Call SpeechAttendant from a touch-tone telephone.2 Say “Maintenance mode,” then press 2.
3 When prompted, enter the maintenance mode password.4 Press 5.5 When prompted, enter the current password on the telephone
keypad.6 When prompted, enter a new password.7 When prompted, enter the new password again.8 Exit the maintenance mode by pressing the * key or follow the
system instructions to perform another task.The new password is now active. The change is reflected automatically in the configuration panel.
Admin
In a multi-administrator environment, Admin is the name of the principal administrator. The Admin password provides the administrator with access to the phone directory and the prompt recorder. Refer to the Administration Guide for instructions on how to change this password.
Another way to access the maintenance mode is to press the assigned speed-dial key (by default, the * key). For details, see page 89.

4
Implementation Guide 105
7
pcAnywhere
SpeechAttendant comes equipped with a modem and pcAnywherehost software. This enables ScanSoft’s Customer Service Center to
SpeechAttendant from a remote workstation. For example, if the computer is installed in a server room, the system administrator may
optimize the directory, ensure that the system is functioning properly, and, when the need arises, perform remotetroubleshooting.
The customer can also use pcAnywhere to administer
find it useful to manage the system from another workstation.
The computer that will be used to manage SpeechAttendant must be equipped with pcAnywhere and configured to allow a remote connection.

Chapter 8pcAnywhere
106 SpeechAttendant™
4
Introduction
pcAnywhere allows remote management of the SpeechAttendant application via either:
A LAN connectionDial-Up Networking through a Point-to-Point Protocol (PPP) connection
To be able to establish a pcAnywhere connection, you must:1 Verify the configuration of the remote computer.2 Create a DUN file on the remote computer (if you want to use a
PPP connection).3 Configure pcAnywhere on the remote computer.
Verifying the remote system
To run the host software, the remote computer must:Be a Pentium-class computer running Windows 2000, Windows XP, Windows NT or Windows 95/98 Be equipped with an analog 33.6 Kbps modem (or faster)Be connected to an analog telephone lineBe equipped with pcAnywhere remote access software
pcAnywhere remote access software is not included in the SpeechAttendant package; only the host software is provided.
Chapter 8pcAnywhere
Implementation Guide 107
7
Creating a DUN file
To be able to manage SpeechAttendant remotely, you must first create a DUN file on the remote computer. The process differs slightly depending on the operating system installed on the remote computer. Refer to the appropriate procedure.To create a DUN file using Windows 2000:1 On the desktop of the remote computer, right-click My Network
Places and choose Properties.2 In the Network and Dial-up Connections window, double-click
Make New Connection.3 In the first Network Connection Wizard window, click Next.4 Select Dial-up to private network, then click Next.5 Enter the remote computer’s phone number, then click Next.6 Select For all users, then click Next.7 Enter connection’s name, then click Finish.You can now configure pcAnywhere (see page 112).To create a DUN file using Windows XP:1 On the desktop of the remote computer, right-click My Network
Places and choose Properties.2 In the Network Connections window, double-click New
Connection Wizard.3 In the first New Connection Wizard window, click Next.4 Select Connect to the network at my workplace, then click Next.5 Select Dial-up connection, then click Next.6 Enter the connection’s name, then click Next.7 Enter remote computer’s phone number, then click Next.8 Select For anyone’s use, then click Finish.You can now configure pcAnywhere (see page 112).
Chapter 8 pcAnywhere
108 SpeechAttendant™
4
To create a DUN file using Windows NT:1 On the remote computer, click Start, then choose Programs >
Accessories > Dial-Up Networking.2 In the Dial-Up Networking window, click New.3 In the New Phonebook Entry Wizard window, enter the name
of the new phone book entry, then click Next.4 In the Server window, click Next.5 In the Phone Number window, specify the required information.6 In the New Phonebook Entry Wizard window, click Finish.7 In the Dial-Up Networking window, click More, then select
Edit entry and modem properties.8 In the Edit Phonebook Entry window, click the Server tab.9 In the Dial-up server type field, select PPP: Windows NT,
Windows 95 Plus, Internet.10 Under Network protocols, check TCP/IP, then click TCP/IP
Settings.
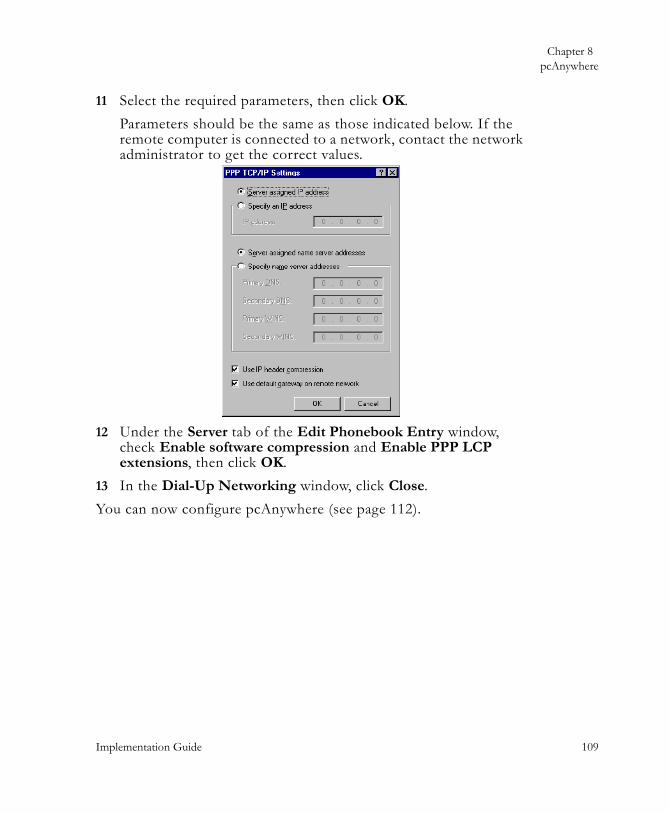
Chapter 8 pcAnywhere
Implementation Guide 109
7
11 Select the required parameters, then click OK.Parameters should be the same as those indicated below. If the remote computer is connected to a network, contact the network administrator to get the correct values.
12 Under the Server tab of the Edit Phonebook Entry window, check Enable software compression and Enable PPP LCP extensions, then click OK.
13 In the Dial-Up Networking window, click Close.You can now configure pcAnywhere (see page 112).
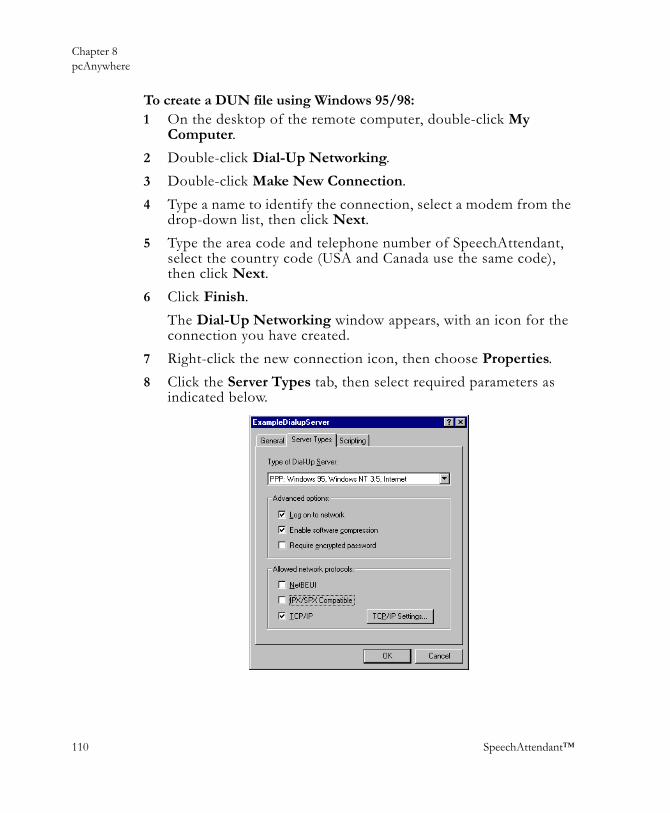
Chapter 8 pcAnywhere
110 SpeechAttendant™
4
To create a DUN file using Windows 95/98:1 On the desktop of the remote computer, double-click My
Computer.2 Double-click Dial-Up Networking.3 Double-click Make New Connection.4 Type a name to identify the connection, select a modem from the
drop-down list, then click Next.5 Type the area code and telephone number of SpeechAttendant,
select the country code (USA and Canada use the same code), then click Next.
6 Click Finish.The Dial-Up Networking window appears, with an icon for the connection you have created.
7 Right-click the new connection icon, then choose Properties.8 Click the Server Types tab, then select required parameters as
indicated below.
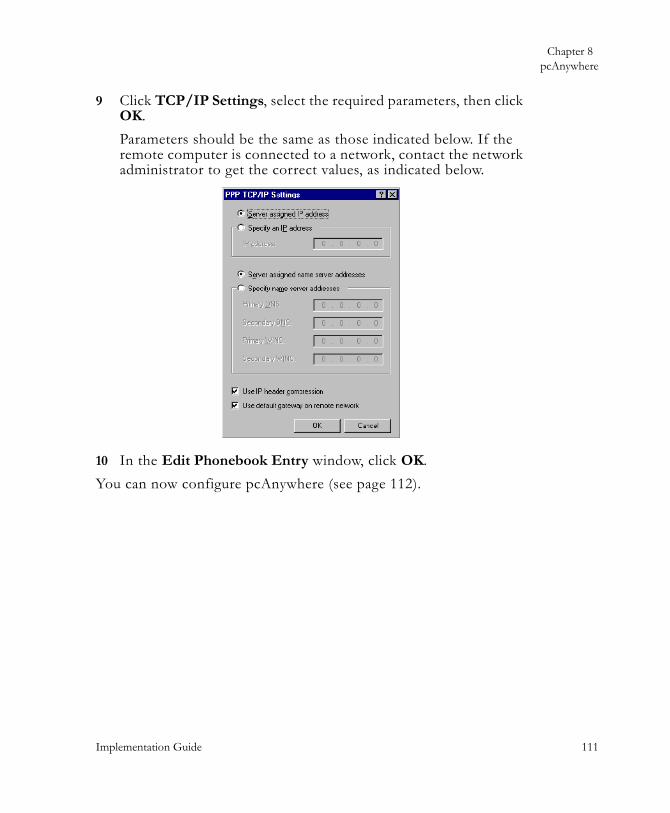
Chapter 8pcAnywhere
Implementation Guide 111
7
9 Click TCP/IP Settings, select the required parameters, then click OK.Parameters should be the same as those indicated below. If the remote computer is connected to a network, contact the network administrator to get the correct values, as indicated below.
10 In the Edit Phonebook Entry window, click OK.You can now configure pcAnywhere (see page 112).
Chapter 8 pcAnywhere
112 SpeechAttendant™
4
Configuring pcAnywhere
pcAnywhere is already configured on SpeechAttendant. However, it must be configured on the remote computer before you can log on to the SpeechAttendant computer. To configure the pcAnywhere remote software:1 On the remote computer, click Start, then choose Programs >
Symantec pcAnywhere.2 In the pcAnywhere window, click Remote Control, then double-
click Add Remote Control Item.3 In the first Remote Control Wizard window, enter a name to
identify the remote connection configuration, then click Next.4 When prompted to specify a connection device, select TCP/IP,
then click Next.5 When prompted to enter the “Host PC’s name,” enter the IP
address of SpeechAttendant, then click Next.
6 If you wish to establish the remote connection immediately, check Automatically begin remote.
7 Click Finish.pcAnywhere configuration is complete. An icon with the remote control connection’s name appears in the pcAnywhere window.
SpeechAttendant configuration requires an IP address rather than a host name.
Chapter 8 pcAnywhere
Implementation Guide 113
7
Logging on to SpeechAttendant
Once pcAnywhere has been configured on the remote computer, you can use it to manage SpeechAttendant remotely.To log on to the SpeechAttendant computer:
pcAnywhere must be “waiting” on the SpeechAttendant computer.You must know the following information about the SpeechAttendant computer:
The modem phone number and/or the IP address provided by your distributorThe user name and password
Refer to pcAnywhere documentation for specific instructions.

4
Implementation Guide 115
7
Testing
Once the phone directory is loaded, you must test:
u The integration of SpeechAttendant with the PBX/KSU u The SpeechAttendant functions
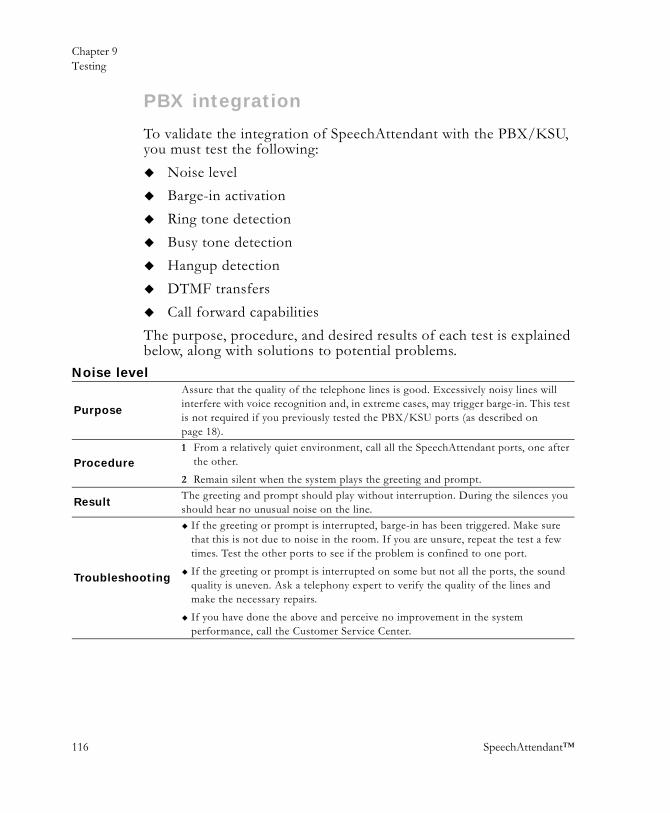
Chapter 9Testing
116 SpeechAttendant™
4
PBX integration
To validate the integration of SpeechAttendant with the PBX/KSU, you must test the following:
Noise levelBarge-in activationRing tone detectionBusy tone detectionHangup detectionDTMF transfersCall forward capabilities
The purpose, procedure, and desired results of each test is explained below, along with solutions to potential problems.
Noise level
Purpose
Assure that the quality of the telephone lines is good. Excessively noisy lines will interfere with voice recognition and, in extreme cases, may trigger barge-in. This test is not required if you previously tested the PBX/KSU ports (as described on page 18).
Procedure1 From a relatively quiet environment, call all the SpeechAttendant ports, one after
the other. 2 Remain silent when the system plays the greeting and prompt.
ResultThe greeting and prompt should play without interruption. During the silences you should hear no unusual noise on the line.
Troubleshooting
If the greeting or prompt is interrupted, barge-in has been triggered. Make sure that this is not due to noise in the room. If you are unsure, repeat the test a few times. Test the other ports to see if the problem is confined to one port. If the greeting or prompt is interrupted on some but not all the ports, the sound quality is uneven. Ask a telephony expert to verify the quality of the lines and make the necessary repairs.If you have done the above and perceive no improvement in the system performance, call the Customer Service Center.
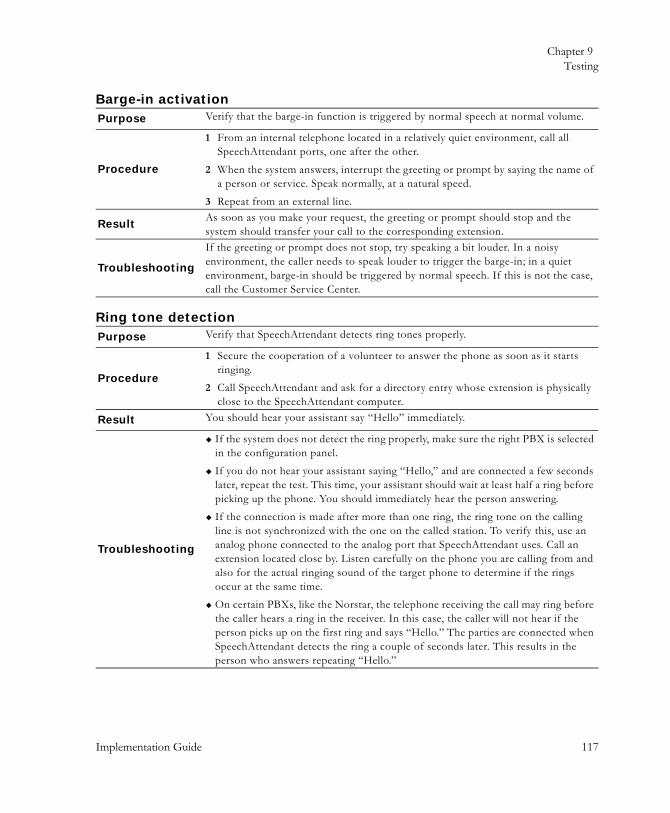
Chapter 9Testing
Implementation Guide 117
7
Barge-in activationPurpose Verify that the barge-in function is triggered by normal speech at normal volume.
Procedure
1 From an internal telephone located in a relatively quiet environment, call all SpeechAttendant ports, one after the other.
2 When the system answers, interrupt the greeting or prompt by saying the name of a person or service. Speak normally, at a natural speed.
3 Repeat from an external line.
Result As soon as you make your request, the greeting or prompt should stop and the system should transfer your call to the corresponding extension.
Troubleshooting
If the greeting or prompt does not stop, try speaking a bit louder. In a noisy environment, the caller needs to speak louder to trigger the barge-in; in a quiet environment, barge-in should be triggered by normal speech. If this is not the case, call the Customer Service Center.
Ring tone detectionPurpose Verify that SpeechAttendant detects ring tones properly.
Procedure
1 Secure the cooperation of a volunteer to answer the phone as soon as it starts ringing.
2 Call SpeechAttendant and ask for a directory entry whose extension is physically close to the SpeechAttendant computer.
Result You should hear your assistant say “Hello” immediately.
Troubleshooting
If the system does not detect the ring properly, make sure the right PBX is selected in the configuration panel.If you do not hear your assistant saying “Hello,” and are connected a few seconds later, repeat the test. This time, your assistant should wait at least half a ring before picking up the phone. You should immediately hear the person answering.If the connection is made after more than one ring, the ring tone on the calling line is not synchronized with the one on the called station. To verify this, use an analog phone connected to the analog port that SpeechAttendant uses. Call an extension located close by. Listen carefully on the phone you are calling from and also for the actual ringing sound of the target phone to determine if the rings occur at the same time. On certain PBXs, like the Norstar, the telephone receiving the call may ring before the caller hears a ring in the receiver. In this case, the caller will not hear if the person picks up on the first ring and says “Hello.” The parties are connected when SpeechAttendant detects the ring a couple of seconds later. This results in the person who answers repeating “Hello.”
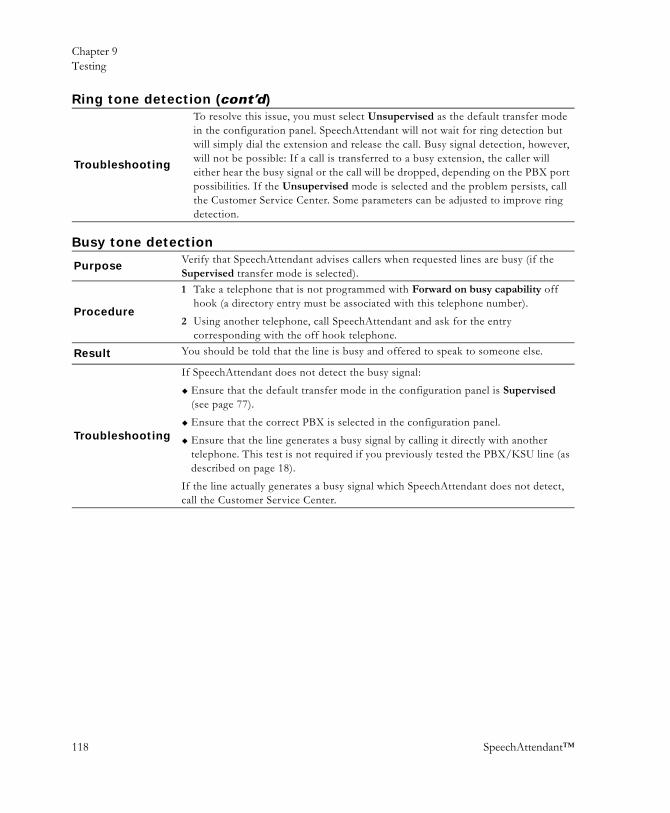
Chapter 9Testing
118 SpeechAttendant™
4
Troubleshooting
To resolve this issue, you must select Unsupervised as the default transfer mode in the configuration panel. SpeechAttendant will not wait for ring detection but will simply dial the extension and release the call. Busy signal detection, however, will not be possible: If a call is transferred to a busy extension, the caller will either hear the busy signal or the call will be dropped, depending on the PBX port possibilities. If the Unsupervised mode is selected and the problem persists, call the Customer Service Center. Some parameters can be adjusted to improve ring detection.
Busy tone detection
Purpose Verify that SpeechAttendant advises callers when requested lines are busy (if the Supervised transfer mode is selected).
Procedure
1 Take a telephone that is not programmed with Forward on busy capability off hook (a directory entry must be associated with this telephone number).
2 Using another telephone, call SpeechAttendant and ask for the entry corresponding with the off hook telephone.
Result You should be told that the line is busy and offered to speak to someone else.
Troubleshooting
If SpeechAttendant does not detect the busy signal: Ensure that the default transfer mode in the configuration panel is Supervised (see page 77).Ensure that the correct PBX is selected in the configuration panel.Ensure that the line generates a busy signal by calling it directly with another telephone. This test is not required if you previously tested the PBX/KSU line (as described on page 18).
If the line actually generates a busy signal which SpeechAttendant does not detect, call the Customer Service Center.
Ring tone detection (cont’d)
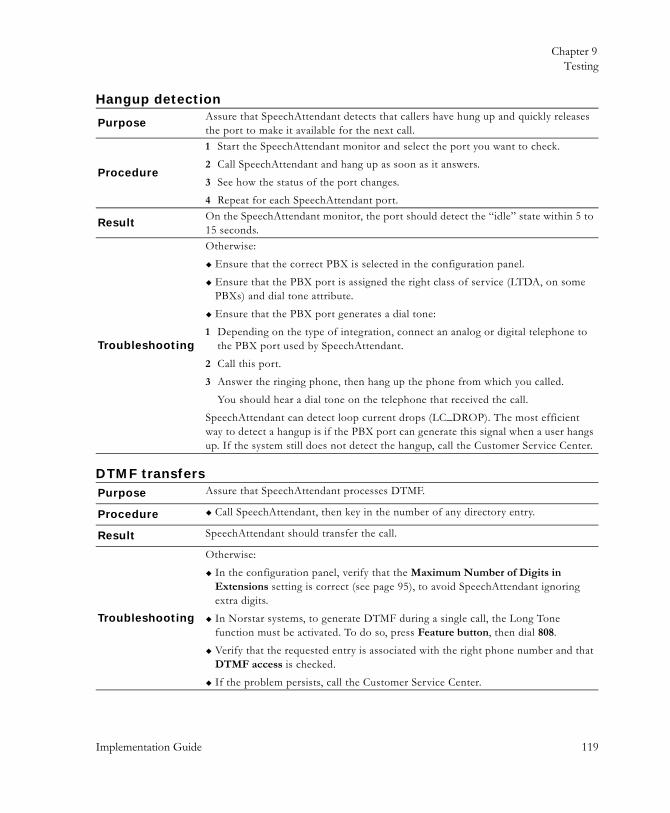
Chapter 9Testing
Implementation Guide 119
7
Hangup detection
Purpose Assure that SpeechAttendant detects that callers have hung up and quickly releases the port to make it available for the next call.
Procedure
1 Start the SpeechAttendant monitor and select the port you want to check. 2 Call SpeechAttendant and hang up as soon as it answers.3 See how the status of the port changes.4 Repeat for each SpeechAttendant port.
ResultOn the SpeechAttendant monitor, the port should detect the “idle” state within 5 to 15 seconds.
Troubleshooting
Otherwise:Ensure that the correct PBX is selected in the configuration panel.Ensure that the PBX port is assigned the right class of service (LTDA, on some PBXs) and dial tone attribute.Ensure that the PBX port generates a dial tone:
1 Depending on the type of integration, connect an analog or digital telephone to the PBX port used by SpeechAttendant.
2 Call this port.3 Answer the ringing phone, then hang up the phone from which you called.
You should hear a dial tone on the telephone that received the call.SpeechAttendant can detect loop current drops (LC_DROP). The most efficient way to detect a hangup is if the PBX port can generate this signal when a user hangs up. If the system still does not detect the hangup, call the Customer Service Center.
DTMF transfersPurpose Assure that SpeechAttendant processes DTMF.
Procedure Call SpeechAttendant, then key in the number of any directory entry.
Result SpeechAttendant should transfer the call.
Troubleshooting
Otherwise:In the configuration panel, verify that the Maximum Number of Digits in Extensions setting is correct (see page 95), to avoid SpeechAttendant ignoring extra digits. In Norstar systems, to generate DTMF during a single call, the Long Tone function must be activated. To do so, press Feature button, then dial 808.Verify that the requested entry is associated with the right phone number and that DTMF access is checked.If the problem persists, call the Customer Service Center.
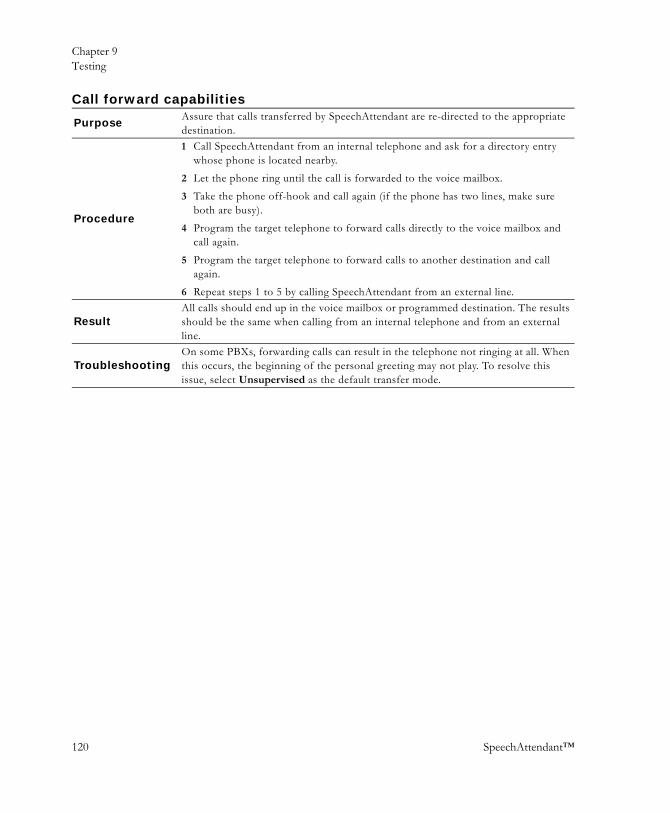
Chapter 9Testing
120 SpeechAttendant™
4
Call forward capabilities
Purpose Assure that calls transferred by SpeechAttendant are re-directed to the appropriate destination.
Procedure
1 Call SpeechAttendant from an internal telephone and ask for a directory entry whose phone is located nearby.
2 Let the phone ring until the call is forwarded to the voice mailbox.3 Take the phone off-hook and call again (if the phone has two lines, make sure
both are busy). 4 Program the target telephone to forward calls directly to the voice mailbox and
call again.5 Program the target telephone to forward calls to another destination and call
again.6 Repeat steps 1 to 5 by calling SpeechAttendant from an external line.
ResultAll calls should end up in the voice mailbox or programmed destination. The results should be the same when calling from an internal telephone and from an external line.
TroubleshootingOn some PBXs, forwarding calls can result in the telephone not ringing at all. When this occurs, the beginning of the personal greeting may not play. To resolve this issue, select Unsupervised as the default transfer mode.
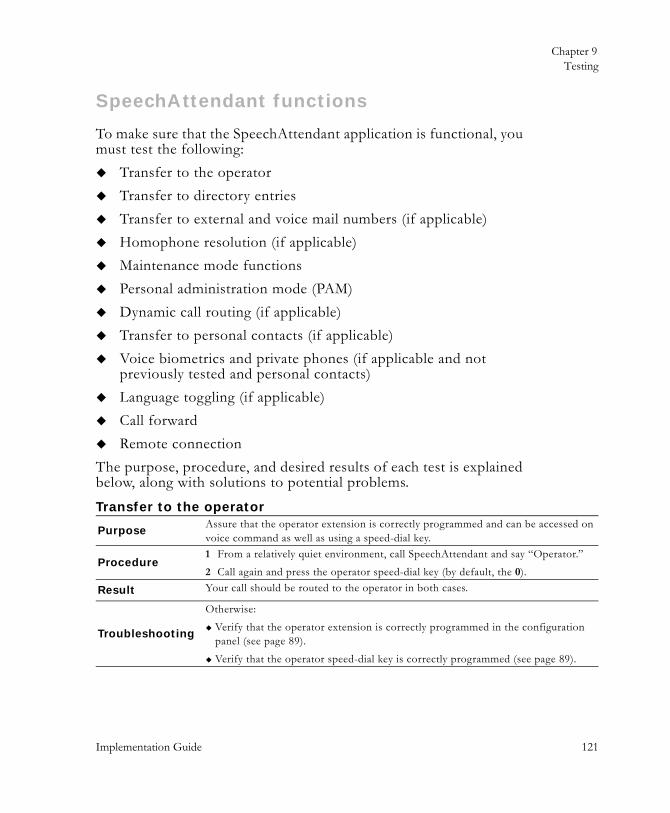
Chapter 9Testing
Implementation Guide 121
7
SpeechAttendant functions
To make sure that the SpeechAttendant application is functional, you must test the following:
Transfer to the operatorTransfer to directory entriesTransfer to external and voice mail numbers (if applicable)Homophone resolution (if applicable)Maintenance mode functionsPersonal administration mode (PAM)Dynamic call routing (if applicable)Transfer to personal contacts (if applicable)Voice biometrics and private phones (if applicable and not previously tested and personal contacts)Language toggling (if applicable)Call forwardRemote connection
The purpose, procedure, and desired results of each test is explained below, along with solutions to potential problems.
Transfer to the operator
PurposeAssure that the operator extension is correctly programmed and can be accessed on voice command as well as using a speed-dial key.
Procedure1 From a relatively quiet environment, call SpeechAttendant and say “Operator.”2 Call again and press the operator speed-dial key (by default, the 0).
Result Your call should be routed to the operator in both cases.
Troubleshooting
Otherwise:Verify that the operator extension is correctly programmed in the configuration panel (see page 89).
Verify that the operator speed-dial key is correctly programmed (see page 89).
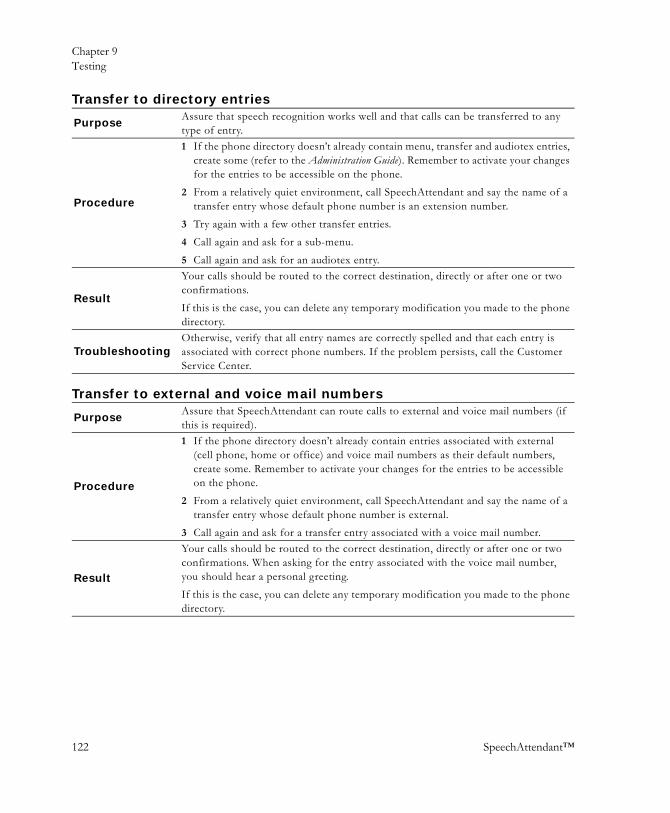
Chapter 9Testing
122 SpeechAttendant™
4
Transfer to directory entries
Purpose Assure that speech recognition works well and that calls can be transferred to any type of entry.
Procedure
1 If the phone directory doesn’t already contain menu, transfer and audiotex entries, create some (refer to the Administration Guide). Remember to activate your changes for the entries to be accessible on the phone.
2 From a relatively quiet environment, call SpeechAttendant and say the name of a transfer entry whose default phone number is an extension number.
3 Try again with a few other transfer entries.4 Call again and ask for a sub-menu.5 Call again and ask for an audiotex entry.
Result
Your calls should be routed to the correct destination, directly or after one or two confirmations.If this is the case, you can delete any temporary modification you made to the phone directory.
TroubleshootingOtherwise, verify that all entry names are correctly spelled and that each entry is associated with correct phone numbers. If the problem persists, call the Customer Service Center.
Transfer to external and voice mail numbers
Purpose Assure that SpeechAttendant can route calls to external and voice mail numbers (if this is required).
Procedure
1 If the phone directory doesn’t already contain entries associated with external (cell phone, home or office) and voice mail numbers as their default numbers, create some. Remember to activate your changes for the entries to be accessible on the phone.
2 From a relatively quiet environment, call SpeechAttendant and say the name of a transfer entry whose default phone number is external.
3 Call again and ask for a transfer entry associated with a voice mail number.
Result
Your calls should be routed to the correct destination, directly or after one or two confirmations. When asking for the entry associated with the voice mail number, you should hear a personal greeting.If this is the case, you can delete any temporary modification you made to the phone directory.
Chapter 9Testing
Implementation Guide 123
7
Troubleshooting
Otherwise:Verify that all entry names are correctly spelled and that each entry is associated with an adequate phone number and phone type. Remember that external phone numbers must include any required prefix such as access and area codes.For external transfers, ensure that the prefixes for external numbers are correctly set (see page 76) and that the PBX ports are programmed to allow external calls. Test this by calling the external number using an analog telephone connected to the PBX port.For voice mail transfers, verify that the voice mail prefix and suffix are correctly set (see page 76).If the problem persists, call the Customer Service Center.
Homophone resolutionPurpose Assure that SpeechAttendant can handle homophones.
Procedure
1 If the phone directory doesn’t already contain homophone entries, create two transfer entries with the same name. Each entry must be associated with a different department and phone number. Remember to activate your changes for the entries to be accessible on the phone.
2 From a relatively quiet environment, call SpeechAttendant and ask for the homophone name.
Result
The system should suggest one of the homophones using the requested name plus that person’s department. If you accept this suggestion, your call should be transferred to this person. Otherwise, the system should suggest the second homophone.If this is the case, you can delete any temporary modification you made to the phone directory.
Troubleshooting
Otherwise:Verify that all entry names are correctly spelled and that each entry is associated with the right phone number and department.Using the Directory Assistant (accessible from the Menu Editor toolbar), validate that the homophones you created are detected as such (refer to the Administration Guide).Verify that the homophone resolution method is set to Department and that homophone resolution threshold is correct (see pages 92 and 93).If the problem persists, call the Customer Service Center.
Transfer to external and voice mail numbers (cont’d)
Chapter 9Testing
124 SpeechAttendant™
4
Maintenance mode functions
Purpose Assure that the maintenance mode is accessible either on voice command or using a speed-dial key, and that its functions are working properly.
Procedure
1 In the phone directory, create a transfer entry for yourself. Make sure name recorder access is allowed.
2 From a phone close to the SpeechAttendant computer, call the system and say “Maintenance Mode.”
3 Press 1, enter the name recorder password, then follow the instructions to record your name.
4 Call again, and press the maintenance mode speed-dial key (by default, the * key).5 Press 2, then enter the maintenance mode password.6 Referring to the Administration Guide, access the prompt recorder and create an
emergency greeting.7 If you have programmed a speed-dial key for accessing the name recorder or
system administration functions directly, call again and press these keys.
Result You should be able to access the maintenance mode and activate all of its functions.
Troubleshooting
Otherwise:Verify that the speed-dial keys and passwords are correctly programmed (see pages 89, 94 and 96).If access to the maintenance is blocked, reset the invalid password counter (see page 94).
Personal administration mode (PAM)
PurposeAssure that the personal administration mode is accessible and that its functions are working properly.
Procedure
1 In the phone directory, create a transfer entry for yourself, making sure you are allowed to use the name recorder and voice biometrics (if applicable).
2 From a quiet environment, call SpeechAttendant, then press *99 to access the PAM.
3 Referring to the Administration Guide, record your name, create your voiceprint, redirect your calls and change your PIN (your default PIN is the one specified in the configuration panel, unless you entered a specific PIN in your directory entry).
ResultYou should be able to record your name, create your voice print (if applicable) and change your PIN. You should also be given the option of redirecting your calls, but this will be tested later (see page 128).
Chapter 9Testing
Implementation Guide 125
7
Troubleshooting
Otherwise: Verify that the PAM speed-dial key is correctly programmed (see page 89).Verify that Name recorder and Voice biometrics are checked in your entry.If you weren’t able to change your PIN, go back to your directory entry and assign yourself a new PIN, then try again.If you experienced difficulty creating your voiceprint, try again from a more quiet environment.If the problem persists, call the Customer Service Center.
Dynamic call routing
Purpose If the system allows dynamic call routing, assure that it recognizes DNIS and CLID and answers calls accordingly.
Procedure
1 Referring to the Administration Guide, create three sub-menus named:“Testing internal CLID”“Testing external CLID”“Testing DNIS” (if applicable)
It is not necessary to create any greetings or prompts, or modify any settings. Once you are done, don’t forget to activate your changes.
2 Create an entry point named “Internal CLID,” selecting “Testing internal CLID” as the home and main menus. In the CLID column of the DNIS/CLID tab, enter the extension number of the phone close to the SpeechAttendant computer.
3 Create a second entry point named “External CLID,” selecting “Testing external CLID” as the home and main menus; in the CLID column of the DNIS/CLID tab, enter your cell phone number.
4 Create another entry point named “DNIS,” selecting “Testing DNIS” as the home and main menus; in the DNIS column of the DNIS/CLID tab, enter the phantom number programmed as explained on page 15.
5 Using the internal phone that you programmed in the CLID internal entry point, call SpeechAttendant.You should hear “Testing internal CLID. Which person or service do you want to reach?”
6 From your cell phone, call SpeechAttendant.You should hear “Testing external CLID. Which person or service do you want to reach?”
7 From any other phone, dial the phantom number programmed in step 4. You should hear “Testing DNIS. Which person or service do you want to reach?”
Personal administration mode (PAM) (cont’d)
Chapter 9Testing
126 SpeechAttendant™
4
ResultEach of your calls should be automatically routed to the appropriate menu, which is confirmed by the greeting. If this is the case, you can delete any temporary modification you made to the phone directory.
Troubleshooting
Otherwise:Check that your entry points are correctly programmed.Make sure the phantom number is correctly programmed (see page 15).Verify that DNIS and CLID are correctly deciphered by the system:
From Admin Tools window, start the monitor.Repeat steps 5 to 7 of the above procedure, making sure the correct DNIS and CLID are displayed.
If this is not the case, modify the DNIS and CLID masks (see page 82).If the problem persists, call the Customer Service Center.
Transfer to personal contacts
Purpose If the SpeechContacts option is included in the license, this test assures that it is functional.
Procedure
1 Ensure the cooperation of an employee who has a personal directory.2 Have this person create a voiceprint in the PAM.3 Referring to the Administration Guide, create this person’s personal directory.4 Ask your assistant to access the personal directory management Web site and
integrate contacts into the personal directory (instructions can be accessed by clicking Help).
5 Ask your assistant to call SpeechAttendant and ask for one of the contacts that has just been integrated into the personal directory (to avoid disturbing people, your assistant should hang up as soon as the transfer is announced).
Result Your assistant should be transferred to the requested contact.
Troubleshooting
If your assistant cannot create a voiceprint, refer to the troubleshooting section of the personal administration mode test (see page 124).If your assistant cannot access the personal directory management Web site, verify that the network connection is correctly programmed (see page 10).If your assistant’s Outlook contacts are not displayed, refer to the online help.If your assistant cannot reach contacts, make sure their names are properly spelled.If the problem persists, call the Customer Service Center.
Dynamic call routing (cont’d)

Chapter 9Testing
Implementation Guide 127
7
Voice biometrics and private phones
Purpose
Assure that the voice biometrics module is working properly.NOTE This test is only required if the SpeechAuthenticator option is included in
the license and if you haven’t previously tested voice biometrics with personal contacts (see page 126).
Procedure
1 Referring to the Administration Guide, create a menu protected with voice biometrics, adding your name to the list of people authorized to access it. Remember to activate your changes in the directory for the newly created menu to be accessible on the phone.
2 Call SpeechAttendant and ask for the protected menu.3 Call again, but when prompted to identify yourself, say another name.4 Ask someone to try accessing the menu using your identity.5 In your transfer entry, designate your phone number as private. 6 From this extension, call SpeechAttendant and ask for the protected menu.
ResultYou should be the only person granted to access the menu, and only when using your real name. When calling from your private phone, the system should not ask you to identify yourself.
TroubleshootingOtherwise, try again from a more quiet environment. If the problem persists, call the Customer Service Center.
Language togglingPurpose In a bilingual system, assure that callers can select another language.
Procedure
1 Call SpeechAttendant.2 When the system answers:
Press 9 (or the actual speed-dial key), if the language selection method is Optional.Say the desired language, if the language selection method is Mandatory.
Result SpeechAttendant should repeat the greeting in the second language.
Troubleshooting Otherwise, verify that the speed-dial key is correctly programed (see page 89).
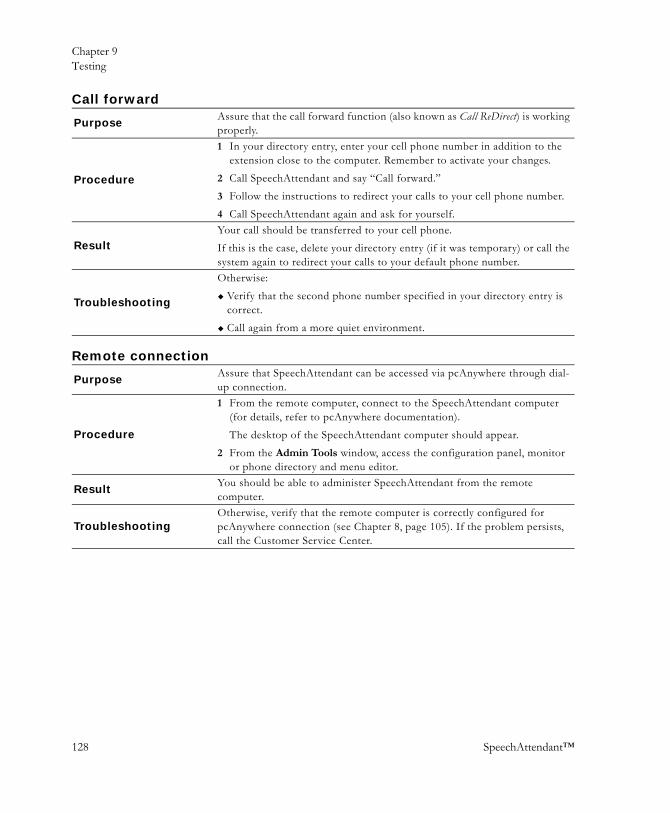
Chapter 9Testing
128 SpeechAttendant™
4
Call forward
Purpose Assure that the call forward function (also known as Call ReDirect) is working properly.
Procedure
1 In your directory entry, enter your cell phone number in addition to the extension close to the computer. Remember to activate your changes.
2 Call SpeechAttendant and say “Call forward.”3 Follow the instructions to redirect your calls to your cell phone number.4 Call SpeechAttendant again and ask for yourself.
ResultYour call should be transferred to your cell phone. If this is the case, delete your directory entry (if it was temporary) or call the system again to redirect your calls to your default phone number.
Troubleshooting
Otherwise:Verify that the second phone number specified in your directory entry is correct.Call again from a more quiet environment.
Remote connection
Purpose Assure that SpeechAttendant can be accessed via pcAnywhere through dial-up connection.
Procedure
1 From the remote computer, connect to the SpeechAttendant computer (for details, refer to pcAnywhere documentation).The desktop of the SpeechAttendant computer should appear.
2 From the Admin Tools window, access the configuration panel, monitor or phone directory and menu editor.
Result You should be able to administer SpeechAttendant from the remote computer.
TroubleshootingOtherwise, verify that the remote computer is correctly configured for pcAnywhere connection (see Chapter 8, page 105). If the problem persists, call the Customer Service Center.
Implementation Guide 129
Index
Aaccess to name recorder 97Access to Secured Features 85account code prefix 88ACD queue 27–36
enabling 32, 36for a redundant server 59, 72
agentID 29, 32, 36logged out 32, 36
amphenol connector 22, 24analog integration 16, 20analog terminal adapters (ATAs) 19–20Announce Destination Number 95area codes, number of digits in 76
authorization code prefix 88Avaya
ACD queue 33–36digital integration 16, 22
Bbarge-in
during emergency greeting 96mode 80standard 80testing 117
beepduring ASR processing 86interval 86
breakout box 23, 25Business Communications Manager
(BCM) 39–55busy condition 18busy tone detection 118
Ccall analyzer
call filter 80recorded channels 80

Index
130 SpeechAttendant™
class of service 17CLID
available 82masks 82–85
client site 9clustering 71–86computer
location for 9setting up 8
configuration panel 74–99passwords 102
configuration settingsAccess to Secured Features 85Account Code Prefix 88ACD Enabled 32, 36Agent ID 32, 36Agent Logged Out 32, 36Announce Destination Number 95
Authorization Code Prefix 88Barge-in Mode 80Beep During ASR Processing 86Beep Interval 86call accounting 88Call Analyzer Call Filter 80Call Analyzer Recorded Channels 80CLID Available 82Confirmation Before Homophone
Listing 93Consecutive Rejections 94customizing 74Default Account Code 88Default PIN 97Default Transfer Mode 77DNIS and CLID Masks 82–85Emergency Barge-in Mode 96External Voice Mail Prefix 76
External Voice Mail Suffix 76Flash Length 79Flashback String 78GUI Language 97Homophone Resolution Method 92Homophone Resolution Threshold 93Invalid Password Counter 94LDAP Server Timeout 97Maintenance Mode Password 94Max. Number Unauthorized Requests 88Maximum Number of Digits in
Extensions 95Name Recorder Password 96Nortel-M1 Agent ID Mode 32, 36Number of Digits for Account Code 88Number of Digits in Area Code 76Number of Digits in External Phone
Numbers 76Number of Ports 75Operator Extension Number 89Pause Length 79PBX 75Percentage of Ports Available for PAM 89Prefixes for External Numbers 76Refusal and Request Together 87Reminder for Name Recorder 98Required Action When Port Idle 32, 36Ring Off Time 79Ring On Time 79
Show Menu Editor IDs 98Single Access to Name Recorder 97SMTP Server Name 85SpeechAttendant Trace Level 80Speed-Dial Keys 89–91SWI Server Trace Level 80System Behavior on Busy 98

Index
Implementation Guide 131
System Languages 81Telephony Card 75Transfer Connect Prefix 81Transfer String 78Transfer to Operator on Silence 96Verify Caller Identity by Default 99Volume 87
Confirmation Before Homophone Listing 93connecting
printer 100remotely with pcAnywhere 113to the network 10to the PBX 20–25
consecutive rejections 94counter, invalid password 94Customer Service Center xii
Ddefault
account code 88PIN 97transfer mode 77
department homophone resolution method 92
destination number, announce 95dial tone detection 18digital integration 15, 16–17, 22–25digits
in area codes 76in external numbers 76
directory entriestransfer to 122
DNIS Masks 82–85DTMF, testing transfers 119duration
of hookflash 79of pause 79of ring tone 79
of silence following ring tone 79dynamic call routing
CLID available 82DNIS and CLID masks in 82testing 125
Eemergency barge-in mode 96extensions
for the operator 89maximum number of digits in 95speed-dial keys 89
external numbersnumber of digits in 76prefixes for 76testing transfer to 122
external voice mailprefix 76suffix 76
Ffallback plan 18fast keys 89Flash Length 79Flashback String 78
GGUI language 97
Hhang-up detection 18, 119homophone resolution
confirmation before listing 93method 92testing 123threshold 93
hunting method 15for a redundant server 59

Index
132 SpeechAttendant™
Iinstalling ATAs 19–20interrupting a prompt. See barge-ininvalid password counter 94IP
address 10
KKSU See PBX.
LLAN connection 10language
graphical user interface 97recognized by system 81switching with speed-dial key 90, 127
LDAP Server Timeout 97level 1 password 102level 2 password 102license activating 11Linx ATA 19–20Locus password 101
Mmaintenance mode
password 94, 103resetting access to 94speed-dial key 90testing 124
masks, DNIS and CLID 82–85maximum
consecutive rejections 94digits in extensions 95homophones 93number of unauthorized requests 88
MeridianACD queue 28–32
digital integration 16, 22mini-patch panel 23, 25Mitel digital integration 16, 22modem 17multi-server application 57–72
Nname homophone resolution method 92name recorder
password 96reminder 98single access to 97speed-dial key 90
NEC digital integration 17, 24network connection 10Norstar integration 19–20Nortel-M1 Agent ID Mode 32, 36number
of digits for account code 88of digits in area code 76of digits in external phone numbers 76of ports 75
Ooperator
extension 89homophone resolution method 92speed-dial key 90testing transfer to 121transfer on silence 96
PPAM (personal administration mode)
ports available for 89speed-dial key 90testing 124
passwordscounter for invalid 94level 1 102
Index
Implementation Guide 133
level 2 102Locus 101maintenance mode 94, 103modifying 100–103name recorder 96Windows administrator 101See also PIN.
Pause Length 79PBX
Avaya ACD queue 33–36
connecting 20–25for a standby/redundant server 59Meridian ACD queue 28–32programming 14–18specifying the model 11, 75
pcAnywhere 105–113, 128percentage
of ports available for PAM 89personal administration mode. See PAM.personal contacts, testing 126phantom number 15PIN (personal identification number) 103
default 97ports
ACD 31
assigned to SpeechAttendant 75attributes 16available for PAM 89standby/redundant server 59
position ID 29, 32prefixes
account codes 88authorization code 88external numbers 76external voice mail 76
Transfer Connect service 81printer, connecting 100private phone 99prompt, interrupting. See barge-in.
Rrefusal and request together, setting 87rejections, consecutive 94Reminder for Name Recorder 98remote connection 105–113, 128Required Action When Port Idle 32, 36Ring Off Time 79Ring On Time 79rotary hunting 15
Ssecurity
features 85
sequential hunting 15server clustering 57–72Show Menu Editor IDs 98silence, transfer to operator on 96Single Access to Name Recorder 97site requirements 9SMTP Server Name 85speed-dial keys 89–91standby server
customizing configuration settings 72required equipment for setup 8
suffix, external voice mail 76supervised transfers 77system
behavior on busy 98languages 81
Ttechnical support xiitests
Index
134 SpeechAttendant™
barge-in activation 117busy tone detection 118call forward 128call forward capabilities 120DTMF transfers 119dynamic call routing 125hang-up detection 119homophone resolution 123language toggling 127maintenance mode functions 124noise level 116PBX 18, 116–120personal administration mode 124ring tone detection 117transfer to directory entries 122transfer to external and voice mail
numbers 122transfer to personal contacts 126transfer to the operator 121voice biometrics 127
trace level 80transfer
default mode 77DTMF 119string 78
supervised 77to operator on silence 96unsupervised 78
Transfer Connect prefix 81trunk access 17
Uunsupervised transfers 78
VVerify Caller Identity by Default 99virtual number 15voice biometrics
security level for 86testing 127
voice board 75voice mail
prefix 76suffix 76
volume 87
Wwhat’s new in the current version xWindows
administrator password 101parameters 99