a seven day and nine meal guide to cooking bistro style
TRANSCRIPT
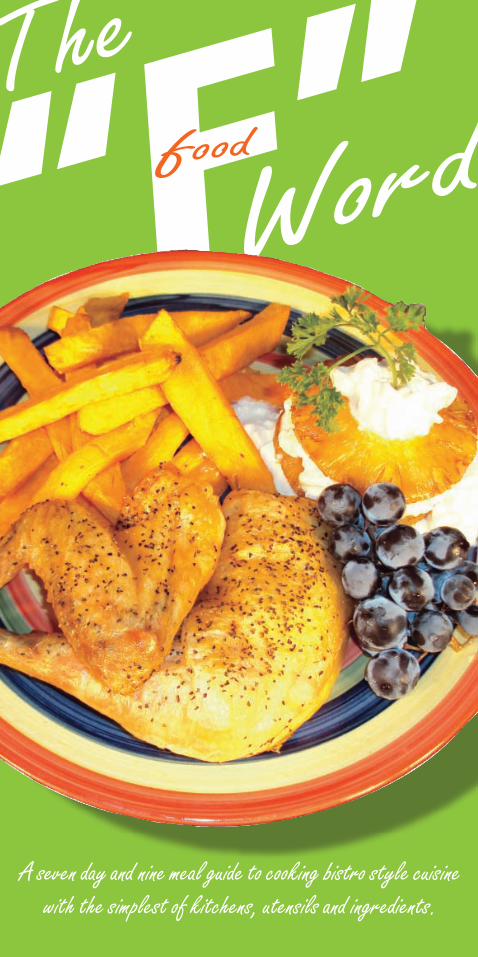
“F”
A seven day and nine meal guide to cooking bistro style cuisinewith the simplest of kitchens, utensils and ingredients.

To cook
Sunday is my favorite day of the week. I spend all day in the kitchen and nothing makes me happier. Having friends and family around, The laughter and the aroma, the conversation and the colors, and finally the quiet we share as we enjoy the flavors and each others company. Cooking is sublime.
It’s not hard to draw a crowd when food is involved. It’s human nature. Historically we huddled around campfires. Kitchens are the modern campfire and you too can call a huddle with the sizzling of bacon, the smell of simmering garlic or by simply pulling more than two ingredients from the refrigerator. People sense something great is about to happen.
If you cook, your ego will be fed. People will lavish you with thanks and praise. Some will show up bearing gifts and contributions. Your drink will never empty. However, this is not why I cook. I cook because as I cut, blend, grate, braise, plate and serve. For me, the food is the celebration, and I love to celebrate
When I moved to Miami from a small beach town in Virginia I was single, living in a studio apartment and had left nearly all of my worldly possessions behind. Including my cuisinart and microwave, pretty much everything except for a pot, pan, broiler pan and my trusty knife, “Leonard”. I soon learned I needed little more than that to prepare the same dishes I had made back home. I also found that it was taking a bit more time. Time I have since learned to savor, with friends.
I soon settled into Miami, the city I now call home and have made many friends. One of these friends commented on how I shop only once a week and how often times while I am cooking a meal I am also prep cooking for a meal I am planning for tomorrow. This seems organized and natural to me but apparently not to those who are not so comfortable or even intimidated in the kitchen. This book is for those people. I will share all of my knowledge in the kitchen in a loose and casual way in hopes that everyone has fun and in no time at all, cooking will be something you look forward to and are passionate about.
I am going to show you how to make delicious bistro style meals in any kitchen with very simple tools and easily obtained ingredients. This is not a recipe book. I repeat: “This Is NOT A Recipe Book!” This is a guide. One that is intended to be enjoyable, affordable and provide the timid with the encouragement to turn on the burner and make things happen. So, check off the items on the next page to make sure you have the basic equipment in the kitchen. Be sure and take the book with you. You’ll need the shopping list and let’s head to the grocery store. Come home, stock the cupboards, roll up your sleeves and Let’s Get Cooking!
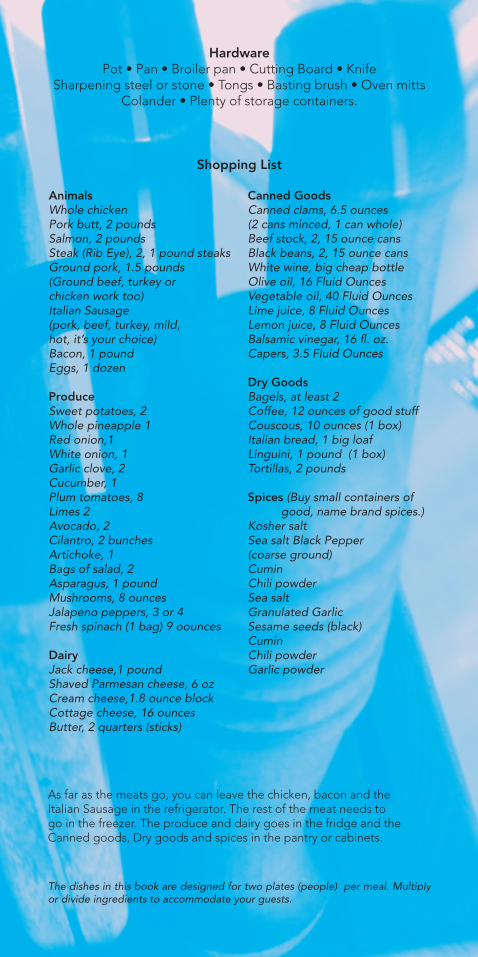
AnimalsWhole chickenPork butt, 2 poundsSalmon, 2 poundsSteak (Rib Eye), 2, 1 pound steaksGround pork, 1.5 pounds(Ground beef, turkey or chicken work too)Italian Sausage (pork, beef, turkey, mild, hot, it’s your choice)Bacon, 1 poundEggs, 1 dozen
Produce Sweet potatoes, 2Whole pineapple 1Red onion,1White onion, 1Garlic clove, 2Cucumber, 1Plum tomatoes, 8Limes 2Avocado, 2Cilantro, 2 bunchesArtichoke, 1Bags of salad, 2Asparagus, 1 poundMushrooms, 8 ouncesJalapeno peppers, 3 or 4Fresh spinach (1 bag) 9 oounces
DairyJack cheese,1 poundShaved Parmesan cheese, 6 ozCream cheese,1.8 ounce blockCottage cheese, 16 ouncesButter, 2 quarters (sticks)
Canned GoodsCanned clams, 6.5 ounces(2 cans minced, 1 can whole)Beef stock, 2, 15 ounce cansBlack beans, 2, 15 ounce cansWhite wine, big cheap bottleOlive oil, 16 Fluid OuncesVegetable oil, 40 Fluid OuncesLime juice, 8 Fluid OuncesLemon juice, 8 Fluid Ounces Balsamic vinegar, 16 fl. oz.Capers, 3.5 Fluid Ounces
Dry GoodsBagels, at least 2Coffee, 12 ounces of good stuffCouscous, 10 ounces (1 box)Italian bread, 1 big loafLinguini, 1 pound (1 box)Tortillas, 2 pounds
Spices (Buy small containers of good, name brand spices.)Kosher saltSea salt Black Pepper (coarse ground)CuminChili powderSea saltGranulated GarlicSesame seeds (black)CuminChili powderGarlic powder
HardwarePot • Pan • Broiler pan • Cutting Board • Knife
Sharpening steel or stone • Tongs • Basting brush • Oven mitts Colander • Plenty of storage containers.
Shopping List
The dishes in this book are designed for two plates (people) per meal. Multiply or divide ingredients to accommodate your guests.
As far as the meats go, you can leave the chicken, bacon and the Italian Sausage in the refrigerator. The rest of the meat needs to go in the freezer. The produce and dairy goes in the fridge and the Canned goods, Dry goods and spices in the pantry or cabinets.
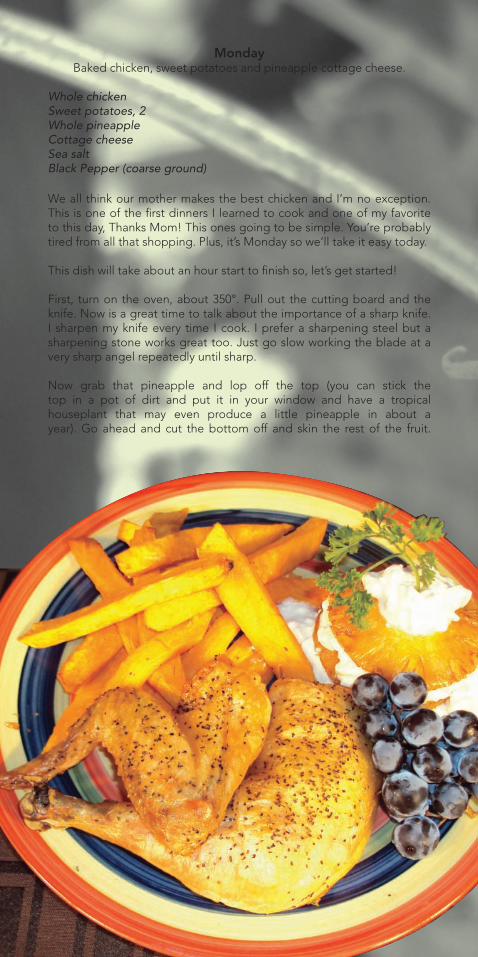
MondayBaked chicken, sweet potatoes and pineapple cottage cheese.
Whole chickenSweet potatoes, 2Whole pineappleCottage cheeseSea saltBlack Pepper (coarse ground)
We all think our mother makes the best chicken and I’m no exception. This is one of the first dinners I learned to cook and one of my favorite to this day, Thanks Mom! This ones going to be simple. You’re probably tired from all that shopping. Plus, it’s Monday so we’ll take it easy today.
This dish will take about an hour start to finish so, let’s get started!
First, turn on the oven, about 350°. Pull out the cutting board and the knife. Now is a great time to talk about the importance of a sharp knife. I sharpen my knife every time I cook. I prefer a sharpening steel but a sharpening stone works great too. Just go slow working the blade at a very sharp angel repeatedly until sharp.
Now grab that pineapple and lop off the top (you can stick the top in a pot of dirt and put it in your window and have a tropical houseplant that may even produce a little pineapple in about a year). Go ahead and cut the bottom off and skin the rest of the fruit.
Now cut the remainder into an equal number of slices, the thicker the better, about an inch is great. Now, You need to core it, this may require a smaller knife. Be careful. You can throw away all the pineapple skins and core. Or put it in a covered container filled with water and about a half pound of sugar. Put this concoction in a dark cupboard or closet for 4 - 6 weeks. You will have pineapple hooch, or ChiCha as my Colombian wife calls it. The namesake comes from the Indian tribe that made it famous.
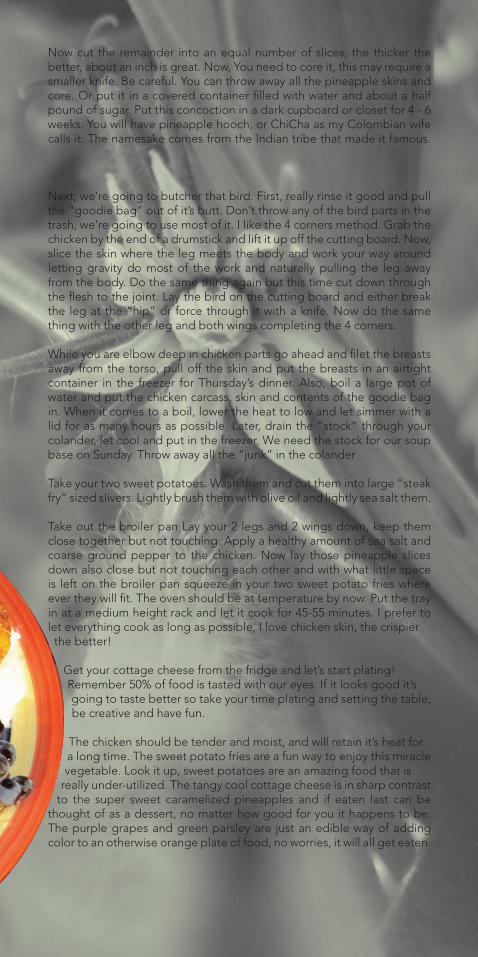
Next, we’re going to butcher that bird. First, really rinse it good and pull the “goodie bag” out of it’s butt. Don’t throw any of the bird parts in the trash, we’re going to use most of it. I like the 4 corners method. Grab the chicken by the end of a drumstick and lift it up off the cutting board. Now, slice the skin where the leg meets the body and work your way around letting gravity do most of the work and naturally pulling the leg away from the body. Do the same thing again but this time cut down through the flesh to the joint. Lay the bird on the cutting board and either break the leg at the “hip” or force through it with a knife. Now do the same thing with the other leg and both wings completing the 4 corners.
While you are elbow deep in chicken parts go ahead and filet the breasts away from the torso, pull off the skin and put the breasts in an airtight container in the freezer for Thursday’s dinner. Also, boil a large pot of water and put the chicken carcass, skin and contents of the goodie bag in. When it comes to a boil, lower the heat to low and let simmer with a lid for as many hours as possible. Later, drain the “stock” through your colander, let cool and put in the freezer. We need the stock for our soup base on Sunday. Throw away all the “junk” in the colander
Take your two sweet potatoes. Wash them and cut them into large “steak fry” sized slivers. Lightly brush them with olive oil and lightly sea salt them.
Take out the broiler pan Lay your 2 legs and 2 wings down, keep them close together but not touching. Apply a healthy amount of sea salt and coarse ground pepper to the chicken. Now lay those pineapple slices down also close but not touching each other and with what little space is left on the broiler pan squeeze in your two sweet potato fries where ever they will fit. The oven should be at temperature by now. Put the tray in at a medium height rack and let it cook for 45-55 minutes. I prefer to let everything cook as long as possible, I love chicken skin, the crispier the better!
Get your cottage cheese from the fridge and let’s start plating! Remember 50% of food is tasted with our eyes. If it looks good it’s going to taste better so take your time plating and setting the table, be creative and have fun.
The chicken should be tender and moist, and will retain it’s heat for a long time. The sweet potato fries are a fun way to enjoy this miracle vegetable. Look it up, sweet potatoes are an amazing food that is really under-utilized. The tangy cool cottage cheese is in sharp contrast
to the super sweet caramelized pineapples and if eaten last can be thought of as a dessert, no matter how good for you it happens to be. The purple grapes and green parsley are just an edible way of adding color to an otherwise orange plate of food, no worries, it will all get eaten.
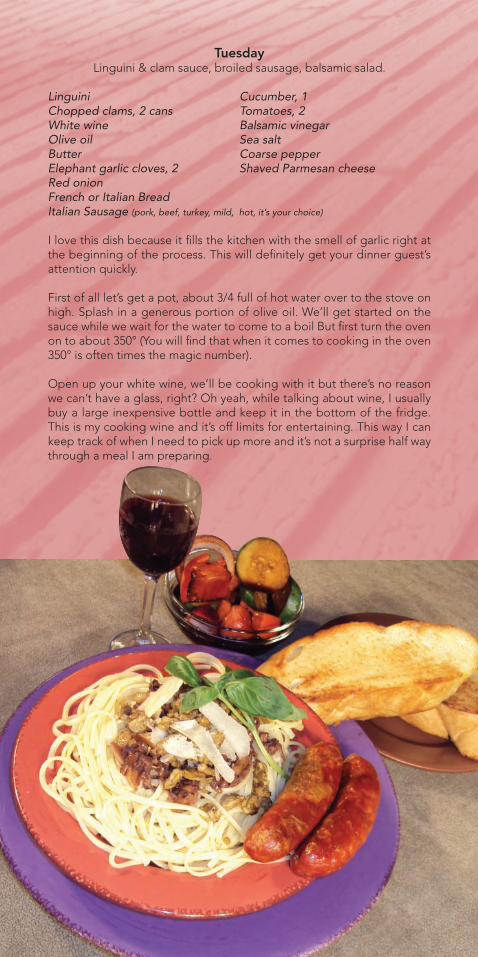
TuesdayLinguini & clam sauce, broiled sausage, balsamic salad.
Linguini Cucumber, 1Chopped clams, 2 cans Tomatoes, 2White wine Balsamic vinegarOlive oil Sea saltButter Coarse pepperElephant garlic cloves, 2 Shaved Parmesan cheeseRed onionFrench or Italian BreadItalian Sausage (pork, beef, turkey, mild, hot, it’s your choice)
I love this dish because it fills the kitchen with the smell of garlic right at the beginning of the process. This will definitely get your dinner guest’s attention quickly.
First of all let’s get a pot, about 3/4 full of hot water over to the stove on high. Splash in a generous portion of olive oil. We’ll get started on the sauce while we wait for the water to come to a boil But first turn the oven on to about 350° (You will find that when it comes to cooking in the oven 350° is often times the magic number).
Open up your white wine, we’ll be cooking with it but there’s no reason we can’t have a glass, right? Oh yeah, while talking about wine, I usually buy a large inexpensive bottle and keep it in the bottom of the fridge. This is my cooking wine and it’s off limits for entertaining. This way I can keep track of when I need to pick up more and it’s not a surprise half way through a meal I am preparing.
Using your cutting board, dice (small square cuts, picture cubes) about 1/3 of a red onion. Now take two cloves (sections) of your Elephant garlic cut off the top and peel the skin away. There are many tricks to this but with the big Elephant garlic it’s pretty easy to just peel it. Then dice the garlic. You can put your garlic and onions to the side. Now cut off another 1/3 of that onion and slice it into rings. Take one whole cucumber, cut off both ends and slice it into disks. And 3 or 4 Roma tomatoes cut into quarters. Put these veggies in a bowl and poor on the balsamic vinegar until veggies are submerged. Put this in the fridge to marinade while we cook.
By now the oven should be pre-heated and your water should be boiling. Using your broiler pan lay your sausages out, chuck them in the oven and let ‘em cook. I prefer spicy sausage and although I don’t believe in dieting, the turkey sausages are pretty damn good these days.
With the sausage under way let’s move on to our pasta. It’s pretty straight forward, open the box, I always break the pasta in half just so it fits in the pot easier and stir it every 20 or 30 seconds. In just a few minutes the pasta should be done, the only way to be sure is to taste it. So feel free to taste all you want, that’s one of the perks of being the chef! Once your pasta is cooked to your liking, set your colander in the sink and carefully pour the pasta into the colander. Now run cool water over the pasta, seems strange I know, but this rinses all the starch off of the pasta so it won’t stick together.
Let’s get that burner on a medium heat and get your pan on it, this sauce is gonna be quick. Open up your 2 cans of Chopped clams and drain the clam juice into a bowl or cup. By now your pan should be hot. Melt a really generous helping of butter, real butter, not spread. Once melted it should be bubbling a little. If not, turn up the heat a tad, throw in your garlic and onion and quickly, with a spatula move everything around. The goal here is to get butter on all sides of your garlic and onion. Mmmmm, smell that? Keep moving everything around till the garlic and onion soften and they start to show a little browning. It’s time to add the clams. All of the ingredients should start to brown at about the same time. Once they do pour in the clam juice, and an equal part of white wine. I usually have to add more white wine and a couple of glugs of olive oil to make it a bit saucier, but taste it and see what you think in a couple of minutes.
Check on your sausages, they probably need to be flipped and it’s also time to put your Italian bread in foil and join the sausage in the oven. Use about 1/3 of your loaf and cut that into thick slices. At this point you are about 10-12 minutes from serving so, top off your wine and set the table. It’s probably a good time to remove your balsamic salad from the fridge and get it plated and on the table. Wine is a great accompaniment to this dish as well. You’ll want to go back to your pasta and run the hottest water your faucet can produce over it, this will heat it up. Once reheated go ahead and plate in shallow bowls. Spoon on the clam sauce. Serve the sausages and the bread.
There are a lot of complex flavors in this dish, and to serve it shows simple sophistication. It will impress!
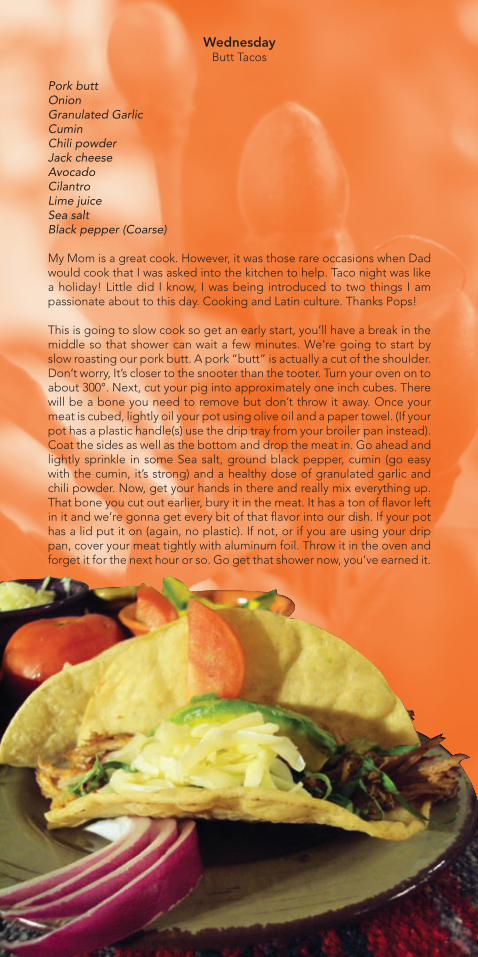
WednesdayButt Tacos
Pork buttOnionGranulated GarlicCuminChili powderJack cheeseAvocadoCilantroLime juiceSea saltBlack pepper (Coarse)
My Mom is a great cook. However, it was those rare occasions when Dad would cook that I was asked into the kitchen to help. Taco night was like a holiday! Little did I know, I was being introduced to two things I am passionate about to this day. Cooking and Latin culture. Thanks Pops!
This is going to slow cook so get an early start, you’ll have a break in the middle so that shower can wait a few minutes. We’re going to start by slow roasting our pork butt. A pork “butt” is actually a cut of the shoulder. Don’t worry, It’s closer to the snooter than the tooter. Turn your oven on to about 300°. Next, cut your pig into approximately one inch cubes. There will be a bone you need to remove but don’t throw it away. Once your meat is cubed, lightly oil your pot using olive oil and a paper towel. (If your pot has a plastic handle(s) use the drip tray from your broiler pan instead). Coat the sides as well as the bottom and drop the meat in. Go ahead and lightly sprinkle in some Sea salt, ground black pepper, cumin (go easy with the cumin, it’s strong) and a healthy dose of granulated garlic and chili powder. Now, get your hands in there and really mix everything up. That bone you cut out earlier, bury it in the meat. It has a ton of flavor left in it and we’re gonna get every bit of that flavor into our dish. If your pot has a lid put it on (again, no plastic). If not, or if you are using your drip pan, cover your meat tightly with aluminum foil. Throw it in the oven and forget it for the next hour or so. Go get that shower now, you’ve earned it.
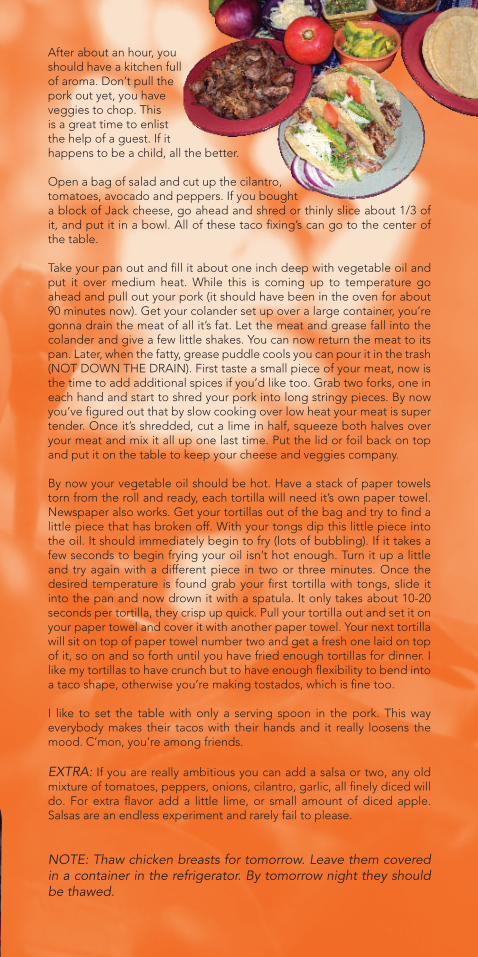
After about an hour, you should have a kitchen full of aroma. Don’t pull the pork out yet, you have veggies to chop. This is a great time to enlist the help of a guest. If it happens to be a child, all the better.
Open a bag of salad and cut up the cilantro, tomatoes, avocado and peppers. If you bought a block of Jack cheese, go ahead and shred or thinly slice about 1/3 of it, and put it in a bowl. All of these taco fixing’s can go to the center of the table.
Take your pan out and fill it about one inch deep with vegetable oil and put it over medium heat. While this is coming up to temperature go ahead and pull out your pork (it should have been in the oven for about 90 minutes now). Get your colander set up over a large container, you’re gonna drain the meat of all it’s fat. Let the meat and grease fall into the colander and give a few little shakes. You can now return the meat to its pan. Later, when the fatty, grease puddle cools you can pour it in the trash (NOT DOWN THE DRAIN). First taste a small piece of your meat, now is the time to add additional spices if you’d like too. Grab two forks, one in each hand and start to shred your pork into long stringy pieces. By now you’ve figured out that by slow cooking over low heat your meat is super tender. Once it’s shredded, cut a lime in half, squeeze both halves over your meat and mix it all up one last time. Put the lid or foil back on top and put it on the table to keep your cheese and veggies company.
By now your vegetable oil should be hot. Have a stack of paper towels torn from the roll and ready, each tortilla will need it’s own paper towel. Newspaper also works. Get your tortillas out of the bag and try to find a little piece that has broken off. With your tongs dip this little piece into the oil. It should immediately begin to fry (lots of bubbling). If it takes a few seconds to begin frying your oil isn’t hot enough. Turn it up a little and try again with a different piece in two or three minutes. Once the desired temperature is found grab your first tortilla with tongs, slide it into the pan and now drown it with a spatula. It only takes about 10-20 seconds per tortilla, they crisp up quick. Pull your tortilla out and set it on your paper towel and cover it with another paper towel. Your next tortilla will sit on top of paper towel number two and get a fresh one laid on top of it, so on and so forth until you have fried enough tortillas for dinner. I like my tortillas to have crunch but to have enough flexibility to bend into a taco shape, otherwise you’re making tostados, which is fine too.
I like to set the table with only a serving spoon in the pork. This way everybody makes their tacos with their hands and it really loosens the mood. C’mon, you’re among friends.
EXTRA: If you are really ambitious you can add a salsa or two, any old mixture of tomatoes, peppers, onions, cilantro, garlic, all finely diced will do. For extra flavor add a little lime, or small amount of diced apple. Salsas are an endless experiment and rarely fail to please.
NOTE: Thaw chicken breasts for tomorrow. Leave them covered in a container in the refrigerator. By tomorrow night they should be thawed.
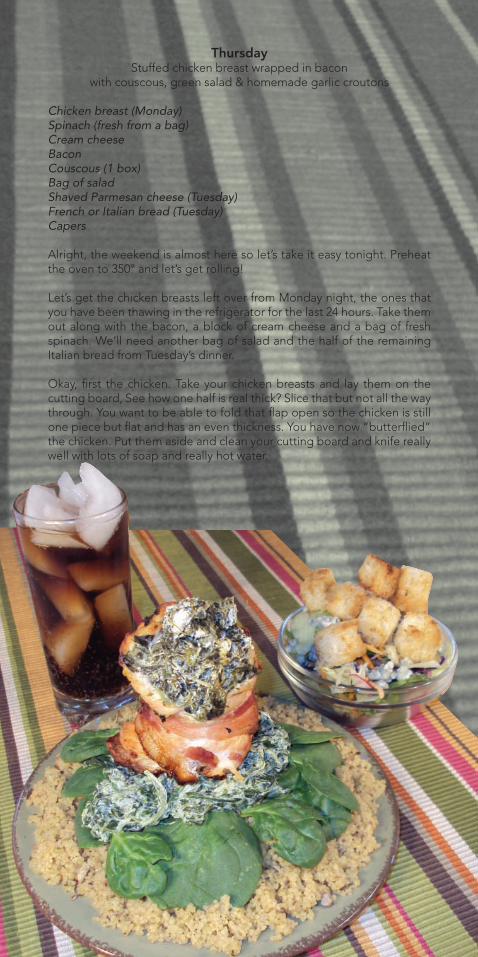
ThursdayStuffed chicken breast wrapped in bacon
with couscous, green salad & homemade garlic croutons
Chicken breast (Monday)Spinach (fresh from a bag)Cream cheeseBaconCouscous (1 box)Bag of saladShaved Parmesan cheese (Tuesday)French or Italian bread (Tuesday)Capers
Alright, the weekend is almost here so let’s take it easy tonight. Preheat the oven to 350° and let’s get rolling!
Let’s get the chicken breasts left over from Monday night, the ones that you have been thawing in the refrigerator for the last 24 hours. Take them out along with the bacon, a block of cream cheese and a bag of fresh spinach. We’ll need another bag of salad and the half of the remaining Italian bread from Tuesday’s dinner.
Okay, first the chicken. Take your chicken breasts and lay them on the cutting board, See how one half is real thick? Slice that but not all the way through. You want to be able to fold that flap open so the chicken is still one piece but flat and has an even thickness. You have now “butterflied” the chicken. Put them aside and clean your cutting board and knife really well with lots of soap and really hot water.

Next, the spinach filler. Take about 3/4 of a bag of your spinach and start chopping. If you have a food processor, now is the time to use it. Once chopped up really well in a bowl mix your chopped spinach and a whole block of cream cheese. The warmer the cream cheese the easier it will mix and also spread. Set the mixture aside and wash the cutting board again.
Lay a piece of bacon at an angle across the cutting board. Lay a butterflied chicken breast on top of it but straight. Now spoon on a healthy portion of your spinach mixture. Next roll the whole thing up as tightly and neatly as possible. If done correctly the bacon should look something like the stripe on the side of a candy cane, wrapping around the chicken breast diagonally from bottom to top. Once satisfied, use a few toothpicks to hold the roll closed and the bacon to the outside of the roll. Repeat for each additional chicken roll. On your broiler pans grate (the top part), set these rolls upright. They are going to be a bit “lazy” but will find their balance and sit upright even if they have to lean against each other a little. Pop them in the oven for 50 minutes. You may have noticed we added no spices to this. It already has four flavors working. The bacon will provide the salt, the cream cheese the tang, the spinach is earthy and strong while the chicken tastes like, well, you know.
On to the croutons. Home made croutons are great, they only take a second, they beat the pants off the ones from a box and you look like a pro serving them. Get your pan heated up to a medium high heat. While it’s warming up, cut half of your remaining bread into cubes. For me, the bigger the better. If it’s a little stale all the better. Coat the bottom of your pan with a puddle of butter and have your granulated garlic handy. Once the butter has all melted throw in the bread cubes, quickly toss them around with the spatula to get a little butter on all the sides. Now hit it with a healthy portion of granulated garlic. Flip them every few seconds, you are simply browning each side of the cubes. Think of the bread on a grilled cheese sandwich. That’s what you are trying to achieve.
Now couscous. Couscous, although a pasta, packs it’s fair share of sodium and rounds out this meal well. If you haven’t had it’s great. It cooks in 5 minutes. Simply follow the instructions on the box. I’d start it 5-10 before your chicken is done.
As for the salad, again your choice of salads are fine, I have really grown to love the convenience and variety of the fresh salads in a bag. So let’s start our plating there. A handful of salad in each salad bowl topped with some crumbled bleu cheese or shaved Parmesan from Tuesday’s dinner hidden by a heaping pile of your home made garlic croutons. That’s gonna impress at the table, believe me!
As for the dinner plate, a thin layer of the hot couscous then a layer of fresh, whole spinach, now a big dab of the spinach mix and last push that gorgeous chicken roll down into that cool spinach mix. Anytime you can add height and dimension to a plate it really helps the presentation.Always try and build your plate up, not out. Even if it means you need to use a smaller plate.
Enjoy your meal and remember, if you did the cooking you aren’t supposed to be the one doing the dishes!
NOTE: The rest of the spinach mix goes in a container in the fridge for Saturday’s brunch. Move the salmon from the freezer to the refrigerator for tomorrow. It’s gonna be GOOD.
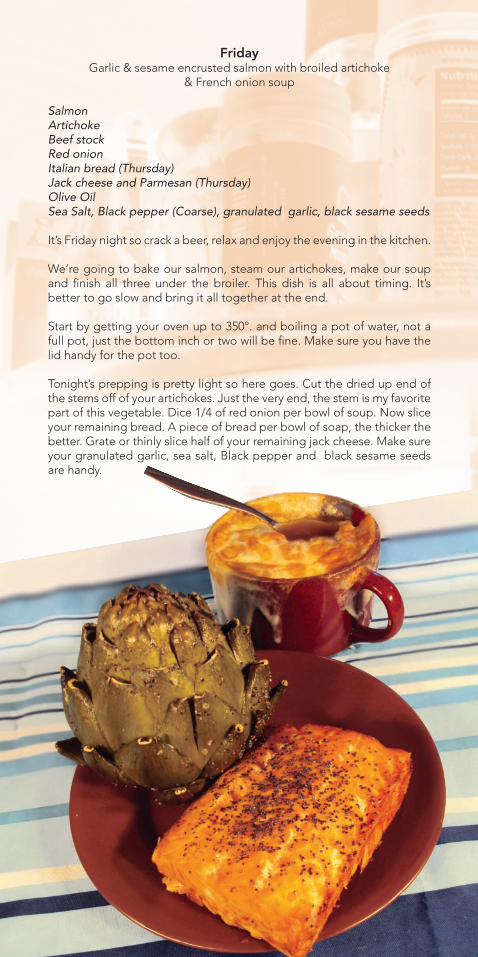
FridayGarlic & sesame encrusted salmon with broiled artichoke
& French onion soup
SalmonArtichokeBeef stockRed onionItalian bread (Thursday)Jack cheese and Parmesan (Thursday)Olive OilSea Salt, Black pepper (Coarse), granulated garlic, black sesame seeds
It’s Friday night so crack a beer, relax and enjoy the evening in the kitchen.
We’re going to bake our salmon, steam our artichokes, make our soup and finish all three under the broiler. This dish is all about timing. It’s better to go slow and bring it all together at the end.
Start by getting your oven up to 350°. and boiling a pot of water, not a full pot, just the bottom inch or two will be fine. Make sure you have the lid handy for the pot too. Tonight’s prepping is pretty light so here goes. Cut the dried up end of the stems off of your artichokes. Just the very end, the stem is my favorite part of this vegetable. Dice 1/4 of red onion per bowl of soup. Now slice your remaining bread. A piece of bread per bowl of soap, the thicker the better. Grate or thinly slice half of your remaining jack cheese. Make sure your granulated garlic, sea salt, Black pepper and black sesame seeds are handy.
Okay, the salmon. You’ll notice that your salmon filet will still have the skin on one side, no biggie. Also it is going to have a thick side and a thin side. You want to cut the thin part off, leaving a filet that is pretty consistent in thickness. That thin part you just cut off, slice that into long slender pieces. Take a plastic container or resealable bag and coat the bottom with a thick layer of sea salt. Now, place your thinly sliced salmon on top of the sea salt. Make sure the salmon strips are not touching each other. Now pour on another layer of sea salt, completely covering and hiding the salmon from view. Seal your container and put it in the fridge. We’ll be using this on sunday morning. Getting back to dinner, lightly coat your broiler pan grate with olive oil. Lay the salmon filet on it flesh side down (skin up). Cover it with aluminum foil and tent the foil (don’t pull it tight, you don’t want the foil to touch the fish). Go ahead and throw the fish in the oven.
That pot of boiling water on the stove is pulling double duty tonight so let’s get those artichokes in and out so we can move on to the soup. I usually squirt a little lemon juice in the water just before the artichoke goes in. Just a smidgen, lemon juice is powerful stuff. Okay, go ahead and dunk your artichoke in head first (stem pointing up). Get the lid on there. If you have a steamer basket for your pan by all means use it, if not having the tips in the water won’t hurt anything. Artichokes should steam for 15 minutes. As soon as you can easily sink a fork into the stem, it’s done. Remove it from the pot, dump the water and rinse the pot. Put one can of beef stock per bowl of soup in the pan and bring it to a boil.
While we wait, have another beer, it’s not a school night. Now, lightly coat your artichoke with olive oil and heavily pepper and sea salt it. This reminds me of crab boils. All that salty spice covering your hands as you tear at your dinner, you’re gonna love it!
Back to the soup. Once boiling throw in your onions and reduce to a medium heat and let simmer till onions begin to soften. About 3-5 minutes. Have your ceramic bowls or mugs ready for the number of guests you have and pour your onion broth mixture into each bowl. Leaving an inch or so free at the top of each bowl. Now, that left over bread you sliced up earlier, lay it right on top. With a spoon push it down into the broth as far as you can without the soup over flowing. Now Cover the tops of the bread in your cheese. From here on it’s broiler work!
Remove the broiler pan from the oven and remove and throw away the foil. Turn the oven to broil. By this time the salmon should be partially cooked. It’s time to get rid of that skin. With a fork, get a hold of one corner of the skin and peel it back. I usually microwave the skin to a crisp, the dogs love it. Go ahead and spice with a little sea salt, black pepper and lots of granulated garlic and black sesame seeds. Set the artichoke upright on the broiler pan next to the fish. Return the broiler pan without the foil to the oven, also add the bowls or mugs of soup to the broiler. This will do miracles to the cheese. Turn on your oven light and watch carefully over the next 4-7 minutes. Everything is going to cook super hot an fast. Don’t be tempted to open the oven, watch through the glass. Pull everything out at the same time, Carefully! Serve it and chow down.
A note on eating artichokes. If you haven’t had them they can appear a bit “angry”. Don’t worry, they aren’t. Just pull one leaf off at a time and use your teeth to scrape the “meat” off the bottom half of each leaf, that’s the tender part that attaches to the plant, not the pointy end. When you get to the center, there is a “furry” bit you should spoon out. Then you are left with the remaining part, , the best part, the heart. It’s a little work but fun finger food.
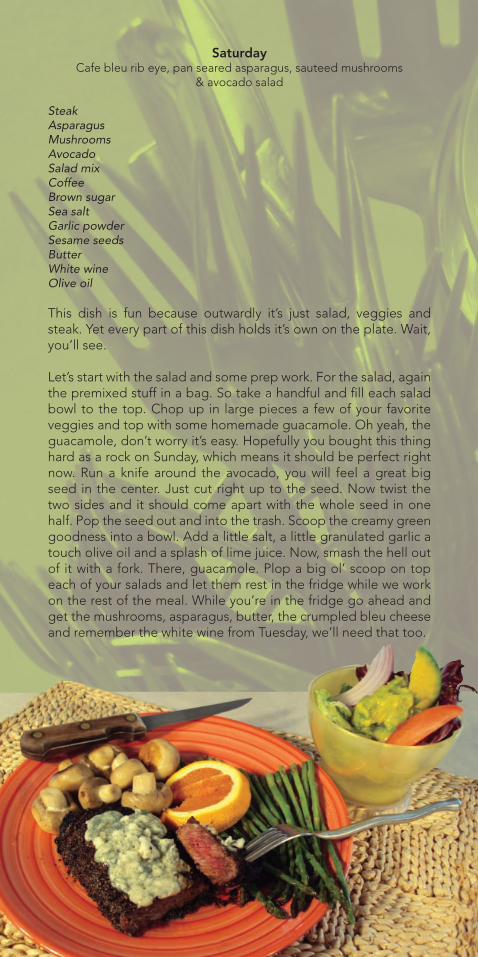
SaturdayCafe bleu rib eye, pan seared asparagus, sauteed mushrooms
& avocado salad
SteakAsparagusMushroomsAvocadoSalad mixCoffeeBrown sugarSea saltGarlic powderSesame seedsButterWhite wineOlive oil
This dish is fun because outwardly it’s just salad, veggies and steak. Yet every part of this dish holds it’s own on the plate. Wait, you’ll see.
Let’s start with the salad and some prep work. For the salad, again the premixed stuff in a bag. So take a handful and fill each salad bowl to the top. Chop up in large pieces a few of your favorite veggies and top with some homemade guacamole. Oh yeah, the guacamole, don’t worry it’s easy. Hopefully you bought this thing hard as a rock on Sunday, which means it should be perfect right now. Run a knife around the avocado, you will feel a great big seed in the center. Just cut right up to the seed. Now twist the two sides and it should come apart with the whole seed in one half. Pop the seed out and into the trash. Scoop the creamy green goodness into a bowl. Add a little salt, a little granulated garlic a touch olive oil and a splash of lime juice. Now, smash the hell out of it with a fork. There, guacamole. Plop a big ol’ scoop on top each of your salads and let them rest in the fridge while we work on the rest of the meal. While you’re in the fridge go ahead and get the mushrooms, asparagus, butter, the crumpled bleu cheese and remember the white wine from Tuesday, we’ll need that too.
First, let’s get the oven on at “broil.” Before you do this put the rack in the oven to the highest point. Next let’s make the rub for our steaks. This is easy, four ingredients in four equal parts of the following; ground coffee (Viva Colombia!), brown sugar, coarse ground black pepper and sea salt. Make enough to really coat your steaks heavily. Rinse your steaks off well, the moisture will help the rub stick to the meat. This is a good time to talk about steak, I am a big fan of the rib-eye. It’s real fatty and real tender, but this recipe will work with any cut. So, they don’t call it a rub for nothing. Get to it, cover those steaks with your coffee rub and set them on a plate.
Let’s move on to the veggies, we’ll start with the mushrooms. Use a dry paper towell to brush any dirt off of your mushrooms and cut the stems shorter if the bottoms are dirty or dried out. In your pot melt a good sized lump of butter over medium heat. Once melted turn the heat up a tad till it’s bubbling. Throw your mushrooms in and quickly stir them around to get butter on all sides of the mushrooms. These are going to cook quickly, keep them moving and when they are slightly browned turn the heat up a touch more. Now pour in about half of a glass (wine glass) of white wine. Stir everything around again. In about 2 minutes you will remove the pot from the burner and put the top on it.
Next is the asparagus, Cut the bottom 1/3 off of the stalks and rinse the remaining tops. This time use your pan over medium heat, again melting butter and adjusting your heat till it’s bubbling but not browning. Throw in the asparagus and add a little sea salt and a lot of black sesame seeds. This only needs to cook for 1-3 minutes depending on how big the stalks are. When they just begin to get a little “limp.” That’s when you wanna cover them and remove the pan from heat.
Now, back to the steaks. Cover your broiler pan with some foil, when the brown sugar cooks down it caramelizes and makes a sticky mess to clean up. So, foil the drip pan part of the broiler pan. Now lay your steaks on the lightly oiled grate and slide it carefully onto the top oven rack keeping it in the center of the oven, not to the left or right. The way a broiler works is, it is direct heat from the top of your oven, and it is a high and dry heat. So we are going to be cooking fast. Similar to cooking directly over the flame of a grill. Be careful and be sure to use your oven mitts. Okay, I like my steak really rare so for me, 2 or 3 minutes per side are perfect. The outside will be charred and the inside tender and juicy. When I order a steak I say, “Just knock the horns off and walk it through a warm room.” If that’s not your style, then you may want to move the oven rack down one level and cook for 4 to 5 minutes per side. Which means you will have to pull the pan out and flip the cows once.
After the flip, get your salads to the table, drinks poured and veggies plated. About one minute before you are ready to take the steaks out, glob on a healthy portion of crumpled bleu cheese and slide it back under the broiler till the cheese oozes. Bon apetít.
NOTE: Pull the chicken stock/soup base from the freezer to thaw for our soup tomorrow.
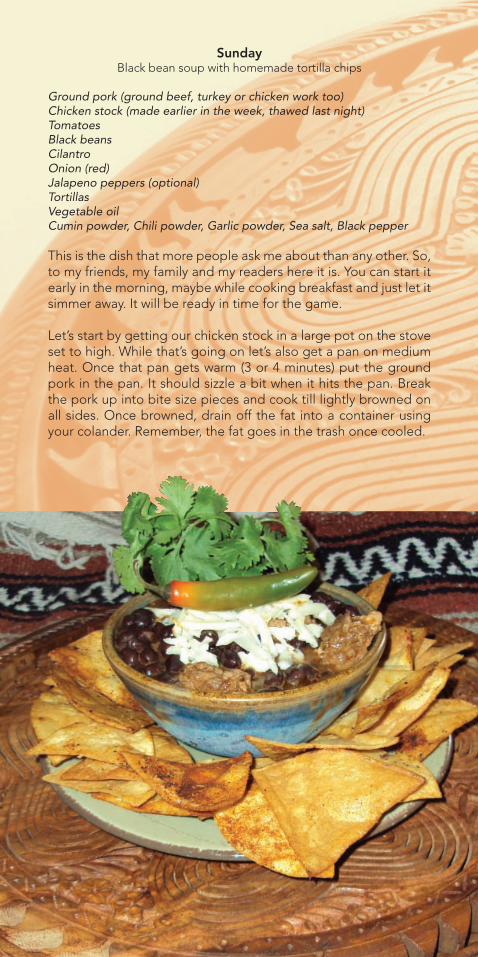
SundayBlack bean soup with homemade tortilla chips
Ground pork (ground beef, turkey or chicken work too)Chicken stock (made earlier in the week, thawed last night)TomatoesBlack beansCilantroOnion (red)Jalapeno peppers (optional)TortillasVegetable oilCumin powder, Chili powder, Garlic powder, Sea salt, Black pepper
This is the dish that more people ask me about than any other. So, to my friends, my family and my readers here it is. You can start it early in the morning, maybe while cooking breakfast and just let it simmer away. It will be ready in time for the game.
Let’s start by getting our chicken stock in a large pot on the stove set to high. While that’s going on let’s also get a pan on medium heat. Once that pan gets warm (3 or 4 minutes) put the ground pork in the pan. It should sizzle a bit when it hits the pan. Break the pork up into bite size pieces and cook till lightly browned on all sides. Once browned, drain off the fat into a container using your colander. Remember, the fat goes in the trash once cooled.
Rinse your colander with hot water and then empty 2 cans of black beans into the colander while running water over it. We are rinsing the “gravy” from the beans. You can also save the gravy. The dogs love it over their dry kibble.
Now the chopping. I like everything rustic cut, or chopped big for this dish. Think of a stew. First the whole red onion. Once chopped throw it in your stock pot. Now the plum tomatoes, about 2 or 3 will do nicely. Slice that pepper if you like it hot, my vote is always yes to heat. Pour in the black beans and the pork.
Once all the ingredients are in the pot, lower the heat to low, and loosely set a lid on top. Stir the soup frequently making sure nothing is sticking to the bottom of the pan.
Seasoning. You’ve been cooking for a week and are no stranger to any of the spices mentioned to the left, go ahead and use your best judgement. You have a long time to keep adding and tasting over the next few hours. Add just a little of each spice, stir, taste and repeat. This is the essence of the way I cook. I cook to taste, and hopefully by now, so do you. This dish is going to take a lot of spice but take your time and really pay attention to the flavor.
You can serve your soup in as little as an hour or let it simmer for several hours. I prefer the latter.
About 30 minutes before serving, you’re gonna want to start your homemade tortilla chips. Again, this is really easy and sets you apart from the chef that would just throw a bag of tortilla chips on the table. First get your pan on the stove and put about 2 inches of vegetable oil in the pan. Set the stove a little above medium. While that is coming up to temperature cut about 6 or 8 tortillas. You can leave them stacked and make 3 cuts (think of how a pizza is sliced). Get a pile of paper towels or newspapers laid out to drain the oil from the chips once fried. Once the oil is ready (Remember how we fried the taco shells? Same thing). Use your tongs and carefully put one layer of tortillas in the pan, don’t pile them on top of each other. They will cook fast, pull them out of the oil when they start to brown and get them to the paper to drain. This may take a few batches to get them done but will be worth the effort. Once finished, put all the chips in a bag. A paper bag is preferable. Add sea salt, ground black pepper and chili powder and garlic powder if you feel adventurous. Shake the bag to evenly season the chips.
Chop up and add a good amount of cilantro and add a splash of lime juice to the soup just before serving, It adds a really fresh element right at the end. Some grated cheese on top is a fine garnish as well as a tasty topper. By now you should be getting good at plating as well. So be creative, have fun and I hope you enjoy your meal as well as cooking it. Oh, hurry up, the game is starting.
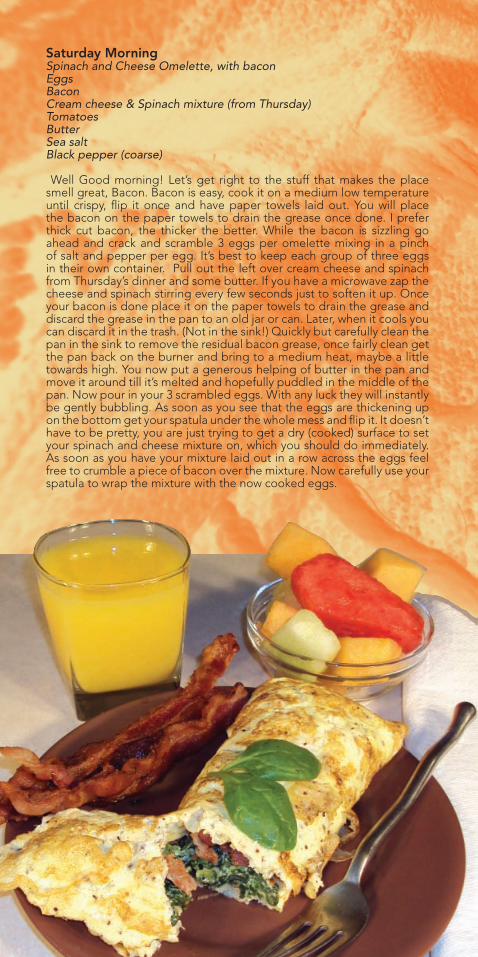
Saturday MorningSpinach and Cheese Omelette, with baconEggsBaconCream cheese & Spinach mixture (from Thursday)TomatoesButterSea saltBlack pepper (coarse)
Well Good morning! Let’s get right to the stuff that makes the place smell great, Bacon. Bacon is easy, cook it on a medium low temperature until crispy, flip it once and have paper towels laid out. You will place the bacon on the paper towels to drain the grease once done. I prefer thick cut bacon, the thicker the better. While the bacon is sizzling go ahead and crack and scramble 3 eggs per omelette mixing in a pinch of salt and pepper per egg. It’s best to keep each group of three eggs in their own container. Pull out the left over cream cheese and spinach from Thursday’s dinner and some butter. If you have a microwave zap the cheese and spinach stirring every few seconds just to soften it up. Once your bacon is done place it on the paper towels to drain the grease and discard the grease in the pan to an old jar or can. Later, when it cools you can discard it in the trash. (Not in the sink!) Quickly but carefully clean the pan in the sink to remove the residual bacon grease, once fairly clean get the pan back on the burner and bring to a medium heat, maybe a little towards high. You now put a generous helping of butter in the pan and move it around till it’s melted and hopefully puddled in the middle of the pan. Now pour in your 3 scrambled eggs. With any luck they will instantly be gently bubbling. As soon as you see that the eggs are thickening up on the bottom get your spatula under the whole mess and flip it. It doesn’t have to be pretty, you are just trying to get a dry (cooked) surface to set your spinach and cheese mixture on, which you should do immediately. As soon as you have your mixture laid out in a row across the eggs feel free to crumble a piece of bacon over the mixture. Now carefully use your spatula to wrap the mixture with the now cooked eggs.
Do one side at a time, think of how a burrito looks when wrapped. Flip the whole omelet one time before plating it. It should take about 4 minutes of cooking time for each omelette. Mastering a good omelette takes a lot of practice to make look good however work on the flavor first, it’s all about the timing and temperature which varies from pan to pan and stove to stove.
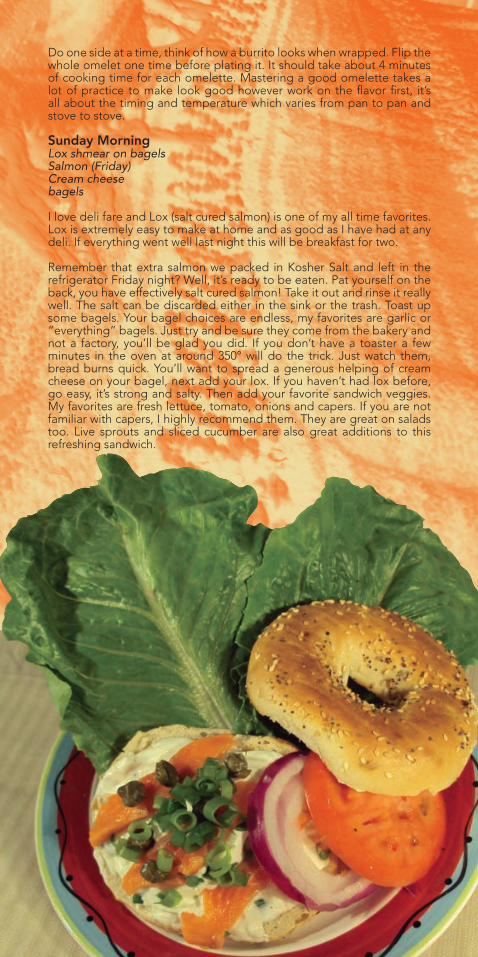
Sunday MorningLox shmear on bagelsSalmon (Friday)Cream cheesebagels
I love deli fare and Lox (salt cured salmon) is one of my all time favorites. Lox is extremely easy to make at home and as good as I have had at any deli. If everything went well last night this will be breakfast for two.
Remember that extra salmon we packed in Kosher Salt and left in the refrigerator Friday night? Well, it’s ready to be eaten. Pat yourself on the back, you have effectively salt cured salmon! Take it out and rinse it really well. The salt can be discarded either in the sink or the trash. Toast up some bagels. Your bagel choices are endless, my favorites are garlic or “everything” bagels. Just try and be sure they come from the bakery and not a factory, you’ll be glad you did. If you don’t have a toaster a few minutes in the oven at around 350° will do the trick. Just watch them, bread burns quick. You’ll want to spread a generous helping of cream cheese on your bagel, next add your lox. If you haven’t had lox before, go easy, it’s strong and salty. Then add your favorite sandwich veggies. My favorites are fresh lettuce, tomato, onions and capers. If you are not familiar with capers, I highly recommend them. They are great on salads too. Live sprouts and sliced cucumber are also great additions to this refreshing sandwich.
