a nima prime - berengad.com
TRANSCRIPT

1
A N I M A P R I M E Introduction
This is an anime action game. Think people with various spirit-animal or demonic parts kicking each other's asses and destroying half the city in the process.
The game is meant to be easy to pick up and play. The dice handling rules are intuitive, most of the bookkeeping can be done by moving dice around, and the focus is on spontaneous fun.
This is an unabashed anime heartbreaker. Some clichés lie ahead, including the whole spirits/demons thing. Somewhere along the way, it also turned into an homage to Final Fantasy X.
This is an alpha version: none of this is edited or tested material, so there'll be lots of rambling and potential changes. Things are going to have funny names like Steamworld.
All dice used are six-sided (D6s).
SETTING UP A GAME There are four steps to setting up a game. First, you pick a mood. Then you select the setting, which are the place and circumstances of where the game will take place. The third step is character creation, in a way that fits the mood and setting. And finally you create story seeds for your characters, group, and setting.
Mood
The mood of your game is very important. The rules do not predetermine whether you play a dark urban game or a humorous adventure game. The group as a whole should discuss what mood you would like your game to have. Once you’ve agreed to it, you should try to stick with it when you pick the setting, make the characters, create your story seeds, and most of all play the game.
Setting
The world you know is just one of many. They spring up like bubbles in the ocean, some small, some big. They form around life energy; bigger bubbles represent worlds with more living creatures in them. Mostly they are self-contained, but some tunnels exist, and some special individuals can even jump from one bubble to the next all on their own. Don't think of these in 3 dimensions; the bubbles can each represent completely different dimensional systems of their own.
A graphical representation of the worlds is attached at the end of this document. On it, you’ll see some big worlds, some medium-sized ones, and some small worlds as well. The arrows represent the established tunnels that connect the 3 big worlds to the six medium worlds. There are, in fact, several tunnels for each arrow, leading to different points in the same world.
The tiny worlds surrounding them can only be reached by jumping, a rare and powerful skill that cannot be used too often. Summoning also allows a bridging of the worlds on a very limited and temporary basis.
These worlds are filled with all sorts of creatures. Some of them possess great powers—including the PCs. Many of them in between the spirit and the human world look like mixtures of humans and animals. This ranges from humans with cat ears to Kimahri from FFX. Others show their demonic legacy in various ways.
Sometimes humans can merge with spirits or demons to acquire these powers. Everyone has at least some mark of the source of their power.
In order to set up your game, you should first figure out which world it is set in. Then roughly sketch out the kind of place it is. What does it look like? What kind of technology is available? How common and publicly known are special powers? Who are the main movers and shakers?

2
Keep the established mood in mind when you answer these questions.
Another part of creating the setting is to figure out where the player characters (PCs) fit into it. This needs to account for them being a group that sticks together.
Characters
Characters in Anima Prime, in addition to descriptive elements like hair color, size, and cat ears (for example), possess a few distinct traits and powers. This section walks you through the process of creating a character to play (a PC).
Creating a Playtest Character First, determine the concept for the character.
Second, write down the basic stats of your character.
Third, select nine powers from the ones listed toward the end of this document.
Fourth, make up 3 traits.
Fifth, select a passion.
Sixth, fill in background items and links, if any.
All of these steps are described in their own sections, below.
Concept Pick a name, figure out what her overall concept is, and determine whether her powers are inborn, granted by a spirit or demon, result from a fusion with a spirit or demon, or come from some other source altogether. Also make sure to determine the looks, including any non-human parts and pieces. Anyone with powers has some non-human aspect to them, as the powers result from the tension between the worlds (this tension and the resulting powers are referred to as Anima in some worlds).
An overall concept could be something like Spirit Warrior, Biomechanoid, Vengeful Ninja Bunny, or whatever. You’ll find that having a 2- or 3-word concept in mind helps when picking powers.
Stats Every character starts with 3 wound circles, an Action Pool with a maximum of 10 action dice, an empty Charge Pool with a maximum of 6 charge dice, and a defense of 1.
Powers Each main character, be it a protagonist or an important antagonist, has powers. There are 2 kinds of powers: passive powers and charge powers. Passive powers work all the time; they include larger action pools, resistances, and so on. Charge powers cost charge dice to use, which are stored up during a conflict. Powers are listed in their own section toward the end.
Soulbound Weapons are a distinct collection of powers that allow characters to have items infused with specific effects. These powers include both passive and charge powers.
There is another separate collection of powers: Summoning. It deals with binding creatures (known as eidolons) from other worlds to oneself and being able to jump them to one’s own location. Good-natured characters have a bond of friendship and loyalty with these creatures, while others enslave them to do their bidding.
Traits Characters have 3 traits, which indicate what the character cares about, the special skills that define her, the goals in her life, the unrequited love that drives her mad, the flaw that always makes her flustered, and so on. A trait can be focused on another character, or it can be general. Traits guide play and fuel the character's actions.
For alpha playtest purposes, I’ll assume you know how to make up freeform traits.
You can gain a plussie on a trait for playing a character scene (this is called “marking the trait”). Players can use traits to reroll failed dice during conflicts. When you use it, just remove the plussie (this is called “unmarking the trait”).

3
Passions The passion describes the profound emotional state of the character, that is, not just their current mood, but the one passion that permeates everything they do. It tells you something about the character, thereby allowing you to roleplay them in interesting ways.
The passion also allows the character’s player to earn charge dice when certain conditions are triggered.
If the triggering of a passion would earn more charge dice than fit in the character’s Charge Pool, the remaining dice are turned into strike dice instead.
Every character only has one passion at a time. You can change your passion on the spot, either during a character scene or at the beginning or end of your turn in a conflict, but only once per play session. Any additional changes need to be approved by the GM. Given that passions are profound states of mind of the characters, such changes should be reasonably rare.
List of Passions Anger The character has a lot of stored-up aggression. Trigger: Gain 1 charge die every time an opponent makes a strike roll against you, whether it is successful or not.
Bloodlust The character revels in dealing out pain. Trigger: Gain 1 charge die every time you inflict 1 or more wounds on an opponent.
Compassion The character cares deeply about other people. She puts them first, even if that places her in danger. Trigger: Gain 1 charge die every time one of your allies takes 1 or more wounds from a strike.
Glory This character revels in victory and achievements. Trigger: Gain 1 charge die after winning a conflict (after the regular halving of your Charge Pool).
Love This passion is aimed at a particular other person. It can be a romantic interest, family member, or someone else who is very close to the character. It does not have to be requited. Trigger: Gain 1 charge die every time an opponent makes a strike roll against your loved one, and another die if it inflicts at least 1 wound.
Self-Loathing The character hates herself. She purposely puts herself in dangerous situations and revels in pain. Trigger: Gain 2 charge dice for each wound that you take.
Vengeance The character is out for someone or something. Any obstacles in the way, any setbacks, only serve to make the character more determined. Trigger: Gain 2 charge dice after losing a conflict (after the regular halving of your Charge Pool).
Background and Links Characters can (but do not have to) have background items and links listed on their character sheets. If you’ve ever written a character background with important events in the character’s past, made a list of the character’s NPC contacts, and so on, you know what kinds of things to list here.
There is one big difference between background items and links: background items are the domain of the player to give their character depth, whereas links are provided as tools for the GM.
If your character has a long-lost brother, and you list him in your background, the GM is not going to bring him up in play. The brother plays a role for who your character is, but he won’t be used by the GM for plot purposes.
If you list your brother under links, however, you are giving the GM the authority to have your brother show up in the game as an NPC. Or maybe you’ll find clues to his whereabouts. Or you may find his corpse. How the link is used is up to the GM (though you should feel free to make suggestions, of course). You can add or change background items and links later on as well, just make sure to inform the GM.

4
Story Seeds
Now you create the seeds for the stories you will develop with your characters. These seeds come in the form of events that kick off a particular plot (though you don’t actually plan out the plot, you just make up an interesting starting point).
There are 3 levels of story seeds: character, group, and setting.
The character story seed is created by each player for his or her own character. It is an event that personally affects the character and pushes them into action. It could be a personal loss, falling in love, discovering a mystical item, swearing vengeance, being exiled, and so on. As mentioned above, you shouldn’t plan out a whole story arc—you don’t even have to know who or what caused the event. As long as there’s something going on that gives your character a goal to passionately pursue, you’re good to go.
The group story seed is created by all players (except for the GM) for their group of PCs. It is an event that changes the circumstances of the group. It can be a simple mundane thing (our group of elite soldiers was just given a new commanding officer, and we don’t trust him), a mystery (we all woke up with matching crimson tattoos on the back of our necks), a disaster (the organization that protected our identity and allowed us to live a normal life was just wiped out), or anything that the group as a whole needs to address together. Use this as a tool to make sure the group has a good reason to stick together and find common ground to act upon.
The setting story seed is created by the GM. It is an occurrence in the setting that goes against the usual events. These can range from the blatantly obvious and aggressive (an invading force) to the subtle (the water from the river has started to taste metallic) to the weird and ominous (a black skyscraper just appeared in the middle of the city, and most people act as though it’s always been there). Feel free to create more than one if you want to give players lots of choices of what to look into during the game, though that might make your game less focused. Just be aware that this is not a group seed—it cannot be something that specifically and only affects the PCs like the other story seeds.
CONFLICTS
Setting Up Conflicts
In order to set up conflicts, you need to have adversity as well as goals. Every conflict needs opposed parties who want different things, and the adversity represents whatever stands in the way of the PCs and what they want.
First, determine the adversity that the players are up against. The following section, Adversity, guides you through that process. Adversity can be prepared, or you can make it up on the spot.
Second, determine one or more goals that can be achieved during the conflict. You can potentially have conflicts without goals, which tend to be duels or showdowns where all that counts is beating the other side just for the glory of it. But even then, adding a side goal makes the conflict that much more interesting. See the section on goals, below, for suggestions.
You can also have switches in a conflict, which are a special kind of goal and have their own section.
In some circumstances, you can determine that starting conditions are in place.
Once you’ve got all of these figured out, you can play out the conflict.
Adversity Creating adversity is relatively easy: you pick the adversity type of the opponent, determine the stats, and finally select the adversity’s special powers, if any.
Type The opponents of the PCs come in 3 different types: individuals, squads, and swarms.
Individuals are powerful single characters. They can range from humanoids to demon lords to steam-powered robots. They have specific powers and abilities, and each time a wound is inflicted the individual is injured (or damaged).

5
Squads are multiple characters that act as a group. These can be reptile assassins that always work in threes, a small pack of demonic howlers, a special assault unit, or something along those lines. Squads lose members whenever a wound is inflicted.
Swarms are huge groups of similar creatures. A swarm can be an army of humans, a massive rush of crimson wolves, or a hundred vengeful spirits. Swarms lose members even during maneuvers against them, and wounds inflicted on a swarm represent serious blows to the integrity, morale, or leaders of the swarm. Still, wounds do not usually make swarms less effective, as they can only attack in small parts of the whole anyway.
The type of the enemy makes a difference for the effect of wounds inflicted upon it, as well as for the function of certain powers. Some powers and weapon effects are more effective against one type than against another. These differences are listed with the individual powers and effects.
Stats There are several stats that you need to determine for each opponent. They are:
Action Pool: This is the number of action dice with which the opposition starts the conflict, and the maximum number it can have. A rating of 5 would indicate an opponent with little stamina, while a rating of 15 is quite dangerous.
Charge Pool: If there is a limit to the number of charge dice that this opponent can store, mark that down as the Charge Pool maximum. Most adversity will start with an empty Charge Pool, but the GM can rule otherwise if circumstances make that plausible.
Competence: This is the number of basic dice the adversity gets for a maneuver in lieu of the 1-4 dice that PCs get from the GM (see Playing Adversity below). A rating of 2 to 3 would be normal, with 1 for easy opponents and 4 or more for challenging ones.
Defense: How hard it is to injure the adversity. A rating of 1 is weak, while a rating of 4 is pretty tough.
Strike Pool: Write down the limit of how many strike dice the adversity can roll out of the Strike Pool. The default number is 6.
Wound Circles: How many wounds it takes to defeat the adversity. Just having 1 wound circle indicates a quick end in sight for this opponent, while 3 or more often make for extended conflicts (depending on the defense rating). A squad cannot have more wounds than the total number of units in the and usually has 1 less than that squad (a squad made of 5 bloodthirsty monkey demons would have 4 wounds).
Powers and Weaknesses Assign the adversity any of the PC powers or make up your own. You can also add a weakness, which are listed at the end of the Summoning section on eidolon powers.
Goals Every conflict has at least 1 goal. This is something that can be achieved aside from just beating the crap out of the other people involved. There can be multiple goals, depending on the situation.
Some goals are described by the GM before the conflict begins. Write down the goal and its difficulty somewhere where it’s visible to all of the players; index cards for each goal or a central sheet of paper listing all goals both work.
Goals need to be determinative: once the goal is achieved by either side, it cannot be altered anymore during the conflict.
Goals have a difficulty rating associated with them that indicates how hard it is to achieve the goal. A player who wants to determine the outcome of the goal has to roll more successes with an achievement (see Playing Out Conflicts below) than the difficulty rating. In a sense, the difficulty rating has the same type of function as the defense rating of a character.
An example of a goal would be:
Steal the Gem [5]
This goal refers to a gem in the story that either the players or their opponents want to steal. It

6
has a difficulty rating of 5. Whoever first manages to do score 6 successes with an achievement will determine whether the gem gets stolen, and by whom. After this has been determined, the other side cannot retrieve the gem or change the outcome within this conflict.
If the opposition in a conflict is strong, the GM should create goals that allow the players to weaken the opposition in actual game-mechanical terms. This allows for tactical decisions as well as cool combat scenes like the ones you see in good anime series. The GM can either determine those at the start or allow players to suggest appropriate courses of action either during a planning phase and/or spontaneously during the conflict.
For example: The GM’s opposition has a defense of 4, and she links some of those to conflict goals. They can either be 1 goal that's harder to achieve:
Destroy Fortifications [5]: Adversity loses 2 points of defense
Or 2 goals that are easier to achieve:
Destroy East Fortification [3]: Adversity loses 1 point of defense
Destroy West Fortification [3]: Adversity loses 1 point of defense
Whether the GM creates these goals as an option beforehand, gives the players an opportunity to plan, or lets the players come up with these during the conflict depends on your play style and the way your story is going.
Possible effects of these kinds of goals are: reducing maneuver dice, reducing strike dice, blocking a power,
Standard Difficulties As a guideline, an easy goal should have a difficulty rating of 1, a medium goal should have a difficulty rating of 3, and a difficult goal should have a difficulty rating of 5. The difficulty rating should never be higher than 7.
Switches Switches are a variation on goals. They are achievements that can be pushed back and forth. The result can be a tug-of-war that can prolong conflicts, so be conscious about that when using switches.
You could have a switch instead of the goal in the above example:
Disable Fortifications [3]: Adversity loses 2 maneuver dice
In this case, the adversity would lose those 2 maneuver dice, but could regain them through an achievement, in which case the fortifications are brought back online.
When a switch is flipped, the difficulty is changed to the number of successes that achieved the switch. In the above case, if a player gets 5 successes and flips the switch, its difficulty is now 5. Switch difficulty can never be higher than 6, however, so even scoring 8 successes would only change the difficulty rating to 6.
I suggest either keeping switches and goals on 2 separate sheets with appropriate headers, or prominently marking each index card with either switch or goal to ensure that all players know what is which.
Starting Conditions Some conflicts take place under unusual conditions, and the GM can determine that the conflict starts with certain conditions in place. The most common conditions are listed in the Powers section right after the charge powers.
For example, the GM can declare that a fight at night in the absence of strong light sources begins with the Darkness condition in place. Or maybe the PCs find themselves in a cave filled with toxic gas, where all characters (including the adversity) start with the Poisoned condition on them.
There are other possibilities as well, and you can link up the conditions to goals and switches for some fun possibilities (Goal: Tear down walls—Effect: Poisoned conditions disappear).
7
Playing Out Conflicts
There is a summary of the following rules in the attachments to this document.
When a conflict begins, characters might have a lower Action Pool than their maximum and some charge dice stored up from earlier conflicts, but their Strike Pool is always empty (see Conflict End at the end of this section).
The GM determines how the order of actions in a particular conflict goes. She can either set the order or have players roll a die, with higher numbers going first and ties breaking in the PCs’ favor.
Each player other than the GM gets 1 action per turn, which can be a maneuver, a strike, an achievement, or a special power. The GM gets to take 1 action for each opponent in the conflict. In most cases you can use powers to modify or improve any of these actions, thus broadening your choices.
Maneuvers are used to gain strike dice and charge dice. You start out a conflict doing maneuvers until you've gained a few strike dice and charge dice, then use those for strikes and/or powers to inflict damage on your opposition.
Strikes are used to inflict damage on the opponent. They use up strike dice. Once you've inflicted enough damage on your opponent, you knock them out. You also might have charge powers that you can add to a strike if you can pay the required number of charge dice.
Achievements are used to accomplish goals or flip switches. Achievements use up strike dice.
Some powers are actions in themselves. Examples are summoning an eidolon or using Life Drain. When you use those powers, they use up your action for that turn and cost the listed number of charge dice.
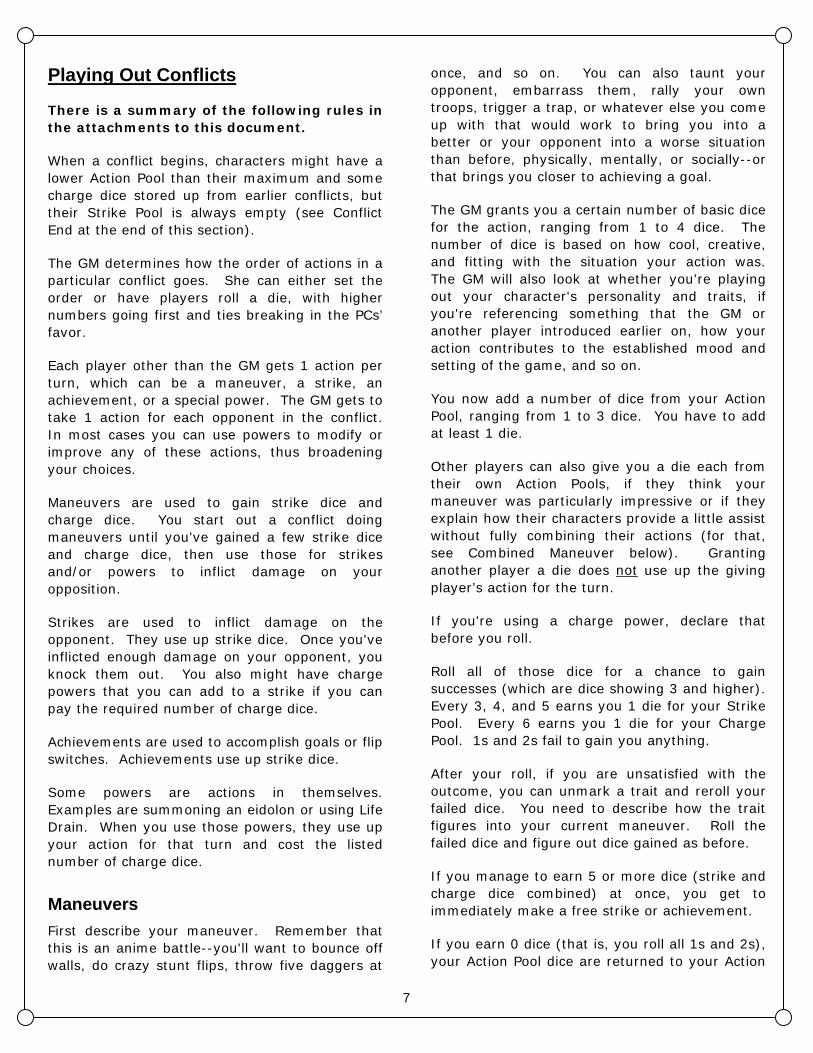
Maneuvers First describe your maneuver. Remember that this is an anime battle--you'll want to bounce off walls, do crazy stunt flips, throw five daggers at
once, and so on. You can also taunt your opponent, embarrass them, rally your own troops, trigger a trap, or whatever else you come up with that would work to bring you into a better or your opponent into a worse situation than before, physically, mentally, or socially--or that brings you closer to achieving a goal.
The GM grants you a certain number of basic dice for the action, ranging from 1 to 4 dice. The number of dice is based on how cool, creative, and fitting with the situation your action was. The GM will also look at whether you're playing out your character's personality and traits, if you're referencing something that the GM or another player introduced earlier on, how your action contributes to the established mood and setting of the game, and so on.
You now add a number of dice from your Action Pool, ranging from 1 to 3 dice. You have to add at least 1 die.
Other players can also give you a die each from their own Action Pools, if they think your maneuver was particularly impressive or if they explain how their characters provide a little assist without fully combining their actions (for that, see Combined Maneuver below). Granting another player a die does not use up the giving player’s action for the turn.
If you're using a charge power, declare that before you roll.
Roll all of those dice for a chance to gain successes (which are dice showing 3 and higher). Every 3, 4, and 5 earns you 1 die for your Strike Pool. Every 6 earns you 1 die for your Charge Pool. 1s and 2s fail to gain you anything.
After your roll, if you are unsatisfied with the outcome, you can unmark a trait and reroll your failed dice. You need to describe how the trait figures into your current maneuver. Roll the failed dice and figure out dice gained as before.
If you manage to earn 5 or more dice (strike and charge dice combined) at once, you get to immediately make a free strike or achievement.
If you earn 0 dice (that is, you roll all 1s and 2s), your Action Pool dice are returned to your Action
8
Pool and the other dice are used up. In all other cases, all dice are used up.
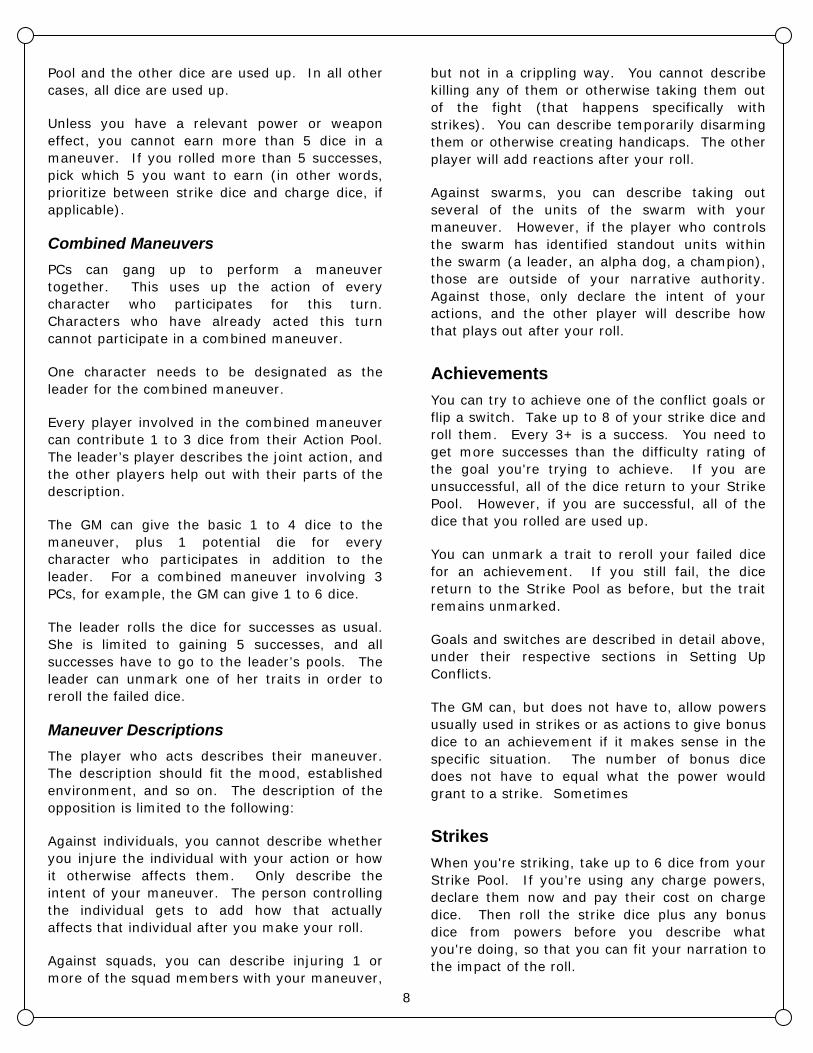
Unless you have a relevant power or weapon effect, you cannot earn more than 5 dice in a maneuver. If you rolled more than 5 successes, pick which 5 you want to earn (in other words, prioritize between strike dice and charge dice, if applicable).
Combined Maneuvers PCs can gang up to perform a maneuver together. This uses up the action of every character who participates for this turn. Characters who have already acted this turn cannot participate in a combined maneuver.
One character needs to be designated as the leader for the combined maneuver.
Every player involved in the combined maneuver can contribute 1 to 3 dice from their Action Pool. The leader’s player describes the joint action, and the other players help out with their parts of the description.
The GM can give the basic 1 to 4 dice to the maneuver, plus 1 potential die for every character who participates in addition to the leader. For a combined maneuver involving 3 PCs, for example, the GM can give 1 to 6 dice.
The leader rolls the dice for successes as usual. She is limited to gaining 5 successes, and all successes have to go to the leader’s pools. The leader can unmark one of her traits in order to reroll the failed dice.
Maneuver Descriptions The player who acts describes their maneuver. The description should fit the mood, established environment, and so on. The description of the opposition is limited to the following:
Against individuals, you cannot describe whether you injure the individual with your action or how it otherwise affects them. Only describe the intent of your maneuver. The person controlling the individual gets to add how that actually affects that individual after you make your roll.
Against squads, you can describe injuring 1 or more of the squad members with your maneuver,
but not in a crippling way. You cannot describe killing any of them or otherwise taking them out of the fight (that happens specifically with strikes). You can describe temporarily disarming them or otherwise creating handicaps. The other player will add reactions after your roll.
Against swarms, you can describe taking out several of the units of the swarm with your maneuver. However, if the player who controls the swarm has identified standout units within the swarm (a leader, an alpha dog, a champion), those are outside of your narrative authority. Against those, only declare the intent of your actions, and the other player will describe how that plays out after your roll.
Achievements You can try to achieve one of the conflict goals or flip a switch. Take up to 8 of your strike dice and roll them. Every 3+ is a success. You need to get more successes than the difficulty rating of the goal you're trying to achieve. If you are unsuccessful, all of the dice return to your Strike Pool. However, if you are successful, all of the dice that you rolled are used up.
You can unmark a trait to reroll your failed dice for an achievement. If you still fail, the dice return to the Strike Pool as before, but the trait remains unmarked.
Goals and switches are described in detail above, under their respective sections in Setting Up Conflicts.
The GM can, but does not have to, allow powers usually used in strikes or as actions to give bonus dice to an achievement if it makes sense in the specific situation. The number of bonus dice does not have to equal what the power would grant to a strike. Sometimes
Strikes When you're striking, take up to 6 dice from your Strike Pool. If you’re using any charge powers, declare them now and pay their cost on charge dice. Then roll the strike dice plus any bonus dice from powers before you describe what you're doing, so that you can fit your narration to the impact of the roll.
9
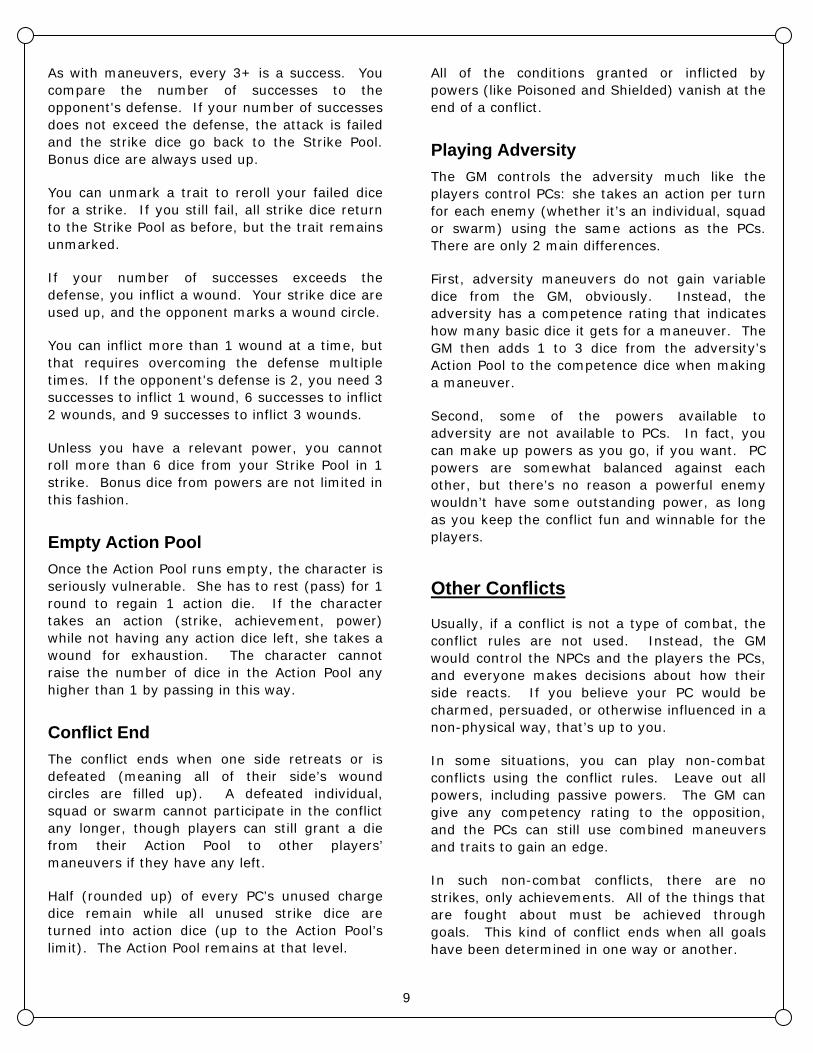
As with maneuvers, every 3+ is a success. You compare the number of successes to the opponent's defense. If your number of successes does not exceed the defense, the attack is failed and the strike dice go back to the Strike Pool. Bonus dice are always used up.
You can unmark a trait to reroll your failed dice for a strike. If you still fail, all strike dice return to the Strike Pool as before, but the trait remains unmarked.
If your number of successes exceeds the defense, you inflict a wound. Your strike dice are used up, and the opponent marks a wound circle.
You can inflict more than 1 wound at a time, but that requires overcoming the defense multiple times. If the opponent's defense is 2, you need 3 successes to inflict 1 wound, 6 successes to inflict 2 wounds, and 9 successes to inflict 3 wounds.
Unless you have a relevant power, you cannot roll more than 6 dice from your Strike Pool in 1 strike. Bonus dice from powers are not limited in this fashion.
Empty Action Pool Once the Action Pool runs empty, the character is seriously vulnerable. She has to rest (pass) for 1 round to regain 1 action die. If the character takes an action (strike, achievement, power) while not having any action dice left, she takes a wound for exhaustion. The character cannot raise the number of dice in the Action Pool any higher than 1 by passing in this way.
Conflict End The conflict ends when one side retreats or is defeated (meaning all of their side’s wound circles are filled up). A defeated individual, squad or swarm cannot participate in the conflict any longer, though players can still grant a die from their Action Pool to other players’ maneuvers if they have any left.
Half (rounded up) of every PC’s unused charge dice remain while all unused strike dice are turned into action dice (up to the Action Pool’s limit). The Action Pool remains at that level.
All of the conditions granted or inflicted by powers (like Poisoned and Shielded) vanish at the end of a conflict.
Playing Adversity The GM controls the adversity much like the players control PCs: she takes an action per turn for each enemy (whether it’s an individual, squad or swarm) using the same actions as the PCs. There are only 2 main differences.
First, adversity maneuvers do not gain variable dice from the GM, obviously. Instead, the adversity has a competence rating that indicates how many basic dice it gets for a maneuver. The GM then adds 1 to 3 dice from the adversity’s Action Pool to the competence dice when making a maneuver.
Second, some of the powers available to adversity are not available to PCs. In fact, you can make up powers as you go, if you want. PC powers are somewhat balanced against each other, but there’s no reason a powerful enemy wouldn’t have some outstanding power, as long as you keep the conflict fun and winnable for the players.
Other Conflicts
Usually, if a conflict is not a type of combat, the conflict rules are not used. Instead, the GM would control the NPCs and the players the PCs, and everyone makes decisions about how their side reacts. If you believe your PC would be charmed, persuaded, or otherwise influenced in a non-physical way, that’s up to you.
In some situations, you can play non-combat conflicts using the conflict rules. Leave out all powers, including passive powers. The GM can give any competency rating to the opposition, and the PCs can still use combined maneuvers and traits to gain an edge.
In such non-combat conflicts, there are no strikes, only achievements. All of the things that are fought about must be achieved through goals. This kind of conflict ends when all goals have been determined in one way or another.

10
CHARACTER SCENES In between conflicts, the players can set up specific scenes to refresh their PCs. For alpha playtesting purposes, I assume you know how to frame a scene and play it out.
If there is no urgency, players can usually play enough scenes to fully heal and refresh their PCs after every conflict. However, sometimes there are limitations to this—see “Threat Die” below.
A scene must have a location, participating characters, and interaction. It ends when the interaction has run its course and the location or participants change substantially.
For each such character scene that the players roleplay, they can do one of the following:
1. Heal 1 wound on oneself.
2. Remotely heal 1 wound on an eidolon.
3. Fill up the Action Pool to its maximum limit.
4. Mark a trait with a plussie.
PCs can often have several conflicts, take grievous wounds, and completely recover in very short time frames. They are some of the most powerful beings around, after all.
Threat Die There are several reasons why scenes are kept as discrete units rather than a stream of continuous events. For example, that’s how it works in the fictional pieces that inspired this game, such as anime TV shows, comics, video games, etc. But another very important reason is the Threat Die.
At any point during the game, the GM can slam a Threat Die on the table. The number it shows on top indicates how many scenes away a specific looming threat is. The threat might be unknown, or it might be something the PCs are aware of. It could be a powerful enemy hunting the PCs, a disaster waiting to happen, or something else along those lines.
At the beginning of every scene—and a conflict counts as a scene in this regard—the die is turned down by 1 number. If the die showed a 3 before, it now shows a 2. If it now shows a 1, the very next scene following the current scene is the one in which the threat manifests.
The Threat Die severely limits the amount of recovery that PCs can indulge in between conflicts—use it sparingly to insert tension and pacing into the game.
If during a conflict the players come up with a clever way to delay the threat, the GM can establish a goal that they can achieve. For example, the threat is a pack of demonic guard dogs that were stirred up by an alarm that the PCs triggered, and they will take 3 scenes to arrive. If the players are in the middle of fighting off other guards, and they realize they can barricade a door to keep the dogs out a bit longer, the GM can create a Barricade Door goal that will turn the die up 1 or 2 notches (the specific effect needs to be declared when the goal is created).
You can also let PCs do actions that will delay the threat in scenes when there’s no conflict going on, but one or more PCs will not be able to gain any character scene payoffs for that scene as they focus on fulfilling the goal. This is also used for “you guys run while I’ll hold the door shut as long as I can” situations of self-sacrifice. In fact, you can have a whole session during which players need to come up with new ways to delay the impending doom as they run toward salvation and even sometimes sacrifice one of their own to buy a delay for the others (think Aliens).
Refresh Every now and then, the PCs can catch their breath for an extended period of time. This usually happens at the conclusion of a story arc, or a big chapter thereof. In these cases, you don’t need to play through all of the character scenes that would usually be necessary. Instead, remove all marks on traits and consider all wounds (on self and eidolons) healed. If you want trait plussies, you will have to play new character scenes.

11
LIST OF POWERS
Powers are listed in several categories: passive powers, which are always active, charge powers, which need to be paid for with charge dice, Soulbound Weapon powers, and Summoning powers.
Passive powers are always active and do not require the expenditure of charge dice.
Charge powers have a type listed, which tells you whether the power is an action in itself or supplements a strike, maneuver, or other power (Boost). You can combine as many non-action powers as you can pay for, with listed exceptions.
Soulbound Weapon and Summoning powers have passive and charge powers among them, but they have their own sections because they have some special rules associated with them.
Unless otherwise stated, you can only take each power once. This applies to all powers in all categories.
Some of the powers and weapon effects inflict conditions on characters. These conditions are listed after the charge powers. A character can only be affected by a condition once; that is, being Shielded through the Protection weapon effect and through the Shield power does not stack.
Passive Powers
Achievement Boost: The limit on the number of dice you can roll from your Strike Pool for achievements is raised by 2.
Body Resistance: You are immune to any charge powers that reduce your Action Pool or Strike Pool (Body Drain, Slow, Weaken) and to the Poisoned condition.
Charge Boost: The limit on the number of charge dice you can store in your Charge Pool is raised by 2. You can take this power up to 3 times.
Darksight: The character is not affected by Blinded or Darkness conditions.
Leadership: The character can distribute dice gained in a combined maneuver among the involved characters. The limit for earning 5 dice altogether still applies (unless the character has Tactical Maneuvering).
Maneuver Boost: The limit on the number of strike and charge dice you can earn in a maneuver is raised by 2. You can take this power up to 2 times. It does not apply to combined maneuvers.
Resilience: Raise your defense by 1. You can take this power up to 3 times.
Resistance to Fire: Your defense counts as 2 points higher against fire-based strikes (charged or weapon effect).
Resistance to Frost: Your defense counts as 2 points higher against frost-based strikes (charged or weapon effect).
Squad Tactics: This power grants 1 bonus die to the leader of any combined maneuver in which this character participates (including cases in which this character is the leader). If more than 1 character in a combined maneuver has this power, the bonus dice from all such characters apply.
Soul Resistance: You are immune to any charge powers that inflict wounds on you without requiring a roll against your defense. The following charge powers cannot be used against you: Life Drain, Life Transfer, Vampiric Strike.
Stamina: The limit on the number of action dice you can store in your Action Pool is raised by 2. You can take this power up to 3 times.
Strike Boost: The limit on the number of dice you can roll from your Strike Pool for strikes is raised by 2. You can take this power up to 2 times.

12
Tactical Maneuvering: The limit on the number of strike and charge dice you can earn as the leader in a combined maneuver is raised by 3. You can take this power up to 2 times. It does not apply to maneuvers your character performs on her own.
Toughness: You have 1 additional wound circle, which means that you can take an extra wound before you are defeated.
Charge Powers
Banishment Type: Action Cost: 2 plus Eidolon Level in Charge Dice Effect: This power must be directed against an eidolon, who is thereby automatically banished. This means that the eidolon returns to its home world with all of its wound circles marked. This power is costlier for higher-level eidolons. For example, banishing a Level 4 eidolon costs 6 charge dice.
Blaze Type: Strike Cost: 3 Charge Dice Effect: This strike is now fire-based. You gain 3 bonus dice to roll in this strike against an individual, 2 against a squad, or 1 against a swarm. Blaze cannot be combined with frost-based powers and weapon effects.
Blindness Type: Action Cost: 2 Charge Dice Effect: Inflicts the Blinded condition on a character.
Body Drain Type: Action Cost: 4 Charge Dice Effect: This power transfers stamina from the victim to the power user. The victim loses 3 action dice, and the power user gains 3 action dice, regardless of defense. This power does not work on squads or swarms (but see Mass Effect).
Brighten Type: Action Cost: 2 Charge Dice Effect: Removes the Darkness condition from the area of the conflict.
Conjure Darkness Type: Action Cost: 2 Charge Dice Effect: Inflicts the Darkness condition on the area of the conflict.
Dispel Type: Action Cost: 2+ Charge Dice Effect: Removes all of the following conditions from the targeted character: Darksighted, Empowered, Quickened, Shielded. You can target multiple characters by spending 2 charge dice per additional character. This power cannot remove Soulbound Weapon effects.
Elemental Surge Type: Boost Cost: 1 Charge Die Effect: This power adds 1 bonus die to the effect of an elemental power (Blaze, Firestorm, Frost Spikes, Ice Hurricane).
Empower Type: Action Cost: 2+ Charge Dice Effect: This power grants the Empowered condition to a character designated by the power user. You can grant the condition to multiple characters by spending 2 charge dice per additional character.
Firestorm Type: Strike Cost: 3 Charge Dice Effect: This strike is now fire-based. You gain 3 bonus dice to roll in this strike against a swarm, 2 against a squad, or 1 against an individual. Firestorm cannot be combined with frost-based powers and weapon effects.
Force Attack Type: Strike Cost: 3 Charge Dice Effect: This power adds 2 bonus dice to a strike against any kind of opponent.

13
Frost Spikes Type: Strike Cost: 3 Charge Dice Effect: This strike is now frost-based. You gain 3 bonus dice to roll in this strike against an individual, 2 against a squad, or 1 against a swarm. Frost Spikes cannot be combined with fire-based powers and weapon effects.
Guard Type: Maneuver Cost: 1 Charge Die Effect: Until your next turn, any strike against an ally that you dedicate when invoking this power must instead be directed at you.
Heroics Type: Achievement Cost: 2 Charge Dice Effect: This power adds 3 bonus dice to an achievement roll.
Ice Hurricane Type: Strike Cost: 3 Charge Dice Effect: This strike is now frost-based. You gain 3 bonus dice to roll in this strike against a swarm, 2 against a squad, or 1 against an individual. Ice Hurricane cannot be combined with fire-based powers and weapon effects.
Leap Attack Type: Strike Cost: 1 Charge Die Effect: This power adds 1 bonus die to a strike against a squad or an individual.
Life Drain Type: Action Cost: 5 Charge Dice Effect: This power transfers life force from the victim to the character using the power. The victim takes 1 wound, and the user heals 1 wound (if applicable), regardless of defense. This power does not work on squads or swarms (but see Mass Effect).
Life Transfer Type: Action Cost: 5 Charge Dice Effect: This power transfers life force from the victim to a character designated by the character using the power (other than herself). The victim
takes 1 wound, and the designated character heals 1 wound (if applicable), regardless of defense. This power does not work on squads or swarms (but see Mass Effect). The character to be healed must either be present or be an eidolon of the character using the power.
Mass Effect Type: Boost Cost: 1 Charge Die Effect: This power can be used in combination with Body Drain, Life Drain, Life Transfer, Poison, Slow, Vampiric Strike, or Weaken to allow those powers to be used against squads and swarms.
Nightvision Type: Action Cost: 1+ Charge Die Effect: This power grants the Darksighted condition to the characters designated by the power user, which works exactly like the Darksight passive power. The cost is 1 charge die per character affected.
Poison Type: Action Cost: 2 Charge Dice Effect: Inflicts Poisoned on a character. Until this condition is cleared, the character loses one action die from her Action Pool at the beginning of her turn each round. This power does not work on squads or swarms (but see Mass Effect).
Quicken Type: Action Cost: 2+ Charge Dice Effect: This power grants the Quickened condition to a character designated by the power user. You can grant the condition to multiple characters by spending 2 charge dice per additional character.
Refresh Type: Action Cost: 2 Charge Dice Effect: This power strengthens a character’s stamina. The target’s current number of action dice in the character’s Action Pool is raised by 3. This power does not work on squads or swarms (but see Mass Effect).

14
Restore Type: Action Cost: 1+ Charge Die Effect: Removes Blindness or Poison from 1 character (but it cannot counter the effect of Darkness). You can remove several conditions (from multiple characters and/or the area) by spending an additional charge die per condition.
Shadow Strike Type: Strike Cost: 1 Charge Die Effect: This power adds 2 bonus dice to a strike against an opponent who suffers the effects of the Darkness or Blinded conditions.
Shield Type: Action Cost: 2+ Charge Dice Effect: This power grants the Shielded condition to a character designated by the power user. You can grant the condition to multiple characters by spending 2 charge dice per additional character.
Slow Type: Action Cost: 2 Charge Dice Effect: This power slows down a character temporarily. The victim’s current number of strike dice in the character’s Strike Pool is reduced to half (rounded up). This power does not work on squads or swarms (but see Mass Effect).
Superior Power Control Type: Boost Cost: 2 Charge Dice Effect: This power allows the user to use a strike power after rolling the strike dice. The player first rolls for the strike, then invokes this power and pays 2 charge dice plus any charge dice costs for the additional power(s) to be applied. Then the player rolls any dice granted by the power and adds them to the strike roll.
Vampiric Strike Type: Strike Cost: 3 Charge Dice Effect: If this strike inflicts 1 or more wounds, the character using this power heals 1 wound. If the strike does not inflict a wound, the effect
evaporates. This power does not work on squads or swarms (but see Mass Effect).
Weaken Type: Action Cost: 2 Charge Dice Effect: This power weakens a character’s stamina. The victim’s current number of action dice in the character’s Action Pool is reduced by 2. This power does not work on squads or swarms (but see Mass Effect).
Whirlwind Attack Type: Strike Cost: 1 Charge Die Effect: This power adds 1 bonus die to a strike against a squad or a swarm.
Conditions
A character can benefit or suffer from the effects of a condition only once. Duplicate sources of the same condition do not stack. All conditions are erased at the end of a conflict.
Blinded: Until this condition is cleared, the character has to subtract 1 success from any rolls she makes.
Darkness: This is an overarching condition that works like Blinded on everyone in the conflict until it is removed.
Darksighted: The character is not affected by Blinded or Darkness conditions.
Empowered: This condition adds 1 bonus die to the character’s strikes.
Poisoned: Until this condition is cleared, the character loses 1 action die from her Action Pool at the beginning of her turn. If the Action Pool is empty, the condition has no effect. Note that this condition will prevent her from making use of the benefits of resting, because the acquired die is lost at the beginning of the next turn.
Quickened: This condition adds 1 bonus die to the character’s maneuvers.
Shielded: This condition adds 1 point to the character’s defense.
15
Soulbound Weapons
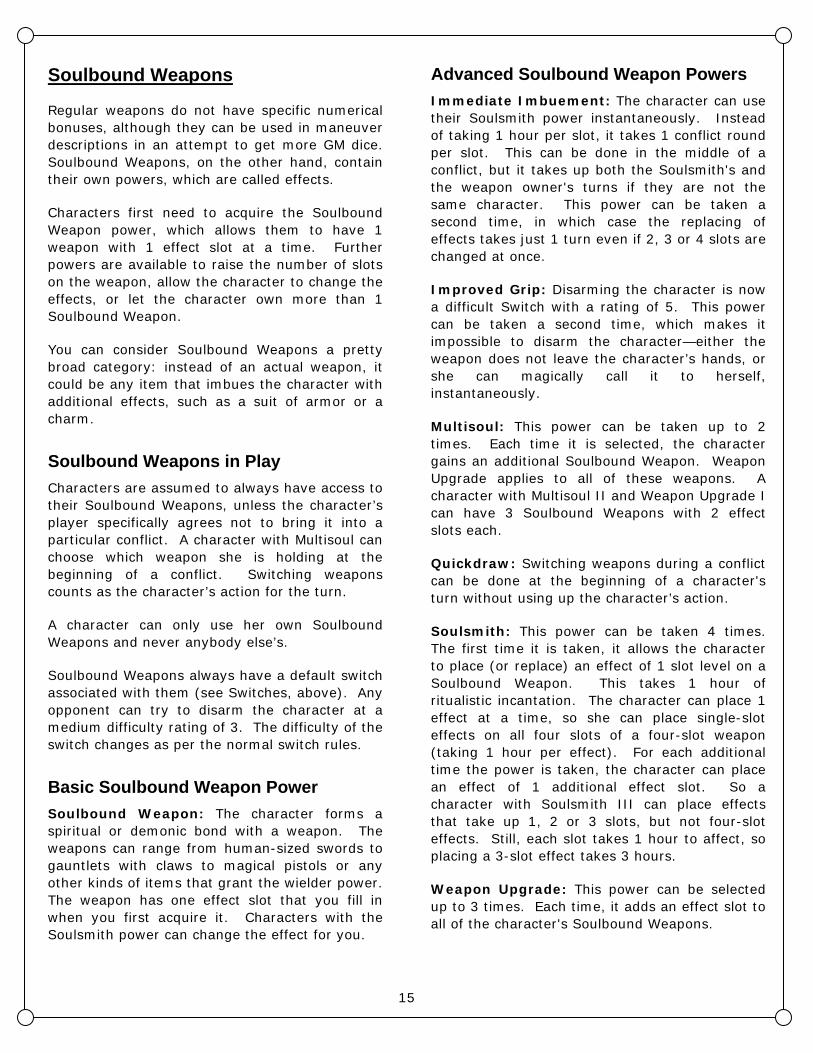
Regular weapons do not have specific numerical bonuses, although they can be used in maneuver descriptions in an attempt to get more GM dice. Soulbound Weapons, on the other hand, contain their own powers, which are called effects.
Characters first need to acquire the Soulbound Weapon power, which allows them to have 1 weapon with 1 effect slot at a time. Further powers are available to raise the number of slots on the weapon, allow the character to change the effects, or let the character own more than 1 Soulbound Weapon.
You can consider Soulbound Weapons a pretty broad category: instead of an actual weapon, it could be any item that imbues the character with additional effects, such as a suit of armor or a charm.
Soulbound Weapons in Play Characters are assumed to always have access to their Soulbound Weapons, unless the character’s player specifically agrees not to bring it into a particular conflict. A character with Multisoul can choose which weapon she is holding at the beginning of a conflict. Switching weapons counts as the character’s action for the turn.
A character can only use her own Soulbound Weapons and never anybody else’s.
Soulbound Weapons always have a default switch associated with them (see Switches, above). Any opponent can try to disarm the character at a medium difficulty rating of 3. The difficulty of the switch changes as per the normal switch rules.
Basic Soulbound Weapon Power Soulbound Weapon: The character forms a spiritual or demonic bond with a weapon. The weapons can range from human-sized swords to gauntlets with claws to magical pistols or any other kinds of items that grant the wielder power. The weapon has one effect slot that you fill in when you first acquire it. Characters with the Soulsmith power can change the effect for you.
Advanced Soulbound Weapon Powers Immediate Imbuement: The character can use their Soulsmith power instantaneously. Instead of taking 1 hour per slot, it takes 1 conflict round per slot. This can be done in the middle of a conflict, but it takes up both the Soulsmith's and the weapon owner's turns if they are not the same character. This power can be taken a second time, in which case the replacing of effects takes just 1 turn even if 2, 3 or 4 slots are changed at once.
Improved Grip: Disarming the character is now a difficult Switch with a rating of 5. This power can be taken a second time, which makes it impossible to disarm the character—either the weapon does not leave the character’s hands, or she can magically call it to herself, instantaneously.
Multisoul: This power can be taken up to 2 times. Each time it is selected, the character gains an additional Soulbound Weapon. Weapon Upgrade applies to all of these weapons. A character with Multisoul II and Weapon Upgrade I can have 3 Soulbound Weapons with 2 effect slots each.
Quickdraw: Switching weapons during a conflict can be done at the beginning of a character's turn without using up the character’s action.
Soulsmith: This power can be taken 4 times. The first time it is taken, it allows the character to place (or replace) an effect of 1 slot level on a Soulbound Weapon. This takes 1 hour of ritualistic incantation. The character can place 1 effect at a time, so she can place single-slot effects on all four slots of a four-slot weapon (taking 1 hour per effect). For each additional time the power is taken, the character can place an effect of 1 additional effect slot. So a character with Soulsmith III can place effects that take up 1, 2 or 3 slots, but not four-slot effects. Still, each slot takes 1 hour to affect, so placing a 3-slot effect takes 3 hours.
Weapon Upgrade: This power can be selected up to 3 times. Each time, it adds an effect slot to all of the character's Soulbound Weapons.

16
Weapon Effects Each effect is listed with the number of effect slots it takes up. Effects can only be placed once on each weapon.
[1] Area Strike: You gain 1 bonus die to all strike rolls against swarms.
[1] Charge Boost: The limit on the number of charge dice you can store in your Charge Pool is raised by 1. This effect is cumulative with the power of the same name. If you stop using this weapon (switch, being disarmed, etc.) and have an extra charge die above your adjusted limit, it is discarded.
[1] Charged Summoning: Any summoned eidolon has 1 charge die in its Charge Pool when it is summoned. This effect is cumulative with the power of the same name.
[1] Elemental Surge: Double the bonus dice you get from Fire Aura and Frost Aura.
[1] Fire Aura: Your attack is now fire-based. Add 1 bonus die to your strike rolls. If you have a frost-based effect on your weapon, you need to pick which one applies before the strike. This cannot be combined with elemental charge powers other than fire-based ones.
[1] Fire Resistance: Your defense counts as 1 point higher against fire-based strikes (charged or weapon effect). This effect is cumulative with the Resistance to Fire power.
[1] Frost Aura: Your attack is now frost-based. Add 1 bonus die to your strike rolls. If you have a fire-based effect on your weapon, you need to pick which one applies before the strike. This cannot be combined with elemental charge powers other than frost-based ones.
[1] Frost Resistance: Your defense counts as 1 point higher against frost-based strikes (charged or weapon effect). This effect is cumulative with the Resistance to Frost power.
[1] Maneuver Boost: Your limit for gaining dice in a maneuver is raised by 1. This effect is cumulative with the power of the same name.
[1] Multi Strike: You gain 1 bonus die to all strike rolls against squads.
[1] Power Strike: You gain 1 bonus die to all strike rolls against characters.
[1] Protection: You benefit from the Shielded condition as long as you hold the weapon.
[1] Quicken: You benefit from the Quickened condition as long as you hold the weapon.
[1] Shining: The character is not affected by the Darkness condition.
[1] Strike Boost: The limit on the number of dice you can roll from your Strike Pool is raised by 1. This effect is cumulative with the power of the same name.
[1] Summoning Gateway: The charge die cost for summoning eidolons is reduced by 1 (to a minimum of 1). This effect is cumulative with the Natural Summoner power, subject to the minimum cost restriction.
[2] Cursed: When you inflict a wound on a character, the current number of charge dice in the character’s Charge Pool is reduced by 2. This does not work against squads or swarms.
[2] Poisonous: When you inflict a wound on a character, you inflict the Poisoned condition on her.
[2] Weakening: When you inflict a wound on a character, the current number of action dice in the character’s Action Pool is reduced by 2. This power does not work on squads or swarms.
[3] Soulcharge: Every round at the end of the character's turn, she gains 1 charge die. If the character’s Charge Pool already has hit its limit, this effect does nothing.
[3] Banisher: When you inflict a wound on an eidolon, the eidolon is automatically banished. This means that the eidolon returns to its home world with all of its wound circles marked.

17
[4] Ultimate Weapon: This effect is customized for each character, consisting of five effect slots’ worth of effects. A player can only choose the contents of this power once for her character. After determining what a particular character’s Ultimate Weapon is, it cannot be changed outside of drastic character developments (GM’s call). The following are examples of Ultimate Weapons:
Bridge of Worlds: This package combines Charged Summoning, Soulcharge, and Summoning Gateway.
Energy Nexus: This package combines Charge Boost, Protection and Soulcharge.
Flaming Wrath: This package combines Area Strike, Elemental Surge, Fire Aura, Quicken, and Strike Boost.
Freezing Vengeance: This package combines Elemental Surge, Frost Aura, Power Strike, and Weakening.
Summoning
Summoning is the art of bonding with, summoning, and empowering eidolons. Eidolons are creatures from specific worlds that have the ability to jump between the worlds to the one they are bonded with, but only at the command of the summoner. They can only stay for short visits and automatically return to their own worlds if they are severely wounded.
There are several known types of eidolons from various worlds. Other eidolons can be discovered by adventurous summoners, but they are exceedingly rare. Those are handled by the Creating Eidolons rules below.
There are several powers related to summoning: Summoning allows a character to create a bond with 1 eidolon, Open Bond lets the summoner have additional bonds to eidolons, and Empower Eidolons lets the character create bonds with higher-power eidolons and strengthens the lower-power ones.
Eidolons in Play Summoning an eidolon counts as the summoner’s action for that turn and costs 1 plus the Eidolon’s Level in charge dice (summoning a Level 3 eidolon costs 4 charge dice). The eidolon appears instantaneously. Check out the eidolon’s entrance description to see what that looks like for a particular eidolon. A summoner can always only have 1 eidolon summoned at any time (note that eidolons that are squads or swarms still count as 1 eidolon for all intents and purposes).
Even though both the summoner and the eidolon are now in the conflict together, the player has to decide each turn which one of them acts (that is, the summoner can either act on her own or command her eidolon to do something). They cannot both act in the same turn. Their pools are separate. You can still describe them doing things together (and thereby aim for more maneuver dice from the GM), but you can’t take 2 actions.
Summoners can unmark one of their traits to reroll failed dice when the eidolon is acting.
The summoner and her eidolon cannot both do a combined maneuver together, but either one of them can do a combined maneuver with other PCs (and possibly eidolons). However, eidolons can never be leaders in a combined maneuver, so there always needs to be at least one PC involved in any combined maneuver.
The summoner can still be targeted with strikes while the eidolon is around, unless the eidolon has the Auto Guard power or uses the Guard power.
Dismissing the eidolon is a free action that the summoner can take at the beginning of her turn. It does not use up her action for that turn. It does not hurt the eidolon. A dismissed eidolon can be summoned back in the same conflict.
If the eidolon is defeated (that is, if it takes enough wounds to fill up all of its wound circles), it immediately disappears back to its home world and cannot be summoned back until at least 1 of its wounds has been healed.

18
Eidolons do not retain their Pools after a conflict. Instead, their Action Pool is considered filled and their Charge and Strike Pools are empty. Eidolons do retain their wounds, however, which can be healed through character scenes.
Basic Summoning Powers Summoning: The character has the ability to summon eidolons. Please see Eidolons in Play, above, for details on how Summoning works. Without also choosing Open Bond, this power cannot be used.
Open Bond: The character can bond with an eidolon, in which case the power is renamed to Bond: [name of the eidolon]. This power can be taken multiple times and is required every time that the summoner wants to add a new eidolon to her collection. Summoners can, under rare circumstances, break a bond with an eidolon to free up a bond for a new eidolon. However, this could have very bad consequences, requires the agreement of the GM, and should not happen more than once in any given story arc. Note that this power is useless without the Summoning power. You can take this power up to 3 times.
Advanced Summoning Powers Charged Summoning: Any summoned eidolon has 1 charge die in its Charge Pool when it is summoned (normally, eidolons always start with an empty Charge Pool and do not retain charge dice after conflicts). You can take this power up to 3 times to raise the number of charge dice with which your eidolons enter the conflict.
Companion: One of your Level 0 eidolons can remain in your world for prolonged periods of time. It stays by your side and does not need to be summoned at the beginning of a conflict. If the eidolon is defeated or banished, it returns once at least 1 of its wound circles is healed. The companion cannot be changed unless the summoner permanently loses their companion (in other words, the bond is broken and the eidolon is no longer available to the summoner). I suggest creating a custom eidolon for a companion.
Empower Eidolons: This power has 2 effects. First, it is a requirement for bonding with higher-
level eidolons. In order to bond with a Level 2 eidolon, for example, the character needs to have Summoning as well as Empower Eidolon II. Second, each eidolon with which the summoner has bonded receives an additional eidolon power for each Empower Eidolon level above the one required to bond with it. For example, a summoner with Empower Eidolon II’s level zero eidolon would have 2 extra powers, any of her Level 1 eidolons would have 1 additional power, and the Level 2 eidolons would not have any powers other than the ones they come with. The additional powers are selected by the summoner when she acquires a new level of Empower Eidolon and cannot later be changed.
Magnificent Companion: The summoner’s companion can be a Level 1 or Level 2 eidolon. Note that this power is useless without the Companion power.
Natural Summoner: The charge die cost for summoning eidolons is reduced by 1 (to a minimum of 1).
Unbreakable Bond: If you have a companion (see the Companion power above), it is immune to being banished by powers or weapon effects.
Known Eidolons The following is a listing of known and common eidolons. When a character has an Open Bond and a reasonable amount of time to conduct the necessary rituals, that character’s player can freely choose 1 of these types of eidolons for the bond, subject to the power level restrictions (that is, the character needs to have Empower Eidolon of the appropriate level).
The stats for the eidolons are listed taking their powers into account. An eidolon with Strike Boost III will be listed with Strike Pool Limit 9 (the basic value is 6, plus 3 boosts). This is for ease of reference, so that you won’t have to calculate those numbers during play.
The listings use AP Limit for the maximum number of action dice in its Action Pool, CP Limit for the maximum number of charge dice in its Charge Pool, and SP Limit for the highest number of strike dice it can use at one time from its Strike Pool.
19
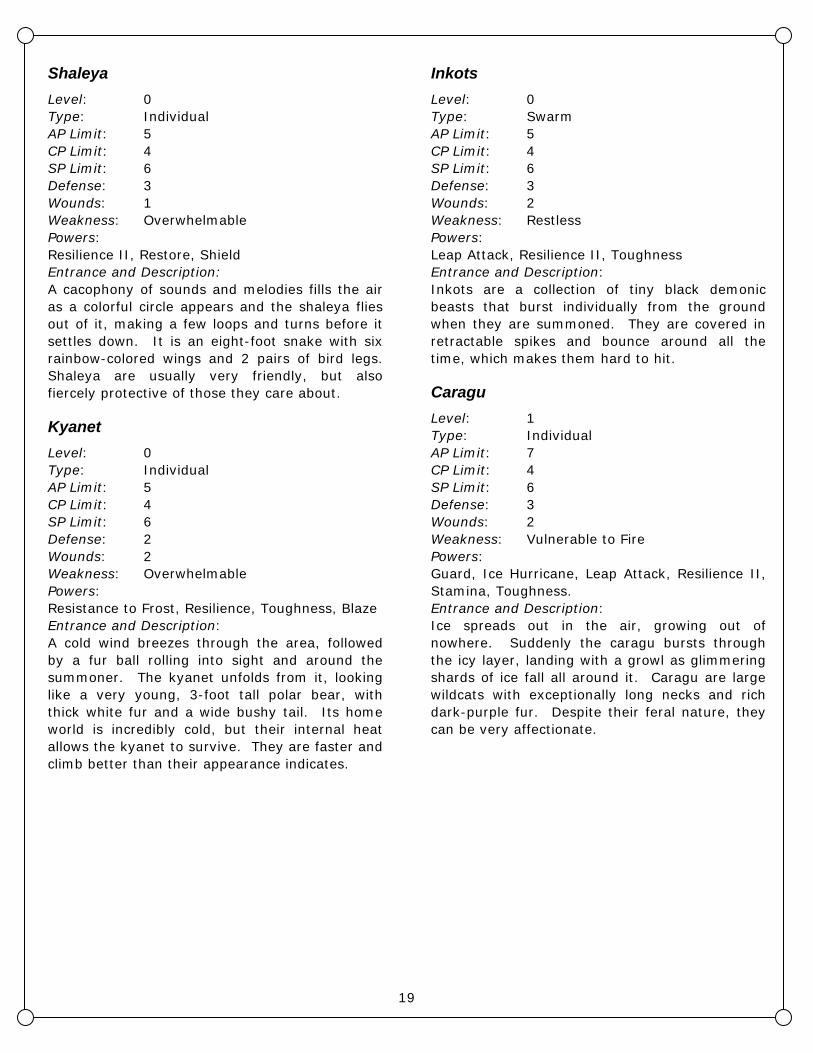
Shaleya Level: 0 Type: Individual AP Limit: 5 CP Limit: 4 SP Limit: 6 Defense: 3 Wounds: 1 Weakness: Overwhelmable Powers: Resilience II, Restore, Shield Entrance and Description: A cacophony of sounds and melodies fills the air as a colorful circle appears and the shaleya flies out of it, making a few loops and turns before it settles down. It is an eight-foot snake with six rainbow-colored wings and 2 pairs of bird legs. Shaleya are usually very friendly, but also fiercely protective of those they care about.
Kyanet Level: 0 Type: Individual AP Limit: 5 CP Limit: 4 SP Limit: 6 Defense: 2 Wounds: 2 Weakness: Overwhelmable Powers: Resistance to Frost, Resilience, Toughness, Blaze Entrance and Description: A cold wind breezes through the area, followed by a fur ball rolling into sight and around the summoner. The kyanet unfolds from it, looking like a very young, 3-foot tall polar bear, with thick white fur and a wide bushy tail. Its home world is incredibly cold, but their internal heat allows the kyanet to survive. They are faster and climb better than their appearance indicates.
Inkots Level: 0 Type: Swarm AP Limit: 5 CP Limit: 4 SP Limit: 6 Defense: 3 Wounds: 2 Weakness: Restless Powers: Leap Attack, Resilience II, Toughness Entrance and Description: Inkots are a collection of tiny black demonic beasts that burst individually from the ground when they are summoned. They are covered in retractable spikes and bounce around all the time, which makes them hard to hit.
Caragu Level: 1 Type: Individual AP Limit: 7 CP Limit: 4 SP Limit: 6 Defense: 3 Wounds: 2 Weakness: Vulnerable to Fire Powers: Guard, Ice Hurricane, Leap Attack, Resilience II, Stamina, Toughness. Entrance and Description: Ice spreads out in the air, growing out of nowhere. Suddenly the caragu bursts through the icy layer, landing with a growl as glimmering shards of ice fall all around it. Caragu are large wildcats with exceptionally long necks and rich dark-purple fur. Despite their feral nature, they can be very affectionate.

20
Farillia Level: 1 Type: Individual AP Limit: 5 CP Limit: 4 SP Limit: 6 Defense: 3 Wounds: 1 Weakness: Vulnerable to Frost Powers: Blaze, Brighten, Fire Storm, Refresh, Resilience II, Restore Entrance and Description: Flames shoot in from all directions and circle around each other, forming a ball of fire. The farillia bursts out of it, soaring toward the sky as it leaves a trail of fire behind it before it comes back down in a spiraling pattern to settle next to its summoner. Farillia are two-foot fairies with beautiful butterfly wings, always surrounded by the shimmer of heat.
Harklings Level: 2 Type: Squad AP Limit: 7 CP Limit: 4 SP Limit: 6 Defense: 4 Wounds: 2 Weakness: Crazy Powers: Auto Guard, Blindness, Darksight, Force Attack, Resilience III, Slow, Stamina, Toughness Entrance and Description: The first sign of the harklings’ appearance is a very low, vibrating horn sound in the distance, followed by creaking and screeching sounds. Many people feel the hairs at the back of their necks standing up. The air is filled with an earthen scent. Finally the harklings come around different corners, rise from behind objects, or step out from behind someone’s back. They are three humanoids, all completely robed and hooded, each holding a different weapon ending in a crescent blade. No one knows what their intent or purpose is, and they hardly follow orders, though they do often protect the one who called them. When two of them have been defeated (that is, they’ve taken two wounds), the third one gathers them up and simply walks away.
Yiyon Level: 2 Type: Individual AP Limit: 5 CP Limit: 4 SP Limit: 6 Defense: 4 Wounds: 2 Weakness: Cowardly Powers: Blaze, Frost Spikes, Resilience III, Resistance to Fire II, Resistance to Frost II, Toughness Entrance and Description: A ball made of large scales falls from the sky and slams onto the ground, then bounces from one object to another until it finally comes to a halt. The yiyon’s eyes carefully peek out above on their feelers, before the yiyon unfolds. It stands on four insectoid legs, and its two upper arms end in flaming fists while the lower two give off a chilly mist.
Hykeor Level: 3 Type: Individual AP Limit: 9 CP Limit: 4 SP Limit: 7 Defense: 4 Wounds: 3 Weakness: Overwhelmable Powers: Body Resistance, Guard, Leap Attack, Resilience III, Soul Resistance, Stamina II, Strike Boost, Toughness II, Whirlwind Attack Entrance and Description: The earth rumbles and cracks appear. A chilling howl fills the air. The Hykeor, a huge wolf with bat-like wings, bursts out of the ground. It descends amidst a shower of debris and lands surprisingly gracefully, immediately starting to pace back and forth as it eyes its first victim with red glowing eyes.

21
Stormravens Level: 3 Type: Swarm AP Limit: 9 CP Limit: 4 SP Limit: 6 Defense: 3 Wounds: 4 Weakness: Vulnerable to Fire Powers: Auto Guard, Elemental Surge, Frost Spikes, Ice Hurricane, Resilience II, Resistance to Frost II, Stamina II, Toughness III Entrance and Description: Snow begins to fall, and the sky darkens. The crowing of ravens is heard as they gather above (if you’re inside, they come rushing in through various openings or seem to emerge from the shadows). The ravens circle for a moment before their formation dashes downwards, led by one huge raven that lands on the summoner’s shoulder or arm. The remaining stormravens fly around them, waiting for orders.
Kulos Level: 4 Type: Individual AP Limit: 9 CP Limit: 6 SP Limit: 6 Defense: 3 Wounds: 3 Weakness: Weak Spot Powers: Body Drain, Charge Boost II, Life Drain, Mass Effect, Refresh, Resilience II, Slow, Soul Resistance, Stamina II, Toughness II, Weaken Entrance and Description: A surprisingly short, absolutely hairless, naked, and genderless human appears with a blinding yet soundless flash, accompanied by a strong metallic taste any spectator’s mouth. Around it, space and time seem to bend. Kulos does not walk or fly or otherwise move—it makes things comes to him. It can move nonliving things with its mind. The only moving thing about this creature is its eyes, which seem to command reality around itself. As it never moves, its back presents a blind spot, assuming the Kulos does not have extrasensory perception.
Uyar Level: 5 Type: Individual AP Limit: 13 CP Limit: 6 SP Limit: 8 Defense: 4 Wounds: 5 Weakness: Darkbound Powers: Auto Guard, Body Resistance, Conjure Darkness, Darksight, Force Attack, Poison, Resilience III, Stamina IV, Strike Boost II, Toughness IV Entrance and Description: Lights flicker violently, even sunlight, as the Uyar’s thundering steps are heard. If it is summoned within a confined space, this huge eidolon will break through the nearest wall. Out in the open, it appears as a slowly manifesting outline behind the summoner in the strobes of occasional light until it towers above all. The uyar is covered in thick black oil, which constantly drips from his hulking form and turns to smoke soon after hitting the ground. Metal spikes are sticking out of its arms and legs.
Creating Eidolons The custom creation of eidolons is something that GMs and players should approach together. As a default rule, no summoner should have more than 1 custom eidolon unless your campaign is all about summoners.
You will see that an eidolon starting out at a higher power level will be more powerful than a lower-level eidolon with Empower Eidolon powers. This is intended to make up for the customizable nature of Empower Eidolon, which is why creating a custom eidolon needs to be a rare event and subject to GM approval. Higher-level eidolons are also more costly to summon.
In order to create a custom eidolon, follow these steps:
First, figure out the nature and details of the eidolon. What is it called, what is its home world like, what does it look like, and so on. You also need to determine its Level (ranging from 0 to 5) and type (individual, squad, swarm).
22
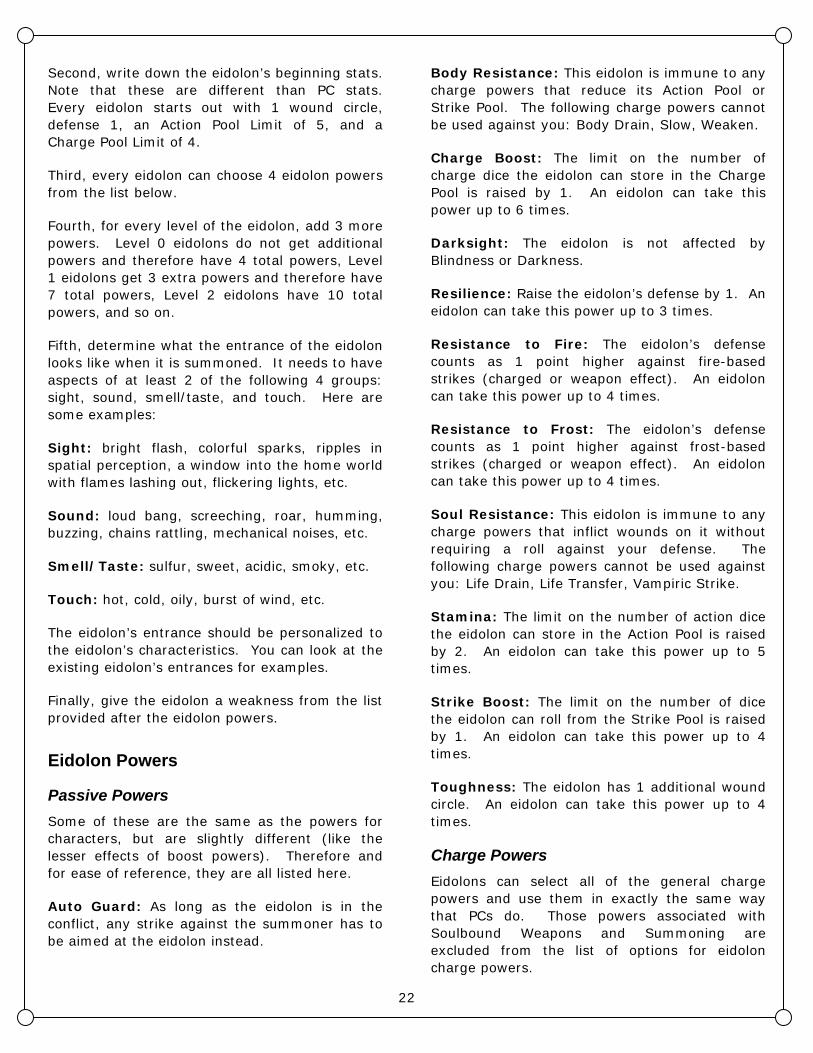
Second, write down the eidolon’s beginning stats. Note that these are different than PC stats. Every eidolon starts out with 1 wound circle, defense 1, an Action Pool Limit of 5, and a Charge Pool Limit of 4.
Third, every eidolon can choose 4 eidolon powers from the list below.
Fourth, for every level of the eidolon, add 3 more powers. Level 0 eidolons do not get additional powers and therefore have 4 total powers, Level 1 eidolons get 3 extra powers and therefore have 7 total powers, Level 2 eidolons have 10 total powers, and so on.
Fifth, determine what the entrance of the eidolon looks like when it is summoned. It needs to have aspects of at least 2 of the following 4 groups: sight, sound, smell/taste, and touch. Here are some examples:
Sight: bright flash, colorful sparks, ripples in spatial perception, a window into the home world with flames lashing out, flickering lights, etc.
Sound: loud bang, screeching, roar, humming, buzzing, chains rattling, mechanical noises, etc.
Smell/Taste: sulfur, sweet, acidic, smoky, etc.
Touch: hot, cold, oily, burst of wind, etc.
The eidolon’s entrance should be personalized to the eidolon’s characteristics. You can look at the existing eidolon’s entrances for examples.
Finally, give the eidolon a weakness from the list provided after the eidolon powers.
Eidolon Powers
Passive Powers Some of these are the same as the powers for characters, but are slightly different (like the lesser effects of boost powers). Therefore and for ease of reference, they are all listed here.
Auto Guard: As long as the eidolon is in the conflict, any strike against the summoner has to be aimed at the eidolon instead.
Body Resistance: This eidolon is immune to any charge powers that reduce its Action Pool or Strike Pool. The following charge powers cannot be used against you: Body Drain, Slow, Weaken.
Charge Boost: The limit on the number of charge dice the eidolon can store in the Charge Pool is raised by 1. An eidolon can take this power up to 6 times.
Darksight: The eidolon is not affected by Blindness or Darkness.
Resilience: Raise the eidolon’s defense by 1. An eidolon can take this power up to 3 times.
Resistance to Fire: The eidolon’s defense counts as 1 point higher against fire-based strikes (charged or weapon effect). An eidolon can take this power up to 4 times.
Resistance to Frost: The eidolon’s defense counts as 1 point higher against frost-based strikes (charged or weapon effect). An eidolon can take this power up to 4 times.
Soul Resistance: This eidolon is immune to any charge powers that inflict wounds on it without requiring a roll against your defense. The following charge powers cannot be used against you: Life Drain, Life Transfer, Vampiric Strike.
Stamina: The limit on the number of action dice the eidolon can store in the Action Pool is raised by 2. An eidolon can take this power up to 5 times.
Strike Boost: The limit on the number of dice the eidolon can roll from the Strike Pool is raised by 1. An eidolon can take this power up to 4 times.
Toughness: The eidolon has 1 additional wound circle. An eidolon can take this power up to 4 times.
Charge Powers Eidolons can select all of the general charge powers and use them in exactly the same way that PCs do. Those powers associated with Soulbound Weapons and Summoning are excluded from the list of options for eidolon charge powers.

23
Weaknesses Every eidolon has a weakness. Some combinations of powers and weaknesses should be avoided, for example Resistance to Frost with Vulnerable to Frost and Resistance to Fire with Vulnerable to Fire. I’ll leave those up to your good judgment; it’s something for the GM to consider when making or approving custom eidolons.
Other opponents might have a weakness as well—in that case, pick them from this list and modify them as necessary. You can also roll a die for each opponent that the characters face, skipping over two weakness you exclude beforehand (for example, if you are creating a fire demon, skip over Vulnerable to Fire and Darkbound).
List of Weaknesses Cowardly: The eidolon returns to its home world whenever it suffers a wound, even if it still has unmarked wound circles left. It can be summoned back during the current conflict, but at the usual cost (spending an action and the associated charge dice), and the eidolon loses any accumulated strike and charge dice while retaining its wounds and the current Action Pool. Eidolons that only have 1 wound circle cannot have this weakness. A non-eidolon opponent with this weakness will be considered absent during the turn immediately following the taking of the wound, after which it returns with the same wounds and Action Pool while having lost any charge and strike dice.
Crazy: The eidolon’s action for each turn is determined randomly. If the roll shows an action it cannot do (such as strike when it has no strike dice), the eidolon passes for that round. Every turn, roll 1 die and consult the following list: 1-3: Maneuver, 4: Strike, 5: Power, 6: summoner’s choice.
Darkbound: Unless Darkness is in effect, this eidolon has to subtract 1 success from every roll. This weakness does not automatically grant Darksight; you have to select that as a power.
Overwhelmable: Squads and swarms gain 2 bonus dice to their strikes against this eidolon.
Restless: The eidolon cannot do the same type of action (maneuver, strike, achievement, power) 2 turns in a row. For example, the turn after it makes a maneuver, it has to choose a strike, achievement, or power. Eidolons above Level 1 cannot select this weakness.
Vulnerable to Fire: Any fire-based strikes (through charge powers or weapon effects) against this eidolon gain 3 bonus dice.
Vulnerable to Frost: Any frost-based strikes (through charge powers or weapon effects) against this eidolon gain 3 bonus dice.
Weak Spot: The eidolon has a weak spot that can be used to instantly defeat it. The weak spot is represented by a default goal in any conflict. Its difficulty rating is 2 plus the eidolon’s Level. If anyone achieves this goal, all of the eidolon’s wound circles are marked and it returns to its home world. Only eidolons of Level 2 and higher can have this as their weakness.

Anima Prime
SAMPLE CHARACTERS
Yara – Gunblade Warrior
Yara is a human who, through an accidental summoning of her father, merged with a demonic eidolon as a little child. Her skin is a deep crimson, and she has a row of little spikes running along her spine, usually covered by her full mane of jet black hair. She wields a Soulbound Weapon by the name of Gaekalliet, which has 2 barrels of an integrated fully-automatic rifle set into the lower half of its gigantic blade. She can switch back and forth between the 2 modes of the weapon at will.
Passion: Anger.
Mark: Spinal spikes and crimson skin.
Traits: “I was hoping you’d do that.” Shunned by her family. Unable to resist the tantalizing lure of flames.
Stats: Action Pool 10, Wounds 3, Defense 3.
Powers: Leadership, Multisoul, Quickdraw, Resilience II, Resistance to Fire, Soulbound Weapon (Gaekalliet), Weapon Upgrade II.
Weapons: Gaekalliet (Blade Mode): Elemental Surge, Fire Aura, Power Strike. Gaekalliet (Gun Mode): Area Strike, Protection, Strike Boost.
Evanon – Frost Hunter
Evanon’s tribe lives in the frozen wastes of Asiye, among glittering glaciers and towers of gray stone. His powers allow him to slow down and weaken more dangerous prey so that he can bring it down. Senja, a Caragu eidolon, is his hunting companion. Together they set out to explore the lands beyond their borders.
Passion: Glory.
Mark: His head and face resemble a bear’s.
Traits: There is nothing that scares me. Family lineage of hunters. Beautiful singing voice.
Stats: Action Pool 10, Wounds 4, Defense 2.
Powers: Bond: Senja (Caragu), Companion, Empower Eidolons, Magnificent Companion, Resilience, Slow, Summoning, Toughness, Weakening.
Eidolon: Senja is a standard Caragu.

Anima Prime
Kassala – Spirit Mecha Pilot
Kassala is a fragile cat-like humanoid with the ability to summon a powerful semi-sentient spiritual battle suit to encapsulate her. She feels a great urge to frequently use the power of her suit, which is an addiction she tries her hardest to resist. When injured, she often succumbs to the impulse to call it to her and vanquish anyone who dares get in her way, but she hates herself for her weak will.
Passion: Self-Loathing.
Mark: Feline humanoid.
Traits: “You’re going to regret that.” Quick, agile, and never where you expect me to be. Behind the teasing hides genuine shyness.
Stats: Action Pool 10, Wounds 3, Defense 1.
Powers: Bond: Kasitaka Living Armor Suit (custom eidolon), Charged Summoning II, Empower Eidolons III, Natural Summoner, Summoning.
Eidolon: The Kasitaka Living Armor Suit is a unique custom eidolon: Level: 3 Type: Character AP Limit: 9 CP Limit: 4 SP Limit: 6 Defense: 4 Wounds: 4 Weakness: Vulnerable to Frost Powers: Auto Guard, Fire Storm, Force Attack, Leap Attack, Resilience III, Stamina II, Toughness III, Whirlwind Attack. Entrance and Description: A whirlwind filled with flashing lights appears around the summoner as she is lifted into the air. Parts and pieces of the Kasitaka Living Armor Suit fly in from all directions, hurling the summoner around as they attach themselves forcefully to her body. Once the whole suit is assembled and completely covers the summoner, she lands with earth-shattering force, steam hissing out of some of the suit’s vents. The suit boosts the wearer’s speed and strength and has integrated weaponry, including a multi-barrel organic rocket launcher with an overdrive setting that creates a flaming inferno all around.
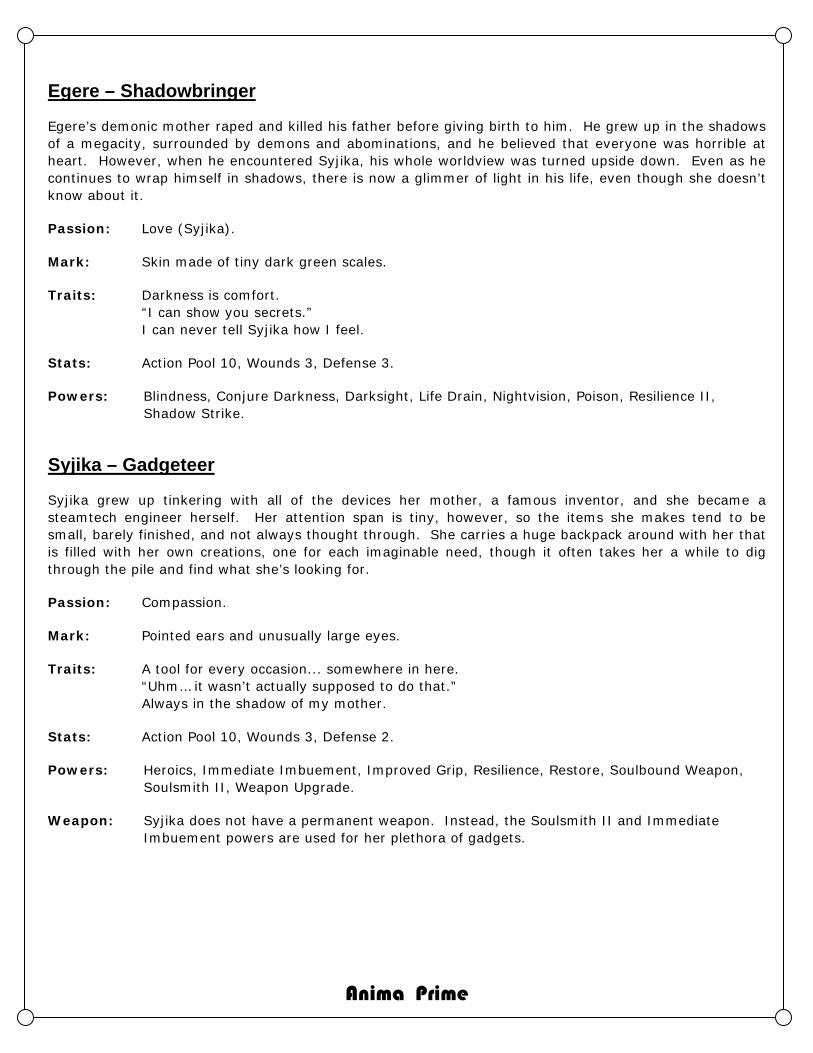
Anima Prime
Egere – Shadowbringer
Egere’s demonic mother raped and killed his father before giving birth to him. He grew up in the shadows of a megacity, surrounded by demons and abominations, and he believed that everyone was horrible at heart. However, when he encountered Syjika, his whole worldview was turned upside down. Even as he continues to wrap himself in shadows, there is now a glimmer of light in his life, even though she doesn’t know about it.
Passion: Love (Syjika).
Mark: Skin made of tiny dark green scales.
Traits: Darkness is comfort. “I can show you secrets.” I can never tell Syjika how I feel.
Stats: Action Pool 10, Wounds 3, Defense 3.
Powers: Blindness, Conjure Darkness, Darksight, Life Drain, Nightvision, Poison, Resilience II, Shadow Strike.
Syjika – Gadgeteer
Syjika grew up tinkering with all of the devices her mother, a famous inventor, and she became a steamtech engineer herself. Her attention span is tiny, however, so the items she makes tend to be small, barely finished, and not always thought through. She carries a huge backpack around with her that is filled with her own creations, one for each imaginable need, though it often takes her a while to dig through the pile and find what she’s looking for.
Passion: Compassion.
Mark: Pointed ears and unusually large eyes.
Traits: A tool for every occasion... somewhere in here. “Uhm… it wasn’t actually supposed to do that.” Always in the shadow of my mother.
Stats: Action Pool 10, Wounds 3, Defense 2.
Powers: Heroics, Immediate Imbuement, Improved Grip, Resilience, Restore, Soulbound Weapon, Soulsmith II, Weapon Upgrade.
Weapon: Syjika does not have a permanent weapon. Instead, the Soulsmith II and Immediate Imbuement powers are used for her plethora of gadgets.

Anima Prime
ATTACHMENTS
Setting Map
A: Steamworld (think Final Fantasy)
B: Wonderland (yep, just like Alice's)
C: Shadowland (Vampire Hunter D-esque)
D: Metropolis (any dark urban anime ever made could fit here)
E and F have never been seen by human eyes, but rumors speak of volatile worlds filled with chaos.
The arrows represent the established tunnels that connect the 3 big worlds to the six medium worlds. There are, in fact, several tunnels for each arrow, leading to different points in the same world.
The tiny worlds surrounding them can only be reached by jumping, a rare and powerful skill that cannot be used too often. Summoning also allows bridging of the worlds, on a very limited and temporary basis.

Anima Prime
Conflict Rules Summary
Choose one action per turn: maneuver, strike, achievement, or action power. Anytime you roll dice, you can unmark a trait to reroll all of the failed dice (summoners can use their traits for their eidolons). Check for condition effects every turn.
Maneuver:
1. Describe your action. Remember what you can say regarding individuals, squads, and swarms.
2. Players: Get 1-4 dice from GM based on description. GM: Get competency in dice.
3. Add 1-3 dice from Action Pool.
4. Other players may give 1 die each from their Action Pool (optional).
5. Spend charge dice on charge powers for bonus dice and other effects (optional).
6. Add any bonus dice from weapon effects and conditions.
7. Roll dice. 1s and 2s are discarded. 3s, 4s, and 5s go into your Strike Pool. 6s go into your Charge Pool. If all dice are 1s and 2s, return action dice (not bonus dice) to Action Pool.
Strike:
1. Take 1-6 dice from your Strike Pool and designate a target.
2. Spend charge dice on charge powers for bonus dice and other effects.
3. Add any bonus dice from weapon effects and conditions.
4. Roll dice. 1s and 2s are discarded. 3s and higher are counted as successes. If the number of successes overcomes the defense, mark 1 wound (plus 1 wound for each additional time that the defense is overcome). If no wound is inflicted, return strike dice (not bonus dice) to Strike Pool.
5. Describe the strike once the effects have been determined.
Achievement:
1. Take 1-8 dice from Strike Pool and designate a goal or switch to achieve.
2. Spend charge dice on charge powers for bonus dice (optional).
3. Add any bonus dice from weapon effects and conditions.
4. Roll dice. 1s and 2s are discarded. 3s and higher are counted as successes. If the number of successes surpasses the difficulty, the goal or switch is achieved (and the successes determine the new switch difficulty). If not, return strike dice (not bonus dice) to Strike Pool.
Power:
1. Determine which action power you use on which target and whether you use any of its options and any boost powers.
2. Pay the associated charge dice and mark the effects. Keep track of inflicted conditions.
End of Conflict:
1. A character is defeated when all of her wound circles are marked. At that point the character can no longer participate in the conflict.
2. Once all characters on one side have been defeated, the other side wins the conflict.
3. All conditions are erased, remaining strike dice are turned into action dice (with leftovers discarded), and the number of charge dice in each character’s Charge Pool is halved (rounded up). Eidolons return to their home worlds with Strike and Charge Pools empty and Action Pools refilled.

Anima Prime
ADVERSITY SHEET
Name: Type: Name: Type:
Competence: Defense: Competence: Defense:
Powers:
Powers:
Weakness:
Weakness:
Name: Type: Name: Type:
Competence: Defense: Competence: Defense:
Powers:
Powers:
Weakness:
Weakness:
Name: Type: Name: Type:
Competence: Defense: Competence: Defense:
Powers:
Powers:
Weakness:
Weakness:
AP SP CP AP SP CP
AP SP CP AP SP CP
AP SP CP AP SP CP

Anima Prime
CHARACTER SHEET Name: ________________________ Concept: ___________________________
Passion: ________________________ Mark of Power: __________________________
Traits: ___ ________________________________________________________________
___ ________________________________________________________________
___ ________________________________________________________________
Power: Effect:
_______________ _____________________________________________________________
_______________ _____________________________________________________________
_______________ _____________________________________________________________
_______________ _____________________________________________________________
_______________ _____________________________________________________________
_______________ _____________________________________________________________
_______________ _____________________________________________________________
_______________ _____________________________________________________________
_______________ _____________________________________________________________
Background: Links:
____________________________________ ___________________________________
____________________________________ ___________________________________
____________________________________ ___________________________________
____________________________________ ___________________________________