a manual for practical work in fashion studies
TRANSCRIPT

A Manual for Practical Workin
Fashion StudiesClass XI

ii
© All rights reserved of the publisher
April, 2005
Price : Rs. 50.00
Advisory Committee :
l Mr. Ashok Ganguly l Mrs. Gauri KumarChairman, C.B.S.E Director General
NIFT, New Delhi
l Mr. G. BalasubramanianDirector (Academic), C.B.S.E
Contributors :l Ms. Vandana Narang
NIFT, New Delhi
l Ms. Monika GuptaNIFT, New Delhi
l Mr. Anupam JainNIFT, New Delhi
Co-ordinatorl Mr. P. Mani
Education Officer (Hum. & Lang.), C.B.S.E
Published by :The Secretary, Central Board of Secondary Education2, Community Centre, Preet Vihar, Delhi - 110 092
Designed by:Multi Graphics, 5745/81, Reghar Pura, Karol Bagh, New Delhi - 110005
Ph.: 25783846
Printed by :Chandu Press, D-97, Shakarpur, New Delhi - 110 092Ph.: 22424396, 22526936

iii
Hkkjr dk lafo/kumísf'kdk
ge] Hkkjr ds yksx] Hkkjr dks ,d ^¹lEiw.kZ izHkqRo&laiUu lektoknh iaFkfujis{k yksdra=kkRed x.kjkT;º cukusds fy,] rFkk mlds leLr ukxfjdksa dks%
lkekftd] vkfFkZd vkSj jktuSfrd U;k;]fopkj] vfHkO;fDr] fo'okl] /eZ
vkSj mikluk dh Lora=krk]izfr"Bk vkSj volj dh lerk
izkIr djkus ds fy,]rFkk mu lc esa]
O;fDr dh xfjek vkSj 2 ¹jk"Vª dh ,drkvkSj v[k.Mrkº lqfuf'pr djus okyh ca/qrk
c<+kus ds fy,
n`<+ladYi gksdj viuh bl lafo/ku lHkk esa vkt rkjh[k 26 uoEcj] 1949 bZñ dks ,rn~}kjk bl lafo/ku dksvaxhÑr] vf/fu;fer vkSj vkRekfiZr djrs gSaA
1- lafo/ku (c;kyhloka la'kks/u) vf/fu;e] 1976 dh /kjk 2 }kjk (3-1-1977) ls ¶izHkqRo&laiUu yksdra=kkRed x.kjkT;¸ dsLFkku ij izfrLFkkfirA
2- lafo/ku (c;kyhloka la'kks/u) vf/fu;e] 1976 dh /kjk 2 }kjk (3-1-1977 ls)] ¶jk"Vª dh ,drk¸ ds LFkku ij izfrLFkkfirA
Hkkx 4 dewy dÙkZO;
51 d- ewy dÙkZO; & Hkkjr ds izR;sd ukxfjd dk ;g dÙkZO; gksxk fd og &
(d) lafo/ku dk ikyu djs vkSj mlds vkn'kksZa] laLFkkvksa] jk"Vªèot vkSj jk"Vªxku dk vknj djas_([k) Lora=krk ds fy, gekjs jk"Vªh; vkanksyu dks izsfjr djus okys mPp vkn'kksZa dks ân; esa latks, j[ks vkSj
mudk ikyu djs_(x) Hkkjr dh izHkqrk] ,drk vkSj v[kaMrk dh j{kk djs vkSj mls v{kq..k j[ks_(?k) ns'k dh j{kk djs vkSj vkg~oku fd, tkus ij jk"Vª dh lsok djs_(Ä) Hkkjr ds lHkh yksxksa esa lejlrk vkSj leku Hkzkr`Ro dh Hkkouk dk fuekZ.k djs tks /eZ] Hkk"kk vkSj izns'k
;k oxZ ij vk/kfjr lHkh HksnHkko ls ijs gksa] ,slh izFkkvksa dk R;kx djs tks fL=k;ksa ds lEeku ds fo#¼gSa_
(p) gekjh lkekftd laLÑfr dh xkSjo'kkyh ijaijk dk egÙo le>s vkSj mldk ijh{k.k djs_(N) izkÑfrd i;kZoj.k dh ftlds varxZr ou] >hy] unh] vkSj oU; tho gSa] j{kk djs vkSj mldk laoèkZu
djs rFkk izkf.kek=k ds izfr n;kHkko j[ks_(t) oSKkfud n`f"Vdks.k] ekuookn vkSj KkuktZu rFkk lq/kj dh Hkkouk dk fodkl djs_(>) lkoZtfud laifÙk dks lqjf{kr j[ks vkSj fgalk ls nwj jgs_(×k) O;fDrxr vkSj lkewfgd xfrfof/;ksa ds lHkh {ks=kksa esa mRd"kZ dh vksj c<+us dk lrr iz;kl djs ftlls
jk"Vª fujarj c<+rs gq, iz;Ru vkSj miyfC/ dh ubZ mapkb;ksa dks Nw ysA
iv
THE CONSTITUTION OF INDIAPREAMBLE
WE, THE PEOPLE OF INDIA, having solemnly resolved to constitute India into a1SOVEREIGN SOCIALIST SECULAR DEMOCRATIC REPUBLIC and to secure to allits citizens :
JUSTICE, social, economic and political;
LIBERTY of thought, expression, belief, faith and worship;
EQUALITY of status and of opportunity; and to promote among them all
FRATERNITY assuring the dignity of the individual and the 2 [unity and integrity ofthe Nation];
IN OUR CONSTITUENT ASSEMBLY this twenty-sixth day of November, 1949, doHEREBY ADOPT, ENACT AND GIVE TO OURSELVES THIS CONSTITUTION.
1. Subs, by the Constitution (Forty-Second Amendment) Act. 1976, sec. 2, for "Sovereign Democratic Republic(w.e.f. 3.1.1977)
2. Subs, by the Constitution (Forty-Second Amendment) Act. 1976, sec. 2, for "unity of the Nation (w.e.f. 3.1.1977)
THE CONSTITUTION OF INDIAChapter IV A
Fundamental DutiesARTICLE 51A
Fundamental Duties - It shall be the duty of every citizen of India-
(a) to abide the Constitution and respect its ideals and institutions, the National Flag andthe National Anthem;
(b) to cherish and follow the noble ideals which inspired our national struggle for freedom;
(c) to uphold and protect the sovereignty, unity and integrity of India;
(d) to defend the country and render national service when called upon to do so;
(e) To promote harmony and the spirit of common brotherhood amongst all the people ofIndia transcending religious, linguistic and regional or sectional diversities; to renouncepractices derogatory to the dignity of women;
(f) to value and preserve the rich heritage of our composite culture;
(g) to protect and improve the natural environment including forests, lakes, rivers, wild lifeand to have compassion for living creatures;
(h) to develop the scientific temper, humanism and the spirit of inquiry and reform;
(i) to safeguard public property and to abjure violence;
(j) to strive towards excellence in all spheres of individual and collective activity so that thenation constantly rises to higher levels of endeavour and achievement.

v
FOREWORD
The Central Board of Secondary Education introduced the subject of Fashion Studiesas an independent elective subject at senior school level from the academic session 2004-2005. It has published the learning resource books for classes XI and XII with the activesupport and help of the National Institute of Fashion Technology, New Delhi. The presentpublication is a Manual for the Practical Work in Fashion Studaies for class XI and it covers thepractical component that has 30% weightage in the Board’s Examination.
The manual gives simple practical tasks / projects in Elements of Design and Elementsof Garment Making. Fashion Studies is basically a concept and skill-based subject requiringthe students to plan, visualize and execute a number of designs to produce garments. Hencethe practical component is of great importance in this subject. Moreover, students should alsobe taught to use different tools and equipments that are an integral part of design and garmentmaking.
An attempt has been made to include basic exercises in exploration of designs andsimple garment making. They are aimed at helping the learners acquire the right perceptionand the elementary skills needed to establish a foothold in the field of fashion design andfashion technology. Meticulous care has been bestowed by the authors on the details of eachexercise, providing adequate information by way of introduction, aim, materials and methods,conclusions and references. The manual also includes a list of basic materials and equipmentneeded for the practical work besides a set of safety rules in the Laboratory. It is expected thateach candidate will perform all the 27 exercises given in the manual in class XI and maintain aportfolio for assessment following the procedure outlined in the manual. The sewing kit givenin Annexure I and the common machine problems given in Annexure II will be of immense helpto both the teachers and students. The viva questions given at the end of some exercises willhelp the learners develop an insight into the concepts and processes involved.
The eminent faculty of the National Institute of Fashion Technology, New Delhi havecontributed to the development of this material. I express my sincere thanks to Mrs. GauriKumar, Director General, NIFT and to the authors, Ms. Vandana Narang, Ms. Monika Guptaand Mr. Anupam Jain, all from the NIFT faculty. Shri G. Balasubramanian, Director (Academic)and Shri P. Mani, Education Officer (H & L) also deserve a special mention for planning andgiving shape to this publication. Suggestions for further improvement of the publication will bemost welcome.
Ashok Ganguly
Chairman,

vi
Lab requirement for a batch of 30 students
Lab size - 35ft x 20 ft. ( minimum)AC environment
Item Nos.
Industrial sewing machines with power (costs at least Rs. 4,500 each) 30
Pattern Making tables (size 5 ft x 4 ft cork top) 8 (4 students/tab)
Dress forms (half) costs Rs. 8000/- each 30 (one per student)
Steam irons @ Rs. 1000/- 4
Ironing boards @ Rs. 500/- 4
Soft boards All around the wall
Stools 30
White board 1
Black board 1
Approximate cost will be Rs. 5,00,000/-
Selection criteria of school
They should have ability to provide appropriate environment, space, equipment,machinery and maintenance, trained faculty, exclusive library for the course,willingness to upgrade facility and faculty.

vii
CONTENTS
1. Elements of Design — Part A
l Introduction 1
l Suggested Guidelines for Instructors 4
l Basic Preparation 5
l Practical Exercises 1 - 11 6-18
2. Elements of Garment Making — Part B
l Introduction 19
l Practical Exercises 1-16 22-38
l Annexure I Sewing Kit 39
l Annexure II Common Machine Problems 40

viii
Part A
ELEMENTS OF DESIGN- Mr. Anupam Jain
Part B
ELEMENTS OF GARMENT MAKING- Ms. Vandana Narang& Ms. Monika Gupta

1
Part AELEMENTS OF DESIGN
Introduction
Designers, in their quest for the best functional and aesthetic solution to a problem,need to be aware of and explore as many possibilities as they can. Clarity of the finalconceptual idea and its communication to others is of utmost importance. With everadvancing technology in every field of life, intensive and extensive practical knowledgewill help achieve the best possible ergonomical designs. Design is all about systematicplanning and clarity in effective execution of a concept, after overcoming all possibleenvironmental and technical constraints. The following exercises will help studentsvisualise, and practically substantiate, fundamental design concepts they learntheoretically in the textbook of Fashion Studies.
BASIC SUPPLY LIST
The following supply list is the compilation of items recommended for elements ofDesign. Individually faculty may recommend and add on to the list at the beginning orduring the course period. Emphasis is normally on good quality but inexpensive mate-rials:-
1 DRAWING BOARD:Drawing board: Half Imperial i.e. 14”x22” - 1pc
2 PAPERS: (Quality: As when directed by faculty)a. Cartridgeb. Sunlit Bondc. News printd. Ivory (Indian or Japanese)
e. Tracing paper/Butter paper
3 PENCILS:Brand Name- Kohinoor, Natraj, ApsaraRegular lead pencils with following lead thickness: HB.B.2B, 4 Charcoal pen cilor sticks.
4 ERASER

2
5 SET-SQUAREBrand Name: Nalanda, Arasler, Omega Medium Size - 1 set
6 STAINLESS STEEL RULERSize 12”&24” lengths - 1 each
7 COLOURS:· Poster Colours:- Brand Name: (Camlin)
initially a box of 12colours
Oil Pastels(Camlin) one box of 12 coloursl Black water-proof ink(Camlin) one bottlel Water Colours(Camlin) one box of 12 coloursl Wax crayon(Camlin) one box of 12 coloursl Colour markers and colour pencil as and when indicated/required for thecourse by individual faculty.
8 BRUSHES:Round water colour brushes (Camlin or Fine Art)
Size nos.0, 2, 4,5,8,10,12 - 1 eachFlat water colour brushes (Camlin or Fine Art)
Size nos.3, 5,8,12 - 1 each
9 WATER CONTAINERS: Juice Mug or Coffee Mug(Should be sufficiently heavy & stable) - 2 pcs.
10 PALLETTE (For mixing of colours, use plastic ice cube tray) - 1 pc.
11 SKETCHBOOK Size 11”x 14” - 1 pc.
12 WRITING PAD Size 8”x 10” Approx. - 1 pc.
13 SOFT COTTON MOP Size 18”x 18”Approx. - 1 pc.
14 HARDBOARD PORTFOLIO FOLDER (Half- Imperial Size) - 1 pc.
15 STAPLER Regular Size - 1 pc.

3
16 MISCELLANEOUS Supply:Scotch tape Medium size - 1 pc.Scissors (Good quality) Medium size - 1 pc.Paper cutter or paper knife - 1 pc.Drawing Board Pins - 1 pktDrawing Board Clips - 4/6 pktWriting pens: Fountain/Micro tip/Ball pen etc.Thumb pins, Gem Clips, all pins.
INTERNATIONAL PAPER SIZES (FOR REFERENCE)
Size MM INCHESAO 841 x 1189 33.1 x 46.8A1 594 x 841 23.4 x 33.1 ImperialA2 420 x 594 16.5 x 23.4 1/2ImperialA3 297 x 420 11.7 x16.5 1/4ImperialA4 210 x 297 8.3 x 11.7A5 148 x 210 5.8 x 8.3

4
SUGGESTED GUIDELINES FOR INSTURCTORS
1. The syllabus break-up should be followed as far as possible.
2. Make full utility of OHP’S and slide projectors while teaching.
3. Do not dictate notes for theory to the students, give a Photostat copy of notes tothe students & discuss the same in class.
4. A date should be given to the students for submission. Deduct 10 marks of anystudent who submits late 2 consecutive submissions.
5. Try & arrange at least two outings in a semester for outdoor sketching or marketsurveys.
6. Guest lecturers should be arranged for any important or interesting topic.
7. Maintain a daily assignment register in which the teacher writes down the sub-jects & topic covered in class.
8. Also maintain an assessment register in which the marks obtained by studentsin various practicles are entered.
9. All sheets should be marked out of 50 or 100 marks &survey reports out of 20marks.
10. Be particular about filling up the feedback report at the end of each week.Please use 1 sheet per exercise & make entries date wise. Please give complete detail of all exercises done.
11. Use only ½ imperial size Cartridge/Ivory sheets for all assignments.

5
Basic Preparation
Exploration, or, the consideration of, several possible ways of answering a single ques-tion, of tackling an issue, or divergent points of view on the same subject, is necessaryfor a designer to achieve an overview of a problem and the best solution applicable.
A minimum of 10-12 A4 size sunlit bond sheets with 6”x 6” squares for the explorationof each expression to be represented are required.
It is from these explorations that a final concept will emerge and be finished, to presentthe ultimate design solution.
Stapler (Medium) - 1 pc.Paper cutter - 1 pc.Tape - 1 pc.Newspaper (as and when required)
Precautions:
l Use newspaper on table/ work base as precaution against spillage.
l Careful use of paper cutter. Keep away from children under 15 years of age.
l Inks and paints are toxic – do not imbibe.
l Wash immediately if they enter eyes, mouth, nose, etc.
l Keep hands clean. Any marks on paper become a form of expression.
l Change dirty water continuously as it will effect purity of new colours mixed.
l Do not use same brush for scooping out colour from pots and mixing on palette.Original colour in pot will get soiled.
l Wash brushes immediately after use. Left over ink and paint will harden brush hairand make it useless for future use.
l Use apron to avoid soiling clothes / uniform.

6
PRACTICAL EXERCISE 1
Aim
Introduction to composition, working with constraints, and developing an eye for detail.a) To achieve one composition in a 6” x 6” square format using 9 to 12 lines, of thesame length and thickness, that represents movement in single directionb) A second composition using 9 to 12 lines as in a) to represent passivity.
Principles
The eye will remain at a single point, passive, unless a change occurs to induce itmove from that point to another, causing a movement.
Requirements
For explorationl A4 sunlit bond sheets with a 6” x 6” square eachl Black ink/Black paper cut in stripes of equal length and width / Black marker /
Black gel pen / Black poster paintl Paint brush, Fevicol, Pencil, eraser, ruler For final conceptl Ivory sheet of A4 sizel Black ink, Correction ink / penl Paint brush, pencil (. 5), ruler, set square
Procedure
l Explore as many as possible ways to achieve, first a) and then b), in 6” x 6”format on A4 Sunlit Bond sheet
l Do not discuss or share.l Explorations should be neat and well thought out, keeping the principle behind
the exercise in mindl Use absolute black lines. Lead pencils do not give required results.l Put up your explorations on the soft board to make a final choice for yourself.l Put up your final concepts on soft board with work of other students.
Observation & Discussion
- Students explain the visualisation of their point of view to the rest of theclass and faculty
- Each student’s views, explorations & final concept are quickly but thor-oughly discussed

7
PRACTICAL EXERCISE – 2
Aim
To reach a clear understanding of how to express one’s visualisation of a movement;
a) in a single directionb) in 2 directionsc) such that the movement describes an action
To practically see, learn and understand the basic principles of composition.
Principles
Placement of an object in different parts of a given spatial composition will elicit varianteffects of weight and motion.
Placement of objects of different weights in the same place in a spatial composition willalso elicit variant effects of expression and movement.
Requirements
As per exercise 1, EXCEPT, the Black paper strips will be cut in unequal lengths andwidths
Procedure
Explore possible ways to express first, aim a), then b) and finally c) in 6” x 6” format onA4 sunlit bond sheets.
l As per exercise 1
Observation & Discussion
l As per exercise 1
Conclusion
Final concept of exercise 2 c) is neatly redone, as artwork, on an A4 Ivory sheet, withBlack Ink

8
PRACTICAL EXERCISE – 3
Aim
To understand the relationship between Form & Space, as well as, +ve & -ve space.
Principles
Form and space are proportionally inter-related.
Procedure
l Within a 6” x 6” white square format ( on A4 Sunlit bond sheet) create a form inBlack that is small and is well away from the format edges.
l Within another white 6” x 6” square format increase the size of the object suchthat it occupies 50% of the space, but do not let it touch any part of the formatedges.
l In yet another white 6” x 6” square format enlarge the object size such that ittouches 2 or 3 sides of the format
l Put concepts on soft board for class discussion.
Observation & Discussion
l Observe how a form can be expand to become the background itself, by dis-placing the white space
l See how the white space is morphed into becoming a form.l Discuss the importance of +ve and –ve space interaction within a composition
and its effects.

9
PRACTICAL EXERCISE – 4
Aim
To diagrammatically represent the Hue and Value chart by simple line drawing.
Principle
Pure colour is Hue. Addition of any other hue (except for the one opposite it in thecolourwheel) will not change the intensity or purity of colour. Addition of any part ofthe gray scale WILL change the value of a colour.
Requirement
l A4 Ivory sheetl . 5 Black pen, ruler
Procedure
l Draw a 6” vertical straight line. Label the top extreme ‘White’ and the lowerextreme ‘Black’
l Mark the centre ‘Gray’l Cut the vertical line with a 6” horizontal line at the centre. Label the two ex-
tremes ‘Hue’l Move arrow from ‘Hue to Gray’ to indicate ‘saturation’ of colour.l Move arrow from ‘Gray’ to ‘Hue’ to express ‘intensity’ of colour.l Along the vertical line indicate ‘shades’, ‘tones’ and ‘tints’.
Observations & Discussion
l Maintain absolute neatness and precision in the line drawing and its labeling.l Discuss how the value of colour and its intensity are affected on the various
axis of the value chart.

10
PRACTICAL EXERCISE – 5
Aim
To paint and understand the Primary, Secondary and Tertiary colours in progression,using poster colours.
Practice flat application of colour.
Principle
There are 3 Primary colours that give rise to all other colours.
Requirements
l White cartridge sheets (size – A3)
l Ivory sheet A3
l Poster paints, water container, palette, brushes, HB pencil, ruler, cutter
l Soft cotton mop
Procedure
l Refer to the colour chart in your text book.
l Scoop out pure colours one at a time into your palette.
Pure Red = Scarlet Red 90% + Cuinson 10%
Pure Blue = Cobalt Blue 90% + Ultramarine 10% Pure Yellow = Lemon yellow
l Add water to the paint to achieve medium fluid consistency.
l Apply colour to cartridge paper in approximately square area of 3” x 3” first withvertical strokes, then, before the paint dries, with horizontal strokes. Alternatethe strokes till the paint is not running, but is damp not dry.
l DO NOT USE BRUSH STROKES ON DRY PAINT.
l Keep painting 3” x 3” squares till maximum flatness of colour application isachieved.
l Once the primary colours are achieved mix the secondary colours. Secondarycolours consist of 50% each of two Primary colours.

11
Green = 50% yellow + 50% Blue
Orange = 50% Yellow + 50% Red
Purple = 50% Red + 50% Blue
l Application of the Secondary colours is done the same way as for thePrimary colours.
l Tertiary colours are achieved by mixing Primary and Secondary Colours.
50% Yellow + 50% Green - Yellow green
50% Blue + 50% Green - Blue green
50% Yellow + 50% Orange - Yellow orange
50% Red + 50% Orange - Red orange
50% Blue + 50% Purple - Indigo
50% Red + 50% Purple - Violet
l On achieving flat application of all above colours set them into a colour chart onan Ivory sheet with neat labels.
Observations & Discussion
Discuss how mixing of colours produce other colours, how results may havevaried, in explorations not used, due to different %s of colour additions.

12
PRACTICAL EXERCISE - 6
Aim
To identify and paint 3 pairs each of:Similar coloursComplimentary coloursContrasting colours
Principle
Colours are inter-related and interact with each other.
Requirements
Same as practical exercise-5.
Procedure
l Paint 2” x 2” square, flat application chips of the above mentioned colours, oncartridge sheets.
l Set the pairs together under their suitable headings.
Observation and discussion
l Record your observation about the effect each colour has on it’s pair.
l Discuss your observations.

13
PRACTICAL EXERCISE - 7
Aim
To make students aware of their surroundings, and encourage them to be more obser-vant.
To re-produce four interesting textures from nature and another four textures fromman-made objects.
Principle
Design solutions abound around us; we simply need to sensitize ourselves to theirpresence.
Procedure
l Identify textures form the environment around you.
l Cover the texture with a Sunlit-bond sheet.
l Transfer the texture in a 6” x 6” square format by rubbing your 2B/4B lead pencilover the paper covering the texture.
l Collect as many textures as possible.
l Categorize them.
l Display your transferred textures on the board for all to see.
Observation & Discussion
l Discuss the collection of visual textures with reference to their actual tactilequotient (actual response to touch).
l How contradictory or similar is the textural representation on paper to the origi-nal visual texture.
l Observe differences and similarities between textures of natural and man- madeelements.
Conclusion
l Mount four each of clearly defined reproductions, of natural and man-madetextures, on Ivory sheets of A4size, in 3” x 3” square formats, 2 to a sheet.

14
PRACTICAL EXERCISE - 8
Aim
To create a form in a 1” x 1” square format.Use that form to showcase compositions of:
l A sequence
l A rhythm
l A symmetrical balance
l An asymmetrical balance.
Principle
A form or motif when used in repetition creates a movement and when used within aformat creates a composition.
Requirements
A4 sunlit-bond sheets
Black ink or Black poster colour
Brushes, water container, cotton mop, .5 Black pen
HB pencil, eraser, ruler
A4 size Ivory sheet
Procedure
l Explore various forms in 1” x 1” square format on an A4 Sunlit-bond sheet.
l Select a form.
l Mark 6” x 6” square format on other A4 bond sheets.
l Repeat the form made within the 1” square format in the 6” square format toachieve a sequence, a rhythm, an asymmetrically balanced composition and asymmetrically balanced composition.
l From your explorations select those concepts which achieve the above, anddisplay on the board.

15
Observation & discussion
l Observe to see what kind of movement organic and inorganic forms lend them-selves to.
l Discuss the compositions for the symmetrical and asymmetrical balance.
l Do positive and negative spaces play a role in these compositions? How?
Conclusion
Make artworks of the four best compositions and the motif on Ivory sheets of A4 size.
16
PRACTICAL EXERCISE - 9
Aim
To familiarize students with, and let them discover anew, the endless possibilities ofdescribing a single form in different materials using various tools and techniques.
Principle
The final design solution is the culmination of one’s ideas presented in the correctmaterial, using the right techniques and tools.
Requirements
l A4 sheets with a 6” x 6” square format
l Different raw materials depending on the student’s concepts for example cray-ons, poster colours, oil paints, inks etc.
l A variety of papers, fabric and other non- decomposing materials
l Thread, needle, fevicol, brushes, charcoals sticks, knife, scraper and tools rel-evant to choice of material.
Procedure
l Explore a few forms on A4 sheets in the 6” x 6” square format. Select one forimprovisation.
l Choose 8 raw materials to express the form in.
l Identify a possible use of each of the end products achieved.
l Make sure the work is neat and the individual concepts are clear.
Observation & Discussion
Constructive discussion and feedback on the end results and ideas explored by thestudents.
17
PRACTICAL EXERCISE - 10
Aim
To develop a swatch card as future reference material and vocabulary, for the stu-dents.
Principle
Fabric is the basic raw material that all future aspirants of Fashion Studies should befamiliar with.
Requirements
l A4 size card paper booklets (can be spiral bound or punched and tied together).
l Sourced fabric.
l Ruler and micro tip pen
l Paper stickers.
Procedure
l Visit the market and collect 25 cms. each of as many fabric qualities as pos-sible.
l Enquire about its quality, construction weight and price.
l Use stickers on the fabric to carry the information.
l Mount and number the fabric in the booklet.
l On the facing page put down its particulars.
l Identify whether they are natural or synthetic fabrics.
Observation & Discussion
The class may discuss what kind of fall, drape, flounce etc. would specific fabric samplessuit.

18
PRACTICAL EXERICISE-11
Aim
To put to use all that the students have been exposed to during their studies of theelements of design. The student’s power of visualization, clarity of concept, degree ofexploration and their presentation ability are to be put to practical use.
Principle
Application of theoretical knowledge to practical purpose will express the studentsunderstanding of the basic elements of design.
Requirements
l A4 sunlit bond sheets
l Pencils, colours pencils
l Raw fabric material
Procedure
l explore garments possibilities on A4 bond sheets.
l use different mediums, to express different fabric looks and weights in thesketches.
l Indicate, with fabric swatches, how a single look or silouhete changes by changingthe fabric material.
l Select 1 final garment concept and present it with complete visual and writtendetails.
Observation & Discussion
l Students to present their final selections giving reasons for their specific choice.

19
Part B
Elements of Garment Making
Introduction
This course introduces the student to the skills required for converting fabrics into astitched garment. The basic skill of sewing which is essential to convert the design onpaper into a garment is important for hands-on experience in garment assembly.
The hands on experience of working on a power machine is an essential and integralpart of these practicals.
Basic preparation
Prior planning and clarity is necessary for the performance of the exercises. Readhandouts, appropriate lab manuals and textbooks before performing the practical.Follow all precautions and regulations while working in the lab. Listen carefully to anyintroductory remarks and experimental procedure given by your teacher. Make surethat your working space is clean and organized, and all the required stocks and mate-rials are kept ready. Maintain the discipline in your working area.
Recording Practical Results
Practical results should be recorded in the recommended record/file neatly and legiblywith great care. The record of exercises may be done in the following headings:
1 Introduction/Aim
State precisely the purpose and objectives of the experiment in two or three sentences.
2. Materials and methods
The requirements like equipment, materials, etc. should be given here. Besides, meth-ods should also be described along with principles of the techniques used.
3. Sample / Results
The sample should be attached here.
4. Discussion and Conclusions
Here, the results should be interpreted and conclusions be drawn.

20
5. References
Reading materials that were consulted for the experiment be given as reference (e.g.your lab manual) along with the name of the author and the book, pages referred andyear of publication.
Safety rules in the laboratory
l Safety rules to be observed while working on the machine: Safety is importantto everyone and it is ones responsibility to maintain a safe working place.
l When operating the machine, do not be careless.
l Always inspect the machine before starting the work. Be sure it is clean andthreaded correctly, with no loose threads on the pulley belt and all guards inplace.
l When in doubt, ask the teacher.
l Report any injuries or accidents immediately to the teacher.
l Wipe up any oil spilled on the floor immediately to prevent anyone from slip-ping.
l Operate machines only with permission.
l When sewing on a power machine, wear low shoes and close-fitting clothing.Avoid loose-fitting sleeves, sweaters, jewellery, ties and ribbons when operat-ing the machine. If your hair is long, tie it at the back.
l Do not tilt your chair forward or backward while operating the machine.
l Use both hands to raise and lower the machine head.
l Always keep your head above the table.
l Keep your feet off the treadle when you are not operating the machine.
l Keep your feet off the treadle when you are setting or threading the needle.
l Turn the motor off when you are not stitching.
l Turn the motor off before cleaning, oiling or adjusting the machine.
l Turn the motor off before removing or replacing the pulley belt and run themachine out. Wait until all motion has stopped.
l Turn the motor off in case of an emergency or when in doubt.
21
l Turn the motor off before unplugging the machine.
l Do not use your hand to stop and start the hand wheel.
l Use your hand only to set the hand wheel.
l Before operating the machine, close the slide bed cover. When operating themachine, keep your hands, scissors and other sharp objects away from thebelt.
l Keep the machine and work station clean with all tools in the side drawer.
l Unplug the machine at the end of the day.
l Know the location of the main power switch, outlets and fuses in case of anemergency.
l Do not remove any safety devices from the machines.
l Turn off the iron at the end of the class.
l Always place the iron on the iron pad to avoid burning the ironing board cover.
l When trimming or cutting, put all trimmings in the wastebasket.
l Scissors should be handed to another person with the handles toward the per-son.
l Never toss or throw scissors or equipment.
l Do not eat or drink in the work area.
l Keep your machine covered when not in use.
22
Practical 1 – FAMILARITY WITH THE MACHINE
Aim
Know your sewing machine.
Principles
Sewing Machine is an important piece of sewing equipment. A basic understanding ofhow the machine operates will enable the student to use any machine efficiently andcorrect stitching defects. The stitch looks same from both the sides & it is absolutelyflat.
Requirements
Machine
Pre Lab Preparation
Student should be familiar with the safety rules.
Procedure
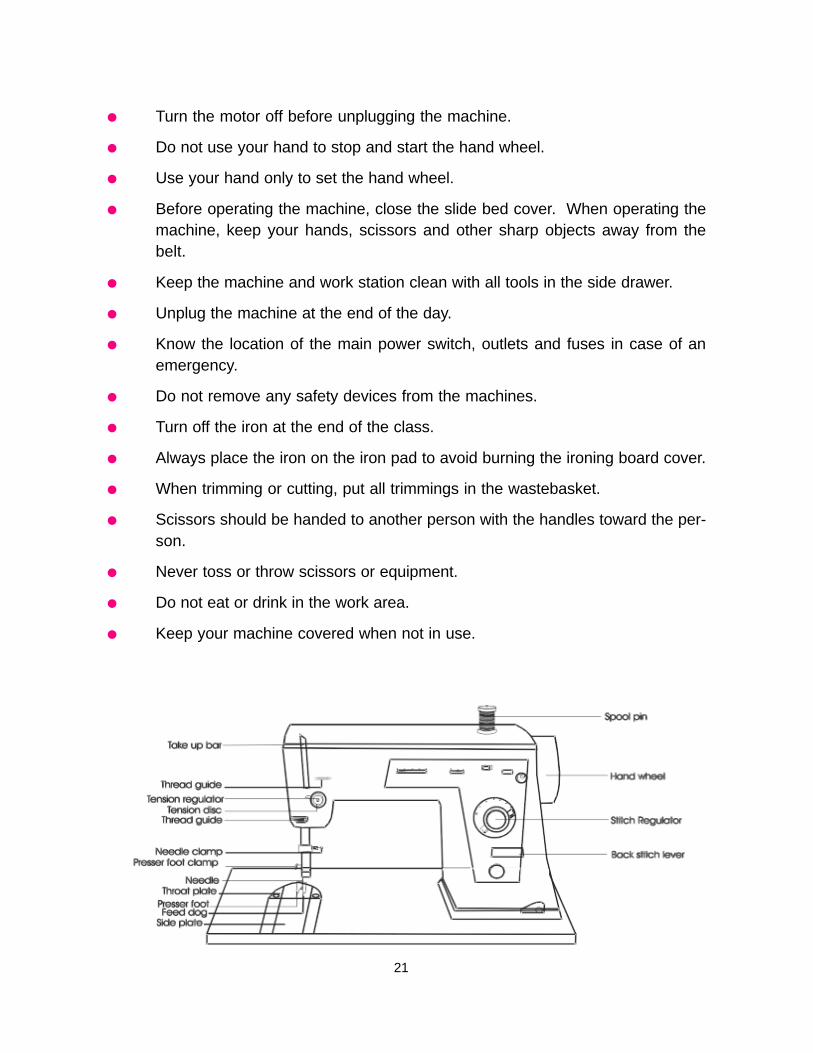
1. Identification of the following machine parts
l Arm
l Back Stitch Lever
l Bed
l Bobbin
l Bobbin case
l Bobbin Winder
l Feed Dog
l Hand -wheel
l Hand Lifter
l Head
l Knee Lifter

23
l Needle Bar
l Pan
l Presser Foot
l Presser Foot Lifter
l Shuttle
l Stitch Regulator
l Tension Regulator
l Thread stand or Spool Pin
l Thread take up lever
l Throat Plate
2. Learn to operate treadle
3. Turn hand wheel
4. Switch on the machine
Observations
The student should be able to identify all parts of the machine and understand theimportance of each part.
Viva Questions
1. What all does bed of sewing machine contain?
2. What are the different parts required for threading the machine?

24
Practical 2 - THREADING THE MACHINE
Aim
To thread the sewing machine.
Principles
It is important for a beginner to learn to thread the machine correctly as a lot of problemsin stitching and final seams occur due to incorrect threading. Machine will not work prop-erly until it is threaded in right sequence.
Requirements
Machine, thread
Pre Lab Preparation
Student should be familiar with the safety rules.
Procedure
UPPER THREADING
The thread is fed from the spool through the tension discs, and then the take up leverbefore it is threaded through the needle.
Before threading the machine,
(1) Raise the pressure foot(2) Always have the take-up lever to its highest point before threading
The following steps need to be followed in exact sequence-
l Place spool of thread on spool pin. Be sure nick on spool will not catch threadas it is reeled off spool. Take hold of thread end.
l Pass thread end through first thread guide.
l Bring thread down toward the tension assembly.
l Pass thread under and around tension discs, taking care that it falls betweentwo of the discs.
l Pull thread upward and then let it go slack. This allows thread to be caught bythe hook and thread check spring, which together hold thread in position be-tween tension discs.

25
l Bring thread up and behind next thread guide.
l Pass thread into the take-up lever.
l Bring thread down and through thread guides.
l Pass thread end through eye of needle, being sure that it goes in proper directionfor machine. Pull at least 3" of thread through needle.
LOWER THREADING
l Threading the lower portion of the machine involves threading the bobbin intoits case.
l Insert the filled bobbin into the bobbin case so that the thread is pulled back onitself through the spring.
l Fit the bobbin case into the machine, holding the case by the lever on the back.The open lever locks the bobbin into the case.
l Push the case into the socket until it clicks then release the lever, close thecover. If it does not click, the mechanism inside is not aligned.
RAISING THE BOBBIN THREAD
l To raise the bobbin thread, thread the needle, holding the top thread, turn thehand wheel with the other hand until the needle has gone down in the bobbinarea.
l Bring the needle up again to the highest point, still holding the thread and rotat-ing the hand wheel. With the needle, a loop of bobbin thread will also come up.
l Pull the upper thread to bring the bobbin thread out. Take both threads throughthe pressure foot and bring them toward the back. The thread ends should beat least 2" - 3" long.
Observations
If the machine is threaded properly it will run smoothly.
Viva questions
1. What problems are you likely to face when the upper thread is not in right place?
2. If bobbin thread is not pulling up what may be the cause for it?

26
Practical 3 - Machine Practice
Aim
To master control of sewing machine.
Principles
The students are required to achieve proficiency of the control of machine. Thestudent should be able to control the machine in straight line, curved lines andvarious shapes.
Requirements
Machine & sewing kit (as given in annexure I)
Pre Lab Preparation
Student should be familiar with the safety rules.Nine pieces of muslin of 7”x 7”
Procedure
All the exercises are to be done on fabric first on single layer of muslin and then doublelayer. Stitch the following
a) Parallel linesb) Cornersc) Curved lines.
Observations
Take care while stitching so that all line are parallel, the corners are at 90 degrees andcurves are smooth and there are no puckers and seam slippage.
Viva questions
1. How do you ensure that your corner is perfect?2. How do you ensure parallel lines?

27
Practical 4 - A STRAIGHT SEAM
Aim
Prepare a sample of straight seam.
Principles
Seams are result of joining together two or more pieces of fabric by means of stitching &the basic function of a seam is to hold pieces of fabric together. To perform its functioncorrectly the seam should have properties or characteristics closely allied to those of thefabric being sewn.
Requirements
Machine & sewing kit (as given in annexure I)
Pre Lab Preparation
Two pieces of muslin of 6”x 4” each
Procedure
1. Lay two layers of material together, right side facing right side.
2. Machine stitch at edge leaving an allowance of 1”. Start with backstitch and endwith backstitch.
3. Press opens the seam, to avoid bulkiness and to make it smooth and flat.
Observations
Check if the seam line is straight and there are no puckers or pulls.
Viva questions
1. What are the qualities of a straight seam?
2. How many stitches per inch should be used for cotton fabric?
3. Where all do you use the straight seam?

28
Practical 5 - A CURVED SEAM
Aim
To prepare a sample of curved seam.
Principles
A curved seam requires careful guiding as it passes under the needles so that the entireseam line will be the same even distance from the edge. To get better control, use ashorter stitch length (15 per stitch) and slower machine speed.
Requirements
Machine & sewing kit (as given in annexure I)
Pre Lab Preparation
Two pieces of muslin of 6”x 6” each
Procedure
1. Stitch a line of reinforcement stitching just on seam line of the curve.
2. Clip into seam allowance all the way to the stitching line at intervals along thecurve.
3. Cut out wedge-shaped notches in the seam allowance of outer curve by makingsmall folds in seam allowance and cutting at slight angle. Be careful not to cut intostitching line.
4. Press seam open over the curve, using tip of iron only. Do not press into body ofthe sample. If not pressed to required curves, seam lines become distorted andlook pulled out of the shape.
Observations
Check if the seam line is curved, without breaks and there are no puckers or pulls.
Viva questions
1. What are the qualities of a curved seam?
2. How many stitches per inch should be used for cotton fabric?
3. Give two uses of curved seam.

29
Practical 6 A CORNERED SEAM
Aim
To prepare a sample of cornered seam.
Principles
A cornered seam needs reinforcement at the angle to strengthen it. This is done by usingsmall stitches (15 to 20 per inch) for 1” on either side of the corner. It is important to pivotwith accurately.
Requirements
Machine & sewing kit (as given in annexure I)
Pre Lab Preparation
Two pieces of muslin of 6”x 4” each
Procedure
1. To join an inward corner with an outward corner or straight edge, first reinforcethe inward angle stitching just inside the seam line 1” on either side of corner.
2. Insert a pin diagonally across the point where stitching forms the angle clipexactly to this point, being careful not to cut past the stitches.
3. Spread the clipped section to fit the other edge; pin in position then with clippedside up, stitch on the seam line pivoting at the corner
Observations
Ensure that the corners are at perfect right angle.
Viva questions
1. Where all do you use the cornered seam?
2. Why do we need to reinforce the corner seam?
30
Practical 7 STITCHED & PINKED SEAM
Aim
To prepare a sample of stitched & pinked seam.
Principles
A seam finish in which a line of machine stitching is made ¼” from the raw cut edge beforepinking. It is done to prevent the pinked edge from raveling, to prevent the seam fromcurling & on fabrics which ravel slightly. It is a quick and easy finish suitable for firmlywoven fabrics.
Requirements
Machine & sewing kit (as given in annexure I)
Pre Lab Preparation
Two pieces of muslin of 6”x 4” each
Procedure
1. Take two layers of fabric, right side facing right side; stitch on wrong side, leav-ing a distance of 1” from edge. Press open the seam allowance.(straight plainseam)
2. Using a short stitch place a line of a stitching ¼” away from the edge of theseam allowance. On the one side of seam allowance. Repeat the same on theother end of seam allowance.
3. Then pink the outer edge of the seam allowance away from the seam you havejust applied.
4. Press open flat seam allowance.
Observations
Ensure that the fabric does not ravel after pinking.
Viva questions
1. How does pinking help in finishing the sample?
2. Give names of fabric for which Pinked seam is most suitable for.

31
Practical 8 TURNED AND STITCHED SEAM
Aim
To prepare a sample of turned and stitched seam.
Principles
A seam finish in which the raw edge of the seam allowance is turned under stitched andconcealed. This is a neat tailored finish for light to medium weight fabrics of cotton, linenand viscose.
Requirements
Machine & sewing kit (as given in annexure I)
Pre Lab Preparation
Two pieces of muslin of 6”x 4” each
Procedure
1. Take two layers of fabric, right side facing right side, stitch from wrong side at adistance of 1” from the edge. Press open the allowance. (straight plain seam)
2. Turn under the edge of the seam allowance ¼” stitch along the edge of the fold.Repeat the same step on the other edge of seam allowance.
Observations
Check if the seam line is straight and there are no puckers or pulls.
Viva questions
1. Where all do you use the turned and stitched seam?
2. How is this seam different from the stitched and pinked seam?

32
Practical 9 HONG-KONG SEAM
Aim
To prepare a sample of Hong Kong seam.
Principles
A seam finish in which the raw edge of the seam allowance is covered with a foldedribbon tape or bias binding.
Requirements
Machine & sewing kit (as given in annexure I)
Pre Lab Preparation
Two pieces of muslin of 6”x 4” eachTwo pieces of light weight muslin on bias grain of 1” x 6”
Procedure
1. Place two layers of fabric right side facing right side. Stitch at a distance of 1”from the edge on wrong side. Press opens the allowance.
2. Using 1” wide bias strip, with right sides together stitch bias strip to seam allow-ance ¼” from edge on one side of the seam allowance.
3. Turn bias over edge to the underside and press. From the right side. Stitch inthe crevice of the first stitching (stitch in ditch) trim unfinished edge of bias.
4. Finish the other side similarly.
Observations
The edges should be neatly concealed in the bias strip.
Viva questions
1. Where all do you use the Honk Kong seam?
2. How is this seam different from the turned & stitched seam?

33
Practical 10 FRENCH SEAM
Aim
To prepare a sample of French seam.
Principles
A seam constructed so that a narrow seam is contained within a case on producing aclear finish. This is a very secure and neat seam as the raw edges are not exposed.
Requirements
Machine & sewing kit (as given in annexure I)
Pre Lab Preparation
Two pieces of muslin of 6”x 4” each
Procedure
1. Lay two layers of material together, wrong side facing wrong side. The firststitch is 1/8”or ¼”outside the fitting line, depending on the desired finished widthof the seam. Trim the edge so that it is less than desired finished width of theseam. It looks best when finished width is ¼” or less.
2. Press the seam in one direction. Turn the fabric so that right side is facing rightside. Fold on the line of stitching. Machine stitch on the seam line. Since theraw edges are enclosed, this seam requires no special finish.
Observations
The seam should not be too broad and bulky. The edges should be neatly enclosed inthe seam.
Viva questions
1. What are the advantages of this seam?
2. Where all is this seam used and why?
3. Give other names of this seam.
34
Practical 11 FLAT FELLED SEAM
Aim
To prepare a sample of flat felled seam.
Principles
The flat-felled seam is very sturdy and so often used for garment that aremade to take hard wear.
Requirements
Machine & sewing kit (as given in annexure I)
Pre Lab Preparation
Two pieces of muslin of 6”x 4” each
Procedure
1. Place two layers of fabric with the wrong side facing wrong side. Stitch fromright side leaving an allowance of 1”. Press open the seam (straight plain seam)
2. Trim the inner seam allowance to ¼”. Press under the edge of the outer seamallowance which is trimmed to ½”.
3. After pressing or folding outer seam allowance on inner one, stitch this foldededge to the garment.
Observations
The seam should be of uniform width from one seam to another.
Viva questions
1. Which category of seam finish does this seam fall?
2. Give two uses of this seam.

35
Practical 12 DOUBLE TOP STITCHED SEAM
Aim
To prepare a sample of double top stitched seam.
Principles
A seam which has been pressed open and stitched parallel to and on both sides of theseam line, through garment and seam plies.
Requirements
Machine & sewing kit
Pre Lab Preparation
Two pieces of muslin of 6”x 4” each
Procedure
1. Take two layers of fabric, right side facing right side, stitch at a distance of 1”from the edge on wrong side. (straight plain seam)
2. Press plain seam open. Top stitch at equal distance from each side of seamline, (1/4” away from seam line on both sides) catching seam allowances intostitching.
Observations
The stitch line should be uniform on the both sides of the seam. The under layersshould be flat and pressed open.
Viva questions
1. Give two uses of the seam &where it can be used as decorative seams.
2. Can you give variations of this seam?

36
Practical 14 GATHERED SEAMAim
To prepare a sample of gathered seam.
Principles
Gathering is the process of drawing fullness into a much smaller area by means of tworows of machine basting.
Requirements
Machine & sewing kit (as given in annexure I)
Pre Lab Preparation
Two pieces of muslin of 6”x 4” and 18”x4”
Procedure
The stitch length for gathering is longer than for ordinary sewing. Use a stitch length of6 to 8 stitches per inch for medium weight fabrics. For soft or sheer fabrics, use 8 to10 stitches per inch. A long stitch makes it easier to draw up the fabric but a shorterstitch gives more control when adjusting gathers.
1. Take a bigger fabric piece and from the right side stitch (8 to 10 per inch) onebasting line just next the seam.
2. Stitch another line (on the same single piece of fabric) ¼” away in the seamallowance.
3. Pin seam edges together at matching points, such as notches.
4. Draw up bobbin threads, distributing fullness evenly and with drawn threadswound around a pin on either side to secure gathers.
5. Pin baste and stitch seam with gathered side up.
Observations
The gathers shout be distributed evenly and should not form pleats.
Viva questions
1. What stitch size should be used for gathering?2. Why do we need two rows of stitch line to gather evenly?
37
Practical 15 PLEATS
Aim
To prepare a sample of pleats.
Principles
Pleats are made by folding the fabric in various ways. Pleating may occur as a singlepleat, as a cluster or around an entire garment section. Side pleats are all turned in thesame direction. Box pleats have the two folds turned away from each other. Invertedpleats, which have an underlay, have the two folds meeting at the centre.
Requirements
Machine & sewing kit
Pre Lab Preparation
One pieces of muslin of 6”x 18” each
Procedure
1. Mark and fold the pleats as desired.2. Stitch on the seam line ¼” away in the seam allowance.3. Now stitch the pleats in place and finish as desired.
Observations
The pleats should be even and according to the design.
Viva questions
1. How much extra fabric is required for 2 box pleat of 2” depth?
2. What is the best way to finish the pleats?
38
Practical 16 TUCKS
Aim
To prepare a sample of tucks.
Principles
Tucks are parallel folds of fabric used for a decorative effect on the right side of the fabric.The spacing can vary from the very narrow pin tucks to deeper, spaced tucks.
To ensure perfection in stitching tucks, the markings must be exact. The pin tuck is anedge stitch evenly spaced 1/16" from the fold, for wider or more widely spaced tucks,increase the amount of fabric in each fold or the space between the tucks.
Requirements
Machine & sewing kit
Pre Lab Preparation
One pieces of muslin of 6”x 12” each
Procedure
1. Mark and fold the tucks as desired.
2. Stitch on the seam line of the tuck as shown.
3. Now finish the sample as desired.
Observations
The tucks should be of even depth and equally distributed. Check if the seam line isstraight and there are no puckers or pulls.
Viva questions
1. What is the ideal width of pin tucks?
2. Why are they called pin tucks?

39
Annexure I
SEWING KIT
All pins : fine, long, rust proof pins.
Magnetic pin holder / pin cushion: to hold pins.
Muslin : to experiment and develop samples.
Push pins : Drum shaped 1/2" long pin, to hold pattern pieces and fabric on table.
Tracing wheel : An instrument with small serrated or needle point wheel mounted on oneend of a handle. For transferring markings from paper patterns on the muslin.
Tailor chalk: for marking on fabric.
12" / 24" scale: to mark straight lines to measure.
Measuring tape: Metal tipped narrow, firmly woven double tape of cloth or plastic usually60" long (150cm) marked with both inches and centimeters.
Grading scale : 2" X 18" transparent straight plastic with grid in inches and fraction ofinches (or millimeters) ruler.
Pencil: to mark lines in developing the muslin, pattern or sloper.
L-square : Plastic or metal ruler with two arms at right angles of varying lengths usually 12"and 24", to square off corners.
Carbon paper: Coated paper on one side with white or coloured wax, to transfer markingon fabric or paper.
Transparent tape: to hold paper pieces and mend tears.
Paper shears/scissors: a cutting instrument, ranging in size from 8" to 12", with two sharplypointed straight blades, to cut paper patterns.
Tailor’s shears: A cutting instrument ranging in size from 12" to 16" with two wide blades,to cut fabric and muslin.
Magnet: a high carbon alloy steel that has a property of attracting iron and steel can be ofany shape, to pick up pins and needles.

40
Annexure II
COMMON MACHINE PROBLEMS
The student needs to understand the common problems that may be there while sewingand should be able to rectify these as they are common and irritating and slow down thesewing process. A person operating the machine should be able to rectify these andsolve the problems.
Bobbin
1. Does not wind :
l Make sure the thread is wrapped around the bobbin in proper direction.
l Check to see if bobbin has been placed properly in the winder.
l The rubber ring might be worn out and needs to be replaced.
2. Winds unevenly :
l The thread may not be inserted in the thread guide.
l You may be running the machine too fast.
l The tension spring may need adjustment.
3. l The Needle moves up and down during winding
l Needle has not been disengaged
Fabric
1. Layers feed unevenly
l Presser foot pressure incorrect
l May need to stitch slowly
l The fabric may be very light weight use tissue paper while stitching
2. Does not feed in straight line
l Presser foot may be loose or bent
l Pressure of the presser foot may be incorrect
41
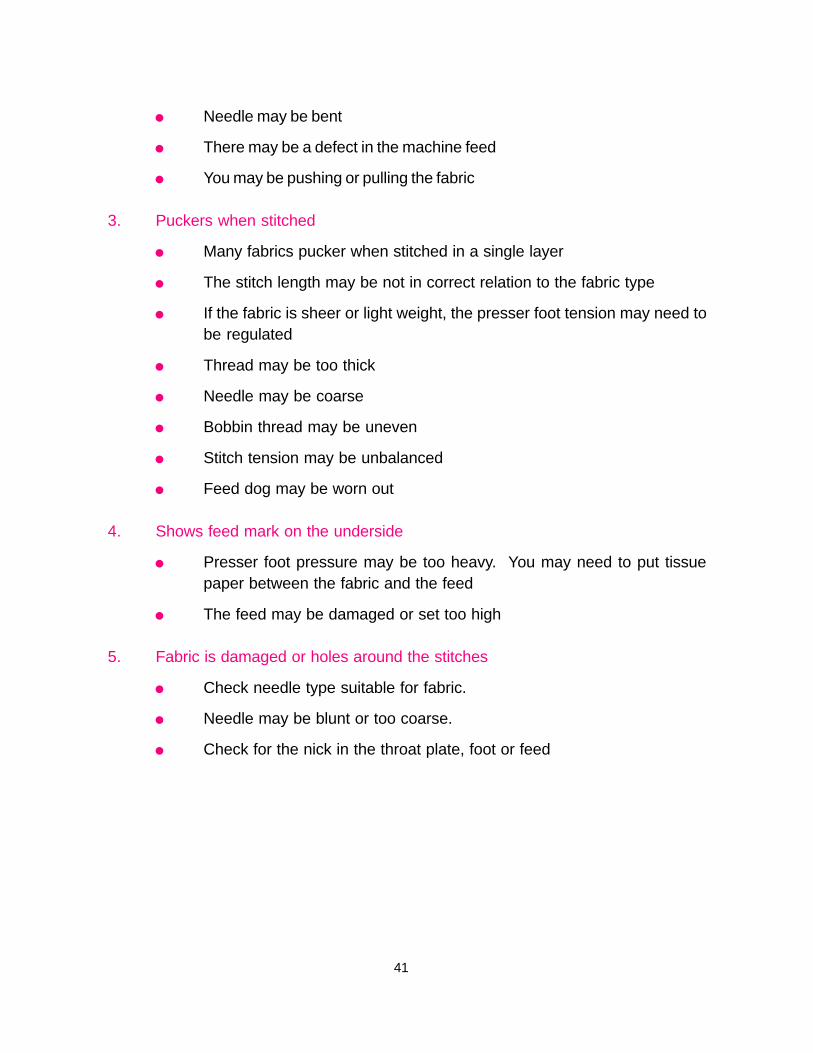
l Needle may be bent
l There may be a defect in the machine feed
l You may be pushing or pulling the fabric
3. Puckers when stitched
l Many fabrics pucker when stitched in a single layer
l The stitch length may be not in correct relation to the fabric type
l If the fabric is sheer or light weight, the presser foot tension may need tobe regulated
l Thread may be too thick
l Needle may be coarse
l Bobbin thread may be uneven
l Stitch tension may be unbalanced
l Feed dog may be worn out
4. Shows feed mark on the underside
l Presser foot pressure may be too heavy. You may need to put tissuepaper between the fabric and the feed
l The feed may be damaged or set too high
5. Fabric is damaged or holes around the stitches
l Check needle type suitable for fabric.
l Needle may be blunt or too coarse.
l Check for the nick in the throat plate, foot or feed

42
MACHINE
Motor does not run
1. Cord is not plugged in.
2. Power stitch off.
3. Knee or foot accelerator may be jammed or improperly attached to power source.
Motor runs but hand wheel does not turn
l Thread or lint may be caught or tangled in the bobbin case area.
Motor runs, hand wheel turns, but needle does not move
1. The needle may have been disengaged for bobbin winding and not tightened backto sewing position
2. If needle has been tightened but still does not move, the motor belt is slippingbecause it is loose or worn.
Motor, hand wheel and needle move but fabric does not feed
1. Make sure the presser foot is down
2. Check the stitch length regulator
3. The pressure regulator may at the least/ light pressure. If fabric is heavy, morepressure may be necessary for fabric to feed.
4. The feed dog may be in the lowered or “down” position
Motor, hand wheel, needle and fabric move but no stitch is formed
1. Thread may have come out of the needle.
2. Needle may be threaded in the wrong direction.
3. Needle may be inserted backward or may not be pushed all the way up into theclamp.
4. Needle may be the wrong length for the machine.

43
5. Machine may be threaded incorrectly
6. Bobbin may be empty
7. Bobbin and / or case may be inserted incorrectly
8. The timing of the machine might be off
Runs sluggishly
1. Bobbin winder may still be engaged
2. Knee or foot control might be improperly positioned
3. Machine may be in need of oiling and / or cleaning
Runs noisily
1. Machine probably needs oiling and / or cleaning
2. The needle could be bent and hitting against foot or throat plate
3. Bobbin and / or case may not be tight enough
4. Bobbin may be almost out of thread.
Will not stitch in reverse
1. If machine is very old, it may not have this capability
2. If it is a recent model, check the stitch control. It may be set for stretch stitch” or“buttonhole”, sometimes these stitches cannot be reversed manually.
NEEDLE
Unthreads
1. Insufficient thread may have been pulled through the needle before the seamwas started
2. Machine may be out of top thread

44
Breaks
1. You may be using the incorrect presser foot
2. Presser foot and / or throat plate may be loose or improperly fastened.
3. Needle might have bent and hit the presser foot and /or throat plate
4. Needle may be incorrectly inserted
5. Needle might be too fine for the fabric being sewed and for the job being done
6. You may have pulled too hard on fabric while stitching
7. Check machine settings.
8. Needle may be defective
STITCHES
Are uneven lengths
1. You might be pushing or pulling the fabric too much
2. Pressure on the presser foot could be either too light or too heavy for the fabric
3. There could be lint or other clog between the teeth of the feed dog
Have loops between them
1. If the loops are large, the machine is improperly threaded
2. If loops are small tensions are unbalanced
3. Bobbin may be wound unevenly
4. There may not be enough pressure to hold the fabric taut during stitch forma-tion
Skip here and there
1. Needle may be blunt or bent
2. Needle may be inserted backward or it might not be all the way up into theclamp

45
3. There may be insufficient pressure on the presser foot
4. Throat plate may be wrong for the purpose
5. You may be stitching at an uneven speed
6. While stitching, you may be pulling too hard on the fabric
THREAD
Needle thread breaks
1. Usually this is caused by the needle being inserted backward or threaded back-ward
2. Thread may be caught in the spool notch or it could be wrapped around thespindle
3. There may be a rough or burred place on a thread guide
4. The needle may be blunt
5. Needle may not be all the way up into the clamp
6. Needle may be too fine for the thread, causing it to fray-often the case with silkbuttonhole twist
7. check thread quality
Bobbin thread breaks
1. Bobbin case may not be threaded properly and / or the case not inserted prop-erly
2. Bobbin may be too full
3. Check for dirt or clog in the bobbin case
4. Bobbin tension may be too tight
Bobbin thread cannot be raised through hole in throat plate
1. Bobbin case may be improperly threaded.
2. It may not have been properly inserted