6. gl theory
TRANSCRIPT
R12 = GL THEORY
1
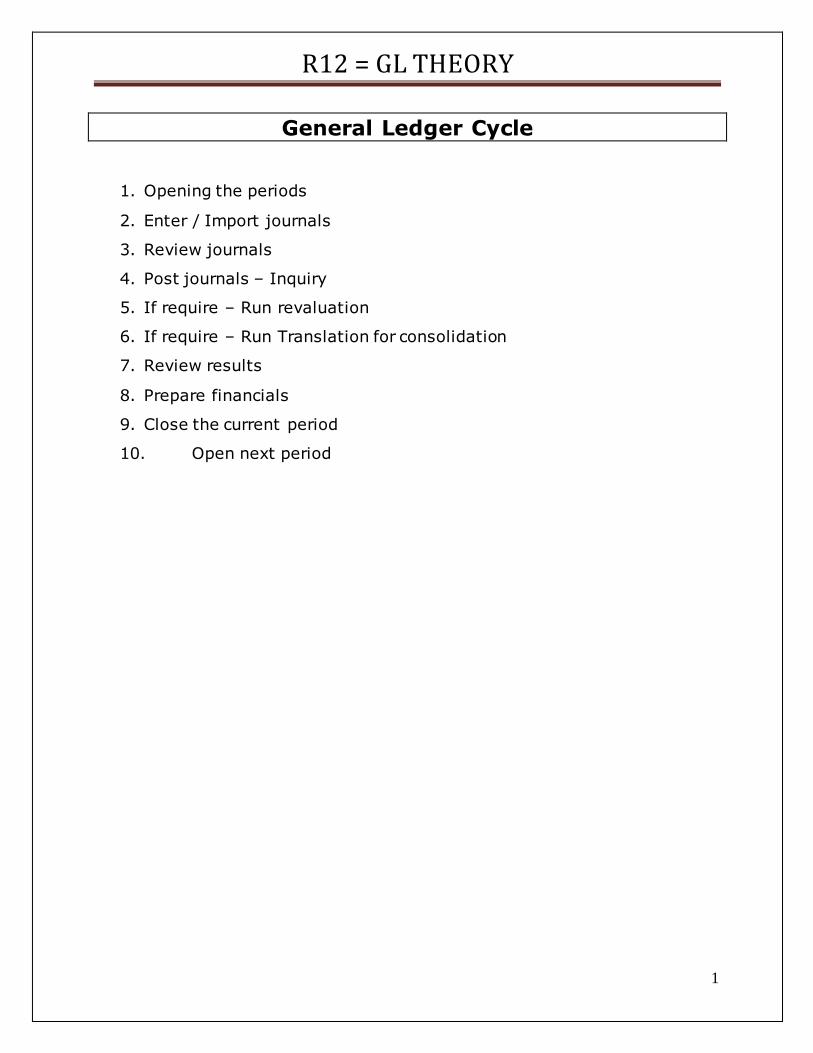
General Ledger Cycle
1. Opening the periods
2. Enter / Import journals
3. Review journals
4. Post journals – Inquiry
5. If require – Run revaluation
6. If require – Run Translation for consolidation
7. Review results
8. Prepare financials
9. Close the current period
10. Open next period

R12 = GL THEORY
2
FLEX FIELDS IN GENERAL LEDGER:
1. Key Flex Fields 2. Descriptive Flex Fields
Key Flex Fields:
• General Ledger: • Accounting KFF • Reporting Attribute KFF
• GL Ledger KFF
• Receivables: • Sales Tax Location Flex Field
• Territory Flex Field
• Fixed Assets: • Category KFF • Asset Location KFF
• Asset key KFF
Flex Field Qualifiers (Assign to Segments)
1. Balancing Segment FFQ 2. Cost Center Segment FFQ
3. Natural Accounts Segment FFQ 4. Inter Company Segment FFQ 5. Secondary Tracking Segment FFQ
6. Management FFQ
Segment Qualifiers (Assign to Segment values) 1. Allow Budgeting
2. Allow Posting 3. Account type (Assets / Liability / Expenses / Revenue / Ownership)
4. Third party control 5. Reconcile
R12 = GL THEORY
3
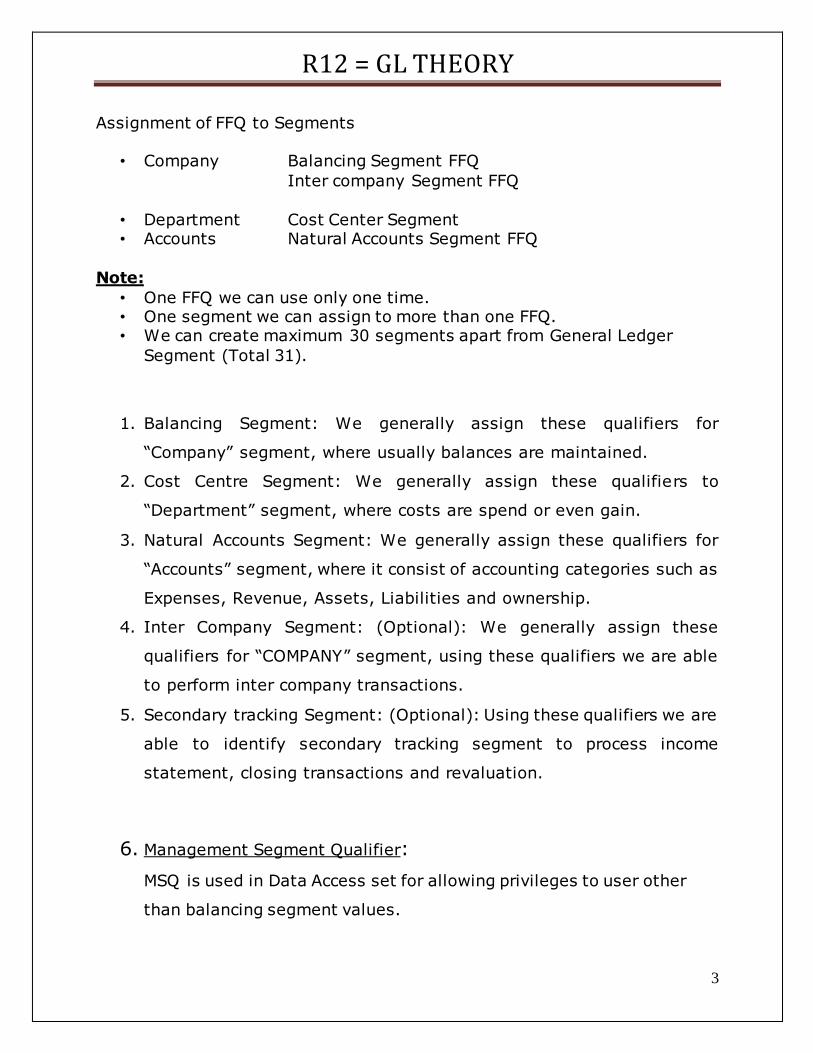
Assignment of FFQ to Segments
• Company Balancing Segment FFQ
Inter company Segment FFQ
• Department Cost Center Segment • Accounts Natural Accounts Segment FFQ
Note:
• One FFQ we can use only one time. • One segment we can assign to more than one FFQ. • We can create maximum 30 segments apart from General Ledger
Segment (Total 31).
1. Balancing Segment: We generally assign these qualifiers for
“Company” segment, where usually balances are maintained.
2. Cost Centre Segment: We generally assign these qualifiers to
“Department” segment, where costs are spend or even gain.
3. Natural Accounts Segment: We generally assign these qualifiers for
“Accounts” segment, where it consist of accounting categories such as
Expenses, Revenue, Assets, Liabilities and ownership.
4. Inter Company Segment: (Optional): We generally assign these
qualifiers for “COMPANY” segment, using these qualifiers we are able
to perform inter company transactions.
5. Secondary tracking Segment: (Optional): Using these qualifiers we are
able to identify secondary tracking segment to process income
statement, closing transactions and revaluation.
6. Management Segment Qualifier:
MSQ is used in Data Access set for allowing privileges to user other
than balancing segment values.
R12 = GL THEORY
4
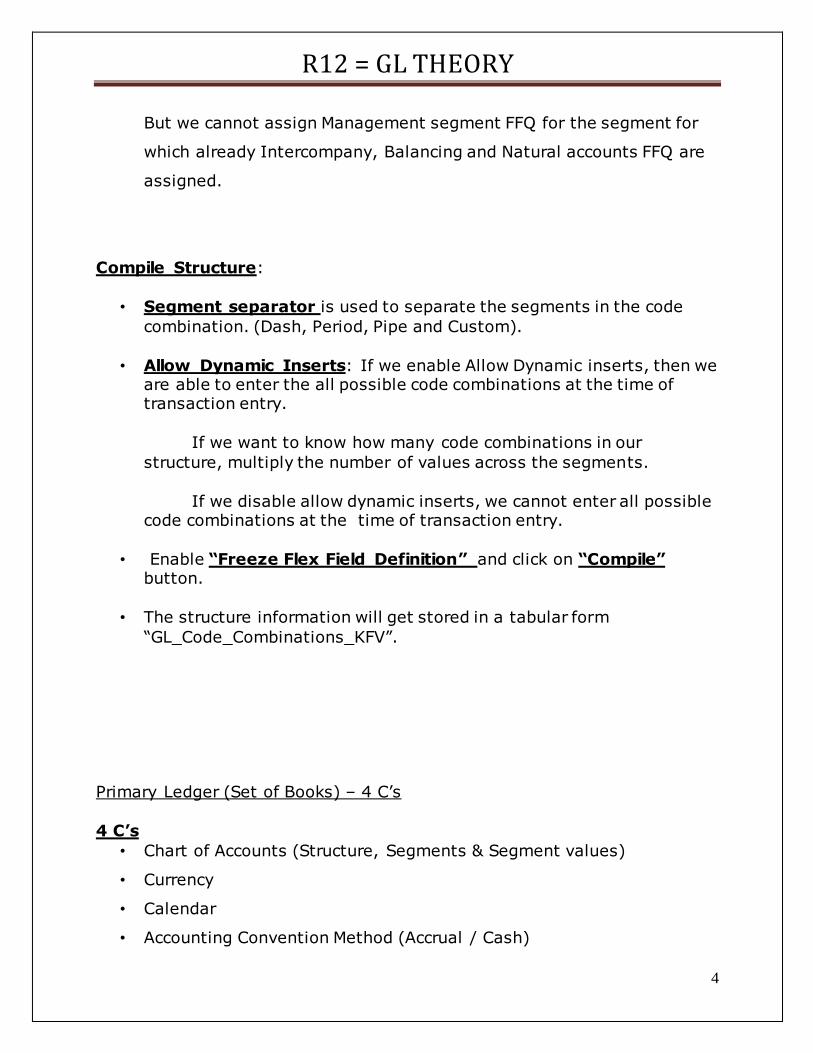
But we cannot assign Management segment FFQ for the segment for
which already Intercompany, Balancing and Natural accounts FFQ are
assigned.
Compile Structure:
• Segment separator is used to separate the segments in the code
combination. (Dash, Period, Pipe and Custom).
• Allow Dynamic Inserts: If we enable Allow Dynamic inserts, then we are able to enter the all possible code combinations at the time of transaction entry.
If we want to know how many code combinations in our
structure, multiply the number of values across the segments.
If we disable allow dynamic inserts, we cannot enter all possible code combinations at the time of transaction entry.
• Enable “Freeze Flex Field Definition” and click on “Compile”
button.
• The structure information will get stored in a tabular form
“GL_Code_Combinations_KFV”.
Primary Ledger (Set of Books) – 4 C’s
4 C’s
• Chart of Accounts (Structure, Segments & Segment values)
• Currency
• Calendar
• Accounting Convention Method (Accrual / Cash)
R12 = GL THEORY
5
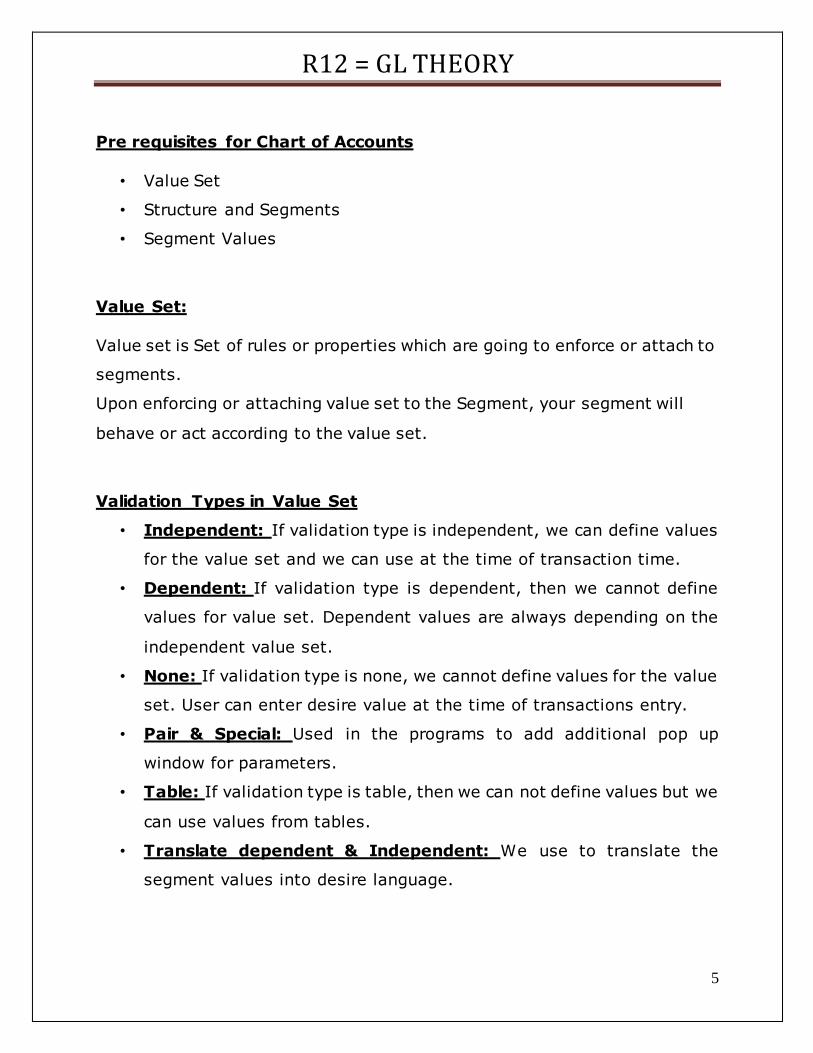
Pre requisites for Chart of Accounts
• Value Set
• Structure and Segments
• Segment Values
Value Set:
Value set is Set of rules or properties which are going to enforce or attach to
segments.
Upon enforcing or attaching value set to the Segment, your segment will
behave or act according to the value set.
Validation Types in Value Set
• Independent: If validation type is independent, we can define values
for the value set and we can use at the time of transaction time.
• Dependent: If validation type is dependent, then we cannot define
values for value set. Dependent values are always depending on the
independent value set.
• None: If validation type is none, we cannot define values for the value
set. User can enter desire value at the time of transactions entry.
• Pair & Special: Used in the programs to add additional pop up
window for parameters.
• Table: If validation type is table, then we can not define values but we
can use values from tables.
• Translate dependent & Independent: We use to translate the
segment values into desire language.
R12 = GL THEORY
6
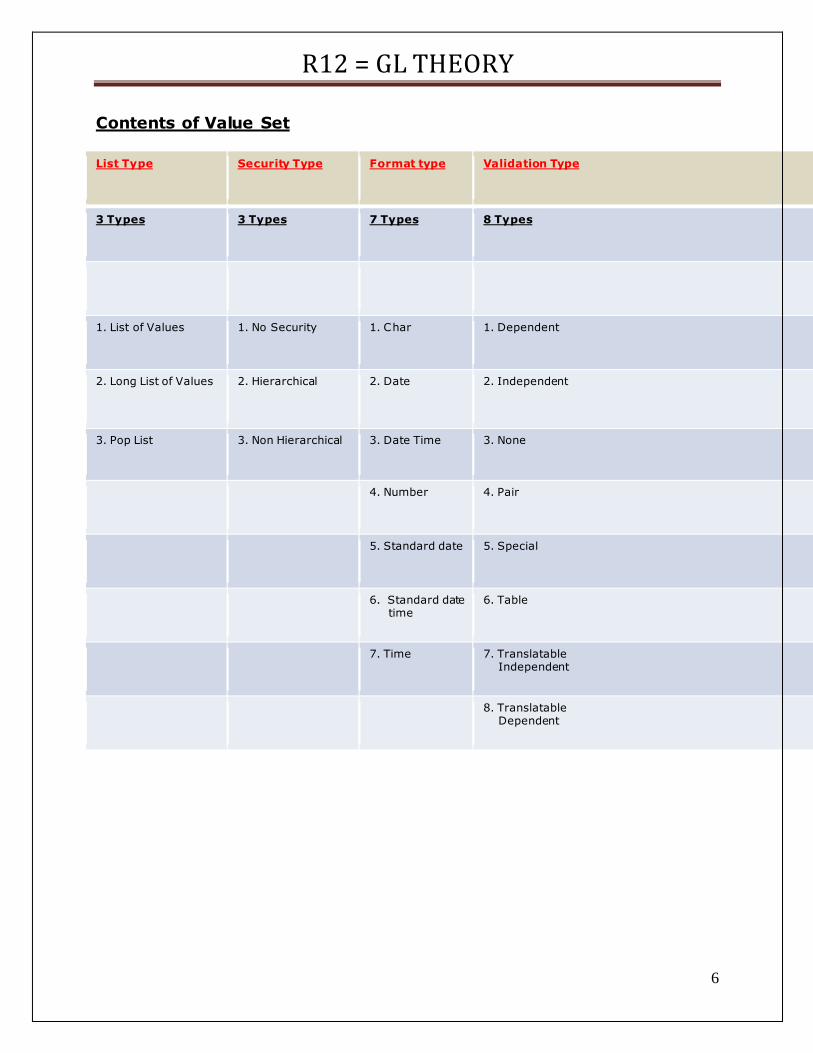
Contents of Value Set
List Type Security Type Format type Validation Type
3 Types 3 Types 7 Types 8 Types
1. List of Values 1. No Security 1. Char 1. Dependent
2. Long List of Values 2. Hierarchical 2. Date 2. Independent
3. Pop List 3. Non Hierarchical
3. Date Time 3. None
4. Number 4. Pair
5. Standard date 5. Special
6. Standard date time
6. Table
7. Time 7. Translatable Independent
8. Translatable Dependent
R12 = GL THEORY
7
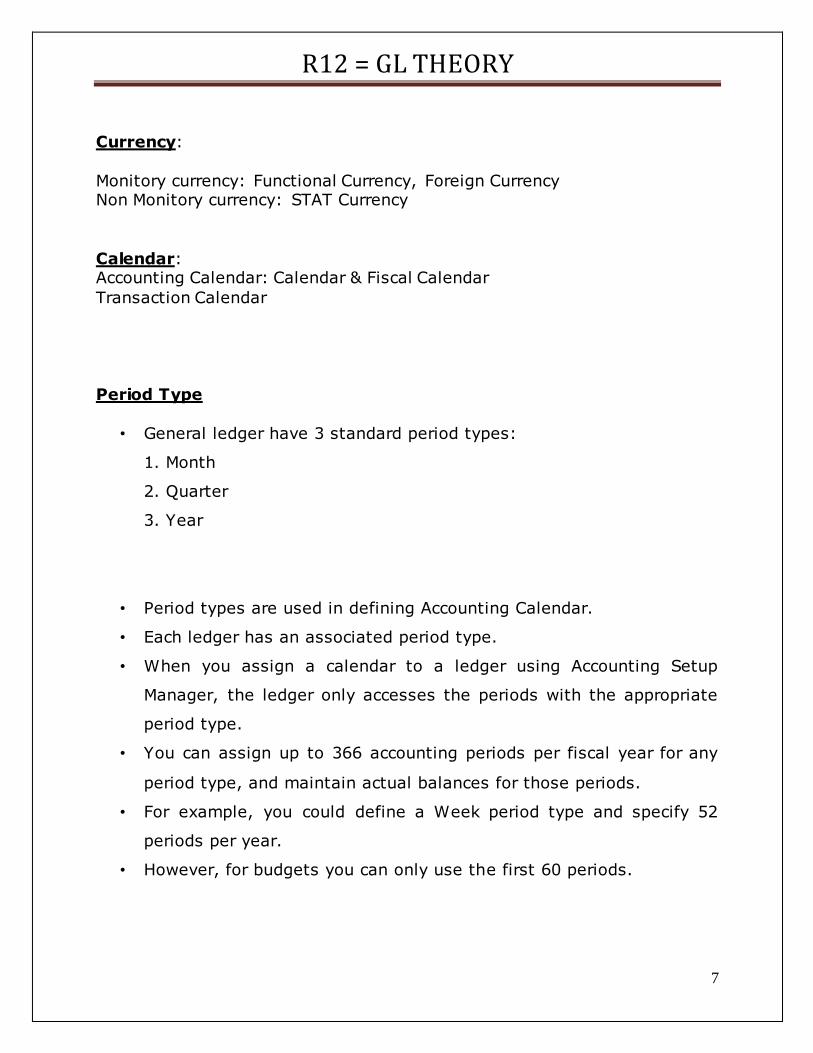
Currency:
Monitory currency: Functional Currency, Foreign Currency Non Monitory currency: STAT Currency
Calendar: Accounting Calendar: Calendar & Fiscal Calendar
Transaction Calendar
Period Type
• General ledger have 3 standard period types:
1. Month
2. Quarter
3. Year
• Period types are used in defining Accounting Calendar.
• Each ledger has an associated period type.
• When you assign a calendar to a ledger using Accounting Setup
Manager, the ledger only accesses the periods with the appropriate
period type.
• You can assign up to 366 accounting periods per fiscal year for any
period type, and maintain actual balances for those periods.
• For example, you could define a Week period type and specify 52
periods per year.
• However, for budgets you can only use the first 60 periods.
R12 = GL THEORY
8
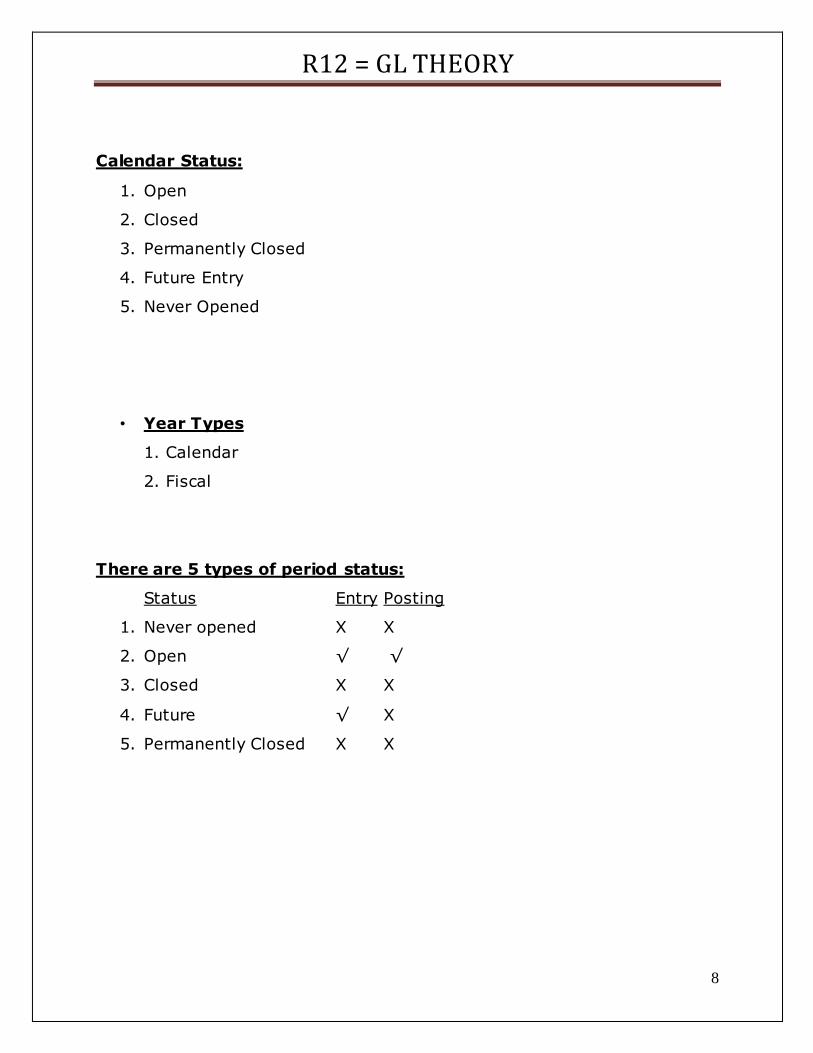
Calendar Status:
1. Open
2. Closed
3. Permanently Closed
4. Future Entry
5. Never Opened
• Year Types
1. Calendar
2. Fiscal
There are 5 types of period status:
Status Entry Posting
1. Never opened X X
2. Open √ √
3. Closed X X
4. Future √ X
5. Permanently Closed X X
R12 = GL THEORY
9
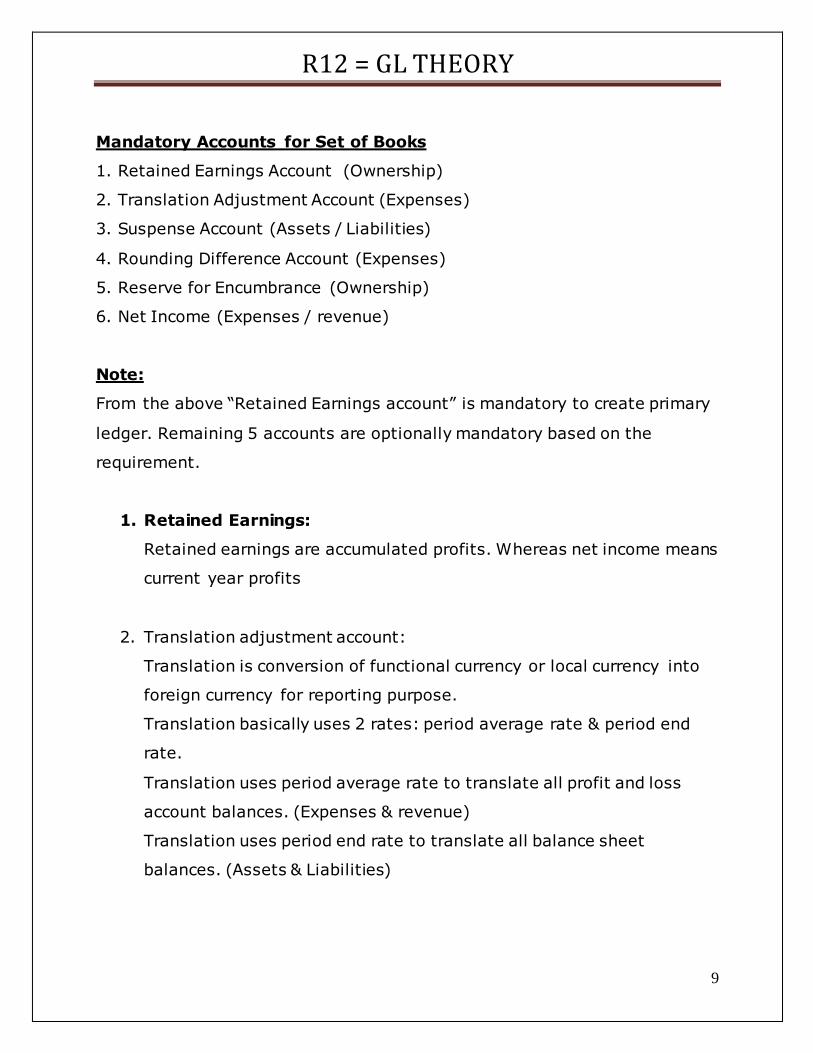
Mandatory Accounts for Set of Books
1. Retained Earnings Account (Ownership)
2. Translation Adjustment Account (Expenses)
3. Suspense Account (Assets / Liabilities)
4. Rounding Difference Account (Expenses)
5. Reserve for Encumbrance (Ownership)
6. Net Income (Expenses / revenue)
Note:
From the above “Retained Earnings account” is mandatory to create primary
ledger. Remaining 5 accounts are optionally mandatory based on the
requirement.
1. Retained Earnings:
Retained earnings are accumulated profits. Whereas net income means
current year profits
2. Translation adjustment account:
Translation is conversion of functional currency or local currency into
foreign currency for reporting purpose.
Translation basically uses 2 rates: period average rate & period end
rate.
Translation uses period average rate to translate all profit and loss
account balances. (Expenses & revenue)
Translation uses period end rate to translate all balance sheet
balances. (Assets & Liabilities)
R12 = GL THEORY
10
3. Suspense Account:
When ever, user is going to enter Debit without credit or credit without
debit or debit balances are not matching with credit balances, in this
case, system will automatically populate “Suspense” account.
Error: 6 unbalanced journal entry, suspense not allowed
Conversion rate types: 3
1. Spot
2. Corporate
3. User (Reporting)
Spot:
An exchange rate which you enter to perform conversion based on the rate
on a specific date. It applies to the immediate delivery of a currency.
Corporate:
This rate is generally a standard market rate determined by senior financial
management for use throughout the organization.
User (Reporting):
An exchange rate you specify when you enter a foreign currency journal
entry.
R12 = GL THEORY
11
Journal Source
• It is a Journal component; it is used to identify the ORIGIN of the
journal.
• To define journal source: Setup Journal Sources.
• When we import data from legacy systems to GL we require source
names.
• Importing journal Reference:
To import detailed information from summary journals we use this
option.
• Require Journal approval:
This field is used to get the journal approval by higher management
for different journal sources.
• Import using key: This is used to define whether journals will be
imported using source key or not.
• Freeze Journals:
To freeze the journal source, preventing users from making changes to
any un posted journals from that source, or reversing journals for Sub
ledger Accounting journal sources.
• Effective date Rule:
1. Fail
2. Leave alone
3. Roll Date
R12 = GL THEORY
12
• Fail: Journal Import will reject transactions when the effective date is
not a valid business day. No posting takes place.
• Leave Alone: Journal import will accept all transactions regardless of
the effective date.
• Roll Date: Journal Import will accept the transaction, but roll the
effective date back to the nearest valid business day within the same
period. If there is no prior valid business day within the same period,
the effective date is rolled forward.
• Note: The Effective Date Rule field will not appear unless you have
average balance processing enabled for at least one ledger.
Journal category
• Journal Category determines the purpose or type of the journal entry.
• When you enter a journal you specify a journal category.
Examples:
1. AP Invoices
2. AP Payments
3. Adjustment
4. Budget
5. Intercompany
6. Inventory
7. Payments
8. Payroll
9. Receipts
10. Year end close.
R12 = GL THEORY
13
Enter Journals
• It is used to record the day to day business transactions. It contain Dr
and Cr lines. Always debit must be equal to credit.
• You can enter several types of journal entries, including foreign
currency journals, statistical journals, and intercompany journals.
• Journals can be created in two ways: 1. Manual 2. Import
1. manual: Enter journals manually by using navigator
Navigation to enter Journal: Journals Enter
Manual journals can be enter in 2 ways:
1. individual Journal 2. batch Journal.
• Journal body contains two areas:
1. Header 2. Lines
• We have 2 types of methods:
1. Standard Journal 2. Average Journals
• We have 3 types of balances:
1. Actual 2. Budget 3. Encumbrance.
R12 = GL THEORY
14
Reverse Journal
• We generally reverse that journal, which got entered also got posted,
where you find there is an error in the posted entry.
• Once the journal is got posted it wouldn’t allow the user to make any
changes.
• The only solution or remedy is to reverse the journal.
• In order to reverse the journal, first review the journal, use reverse
button available in the journal window, also indicate the period where
the reversal entry should get created.
• Navigation: Journal Entry
• Once we reverse the journal system will create one un posted journal,
showing the earlier debit balance to credit side & earlier credit balance
to debit side.
• Post this un posted journal.
• After the journal reversal the particular account in the journal will
show the balance Zero.
• Reverse is of two types:
• Change sign (Profile option is required)
• Switch Dr/Cr.
R12 = GL THEORY
15
BUDGETS Budget is nothing but: better planning and controlling of the funds for future
usage.
In oracle we can define budgets up to 60 periods
There are 2 types of budgets
1. Planning budget (Revenue Budget)
2. Funding budget (Expenses Budget)
Planning Budget
This is used for only planning purpose. System will not be controlling under
this budget.
For planning budget we cannot create budget journals
Funding Budget Under funding budget we can plan and control the expenses.
We can create budget journals in funding budget.
Setup Steps:
1. Create Reserve for encumbrance account
2. Enable:
budgetary control
Require Budgetary journals
Assign “Reserve for Encumbrance account”
At Ledger level
3. Define expenditure head of accounts
4. Define Budget and open next year
R12 = GL THEORY
16
5. Define Budget organization:
Set sequence Set password for budget
Set range for accounts Create Budget Rules Select funds check level
Select amount type
6. Create Budget Journals
7. Query the budget journals and post
8. Create journal entry using budget account
Balance types: 3
1. Budget 2. Actual
3. Encumbrance Budget balances are planned amounts at initial stage.
Actual balances are paid amounts so far.
Encumbrance balances are reserved amounts for future payments.
Funds Check Level: 3
1. Absolute
2. Advisory 3. None
If we use absolute we cannot use more than the amount what we specified.
If we use Advisory, system will give caution if we cross the amount given
If we use None, System will not give any caution, and we can enter the more amounts also.
R12 = GL THEORY
17
Amount Types: 4
1. PTD: Period to date: One month 2. QTD: Quarter to date: 3 months
3. YTD: Year to date: 1 year 4. PJTD: Project to date: Depends on project beginning date
Budget Rules: 8
1. Divide evenly 2. Repeat per period
3. 4/4/5 4. 4/5/4
5. 5/4/4 6. Prior year budget monetary
7. Current year budget monetary 8. Prior year budget STAT
R12 = GL THEORY
18
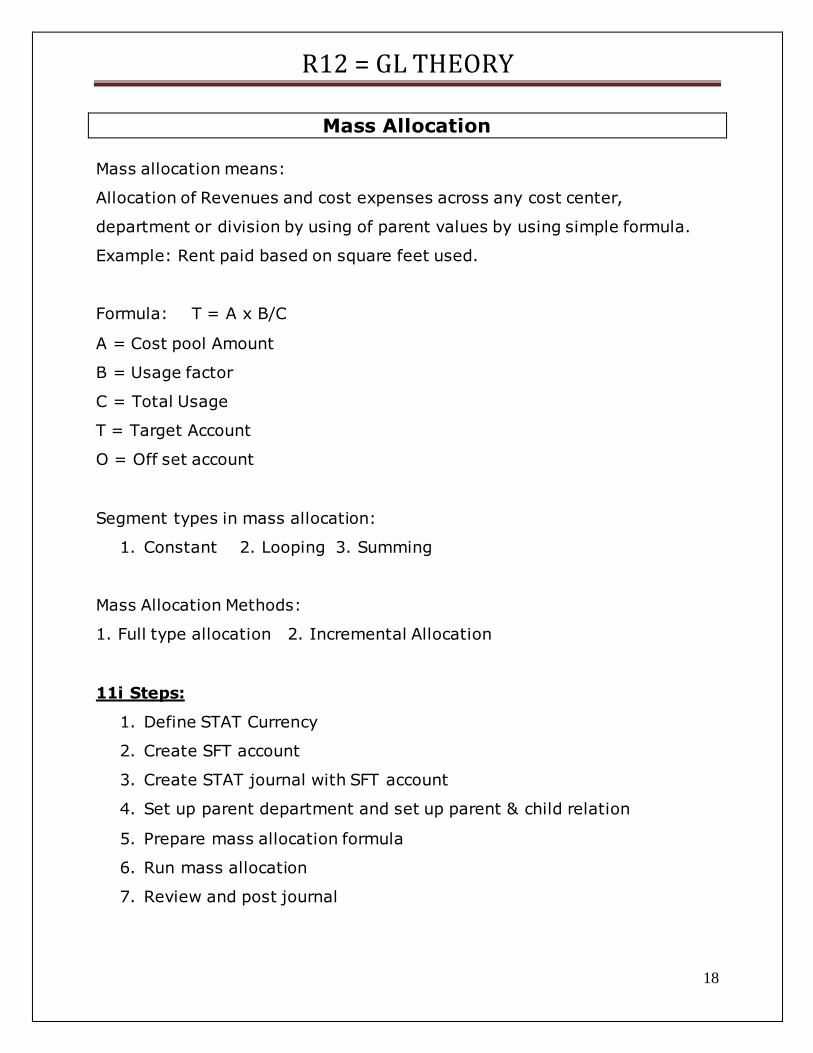
Mass Allocation
Mass allocation means:
Allocation of Revenues and cost expenses across any cost center,
department or division by using of parent values by using simple formula.
Example: Rent paid based on square feet used.
Formula: T = A x B/C
A = Cost pool Amount
B = Usage factor
C = Total Usage
T = Target Account
O = Off set account
Segment types in mass allocation:
1. Constant 2. Looping 3. Summing
Mass Allocation Methods:
1. Full type allocation 2. Incremental Allocation
11i Steps:
1. Define STAT Currency
2. Create SFT account
3. Create STAT journal with SFT account
4. Set up parent department and set up parent & child relation
5. Prepare mass allocation formula
6. Run mass allocation
7. Review and post journal
R12 = GL THEORY
19
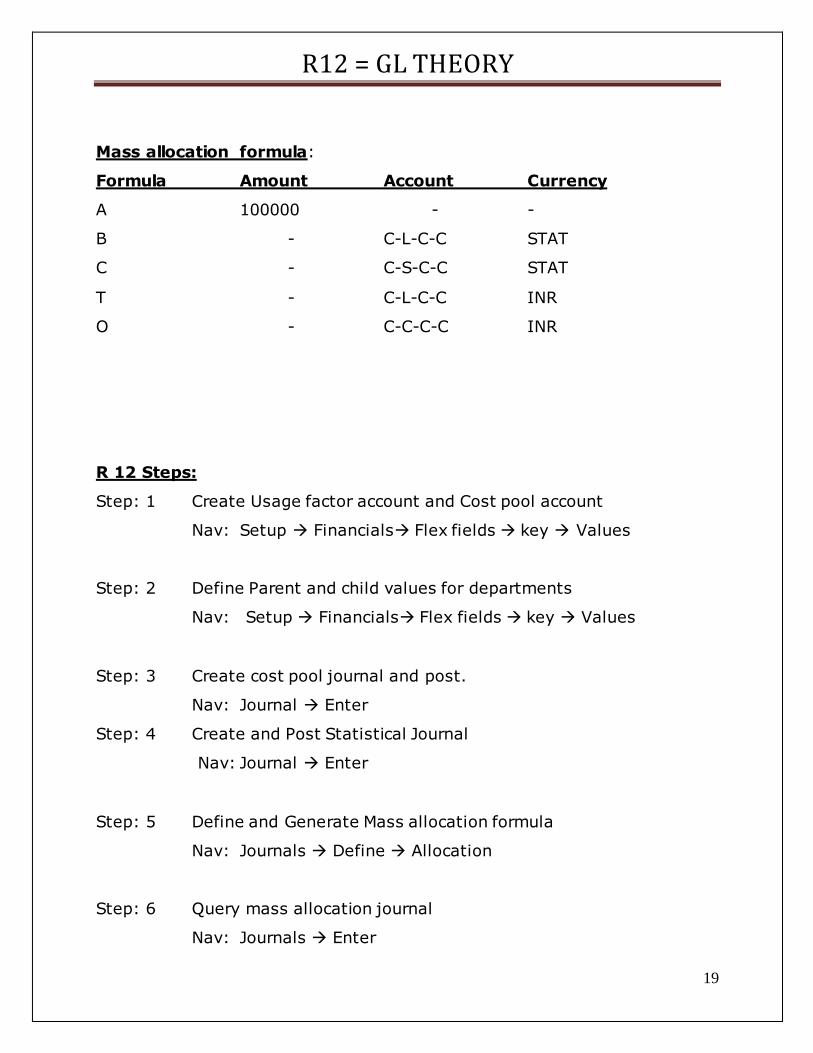
Mass allocation formula:
Formula Amount Account Currency
A 100000 - -
B - C-L-C-C STAT
C - C-S-C-C STAT
T - C-L-C-C INR
O - C-C-C-C INR
R 12 Steps:
Step: 1 Create Usage factor account and Cost pool account
Nav: Setup Financials Flex fields key Values
Step: 2 Define Parent and child values for departments
Nav: Setup Financials Flex fields key Values
Step: 3 Create cost pool journal and post.
Nav: Journal Enter
Step: 4 Create and Post Statistical Journal
Nav: Journal Enter
Step: 5 Define and Generate Mass allocation formula
Nav: Journals Define Allocation
Step: 6 Query mass allocation journal
Nav: Journals Enter
R12 = GL THEORY
20
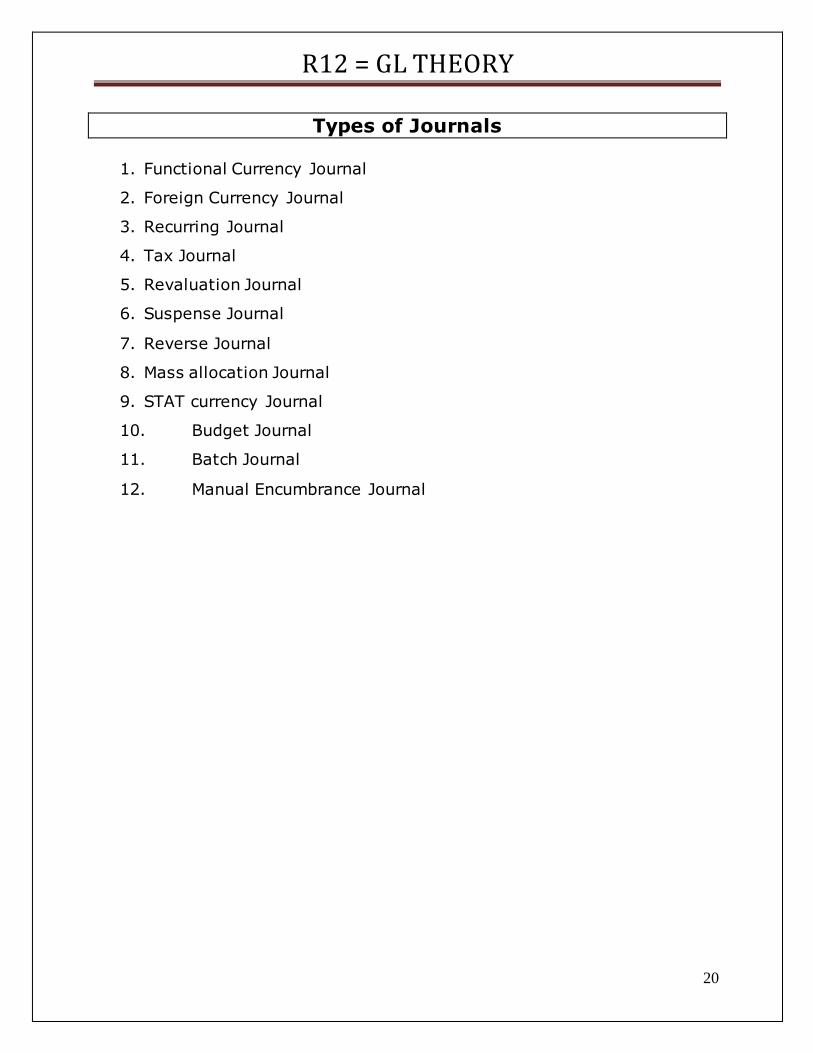
Types of Journals
1. Functional Currency Journal
2. Foreign Currency Journal
3. Recurring Journal
4. Tax Journal
5. Revaluation Journal
6. Suspense Journal
7. Reverse Journal
8. Mass allocation Journal
9. STAT currency Journal
10. Budget Journal
11. Batch Journal
12. Manual Encumbrance Journal
R12 = GL THEORY
21
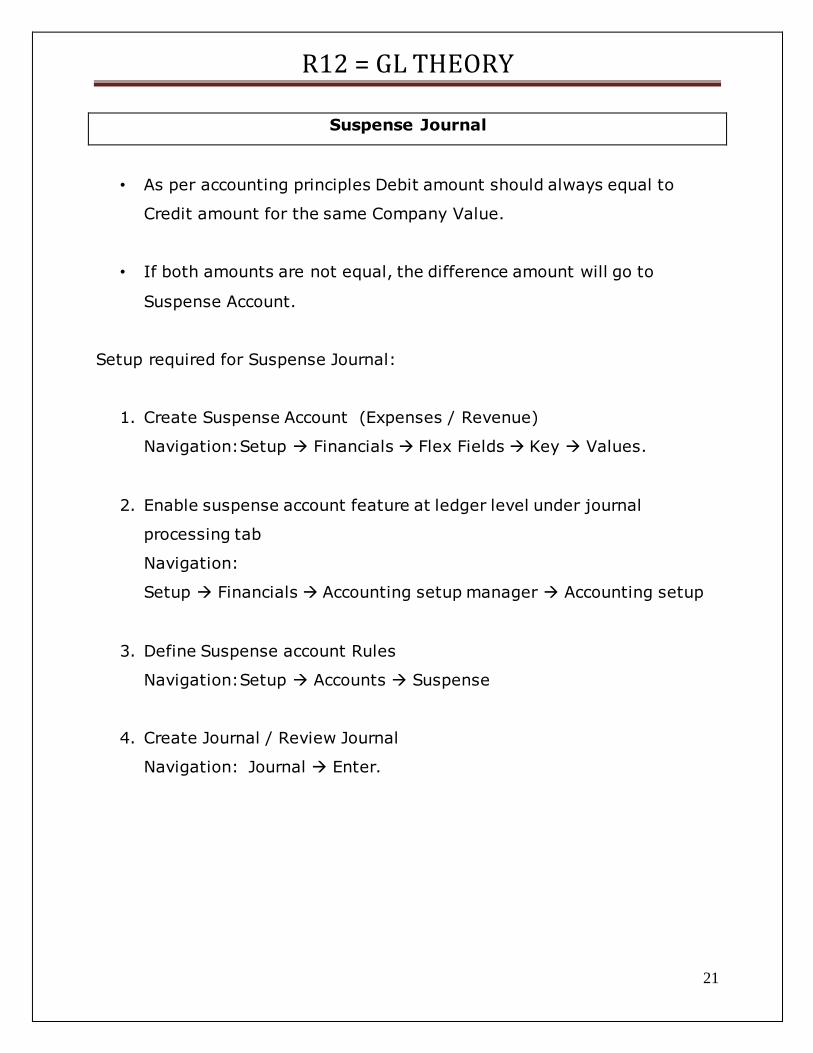
Suspense Journal
• As per accounting principles Debit amount should always equal to
Credit amount for the same Company Value.
• If both amounts are not equal, the difference amount will go to
Suspense Account.
Setup required for Suspense Journal:
1. Create Suspense Account (Expenses / Revenue)
Navigation: Setup Financials Flex Fields Key Values.
2. Enable suspense account feature at ledger level under journal
processing tab
Navigation:
Setup Financials Accounting setup manager Accounting setup
3. Define Suspense account Rules
Navigation: Setup Accounts Suspense
4. Create Journal / Review Journal
Navigation: Journal Enter.
R12 = GL THEORY
22
Recurring Journal
• Journals which are repeating every accounting period is called a
recurring journal.
Recurring journals are 3 types:
1. Standard Recurring Journal 2. Skeleton Recurring Journal
3. Formula Recurring Journal
Standard Recurring Journal:
Under standard recurring journal method same accounts with the same amounts will be effected with the each accounting period. We know account
and amount already.
Skeleton Recurring Journal: Under skeleton journal method partial information will be entered at the time
of recurring journal creation. We know the account but do not know the amount.
Formula Recurring Journal: Using formula recurring method, journal lines amounts will be calculated by
recurring journal program based on simple formula.
Recurring Journal Setup
• Step:1 Define Recurring Journal
Navigation: Journals Define Recurring.
• Line:1
Enter Expenses account (Debit Account) and the amount for Standard
Recurring Journal
Enter only Debit account for Skeleton recurring, do not enter amount
Enter debit account & enter the formula for the amount for Formula
recurring journal
R12 = GL THEORY
23
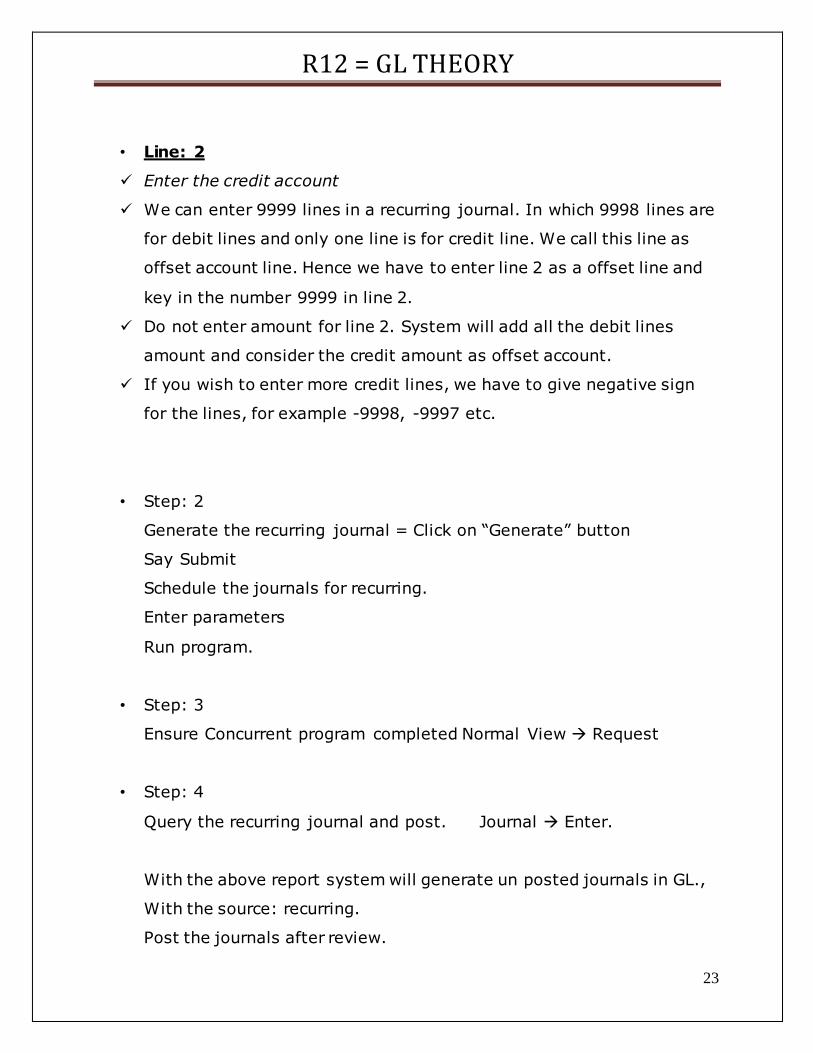
• Line: 2
Enter the credit account
We can enter 9999 lines in a recurring journal. In which 9998 lines are
for debit lines and only one line is for credit line. We call this line as
offset account line. Hence we have to enter line 2 as a offset line and
key in the number 9999 in line 2.
Do not enter amount for line 2. System will add all the debit lines
amount and consider the credit amount as offset account.
If you wish to enter more credit lines, we have to give negative sign
for the lines, for example -9998, -9997 etc.
• Step: 2
Generate the recurring journal = Click on “Generate” button
Say Submit
Schedule the journals for recurring.
Enter parameters
Run program.
• Step: 3
Ensure Concurrent program completed Normal View Request
• Step: 4
Query the recurring journal and post. Journal Enter.
With the above report system will generate un posted journals in GL.,
With the source: recurring.
Post the journals after review.
R12 = GL THEORY
24
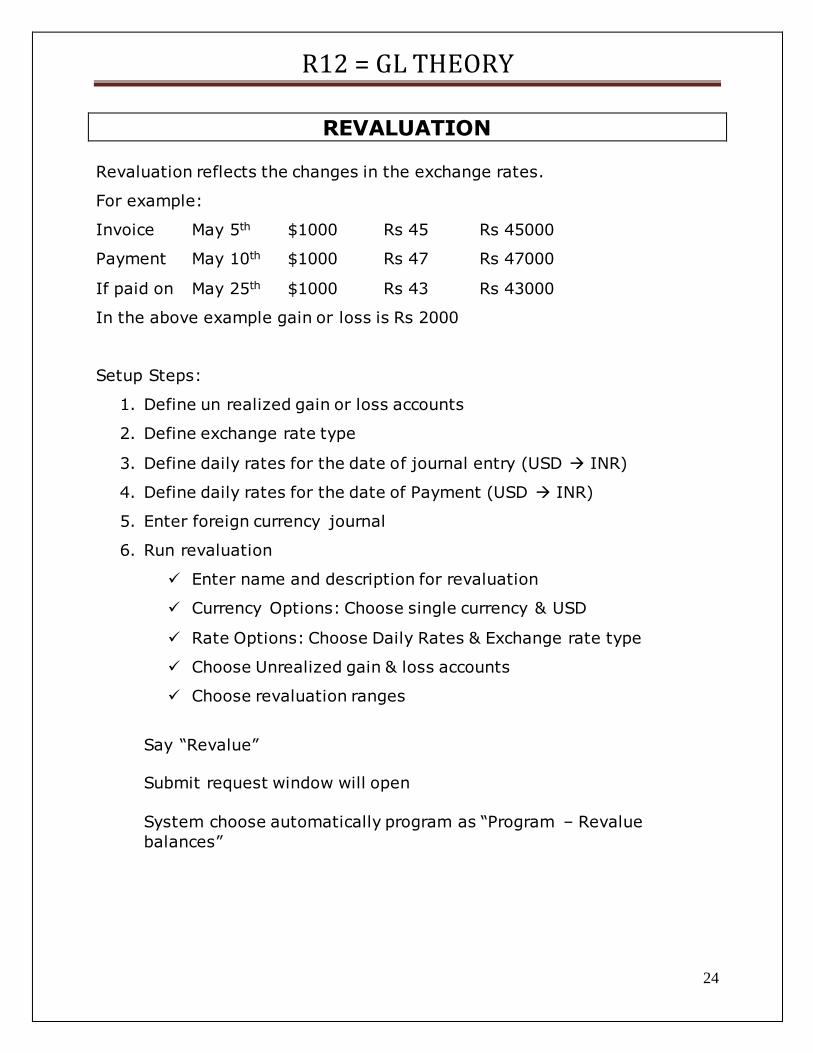
REVALUATION
Revaluation reflects the changes in the exchange rates.
For example:
Invoice May 5th $1000 Rs 45 Rs 45000
Payment May 10th $1000 Rs 47 Rs 47000
If paid on May 25th $1000 Rs 43 Rs 43000
In the above example gain or loss is Rs 2000
Setup Steps:
1. Define un realized gain or loss accounts
2. Define exchange rate type
3. Define daily rates for the date of journal entry (USD INR)
4. Define daily rates for the date of Payment (USD INR)
5. Enter foreign currency journal
6. Run revaluation
Enter name and description for revaluation
Currency Options: Choose single currency & USD
Rate Options: Choose Daily Rates & Exchange rate type
Choose Unrealized gain & loss accounts
Choose revaluation ranges
Say “Revalue” Submit request window will open
System choose automatically program as “Program – Revalue
balances”
R12 = GL THEORY
25
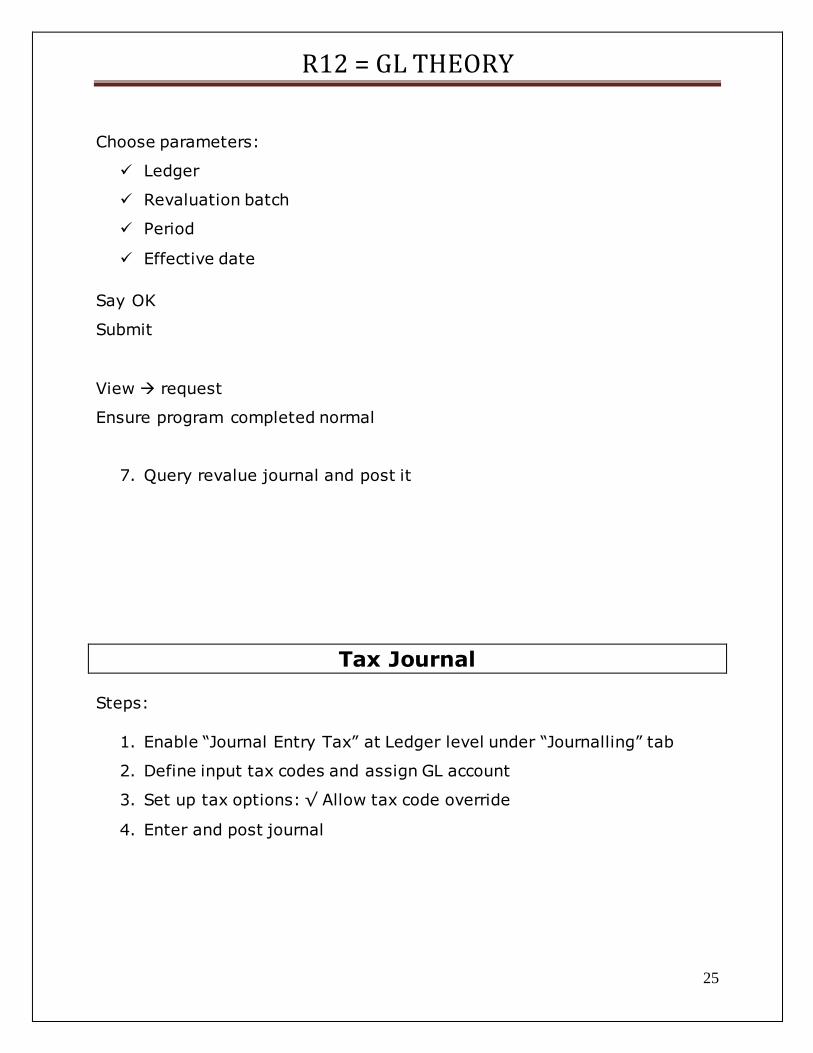
Choose parameters:
Ledger
Revaluation batch
Period
Effective date
Say OK
Submit
View request
Ensure program completed normal
7. Query revalue journal and post it
Tax Journal Steps:
1. Enable “Journal Entry Tax” at Ledger level under “Journalling” tab
2. Define input tax codes and assign GL account
3. Set up tax options: √ Allow tax code override
4. Enter and post journal
R12 = GL THEORY
26
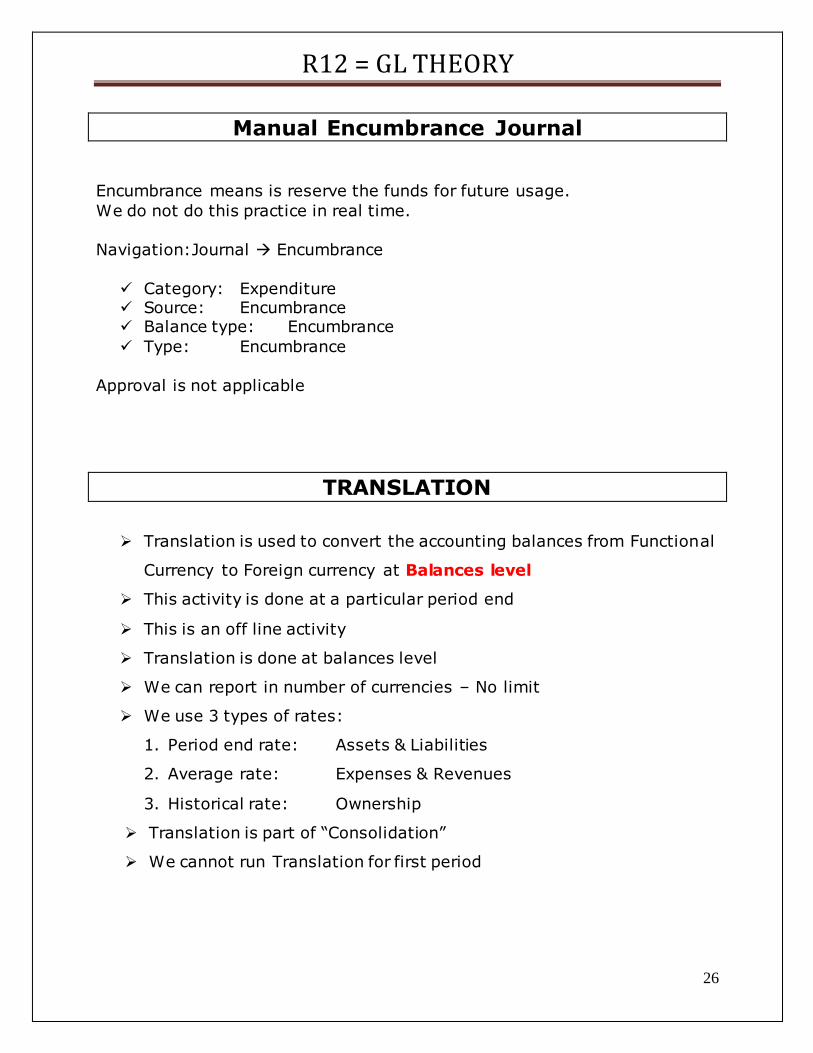
Manual Encumbrance Journal
Encumbrance means is reserve the funds for future usage.
We do not do this practice in real time.
Navigation: Journal Encumbrance
Category: Expenditure Source: Encumbrance Balance type: Encumbrance
Type: Encumbrance
Approval is not applicable
TRANSLATION
Translation is used to convert the accounting balances from Functional
Currency to Foreign currency at Balances level
This activity is done at a particular period end
This is an off line activity
Translation is done at balances level
We can report in number of currencies – No limit
We use 3 types of rates:
1. Period end rate: Assets & Liabilities
2. Average rate: Expenses & Revenues
3. Historical rate: Ownership
Translation is part of “Consolidation”
We cannot run Translation for first period
R12 = GL THEORY
27
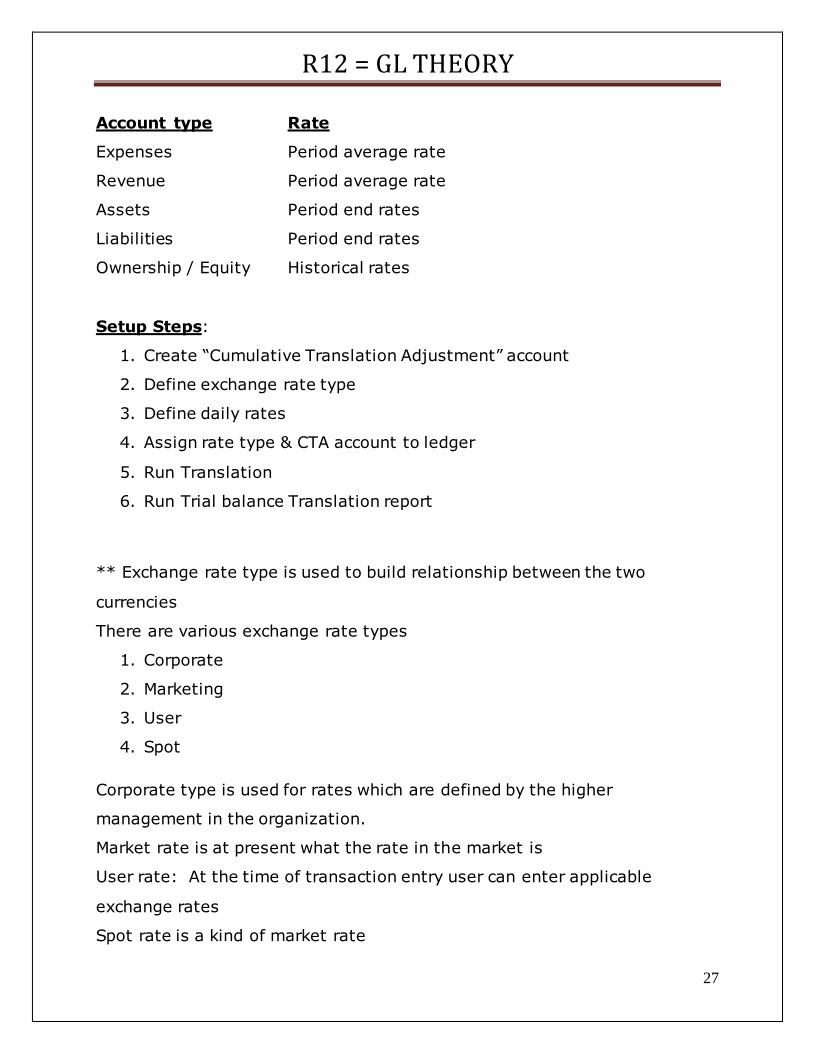
Account type Rate
Expenses Period average rate
Revenue Period average rate
Assets Period end rates
Liabilities Period end rates
Ownership / Equity Historical rates
Setup Steps:
1. Create “Cumulative Translation Adjustment” account
2. Define exchange rate type
3. Define daily rates
4. Assign rate type & CTA account to ledger
5. Run Translation
6. Run Trial balance Translation report
** Exchange rate type is used to build relationship between the two
currencies
There are various exchange rate types
1. Corporate
2. Marketing
3. User
4. Spot
Corporate type is used for rates which are defined by the higher
management in the organization.
Market rate is at present what the rate in the market is
User rate: At the time of transaction entry user can enter applicable
exchange rates
Spot rate is a kind of market rate
R12 = GL THEORY
28
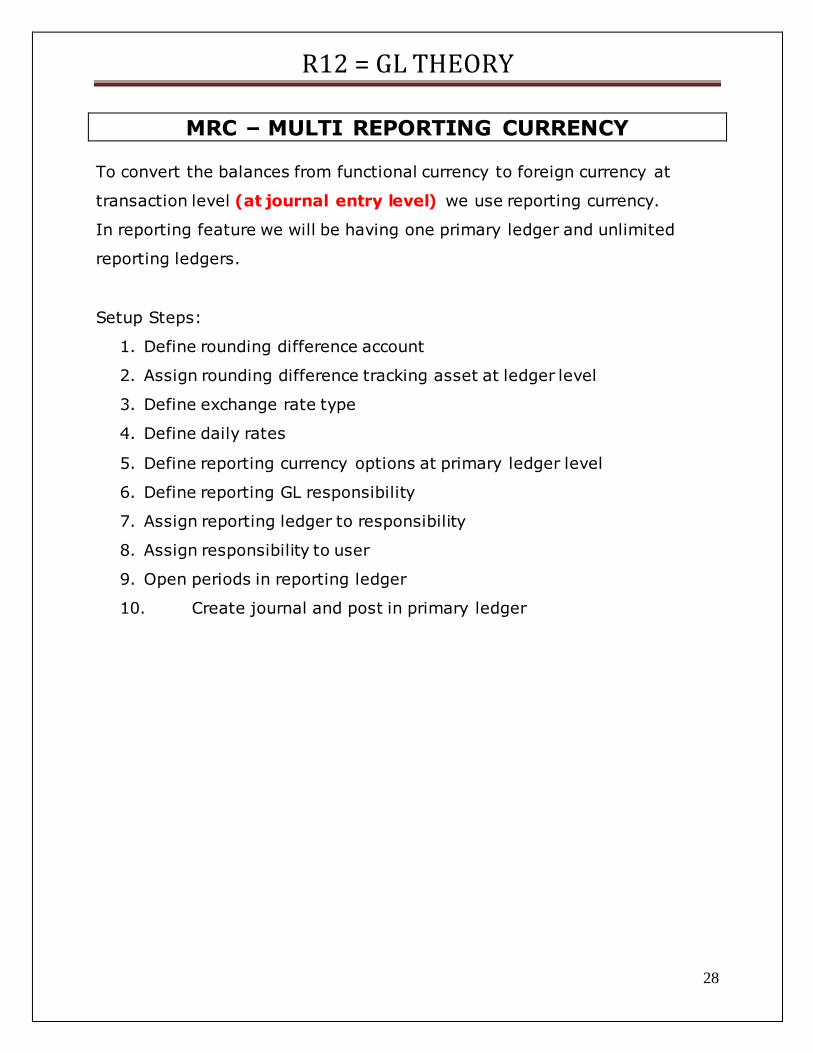
MRC – MULTI REPORTING CURRENCY
To convert the balances from functional currency to foreign currency at
transaction level (at journal entry level) we use reporting currency.
In reporting feature we will be having one primary ledger and unlimited
reporting ledgers.
Setup Steps:
1. Define rounding difference account
2. Assign rounding difference tracking asset at ledger level
3. Define exchange rate type
4. Define daily rates
5. Define reporting currency options at primary ledger level
6. Define reporting GL responsibility
7. Assign reporting ledger to responsibility
8. Assign responsibility to user
9. Open periods in reporting ledger
10. Create journal and post in primary ledger
R12 = GL THEORY
29
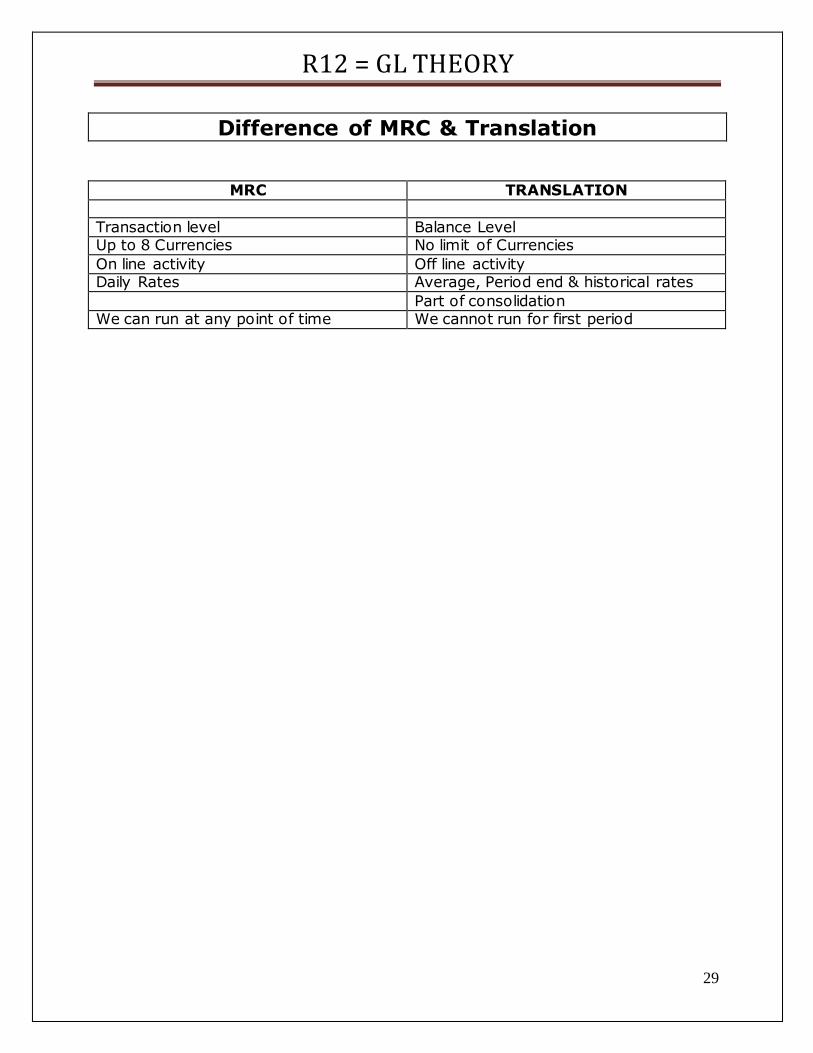
Difference of MRC & Translation
MRC TRANSLATION
Transaction level Balance Level Up to 8 Currencies No limit of Currencies
On line activity Off line activity Daily Rates Average, Period end & historical rates
Part of consolidation We can run at any point of time We cannot run for first period

R12 = GL THEORY
30
Auto Post
• We can post the journals automatically by specifying the some criteria
in Auto post criteria set.
• Criteria could be: combinations of ledger or ledger set, journal source,
journal category, balance type, and period.
• Once you define an Auto Post criteria set, run the Auto Post program
to select and post any journal batches that meet the criteria defined by
the criteria set.
• You can also schedule the Auto Post program to run at specific times
and submission intervals.
• You can submit the Auto Post program or schedule Auto Post runs
directly from the Auto Post Criteria Sets window. Alternatively, you can
use the Submit Request window.
Steps:
1. Define auto post criteria
Navigation: Set up Journal Auto Post
2. Enter Journal
Navigation: Journal Enter
Enter Journal lines
Save journal
Do not post
Check to see Auto post program completed successfully
R12 = GL THEORY
31
Auto Reversal
Auto reverse is nothing but, reversing journal automatically based on the
criteria that we specify.
Criteria could be:
Journal category
Reversal Method
Reversal period
If you routinely generate and post large numbers of journal reversals as part
of your month end closing and opening procedures, you can save time and
reduce entry errors by using Automatic Journal Reversal to automatically
generate and post your journal reversals.
Prerequisites for Auto Reversal:
• The journal balance type is Actual.
• The journal category is enabled to be Auto reversed.
• The journal is posted but not yet reversed.
• The journal reversal period is open or future enterable.
• Note: Automatic Journal Reversal reverses posted journals of
the balance type Actual. You cannot use this feature to
automate budget or encumbrance journal reversals.
R12 = GL THEORY
32
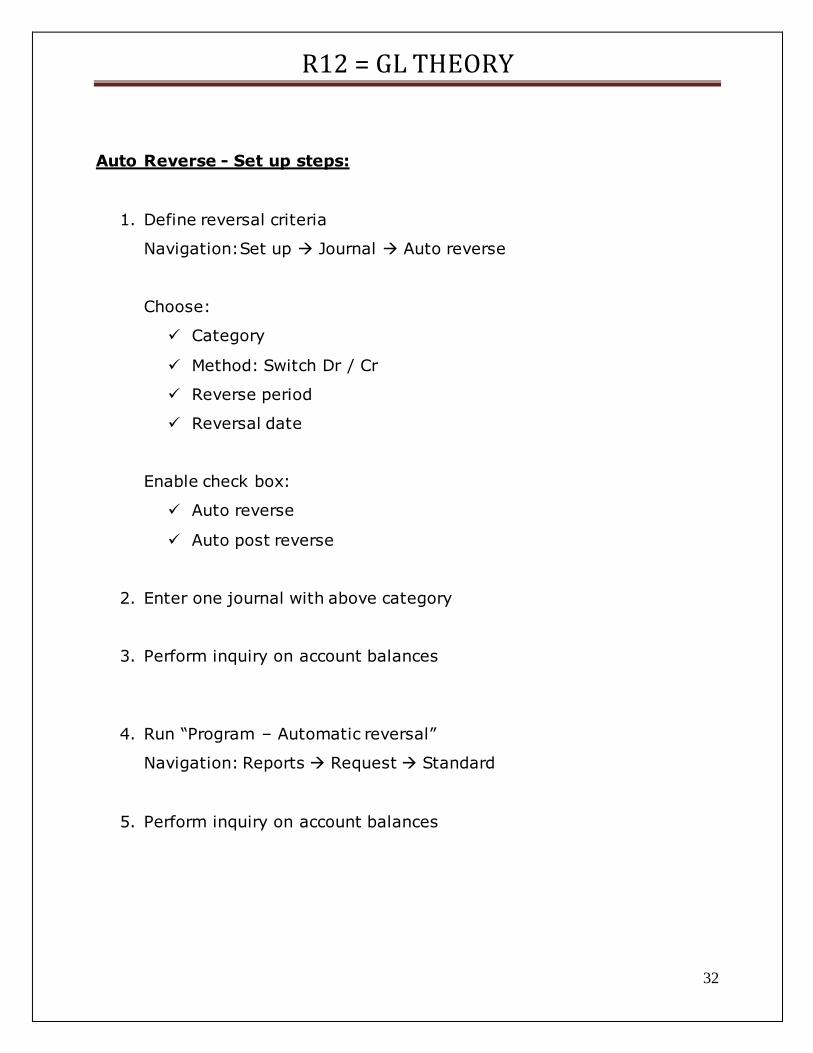
Auto Reverse - Set up steps:
1. Define reversal criteria
Navigation: Set up Journal Auto reverse
Choose:
Category
Method: Switch Dr / Cr
Reverse period
Reversal date
Enable check box:
Auto reverse
Auto post reverse
2. Enter one journal with above category
3. Perform inquiry on account balances
4. Run “Program – Automatic reversal”
Navigation: Reports Request Standard
5. Perform inquiry on account balances
R12 = GL THEORY
33
SEQUENTIAL NUMBERING
Sequential numbering is used to assign unique number to the various
transactions.
System will assign serial numbers to the data flows in to General
Ledger through sub ledger accounts based on the category.
The transactions are Journals, AP Invoices, AP payments, Bank
accounts, AR invoices and AR receipts etc.
Sequencing information is available for querying and display of
journals.
You can call either sequential numbering or Document category or
voucher numbers.
SLA provides 2 different sequence mechanism for sub ledger journal entries:
1. Accounting Sequence
2. Reporting Sequence
Accounting Sequence:
The accounting sequence is assigned to sub ledger accounting journal
entries at the time that the journal entry is completed.
Reporting sequence:
The reporting sequence is assigned to both sub ledger accounting journal
entries & General Ledger journal entries, when the General Ledger period is
closed.
This sequence is used by most of the legal reports required in some
countries, as the main sorting criteria to display the journal entries.
R12 = GL THEORY
34
Reporting sequence is optional
These two sequences are not mutually exclusive, and, can coexist in
the same journal entry
Setup Steps
1. Define “Sequential numbering” profile option at responsibility level
Navigation: System administrator Profile System
2. Define sequential numbering
Navigation: System administrator
Application Sequence numbering Define
3. Assign sequential number to the Category
Navigation: System administrator Application Sequential numbering Assign
4. Create Journal
Navigation: General ledger
Journals Enter
** Automatic: System generate number after saving journal
** Manual: user has to enter number manually
** Gapless: No gap for the journals from different sources
R12 = GL THEORY
35
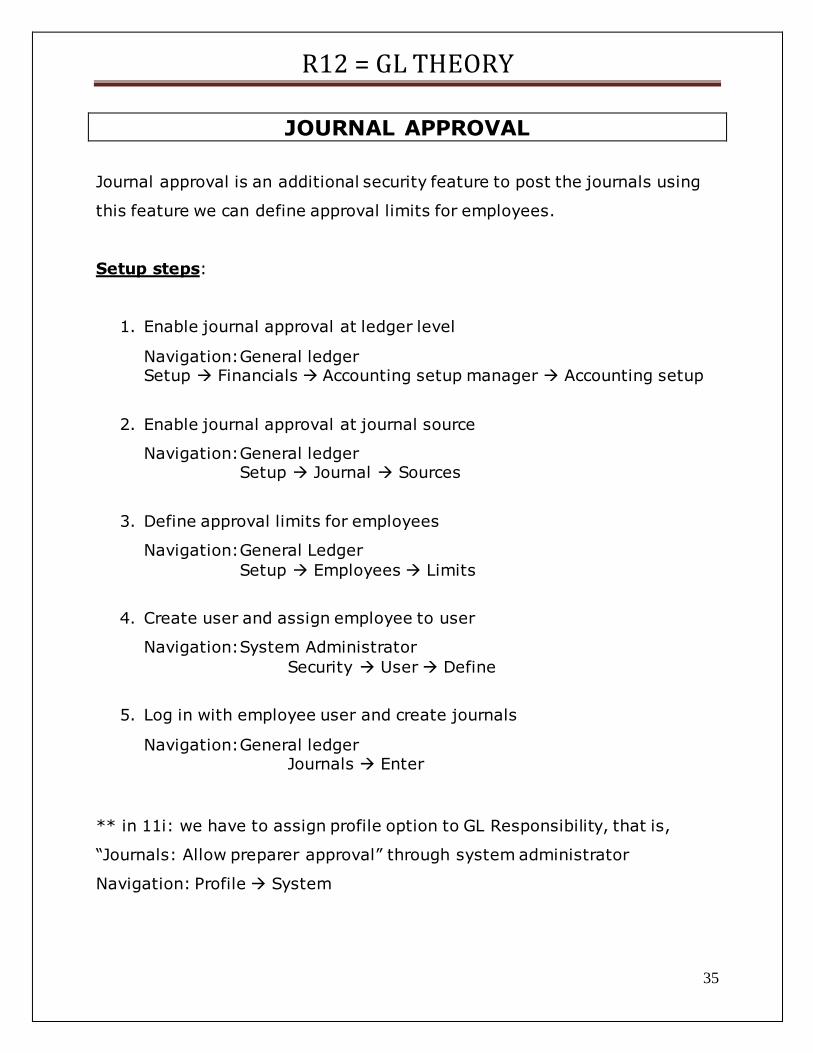
JOURNAL APPROVAL
Journal approval is an additional security feature to post the journals using
this feature we can define approval limits for employees.
Setup steps:
1. Enable journal approval at ledger level
Navigation: General ledger Setup Financials Accounting setup manager Accounting setup
2. Enable journal approval at journal source
Navigation: General ledger Setup Journal Sources
3. Define approval limits for employees
Navigation: General Ledger
Setup Employees Limits
4. Create user and assign employee to user
Navigation: System Administrator
Security User Define
5. Log in with employee user and create journals
Navigation: General ledger Journals Enter
** in 11i: we have to assign profile option to GL Responsibility, that is,
“Journals: Allow preparer approval” through system administrator
Navigation: Profile System
R12 = GL THEORY
36
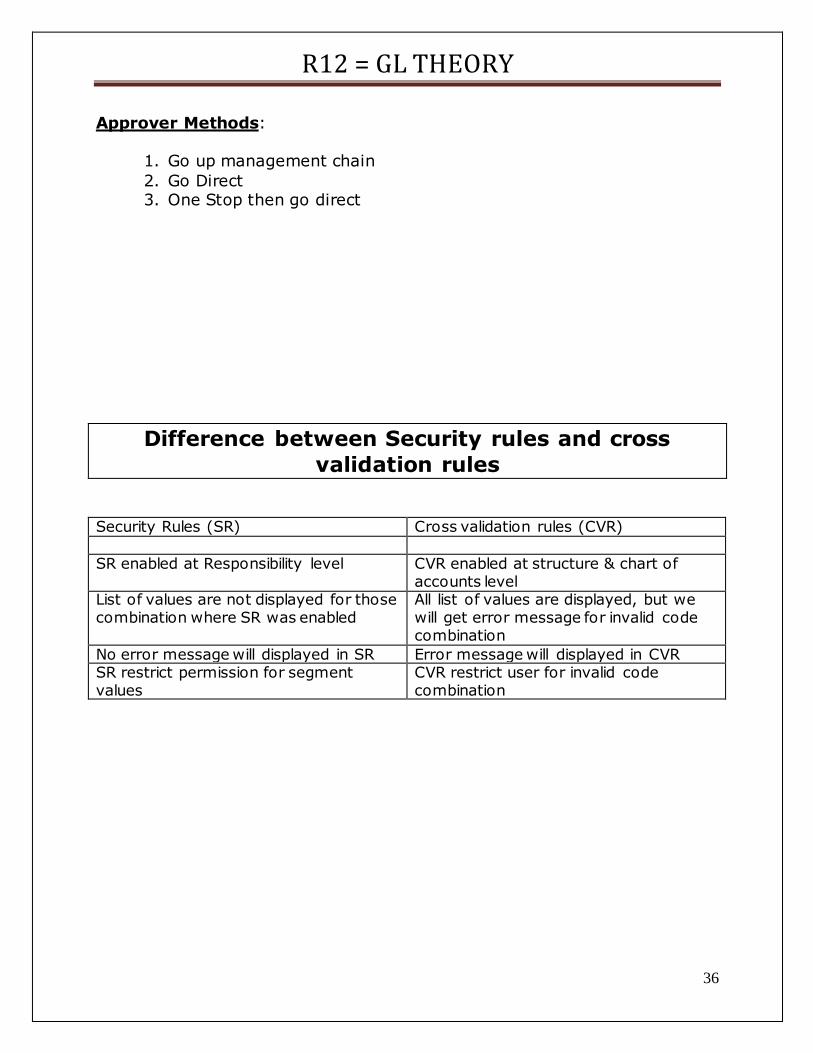
Approver Methods:
1. Go up management chain
2. Go Direct 3. One Stop then go direct
Difference between Security rules and cross
validation rules Security Rules (SR) Cross validation rules (CVR)
SR enabled at Responsibility level CVR enabled at structure & chart of
accounts level List of values are not displayed for those combination where SR was enabled
All list of values are displayed, but we will get error message for invalid code combination
No error message will displayed in SR Error message will displayed in CVR SR restrict permission for segment values
CVR restrict user for invalid code combination
R12 = GL THEORY
37
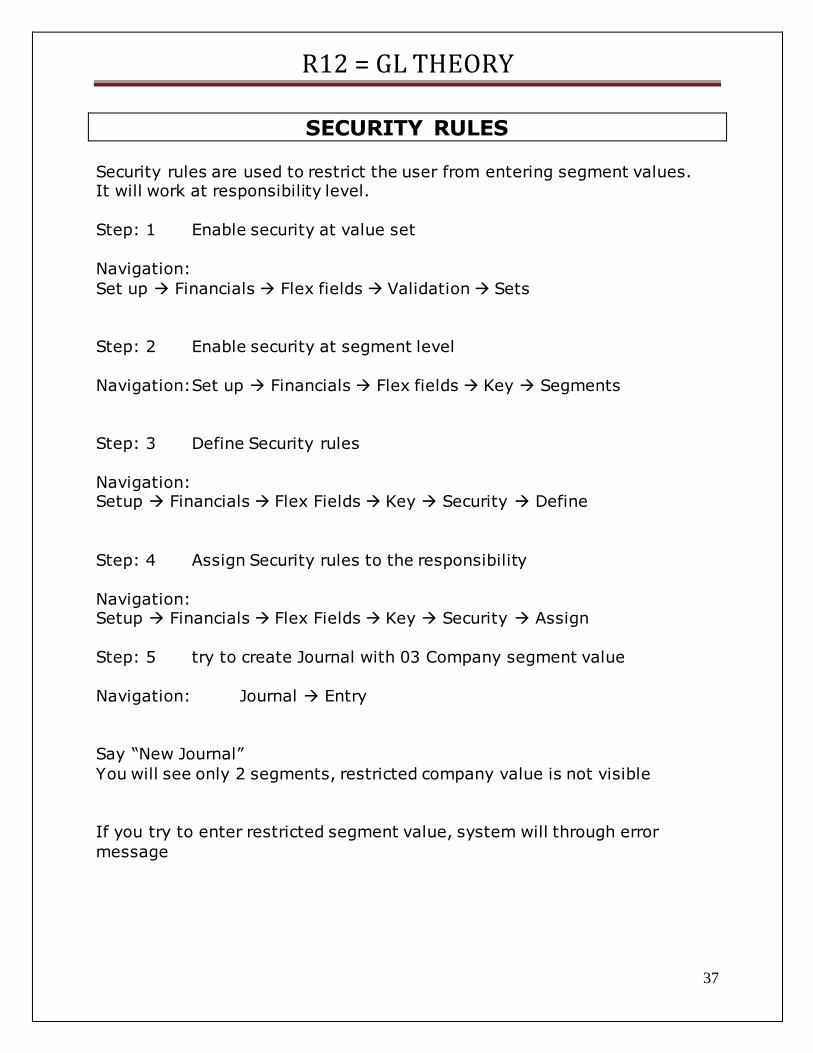
SECURITY RULES
Security rules are used to restrict the user from entering segment values. It will work at responsibility level.
Step: 1 Enable security at value set
Navigation:
Set up Financials Flex fields Validation Sets
Step: 2 Enable security at segment level
Navigation: Set up Financials Flex fields Key Segments
Step: 3 Define Security rules
Navigation: Setup Financials Flex Fields Key Security Define
Step: 4 Assign Security rules to the responsibility
Navigation: Setup Financials Flex Fields Key Security Assign
Step: 5 try to create Journal with 03 Company segment value
Navigation: Journal Entry
Say “New Journal”
You will see only 2 segments, restricted company value is not visible
If you try to enter restricted segment value, system will through error
message
R12 = GL THEORY
38
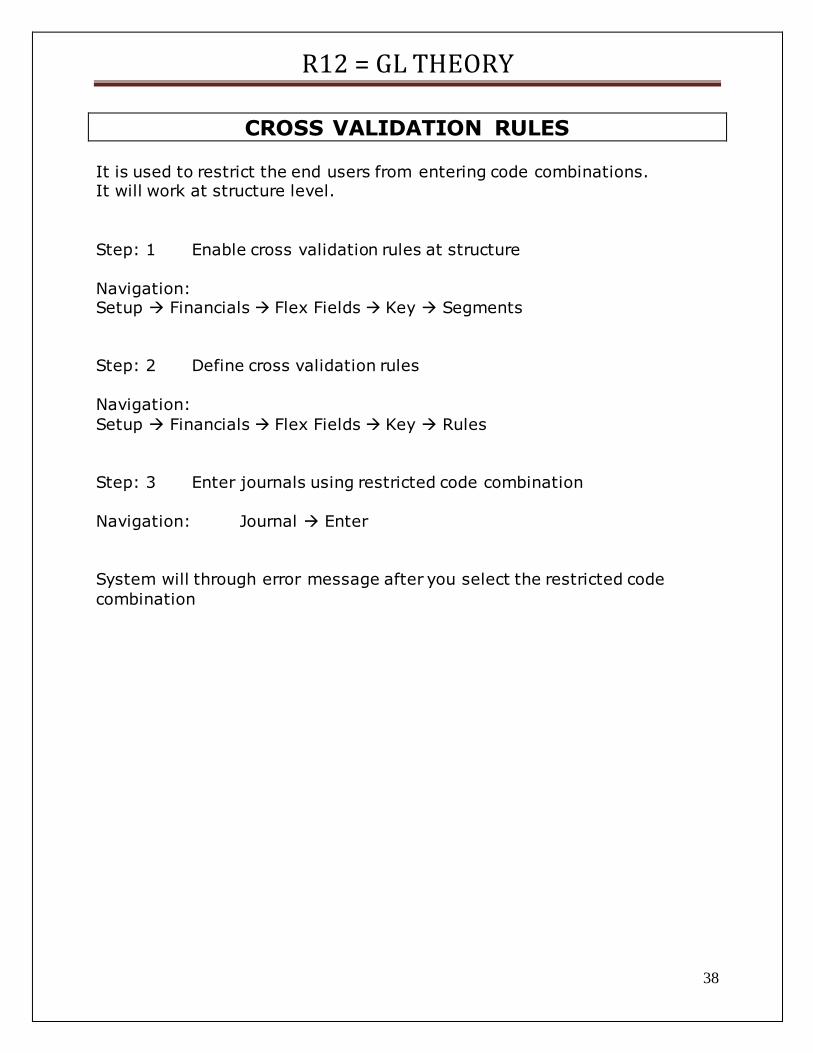
CROSS VALIDATION RULES
It is used to restrict the end users from entering code combinations. It will work at structure level.
Step: 1 Enable cross validation rules at structure
Navigation: Setup Financials Flex Fields Key Segments
Step: 2 Define cross validation rules
Navigation:
Setup Financials Flex Fields Key Rules
Step: 3 Enter journals using restricted code combination
Navigation: Journal Enter
System will through error message after you select the restricted code
combination
R12 = GL THEORY
39
DEFINITION ACCESS SET
Definition access set will work at Responsibility level.
DAS is used to provide access in 3 ways to the users for various definitions:
1. Use
2. View
3. Modify
Step: 1 Define Definition Access Set
Navigation:
Set up Financials Definition Access sets Define
Step: 2 Assign Definition Access set to Responsibility
Navigation:
Setup Financials Definition Access Sets Assign
Step: 3 Enable Security for accounting Calendar
Navigation:
Setup Financials Calendars Accounting
Query your accounting calendar
Select check box “Enable Security”
Say “Assign Access”
Choose Definition Access set
R12 = GL THEORY
40
ALIASES
Aliases are used to define the short name for account code combinations
Step: 1 Define Aliases
Navigation: Setup Financials Flex Fields Key Aliases
F11 Query your structure
Shorthand:
Select check box: Enabled Enter Max alias size
Prompt: Short Name
Go to “Alias, Descriptions” tab Enter alias name Choose values for Template
Go to “Aliases, Effective” tab Enter from date
Save
Step: 2 Compile Accounting Structure
Navigation: Set up Financials Flex Fields Key Values
Step: 3 Enter Journal to check the Alias result
Navigation: Journals Enter
R12 = GL THEORY
41
LEDGER SET
Ledger set is used to access multiple Ledgers information from single responsibility.
Using Ledger set we can group only Ledgers which are having same Chart of Accounts and same Calendars.
Step: 1 Define ledger sets
Navigation: Setup Financials Ledger Sets Enter Name and Short name
Choose: Chart of Accounts
Calendar
Default Ledger
All other ledgers you want to group
Save.
Step: 2 Assign Ledger set to responsibility Navigation: System Administrator
Profile System
Choose responsibility Profile Option: GL: Data Access Set
Choose Ledger set
If you assign both the profile options: GL Ledger Name & GL Data Access Set System will choose first Data Access set
R12 = GL THEORY
42
DESCRIPTIVE FLEX FIELD
If you want to have additional field in standard forms, DFF is used to capture
the additional information of organization.
Step: 1 Enable and Define DFF fields
Navigation:
Setup Financials Flex Fields Descriptive Segments
Query Application: General Ledger
Title: Enter Journals: Journals
Prompt: Context or Enter DFF
Enable check boxes: Required & Displayed
Click on Segments
Enter the fields
Save
Close this window
Freeze Flex Field definition
Say “Compile”
Step: 2 Enter Journal to view DFF
Navigation: Journal Enter
New Journal
Enter Journal as usual
Click on DFF check box to enter DFF fields
R12 = GL THEORY
43
CONSOLIDATION
Consolidation is used to consolidate the multiple subsidiary ledger
information into parent ledger.
In other words, Consolidation is used for preparation of financial reports of
parent and subsidiary companies.
If both companies are using different currencies, translation is required.
After translation data will be remain in the same books.
By using consolidation concept, we transfer data from subsidiary to Parent
SOB.
For Translation of fixed assets balances, revaluation is required.
The difference will go to “unrealized gain / loss” account.
The difference of 3 rates will go to “CTA Account” (Cumulative Translation
adjustment account)
There are 2 types of consolidation methods:
1. Balance
2. Transaction
** Transaction method is used when we have same currency for parent and
subsidiary ledger
** Balancing method is used when we have different currency in parent and
subsidiary ledger
R12 = GL THEORY
44
Consolidation Rules: 2
1. Segment Rules
2. Account Rules
Segment Rules again classified in to 3
1. Use roll up rule from 2. Use copy value from 3. Assign single value
** If codes are different: Co2 Co1 Use roll up rule from
** If codes are same: Do1 Do1 Use copy value from ** If structure is different Assign single value
Setup Steps:
1. Define Parent Ledger and required Subsidiary Ledgers
2. Define Parent and Subsidiary GL Responsibilities
3. Assign Ledgers to Responsibilities
4. Assign responsibilities to users
5. Define Exchange Rate type
6. Define Daily Rates
7. Complete currency translation options
8. Define consolidation mapping in the Parent ledger
9. Open periods in parent and subsidiary ledgers
10. Define Consolidation set
11. Enter and post journals in each subsidiary ledger
12. Run translation
13. Transfer data in to Parent ledger
14. Query the Consolidation journals in the Parent Ledger and post
R12 = GL THEORY
45
Step: 7
Complete Currency translation options in parent and subsidiary ledger Navigation: Setup Financials ASM Accounting Setup
Query your Ledger
Go
Update Accounting options
Click on Update of Ledger set up step
Go to “Ledger Options” tab
Under “Currency Translation options”
Choose:
Default period end rate type
Default period average rate
Cumulative Translation Adjustment Account
Say Finish
Step: 8 Define consolidations mapping in the parent ledger
Navigation: General Ledger
Consolidation Define Consolidation
Name Consolidation Mapping
Enter Description
Consolidation Attributes:
Choose Parent Ledger
Choose Subsidiary Ledger
Currency: INR
R12 = GL THEORY
46
Method: Balances
Usage: Standard
Run Options:
Select check boxes
Run Journal Import
Create Summary Journals
Auto post
Click on “Mapping”
Enter Mapping Name and Description
Choose Target & Source Chart of Accounts
Click on “Segment Rules”
Choose Target Segment Values
Choose Action: Copy value from
Choose Source Segment values
Save and close this window
Choose “mapping” in Consolidation Definition window
Step: 10 Define Consolidation Set
Navigation: General Ledger
Consolidation Define Consolidation set
** Consolidation set is used to group the consolidation mapping
R12 = GL THEORY
47
Enter Consolidation set name
Choose Parent Ledger
Method: Balances
Choose Run options
Chose Consolidation mapping
Save
Step: 12 run the translation in each subsidiary ledger
Navigation: Subsidiary ledger
Currency Translation
Step: 13 Transfer data in the parent ledger
Navigation: Parent General Ledger
Consolidation Transfer Data Set
Choose “Consolidation set”
Usage: Standard
Balance Type: Actual
Currency: INR
Method: Balances
Subsidiary:
Amount type: PTD
Choose Period
R12 = GL THEORY
48
Click on “Query consolidation” system will automatically select consolidation
mapping
Say “Transfer”
Ensure program completed normal
ROLL UP GROUP & SUMMARY ACCOUNTS Step: 1 Create summary accounts at chart of account level
Navigation: Setup Financials Flex fields Key Values
Step: 2 Create Roll up group
Navigation:
Setup Financials Flex fields Key Groups
Step: 3 Assign Roll up group to parent account at COA level
Navigation:
Setup Financials Flex fields Key values
Select “parent Account”
Go to “Value, Hierarchy, Qualifiers”
Group: Choose Roll up group
Save
Step: 4 Create Summary Accounts
Navigation: Setup Accounts Summary
R12 = GL THEORY
49
Name: Enter Name
Choose Ledger
Enter Template values:
Company: D
Department: D
Account: Choose Roll up group
Sub account: D
Product: D
Say OK
Choose: Earliest period
Save
Status: Adding
Go to View Request
Ensure program completed normal
Step: 5 Pass a journal entry with these accounts and post it
Navigation: Journal Enter
Step: 6 Inquiry of Account balances
Navigation: Inquiry Accounts
Choose Summary Template
Choose parent account
Click on “Show balances”
R12 = GL THEORY
50
Average Balances
Average balances are in General used by banking sectors.
Through this we will find out the account balances for working days
only
We have to setup working days and non working days through
“Transaction Calendar” in general ledger.
If you choose transaction calendar, system will not allow user to
record any type of transaction on non working days, and we can see
the balances on daily basis also.
Steps:
1. Set up Transaction calendar
2. Create new set of books, assign this transaction calendar to new SOB
3. At SOB √ Enable average balances and assign “Net income account”
(No, No, Revenue, No, No)
4. Create new responsibility for general ledger average balances
5. Assign profile option “GL Ledger name” to the GL responsibility
6. Assign this responsibility to user
7. Open periods in SOB
8. Enter journal to see whether non working days enabled or not
9. We can inquiry the balances by specific day wise (Only for Balance
sheet items)
R12 = GL THEORY
51
Financial Statement Generator – FSG
FSG is dynamic tool in General Ledger to build reports such as Balance
Sheet and Income Statement.
Through FSG we can build reports in simple manner without writing
any codes.
The report is consist of Rows and Columns, and is used Row set &
Column set to define rows and columns.
Steps:
1. Define row set
Navigation: Reports Define Row set
2. Define Column set
Navigation: Reports Define Column set
3. Define Report
Navigation: Reports Define Report
4. Run Report
Navigation: Reports Requests Financial
R12 = GL THEORY
52
General Ledger period Closing Procedures 1. Set the status of the first accounting period in the new fiscal year to Future Entry.
Note: The first period of the new fiscal year should not be opened until all of the year–
end processing for the last period of the current year has completed. 2. Transfer data from all of your subledgers and feeder systems to the GL_INTERFACE table. 3. Run the Journal Import process to populate the GL_JE_BATCHES, GL_JE_HEADERS, and the GL_JE_LINES tables. This can be done automatically from the subledger systems, or manually from Oracle General Ledger. 4. Close the period for each subledger. This prevents future subledger transactions from being posted to General Ledger in the same period. 5. Review the imported journal entries in Oracle General Ledger. You can review them online or in reports. Reviewing journal entries before posting minimizes the number of corrections and changes that need to be made after posting. Below is a list of useful reports: • Journal Batch Summary Report • General Journal Report • Journal Entry Report • Journal Line Report • Journal Source Report • Journals by Document Number Report (when document sequencing is used)
• Unposted Journals Report. 6. Post the imported journal entries. You can also schedule Autopost to pick up and post journals transferred from subledgers on a regular basis. This reduces the volume of posting done at month end. 8. Revalue balances to update foreign currency journals to your functional currency equivalents. 9. Post all journal entries, including: manual and reversals. 10. Update any unpostable journal entries and then post them again. Common reasons for unpostable batches include: • Control total violations
R12 = GL THEORY
53
• Posting to unopened periods
• Unbalanced journal entries
11. Run General Ledger reports, such as the Trial Balance reports, Account Analysis reports, and Journal reports. 12. Create and post adjusting entries and accruals in the adjusting period. 13. Run Trial Balance reports and other General Ledger Reports in the adjusting period after adjustments are made. 14. Close the last period of the fiscal year using the Open and Close Periods window. 15. Open the first period of the new fiscal year to launch a concurrent process to update account balances. Opening the first period of a new year automatically closes your income statement and posts the difference to your retained earnings account specified in the Set of Books form. 16. Run FSG reports for the last period of the year.