2. valley fold the paper diagonally
TRANSCRIPT
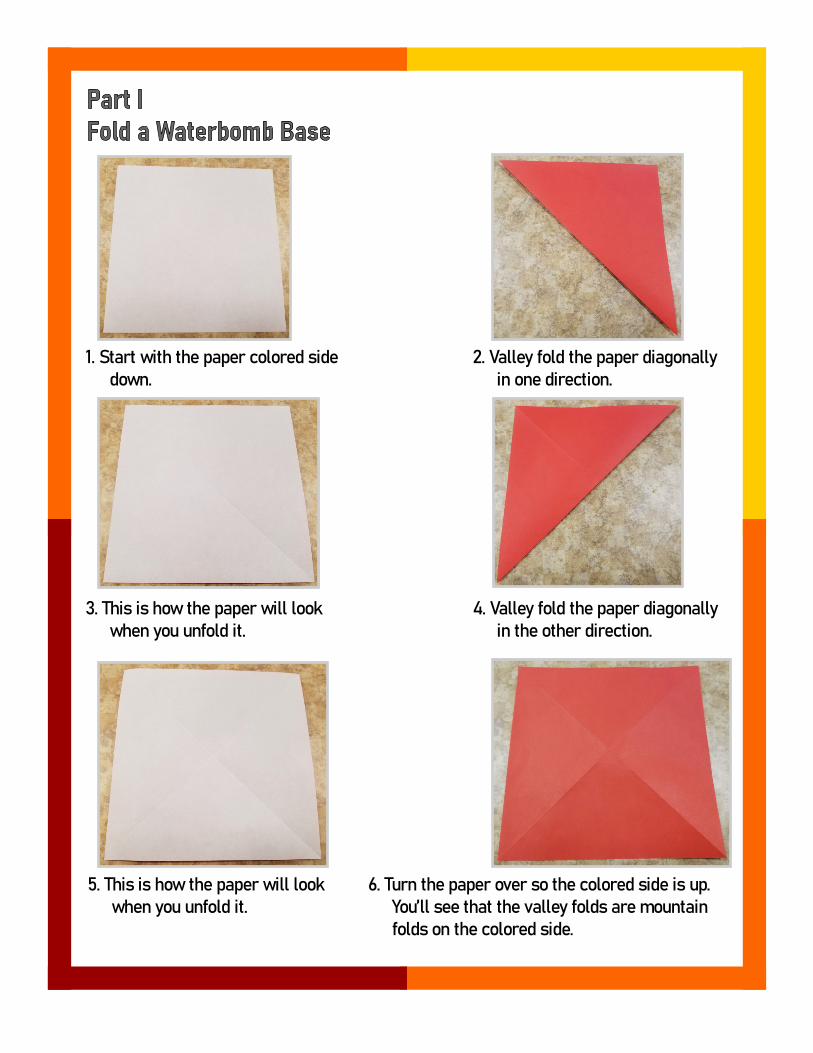
1. Start with the paper colored side down.
3. This is how the paper will look when you unfold it.
4. Valley fold the paper diagonally in the other direction.
5. This is how the paper will look when you unfold it.
6. Turn the paper over so the colored side is up. You’ll see that the valley folds are mountain folds on the colored side.
2. Valley fold the paper diagonally in one direction.
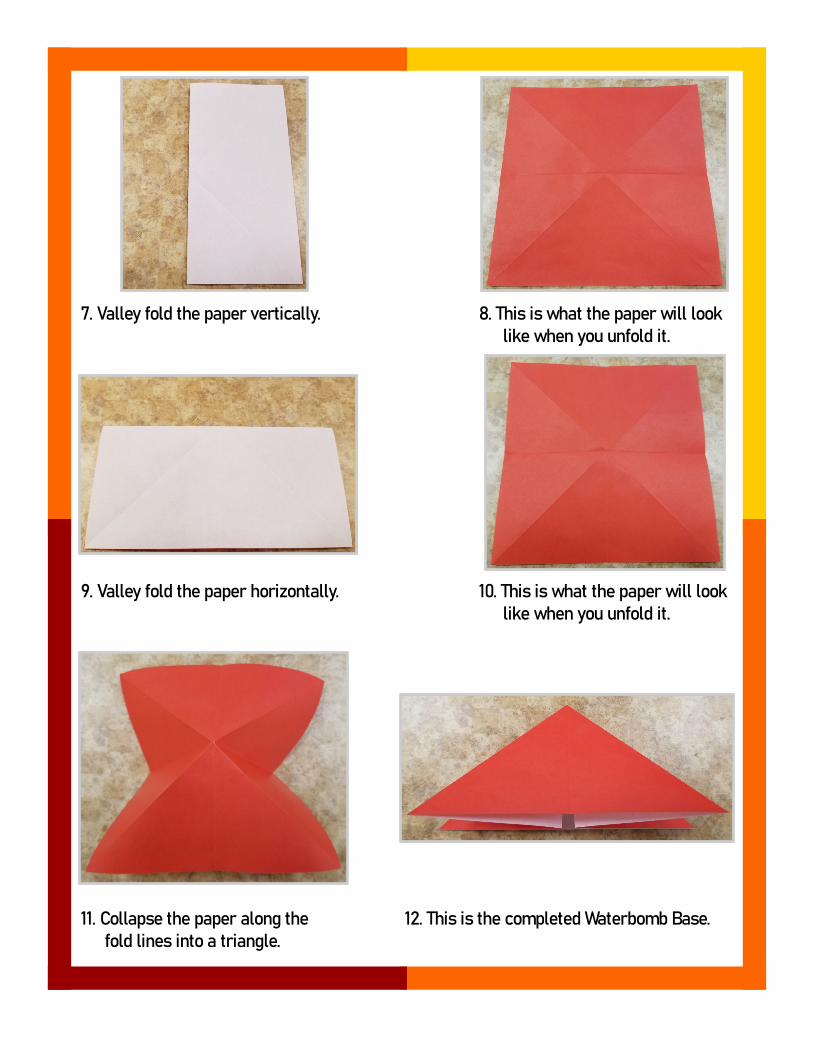
7. Valley fold the paper vertically. 8. This is what the paper will look like when you unfold it.
9. Valley fold the paper horizontally. 10. This is what the paper will look like when you unfold it.
11. Collapse the paper along the fold lines into a triangle.
12. This is the completed Waterbomb Base.
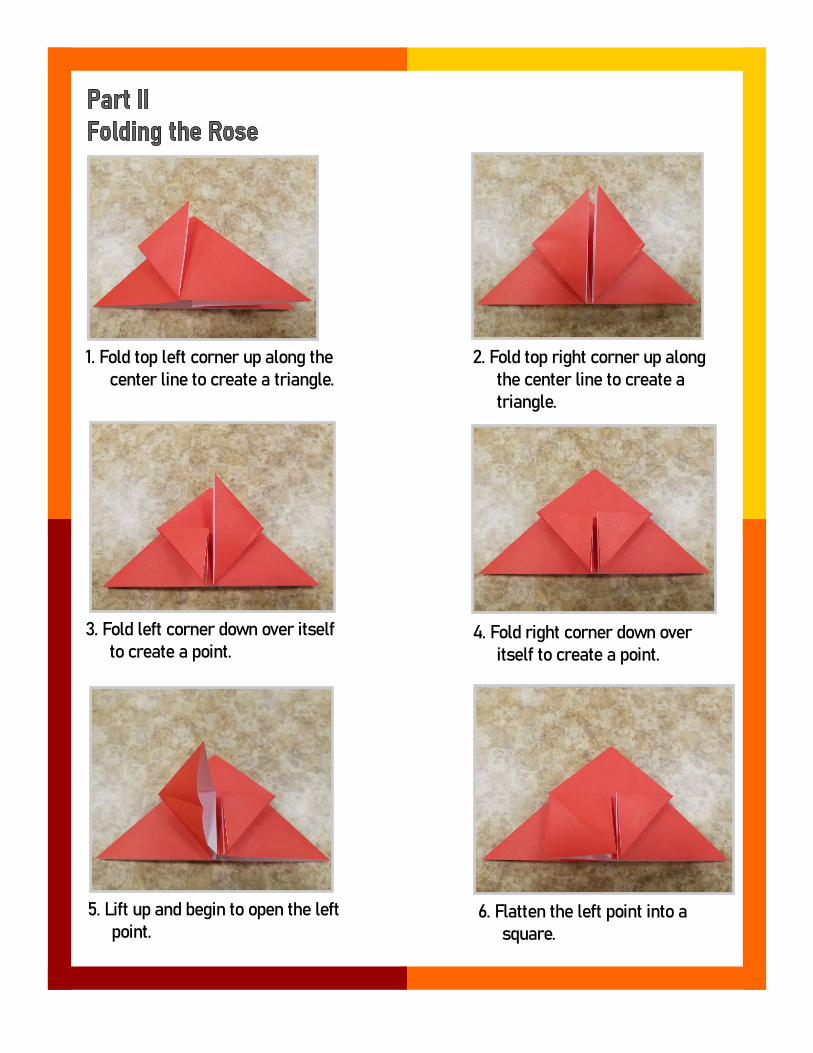
1. Fold top left corner up along the center line to create a triangle.
3. Fold left corner down over itself to create a point.
4. Fold right corner down over itself to create a point.
5. Lift up and begin to open the left point.
6. Flatten the left point into a square.
2. Fold top right corner up along the center line to create a
triangle.
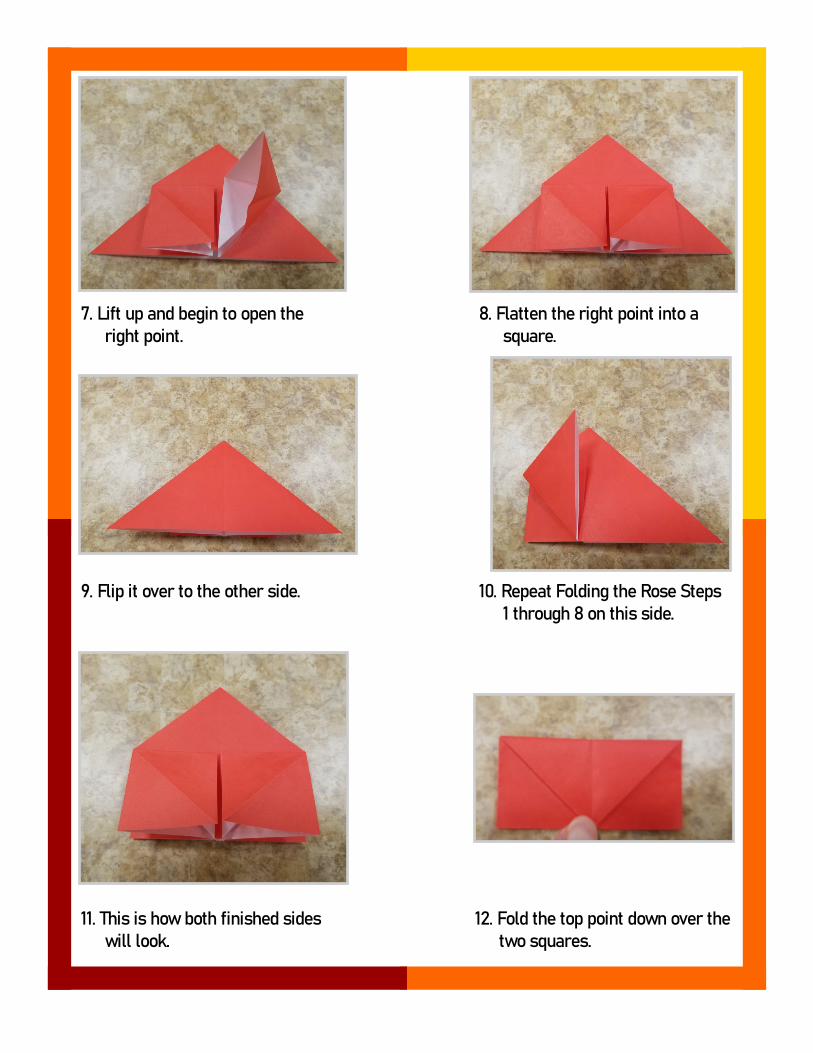
7. Lift up and begin to open the right point.
8. Flatten the right point into a square.
9. Flip it over to the other side. 10. Repeat Folding the Rose Steps 1 through 8 on this side.
11. This is how both finished sides will look.
12. Fold the top point down over the two squares.
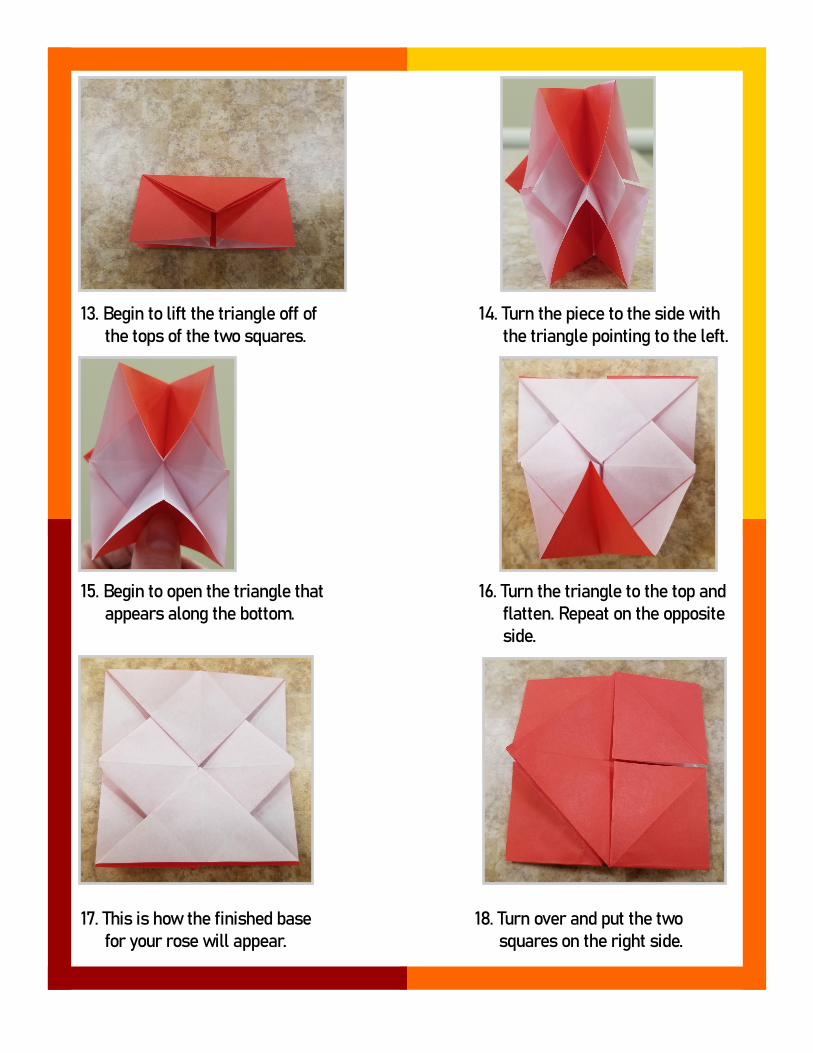
13. Begin to lift the triangle off of the tops of the two squares.
14. Turn the piece to the side with the triangle pointing to the left.
15. Begin to open the triangle that appears along the bottom.
16. Turn the triangle to the top and flatten. Repeat on the opposite side.
17. This is how the finished base for your rose will appear.
18. Turn over and put the two squares on the right side.

19. Fold the triangle in the center from left to right.
20. Stand the center triangle up to become the center of the rose.
21. Begin to open the lower left corner square.
22. Flatten along the center line.
23. Begin to open the upper right corner square.
24. Flatten along the center line to create the center of the rose.
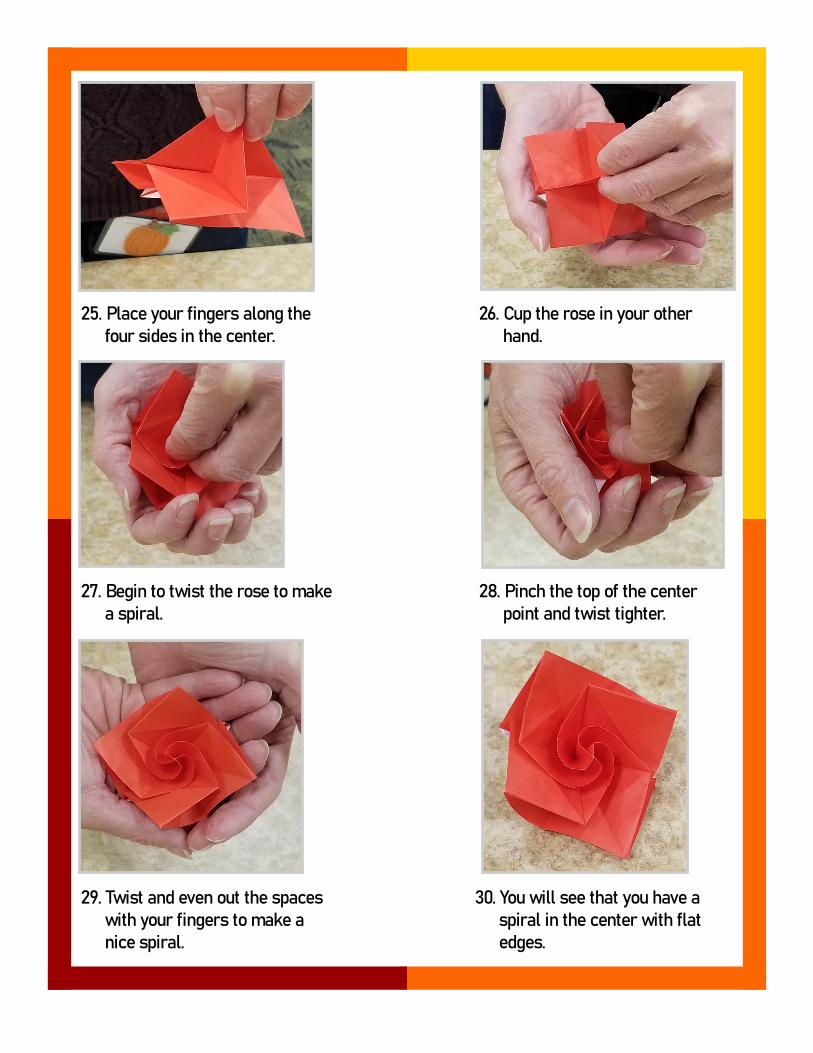
25. Place your fingers along the four sides in the center.
26. Cup the rose in your other hand.
27. Begin to twist the rose to make a spiral.
28. Pinch the top of the center point and twist tighter.
29. Twist and even out the spaces with your fingers to make a nice spiral.
30. You will see that you have a spiral in the center with flat edges.

1. Begin curling the petal points around the bamboo skewer.
3. Reshape the curled edges and central spiral as needed.
4. To create a stem, take a length of floral wire.
5. Bend one end of the floral wire into a small hook.
6. Bend the wire below the hook 90 degrees.
2. Curl the points closest to the central spiral with the bamboo skewer.

25. Turn the rose over. 26. Insert the wire hook under a folded seam.
27. Move the wire stem to the center of the rose.
28. Pinch the space above the stem and secure with a piece of tape.
29. Your beautiful rose is now ready to be part of a floral
arrangement.
30. Follow all of these steps again to create your other origami
roses!

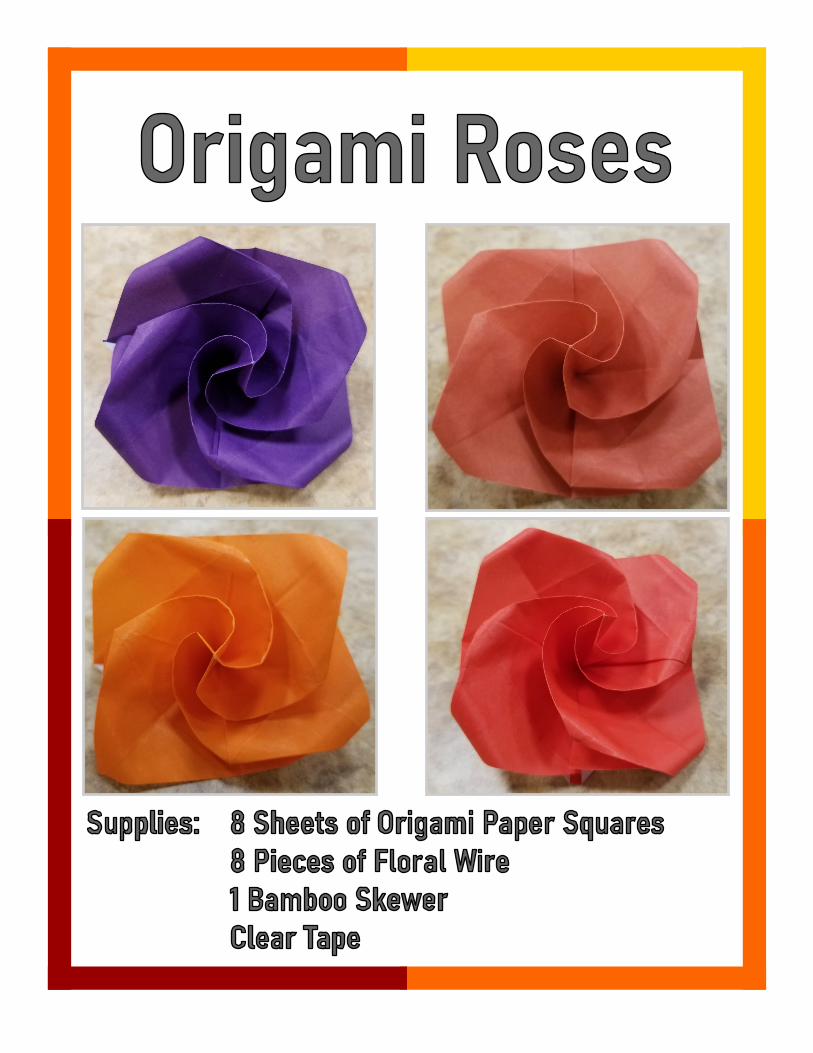
Alternate Finishing Options: Join each of your origami roses on their stems to create a garland or a wreath. You could also simply arrange your origami roses on a surface or place them in a large flat bowl for another centerpiece option. Origami roses would be a nice touch in place of a bow on a gift. You could even add origami roses to different hair accessories for an elegant touch.
I picked autumnal colors for the season, but the possibilities for the color combinations of the roses that you could create are endless. Change the color scheme to make party decorations or favors for your events. Brighten the look of your home every season. I hope that you enjoyed learning how to make origami roses. Happy folding!
Book Source: Beautiful Origami Flowers: 23 blooms to fold by Anca Oprea for the Waterbomb Base instructions.
YouTube Video Source: Origami Easy - Origami Flower Tutorial produced by Craft TV - Origami
This origami rose was designed by Fumiaki Shingu.
https://www.youtube.com/watch?v=jm_4hFPFAOU
Origami Book List for Teens and Adults Easy Origami by Didier Boursin LaFosse & Alexander's Origami Jewelry: easy-to-make paper pendants, bracelets, necklaces
and earrings by Michael G. LaFosse Beautiful Origami Flowers: 23 blooms to fold by Anca Oprea Paper Blooms: 25 extraordinary flowers to make for weddings, celebrations & more by Jeffery
Rudell Crease + Fold: innovative origami projects anyone can make by Sok Song
Origami Book List for Children Sort-of-Difficult Origami by Chris Alexander Difficult Origami by Chris Alexander ART2-D2's Guide to Folding and Doodling by Tom Angleberger Folding for Fun: origami for ages 4 and up by Didier Boursin Origami for Easter by Jasmine Brooke Origami for Halloween by Robyn Hardyman Origami for Christmas by Robyn Hardyman Super Simple Japanese Art: fun and easy art from around the world by Alex Kuskowski Easy Origami by Mary Meinking Not-Quite-So-Easy Origami by Mary Meinking Origami Pets by Lisa Miles Origami Birds and Butterflies by Lisa Miles Origami Dinosaurs by Lisa Miles Batman Origami: amazing folding projects featuring the dark knight by John Montroll More Halloween Origami by Ruth Owen Make Origami Mammals by Ruth Owen Make Origami Insects and Spiders by Ruth Owen More Hanukkah Origami by Ruth Owen More Christmas Origami by Ruth Owen Polar Animals by Ruth Owen Ocean Animals by Ruth Owen Mountain Animals by Ruth Owen Jungle Animals by Ruth Owen Grassland Animals by Ruth Owen Origami A-B-C by David Petty Super Simple Paper Airplanes by Nick Robinson Holiday Origami by Fumiaki Shingu
Directions and Photographs by: Julie Marchand Public Services Professional