xpc user guide -...
TRANSCRIPT

Forthe:X27Series
XPC User Guide

Shuttle®
XPCInstallationGuideCopyright
©2008byShuttle®Inc.AllRightsReserved.
Nopartofthispublicationmaybereproduced,transcribed,storedinaretrievalsystem,translatedintoanylanguage,ortransmittedinanyformorbyanymeanssuchaselectronic,mechanical,magnetic,optical,chemical,photocopy,manual,orotherwise,withoutpriorwrittenpermissionfromShuttle®Inc.
Otherbrandsandproductnamesusedhereinareforidentificationpurposesonlyandmaybetrademarksoftheirrespectiveowners.
DisclaimerShuttle®Inc.shallnotbeliableforanyincidentalorconsequentialdamagesresultingfromtheperformanceoruseofthisproduct.
Shuttle® Inc. makes no representation or warranty regarding the contents of this ma-nual.Informationinthismanualhadbeencarefullycheckedforaccuracy;however,noguaranteeisgivenastothecorrectnessofthecontents.Forcontinuingproductimprove-ment,Shuttle®Inc.reservestherighttorevisethemanualormakechangestothespeci-ficationsofthisproductatanytimewithoutnoticeandobligationtoanypersonorentityregardingsuchchange.Theinformationcontainedinthismanualisprovidedforgeneralusebycustomers.
ThisdevicecompliestoPart��oftheFCCRules.Operationissubjecttothefollowingtwoconditions:
�.Thisdevicemaynotcauseharmfulinterference.
2.Thisdevicemustwithstandanybackgroundinterferenceincludingthosethatmay causeundesiredoperation.
TrademarksShuttleisaregisteredtrademarkofShuttleInc.
IntelandPentiumareregisteredtrademarksofIntelCorporation.PS/2isaregisteredtrademarkofIBMCorporation.AWARDisaregisteredtrademarkofAwardSoftwareInc.MicrosoftandWindowsareregisteredtrademarksofMicrosoftCorporation.
GeneralNoticeOtherbrandandproductnamesusedhereinareforidentificationpurposesonlyandmaybetrademarksoftheirrespectiveowners.

Safety InformationRead the following precautions before setting up a Shuttle XPC.
Installation Notices
Do not place this device underneath heavy loads or in an unstable position.
Do not expose this device to high levels of direct sunlight, high-humidity or wet conditions.
Do not use or expose this device around magnetic fields as magnetic interference may affect the performance of the device.
Do not block the air vents to this device or impede the airflow in any way.
CAUTIONIncorrectly replacing the battery may damage this computer. Replace only with the same or equivalent as recommended by Shuttle. Dispose of used batteries according to the manufacturer's instructions.
Laser compliance statementThe optical disc drive in this PC is a laser product. The drive's classification label is located on the drive.
CLASS 1 LASER PRODUCTCAUTION: INVISIBLE LASER RADIATION WHEN OPEN. AVOID EXPOSURE TO BEAM.

Driver and Software Installation...............................................................................1
Motherboard Driver CD ........................................................................................1
Install Motherboard Software ..........................................................................2
Appendix ....................................................................................................................3
Enter the BIOS .......................................................................................................3
The Main Menu ......................................................................................................4
Standard CMOS Features ..............................................................................6
Advanced BIOS Features ...............................................................................9
Advanced Chipset Features ..........................................................................12
Integrated Peripherals .................................................................................14
Power Management Setup ...........................................................................17
PC Health Status ..........................................................................................19
Load Default Settings ...................................................................................20
Set Supervisor/User Password .....................................................................20
Save & Exit Setup .........................................................................................21
Exit Without Saving ......................................................................................21
TABLE OF CONTENTS
�
Engl
ish
MotherboardDriverCD
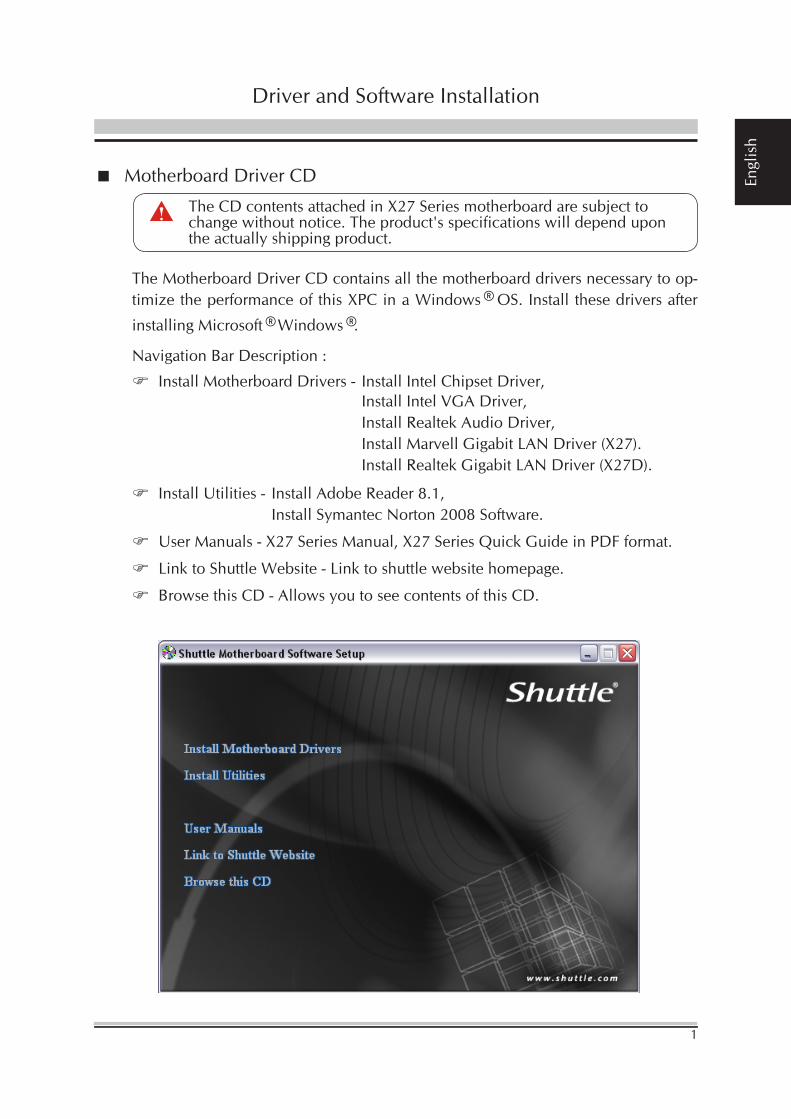
TheMotherboardDriverCDcontainsallthemotherboarddriversnecessarytoop-timizetheperformanceofthisXPCinaWindows®OS.Installthesedriversafter
installingMicrosoft®Windows®.
NavigationBarDescription:
InstallMotherboardDrivers- InstallIntelChipsetDriver, InstallIntelVGADriver, InstallRealtekAudioDriver, InstallMarvellGigabitLANDriver(X27). InstallRealtekGigabitLANDriver(X27D).
InstallUtilities- InstallAdobeReader8.�, InstallSymantecNorton2008Software.
UserManuals-X27SeriesManual,X27SeriesQuickGuideinPDFformat.
LinktoShuttleWebsite-Linktoshuttlewebsitehomepage.
BrowsethisCD-AllowsyoutoseecontentsofthisCD.
DriverandSoftwareInstallation
TheCDcontentsattachedinX27Seriesmotherboardaresubjecttochangewithoutnotice.Theproduct'sspecificationswilldependupontheactuallyshippingproduct.

2
English InstallMotherboardSoftware
InserttheattachedCDintoyourCD-ROMdrive.TheCDAutoRunscreenshouldappear.IftheAutoRunscreendoesnotappear,doubleclickonAutoruniconinMyComputertobringupShuttleMainboardSoftwareSetupscreen.
Clickthe“InstallMotherboardDrivers“bar.Individuallyinstallthefollowingdrivers.
InstallIntelChipsetDriver
InstallIntelVGADriver
InstallRealtekAudioDriver
InstallMarvellGigabitLANDriver(X27).
InstallRealtekGigabitLANDriver(X27D).
Returntopreviouspage
X27
X27D
�
Engl
ish
Appendix
BIOS SettingsTheX27SeriesBIOSROMhasabuilt-inSetupprogramthatallowsuserstomodifybasicsystemconfiguration.Thisinformationisstoredinbattery-backedRAMsothatitretainsSetupinformationevenifthesystempoweristurnedoff.
ThesystemBIOSmanagesandexecutesvarietyofhardwarerelatedfunctionsin-cluding:
Systemdateandtime
Hardwareexecutionsequence
Powermanagementfunctions
Allocationofsystemresources
Enter the BIOS
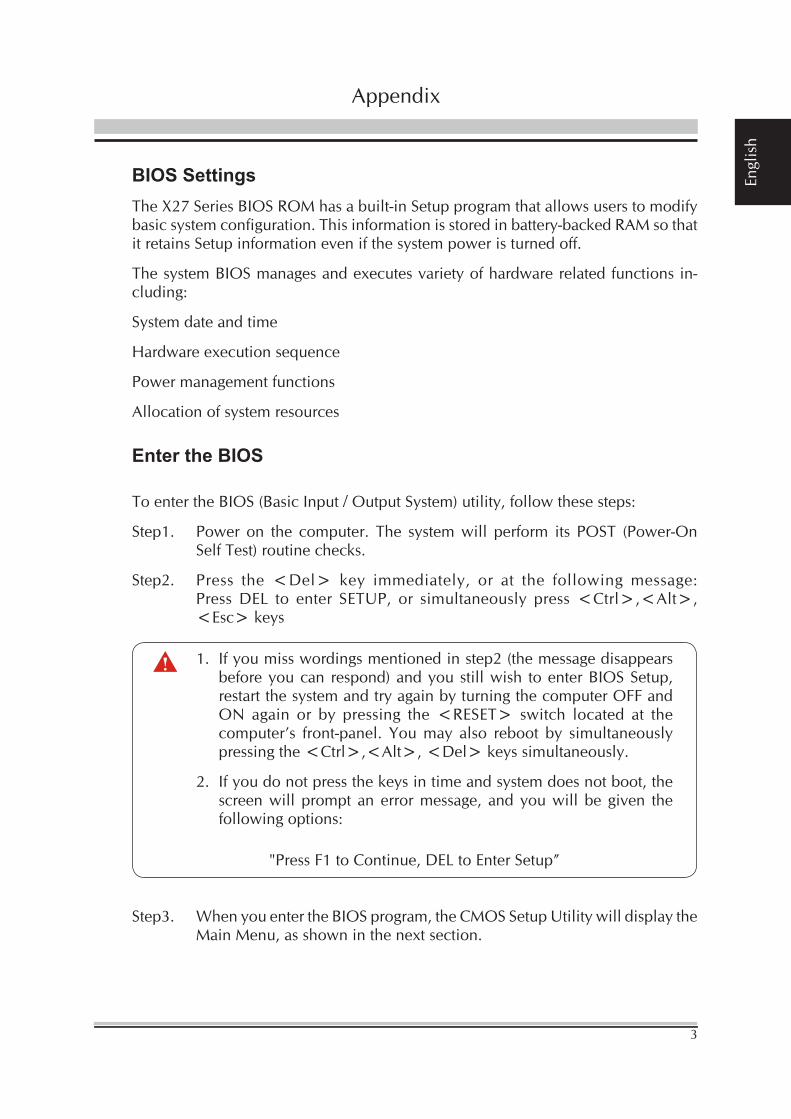
ToentertheBIOS(BasicInput/OutputSystem)utility,followthesesteps:
Step�. Power on the computer. The system will perform its POST (Power-On SelfTest)routinechecks.
Step2. Press the <Del> key immediately, or at the following message: Press DEL to enter SETUP, or simultaneously press <Ctrl>,<Alt>, <Esc>keys
�. Ifyoumisswordingsmentionedinstep2(themessagedisappears beforeyoucan respond)andyoustillwish toenterBIOSSetup, restartthesystemandtryagainbyturningthecomputerOFFand ON again or by pressing the <RESET> switch located at the computer’s front-panel. You may also reboot by simultaneously pressingthe<Ctrl>,<Alt>,<Del>keyssimultaneously.
2. Ifyoudonotpressthekeysintimeandsystemdoesnotboot,the screenwill prompt anerrormessage, andyouwill be given the followingoptions:
"PressF�toContinue,DELtoEnterSetup”
Step�. WhenyouentertheBIOSprogram,theCMOSSetupUtilitywilldisplaythe MainMenu,asshowninthenextsection.
�
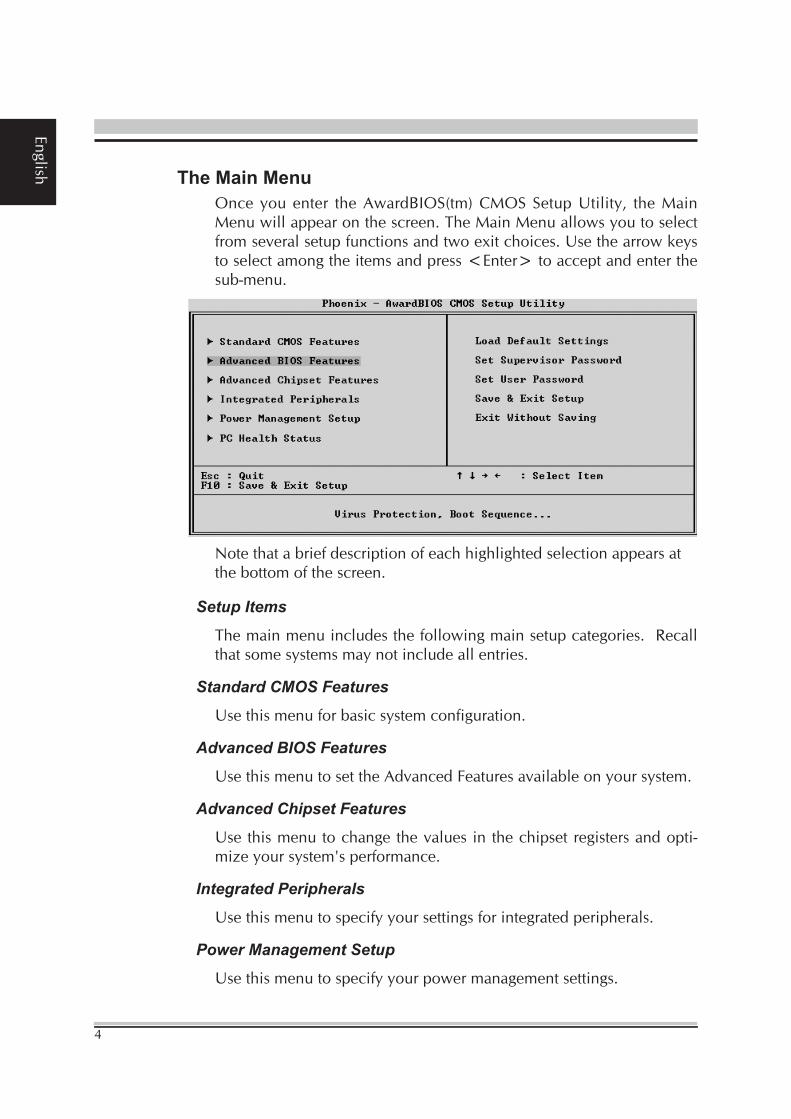
English The Main MenuOnce you enter the AwardBIOS(tm) CMOS Setup Utility, the MainMenuwillappearonthescreen.TheMainMenuallowsyoutoselectfromseveralsetupfunctionsandtwoexitchoices.Usethearrowkeystoselectamongtheitemsandpress<Enter>toacceptandenterthesub-menu.
Notethatabriefdescriptionofeachhighlightedselectionappearsatthebottomofthescreen.
Setup Items
Themainmenuincludesthefollowingmainsetupcategories.Recallthatsomesystemsmaynotincludeallentries.
Standard CMOS Features
Usethismenuforbasicsystemconfiguration.
Advanced BIOS Features
UsethismenutosettheAdvancedFeaturesavailableonyoursystem.
Advanced Chipset Features
Usethismenutochangethevaluesinthechipsetregistersandopti-mizeyoursystem'sperformance.
Integrated Peripherals
Usethismenutospecifyyoursettingsforintegratedperipherals.
Power Management Setup
Usethismenutospecifyyourpowermanagementsettings.

�
Engl
ish
PC Health StatusThisentrydisplaysthecurrentsystemtemperature,Voltage,andFANsettings.
Load Default SettingsUsethismenutoloadtheBIOSdefaultvaluesthatarefactory-setforoptimal systemoperation. WhileAward has designed the customBIOS tomaximizeperformance, the factory has the right to changethesedefaultstomeetusers'needs.
Set Supervisor / User PasswordUsethismenutochange,set,ordisablepasswordprotection.Thisal-lowsyoutolimitaccesstothesystemandSetup,oronlytoSetup.
Save & Exit SetupSaveCMOSvaluechangesinCMOSandexitfromsetup.
Exit Without SavingAbandonallCMOSvaluechangesandexitfromsetup.

�
English
The items in the Standard CMOS SetupMenu are divided into sev-eral categories. Each category includes none, one or more than onesetup items. Use the arrowkeys tohighlight the itemand thenusethe<PgUp>or<PgDn>keystoselectthevalueyouwantineachitem.
Date
<Month><DD><YYYY>
Setthesystemdate.Notethat the'Day'automaticallychangeswhenyousetthedate.
Time
<HH:MM:SS>
Thetimeisconvertedbasedonthe2�-hourmilitary-timeclock.
Forexample,�p.m.is�7:00:00.
IDEChannel0Master/Slave/SerialATA�/2Channel
Optionsareinitssub-menu.
Press<Enter>toenterthesub-menuofdetailedoptions.
HaltOn
SelectthesituationinwhichyouwanttheBIOStostopthePOSTpro-cessandnotifyyou.
Thechoice:AllErrors,NoErrors,All,ButKeyboard.
Standard CMOS Features

7
Engl
ish
BaseMemory
Displaystheamountofconventionalmemorydetectedduringbootup.
Thechoice:N/A.
ExtendedMemory
Displaystheamountofextendedmemorydetectedduringbootup.
Thechoice:N/A.
TotalMemory
Displaysthetotalmemoryavailableinthesystem.
Thechoice:N/A.
******************************************************
IDE AdaptersThe IDE adapters control the hard disk drive. Use a separate sub-menutoconfigureeachharddiskdrive.
IDEHDDAuto-Detection
Press<Enter>toauto-detectHDDonthischannel.Ifdetectionissuccessful,itfillstheremainingfieldsonthismenu.
PressEnter
IDEChannel0Master/Slave/SerialATA�/2Channel
Selecting'manual'letsyousettheremainingfieldsonthisscreenandselectthetypeoffixeddisk."UserType"willletyouselectthenum-berofcylinders,heads,etc.,Note:PRECOMP=�����meansNONE!
Thechoice:None,Auto,orManual.
AccessMode
Choosetheaccessmodeforthisharddisk.
Thechoice:CHS,LBA,Large,orAuto.
Capacity
Diskdrive capacity (Approximated).Note that this size is usuallyslightlygreaterthanthesizeofaformatteddiskgivenbyadiskcheck-ingprogram.
Auto-Displayyourdiskdrivesize.
Thefollowingoptionsareselectableonlyifthe'IDEPrimaryMaster'itemissetto'Manual',andAccessmodesettoCHS.
8
English Cylinder
Setthenumberofcylindersforthisharddisk.
Min=0,Max=�����
Head
Setthenumberofread/writeheads.
Min=0,Max=2��
Precomp
Warning:Settingavalueof�����meansnoharddisk.
Min=0,Max=�����
Landingzone
SettheLandingzonesize.Min=0,Max=�����
Sector
Numberofsectorpertrack.
Min=0,Max=2��
******************************************************

�
Engl
ish
Thissectionallowsyoutoconfigureyoursystemforbasicoperation.Youhavetheopportunitytoselectthesystem'sdefaultspeed,boot-upsequence,keyboardoperation,shadowing,andsecurity.
CPUFeature
Optionsareinitssub-menu.
Press<Enter>toenterthesub-menuofdetailedoptions.
DelayPriortoThermal
ThisitemisselectDelayPriortoThermal.
TheChoice:�Min,8Min,��Minor�2Min.
LimitCPUIDMaxVal
SetLimitCPUIDMaxValto�,ShouldBe"Disabled"forWinXp.
TheChoice:DisabledorEnabled.
SomeolderO.S.'s(Win�8,WinMe..)cannothandleaCPUIDMaxValgreaterthan�.Pleasechoose"Enabled"ifyouuseoneofthoseO.S.IfyourO.S.isWinXPorWin2000,wesuggestyou"Disabled"theitem.
C�EFunction
Whendisabled,processorcan't transitionstoa lowercorefrequencyandvoltage.
TheChoice:AutoorDisabled.
Advanced BIOS Features
�0
English ExecuteDisableBitWhendisabled,forcestheXDfeatureflagtoalwaysreturn0.
TheChoice:EnabledorDisabled.
HardDiskBootPriority
ThisitemallowsyoutoselectHardDiskBookDevicePriority.
BiosWriteProtect
ThisitemallowsyoutoenableordisabletheBiosWriteProtect.IfyouwanttoflashBIOS,youmustsetit[Disabled].
Thechoice:EnabledorDisabled.
QuickPowerOnSelfTestThisitemspeedsupPower-OnSelfTest(POST)afteryoupoweronthecomputer.Ifitissettoenabled,BIOSwillshortenorskipsomecheckitemsduringPOST.
Thechoice:EnabledorDisabled.
First/Second/ThirdBootDeviceTheBIOSattemptstoloadtheoperatingsystemfromthedevicesinthesequenceselectedintheseitems.
TheChoice:LS�20,HardDisk,CDROM,ZIP�00,USB-FDD, USB-ZIP,USB-CDROM,LANorDisabled.
SecurityOption
Selectwhether thepassword is requiredevery timethesystembootsoronlywhenyouentersetup.
SystemThesystemwillnotbootandaccesstoSetupwillbedeniedifthecorrectpasswordisnotenteredpromptly.
SetupThesystemwillboot,butaccesstoSetupwillbedeniedifthecorrectpasswordisnotenteredpromptly.
Thechoice:SystemorSetup.
Todisabledsecurity,selectPASSWORDSETTINGatMainMenu,andthenyouwillbeaskedtoenterpassword.Don'ttypeanythingandjustpress<Enter>;itwilldisablesecurity.Oncethesecurityisdisabled,thesystemwillboot,andyoucanenterSetupfreely.

��
Engl
ish
HDDSecurityFreezeLock
Thisitemallowsyoutoenable/disabletheHDDSecurityFreezeLock.Enabled-preventsanyexternalapplicationfromlockingHarddriveexceptforBIOS.
Thechoice:EnabledorDisabled.
FullScreenLOGOShow
Thisitemallowsyoutoenable/disabletheFullScreenLOGOShow.
Thechoice:EnabledorDisabled.
�2
English
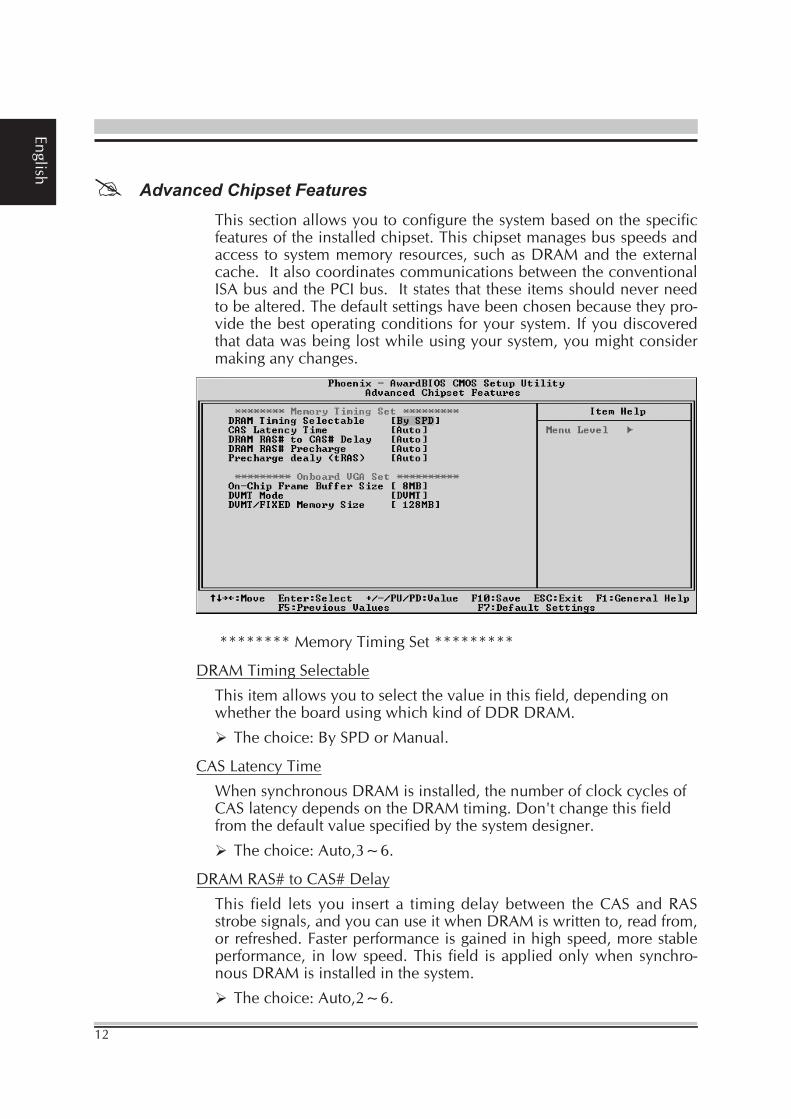
Thissectionallowsyoutoconfigurethesystembasedonthespecificfeaturesoftheinstalledchipset.Thischipsetmanagesbusspeedsandaccess tosystemmemoryresources,suchasDRAMandtheexternalcache.ItalsocoordinatescommunicationsbetweentheconventionalISAbusandthePCIbus.Itstatesthattheseitemsshouldneverneedtobealtered.Thedefaultsettingshavebeenchosenbecausetheypro-videthebestoperatingconditions foryoursystem. Ifyoudiscoveredthatdatawasbeinglostwhileusingyoursystem,youmightconsidermakinganychanges.
********MemoryTimingSet*********
DRAMTimingSelectable
Thisitemallowsyoutoselectthevalueinthisfield,dependingonwhethertheboardusingwhichkindofDDRDRAM.
Thechoice:BySPDorManual.
CASLatencyTime
WhensynchronousDRAMisinstalled,thenumberofclockcyclesofCASlatencydependsontheDRAMtiming.Don'tchangethisfieldfromthedefaultvaluespecifiedbythesystemdesigner.
Thechoice:Auto,�~�.
DRAMRAS#toCAS#Delay
This field lets you insert a timingdelaybetween theCAS andRASstrobesignals,andyoucanuseitwhenDRAMiswrittento,readfrom,orrefreshed.Fasterperformanceisgainedinhighspeed,morestableperformance, in lowspeed.This field isappliedonlywhensynchro-nousDRAMisinstalledinthesystem.
Thechoice:Auto,2~�.
Advanced Chipset Features

��
Engl
ish
DRAMRAS#Precharge
IfaninsufficientnumberofcyclesisallowedfortheRAStoaccumu-lateitschargebeforeDRAMrefresh,therefreshmaybe-incompleted,andtheDRAMmayfail toretaindata.Fastgives fasterperformance;and Slowgives more stable performance. This field is appliedonlywhensynchronousDRAMisinstalledinthesystem.
Thechoice:Auto,2~�.
Prechargedealy(tRAS)
TheprechargetimeisthenumberofcyclesittakesforDRAMtoac-cumulateitschargebeforerefresh.
Thechoice:Auto,�~�8.
*********OnboardVGASet**********
On-ChipFrameBufferSize
ThisitemallowsyoutosettheonboardVGAsharememorysize.
TheChoice:�MBor8MB.
DVMTMode
ThisitemallowsyoutosettheDVMTMode.
Thechoice:DVMT,BOTHorFIXED.
DVMT/FIXEDMemorySize
ThisitemallowsyoutosettheDVMT/FIXEDMemorySize.
Thechoice:��MB,�28MBor22�MB.

��
English
On-ChipIDEDevice
Optionareinitssub-menu.
Press<Enter>toenterthesub-menuofdetailedoptions.
IDEHDDBlockMode
IfyourIDEharddiskdrivesupportsblockmode(mostnewdrivesdo),selectEnabledtoautomaticdetecttheoptimalnumberofblockreadand writes per sector that the drive can support and improves thespeedofaccesstoIDEdevices.
Thechoice:Enabled,orDisabled.
On-ChipPrimaryPCIIDE
UsetheseitemstoenableordisablethePCIIDEchannelsthatareintegratedonthemainboard.
Thechoice:EnabledorDisabled.
IDEPrimaryMaster/SlavePIO
EachIDEchannelsupportsamasterdeviceandaslavedevice.ThesefouritemsletyouassignwhichkindofPIO(ProgrammedInput/Out-put)isusedbyIDEdevices.ChooseAutotoletthesystemautodetectwhichPIOmodeisbestorselectaPIOmodefrom0-�.
Thechoice:Auto,Mode0,Mode�,Mode2,Mode�,orMode�.
Integrated Peripherals

��
Engl
ish
IDEPrimaryMaster/SlaveUDMA
Each IDEchannel supports amasterdevice anda slavedevice.ThismainboardsupportsUltraDMAtechnology,whichprovides fasterac-cesstoIDEdevices.
IfyouinstalladevicethatsupportsUltraDMA,changetheappropriateitemonthislisttoAuto.YoumayhavetoinstalltheUltraDMAdriversuppliedwiththismainboardinordertouseanUltraDMAdevice.
TheChoice:AutoorDisabled.
**********On-ChipSerialATASetting**********
On-ChipSerialATA[Disabled]:DisabledSATAController.[SATAOnly]:SATAisoperatinginlegacymode.[EnhancedMode]:EnablebothSATAandPATA.Max.of�IDEdrives aresupported.
Thechoice:Disabled,SATAOnlyorEnhancedMode.
SATAPORTSpeedSettings
ThisitemallowsyoutosettheSATAPORTSpeed.
Thechoice:Disabled,ForceGENI,orForceGENII.
OnboardDevice
Optionareinitssub-menu.
Press<Enter>toenterthesub-menuofdetailedoptions.
OnboardLanFunction
ThisitemallowsyoutosettheOnboardLanFunction.
Thechoice:DisabledorEnabled.
OnboardLanBootROM
DecidewhethertoinvokethebootROMoftheonboardLANchip.
Thechoice:DisabledorEnabled.
HighDefinitionAudio
ThisitemallowsyoutosettheHighDefinitionAudio.
Thechoice:EnabledorDisabled.
��
English SuperIODevice
Optionareinitssub-menu.
Press<Enter>toenterthesub-menuofdetailedoptions.
OnboardSerialPort�
ThisoptionisusedtoassigntheI/Oaddressandinterruptrequest(IRQ)fortheonboardserialport�(COM�).
Thechoice:Disabled,�F8/IRQ�,2F8/IRQ�,�E8/IRQ�,2E8/IRQ�, orAuto.
USBDeviceSetting
Optionareinitssub-menu.
Press<Enter>toenterthesub-menuofdetailedoptions.
USB�.0/2.0Controller
EnableorDisableUniversalHostControllerInterfaceforUniversalSerialBus.
Thechoice:EnabledorDisabled.
USBOperationMode
AutodecideUSBdeviceoperationmode.
Highspeed:IfUSBdevicewashighspeeddevice,thenitoperatedon highspeedmode.IfUSBdevicewasfull/lowspeeddevice, thenitoperatedonfull/lowspeedmode.
Full/LowSpeed:AllofUSBdeviceoperatedonfull/lowspeedmode.
Thechoice:HighspeedorFull/LowSpeed.
USBStorageFunction
EnableorDisableLegacysupportofUSBUSBMassStorage.
Thechoice:EnabledorDisabled.
***USBMassStorageDeviceBootSetting***
UFDDAUSBFloppy
UFDDBUSBFloppy
NoDevice
Auto:AccordingtocontentsofUSBMSDdecidebootuptype.
FDDMode:TheUSBMSDalwaysbootupasfloppydisk.
HDDMode:TheUSBMSDalwaysbootupasharddisk.
Thechoice:Automode,FDDmodeorHDDmode.

�7
Engl
ish
ThePowerManagementSetupallowsyoutoconfigureyoursystemtomost effectively save energy while operating in a manner consistentwithyourcomputerusage.
ACPISuspendTypeThisitemallowsyoutoselectsleepstatewhensuspend.
Thechoice:S�(POS)orS�(STR).
RunVGABIOSifS�Resume(Auto)ThisitemallowsthesystemtoinitializetheVGABIOSfromS�(Sus-pendtoRAM)sleepstate.
Thechoice:Auto,YesorNo.
Soft-OffbyPWR-BTTNUnderACPI you can create a softwarepowerdown. In a softwarepowerdown, the systemcanbe resumedbyWakeUPAlarms.Thisitemletsyouinstallasoftwarepowerdownthat iscontrolledby thepowerbuttononyoursystem.IftheitemissettoInstant-Off,thenthepowerbuttoncausesasoftwarepowerdown.IftheitemissettoDe-lay�Sec.thenyouhavetoholdthepowerbuttondownfor�secondstocauseasoftwarepowerdown.
Thechoice:Instant-OfforDelay�Sec.
PowerOnbyRingThisitemdeterminethesystemwillresumebyactivatingofmodemring.Thechoice:EnabledorDisabled.
Power Management Setup

�8
English ResumebyAlarmWhenthisitemenabled,yourcansetthedate(dayofthemonth)andtimetoturnonyoursystem.Thechoice:DisabledorEnabled.
Date(ofMonth)AlarmThisitemselectsthealarmDate(dayofthemonth).KeyinaDECnumber:Min=0,Max=��.
Time(hh:mm:ss)AlarmThisitemselectsthealarmTime.[hh]KeyinaDECnumber:Min=0,Max=2�.[mm/ss]KeyinaDECnumber:Min=0,Max=��.
PoweronByPS2MouseThisitemallowsyoutosetthetheMousePowerOnfunction.OnlysupportsS�/S�.Thechoice:DisabledorEnabled.
PoweronByPS2KeyboardThisitemallowsyoutosettheKeyboardPowerOnfunction.OnlysupportsS�/S�.Thechoice:Disabled,password,HotKEY,AnyKEY.
KBPowerONPasswordThisitemallowsyoutosettheKBPowerOnPassword.Press"Enter"tosetPassword.
HotKeyPowerONThisitemallowsyoutosettheHotKeyPowerOn.Thechoice:Ctrl-F�~Ctrl-F�2.
PWR-OnAfterPWR-FailThisitemdefinesifthesystemwillberebootedafterthepowerfails.Thechoice:Off,OnorFormer-Sts.
��
Engl
ish
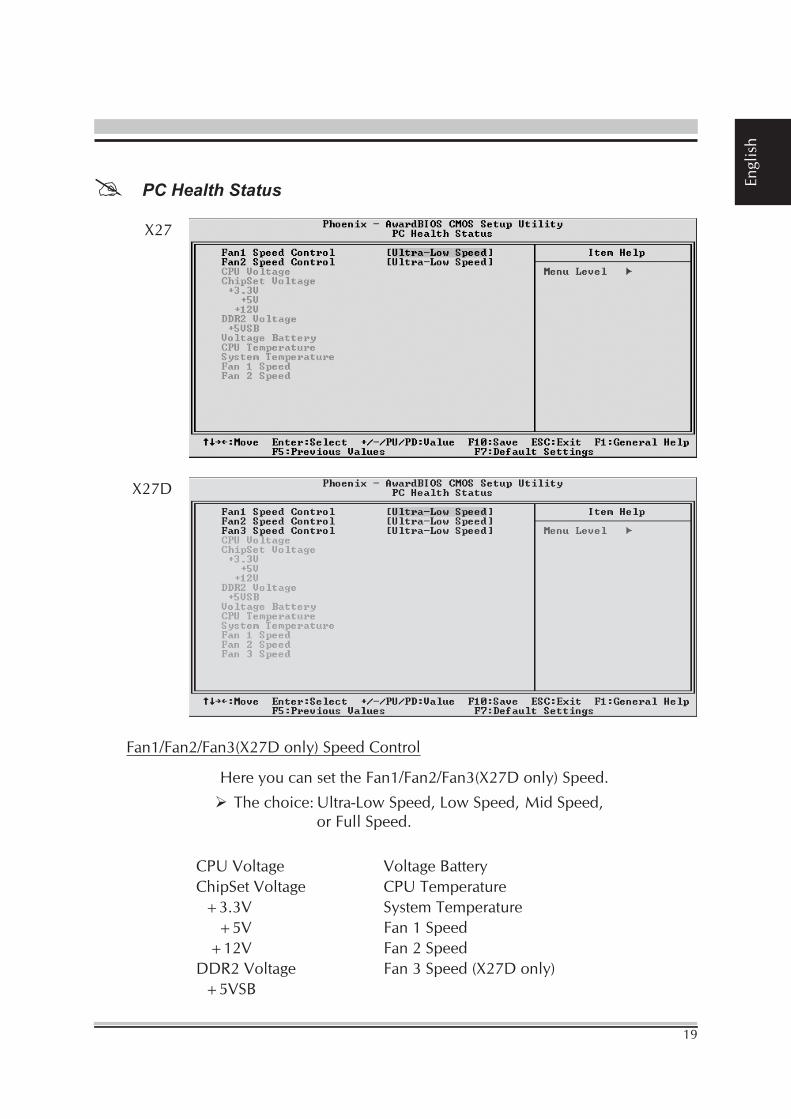
Fan�/Fan2/Fan�(X27Donly)SpeedControl
HereyoucansettheFan�/Fan2/Fan�(X27Donly)Speed.
Thechoice:Ultra-LowSpeed,LowSpeed,MidSpeed, orFullSpeed.
CPUVoltageChipSetVoltage+�.�V+�V+�2VDDR2Voltage+�VSB
PC Health Status
VoltageBatteryCPUTemperatureSystemTemperatureFan�SpeedFan2SpeedFan�Speed(X27Donly)
X27D
X27
20
English
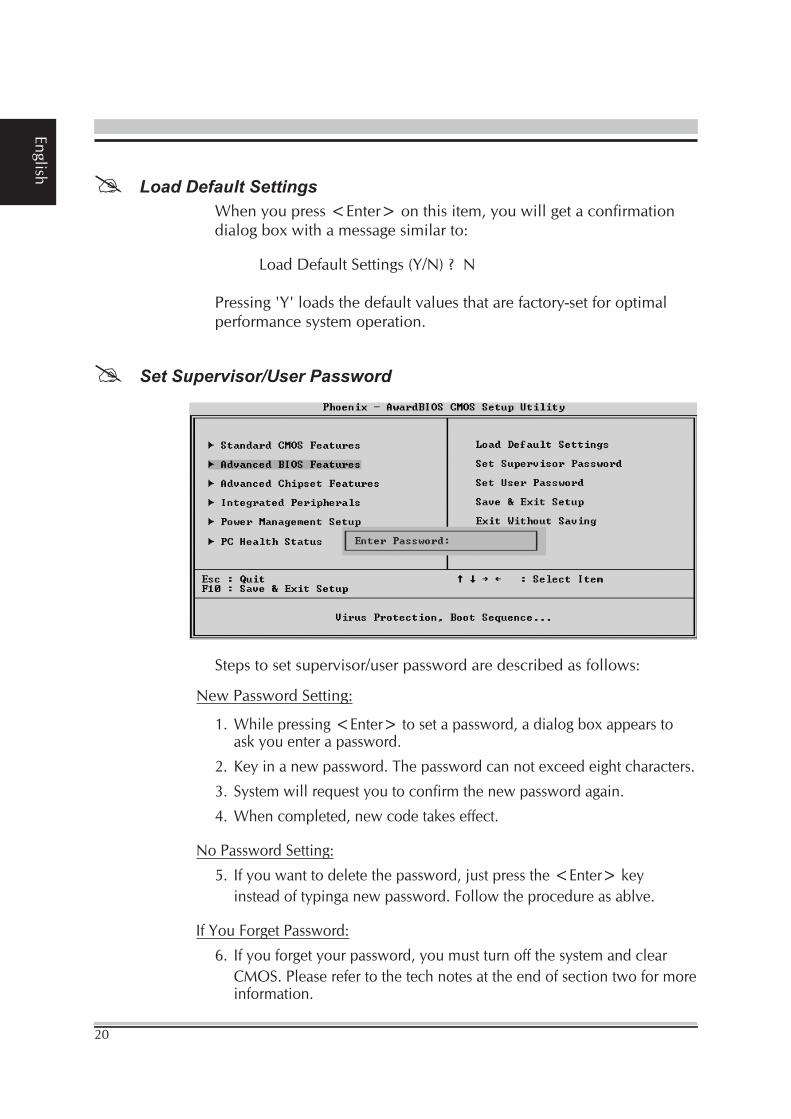
Set Supervisor/User Password
Stepstosetsupervisor/userpasswordaredescribedasfollows:
NewPasswordSetting:
�.Whilepressing<Enter>tosetapassword,adialogboxappearsto askyouenterapassword.
2.Keyinanewpassword.Thepasswordcannotexceedeightcharacters.
�. Systemwillrequestyoutoconfirmthenewpasswordagain.
�.Whencompleted,newcodetakeseffect.
NoPasswordSetting:
�. Ifyouwanttodeletethepassword,justpressthe<Enter>key insteadoftypinganewpassword.Followtheprocedureasablve.
IfYouForgetPassword:
�. Ifyouforgetyourpassword,youmustturnoffthesystemandclear CMOS.Pleaserefertothetechnotesattheendofsectiontwoformore information.
Load Default SettingsWhenyoupress<Enter>onthisitem,youwillgetaconfirmationdialogboxwithamessagesimilarto:
LoadDefaultSettings(Y/N)?N
Pressing'Y'loadsthedefaultvaluesthatarefactory-setforoptimalperformancesystemoperation.

2�
Engl
ish
Save & Exit SetupPressing<Enter>onthisitemasksforconfirmation:
SAVEtoCMOSandEXIT(Y/N)?Y
Pressing"Y"storestheselectionsmadeinthemenusofCMOS-aspecialsectionofmemorythatstaysonafteryouturnyoursystemoff.Thenexttimeyoubootyourcomputer,theBIOSconfiguresyoursystemaccord-ingtotheSetupselectionsstoredinCMOS.Aftersavingthevaluesthesystemisrestartedagain.
Exit Without SavingPressing<Enter>onthisitemasksforconfirmation:
QuitWithoutSaving(Y/N)?N
ThisallowsyoutoexitfromSetupwithoutstoringinCMOSanychange.Thepreviousselectionsremainineffect.ThisexitsfromtheSetuputilityandrestartsyourcomputer.