groups
TRANSCRIPT

Updated: March 18, 2022
Groups.io
Group Owners Manual
Copyright © 2022 Groups.io

ii
This page intentionally left blank for two-sided printing.

iii
Table of Contents Conventions used in this documentation ............................................................. xi
1 Introduction ............................................................................................... 1
2 Creating a group ........................................................................................ 3
3 Customizing group settings ....................................................................... 6
3.1 Displaying the Settings page .................................................................. 6
3.2 Saving setting changes .......................................................................... 6
3.3 General settings ..................................................................................... 6
3.3.1 Group Title ...................................................................................... 6
3.3.2 Group Email Address ...................................................................... 6
3.3.3 Group Description ........................................................................... 7
3.3.4 Subject Tag .................................................................................... 7
3.3.5 Website ........................................................................................... 7
3.3.6 Allow Sponsorships......................................................................... 7
3.4 Privacy settings ...................................................................................... 8
3.4.1 Visibility ........................................................................................... 8
3.4.2 Member List Visibility ...................................................................... 9
3.4.3 Email Address Visibility in Archive .................................................. 9
3.5 Spam control and moderation settings ................................................... 9
3.5.1 Restricted Membership ................................................................... 9
3.5.2 Announcement-Only Group .......................................................... 10
3.5.3 Message Moderation .................................................................... 10
3.5.4 New Members Moderated ............................................................. 10
3.5.5 Unmoderate After ......................................................................... 10
3.6 Message policy settings ....................................................................... 11
3.6.1 Allow Nonmembers to Post ........................................................... 11
3.6.2 Disable No Email .......................................................................... 11
3.6.3 Hashtags Required ....................................................................... 11
3.6.4 Hashtag Permissions .................................................................... 12
3.6.5 Disable Editing Messages ............................................................. 12
3.6.6 Reply To ....................................................................................... 12
3.6.7 Remove Other Reply Options ....................................................... 13
3.6.8 Automatically Moderate Topics Older Than [n] Days ..................... 13
3.6.9 Automatically Lock Topics Older Than [n] Days ............................ 13
3.6.10 Allow Members to Download Archive ............................................ 13
3.6.11 Separate Message Footers ........................................................... 14
3.6.12 Virus Handling .............................................................................. 14
3.6.13 Max Photo Size in Email ............................................................... 14
3.6.14 Storage Limit Reached ................................................................. 15

iv
3.7 Message formatting settings ................................................................ 15
3.7.1 Message Footer ........................................................................... 15
3.7.2 Force HTML Emails ...................................................................... 16
3.7.3 Normalize HTML Emails ............................................................... 16
3.7.4 Plain Text Only ............................................................................. 16
3.7.5 Attachments ................................................................................. 16
4 Using the sponsorship feature to defray Groups.io hosting costs ............ 17
5 Customizing settings for Premium and Enterprise features ..................... 19
5.1 Locating the feature settings ................................................................ 19
5.2 Message reposting .............................................................................. 19
5.3 Calendar .............................................................................................. 20
5.3.1 Permissions .................................................................................. 20
5.3.2 Send Invites On Join .................................................................... 20
5.3.3 Send Event Summaries and Summary Email Schedule ............... 20
5.4 Member directory ................................................................................ 21
5.5 Chats ................................................................................................... 21
5.6 Subgroups ........................................................................................... 21
5.7 Database ............................................................................................. 22
5.7.1 Permissions .................................................................................. 22
5.7.2 Max Image Size In Databases ...................................................... 22
5.8 Files .................................................................................................... 22
5.8.1 Permissions .................................................................................. 22
5.8.2 Allow Photos In Files .................................................................... 23
5.9 Photos ................................................................................................. 23
5.9.1 Permissions .................................................................................. 23
5.9.2 Max Size In Photos Section .......................................................... 23
5.10 Polls .................................................................................................... 23
5.11 Wiki ..................................................................................................... 24
5.11.1 Permissions .................................................................................. 24
5.11.2 Sticky Wiki Page ........................................................................... 24
5.11.3 Max Image Size on Wiki Pages .................................................... 24
6 Setting default email options and user settings for group members......... 25
6.1 Overview ............................................................................................. 25
6.2 Default Subscription Settings panel ..................................................... 26
6.2.1 Email Delivery .............................................................................. 26
6.2.2 Message Selection ....................................................................... 27
6.2.3 Max Attachment Size.................................................................... 27
6.3 Default User Settings panel ................................................................. 28
6.3.1 Timezone ..................................................................................... 28
6.3.2 Time Display ................................................................................ 28

v
6.3.3 Date Display ................................................................................. 28
6.3.4 Monday Start ................................................................................ 28
7 Changing the home page image and group icon ..................................... 29
8 Managing moderator notifications about group activity ............................ 30
8.1 Overview .............................................................................................. 30
8.2 Enabling and disabling web/app notifications ....................................... 30
8.3 Controlling moderator notifications for individual groups ...................... 31
9 Managing member notices ...................................................................... 33
9.1 Overview .............................................................................................. 33
9.2 Creating, editing, or deleting member notices ...................................... 33
9.3 Banned Member notice ........................................................................ 34
9.4 Direct Add notice ................................................................................. 34
9.5 Goodbye notice .................................................................................... 34
9.6 Group Guidelines notice ...................................................................... 35
9.7 Group Sponsorship notice .................................................................... 36
9.8 Invite notice.......................................................................................... 36
9.9 Locked Group notice ............................................................................ 36
9.10 Locked Topic notice ............................................................................. 36
9.11 Message To Member notice ................................................................. 37
9.12 Monthly Reminder notice ..................................................................... 37
9.13 Pending Subscription notice ................................................................. 37
9.14 Rejected Message notice ..................................................................... 38
9.15 Rejected Subscription notice ................................................................ 38
9.16 Removed Member notice ..................................................................... 38
9.17 Welcome notice ................................................................................... 38
10 Inviting people to join a group .................................................................. 39
10.1 Overview .............................................................................................. 39
10.2 Sending invitations to join the group .................................................... 39
10.3 Inviting more than 20 people at a time ................................................. 40
10.4 Tracking, resending, or canceling invitations ........................................ 40
11 Managing members ................................................................................. 41
11.1 Working with the member list ............................................................... 41
11.1.1 Displaying the member list ............................................................ 41
11.1.2 Reviewing the member list ............................................................ 41
11.1.3 Displaying an individual member’s record ..................................... 41
11.2 Adding or updating members’ display names ....................................... 42
11.3 Handling members marked as Not Confirmed ...................................... 42

vi
11.4 Handling pending members ................................................................. 42
11.4.1 Overview ...................................................................................... 42
11.4.2 Approving or rejecting pending members by email ....................... 43
11.4.3 Approving, rejecting, or claiming pending members on the group's website 43
11.5 Adding moderator notes about individual members ............................. 44
11.6 Moderating individual members ........................................................... 44
11.7 Removing members ............................................................................ 46
11.7.1 Removing an individual member .................................................. 46
11.7.2 Removing multiple members ........................................................ 46
11.7.3 Removing a large number of members (bulk remove) .................. 46
11.8 Banning and unbanning members ....................................................... 47
11.8.1 Banning a member ....................................................................... 47
11.8.2 Unbanning a member ................................................................... 48
11.8.3 Viewing a list of banned members ................................................ 48
11.9 Checking for bouncing members ......................................................... 49
11.10 Reviewing members who were removed because of reported spam ... 50
11.11 Syncing group members with Slack teams .......................................... 50
11.12 Premium and Enterprise member management options ...................... 51
11.12.1 Adding members directly .......................................................... 51
11.12.2 Editing members’ email addresses ........................................... 52
11.12.3 Confirming members who are marked as Not Confirmed .......... 52
11.12.4 Viewing information about past members ................................. 53
11.12.5 Synchronizing group members with a file of email addresses ... 53
12 Managing moderators and additional owners .......................................... 55
12.1 Overview ............................................................................................. 55
12.2 Making a member an owner or moderator ........................................... 55
12.3 Changing an owner or moderator back to a regular member ............... 56
13 Sending and receiving group owner email messages ............................. 57
13.1 Overview ............................................................................................. 57
13.2 Reviewing your subscription options for receiving group owner email messages ...................................................................................................... 57
13.3 Receiving and viewing messages sent to the owner email address ..... 58
13.4 Sending messages from the owner email address .............................. 58
13.5 Replying to a message from the owner email address ......................... 59
14 Managing group topics and messages .................................................... 60
14.1 Handling pending messages ............................................................... 60
14.1.1 Overview ...................................................................................... 60
14.1.2 Approving, rejecting, or deleting pending messages by email ....... 60
14.1.3 Handling pending messages on the group's website .................... 60
14.1.4 Working with claimed pending messages ..................................... 62

vii
14.2 Merging topics ..................................................................................... 62
14.3 Splitting topics ...................................................................................... 64
14.4 Moderating topics, messages, and attachments .................................. 65
14.5 Locking topics ...................................................................................... 65
14.6 Editing the properties of topics in the archive ....................................... 65
14.7 Editing the content of messages in the archive .................................... 66
14.8 Deleting topics ..................................................................................... 67
14.9 Deleting individual messages ............................................................... 67
15 Managing hashtags ................................................................................. 68
15.1 Overview .............................................................................................. 68
15.2 Hashtag uses ....................................................................................... 68
15.3 Controlling the use and creation of hashtags ....................................... 70
15.3.1 Overview ....................................................................................... 70
15.3.2 Group hashtag settings ................................................................. 70
15.3.3 Moderator hashtag permissions .................................................... 70
15.3.4 Usage settings on individual hashtags .......................................... 70
15.4 Viewing, creating, modifying, and deleting hashtags ............................ 70
15.4.1 Viewing the list of hashtags used in a group ................................. 70
15.4.2 Creating a hashtag ....................................................................... 71
15.4.3 Modifying a hashtag ...................................................................... 73
15.4.4 Deleting a hashtag ........................................................................ 73
15.5 Applying hashtags to topics ................................................................. 73
15.5.1 Applying hashtags to new topics ................................................... 73
15.5.2 Applying hashtags to existing topics ............................................. 73
15.6 How hashtags are displayed in the group archive ................................ 74
15.7 System hashtags ................................................................................. 74
16 Pinning topics and wiki pages to the Topics page .................................... 77
16.1 Overview .............................................................................................. 77
16.2 Pinning a topic ..................................................................................... 77
16.3 Pinning a wiki page .............................................................................. 77
17 Reviewing the group’s activity log ............................................................ 78
17.1 Displaying the activity log ..................................................................... 78
17.2 Reviewing message activity ................................................................. 78
17.3 Reviewing member activity .................................................................. 78
17.4 Reviewing moderator activity ............................................................... 78
17.5 Reviewing payment activity .................................................................. 78
17.6 Reviewing activity related to other group features ................................ 79
17.6.1 Calendar activity ........................................................................... 79
17.6.2 Database activity .......................................................................... 79

viii
17.6.3 File activity ................................................................................... 80
17.6.4 Photo activity ................................................................................ 80
17.6.5 Wiki activity .................................................................................. 80
18 Viewing and managing your group’s storage space ................................ 81
18.1 Allotted storage space by plan type ..................................................... 81
18.2 Items that count towards the storage limit ............................................ 81
18.3 Items that do not count towards the storage limit ................................. 81
18.4 Viewing your group’s storage limit and current space usage ............... 81
18.5 Managing your group’s storage space ................................................. 82
18.6 Deleting message attachments manually ............................................ 82
19 Managing integrations with outside services ........................................... 83
19.1 Overview ............................................................................................. 83
19.2 Email integrations ................................................................................ 83
19.2.1 Overview ...................................................................................... 83
19.2.2 Adding an email integration .......................................................... 83
19.2.3 Modifying an email integration ...................................................... 84
19.2.4 Deleting an email integration ........................................................ 84
19.3 Feed integrations ................................................................................. 85
19.3.1 Overview ...................................................................................... 85
19.3.2 Adding a feed integration .............................................................. 85
19.3.3 Modifying a feed integration.......................................................... 85
19.3.4 Deleting a feed integration ............................................................ 86
19.4 GitHub integrations .............................................................................. 86
19.4.1 Overview ...................................................................................... 86
19.4.2 Adding a GitHub integration.......................................................... 86
19.4.3 Modifying a GitHub integration ..................................................... 86
19.4.4 Removing a GitHub integration ..................................................... 87
19.5 Trello integrations ................................................................................ 87
19.5.1 Overview ...................................................................................... 87
19.5.2 Adding a Trello integration ............................................................ 87
19.5.3 Modifying a Trello integration ........................................................ 87
19.5.4 Removing a Trello integration ....................................................... 88
20 Promoting your group ............................................................................. 89
21 Exporting or downloading your group’s data ........................................... 90
21.1 Downloading your group’s member list ................................................ 90
21.2 Exporting your group’s message archive and other group content....... 90
22 Taking donations and reviewing payment activity .................................... 92
22.1 Overview ............................................................................................. 92
22.2 Setting up a Stripe account .................................................................. 92
22.3 Creating a donation request ................................................................ 92

ix
22.4 Closing or reopening a donation request .............................................. 93
22.5 Viewing open and closed donation requests ........................................ 93
22.6 Reviewing donation request and payment activity ................................ 93
23 Locking and unlocking groups and subgroups ......................................... 94
24 Banning domains from the group ............................................................. 95
25 Creating group aliases ............................................................................. 96
26 Using subgroups ..................................................................................... 97
26.1 Overview .............................................................................................. 97
26.2 Creating a subgroup ............................................................................ 97
26.3 Using subgroup categories .................................................................. 99
27 Renaming groups .................................................................................. 100
27.1 Considerations ................................................................................... 100
27.2 Renaming a group ............................................................................. 100
28 Upgrading or downgrading groups ......................................................... 101
28.1 Upgrading a Basic group.................................................................... 101
28.2 Downgrading a Premium or Enterprise group .................................... 101
29 Deleting a group .................................................................................... 102
30 Features available for Enterprise groups only ........................................ 103
30.1 Overview ............................................................................................ 103
30.2 Setting up a custom domain or subdomain ........................................ 103
30.2.1 Setting up a custom domain ........................................................ 103
30.2.2 Setting up a custom subdomain .................................................. 103
30.3 Adding a custom logo and custom email header and footer graphics . 104
30.4 Customizing the home page displayed to users who are not logged in 104
30.5 Customizing Enterprise group settings ............................................... 105
30.5.1 Displaying the Enterprise Settings page ...................................... 105
30.5.2 Enterprise Title ............................................................................ 105
30.5.3 Timezone .................................................................................... 106
30.5.4 Disable Signup ............................................................................ 106
30.5.5 Disable +1 Functionality .............................................................. 106
30.5.6 Google Analytics Code ............................................................... 106
30.5.7 Login Page Text .......................................................................... 106
30.5.8 No Account Text ......................................................................... 106
30.5.9 Single Sign On ............................................................................ 106
31 About Groups.io billing .......................................................................... 107
31.1 Group payors ..................................................................................... 107
31.2 Billing notifications ............................................................................. 107
31.3 Updating the credit card or debit card on file ...................................... 108
31.4 Changing the group’s payor ............................................................... 108

x
32 Additional information ........................................................................... 109
32.1 Standard group email addresses ....................................................... 109
32.2 Groups.io bounce handling ................................................................ 109
32.3 Topic threading algorithm .................................................................. 110
32.4 Member badges and topic icons ........................................................ 111
32.4.1 Member badges ......................................................................... 111
32.4.2 Topic icons ................................................................................. 113
32.5 API access and documentation ......................................................... 113
33 Acknowledgements ............................................................................... 114
34 Revision history..................................................................................... 115

xi
Conventions used in this documentation
User interface
The step-by-step instructions in this documentation assume you are using a web browser on a computer, not on a mobile device. Most of those instructions also assume that you are logged in to your Groups.io account.
Admin menu notation
Angle brackets ( > ) are used as shortcuts to indicate the sequence of selecting items from the Admin entry in the left navigation menu on the group’s website, then from its submenu, then on the resulting page.
Examples:
• Select Admin > Settings > Member Notices.
• Go to Admin > Activity > Moderator Activity and select an action from the Actions list.
Terminology
See the Glossary for a list of common terms used in Groups.io.

xii
This page intentionally left blank for two-sided printing.

1 Introduction
Groups.io Group Owners Manual Updated: Mar. 18, 2022 1
1 Introduction Groups.io provides people who share common interests with an ad-free platform for communicating with each other through email groups and group websites. Those who want to run a group in Groups.io can:
• Have a free group with basic message functions or opt for a paid plan that provides additional features.
• Create an announcement-only, moderated, or restricted group, or a group with other combinations of settings.
• Customize member notices such as welcome, goodbye, and pending member messages as well as monthly reminders and guidelines.
• Designate multiple owners and moderators using Groups.io’s full permissions system.
• Monitor the group through the activity log, and receive email or web/app notifications (or both) about group activity.
• Track email delivery to group members.
• Approve messages from moderated members either through the group’s website or by email.
• Automatically moderate or lock individual group topics after a set number of days.
• Set up hashtags to control and organize messages in the group’s archive.
• Create a wiki for storing group knowledge.
• Control access to and use of the group’s web-based collaboration features:
○ Calendar ○ Chats (similar to chat rooms on other platforms) ○ Files ○ Databases ○ Photos ○ Polls ○ Wiki
For more information about the features and benefits of Groups.io, see the Features page on the Groups.io website.
Groups.io provides three levels of plans: a free Basic level and two paid levels, Premium and Enterprise. Basic groups provide only functions related to sending, storing, and managing messages. Premium and Enterprise groups provide additional collaboration features such as calendars, databases, and wikis. You can try a Premium group for free for 30 days. With a 30-day trial Premium group:
• You have access to all Premium features except the ability to add members to the group directly and the ability to change group members’ email addresses.
• You can upgrade to a paid Premium plan at any point during the trial, and it will start at the end of the 30 days.
• One week before the end of your trial, you will get an email reminder.
• If you opt not to continue with a paid Premium plan, your group will automatically be downgraded to a Basic group at the end of 30 days. Any subgroups you created during your trial will be locked and other Premium features will become inaccessible. (Nothing will be deleted in case you decide to upgrade the group in the future.)

1 Introduction
2 Updated: Mar. 18, 2022 Groups.io Group Owners Manual
See the Plans and Pricing page on the Groups.io website for feature summaries and pricing information. At the bottom of that page, you can click See A Complete Plan Comparison to display a detailed comparison.

2 Creating a group
Groups.io Group Owners Manual Updated: Mar. 18, 2022 3
2 Creating a group 1. Log in to your Groups.io account.
Note: If you do not have a Groups.io account (that is, your email address is not registered with Groups.io), create a Groups.io account or register with Groups.io through Facebook or Google.
2. After you are logged into Groups.io, click the Find or Create a Group link at the top of the page. The Publicly Listed Groups page appears.
3. Click the Create A Group button on the left side of the page. The Pricing page appears.
4. To create a free Basic group, scroll down the page and click the Start a free Basic group button.
Tip: You can try a Premium group for free for 30 days by clicking the Start a free Premium group 30-day trial button at the top of the page.
5. On the next page, review the information in the Create A Group panel at the top. Ensure that you review the Terms of Service and the types of content and behavior that are not permitted by Groups.io.
6. In the Group Email Address field, enter the name of your group, up to 34 characters long. This name will appear in the group’s email address and also in the URL of your group on the Groups.io website.
Note:
• The name cannot contain spaces, plus signs, slashes, periods, or underscores. (Hyphens are allowed.)
Exception: If you are creating a subgroup, periods are allowed in the subgroup’s name. Main (primary) group names cannot contain periods because main group names are used as subdomains when you add subgroups, and subdomains cannot contain periods.
• It is possible to change this name later, but be aware that renaming an existing group has repercussions. (See Renaming groups.)
7. In the Description field, enter a description of your group. This description will be displayed on your group’s home page.
Note: You can modify the description later, but at this stage, be as specific as possible to ensure that the Groups.io team will approve the group’s creation.
8. In the Visibility dropdown list, select the option you want to use for your group and its messages (see the table below). This option controls whether your group and its message archive are visible to the general public or only to group members.
! Important: When you make a message archive private, you cannot change it later to be publicly viewable. The “private messages” setting is not reversible. Therefore, at this stage, you should be certain about whether you want your group’s message archive to be public or private.

2 Creating a group
4 Updated: Mar. 18, 2022 Groups.io Group Owners Manual
Visibility option Description
Group listed in directory, publicly viewable messages
The group will be listed in the public directory of groups on Groups.io, and the message archive will be viewable by anyone—not just group members—who has the URL of the group. In addition:
• The contents of group messages will be discoverable by web search engines.
• An RSS feed link will be created automatically and listed in the Group Information section on the group’s home page.
Example: GroupManagersForum
Group not listed in directory, publicly viewable messages
The group will not be listed in the public directory of groups on Groups.io, but the message archive will be viewable by anyone—not just group members—who has the URL of the group. In addition:
• The contents of group messages will be discoverable by web search engines.
• An RSS feed link will be created automatically and listed in the Group Information section on the group’s home page.
Group listed in directory, private messages
The group will be listed in the public directory of groups on Groups.io, but the message archive will be viewable only to group members. Also, message content will not be discoverable by web search engines.
Example: You want prospective members to be able to find the group, but they must meet some criteria before they can join the group and view the message archive.
! Important: The “private messages” setting is not reversible. You can change whether the group is listed in the public directory of groups, but you cannot change private messages to be publicly viewable later.
Group not listed in directory, private messages
The group will not be listed in the public directory of groups on Groups.io, and the message archive will be viewable only to group members. Also, message content will not be discoverable by web search engines. Example: You want an invitation-only group that is not open to the general public (such as for a specific organization or user community). ! Important: The “private messages” setting is not reversible. You can change whether the group is listed in the public directory of groups, but you cannot change private messages to be publicly viewable later.

2 Creating a group
Groups.io Group Owners Manual Updated: Mar. 18, 2022 5
9. Click the Create Group button located at the bottom of the page.
Note: If the name you entered in the Group Email Address field is already in use, the system displays a “not available” message. If the name you entered has a problem, such as containing illegal characters or being more than 34 characters long, the system displays an “invalid name” message. Change or correct the name, then click Create Group again.
When your group is created successfully, Groups.io displays the Promote page with a banner at the top stating that your group has been created, along with some introductory information.
Now you can:
• Customize the settings for your group.
• Set default email options and user settings for group members.
• Create member notices that can be sent to members automatically for certain events (for example, you can customize the default welcome notice that is sent to new members when they join the group).
• Change the image that is displayed on the home page of your group’s website.
• Specify how you want to receive notifications about group activity.
• Invite people to join the group.
Note: If you set a timezone in your Groups.io account preferences, the new group will have that timezone by default. Otherwise, the default timezone is U.S./Canada Pacific Time (UTC-08:00 or UTC-07:00 depending on whether Daylight Saving Time is in effect).

3 Customizing group settings
6 Updated: Mar. 18, 2022 Groups.io Group Owners Manual
3 Customizing group settings
3.1 Displaying the Settings page
In the left navigation menu on the group’s website, select Admin > Settings. The main Settings page appears.
The page contains expandable/collapsible panels for these categories of settings:
• General
• Privacy
• Spam Control
• Message Policies
• Message Formatting
• Premium & Enterprise Features Note: This panel is titled Features in legacy Basic groups (those created before August 24, 20202).
3.2 Saving setting changes
! Important: When you finish customizing settings on the Settings page, ensure that you scroll all the way to the bottom of the page and click the Update Group button. Your changes will not take effect or be remembered until you click that button.
3.3 General settings
In the General panel on the Settings page, you can customize these settings:
• Group Title
• Group Email Address
• Group Description
• Subject Tag
• Website
• Allow Sponsorships
Setting changes will take effect after you click the Update Group button at the bottom of the page.
3.3.1 Group Title
In this field, enter a short, descriptive title that will be displayed on the group’s home page in Groups.io along with the group’s email address. This title is also displayed in the directory of publicly listed groups if you opt to list your group there.
This field is optional, but it is good practice to provide a descriptive group title.
Tip: If you want to promote your group, use appropriate keywords in the group title or group description so the group can be found easily in the public directory of groups.
3.3.2 Group Email Address
This field contains the email address you entered when you created the group. If you decide to change that email address, make the change in this field.
Note: Be aware that changing the email address also changes the URL of your group on the Groups.io website.

3 Customizing group settings
Groups.io Group Owners Manual Updated: Mar. 18, 2022 7
Tip: The ideal time to change the group’s email address is as soon as possible after you create the group—before you create member notices, customize the message footer and other elements, and add members to the group. If you decide to change the email address after a group is well established, additional considerations apply. See Renaming groups.
3.3.3 Group Description
In this field, which is optional, you can enter a description of the group that will appear on the group’s home page. If your group is listed in the public directory, the first few lines of this description will be included under the group’s name and title in the directory.
Tip: If you want to promote your group, use appropriate keywords in the group title or the first few lines of the group description so the group can be found easily in the public directory of groups.
You can include text formatting and links in the description. To see all of the formatting tools, click the Show advanced toolbar “hamburger” icon on the right.
3.3.4 Subject Tag
This field contains text that is automatically added to the beginning of the subject line of group messages that are delivered by email. The tag helps identify the group’s messages in members’ email applications.
The default tag is the name that was entered when the group was created, enclosed in square brackets. You can edit that tag (for example, to make it shorter or clearer). Changes to the subject tag do not affect the group’s name.
Note:
• Subject tags are not displayed in messages in the archive on the group’s website.
• If a group is renamed, the subject tag is not changed automatically. You must update the tag manually.
3.3.5 Website
If you want to list a website on your group’s home page at Groups.io, you can enter that website’s URL in this field. The URL will be listed as a link in the Group Information section on the Groups.io home page for your group.
3.3.6 Allow Sponsorships
Select this checkbox if you want to allow group members to contribute toward Groups.io hosting fees. This setting displays a Sponsor This Group button on the group’s home page, which members can click to contribute (via credit card, debit card, or PayPal) toward the cost of hosting the group. For more information, see Using the sponsorship feature to defray Groups.io hosting costs.

3 Customizing group settings
8 Updated: Mar. 18, 2022 Groups.io Group Owners Manual
3.4 Privacy settings
In the Privacy panel on the Settings page, you can customize these settings:
• Visibility of the group and its message archive
• Member List Visibility
• Email Address Visibility in Archive
Setting changes will take effect after you click the Update Group button at the bottom of the page.
3.4.1 Visibility
When a group is created, the creator selects a visibility setting that specifies whether the group’s message archive is public or private. On the group’s Settings page, you can change a public archive to a private one, but you cannot change a private archive to a public one.
If the group has:
• A “publicly viewable messages” visibility setting: You can change it to a “private messages” setting on this page (for example, if you changed your mind about the public visibility of the group’s message archive).
Note: During the time when the archive was publicly viewable, web search engines might have found and cached the content of some messages (that is, group messages could appear in the results of a web search). That cached content will still be available until it is purged by search engines when they discover that the content is no longer visible from the original page.
• A “private messages” visibility setting: You cannot change it to a “publicly viewable messages” setting. All you can do is change whether the group is listed in the public directory of groups on Groups.io.
The options in the Visibility list on a group’s Settings page are the same as those for the Visibility setting on the Create A Group page (see step 8 in Creating a group). However, the Visibility list on the Settings page contains only the options that are available based on the initial visibility selection made by the group’s creator:
If the creator selected this option when creating the group:
Then the available visibility options on the group’s Settings page are:
Group listed in directory, publicly viewable messages
Group listed in directory, publicly viewable messages Group not listed in directory, publicly viewable messages Group listed in directory, private messages Group not listed in directory, private messages
Group not listed in directory, publicly viewable messages
Group listed in directory, publicly viewable messages Group not listed in directory, publicly viewable messages Group listed in directory, private messages Group not listed in directory, private messages
Group listed in directory, private messages Group listed in directory, private messages Group not listed in directory, private messages
Group not listed in directory, private messages Group listed in directory, private messages Group not listed in directory, private messages

3 Customizing group settings
Groups.io Group Owners Manual Updated: Mar. 18, 2022 9
Note: In a subgroup, the visibility options are different. See Creating a subgroup.
3.4.2 Member List Visibility
This setting controls who can view the member list. Select the option you want to use:
Option Description
Members All members of the group can view the member list. ! Important: Before you can select this setting, you must scroll down to and expand the Spam Control panel on the page and select the Restricted Membership checkbox. Only groups that have restricted membership can allow their members to see the member list. This restriction is a security precaution intended to prevent unscrupulous people from joining groups just to harvest members’ email addresses.
All Owners, and moderators with the correct permissions
Only the group’s owners, as well as moderators who have the appropriate permission settings, can view the member list. (This option is the default setting for new groups.)
Owners Only Only the group’s owners can view the member list.
3.4.3 Email Address Visibility in Archive
This setting controls whether full email addresses are visible in the message archive on the group’s website. Select the option you want to apply:
• Mask email addresses in the web archive
• Show email addresses in the web archive
Note: When an archive is publicly viewable, email addresses are always hidden from nonmembers who view the archive.
3.5 Spam control and moderation settings
In the Spam Control panel on the Settings page, you can customize these settings:
• Restricted Membership
• Announcement-Only Group
• Message Moderation
• New Members Moderated
! Important: To help prevent spam, you must apply at least one of the Spam Control settings to the group.
Setting changes will take effect after you click the Update Group button at the bottom of the page.
3.5.1 Restricted Membership
Select this checkbox if you want to approve membership requests before allowing people to join the group. For more information, see Managing members.
Tip: With this setting, you can also create a Pending Subscription notice that is automatically sent to prospective members who apply to join the group. For example, you can use that notice to request additional information before you approve someone’s membership.
Note: If you want your restricted group’s members to be able to view the group’s member list (see the Member List Visibility setting), you must select the Restricted Membership checkbox first.

3 Customizing group settings
10 Updated: Mar. 18, 2022 Groups.io Group Owners Manual
3.5.2 Announcement-Only Group
Select this checkbox if your group is to be an announcement-only group rather than a discussion group. Only moderators will be allowed to post messages to the group.
Example: Groups.io Updates is an announcement-only group.
3.5.3 Message Moderation
This setting controls whether and how messages sent to the group must be approved by a moderator before they are posted to the entire group. Select the option you want to apply:
Option Description
Messages are not moderated Messages do not need to be approved before they are posted to the group.
All messages are moderated All messages—including those that are replies to existing topics as well as those starting new topics—must be approved before they are posted to the group.
Messages that start new topics are moderated
Only messages that start new topics must be approved before they are posted to the group. Messages that are replies to existing topics do not need to be approved.
Note: Group notices that have these system hashtags are not affected by the “All messages are moderated” or “Messages that start new topics are moderated” setting (these notices are time sensitive, so they are always posted to the group without requiring moderator approval—unless the corresponding hashtag is modified to be moderated):
• #cal-notice
• #cal-reminder
• #guidelines-notice
• #monthly-notice
3.5.4 New Members Moderated
Select this checkbox if you want to approve the first message or first few messages sent to the group by new members. This setting allows you to check that new members follow your group’s requirements for posting messages.
Note: The New Members Moderated checkbox is selected by default when you create a group that does not have restricted membership because Groups.io requires at least one Spam Control option to be set.
3.5.5 Unmoderate After
After you select the New Members Moderate checkbox, the Unmoderate After list appears. Select an option from the list to specify whether new members automatically are no longer moderated after they send one approved message or after they send two, three, or four consecutive approved messages. Or you can select Not enabled (which is at the top of the list) to keep new members moderated until you decide to unmoderate them manually (see Managing members).

3 Customizing group settings
Groups.io Group Owners Manual Updated: Mar. 18, 2022 11
3.6 Message policy settings
In the Message Policies panel on the Settings page, you can customize these settings:
• Allow Nonmembers to Post
• Disable No Email
• Hashtags Required
• Hashtag Permissions
• Disable Editing Messages
• Reply To
• Remove Other Reply Options
• Automatically Moderate Topics Older Than [n] Days
• Automatically Lock Topics Older Than [n] Days
• Allow Members To Download Archive
• Separate Message Footers
• Virus Handling
• Max Photo Size in Email
• Storage Limit Reached
Setting changes will take effect after you click the Update Group button at the bottom of the page.
3.6.1 Allow Nonmembers to Post
By default, a message sent to a group by a nonmember is rejected automatically with a notice that the sender must be a member of the group to post messages to it.
If you want to allow people who are not group members to be able to post messages to the group, select the Allow Nonmembers to Post checkbox. Such messages will not be rejected automatically; instead, they will require approval from a moderator before they are posted to the group. On the Pending Messages page at the group’s website, the Author column will have a red NM badge next to a nonmember’s email address. If you open the pending message on the group’s website, a red “Non Member” label appears next to a nonmember’s email address.
Example: A group set up for a committee might want to allow people who are not members of the committee to send messages to the committee via the group.
Note: Using this setting might result in a lot of spam messages going to the pending (moderated) list, even though the system does some checking for known spammers.
3.6.2 Disable No Email
Select this checkbox if you do not want to allow group members to use the No Email option for email delivery in their subscription settings. When you select this checkbox, the No Email option will not be available on group members’ individual subscription pages.
Note: Members will still be able to select the Special Notices Only email delivery option in their subscription settings.
3.6.3 Hashtags Required
Select this checkbox if you want to require that all messages posted to the group have at least one hashtag. See also Managing hashtags.

3 Customizing group settings
12 Updated: Mar. 18, 2022 Groups.io Group Owners Manual
3.6.4 Hashtag Permissions
This setting controls whether regular members can create new hashtags by including them in message subject lines. It also controls how messages are handled if members are not allowed to create new hashtags but include new hashtags in a message anyway. Select the option you want to apply to the group:
Option Description
Messages can be tagged with new hashtags
Members can include new hashtags in their messages.
Messages from members can only be tagged with existing hashtags, otherwise the message is bounced
If a member includes a new hashtag in a message (that is, the hashtag is not in the list of the group’s existing hashtags), the system bounces the message.
Messages from members can only be tagged with existing hashtags, new hashtags will be removed
If a member includes a new hashtag in a message (that is, the hashtag is not in the list of the group’s existing hashtags), the system strips the new hashtag from the message before sending the message to the group.
Note: You can assign group moderators a permission that allows them to create and modify hashtags.
For more information on hashtag use in Groups.io, see Managing hashtags.
3.6.5 Disable Editing Messages
Select this checkbox if you do not want to allow members to make changes to the content of their own messages in the message archive (that is, after the messages have been posted to the group).
Note:
• Owners and moderators can still edit messages that are pending approval. Moderators can also edit messages in the archive if they have the appropriate permissions.
• Members are always able to delete their own messages regardless of this setting.
3.6.6 Reply To
This setting controls who is initially set to receive replies to messages that are posted to the group. Select the option you want to apply:
Option Description
Group Replies are addressed to the entire group.
Sender Replies are addressed only to the individual sender of the message.
Moderators Replies are addressed only to the group’s moderators (and owners).
Group and Sender Replies are addressed to both the entire group and the individual sender of the message.

3 Customizing group settings
Groups.io Group Owners Manual Updated: Mar. 18, 2022 13
Option Description
Topic Followers Only With this setting:
• The first message in a new topic is sent to everyone in the group per their normal settings.
• A follow topic record is created automatically for the person who originated the topic.
• A follow topic record is created automatically for anyone who replies to this original message.
• All subsequent messages to the topic are sent only to people who are following the topic.
You can use this setting to create “semiprivate” topics in the group where only the members who are following specific topics will see those topics, but all the messages are still archived.
This setting applies to all topics in a group. If you want to change the setting for an individual topic or hashtag, you can use the Reply To property for that topic or hashtag.
Note: This setting does not affect the Message Selection preference in individual members’ subscriptions.
Note: Members will still see additional reply options in messages on the group’s website and in message digests (if they are using that delivery option). You can use the next setting to remove those additional reply options.
3.6.7 Remove Other Reply Options
Select this checkbox to remove links from messages on the group’s website, and in digests, to reply options other than the one you selected in the Reply To list above.
3.6.8 Automatically Moderate Topics Older Than [n] Days
To put topics on moderation automatically after a specific length of time, select this checkbox and specify the number of days after which topics should be moderated.
Note: The moderation becomes effective overnight, U.S. Pacific Time, after the specified number of days have elapsed.
3.6.9 Automatically Lock Topics Older Than [n] Days
To lock topics (prevent further replies to them) automatically after a specific length of time, select this checkbox and specify the number of days after which topics should be locked.
Note: The locking becomes effective overnight, U.S. Pacific Time, after the specified number of days have elapsed.
3.6.10 Allow Members to Download Archive
If you want to allow group members to download the message archive to a file, select this checkbox.
Downloaded archive files are in mbox format.

3 Customizing group settings
14 Updated: Mar. 18, 2022 Groups.io Group Owners Manual
3.6.11 Separate Message Footers
Select this option to put the group's message footers in a separate message part in outbound email messages, rather than having the footers appended to messages. (Message parts are sections of a MIME-structured email body.)
Note: This specialized setting is useful in groups with members who use Pretty Good Privacy (PGP) encryption to sign their email messages.
3.6.12 Virus Handling
This setting specifies how the system should handle messages that it detects contain a virus. Select the option you want to use:
Option Description
Block The system blocks (rejects) the message, sends a notification to the sender, and adds an entry to the group’s activity log. This setting is the default.
Moderate The system flags the message for moderation (regardless of the group’s moderation settings) and adds an entry to the group’s activity log. The system also adds a red badge with the name of the detected virus to the message, and the owner or moderator will see that information when reviewing the message.
Note: Messages from nonmembers that contain viruses are blocked regardless of the selected Virus Handling setting.
3.6.13 Max Photo Size in Email
To save group storage space, you can use this setting to restrict the size of images that are attached to email messages sent by group members. In the list, select the maximum size (in pixels) that images attached to email messages should be resized to. The default setting is No resizing.
Note:
• Images attached to emails are stored in a default Emailed Photos album that the system creates. These images count toward the group’s storage limit. Be aware that the Emailed Photos album is not accessible in Basic groups created on or after August 24, 2020 because the Photos feature is not available in those groups.
• Only images that are larger than 100x100 pixels are displayed in the Emailed Photos album.
• Inline images (that is, images inserted directly into the bodies of HTML-formatted messages) are resized to a maximum of 640 pixels in the long dimension. Inline images count toward the group’s storage limit.

3 Customizing group settings
Groups.io Group Owners Manual Updated: Mar. 18, 2022 15
3.6.14 Storage Limit Reached
This setting specifies how to handle message attachments when the group’s storage space limit is reached. Select the option you want to use:
Option Description
Delete Old Attachments The system deletes attachments to the oldest messages until sufficient space is freed up. This setting is the default. Note: The content (text) in messages themselves is not deleted. Only attachments are deleted.
Bounce Messages With Attachments The system bounces messages that have attachments until sufficient space is freed up.
For more information, see Viewing and managing your group’s storage space.
3.7 Message formatting settings
In the Message Formatting panel on the Settings page, you can customize these settings:
• Message Footer
• Force HTML Emails
• Normalize HTML Emails
• Plain Text Only
• Attachments
Setting changes will take effect after you click the Update Group button at the bottom of the page.
3.7.1 Message Footer
In this optional field, you can enter text—for example, a disclaimer or a link to the group’s guidelines—to be included in the footer of all group messages that are delivered by email.
The text you enter in this field is placed within the system-generated footers that Groups.io automatically adds to email messages.
Note:
• This field does not allow any text formatting, but URLs that you enter will become live links in the emailed messages.
• When entering text, be concise. The text you enter here adds to the bulk of every outbound message.
• You cannot edit, remove, or replace the system-generated footers.
Tip: To ensure that the footer has the same content and formatting when messages are viewed on a mobile device as messages that are viewed on a computer, select the Force HTML Emails setting.

3 Customizing group settings
16 Updated: Mar. 18, 2022 Groups.io Group Owners Manual
3.7.2 Force HTML Emails
When you select this checkbox:
• All messages that are emailed to the group in plain text format will be converted to HTML format. Message footers are particularly affected.
• The option for members to receive plain text digests is removed from the Email Delivery section on the group’s Default Sub Settings page and from members’ individual Subscription pages.
• The footer in email messages viewed on mobile devices will have the same content and formatting as the footer in email messages viewed on computers.
Note: If you apply the Force HTML Emails setting to an existing group, the subscriptions of any members who receive plain text digests will be converted to full digests.
3.7.3 Normalize HTML Emails
Select this checkbox to remove different font families, sizes, and colors from emailed group messages that are in HTML format. This setting also applies to signatures in emails. Simple formatting (such as bold and italic) and inline images are retained.
You can use this setting to “tone down” email messages and signatures that contain excessive use of different fonts and colors. With this setting, the system defaults to the fonts and colors that recipients have selected for their own displays, which might be easier for them to read.
Note: This setting also removes some font formatting options from the toolbar in the message editor on the group’s website. (It does not affect the wiki editing tools.)
3.7.4 Plain Text Only
Select this checkbox to convert HTML-formatted messages that are emailed to the group to plain text format. This setting affects the format of message footers as well.
Note: This setting does not affect the format of attachments.
3.7.5 Attachments
This setting controls whether attachments are allowed with group messages. Select the option you want to apply:
Option Description
Allow Members can include attachments with email messages and with messages they compose on the website.
Bounce Messages that contain attachments are rejected (bounced back to the message senders).
Strip The system strips attachments from messages and posts just the message bodies to the group.
Moderate The system flags messages that include attachments for moderation (regardless of other moderation settings set for the group).
Note: The Override: not moderated setting for individual members takes precedence over this attachment setting. That is, even if attachments are moderated for the group through this setting, attachments sent by members whose posting privilege is set to Override: not moderated will not be moderated.

4 Using the sponsorship feature to defray Groups.io hosting costs
Groups.io Group Owners Manual Updated: Mar. 18, 2022 17
4 Using the sponsorship feature to defray Groups.io hosting costs
In mid-January 2021, Groups.io added a sponsorship feature that group owners can enable to allow group members to help cover the group’s hosting costs. Be aware that a per-member pricing structure applies as of February 8, 2021, so sponsorships could help groups created on or after that date defray those costs.
To enable the sponsorship feature:
1. In the left navigation menu, select Admin > Settings.
2. On the General panel of the Settings page, select the Allow Sponsorships checkbox.
3. Scroll to the bottom of the page and click the Update Group button.
4. Go to your group’s home page and check that a Sponsor This Group button appears in the Group Information section of the page.
When members click the Sponsor This Group button, they are taken to a Sponsor Group page where they can specify a sponsorship amount (minimum of $5.00 US) and pay by credit or debit card or via PayPal.
Tip: You can create a customized Group Sponsorship member notice that is sent automatically to members who sponsor the group. (This notice is in addition to the automated email receipt that members receive.)
To review payment activity related to sponsorships:
1. In the left navigation menu on the group’s website, select Admin > Activity.
2. On the Activity page, click the Payment Activity button. All activities related to sponsorships are listed.
Note: If the group is a Premium or Enterprise group that is set up for donation requests, the Payment Activity page lists donation activities as well.
3. If you want to filter the activity results for sponsorships, select one of these options from the Actions list and click Search:
• Member sponsored
• Member sponsorship failed
To see how much money is in a group’s sponsorship reserve, select Admin > Billing (in a Premium or Enterprise group) or Admin > Upgrade (in a Basic group). The Current Plan panel on the Billing page contains a line that shows how much money is in reserve to pay hosting fees. When the sponsorship reserve contains a sufficient amount for your group, you can remove the Sponsor This Group button from your group’s home page by clearing the Allow Sponsorship checkbox in the group’s settings (remember to click the Update Group button after you clear the checkbox).

4 Using the sponsorship feature to defray Groups.io hosting costs
18 Updated: Mar. 18, 2022 Groups.io Group Owners Manual
Note:
• Group sponsorships generate moderator notifications. Sponsorships also are recorded in the Activity log.
• Sponsorships are nonrefundable. Sponsorship amounts are held by Groups.io and are used to pay hosting fees for the sponsored group as needed.
• The entire amount of a sponsorship is added to the reserve—that is, no processing fees are deducted.
• If a fee is paid solely by sponsorship reserves, you will not be sent a payment receipt; however, you will receive an email notification.
• Free Basic groups can allow sponsorships. Upgrading a Basic group to Premium level requires a credit card to be on file at that time, but you can delete the credit card from the Billing page in your Groups.io account after you have upgraded the group and rely solely on sponsorship reserves to pay the fee.
• Any group sponsorships that you have paid are listed on the Billing page in your Groups.io account.
• The sponsorship feature is separate from the Donations feature in Premium and Enterprise groups.
• Group sponsorship amounts are not tax deductible.

5 Customizing settings for Premium and Enterprise features
Groups.io Group Owners Manual Updated: Mar. 18, 2022 19
5 Customizing settings for Premium and Enterprise features
5.1 Locating the feature settings
Note: The features listed here are available in Premium (trial or paid) and Enterprise groups. Most of them are also available in legacy Basic groups (those created before August 24, 2020). None of these features are available in new Basic groups created on or after August 24, 2020.
In the left navigation menu on the group’s website, select Admin > Settings. When the main Settings page appears, scroll down to the Premium & Enterprise Features panel title (in legacy Basic groups, the title is just Features), and click the arrow at the far right to expand that panel.
In the Premium & Enterprise Features panel, you can customize settings for these Groups.io features:
• Message reposting
• Calendar
• Member directory
• Chats
• Subgroups
• Databases
• Files
• Photos
• Polls
• Wiki
! Important: After you change settings in this panel, remember to scroll to the bottom of the Settings page and click the Update Group button. Setting changes will not take effect or be remembered until you click that button.
5.2 Message reposting
You can allow members to repost messages to the group, and you can specify the maximum number of times that a message can be reposted. For example, a group that posts classified ads might allow members to repost ads if items are not sold.
If you want to allow message reposting in your group, in the Reposting Policies section at the top of the Premium & Enterprise Features panel:
• Select the Allow Reposts Of Messages After [0] Days checkbox and change 0 to the number of days that must elapse before messages can be reposted to the group.
• In the Max Number Of Reposts list, select the option that applies to the number of times you want to allow members to be able repost messages.
The settings will take effect after you click the Update Group button at the bottom of the page. Reposted messages are tagged automatically with the #repost hashtag.

5 Customizing settings for Premium and Enterprise features
20 Updated: Mar. 18, 2022 Groups.io Group Owners Manual
5.3 Calendar
5.3.1 Permissions
Note: In legacy Basic groups (those created before August 24, 2020), the Permissions settings are available, but the other calendar settings are not.
You can specify whether the Calendar feature is available on your group’s website and, if it is, who can view and create/edit events in the group’s calendar. From the Permissions list in the Calendar section of the panel, select the option you want to use:
Option Description
Public can view, members can view and edit
The general public (anyone on the web) can see the calendar, but only group members can create and edit calendar events.
Members can view and edit Only group members can see the calendar and create and edit calendar events.
Public and members can view, moderators can edit
The general public and group members can see the calendar, but only moderators can create and edit calendar events.
Members can view, moderators can edit
Only members can see the calendar, and only moderators can create and edit calendar events. (This setting is the default.)
Members cannot view, moderators can edit
Group members cannot see the calendar; only moderators can see the calendar and create and edit calendar events.
Calendar is disabled The Calendar feature is not available in the group.
The setting will take effect after you click the Update Group button at the bottom of the page.
5.3.2 Send Invites On Join
Premium and Enterprise groups can automatically send an iCalendar (ICS) file of all calendar events to new members when they join the group and automatically send an ICS file of event cancellation notifications to members who leave the group.
To turn on this setting, in the Calendar section of the panel, select the Send Invites On Join checkbox. After you save settings by clicking the Update Group button at the bottom of the page, new members who join the group will automatically receive an ICS file of existing events on the group’s calendar that they can add to their own calendars. Also, members who leave the group will automatically receive an ICS file of event cancellation notifications that they can use to remove the group’s calendar events from their own calendars.
5.3.3 Send Event Summaries and Summary Email Schedule
Premium and Enterprise groups can automatically send a summary of upcoming calendar events (up to 20) to the group at a regular interval. In the Calendar section of the panel:
• Select the Send Event Summaries checkbox.
• From the Summary Email Schedule list, select the interval at which you want the event summary to be sent:
o Weekly on Friday
o Biweekly on Friday
o Monthly

5 Customizing settings for Premium and Enterprise features
Groups.io Group Owners Manual Updated: Mar. 18, 2022 21
After you save settings by clicking the Update Group button at the bottom of the page, a message containing a summary of up to 20 upcoming group calendar events will be sent to the group at the interval you selected. The message’s subject line will contain the hashtag #cal-summary.
5.4 Member directory
You can specify whether the member directory is available on the group’s website and, if it is, who can view it. From the Permissions list in the Member Directory section of the panel, select the option you want to use:
Option Description
Members All members of the group can view the directory.
Moderators and Owners Only the group’s moderators and owners can view the directory.
Member Directory is disabled The directory feature is not available in this group.
The setting will take effect after you click the Update Group button at the bottom of the page.
Note: Each group member can decide whether to create a profile for the group and, if they do create one, whether to allow it to be visible in the member directory.
5.5 Chats
You can specify whether the Chats feature is available on your group’s website and, if it is, who can start new chats. From the Permissions list in the Chats section of the panel, select the option you want to use:
Option Description
Members All members in the group can start new chats.
Moderators and Owners Only moderators and owners can start new chats. (This setting is the default.)
Chat is disabled The Chats feature is not available in the group.
The setting will take effect after you click the Update Group button at the bottom of the page.
5.6 Subgroups
Premium and Enterprise groups can contain subgroups. In the Subgroups section of the Premium & Enterprise Features panel, you can specify who can create subgroups. From the Permissions list in the Subgroups section, select the option you want to use:
Option Description
Members All members in the group can create subgroups.
Moderators and Owners Only moderators and owners can create subgroups. (This setting is the default.)
Owners Only Only owners can create subgroups.
The setting will take effect after you click the Update Group button at the bottom of the page.

5 Customizing settings for Premium and Enterprise features
22 Updated: Mar. 18, 2022 Groups.io Group Owners Manual
Note:
• Subgroups are also available in Basic groups that were created before January 15, 2020. Basic groups that were created after January 15, 2020 cannot have subgroups.
• You can create subgroups during a 30-day free trial of a Premium group. However, if you decide not to continue with a paid Premium plan after the 30 days are up, those subgroups will be locked. (They will not be deleted in case you decide to upgrade to a paid plan in the future.)
5.7 Database
5.7.1 Permissions
You can specify whether the Databases feature is available on your group’s website and, if it is, who can view and create/edit tables in the group’s databases. From the Permissions list in the Database section of the panel, select the option you want to use:
Option Description
Members can view and create tables
All members in the group can create and modify database tables.
Members can view, moderators can create tables
Members can view database tables, but only moderators can create and modify them. (This setting is the default.)
Members cannot view, moderators can create tables
Members cannot see databases; only moderators can create and modify database tables.
Databases are disabled The Databases feature is not available in the group.
The setting will take effect after you click the Update Group button at the bottom of the page.
5.7.2 Max Image Size In Databases
If the Database feature is available in the group, you can restrict the size of images that are uploaded to database tables, to save group storage space. From the Max Image Size In Databases list, select the maximum size (in pixels) that uploaded images should be resized to. The default setting is No resizing.
The setting will take effect after you click the Update Group button at the bottom of the page.
5.8 Files
5.8.1 Permissions
You can specify whether the Files feature is available on your group’s website and, if it is, who can view and upload files. From the Permissions list in the Files section of the panel, select the option you want to use:
Option Description
Members can view and upload All members in the group can upload files.
Members can view, moderators can upload
Members can view files, but only moderators can upload them. (This setting is the default.)
Members cannot view, moderators can upload
Members cannot see files; only moderators can upload files.
Files are disabled The Files feature is not available in the group.
The setting will take effect after you click the Update Group button at the bottom of the page.

5 Customizing settings for Premium and Enterprise features
Groups.io Group Owners Manual Updated: Mar. 18, 2022 23
5.8.2 Allow Photos In Files
If the group uses the Files feature, you can specify whether photos can be uploaded to the Files section (as opposed to restricting them to the Photos section). If you want to allow photos to be uploaded to the Files section, select the Allow Photos in Files checkbox. Photos uploaded to the Files section are not subject to image size restrictions that might be set for photos uploaded to the Photos section. However, they do not have thumbnails like they would in the Photos section.
The setting will take effect after you click the Update Group button at the bottom of the page.
5.9 Photos
5.9.1 Permissions
You can specify whether the Photos feature is available on your group’s website and, if it is, who can view and upload photos and other images. From the Permissions list in the Photos section of the panel, select the option you want to use:
Option Description
Members can view and upload All members in the group can create albums and upload photos.
Members can view, moderators can upload
Members can view photos, but only moderators can upload them. (This setting is the default.)
Members cannot view, moderators can upload
Members cannot see photos; only moderators can upload photos.
Photos are disabled The Photos feature is not available in the group.
The setting will take effect after you click the Update Group button at the bottom of the page.
5.9.2 Max Size In Photos Section
If the group uses the Photos feature, you can restrict the size of images that are uploaded, to save group storage space. From the Max Size In Photos Section list, select the maximum size (in pixels) that uploaded images should be resized to when they are uploaded. The default setting is No resizing.
The setting will take effect after you click the Update Group button at the bottom of the page.
5.10 Polls
You can specify whether the Polls feature is available on your group’s website and, if it is, who can start new polls. From the Permissions list in the Polls section of the panel, select the option you want to use:
Option Description
Members can create All members in the group can create new polls. (This setting is the default.)
Only moderators can create Only moderators (and owners) can create new polls. Members can respond to polls.
Polls are disabled The Polls feature is not available in the group.
The setting will take effect after you click the Update Group button at the bottom of the page.
Note: When the Polls feature is available, only members who can post messages to the group can create (if allowed) and respond to polls.

5 Customizing settings for Premium and Enterprise features
24 Updated: Mar. 18, 2022 Groups.io Group Owners Manual
For information on using polls, see Working with polls in the Groups.io Members Manual.
5.11 Wiki
5.11.1 Permissions
You can specify whether the Wiki feature is available on your group’s website and, if it is, who can view and edit wiki pages. From the Permissions list in the Wiki section of the panel, select the option you want to use:
Option Description
Public can view, members can view and edit
The general public (anyone on the web) can see the wiki, but only group members can create and edit wiki pages.
Members can view and edit Only group members can see, create, and edit the wiki pages.
Public and members can view, moderators can edit:
The general public and group members can see the wiki, but only moderators can create and edit wiki pages.
Members can view, moderators can edit
Only members can see the wiki, and only moderators can create and edit the wiki pages. (This setting is the default.)
Members cannot view, moderators can edit
Group members cannot see the wiki; only moderators can see the wiki and create and edit wiki pages.
Wiki is disabled The Wiki feature is not available in the group.
Note: When an owner or moderator creates a wiki page, they can select a setting that allows only moderators to edit that page.
The setting will take effect after you click the Update Group button at the bottom of the page.
5.11.2 Sticky Wiki Page
In a group that uses the Wiki feature, you can select a specific wiki page that is partially displayed, with a link to the full page, at the top of the Topics page on the group’s website (in other words, the wiki page “sticks” to the top of the Topics page). From the Sticky Wiki Page list, select the page you want to make sticky on the messages page. The setting will take effect after you click the Update Group button at the bottom of the page.
Note: The wiki page must already exist. You cannot create a new wiki page from here.
This setting is useful if, for example, you want to make a help page for the group easily noticeable. See Pinning topics and wiki pages to the Topics page.
5.11.3 Max Image Size on Wiki Pages
To save group storage space, you can use this setting to restrict the size of images that are inserted in wiki pages. From the Max Image Size on Wiki Pages list, select the maximum size (in pixels) that images inserted in wiki pages should be resized to. The default setting is No resizing.
The setting will take effect after you click the Update Group button at the bottom of the page.

6 Setting default email options and user settings for group members
Groups.io Group Owners Manual Updated: Mar. 18, 2022 25
6 Setting default email options and user settings for group members
6.1 Overview
You can set default email options for the group and some default account settings that will apply to all new members. Be aware that members can override these defaults individually by changing their personal subscription and account settings.
To display the Settings page for default email options and default user settings:
1. In the left navigation menu on the group’s website, select Admin > Settings. The main Settings page appears.
2. At the top of the Settings page, click the Default Sub Settings button.
On this page, you can set default options for these elements:
• In the Default Subscription Settings panel:
○ Email Delivery
○ Message Selection
○ Replies
○ Max Attachment Size
• In the Default User Settings panel:
○ Timezone
○ Time Display
○ Date Display
○ Monday Start
Note: The Default User Settings panel does not appear in subgroups because someone must be a member of the parent group before joining a subgroup, and the act of joining the parent group creates the Groups.io account if it does not exist and populates the account with the default user settings at that point. Therefore, default user settings are not needed for subgroups.
! Important: When you finish customizing settings on this page, ensure that you scroll all the way to the bottom of the page and click the Update Group button. Your changes will not take effect until you click that button.

6 Setting default email options and user settings for group members
26 Updated: Mar. 18, 2022 Groups.io Group Owners Manual
6.2 Default Subscription Settings panel
! Important: Settings that you change in this panel will affect only people who join the group after you applied the changes. The subscription settings of existing group members will not be affected.
6.2.1 Email Delivery
Select a setting that specifies how members receive group posts by email:
Setting Description
Individual Messages Members receive each message individually as soon as it is posted to the group. (This setting is the default.)
Full Featured Digest Members receive a fully formatted (HTML) digest containing the day’s messages. With this setting, the system groups a day’s messages into batches of 12 and delivers each batch in one digest message when the 12th message is posted. Any messages that remain at 6:00 AM local time are sent as the final (or only) digest of the day, if a digest has not been sent within the last 6 hours. The digests include the full text of each message, omitting any quotes of previous messages. Full Featured Digests include, at the top, a list of the enclosed topics, which are clickable links to take readers directly to the topics within the digest.
Plain Digest Members receive a plain text digest containing the day’s messages. This digest is generated and sent the same way as a full featured digest, but it does not contain clickable links.
Daily Summary Members receive a once-daily list of topics that were posted that day. Unlike the digests, the summary does not include the text of any of the messages. It contains only a list of topics.
Special Notices Only Members receive only the messages that moderators have designated as special notices.
No Email With this setting, members do not receive any group messages by email. They might still receive individual notifications from the group (for example, messages sent directly to them by moderators) and system messages from Groups.io.
Note:
• With this setting, members can access messages and other group features on the group’s website, but they do not receive group posts through email.
• The No Email setting will not be available if you decide to disable it for the group. See Disable No Email.

6 Setting default email options and user settings for group members
Groups.io Group Owners Manual Updated: Mar. 18, 2022 27
6.2.2 Message Selection
Select a setting that specifies which messages members receive by email:
Setting Description
All Messages Members receive every message (individually or in digests, depending on the Email Delivery setting) posted to the group except those that are in topics that they have specifically muted or that are tagged with one or more hashtags that they have specifically muted. (This setting is the default.)
Following Only Members receive only the messages (individually or in digests, depending on the Email Delivery setting) posted to the group that are in topics that they are specifically following or that are tagged with one or more hashtags that they are specifically following.
First Message Also Members receive the first message of each new topic, disregarding the fact that they have not yet followed that topic. This setting allows members to know that a given topic has been posted so they can then decide whether to follow any additional messages in that topic. Note: You cannot select this checkbox unless you select Following Only.
Auto Follow Replies Select the Auto Follow Replies checkbox to automatically send members all replies to topics that they start or reply to. This setting marks any topic that members start or reply to as one that they follow. This setting mimics the common web forum behavior of providing email notification for topics that members post in. Note: This checkbox is selected automatically when you select Following Only.
6.2.3 Max Attachment Size
If you want to specify a default maximum size for attachments that members receive in emails, select an option from this list. The default maximum attachment size is Unlimited.
This setting is useful for members who have a metered or limited connection or who have limited storage space for attachments. Instead of receiving an attached file, they will receive a link to it so they can open it from the group's website.
Note: This setting does not prevent members from sending large attachments to the group (and using up storage space). It just prevents large attachments from being delivered to members by email.

6 Setting default email options and user settings for group members
28 Updated: Mar. 18, 2022 Groups.io Group Owners Manual
6.3 Default User Settings panel
! Important: The settings in this panel apply to the accounts of people who are entirely new to Groups.io at the time they join this group—that is, people who, before joining this group, had not joined any other group at that email address (or had otherwise set these preferences in their own Groups.io account settings).
Note: This panel does not appear in subgroups because someone must be a member of the parent group before joining a subgroup, and the act of joining the parent group creates the Groups.io account if it does not exist and populates the account with the default user settings at that point. Therefore, default user settings are not needed for subgroups.
6.3.1 Timezone
This setting specifies the timezone to use for displaying times on Groups.io websites.
Note: If you (the group owner) set a timezone in your Groups.io account preferences, new groups that you create will have that timezone by default. Otherwise, the default timezone is U.S./Canada Pacific Time (UTC-08:00 or UTC-07:00 depending on whether Daylight Saving Time is in effect).
6.3.2 Time Display
This setting specifies whether times on Groups.io websites are displayed in standard (12-hour) or military (24-hour) format.
6.3.3 Date Display
This setting specifies how numerical dates are displayed on Groups.io websites.
6.3.4 Monday Start
Select this checkbox to display Groups.io calendars with Monday, rather than Sunday, as the first day of the week. (In countries outside the United States, calendar weeks often start on Monday instead of Sunday.)

7 Changing the home page image and group icon
Groups.io Group Owners Manual Updated: Mar. 18, 2022 29
7 Changing the home page image and group icon 1. In the left navigation menu on the group’s website, select Admin > Settings. The main
Settings page appears.
2. At the top of the Settings page, click the Cover Photo button.
3. On the Cover Photo page, follow the applicable steps:
To: Take these actions:
Change the image on the group’s home page
1. In the Cover Photo panel, click the button to choose or browse to a file. (The button label is either Choose File or Browse, depending on your web browser.)
2. Navigate to the image file you want to use and select it. You return to the Cover Photo panel.
3. Click Set Cover Photo. The system uploads and displays your selected image in the Cover Photo panel. Go to the group’s home page to see the image there.
Delete the image on the group’s home page
In the Cover Photo panel, click the Delete Cover Photo button. The image is removed and replaced with the Groups.io default image.
Change the icon displayed on mobile devices and on members’ Feed pages on the group’s website
1. In the Icon panel, click the button to choose or browse to a file. (The button label is either Choose File or Browse, depending on your web browser.)
2. Navigate to the image file you want to use and select it. You return to the Icon panel.
3. Click Set Icon. The system uploads and displays your selected image in the Icon panel. Go to your Feed page or log in to Groups.io on a mobile device to see the icon image there.
Delete the icon displayed on mobile devices and on members’ Feed pages
In the Icon panel, click the Delete Icon button. The image is removed and replaced with the Groups.io default image.
Tip: The system scales cover photo images to fit within 900 x 300 pixels (3:1 ratio) and scales icon images to fit within 200 x 200 pixels. If you want an image to look its best in Groups.io (that is, not distorted by the scaling), use an image editor to make the image the applicable size before you upload it to the group.

8 Managing moderator notifications about group activity
30 Updated: Mar. 18, 2022 Groups.io Group Owners Manual
8 Managing moderator notifications about group activity
8.1 Overview
Groups.io has always provided the ability for group owners and moderators to receive system-generated notifications by email when pending members or messages required approval, members joined or left groups, group storage limits were reached, subgroups were created or deleted, and group content was reported as objectionable. In June 2020, Groups.io revised and expanded the way it handles system-generated notifications about activity in groups:
• Web/app notifications were implemented, and a Notifications page was added to Groups.io accounts so members can enable or disable web/app notifications.
• For owners and moderators, a Moderator Notifications panel was added to the Subscription page with options for controlling how to receive notifications to moderators about activity that occurs in individual groups. In addition, the list of activities that generate moderator notifications was increased to include activities affecting chats, files, photos, wiki pages, and databases.
• A feature was added to group Hashtags pages that allows members to enable or disable web/app notifications for individual hashtags (in addition to being able to mute or follow hashtags, which was already available).
• New system hashtags were added to identify certain types of group notices, and some existing system hashtags were renamed to include “-notice.” See System hashtags for more information.
In March 2021, a Member Notifications panel was added to the Edit Subscription page that allows members to enable or disable web/app notifications for new messages posted to groups and for new messages posted to group chats that they participate in.
8.2 Enabling and disabling web/app notifications
You can receive web/app notifications for notices that are directed to owners and moderators, notices that are directed to the group, notices that are directed to members, new messages posted to groups, new messages posted to chats that you are participating in, and group messages that are posted with hashtags you opted to be notified about. First, however, you must enable web/app notifications in your Groups.io account. Follow these steps on each device and in each browser where you want to see the notifications:
1. ! Important: Ensure that the browser or device allows notifications from Groups.io. The instructions depend on your specific browser and device. See your browser’s or device’s settings and help information.
Note: If private browsing mode is enabled in your browser, web/app notifications might not work. In that situation, you must disable private browsing to receive web/app notifications.
2. Display your Groups.io Account page.
3. In the left navigation menu, select Notifications.
4. On the Notifications page, click the Enable Notifications In This Browser button. If the browser displays a popup asking you to confirm that you want to allow Groups.io to show notifications, click the option that allows notifications. Your Notifications page then lists the device (operating system) and browser for which you enabled web/app notifications.
5. If desired, click the Send A Test Notification button to check that Groups.io web/app notifications appear in the browser or on the mobile device.

8 Managing moderator notifications about group activity
Groups.io Group Owners Manual Updated: Mar. 18, 2022 31
The steps above enable web/app notifications for all your Groups.io groups. To control the notifications that you receive about activity in individual groups, see Controlling moderator notifications for individual groups.
You can also enable web/app notifications for individual hashtags in a group. Go to the group’s Hashtags page and click the Mute/Notify button of a hashtag for which you want to enable web/app notifications. (That button is labeled Follow/Notify if you have selected “Following Only” on the Advanced Preferences panel of your Subscription page for the group.)
To disable web/app notifications from all your groups:
1. Display your Groups.io Account page.
2. In the left navigation menu, select Notifications.
3. On the Notifications page, click the Disable Notifications In This Browser button. Or, if you want to disable web/app notifications on all your devices, click the Disable Notifications on All Devices button.
4. When the Verify Disable Notifications popup appears, click Yes.
8.3 Controlling moderator notifications for individual groups
As a group owner or moderator, you can control which notifications you receive about activity in your group and the method by which you receive those notifications. The activities that generate notifications are:
• In all groups: o A pending member needs approval. o A pending message needs approval. o A member joined or left the group. o An objectionable message was reported. o The group’s storage limit was reached.
• In Premium or Enterprise groups or legacy Basic groups created before August 24, 2020: o An objectionable file or photo was reported. o A chat was created or modified. o A photo or photo album was uploaded, modified, moved, or deleted. o A file or folder was uploaded, modified, moved, or deleted. o A wiki page was created or modified. o A database table was created or modified.
• In Premium or Enterprise groups or legacy Basic groups created before January 15, 2020: o A subgroup was created or deleted.
To control the notifications you receive about specific group activities:
1. On the group’s website, in the left navigation menu, click Subscription.
2. On your Edit Subscription page, scroll down to the Moderator Notifications panel. Note: This panel appears only for group owners and moderators. (It replaced the original Notifications panel that contained a shorter list of activities for which owners and moderators could choose to receive notifications by email.)

8 Managing moderator notifications about group activity
32 Updated: Mar. 18, 2022 Groups.io Group Owners Manual
3. For each activity type listed on the Moderator Notifications panel, use the corresponding dropdown list to select your preferred notification method for that activity:
Notification method
Description
Email and web/app When the activity occurs, you receive both an email notification and a web/app notification (if you have enabled web/app notifications in your Groups.io account). This method is the default.
Email only When the activity occurs, you receive only an email notification.
Web/App only When the activity occurs, you receive only a web/app notification.
None You receive no notification of any kind when the activity occurs.
4. Scroll to the bottom of the page and click the Save button.
Note:
• Email notifications sent to moderators as a result of their Moderator Notifications settings do not include system hashtags.
• With email notifications, a delay of 4 to 8 minutes occurs between when the action is taken and when the corresponding email notification is delivered. This delay allows the system to combine multiple actions (of the same type) that occur within a short period of time into a single notification, which prevents a barrage of individual email notifications. Web/app notifications are always sent individually; they are not delayed or combined.
• If you are the one who performs an activity that you have chosen to be notified about, you will not receive a web/app notification or email notification for it.
Exceptions:
o If an unauthorized (spam) unsubscription occurs, you will receive a web/app notification if you were unsubscribed as a result.
o You will receive a web/app notification about reaching the group’s storage limit even if your upload or post was the one that caused the limit to be reached.

9 Managing member notices
Groups.io Group Owners Manual Updated: Mar. 18, 2022 33
9 Managing member notices
9.1 Overview
Group owners and moderators can create customized, prewritten messages, called member notices, that can be sent to group members for various reasons. Member notices make it convenient for moderators to send commonly used messages to members under different circumstances without having to rewrite the text each time. In the case of a member-initiated event, such as someone leaving a group or joining an unrestricted group, having a member notice makes it possible for a message pertaining to that event to be sent to the person automatically.
9.2 Creating, editing, or deleting member notices
To create a member notice, follow these general steps:
1. In the left navigation menu on the group’s website, select Admin > Settings. The main Settings page appears.
2. At the top of the Settings page, click the Member Notices button.
3. On the Member Notices page, click the New Notice button.
4. Complete the elements for the new notice, then click the Add Notice button at the bottom of the page:
Element Selection or entry
Notice Type From the list, select the type of notice you want to create.
Name Leave the default name as is or change it. This name is displayed in the list of existing notices on the Member Notice page and in selection lists on other pages. Tip: If you intend to create multiple notices of the same type, you should ensure that each notice of that type has a unique name so you will be able to easily identify specific notices in the lists.
Subject Leave the default subject as is or change it.
Active Message Select this checkbox if you want to make this notice the Active Message for this notice type—that is, the message that is sent automatically at the time of its corresponding event.
Note: Only one notice of each type can be the Active Message at any given time. Exceptions:
• Group Guidelines—This notice type does not have an Active Message checkbox.
• Message to Members—This notice type does not have an Active Message checkbox.
• Monthly Reminder—You can have multiple Monthly Reminder notices set to Active Message. All of them will be sent automatically.
• Welcome—You can have multiple Welcome notices set to Active Message. All of them will be sent automatically.

9 Managing member notices
34 Updated: Mar. 18, 2022 Groups.io Group Owners Manual
Element Selection or entry
Text formatting box Enter and format the body of the notice. Tip: To see all of the formatting tools, click the Show advanced toolbar “hamburger” icon at the right.
Note: For some notices, the system provides default text for the message body. This text appears automatically when you select those notice types. You can edit the default text as desired.
To edit an existing notice:
1. In the left navigation menu on the group’s website, select Admin > Settings > Member Notices.
2. On the Member Notices page, click the notice’s name. 3. Make your changes to the notice. 4. Click the Update Notice button at the bottom of the page.
To delete a notice:
1. In the left navigation menu on the group’s website, select Admin > Settings > Member Notices.
2. On the Member Notices page, click the notice’s name. 3. Scroll to the bottom of the page and click the Delete Notice button.
The topics that follow describe the available types of member notices (in alphabetical order) and how they are used.
9.3 Banned Member notice
This notice can be sent automatically when a moderator bans a member from the group. To be sent automatically, the notice must be the active notice (set to Active Message). If no Banned Member notice is set to Active Message, none will be sent.
9.4 Direct Add notice
Note: The Direct Add feature is available only in paid Premium and Enterprise groups. It is not available in free Premium 30-day trial groups or in Basic groups.
When you are adding members directly to the group, the content of a Direct Add notice is placed in the Customize Message panel on the Direct Add page. If you set a Direct Add notice to be the Active Message, its content is included in the Customize Message panel automatically when you go to the Direct Add page.
You can create more than one Direct Add notice. However, only one Direct Add notice can be designated as the Active Message. For example, you might want a Direct Add notice for general use, which would be the Active Message, and another Direct Add notice for certain situations, which you would select at the time you are direct adding those members.
9.5 Goodbye notice
This notice can be sent automatically to someone who leaves the group. To be sent automatically, the notice must be the active notice (set to Active Message). If no Goodbye notice is set to Active Message, none will be sent.
Some groups use this notice to ask members why they left the group. Responses go to the group owner email address.

9 Managing member notices
Groups.io Group Owners Manual Updated: Mar. 18, 2022 35
9.6 Group Guidelines notice
The Group Guidelines notice is a unique type of notice that provides a convenient and versatile way to communicate and maintain the group’s posting and conduct guidelines, rules, best practices, and so on.
A Group Guidelines notice can be:
• Sent automatically on the first of each month as a message to the group, with an option to include members whose subscriptions are set to Special Notices Only.
• Sent automatically to all new group members.
• Sent manually by a moderator to a group member at any time.
• Displayed through its own Guidelines entry in the left navigation menu on the group’s website, with an option for that entry to be visible to group members only or to the general public.
Unlike most of the other notice types, a group can have only one Group Guidelines notice. When the notice is created, a Guidelines entry automatically appears in the left navigation menu on the group’s website. The rest of the notice’s features are optional, and you can specify them when creating or editing the notice:
Feature Entry or selection
Subject Enter a subject line that will appear in the message when the notice is emailed to a group member separately from the monthly message to the group.
Email Subject Enter a subject line that will appear in the message when the notice is emailed to the group or to an individual.
Private Select this checkbox to make the Guidelines entry on the group’s home page visible only to group members. If you do not select this checkbox, the Guidelines entry is visible to the general public.
Send on Join Select this checkbox to send the Group Guidelines notice automatically to new group members through email.
Send monthly to group Select this checkbox to send the Group Guidelines notice as a message to the group on the first of each month. With this option, the message is also saved in the group’s message archive. Note: The system sends the message with the #guidelines-notice hashtag. If that hashtag does not already exist, it is created with a topic duration of one month, causing the archived message to be automatically deleted after one month (when it is superseded by the next monthly message). The #guidelines-notice hashtag is set to “Use by Mods Only” and “Replies by Mods Only” to prevent nonmoderators from using it.
Send monthly as special This checkbox appears only when the Send monthly to group checkbox is selected. When you select the Send monthly as special checkbox, the monthly Group Guidelines message to the group is sent as a special notice, so that members whose email delivery option is Special Notice Only will receive it (in addition to members whose email delivery option is Individual Messages). In this case, the #guidelines-notice hashtag is also set to “Special.”
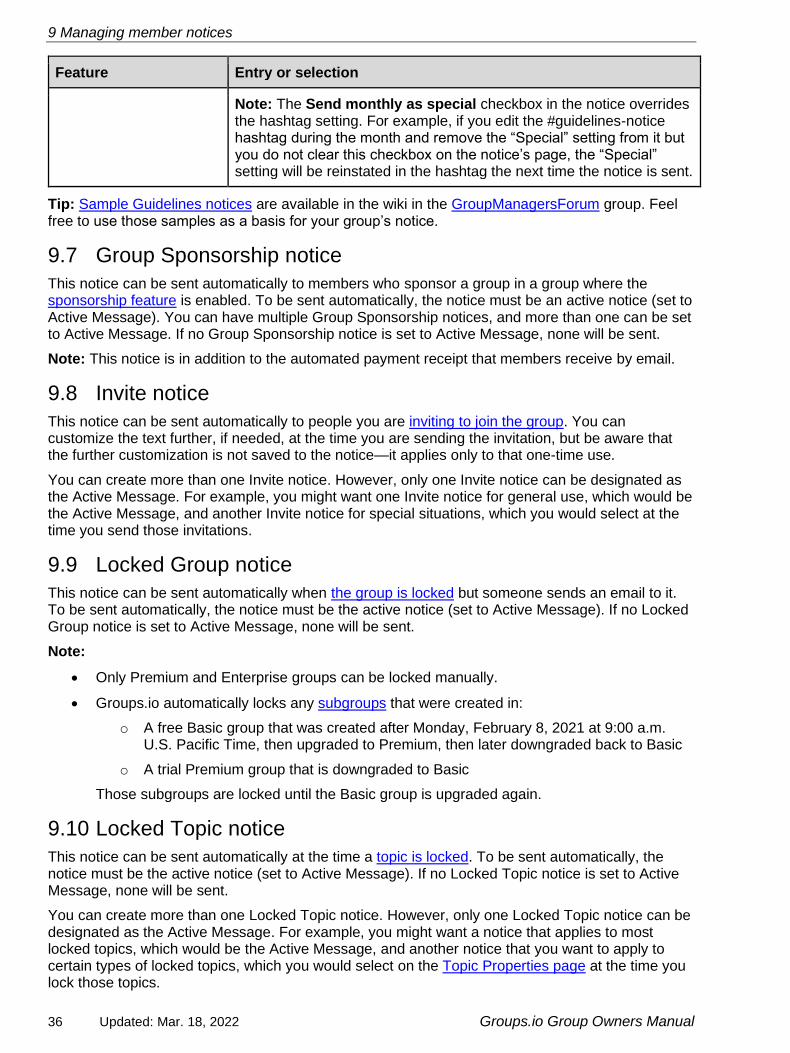
9 Managing member notices
36 Updated: Mar. 18, 2022 Groups.io Group Owners Manual
Feature Entry or selection
Note: The Send monthly as special checkbox in the notice overrides the hashtag setting. For example, if you edit the #guidelines-notice hashtag during the month and remove the “Special” setting from it but you do not clear this checkbox on the notice’s page, the “Special” setting will be reinstated in the hashtag the next time the notice is sent.
Tip: Sample Guidelines notices are available in the wiki in the GroupManagersForum group. Feel free to use those samples as a basis for your group’s notice.
9.7 Group Sponsorship notice
This notice can be sent automatically to members who sponsor a group in a group where the sponsorship feature is enabled. To be sent automatically, the notice must be an active notice (set to Active Message). You can have multiple Group Sponsorship notices, and more than one can be set to Active Message. If no Group Sponsorship notice is set to Active Message, none will be sent.
Note: This notice is in addition to the automated payment receipt that members receive by email.
9.8 Invite notice
This notice can be sent automatically to people you are inviting to join the group. You can customize the text further, if needed, at the time you are sending the invitation, but be aware that the further customization is not saved to the notice—it applies only to that one-time use.
You can create more than one Invite notice. However, only one Invite notice can be designated as the Active Message. For example, you might want one Invite notice for general use, which would be the Active Message, and another Invite notice for special situations, which you would select at the time you send those invitations.
9.9 Locked Group notice
This notice can be sent automatically when the group is locked but someone sends an email to it. To be sent automatically, the notice must be the active notice (set to Active Message). If no Locked Group notice is set to Active Message, none will be sent.
Note:
• Only Premium and Enterprise groups can be locked manually.
• Groups.io automatically locks any subgroups that were created in:
o A free Basic group that was created after Monday, February 8, 2021 at 9:00 a.m. U.S. Pacific Time, then upgraded to Premium, then later downgraded back to Basic
o A trial Premium group that is downgraded to Basic
Those subgroups are locked until the Basic group is upgraded again.
9.10 Locked Topic notice
This notice can be sent automatically at the time a topic is locked. To be sent automatically, the notice must be the active notice (set to Active Message). If no Locked Topic notice is set to Active Message, none will be sent.
You can create more than one Locked Topic notice. However, only one Locked Topic notice can be designated as the Active Message. For example, you might want a notice that applies to most locked topics, which would be the Active Message, and another notice that you want to apply to certain types of locked topics, which you would select on the Topic Properties page at the time you lock those topics.

9 Managing member notices
Groups.io Group Owners Manual Updated: Mar. 18, 2022 37
Note: No one, including group owners and moderators, can reply to a locked topic. Members who send an email reply to a locked topic receive an automatic delivery failure notification stating that the topic is locked.
9.11 Message To Member notice
This notice is a prewritten message on any subject that an owner or moderator can send at any time to a member, or to multiple members, through the Send Message feature from either a member’s individual page or the member list page on the group’s website. See Sending messages from the owner email address.
You can create more than one Message To Member notice (for example, to cover different situations). When you send a Message To Member notice, you can customize it further as needed. However, further customization is not saved to the notice. It applies only to that one-time use.
9.12 Monthly Reminder notice
This notice can be sent to the group automatically every month. The notice is also saved in the group’s message archive. You could use this notice to remind members how to post messages to the group, how to change their subscription preferences, how to change their email address, and so on.
To be sent automatically, the notice must be set to Active Message. You can create multiple Monthly Reminder notices and set each one to Active Message so they are all sent automatically. If no Monthly Reminder notice is set to Active Message, none will be sent automatically.
Note:
• The system sends the message with the #monthly-notice hashtag. If that hashtag does not already exist, it is created with a topic duration of one month, causing the archived message to be automatically deleted after one month (when it is superseded by the next monthly message). The #monthly-notice hashtag is set to “Use by Mods Only” and “Replies by Mods Only” to prevent nonmoderators from using it.
• When you select the Send monthly as special checkbox, the Monthly Reminder message to the group is sent as a special notice, so that members whose email delivery option is Special Notice Only will receive it (in addition to members whose email delivery option is Individual Messages). In this case, the #monthly-notice hashtag is also set to “Special.” Be aware that the checkbox in the notice overrides the hashtag setting. For example, if you edit the #monthly-notice hashtag during the month and remove the “Special” setting from it but you do not clear this checkbox on the notice’s page, the “Special” setting will be reinstated in the hashtag the next time the notice is sent.
• If you have multiple Monthly Reminder notices set to Active Message, the system sends them all at the same time (within the same second or two). Due to the vagaries of email delivery, there is no way to guarantee the order in which multiple notices are delivered.
9.13 Pending Subscription notice
This notice can be sent automatically to anyone who applies for membership in a restricted group (a group that has the Restricted Membership setting). To be sent automatically, the notice must be the active notice (set to Active Message). If no Pending Subscription notice is set to Active Message, none will be sent.
Tips:
• Some groups use this notice to screen potential members by asking questions for applicants to respond to in support of their applications to join the group. Responses go to the group owner address and are recorded on individual members’ pages under “+owner messages.”

9 Managing member notices
38 Updated: Mar. 18, 2022 Groups.io Group Owners Manual
• Templates for Pending Subscription notices are available in the wiki in the GroupManagersForum group. Feel free to use those templates as a basis for your group’s notice.
For more information, see Handling pending members under Managing members.
9.14 Rejected Message notice
This notice is sent when a moderator rejects a pending message from a moderated member or a message in a moderated group or topic. The way it is handled depends on the method the moderator uses to reject the message:
If the moderator rejects the message:
Then:
By email (that is, the moderator uses the rejection link in a “Message Approval Needed” notification)
The Rejected Message notice can be sent automatically. To be sent automatically, the notice must be the active notice (set to Active Message). If no Rejected Message notice is set to Active Message, none will be sent.
On the group’s website The text box for the rejection notice is initially left empty. The moderator can write the entire message by hand or select a Rejected Message notice as the initial text.
9.15 Rejected Subscription notice
This notice can be sent automatically when a moderator rejects an application for membership in a restricted group. To be sent automatically, the notice must be the active notice (set to Active Message). If no Rejected Subscription notice is set to Active Message, none will be sent.
9.16 Removed Member notice
This notice can be sent automatically when a moderator removes a member from the group. To be sent automatically, the notice must be the active notice (set to Active Message). If no Removed Member notice is set to Active Message, none will be sent.
Note: With a bulk removal, the Removed Member notice (if one is active for the group) is not sent to the removed members.
9.17 Welcome notice
This notice is sent automatically to members who join an unrestricted group or whose membership in a restricted group has been approved. When the group is created, the system generates a default, “canned” Welcome notice. You can edit the default notice to personalize it for your group.
You can create multiple Welcome notices and set each one to Active Message so they are all sent automatically. If you have multiple Welcome notices set to Active Message, the system sends them all at the same time (within the same second or two).
Note: Due to the vagaries of email delivery, there is no way to guarantee the order in which multiple notices are delivered.

10 Inviting people to join a group
Groups.io Group Owners Manual Updated: Mar. 18, 2022 39
10 Inviting people to join a group
10.1 Overview
Groups.io provides an invitation system for owners and moderators (with the right permissions) to submit the email addresses of people they want to invite to join the group. The system sends an email invitation to each person. To join the group, each recipient just has to click on the link in the invitation or reply to the invitation.
Owners and moderators can track each invitation and see whether it has been accepted.
Note:
• Links in email invitations expire after 14 days. If no response is received within that period, you can resend the invitations, which will generate new links.
• Basic groups and Premium 30-day trial groups can add members only through the invitation process. If you want to add members to your group directly without the invitation step, that feature—called direct add—is available in paid Premium and Enterprise groups.
10.2 Sending invitations to join the group
1. In the left navigation menu on the group’s website, select Admin > Invite. The Invite page appears. If you have created an Invite notice for the group and set it to be the Active Message, the text of that notice appears in the Customize Message panel.
2. If desired, customize the content in the Customize Message panel. (If your group has more than one Invite notice, you can select one from the Notices list under the text box. The notice text will then appear in the panel.) This content will be included in the invitation message along with the prewritten content in the Invitation To Be Sent panel. As you enter text in the Customize Message panel, it is added to the Invitation To Be Sent panel after the line that says “The following message was included by [your name]:”.
Note: You cannot change the existing content in the Invitation To Be Sent field. Including a customized message might improve the invitation acceptance rate by reassuring recipients that the invitation is legitimate.
Tip: To help set off your customized message from the system-provided content, click the Show Advanced Toolbar “hamburger” icon to display an additional formatting toolbar, and then use the Horizontal line tool to insert horizontal lines before and after your message text.
3. In the Emails field, enter the email addresses (one per line) of the people you want to invite to the group. Alternatively, you can click the Browse button and upload a plain text file that contains a list of email addresses. Email addresses can be in either of these formats:
• Display Name <[email protected]>
Note:
• If you include names with the email addresses (as in the second format example above), the names will become the members’ display names in the group.
• A plain text file must contain one email address (or one display name and email address) per line and must be UTF-8. It cannot be UTF-16LE. Rich text format (RTF) files will not work.
4. Scroll to the bottom of the page and click the Send Invitations button. The Invite page is refreshed and displays an Invite Summary panel with the number of invitations the system processed and sent.

10 Inviting people to join a group
40 Updated: Mar. 18, 2022 Groups.io Group Owners Manual
Note: If an email address being invited is an email alias set up in an existing member’s Groups.io account, the Invite Summary panel displays an error message stating that the invited address is already a member and including the email address the alias is associated with. (For information about setting up email aliases, go to Groups.io Members Manual > Understanding Groups.io accounts > Setting account preferences and viewing account information and scroll to Setting or changing account login elements.)
10.3 Inviting more than 20 people at a time
If you invite more than 20 people to your group in a 24-hour period, you probably will see a notice that says:
“You have reached the limit for number of invites that can be sent out without approval. Once your new invites have been approved, they will be sent out. You will receive a notification when this happens.”
For this situation, Groups.io has a waiting period during which management reviews the list of invitees to ensure that you are not a spammer. The remaining invitations usually are released within a few hours.
Note: This review also applies to paid Premium and Enterprise groups that direct add more than 20 people at a time.
Tip: You do not need to group your invitations in batches of 20 (which will only incur additional delays). You can send all your invitations at once, either by uploading a plain text file or by copying and pasting all the email addresses into the Email Addresses field on the Invite page.
10.4 Tracking, resending, or canceling invitations
To see the status of invitations that were sent:
1. In the left navigation menu on the group’s website, select Admin > Invite.
2. On the Invite page that appears, click the Sent Invitations button at the top. The page is refreshed and displays a list of the email addresses that were invited, the dates the invitations were sent, and the status of the invitations.
To cancel and remove invitations that were sent, or to resend them, you can use the Actions button at the bottom of the list:
1. In the list of email addresses, select the checkboxes in front of the email addresses whose invitations you want to cancel or resend.
2. Click the Actions button and select the action you want to apply to those email addresses:
• Cancel/Remove Invite
• Send Again
Note:
• The links in email invitations expire after 14 days.
• If you do not cancel/remove an invitation, it can be sent again at any future date.

11 Managing members
Groups.io Group Owners Manual Updated: Mar. 18, 2022 41
11 Managing members
11.1 Working with the member list
11.1.1 Displaying the member list
To display the member list so you can review it for member status and other information: In the left navigation menu on the group’s website, select Admin > Members to display the Members page.
11.1.2 Reviewing the member list
The Members page—also referred to as the member list—contains members’ display names, email addresses, email delivery method, and the date they joined (or were approved to join) the group.
Certain colored badges (icons) might appear in entries in the member list to indicate members’ email delivery status, email delivery setting, or moderation status. For a list of these badges and their descriptions, see Additional information > Member badges and topic icons > Member badges.
To filter the member list to display only the members who are in certain categories or who have a certain status:
1. At the top of the Members page, click the filter button (it looks like a funnel).
2. When the filter list appears, select the checkbox for the category or status by which you want to filter the member list. You can select more than one checkbox.
3. ! Important: Go to the bottom of the filter list and click Apply.
To clear the filter list and display the entire member list, click the Members button at the top of the page.
Note: These checkboxes appear in the filter list only if you have the corresponding moderator permission:
• Pending Approval (requires the Approve Pending Members permission)
• Bouncing (requires the Manage Member Subscriptions permission)
• Banned (requires the Manage Member Subscriptions permission)
11.1.3 Displaying an individual member’s record
On the Members page, click anywhere in a member’s row—except the checkbox—to open a page that contains their membership details. (Clicking the checkbox selects the row so you can perform an action using the Actions button at the bottom of the Members page.)

11 Managing members
42 Updated: Mar. 18, 2022 Groups.io Group Owners Manual
11.2 Adding or updating members’ display names
The Display Name field in members’ records can be populated or updated through any of these ways:
• An owner or moderator can include a display name when they invite or add a member to the group.
• Members can add or modify their display names in their Groups.io account profiles or in their profiles for individual groups. (For more information, go to Groups.io Members Manual > Understanding Groups.io accounts > Setting account preferences and viewing account information, and scroll down to Customizing your Groups.io account profile and individual group profiles.)
• Owners and moderators can edit the Display Name field in individual members’ records (but be aware that members can change their own display names as mentioned above).
• If the field is empty when a member initially joins (or is added to) the group, the Groups.io system might automatically populate the field the first time the member emails a message to the group, if the message’s email header contains display name information.
11.3 Handling members marked as Not Confirmed
Members who have not yet responded to the confirmation email message sent by Groups.io are
marked with a Not Confirmed badge in the member list.
In Premium or Enterprise groups, moderators can confirm members directly. That feature is not available in Basic groups. In a Basic group, you can send another confirmation email message to a Not Confirmed member and hope that they respond to it:
1. Display the member list.
2. Click in the row (anywhere except the checkbox) of the member who has a Not Confirmed badge to display that member’s individual page.
3. Go to the bottom of that page and click the Send Confirmation Email button.
Tip: To see a list of only the Not Confirmed members, display the member list. Click the filter (funnel) button at the top of the page, select the Not Confirmed checkbox in the filter list, then go to the bottom of the filter list and click Apply. The page is refreshed and displays a list of the Not Confirmed members.
11.4 Handling pending members
11.4.1 Overview
If the group is set up with restricted membership, people who request to join the group must be approved by an owner or moderator. When someone applies to join a restricted group, owners and moderators who have chosen to receive pending member notifications receive an email or web/app notification (or both) that has a subject line starting with “Subscription approval needed.”
Note:
• For email notifications, the owners’ and moderators’ group subscriptions must be set to receive emails sent to the owner address. See Making a member an owner or moderator.
• Pending member requests expire after 14 days. If no action is taken within that period, the request is deleted. The pending member does not receive any notification.
Exception: The 14-day timeout period does not apply to approval requests that have been claimed by a moderator on the group’s website.

11 Managing members
Groups.io Group Owners Manual Updated: Mar. 18, 2022 43
11.4.2 Approving or rejecting pending members by email
To approve the pending member by email, just reply to the “Subscription approval needed” message without adding anything to it or clearing any text (if your email application is set up to include or quote messages you are replying to).
To reject the pending member by email, forward the message to the rejection link included in the message. The prospective member receives an automatic notification with a simple statement that the subscription request was not approved by the moderators. To provide more feedback to prospective members, you can create a customized Rejected Subscription notice with additional information.
Note: If the pending member has been claimed by another moderator (see below), you will receive an email delivery failure notification containing a statement that the pending member was claimed and including the claiming moderator’s display name.
11.4.3 Approving, rejecting, or claiming pending members on the group's website
To approve, reject, or claim one pending member:
1. In the “Subscription approval needed” email from the prospective member, click the View pending member link, which takes you to the prospective member’s individual page on the group’s website.
2. Scroll to the bottom of the page, and click the button for the action you want to take:
Button Action
Approve Pending Sub Approve the subscription request.
Reject Pending Sub Reject the subscription request.
Claim Sub Indicate to other group moderators that you are handling this subscription request. A “Claimed by” badge appears next to the person’s email address on the member list.
In a group that has more than one moderator, you might want to use this option if, for example, you want to contact the requestor for more information or consult with other moderators before approving or rejecting the request. Claiming the pending request indicates to other moderators that someone is handling that request (however, it does not prevent other moderators from taking action).
Note: Pending subscription requests that are claimed are not subject to the 14-day timeout period for responding to subscription requests. They remain pending until the moderator who claimed them either approves or rejects them.
To approve, reject, or claim multiple pending members:
1. In the left navigation menu on the group’s website, select Admin. The Members entry on the Admin submenu shows the number of pending members.
2. Click Members. The Members page appears and lists the pending members.
3. Select the checkboxes next to the rows of the pending members you want to take the same actions for.

11 Managing members
44 Updated: Mar. 18, 2022 Groups.io Group Owners Manual
4. At the bottom of the page, click the Actions button, and then select the action you want to take for the pending members you selected:
• Approve: Approve those subscription requests.
• Reject: Reject those subscription requests.
• Claim: Indicate to other group moderators that you are handling those subscription requests.
Note: Other moderators with the appropriate permissions can still take action on a claimed pending member on the group’s website. In any confirmation popup that appears, those moderators will see a “Warning: This pending member was claimed by [moderator’s display name]” statement.
11.5 Adding moderator notes about individual members
Group owners and moderators can add notes to individual members’ records that other moderators and owners—and only moderators and owners—can review. For example, you could add a note about who referred a particular member to the group, add a note about a moderator action related to a member (such as putting them on moderation or removing or banning them), and so on.
To add a moderator note to a member’s record:
1. In the left navigation menu on the group’s website, select Admin > Members.
2. On the Members page, locate and open the member’s record.
3. Click the Notes button at the top of the member’s page.
4. On the resulting page, enter the text of your note, then click the Update button.
To modify or delete the note, follow steps 1 to 3 above, edit the text of the note or delete all the text, and click Update.
11.6 Moderating individual members
You can change the message posting privileges for individual members without changing the settings for the entire group. Example: A member is not following the group’s guidelines for posting, so you want to moderate their posts for a while.
Note: Moderation applies only to messages. A member who is moderated will still be able to upload files and photos (if those features are available in the group) without moderator intervention. However, you can receive notifications about activity that involves files and photos. See Controlling moderator notifications for individual groups.
To moderate an individual member:
1. In the left navigation menu on the group’s website, select Admin > Members. The Members page appears.
2. Locate the member’s row and click in it (anywhere except the checkbox) to display their individual membership page.
3. Scroll down to the Posting Privileges panel.

11 Managing members
Groups.io Group Owners Manual Updated: Mar. 18, 2022 45
4. Select the level of moderation you want to apply to this member:
Note: The badges shown in the table appear with the member’s entry on the member list and on certain other group pages. On the group website, you can hover your pointer over a badge to see its meaning.
Setting Description Badge
Use Group Moderation Setting
The message moderation setting specified for the group applies to this member.
This setting is the default.
(No badge)
Override: not moderated No messages posted by this member are moderated, regardless of the group’s or an individual topic’s moderation setting.
Override: moderated All messages posted by this member are moderated, regardless of the group’s or an individual topic’s moderation setting.
Override: new member moderated
The first n messages posted by this member are moderated, where n is a number from 1 to 4. The default is 1 (as shown in the Badge column). You can change the number in the Spam Control panel on the group’s Settings page (look for the Unmoderate After list below the New Members Moderated checkbox).
Override: not allowed to post
This member cannot post any messages, regardless of the group’s or an individual topic’s moderation setting.
Override: moderate the first message of every topic this person starts
The first message in every topic that is started by this member is moderated, regardless of the group’s or an individual topic’s moderation setting.
Override: moderate all messages of every topic this person starts
All messages posted in every topic that is started by this member are moderated, regardless of the group’s or an individual topic’s moderation setting.
5. If desired, click the Notes button at the top of the page and enter a note about why you are moderating this member. The note will be saved in the member’s record. Such notes can be helpful to other moderators who might review the member’s record.
6. Click the Save button at the bottom of the page.

11 Managing members
46 Updated: Mar. 18, 2022 Groups.io Group Owners Manual
11.7 Removing members
Note: Members who are removed are able to rejoin the group at that email address (assuming it is a functioning address). If you want to prevent someone from being able to join the group at all, you can ban them.
11.7.1 Removing an individual member
1. In the left navigation menu on the group’s website, select Admin > Members. The Members page appears.
2. Locate the member’s row and click in it (anywhere except the checkbox) to display their individual membership page.
3. If desired, click the Notes button at the top of the page and enter a note about why you are removing this member. The note will be saved in the member’s record, which will be retained even after the member is removed. Such notes can be helpful to other moderators who might review the member’s record. Note: The records of past members are available only in Premium and Enterprise groups.
4. Scroll to the bottom of the page.
5. Click the Remove button.
6. When the Verify Delete confirmation popup appears, click Yes.
If you set up an active Removed Member notice for the group, the member receives that notice automatically.
11.7.2 Removing multiple members
To remove multiple members from the group at the same time:
1. In the left navigation menu on the group’s website, select Admin > Members. The Members page appears.
2. Next to the Display Name column, select the checkboxes of the members you want to remove.
3. Scroll to the bottom of the page, and click the Actions button, then select Remove from the dropdown menu.
4. When the Verify Action confirmation popup appears, click Yes.
If you set up an active Removed Member notice for the group, the members receive that notice automatically.
11.7.3 Removing a large number of members (bulk remove)
If you have a large number of members to remove, or you have a large membership list and it would be tedious to page through it to remove several members at once, you can use these steps to remove them:
1. In the left navigation menu on the group’s website, select Admin > Members.
2. On the Members page, click the Bulk Remove button at the top.
3. On the Emails to Remove page, you can use one of these methods to enter the email addresses you want to remove:
• In the Email Addresses field, enter (or copy and paste) the email addresses, one address per line.
• Click the Browse button and upload a plain text file that contains the email addresses (one address per line in the file).

11 Managing members
Groups.io Group Owners Manual Updated: Mar. 18, 2022 47
4. Click the Remove Members button.
5. When the Verify Removal confirmation popup appears, click Yes.
Note: With a bulk removal, the Removed Member notice (if one is set up for the group) is not sent to the removed members.
11.8 Banning and unbanning members
11.8.1 Banning a member
To remove a disruptive member or a spammer from the group and prevent them from rejoining at that email address:
1. In the left navigation menu on the group’s website, select Admin > Members. The Members page appears.
2. Locate the member’s row and click in it (anywhere except the checkbox) to display their individual membership page.
3. If desired, click the Notes button at the top of the page and enter a note about why you are banning this member. The note will be saved in the member’s record, which is retained even after the member is banned. Such notes can be helpful to other moderators who might review the member’s record.
4. Scroll to the bottom of the page.
5. Click the Ban button.
6. When the Verify Ban confirmation popup appears, click Yes.
If you set up an active Banned Member notice for the group, the member receives that notice automatically.
Tip: You can proactively ban an email address that you know belongs to a spammer or other undesirable member, to prevent them from trying to join the group:
1. In the left navigation menu on the group’s website, select Admin > Members. The Members page appears.
2. Click the filter button (it looks like a funnel) at the top of the page.
3. In the popup list, select the Banned checkbox.
4. Go to the bottom of the popup list and click Apply.
5. On the resulting page, in the Ban Email Address field, enter the email address that you want to ban.
6. Click Ban User. (If that person is an existing member, they will receive the Banned Member notice if one is set up for the group.)
Note:
• Banning applies only to that specific email address. It is possible for someone to try to join or rejoin using another email address.
• A banned member who is logged in to Groups.io with the banned email address will not be able to see the group’s home page. If they try to go to the group’s home page (for example, by entering the group’s URL in their web browser), they will be redirected to the most recent Groups.io home page they visited, where they will see a “You are not a member of this group” notice in a red box at the top of the page.

11 Managing members
48 Updated: Mar. 18, 2022 Groups.io Group Owners Manual
• A banned member who is not logged in to Groups.io and goes to the group’s home page, clicks the Join This Group button (or Apply For Membership In This Group button in a restricted group), and enters the banned email address will see a “That email has been banned from the group” notice on the page after they click the Confirm Email Address button. This action is also recorded in the group’s activity log.
• A banned member who sends an email message from the banned email address to the group’s posting address will receive a delivery failure notification that contains the statement “You are not allowed to post to that group.” This action is also recorded in the group’s activity log.
• A banned member who attempts to subscribe by email from the banned email address (by sending a message to the group’s +subscribe address) will receive a delivery failure notification that contains the statement “This email has been banned from the group.” This action is also recorded in the group’s activity log.
• The group retains information about members who were banned, including any moderator notes about them, messages they sent to the owner email address, their join dates, and so on.
• In Premium and Enterprise groups, banned members are included in the Past Members list. Those groups also have the option to ban entire domains.
11.8.2 Unbanning a member
If you find you need to reinstate (unban) a member who was banned (for example, if the banning was an error), follow these steps:
1. In the left navigation menu on the group’s website, select Admin > Members. The Members page appears.
2. Click the filter button (it looks like a funnel) at the top of the page.
3. In the popup list, select the Banned checkbox.
4. Scroll to the bottom of the popup list and click Apply.
5. In the resulting list of banned members, select the checkbox next to the member’s row.
6. Click the Actions button at the bottom of the list, and select Unban from the dropdown menu.
7. When the Verify Action confirmation popup appears, click Yes. The member is removed from the Banned list.
Note: The member will need to rejoin the group (by invitation, direct add, or requesting to join). They do not become a group member again automatically after being unbanned.
11.8.3 Viewing a list of banned members
1. In the left navigation menu on the group’s website, select Admin > Members. The Members page appears.
2. Click the filter button (it looks like a funnel) at the top of the page.
3. In the popup list, select the Banned checkbox.
4. Go to the bottom of the popup list and click Apply. The page is refreshed and displays a list of members who were banned from the group.

11 Managing members
Groups.io Group Owners Manual Updated: Mar. 18, 2022 49
11.9 Checking for bouncing members
From time to time, you might want to review your group’s member list to check whether any members are being reported as bouncing. (For more information on bouncing and how the system handles it, see Groups.io bounce handling.)
! Important: Other than try to contact members and make them aware of their bouncing status, group owners and moderators cannot do anything to “unbounce” members’ accounts. Members themselves must address the underlying problem.
To check your group for bouncing members:
1. In the left navigation menu on the group’s website, select Admin > Members. The Members page appears.
2. Review the Email column. Next to their email addresses, bouncing members have either a red B (“Bounced”—the system received no response to any bounce notification messages, or bounce probes, for 15 days) or a blue B (“Bouncing”—the system is sending bounce probes every 3 days).
Tip: To see a list of only the members who are bouncing, click the filter (funnel) button at the top of the page, select the Bouncing checkbox in the filter list, then go to the bottom of the filter list and click Apply. The page is refreshed and displays a list of only the bouncing members.
3. Review the email delivery history of each bouncing member to try and determine the reason why the account is bouncing:
• On the Members page, click in the row (anywhere except the checkbox) of a bouncing member. The Membership page for that member appears.
• Click the Email Delivery History button at the top of the page.
• On the resulting page, review the Bounces panel. It lists all recent bounces and the reasons for them.
Note: This panel displays activity from only your group. Because the account’s bouncing status could have resulted from failed deliveries of messages in another group the member belongs to, you might have to direct the member to look up their own bouncing activity to see what is going on. Individual members can find that information on the Bounces page for their account, https://groups.io/account?page=bounces.
Tip: In the Bounces panel on a member’s email delivery history page:
• 400-level errors usually indicate a temporary condition, and the affected message could subsequently get delivered.
• 500-level errors are considered permanent.
These resources on SMTP error codes provide information that you might find helpful:
• What Those SMTP Error Codes Mean and Why You Should Care
• SMTP errors and reply codes

11 Managing members
50 Updated: Mar. 18, 2022 Groups.io Group Owners Manual
11.10 Reviewing members who were removed because of reported spam
Some email providers notify Groups.io when group messages end up in their (the provider’s) users’ spam folders. Most likely, the group messages were automatically flagged as spam by the email provider rather than having been specifically marked as spam by the users.
When Groups.io receives such a notification, the system automatically unsubscribes that member from the group. Groups.io also sends the member an email with a link that lets them automatically and quickly resubscribe to the group if the spam flagging was a mistake. The email lets the member know to check their spam folder and mark any messages in there from Groups.io as not spam, to help train the email provider’s spam filters to make fewer mistakes about Groups.io emails.
Group owners and moderators can check the activity log for members who were removed because group messages were reported as spam to their email providers:
1. On your group’s left navigation menu, select Admin > Activity. The Activity page appears.
2. In the Actions list, scroll down to and select Removed because of spam report.
3. (Optional) If you want to confine the search to a specific date or range of dates, select the applicable option from the Date list.
4. Click the blue Search button to the right of the Date list.
For additional information about this situation, see the wiki in the GroupManagersForum group.
11.11 Syncing group members with Slack teams
A Groups.io group can be synchronized (synced) with an external service, which means that members of the external service automatically can be made members of the group. Automatic syncing occurs hourly.
Currently, the only service that a Groups.io group can sync with is Slack. Once you set up the connection between your group and your Slack team, you can view which members are a part of one and not the other and synchronize them.
To synchronize your group members with a Slack team:
1. In the left navigation menu on the group’s website, select Admin > Members.
2. At the top of the Members page, click the Service Sync button.
3. On the Sync Settings page, from the Service list, select Synced with a Slack Team. The Authenticate With Slack button appears.
4. Click Authenticate With Slack and then sign in to your Slack workspace. Ensure that you give Groups.io permission to access the workspace. After you are signed in, you are returned to the Sync Settings page in your group.
5. Under Auto Sync Type, select the type of synchronization you want to use. Under Join Channels, select the applicable channels.
6. Click the Update Sync button at the bottom of the page. If the Auto Sync Type option you selected was:
• One of the Pull or Push options: The members in Groups.io and Slack are synchronized according to your selection.
• No Automatic Sync: Groups.io displays the Sync Dashboard page, which contains two tabs. Each tab lists the people who are not members of the other. You can use those tabs to manually select the members of each team that you want to sync with the other team:

11 Managing members
Groups.io Group Owners Manual Updated: Mar. 18, 2022 51
o On the Groups.io Members tab, which lists the group members who are not members of the Slack team, select the group members you want to add to the Slack team and click the Add To Slack button.
o On the Slack Members tab, which lists the Slack team members who are not members of the Groups.io group, select the members you want to add to the group and click the Add To Groups.io button.
Note: When you select No Automatic Sync, you can click the Sync Dashboard button (next to the Update Sync button) at any time to view the Groups.io Members tab and Slack Members tab. The Sync Dashboard button is disabled when you select a Pull or Push sync option.
11.12 Premium and Enterprise member management options
11.12.1 Adding members directly
Note: This feature is not available in free Premium 30-day trial groups.
In a paid Premium or Enterprise group, owners and moderators can add members to the group directly, without going through the invitation process.
To add members directly to a group:
1. In the left navigation menu on the group’s website, select Admin > Direct Add.
2. Complete the Direct Add page:
• The Message To Be Sent panel at the top of the page shows the standard text that will be sent to the members who are added. You can use the Customize Message field to add personalized content, which will be added to the text in the Message To Be Sent field after a statement that says “The Group moderators have included the following important message:”.
Note: If you have set up a Direct Add notice for the group and it is set to Active Message, or you select a Direct Add notice from the Notices list, the content of that notice will be displayed in the Customize Message field, where you can edit it further if desired. Be aware that any changes you make will not be saved to the Direct Add notice.
• If your group includes subgroups, in the Add To Subgroups panel on the page, you can select any subgroups you want to add the new member or members to.
• In the Emails panel on the page, enter the email addresses of the members you want to add (one address per line). Alternatively, you can click the Browse button to upload a text file that contains the email addresses. Email addresses can be in either of these formats:
o [email protected] o Display Name <[email protected]>
Note:
o If you include names with the email addresses (using the second format example above), they will become the members’ display names in the group.
o You can include digest, summary, or nomail at the end of a line to set that email delivery option for that member. (Be aware that members can change their email delivery options.)
o If you upload a plain text file, it must contain one email address (or one display name and email address) per line; a delivery option can be included

11 Managing members
52 Updated: Mar. 18, 2022 Groups.io Group Owners Manual
at the end of a line as well. The file must be UTF-8. It cannot be UTF-16LE. Rich text format (RTF) files will not work.
3. Click the Add Members button at the bottom of the page.
Note:
• If an email address being added is an email alias set up in an existing member’s Groups.io account, the system displays an error message stating that the address is already a member and including the email address the alias is associated with. (For information about setting up email aliases, go to Groups.io Members Manual > Understanding Groups.io accounts > Setting account preferences and viewing account information and scroll to Setting or changing account login elements.)
• If you add more than 20 people to your group in a 24-hour period, you probably will see a notice that says you have reached the limit for the number of members that can be added without approval. For this situation, Groups.io has a waiting period during which management reviews the list of added members to ensure that you are not a spammer. The remaining additions usually are processed within a few hours.
11.12.2 Editing members’ email addresses
Note: This feature is not available in free Premium 30-day trial groups.
! Caution: This action changes the email address for the member’s Groups.io account, which will affect all other group subscriptions they have at this address. It is functionally equivalent to the member changing the address in their own account.
In a paid Premium or Enterprise group, owners and moderators can change the email addresses of members who cannot change their addresses themselves for some reason:
1. Display the membership record of the member whose email address you want to change.
2. In the Email field at the top of the page, edit the member’s email address.
3. Scroll to the bottom of the page and click Save.
Note:
• You cannot change the email address of someone who is a moderator or owner of any group or subgroup.
• If the edited address belongs to an existing Groups.io account (that is, the member has separate accounts at the old and new addresses), the system displays a message that the address is already registered, and no change occurs. Group owners and moderators cannot merge members’ accounts, so the member will have to unsubscribe or delete one of the accounts or merge their accounts. Or you can remove the member from the group and direct add them with their new address.
11.12.3 Confirming members who are marked as Not Confirmed
In a Premium or Enterprise group, owners and moderators can directly confirm members who requested to join the group but have not yet responded to the confirmation message sent by
Groups.io. These members are marked with a Not Confirmed badge in the member list.
To confirm a member who is marked as Not Confirmed:
1. Display the membership record of the member whose membership you want to confirm.
2. Go to the bottom of the member’s page and click the Confirm button.
Note: In a restricted Premium or Enterprise group, if you approve a pending member who is not yet confirmed, the approval also confirms their membership automatically.

11 Managing members
Groups.io Group Owners Manual Updated: Mar. 18, 2022 53
Tip: To see a list of only the Not Confirmed members, display the member list. Click the filter (funnel) button at the top of the page, select the Not Confirmed checkbox in the filter list, then go to the bottom of the filter list and click Apply. The page is refreshed and displays a list of the Not Confirmed members.
11.12.4 Viewing information about past members
In a Premium or Enterprise group, owners and moderators can view a list of all members who left the group, members who were removed from the group, and members who were banned from the group:
1. In the left navigation menu on the group’s website, select Admin > Members.
2. On the Members page, click the Past button at the top. The resulting Past Members page lists all members who left the group (unsubscribed) and were removed or banned from the group by a moderator or owner.
In a past member’s row, you can click the removal reason link in the History column to display that member’s record, where you can view their activity history, any moderator notes, and any messages that the member sent to the owner email address.
11.12.5 Synchronizing group members with a file of email addresses
Note:
• This feature is not available in free Premium 30-day trial groups.
• For a group that has subgroups, the file sync feature is available only for the parent group. Because subgroup members must belong to the parent group, the file sync feature does not apply to subgroups.
In a paid Premium or Enterprise group, owners and moderators can upload a file containing the email addresses of all of the people they want to belong to the group. Any members currently in the group who are not listed in the file will be removed from the group, and any people listed in the file who are not in the group will be added. No emails are sent to group members when they are removed.
To synchronize your group members with a file of email addresses:
1. Create a text file containing a list of the email addresses, one address per line, of all the people you want to be members of the group.
2. Go to the group’s website and, in the left navigation menu, select Admin > Members.
3. On the Members page, click the File Sync button. The Sync Settings page appears. The Message To Be Sent field shows the message that will be sent to any people who are added to the group.
4. Scroll down to the Customize Message field, and enter and format any personalized text that you want to include in the message to be sent. As you enter text there, it is added to the Message To Be Sent field after the line that says “The Group moderators have included the following important message:”.
Note: You cannot change the existing content in the Message To Be Sent field. Providing a customized message might reassure recipients that the message is legitimate.
Tip: To help distinguish your customized message from the system-provided content, click the Show advanced toolbar “hamburger” icon to display an additional formatting toolbar, and then use the Horizontal line tool to insert horizontal lines before and after your message text.
5. If desired, and if your group has a Direct Add notice, select the Direct Add notice from the Notices list under the Customize Message field.

11 Managing members
54 Updated: Mar. 18, 2022 Groups.io Group Owners Manual
6. If your group has subgroups and you want to add any new members to them, scroll to the Add To Subgroups panel and select the checkboxes for the subgroups you want to add new members to.
7. Click the Browse button, and navigate to and select the text file containing the list of email addresses.
8. Click the Sync Members button. The File Sync Members page appears. On this page:
• The top panel, Members To Be Removed, lists the email addresses of members who will be removed from the group because their email addresses are not in the file you uploaded.
• The bottom panel, People To Be Added, lists the email addresses in the file you uploaded that do not belong to any current members of the group.
9. If you are satisfied that the lists of members to be removed and people to be added are correct, click the Sync Members button at the bottom of the page. The system synchronizes the member lists and returns to the Members page.

12 Managing moderators and additional owners
Groups.io Group Owners Manual Updated: Mar. 18, 2022 55
12 Managing moderators and additional owners
12.1 Overview
Groups can have multiple moderators and owners, and moderators can have different sets of permissions. (Owners have all permissions by default.) To be a group moderator or additional owner, the person must first be a member of the group.
It is good practice for a group to have at least one additional owner as a backup. You might want to have multiple moderators as well, depending on the size and activity level of your group.
Note: Moderators cannot change the roles or subscription settings of owners or remove owners from groups.
12.2 Making a member an owner or moderator
1. In the left navigation menu on the group’s website, select Admin > Members. The Members page appears.
2. Locate the row of the member you want to make an owner or moderator, and click in that row (anywhere except the checkbox) to display their individual membership page.
3. In the Role list, select the role you want to assign to that member, Moderator or Owner. When additional panels appear on the page, select the permissions you want to give to that person:
Panel Permission options
Moderator Permissions
Note: This panel appears only for the Moderator role; owners have all permissions by default.
• Approve Pending Messages
• Edit Archives (also allows moderators to view poll results)
• Invite Members Note: This option does not appear in subgroups.
• Create or Modify Hashtags
• Manage Subgroups Note: This option does not appear in subgroups.
• Add or Modify Integrations
• Modify Group Settings
• Manage Paid Subscriptions/Donations
• Billing
• View Member List
• Approve Pending Members (also allows access to the member list)
• Ban Members (also allows access to the member list)
• Set Member Subscription Options (also allows access to the member list)
• Set Moderator Privileges (also allows access to the member list and allows setting member subscription options)
• Remove Members (also allows access to the member list)
Note: Regardless of their permission settings, moderators cannot change the roles or subscription settings of owners or remove owners from groups.

12 Managing moderators and additional owners
56 Updated: Mar. 18, 2022 Groups.io Group Owners Manual
Panel Permission options
Moderator Notifications For each item listed, you can select how the new owner or moderator should be notified about activity related to that item. The notification options are:
• Email and web/app
• Email only
• Web/App only
• None See Managing moderator notifications about group activity for more information.
Owner Email • All Emails
• Members Only
• None
Note: Be aware that all moderators and owners who have the All Emails or Members Only setting will receive email messages that are sent to the group owner email address. For more information, see Sending and receiving group owner email messages.
4. Scroll to the bottom of the page and click the Save button.
12.3 Changing an owner or moderator back to a regular member
1. In the left navigation menu on the group’s website, select Admin > Members. The Members page appears.
2. Click the filter (funnel) button at the top of the page, and select Moderators from the popup list.
3. Go to the bottom of the popup list and click Apply to display only the group members who are owners and moderators.
4. Locate the row of the owner or moderator you want to make a regular member, and click in that row (anywhere except the checkbox) to display their individual membership page.
5. In the Role list, select Member.
6. Scroll to the bottom of the page and click the Save button.
Note: Moderators cannot change the roles of owners.

13 Sending and receiving group owner email messages
Groups.io Group Owners Manual Updated: Mar. 18, 2022 57
13 Sending and receiving group owner email messages
13.1 Overview
Each group in Groups.io has an owner email address, which is in this form: [email protected]
Example: [email protected]
The owner email address and other group email addresses are listed on the group’s home page.
Messages that are sent to the owner email address include automatic notices about pending group members and pending messages that need approval.
Owners and moderators have subscription options to control whether they receive messages that are sent to the owner address. Owners can set these options for moderators and other owners that they add to the group (see Making a member an owner or moderator), but moderators and other owners can change their individual subscription options.
13.2 Reviewing your subscription options for receiving group owner email messages
To review (and adjust, if necessary) your subscription options for receiving owner emails:
1. In the left navigation menu on the group’s website, select Subscription.
2. On your subscription page, scroll down to the Owner Email panel. Note: This panel appears only for owners and moderators.
3. Ensure that the appropriate option is selected:
Option Description
All Emails You will receive all email messages that are sent to the owner email address, including from nonmembers and possible spammers. Note: If your group uses a Pending Subscription notice, at least one owner or moderator should select the All Emails option.
Members Only You will receive only email messages that are sent by group members to the owner email address. This setting is the default.
None You will not receive any email messages sent to the owner email address.
4. If you made any changes, click the Save button.
Be aware that all moderators and owners who select the All Emails option or the Members Only option will receive email messages that are sent to the group owner email address. If your group has several moderators, not all of them might need (or want) to receive owner emails; in that case, some of them could select the None option.

13 Sending and receiving group owner email messages
58 Updated: Mar. 18, 2022 Groups.io Group Owners Manual
13.3 Receiving and viewing messages sent to the owner email address
Email messages sent to the group owner email address are delivered to the email addresses that owners and moderators who receive owner emails use to log in to the group.
On the group’s website, you can use any of these methods to view messages that were sent to the owner email address:
• Review the group’s activity log: Select Admin > Activity. In the Actions list on the Activity page, scroll down to and select Message to +owner. Then click Search to display a list of messages that have been sent to the owner email address.
• Display a member’s record from the member list, and click the +owner Messages button to list any messages that member has sent to the owner email address.
13.4 Sending messages from the owner email address
If you want to send a message to a member or members that comes from the group owner email address rather than your personal email address, you can do so from the group's website:
Note: You cannot send messages from the owner email address through email.
1. In the left navigation menu on the group’s website, select Admin > Members.
2. On the Members page, select the checkbox in the row of the member you want to send the message to. You can select more than one member.
3. Go to the bottom of the page and click the Actions button, then select Send Message. The Post page appears.
4. In the From list, ensure that the owner email address is shown. (The other option in the list is your personal email address.)
5. Use one of these methods to compose the message:
• Complete the Subject field, and enter the body of the message.
• If your group has a Message To Member notice set up (or more than one), use the Notices list to select the Message To Member notice you want to send. The notice’s subject is added to the Subject field, and the content of the notice is added to the message body. You can customize the subject and the message body for this one-time use if desired. Any customizations are not saved to the notice.
6. If you want to send blind copies of the message to your personal email address or the other moderators (or both), select the applicable checkbox.
7. Click the Send To Member button. (It is labeled Send To Members if you are sending the message to more than one member.) You return to the group’s home page, where a banner states that the message has been sent.
Note: Messages sent this way will have the group’s message footer. Also, be aware that any replies the member sends will go to all owners and moderators who receive messages sent to the owner email address.

13 Sending and receiving group owner email messages
Groups.io Group Owners Manual Updated: Mar. 18, 2022 59
13.5 Replying to a message from the owner email address
If you want to reply to an existing message from the owner email address rather than from your personal email address, you can do so from the group’s website. When you are replying to a message on the website, select the group owner email address in the From list above the subject field.
Note: You can reply from the owner email address only from the group’s website, not through email. Also, replies sent from the owner address will have the group’s message footer.

14 Managing group topics and messages
60 Updated: Mar. 18, 2022 Groups.io Group Owners Manual
14 Managing group topics and messages
14.1 Handling pending messages
14.1.1 Overview
When a message that needs approval is posted to the group, owners and moderators who have chosen to receive pending message notifications receive an email or web/app notification (or both) receive an email that has a subject line starting with “Message Approval Needed.”
Note:
• For email notifications, the owners’ and moderators’ group subscriptions must be set to receive emails sent to the owner address. See Making a member an owner or moderator.
• Pending messages expire after 14 days. If no action is taken within that period, the message is deleted. The sender does not receive any notification.
Exception: The 14-day timeout period does not apply to pending messages that have been claimed by a moderator on the group’s website.
Tip: You can visit your Pending home page to see all messages that are currently pending in all the groups you own or moderate.
14.1.2 Approving, rejecting, or deleting pending messages by email
To approve the pending message by email, just reply to the “Message Approval Needed” message without adding anything to it or clearing any text (if your email application is set up to include or quote messages you are replying to).
To reject the pending message by email, forward the message to the rejection link included in the message. The sender receives an automatic notification with a simple statement that the message was not approved by the moderators. To provide more feedback to senders, you can create a customized Rejected Message notice with additional information.
To delete the pending message by email, forward the message to the deletion link included in the message. The sender does not receive any notification that the message was deleted.
Note: If the pending message has been claimed by another moderator (see Working with claimed pending messages below), you will receive an email delivery failure notification containing a statement that the pending message was claimed and including the claiming moderator’s display name.
14.1.3 Handling pending messages on the group's website
Note: In groups that are fully moderated, or in groups where xxx-notice system hashtags are moderated, notifications to be sent to group members (such as for file uploads, photo uploads, calendar invites, and so on) must be approved like any other messages. These notifications are listed on the Pending Messages page and are identified by a blue Notification badge.
Example:
To approve, edit and claim, reject, or delete an individual pending message on the group’s website:
1. In the “Message Approval Needed” email message, click the View this message online link, which takes you to the Pending Messages page on your group’s website.
2. Click the link in the row of the pending message you want to handle. The page with the individual message appears.

14 Managing group topics and messages
Groups.io Group Owners Manual Updated: Mar. 18, 2022 61
3. At the bottom of the page, click the button for the action you want to take:
Button Action
Approve Approve the pending message.
Edit Edit the pending message. Note: This action also claims the message. For more information, see Working with claimed pending messages below.
Skip If more than one message is pending approval, you can click this button to move to the next message in the list without taking any action on the current message.
Cancel Close the message without taking any action and return to the list of pending messages.
View Member View the membership page for that member.
Send Message Send a private message to that member from the group owner email address or your own personal email address. Be aware that a reply to the group owner address will go to all owners and moderators in the group who receive group owner emails.
Reject Reject the pending message. You can include a personal message to the sender, or select a Rejected Message notice (if any exists in the group), or both.
Delete Delete the pending message. This action does not send a notification to the sender.
Ban Sender Ban the sender.
To handle multiple pending messages at the same time:
1. Go to the group’s home page and click Admin on the left navigation menu. A number to the right of the Admin label indicates the number of items (messages or members) that are pending approval.
2. From the Admin menu, select Pending (which also shows the number of pending messages). The Pending Messages page appears and lists the pending messages.
3. Select the checkboxes next to the rows of the pending messages you want to take the same actions for.
4. Click the button for the action you want to take:
Button Action
Approve Approve the selected pending messages.
Approve & Unmoderate Senders Approve the selected pending messages and set their senders to Use Group Moderation Settings.
Reject Reject the pending messages. You can include a personal message to the senders, or select a Rejected Message notice (if any exists in the group), or both.
Delete Delete the pending messages. This action does not send a notification to the senders.

14 Managing group topics and messages
62 Updated: Mar. 18, 2022 Groups.io Group Owners Manual
Note: The Edit button is unavailable when you select more than one message (therefore, it is not listed in the table above). You can edit only one selected message at a time.
14.1.4 Working with claimed pending messages
While an owner or moderator is editing a pending message, or if they edit a pending message and save it without approving (for example, to work on it later), that person effectively claims the pending message. Other moderators will see the “Claimed by [moderator’s display name]” badge, along with the “Moderator Edited” badge, next to the message on the Pending Messages page. The “Claimed by” badge indicates to other moderators that someone is already handling that message.
Note: When someone saves an edited pending message using the Save button at the bottom of the edit page, an Undo button appears on the subject line the next time someone opens that message on the group’s website. Any moderator with the appropriate permissions can click the Undo button to remove any edits that were made to the pending message and restore it to its original state.
Other moderators with the appropriate permissions can still take action on a claimed message on the group’s website. If a different moderator later edits the pending message and saves it (or uses the Undo button), that moderator becomes the claimer, and their name replaces the original name in the “Claimed by” badge. Another moderator can still take action on that pending message on the website, but in any confirmation popup that appears, that moderator will see a “Warning: This message was claimed by [moderator’s display name]” statement.
If a pending message has been claimed and a different moderator tries to approve, reject, or delete that message by email, that moderator will receive a delivery failure notice containing a statement that the message was claimed and including the claiming moderator’s display name.
14.2 Merging topics
Groups.io provides the ability for group owners and moderators to merge separate topics together. For example, you might want to combine separate topics that were started about the same subject, or perhaps a member created a new topic by mistake instead of replying to an existing topic.
Note: Bear in mind that the messages have already been delivered as emails. Even when you merge topics in the message archive, if someone replies to an email that originated from one of the merged topics, a new topic will be created.
To merge topics:
1. In the left navigation menu on the group’s website, click Messages. On the resulting page, if the messages are not already displayed in Topics view, click the leftmost button at the top and select Topics.
Tip: You can use the Search button to search for topics. Then, in the search results, click the Tools button and select the Collapse Topics checkbox. The list now shows the topics and the number of messages in each one.
2. Navigate to one of the topics that you want to merge into the original topic.
3. Click the arrow button next to the posting date to display a submenu.

14 Managing group topics and messages
Groups.io Group Owners Manual Updated: Mar. 18, 2022 63
4. Select Start Merge.
The page is refreshed, and that topic has a vertical blue line to the left of it.
5. Go to the original topic you want to merge the first topic into.
6. Click the arrow button next to the posting date, and select Merge Into.
Note: If you change your mind about merging these topics, you can select Cancel Merge on the submenu.
7. When the Verify Merge confirmation popup appears, click Yes. The first topic you selected is merged into the original topic.
8. Repeat steps 2 through 7 for any other topics you want to merge into the original topic.
Tip: If the original topic is still active, consider putting it on moderation so you (or other moderators) can edit the subject lines of incoming messages before they are posted to the archive (because messages might be replies originating from the “stray” topic that was merged into the original, and the subject lines might be different). You can also consider locking the topic if you do not want members posting more messages to it.

14 Managing group topics and messages
64 Updated: Mar. 18, 2022 Groups.io Group Owners Manual
14.3 Splitting topics
Groups.io provides the ability for group owners and moderators to split a topic into two separate topics. For example, if replies have gotten off track from the subject of the original topic, you might want to move those replies into a separate topic of their own (or merge them into a more appropriate existing topic).
Note: You cannot split the first message displayed on a page. If you are sorting messages by newest first (Date column), that view prevents you from splitting off the most recent message. Click the Date column header to sort the view again and move the message to the bottom of the page, where you can then split it.
To split a topic:
1. In the left navigation menu on the group’s website, click Messages. On the resulting page, if the messages are not already displayed in Topics view, click the leftmost button at the top and select Topics.
Tip: You can use the Search button to search for topics. Then, in the search results, click the Tools button and select the Collapse Topics checkbox. The list now shows the topics and the number of messages in each one.
2. Navigate to the topic you want to split, and expand it to display the messages in that topic.
3. Go to the message in that topic that you want to use as the start of the new (split) topic.
4. In that message, click the More “hamburger” icon at the lower right.
5. On the submenu, select Split.
6. In the Split Topic popup that appears, enter a subject line for the new topic, then click the Split Topic button. That message is moved into a new topic, along with any messages that were posted after it.
Tip: If the topics are still active, consider putting them on moderation so you (or other moderators) can edit the subject lines of incoming messages before they are posted to the archive, to ensure that the messages end up in the correct topic. You can also consider locking the topics if you do not want members posting more messages to them.

14 Managing group topics and messages
Groups.io Group Owners Manual Updated: Mar. 18, 2022 65
14.4 Moderating topics, messages, and attachments
You control whether and how messages are moderated in your group using the spam control and moderation settings in your group’s settings. In your group’s message formatting settings, you can control whether attachments to messages are moderated (or allowed at all).
You can also moderate and unmoderate individual topics in your group separately from the overall group moderation settings. For more information, see Editing the properties of topics in the archive.
Another way to moderate and unmoderate topics is to use hashtags that have moderation properties. See Managing hashtags.
Tip: Groups.io has a setting that allows groups to automatically moderate topics that are older than a specified number of days. You might consider using this setting so moderators can review any replies that are posted to outdated topics. See Automatically Moderate Topics Older Than [n] Days.
14.5 Locking topics
After a topic has run its course (or if it has grown contentious and nothing further can be gained by keeping it going), but you want to keep it available in the message archive, you can prevent further replies from being posted to that topic by locking it. If desired, when you lock the topic, you can send a Locked Topic notice to inform members that the topic is now locked.
Members who send an email reply to a locked topic receive an automatic delivery failure notice stating that the topic is locked.
For information on locking and unlocking topics, see Editing the properties of topics in the archive.
Other ways to lock topics are:
• Use hashtags that have locking properties. See Managing hashtags.
• When you are creating a new topic or replying to an existing topic on the group website, select the Lock Topic After Posting checkbox before you click the Send button. (This checkbox appears only for group owners and moderators who have the Edit Archives permission.)
Tip: Groups.io has a setting that allows groups to automatically lock topics that are older than a specified number of days. You might consider using this setting to prevent members from posting replies to outdated topics. See Automatically Lock Topics Older Than [n] Days.
14.6 Editing the properties of topics in the archive
Owners, and moderators with the appropriate permissions, can edit the properties of topics that have already been posted to the archive on the group’s website. The changes they can make are:
• Edit the subject line of the topic.
• Add hashtags to or remove hashtags from the topic.
• Moderate or unmoderate the topic.
• Lock or unlock the topic.
• Make the topic sticky or unsticky. (Sticky topics always appear at the top of the Topics page in the message archive.)
• Change the Reply To setting for that topic. Note: If you change it to Reply to topic followers only, the system automatically sets up follow topic records for the person who started the topic as well as everyone who replied to it. Those people then will see an Unfollow Topic link in the footer of subsequent email messages in that topic.

14 Managing group topics and messages
66 Updated: Mar. 18, 2022 Groups.io Group Owners Manual
Owners and moderators can edit topic properties using any of these methods:
• In Topics view or Messages view, click the arrow button next to the posting date, and select the desired option from the submenu that appears.
Note:
○ The submenu contains more options in Topics view than it does in Messages view.
○ If your group has an active Locked Topic notice set up, that notice is sent to the group automatically when you select Lock Topic from the submenu.
• Open the topic on the website, then click the More “hamburger” icon at the lower right and select the desired option from the submenu that appears.
Note:
○ You cannot edit the subject line or change the Reply To setting from that submenu. You can make those changes by selecting Topic Properties from the submenu.
○ If your group has an active Locked Topic notice set up, that notice is sent to the group automatically when you select Lock Topic from the submenu.
• Open the topic on the website. Then click the Topic Properties button at the top of the page, or click the More “hamburger” icon at the lower right and select Topic Properties. On the page that appears, you can change any of the properties listed above (you can also delete the topic). Click the Update button when you are done.
Note: When you select the Locked checkbox on the Topic Properties page, a dropdown list appears from which you can select a Locked Topic notice that will be sent to the group after you update the topic’s properties.
14.7 Editing the content of messages in the archive
Owners, and moderators with the appropriate permissions, can edit the content of all messages that are in the message archive on the group’s website.
Note:
• To edit messages before they are delivered by email and posted to the archive, you need to use some form of moderation on members or messages.
• To change a topic’s subject line or hashtags, you need to edit the topic’s properties.
If you need to edit the content of a message that has already been posted to the group:
1. In the left navigation menu on the group’s website, click Messages. If the resulting page displays messages in:
• Topics view: Click the leftmost button at the top and select Messages. Then go to step 2.
• Messages view: Go to step 2.
2. Navigate to and open the message you want to edit.
3. Click the More “hamburger” icon at the lower right and select Edit Message from the submenu that appears.
4. On the Edit Message page that appears:
• Make your edits to the body of the message.
• In the field after the message body, add a brief note about the change. Note: This note is optional but recommended so the reason for the change is documented. The note appears in the edited message if you choose to send it to the group by email. The note also can be viewed by members who click the blue Edited badge that appears next to edited messages on the group's website.

14 Managing group topics and messages
Groups.io Group Owners Manual Updated: Mar. 18, 2022 67
5. Click the appropriate button:
• Save and Send to Group: Use this button if you want to send the edited message to the group by email. The message will include a statement that the message was edited along with the reason you entered.
• Save Without Sending: Use this button if you want to just save the edited message in the archive without emailing it to all group members. A copy will be sent to the original poster.
The message is sent or saved, according to the action that you took. In the archive, an badge appears next to the message, at the far right under the original timestamp. All group members can click that badge to see the message’s history and, if desired, compare revisions.
14.8 Deleting topics
1. In the left navigation menu on the group’s website, click Messages. If the resulting page displays messages in:
• Topics view: Go to step 2.
• Messages view: Click the leftmost button at the top and select Topics. Then go to step 2.
2. Navigate to the topic you want to delete.
3. Click the arrow next to the topic’s posting date and select Delete Topic from the submenu that appears.
4. When the Verify Delete confirmation popup appears, click Yes.
You can also delete a topic that is open on the website:
1. While you are viewing the topic, click the Topic Properties button at the top of the page, or click the More “hamburger” icon under the message at the lower right and select Topic Properties.
2. On the page that appears, click the Delete Topic button at the bottom.
3. In the Verify Delete confirmation popup, click Yes.
14.9 Deleting individual messages
To delete an individual message within a topic (not the entire topic):
1. On the group’s website, display the message you want to delete.
2. Click the More “hamburger” icon under the message at the lower right.
3. Select Delete Message from the submenu that appears.
4. When the Verify Delete confirmation popup appears, click Yes.
Note: Members who received the message by email will still have a copy (unless they deleted it from their inboxes).

15 Managing hashtags
68 Updated: Mar. 18, 2022 Groups.io Group Owners Manual
15 Managing hashtags
15.1 Overview
A hashtag is a word or phrase that contains no spaces and is prefixed with the hash (or pound, number sign, or octothorpe) character, #. Hashtags may contain uppercase and lowercase letters, numerals, hyphens, and underscores. They do not have a character limit, but best practice is to keep hashtags concise. Members “tag” a message with a hashtag by including it somewhere in the message’s subject line.
Examples:
• My name is Inigo Montoya #intro
• Seeking #advice for a #rosebush with blackened leaves
Note:
• The hashtag limit is five per topic. (The system allows message subject lines to contain more than five hashtags, but only the first five hashtags are saved in the message archive.)
• The system treats uppercase and lowercase letters as the same and will not let anyone create the same hashtag with different capitalization. For example, if you create a hashtag of #Question, the system will not allow you to create another hashtag of #question. If a message is sent with a hashtag of #question in the subject line, the system will change that hashtag to #Question before posting the message.
• Hashtags can contain numerals along with other characters, but they cannot consist of only numerals.
15.2 Hashtag uses
Hashtags have several uses within Groups.io, including controlling certain behaviors of topics and messages:
Hashtag use Description
Searching for messages Group members can search on hashtags to easily find all messages tagged with them.
Example: If a group uses a hashtag called #intro for new member introductions, clicking on #intro in the hashtag list displays a list of all messages in which new group members have introduced themselves.
Muting or unfollowing messages Group members who read group messages via email can click the Mute link or Unfollow link for any hashtag listed in a message footer to stop receiving messages that are tagged with that hashtag.
On the Hashtags page on the group’s website, group members can click the Mute/Notify or Follow Notify button (or link) for a hashtag to stop receiving messages tagged with that hashtag.

15 Managing hashtags
Groups.io Group Owners Manual Updated: Mar. 18, 2022 69
Hashtag use Description
Note:
• Hashtags set to Special cannot be muted.
• The function to follow or unfollow hashtags is available only when members have selected “Following Only” in their group email subscription preferences.
Receiving web/app notifications about topics
On the Hashtags page on the group’s website, group members can click the Mute/Notify button for a hashtag to receive (or stop receiving) web/app notifications for topics that are tagged with that hashtag. (The button is labeled Follow/Notify for members who have selected “Following Only” in their group subscription preferences.)
Setting automatic topic timeouts If a hashtag’s Topic Duration is set, topics tagged with it will be deleted (or, if specified, locked) after that period of time. This feature can be useful when a topic will be obsolete after a certain amount of time (for example, messages about items for sale).
Sending messages as special notices When a hashtag is set to Special, all messages tagged with it, including the original message in the topic and all replies, are sent as special notices.
Note: Hashtags set to Special cannot be muted. Also, only moderators and owners can send special notices. If a regular member replies, their message is sent as a normal message.
Posting messages only on the group website (not through email)
When a hashtag is set to No Email, all messages tagged with it are posted to the website but not sent out as email messages.
Moderating messages When a hashtag is set to Moderated, messages sent to topics tagged with it require approval by a moderator.
Unmoderating replies to topics When a hashtag is set to Replies Unmoderated, replies to topics that are tagged with it will be unmoderated, even if members who reply are moderated or the group itself is moderated.
Locking topics on creation When a hashtag is set to Locked, topics tagged with it are locked upon creation.
Overriding the group’s Reply To option Setting a hashtag’s Reply To option to a setting other than Same as Group overrides the group's Reply To setting.
Note: If a hashtag is set to Reply Only To Sender, all responses go privately to the sender and not to the group. This setting overrides the group setting Remove Other Reply Options in a group that is set to Reply to Sender.

15 Managing hashtags
70 Updated: Mar. 18, 2022 Groups.io Group Owners Manual
For more information on the specific hashtag settings mentioned in the table above, see Creating a hashtag.
15.3 Controlling the use and creation of hashtags
15.3.1 Overview
You can control the use and creation of hashtags through various means:
• Group hashtag settings
• Moderator hashtag permissions
• Usage settings on individual hashtags
15.3.2 Group hashtag settings
Group hashtag settings are in the Message Policies panel on the group’s Settings page. These settings are:
• Hashtags Required: Specifies whether messages must have at least one hashtag.
• Hashtag Permissions: Controls whether group members can create new hashtags by adding them to message subject lines.
15.3.3 Moderator hashtag permissions
The setting that allows moderators to create and modify hashtags is Create or Modify Hashtags, which is in the Moderator Permissions panel on a moderator’s member page. See Making a member an owner or moderator.
15.3.4 Usage settings on individual hashtags
When you create a hashtag, you can specify whether it can be used only by moderators by selecting the Use by Mods Only setting. When you select this setting, you can select an additional setting, Replies by Mods Only, so that only moderators can reply to messages that have that hashtag.
15.4 Viewing, creating, modifying, and deleting hashtags
15.4.1 Viewing the list of hashtags used in a group
If a group uses hashtags, members can view the list of hashtags on the group’s website using either of these methods:
• In the left navigation menu, select Hashtags.
• In Topics view or Messages view, click the Hashtags button at the top of the page.
Note: Clicking a hashtag displays a page containing all the messages that are tagged with that hashtag.

15 Managing hashtags
Groups.io Group Owners Manual Updated: Mar. 18, 2022 71
15.4.2 Creating a hashtag
1. In the left navigation menu on the group’s website, select Hashtags.
2. On the Hashtags page, click the Create Hashtag button at the bottom of the page (you will have to scroll if the group already contains a number of hashtags).
3. On the Create Hashtags page, complete the fields and selections:
Field or selection Description
Hashtag Enter the hashtag name, including the # character at the beginning. The name can include uppercase and lowercase letters, hyphens, and underscores. Hashtags do not have a character limit, but best practice is to keep them concise.
Note: The system treats uppercase and lowercase letters as the same and will not let you create the same hashtag with different capitalization. For example, if you create a hashtag of #Question, the system will not allow you to create another hashtag of #question. If a message is sent with a hashtag of #question in the subject line, the system will change that hashtag to #Question before posting the message.
Alias When you select an existing hashtag from this list, topics that are tagged with it will be retagged with the hashtag you are creating.
Note: When you select an alias, the page is refreshed and the other hashtag settings disappear because the alias will point to the hashtag you are creating and, therefore, have that hashtag’s settings. The alias cannot have its own settings.
Aliases are useful when, for example, the group has more than one hashtag that is similar (such as a singular version and a plural version), or an existing hashtag is misspelled, and you want to consolidate topics under one version of the hashtag. New messages that are posted with the alias will be tagged with the hashtag you are creating.
Description If desired, enter a brief description of the hashtag. This description appears on the Hashtags page, in the list displayed by the Hashtags button, and in the Add Tags list on the New Topic page.
Footer If desired, enter text that will be included in the footer of email messages that are tagged with this hashtag (for example, you could include additional guidance for members responding to emails that have this hashtag). In individual email messages, the hashtag footer will appear at the top of the message footer, above the “Groups.io links” line. In digests, the hashtag footer will appear after the body of the tagged message.
Topic Duration If you want to delete or lock topics tagged with this hashtag after a specific period of time, select the applicable option from the list.

15 Managing hashtags
72 Updated: Mar. 18, 2022 Groups.io Group Owners Manual
Field or selection Description
Lock Topic Select this checkbox to lock topics, rather than delete them, after the time period you selected under Topic Duration.
Tag Color Select a color to associate with the hashtag; the default is green. The hashtag will be displayed in this color in the message archive.
You can use colors to categorize hashtags, to help distinguish them visually on the group’s website.
No Email Select this checkbox if you do not want messages tagged with this hashtag to be emailed to group members. The messages will be posted only in the archive on the group’s website.
Special Select this checkbox if you want messages tagged with this hashtag to be sent to group members as special notices.
Moderated Select this checkbox if you want messages tagged with this hashtag to be moderated.
Replies Unmoderated Select this checkbox if you do not want to moderate replies to messages tagged with this hashtag.
Locked Select this checkbox to immediately lock topics that are created with this hashtag.
Reply To If you want to apply a Reply To setting to this hashtag that is different from the group’s Reply To setting, select that setting from the list. Note: If you select Reply to topic followers only, the system automatically sets up follow topic records for those who start new topics with this hashtag as well as everyone who replies to those topics. Those people will see an Unfollow #hashtagname link in the footer of email messages in those topics.
Use by Mods Only Select this checkbox if you want to restrict the use of this hashtag to moderators only. This feature is useful for sending administrative notices, for example. Hashtags with this setting appear in the Add Tags list only when a moderator is creating the topic.
Replies by Mods Only This checkbox appears after you select Use by Mods Only. Select this checkbox if you want only moderators to be able to reply to topics tagged with this hashtag.
4. At the bottom of the page, click the Create Hashtag button.

15 Managing hashtags
Groups.io Group Owners Manual Updated: Mar. 18, 2022 73
15.4.3 Modifying a hashtag
1. In the left navigation menu on the group’s website, select Hashtags.
2. On the Hashtags page, locate the tag you want to modify, and click the Edit Tag button.
3. On the Edit Hashtags page, change the desired fields and selections (see Creating a hashtag). Note: If you change a hashtag’s Reply To setting to Reply to topic followers only, the system automatically sets up follow topic records for the people who started topics with that hashtag as well as everyone who replied to those topics. Those people then will see an Unfollow #hashtagname link in the footer of subsequent email replies to those topics.
4. At the bottom of the page, click the Update Hashtag button. The changes are applied to all topics that are tagged with the hashtag you modified.
15.4.4 Deleting a hashtag
1. In the left navigation menu on the group’s website, select Hashtags.
2. On the Hashtags page, locate the tag you want to delete, and click the Edit Tag button.
3. At the bottom of the Edit Hashtags page, click the Delete Hashtag button.
4. When the Verify Delete confirmation popup appears, click Yes. The hashtag is deleted from the group and removed from all topics that were tagged with it. Note: Any aliases that pointed to the hashtag are deleted as well.
15.5 Applying hashtags to topics
15.5.1 Applying hashtags to new topics
When members are creating topics on the group's website, they can apply existing hashtags by selecting the hashtags from the Add Tags list that appears below the subject line on the Create Topic page.
In email messages, members can simply enter hashtags in the subject line. If a hashtag in the subject line does not already exist in the group, it is created (if members are allowed to create hashtags).
Note:
• Hashtags take effect only if they are placed on the first message in a topic, and they will be applied to all messages in the topic.
• It is possible for members to add a hashtag to an emailed reply by editing the subject line, but this addition has no effect. The hashtag will be included in the reply’s subject line for members receiving messages through email, but it will not be included in the subject line of the archived message or of any other messages within the topic.
• The hashtag limit is five per topic. (The system allows subject lines to contain more than five hashtags, but only the first five hashtags are saved in the message archive.)
15.5.2 Applying hashtags to existing topics
Group owners and moderators can apply hashtags to existing topics on the group’s website:
1. In the left navigation menu on the group’s website, click Messages. If the resulting page displays messages in:
• Topics view: Go to step 2.
• Messages view: Click the leftmost button at the top and select Topics. Then go to step 2.
2. Narrow the list of topics by using the Search button to search for topics by keyword.

15 Managing hashtags
74 Updated: Mar. 18, 2022 Groups.io Group Owners Manual
3. In the search results, click the Tools button, then select the Collapse Topics checkbox. The list now shows the number of messages in each topic.
4. Review the list of topics for a topic you want to tag, and click its link to display that topic. Tip: Use your browser’s feature to open the link in a new tab or a new window, which will preserve your list of search results for you to continue reviewing.
5. At the top of the first message in the topic, click the Topic Properties button (or, at the end of that message, click the More “hamburger” icon to display a submenu, and select Topic Properties). A page with the topic’s properties appears.
6. Under the Subject field, from the Add Tags list, select the hashtag you want to apply.
7. Repeat step 6 for any additional hashtags you want to apply, up to the limit of five.
8. Click the Update button at the bottom of the page. The hashtag is applied to the topic.
9. If you opened the topic in a new browser tab or window, close that tab or window.
10. Repeat steps 4 through 9 for any additional topics you want to apply hashtags to.
15.6 How hashtags are displayed in the group archive
To make hashtags stand out better in the archive, the system duplicates any hashtags placed at the beginning or in the middle of a message’s subject line at the end of the subject line, using whatever background color was chosen for the hashtag.
Example: A subject entered as “Seeking #advice for a #rosebush with blackened leaves” would be displayed in the archive as “Seeking #advice for a #rosebush with blackened leaves #advice #rosebush.”
15.7 System hashtags
The system automatically adds hashtags to certain notices. See the table below. Be aware that all the listed hashtags except for #guidelines-notice and #monthly-notice apply to features that are available only in Premium and Enterprise groups and in legacy Basic groups (those created before August 24, 2020).
Note: If the hashtag does not already exist in the group, the system creates it the first time the associated notice is posted. Owners and moderators can edit the properties of these hashtags if desired.
Tip: If you want to set some properties before a hashtag is created systematically (such as setting it to No Email or to Moderated), you can manually create the tag (ensure you use the name as listed below) and apply the desired properties. Your properties will be retained when the system creates the hashtag. Exception: In the #guidelines-notice and #monthly-notice hashtags, the “Special” checkbox is set each month to match the “Send monthly as special” checkbox in the Group Guidelines notice and Monthly Reminder notice.
Hashtag Associated notice
#cal-cancelled A calendar event was deleted (cancelled).
#cal-invite Members are invited to a calendar event.
#cal-notice A calendar event is happening.
Note: Because the notice is time sensitive, this hashtag bypasses the group’s Message Moderation setting if it is set to moderate messages.

15 Managing hashtags
Groups.io Group Owners Manual Updated: Mar. 18, 2022 75
Hashtag Associated notice
#cal-reminder A calendar event is coming up.
Note: Because the notice is time sensitive, this hashtag bypasses the group’s Message Moderation setting if it is set to moderate messages.
#cal-summary Multiple calendar events (up to the next 20) are coming up.
Note: This feature is available only in Premium and Enterprise groups.
#chat-notice A chat was created. This notice is sent when someone selects the “Send an announcement to the group” checkbox when creating the chat. (The existing #chat hashtag was renamed in June 2020.) Note: This hashtag appears with the notice only in the message archive (Topics or Messages view). The hashtag is not displayed on the group’s Chats page.
#donation-request A donation request was created.
Note: This feature is available only in Premium and Enterprise groups.
#file-notice A file or folder was created, uploaded, updated, or deleted in the group’s Files area. This notice is sent when someone selects the “Notify Members” checkbox during a file or folder action. (This hashtag was added in June 2020.)
#guidelines-notice The notice is the Group Guidelines notice, if one is set up for the group and is sent out automatically. The “Use by Mods Only” and “Replies by Mods Only” properties are applied to this hashtag by default. (This hashtag originally was named #guidelines. It was changed in June 2020.)
Note: Because the notice is time sensitive, this hashtag bypasses the group’s Message Moderation setting if it is set to moderate messages.
#monthly-notice The notice is the Monthly Reminder notice, if one is set up for the group. The “Use by Mods Only” and “Replies by Mods Only” properties are applied to this hashtag by default. (This hashtag was added in June 2020.)
Note: Because the notice is time sensitive, this hashtag bypasses the group’s Message Moderation setting if it is set to moderate messages.
#photo-notice A photo or album was created, uploaded, updated, moved, or deleted in the group’s Photos area. This notice is sent when someone selects the “Notify Members” checkbox during a photo or album action. (This hashtag was added in June 2020.)
#poll-notice A poll was created or updated. (The existing #poll hashtag was renamed in June 2020.)

15 Managing hashtags
76 Updated: Mar. 18, 2022 Groups.io Group Owners Manual
Hashtag Associated notice
#wiki-notice A wiki page was created or updated. This notice is sent when someone selects the “Notify Members” checkbox when they are creating or updating a wiki page. (This hashtag was added in June 2020.)

16 Pinning topics and wiki pages to the Topics page
Groups.io Group Owners Manual Updated: Mar. 18, 2022 77
16 Pinning topics and wiki pages to the Topics page
16.1 Overview
You can pin topics and wiki pages to the top of the Topics page (that is, make them “sticky”) to make it easy for group members to see information that you want to be prominent when they view the Topics page on the group’s website. For example, you might have a topic with important information, or a wiki page with frequently asked questions, that you want group members to be able to see easily on the Topics page.
Note: Wikis are available only in Premium and Enterprise groups and in legacy Basic groups (those created before August 24, 2020).
16.2 Pinning a topic
1. On the group’s website, take one of these actions:
• Open the topic you want to pin and, at the bottom right of the topic, click the More “hamburger” icon.
• Display messages in Topics view, and, at the bottom right of the topic you want to pin, click the down arrow button next to the topic’s posting date.
2. From the resulting menu, select Make Sticky. You return to the Messages page, and that topic is listed at the top with a pushpin icon next to its subject line.
To unpin a topic, follow step 1 above, then select Unstick from the menu.
16.3 Pinning a wiki page
1. In the left navigation menu on the group’s website, select Admin > Settings.
2. On the Settings page, scroll down to the Features panel > Wiki section.
3. From the Sticky Wiki Page list, select the wiki page that you want to pin to the top of the Topics page.
Note: The page must exist. You cannot create a new wiki page from here.
4. Go to the bottom of the Settings page and click the Update Group button. A banner at the top of the page confirms that your changes have been saved. On the Topics page, the first few lines of the wiki page appear at the top. (Members can click the Read More link to see the full page.)
To unpin a wiki page, follow the steps above, but, in step 3, select (no page) from the Sticky Wiki Page list.

17 Reviewing the group’s activity log
78 Updated: Mar. 18, 2022 Groups.io Group Owners Manual
17 Reviewing the group’s activity log
17.1 Displaying the activity log
Groups.io records all activity that occurs in the group in an activity log. Group owners and moderators can use the activity log to review various types of group activity, research email delivery errors, and so on.
To display the activity log, select Admin > Activity in the left navigation menu on the group’s website.
The resulting Activity page lists all actions that have occurred in your group to date. You can refine the list of actions using these methods:
• In the Actions list at the top of the page, select a specific action, then click the Search button. Note: You can further filter the results of the Actions list selection by also entering a keyword in the Search field or selecting a date range from the Date list.
• For these categories, click a button at the top of the page to display actions pertaining to that category:
○ Message Activity
○ Member Activity
○ Moderator Activity
○ Payment Activity
17.2 Reviewing message activity
On the Activity page, click the Message Activity button to display a list of the message-related actions that have occurred in the group. This button also filters the Actions list so it includes only the actions that are related to message activity.
17.3 Reviewing member activity
On the Activity page, click the Member Activity button to display a list of the member-related actions that have occurred in the group. This button also filters the Actions list so it includes only the actions that are related to member activity.
17.4 Reviewing moderator activity
On the Activity page, click the Moderator Activity button to display a list of actions that owners and moderators have taken in the group. This button also filters the Actions list so it includes only the actions that are related to owner and moderator activity.
17.5 Reviewing payment activity
On the Activity page, click the Payment Activity button to display a list of actions that have occurred in the group related to sponsorships or donation requests (if they are enabled for the group). This button also filters the Actions list so it includes only the actions that are related to sponsorships and donation requests.

17 Reviewing the group’s activity log
Groups.io Group Owners Manual Updated: Mar. 18, 2022 79
17.6 Reviewing activity related to other group features
Note: These features are available only in Premium and Enterprise groups and in legacy Basic groups (those created before August 24, 2020).
17.6.1 Calendar activity
The Activity page does not contain a specific button that displays only calendar-related actions. But you can select these items from the Actions list to see activity related to your group’s calendar:
• Added event
• Added repeating event
• Canceled event
• Changed RSVP
• Deleted event
• Deleted following repeated event
• Deleted repeating event
• Locked event
• Modified event
• Modified repeating event
• Moved off waitlist
• No permission to add a calendar event
• RSVP No
• RSVP Not Sure
• RSVP Yes
• Unlocked event
17.6.2 Database activity
The Activity page does not contain a specific button that displays only database-related actions. But you can select these items from the Actions list to see activity related to databases in your group:
• Added row
• Added table
• Deleted row
• Deleted table
• Modified row
• Modified table

17 Reviewing the group’s activity log
80 Updated: Mar. 18, 2022 Groups.io Group Owners Manual
17.6.3 File activity
The Activity page does not contain a specific button that displays only file-related actions. But you can select these items from the Actions list to see activity related to your group’s Files section:
• Added folder
• Added file
• Attempted add of a file with a virus
• Deleted folder
• Deleted file
• Modified folder
• Modified file
• Moved folder
• Moved file
17.6.4 Photo activity
The Activity page does not contain a specific button that displays only photo-related actions. But you can select these items from the Actions list to see activity related to your group’s Photos section:
• Added photo
• Added photo album
• Deleted photo
• Deleted photo album
• Edited photo
• Edited photo album
• Moved photo
• Rotated photo
17.6.5 Wiki activity
The Activity page does not contain a specific button that displays only wiki-related actions. But you can select these items from the Actions list to see activity related to your group’s wiki:
• Added image to wiki
• Added wiki page
• Deleted image from wiki
• Deleted wiki revision
• Deleted wiki page
• Modified wiki page
Tip: For additional information and advice on monitoring activity in your group’s wiki, see the wiki in the GroupManagersForum group.

18 Viewing and managing your group’s storage space
Groups.io Group Owners Manual Updated: Mar. 18, 2022 81
18 Viewing and managing your group’s storage space
18.1 Allotted storage space by plan type
• Basic plans: 1GB
• Premium plans: 30GB (as of February 8, 2021; previously 20GB)
• Enterprise plans: 1TB
Note: In groups that have subgroups, each subgroup has the same amount of allotted storage space as its parent group.
18.2 Items that count towards the storage limit
These items are counted towards your group’s storage limit:
• Files
• Photos
• Images in databases
• Images on wiki pages
• Message attachments
Note: The contents of messages (message bodies) are not counted towards the storage limit. Only attachments are counted.
18.3 Items that do not count towards the storage limit
These items are not counted towards your group’s storage limit:
• Message contents (message bodies)
• Wiki pages
• Database tables
• Chats
• Polls
18.4 Viewing your group’s storage limit and current space usage
1. In the left navigation menu on the group’s website, click Admin to display the submenu.
2. Select the applicable item in the submenu. If your group is a:
• Basic group: Select Upgrade.
• Premium or Enterprise group (or parent group if it has subgroups): Select Billing.
• Subgroup in a group: Select Usage.
Note: Each subgroup has the same amount of allotted storage space as its parent group.
The resulting Billing page shows your plan, its storage limit, and the amount of storage space your group is currently using. (For a subgroup, the Usage page shows the subgroup’s storage limit and current usage.)
Note: You can also view your group’s current space usage by entering this URL in your web browser (substituting your group’s name for groupname): https://groups.io/g/groupname/usage

18 Viewing and managing your group’s storage space
82 Updated: Mar. 18, 2022 Groups.io Group Owners Manual
18.5 Managing your group’s storage space
When a group reaches 80% of its storage limit, Groups.io sends a warning notification to the group owner and to moderators who have opted to receive email notifications when the storage limit is reached.
You can configure your group to either bounce messages with attachments when the storage limit is reached or automatically delete old attachments to keep the group under the storage limit. See the Storage Limit Reached setting, which is under Admin > Settings > Message Policies.
Note: Photos and files are never automatically deleted.
Other settings that you can use to help manage your group’s storage space are:
• Admin > Settings > Message Policies > Max Photo Size in Email
• Admin > Settings > Premium & Enterprise Features > Databases > Max Image Size In Databases
• Admin > Settings > Premium & Enterprise Features > Photos > Max Size In Photos Section
• Admin > Settings > Premium & Enterprise Features > Wiki > Max Image Size on Wiki Pages
18.6 Deleting message attachments manually
In addition to using the Storage Limit Reached setting to handle attachments automatically, you can delete attachments manually to free up space in the group:
1. Display your group’s Billing page (or subgroup's Usage page).
2. In the Billing Overview panel on the page (or the Usage page in a subgroup), click the View Attachments link.
3. On the Attachments page, click the link of a message with an attachment or attachments that you want to delete.
4. When the message is displayed on its own page, click the More “hamburger” icon at the lower right and select Edit Message from the popup menu.
5. At the bottom of the Edit Message page, select the checkboxes for the attachments you want to delete.
6. Click the Save Without Sending button so a notification about the edit is not sent to the entire group. (However, the original poster of the message will receive a notification.)
Note: Do not click the Delete button unless you want to delete the entire message.
Repeat these steps for any more attachments you want to delete.

19 Managing integrations with outside services
Groups.io Group Owners Manual Updated: Mar. 18, 2022 83
19 Managing integrations with outside services
19.1 Overview
Premium and Enterprise groups, as well as legacy Basic groups (those created before August 24, 2020), can use an Integrations feature that allows you to connect your group with outside services. Group integrations allow outside content to be sent automatically to your group. These integrations are configured by owners and moderators and are not controlled by group members.
Group integrations can be moderated, which means that any integration messages must be approved before they are sent to the group.
The available group integration options are:
• Feed
• GitHub
• Trello
Note: Legacy Basic groups are limited to a maximum of five integrations. Premium and Enterprise groups can have an unlimited number of integrations. If you create a Premium 30-day trial group, add integrations, and then decide not to continue with a paid Premium group after the 30 days, the integrations will be disabled.
19.2 Email integrations
19.2.1 Overview
Email integrations allow you to create email addresses that you can use outside of Groups.io to send messages to your group. For example, suppose a web service has a function to email notifications about a subject that would be of interest to your group, and you would like those notifications to be posted to the group. Instead of providing the group email address to that service, which would require you to allow nonmembers to post to your group, you can add an email integration that creates a unique email address to be used by that particular service and then provide that email address to the service.
19.2.2 Adding an email integration
1. In the left navigation menu on the group’s website, select Admin > Integrations. The Group Integrations page appears.
2. In the Email Integration panel, click the button that is displayed:
• If no other email integrations exist, the button is labeled Email Integration. Clicking this button takes you directly to the Add Email Integration page.
• If one or more email integrations exist, the button is labeled Edit Email Integrations. Clicking this button takes you to the Your Email Addresses page. On that page, click the Add an Email Address button to display the Add Email Integration page.
3. Complete the Add Email Integration page:
• Name: Enter a name that identifies the email address.
• Hashtags: Enter any hashtags (up to four; an #email hashtag is provided by default) that you want to apply to the subject lines of the email messages sent to this address (which will be posted to the group).
• Moderate: Select this checkbox if you want to moderate the email messages sent to this address (which will be posted to the group).

19 Managing integrations with outside services
84 Updated: Mar. 18, 2022 Groups.io Group Owners Manual
4. Click the Add button at the bottom of the page. Groups.io generates a unique email address with the name you specified at the beginning of it and adds that email address to the Your Email Addresses page.
You can then provide that email address to the outside service. Email messages sent to that address will be posted to the group.
Caution: Anyone who has the generated email address will be able to post messages to the group using that address.
19.2.3 Modifying an email integration
1. In the left navigation menu on the group’s website, select Admin > Integrations. The Group Integrations page appears.
2. In the Email Integration panel, click the Edit Email Integrations button. The Your Email Addresses page appears.
3. Click the link in the Title column for the email integration you want to modify. The Update Email Integration page appears.
4. As desired, modify the Name field, the Hashtags field, and/or the Moderate selection.
5. Click the Update button at the bottom of the page. Groups.io updates the email integration and returns to the Your Email Addresses page.
19.2.4 Deleting an email integration
1. In the left navigation menu on the group’s website, select Admin > Integrations. The Group Integrations page appears.
2. In the Email Integration panel, click the Edit Email Integrations button. The Your Email Addresses page appears.
3. Select the checkbox for the email integration you want to delete. You can select more than one if you want to delete multiple email integrations.
4. Click the Delete Email Addresses button at the bottom of the page.
5. When the Verify Delete confirmation popup appears, click Yes. The email integration is removed from the Your Email Addresses page.

19 Managing integrations with outside services
Groups.io Group Owners Manual Updated: Mar. 18, 2022 85
19.3 Feed integrations
19.3.1 Overview
Feed integrations allow you to post items from RSS feeds to your group. For example, if a blog is associated with your group, you can add a feed integration to have new blog posts sent to your group automatically.
Note:
• Groups.io polls RSS feeds every 30 minutes, at 5 minutes after and 35 minutes after the hour.
• You can add RSS feeds from other Groups.io groups if those groups have public archives. In such a group, the RSS feed link is in the Group Information section on the group’s home page.
19.3.2 Adding a feed integration
1. In the left navigation menu on the group’s website, select Admin > Integrations. The Group Integrations page appears.
2. In the Feed Integration panel, click the button that is displayed:
• If no other feed integrations exist, the button is labeled Feed Integration. Clicking this button takes you directly to the Add Feed Integration page.
• If one or more feed integrations exist, the button is labeled Edit Feed Subscriptions. Clicking this button takes you to the Your Feeds page, which lists the existing feed integrations. Click the Add a Feed button to display the Add Feed Integration page.
3. Complete the Add Feed Integration page:
• Feed URL: Enter the URL of the RSS feed.
• Hashtags: Enter any hashtags (up to five) that you want to apply to the subject lines of the feed posts that are emailed to the group. A #feed hashtag is provided by default.
• Moderate: Select this checkbox if you want to moderate the feed posts that are emailed to the group.
4. Click the Add button at the bottom of the page. Groups.io verifies the feed and adds it to the Your Feeds page.
Note: When you add the RSS feed of a Groups.io group that has a public archive, the group’s title is listed on the Your Feeds page. If the group has not specified a title, the group’s URL is listed.
19.3.3 Modifying a feed integration
1. In the left navigation menu on the group’s website, select Admin > Integrations. The Group Integrations page appears.
2. In the Feed Integration panel, click the Edit Feed Subscriptions button. The Your Feeds page appears.
3. Click the link in the Title column for the feed integration you want to modify. The Update Feed Integration page appears.
4. As desired, modify the Name field, the Hashtags field, and/or the Moderate selection.
Note: You cannot change the feed’s URL on this page. If you need to change the URL, you must delete this feed integration and add a new one with the revised URL.

19 Managing integrations with outside services
86 Updated: Mar. 18, 2022 Groups.io Group Owners Manual
5. Click the Update button at the bottom of the page. Groups.io updates the feed integration and returns to the Your Feeds page.
19.3.4 Deleting a feed integration
1. In the left navigation menu on the group’s website, select Admin > Integrations. The Group Integrations page appears.
2. In the Feed Integration panel, click the Edit Feed Subscriptions button. The Your Feeds page appears.
3. Select the checkbox for the feed integration you want to delete. You can select more than one if you want to delete multiple feed integrations.
4. Click the Delete Feeds button at the bottom of the page.
5. When the Verify Delete confirmation popup appears, click Yes. The feed integration is removed from the Your Feeds page.
19.4 GitHub integrations
19.4.1 Overview
You can set up a GitHub integration to send notifications to your group when code is committed to a GitHub repository.
19.4.2 Adding a GitHub integration
1. In the left navigation menu on the group’s website, select Admin > Integrations. The Group Integrations page appears.
2. In the GitHub Integration panel, click the button that is displayed:
• If no other GitHub integrations exist, the button is labeled GitHub Integrations. Clicking this button takes you directly to the Add GitHub Integration page.
• If one or more GitHub integrations exist, the button is labeled Edit GitHub Integrations. Clicking this button takes you to the GitHub Integrations page that lists the existing integrations. Click the Add A Repository button to display the Add GitHub Integration page.
3. On the next page, click the Authenticate With GitHub button and sign in to your GitHub account. After you sign in, you are returned to Groups.io.
4. Complete the Add GitHub Integration page.
5. Click the Add button at the bottom of the Add GitHub Integration page. Groups.io verifies the repository and adds it to the GitHub Integrations page.
19.4.3 Modifying a GitHub integration
1. In the left navigation menu on the group’s website, select Admin > Integrations. The Group Integrations page appears.
2. In the GitHub Integration panel, click the Edit GitHub Integrations button.
3. On the Edit GitHub Integrations page, click the link to the integration you want to modify.
4. Sign in to GitHub, then make your changes on the Edit GitHub Integration page.
5. Click the Update button at the bottom of the Edit GitHub Integration page. Groups.io updates the integration and returns to the GitHub Integrations page.

19 Managing integrations with outside services
Groups.io Group Owners Manual Updated: Mar. 18, 2022 87
19.4.4 Removing a GitHub integration
1. In the left navigation menu on the group’s website, select Admin > Integrations. The Group Integrations page appears.
2. In the GitHub Integration panel, click the Edit GitHub Integrations button.
3. On the GitHub Integrations page, select the checkbox for the integration you want to remove. You can select more than one if you want to remove multiple GitHub integrations.
4. Click the Remove Repositories button at the bottom of the page.
5. When the Verify Removal confirmation popup appears, click Yes. The integration is removed from the GitHub Integrations page.
19.5 Trello integrations
19.5.1 Overview
You can set up Trello integrations to send notifications to your group when activity occurs in Trello boards.
19.5.2 Adding a Trello integration
1. In the left navigation menu on the group’s website, select Admin > Integrations. The Group Integrations page appears.
2. In the Trello Integration panel, click the button that is displayed:
• If no other GitHub integrations exist, the button is labeled Trello Integrations. Clicking this button takes you directly to the Add Trello Integration page.
• If one or more GitHub integrations exist, the button is labeled Edit Trello Integrations. Clicking this button takes you to the Trello Integrations page that lists the existing integrations. Click the Add A Board button to display the Add GitHub Integration page.
3. On the next page, click the Authenticate With Trello button and log in to your Trello account. After you log in, you are returned to Groups.io.
4. Complete the Add Trello Integration page.
5. Click the Add button at the bottom of the Add Trello Integration page. Groups.io verifies the repository and adds it to the GitHub Integrations page.
19.5.3 Modifying a Trello integration
1. In the left navigation menu on the group’s website, select Admin > Integrations. The Group Integrations page appears.
2. In the Trello Integration panel, click the Edit Trello Integrations button.
3. On the Edit Trello Integrations page, click the link to the integration you want to modify.
4. Log in to Trello, then make your changes on the Edit Trello Integration page.
5. Click the Update button at the bottom of the Edit Trello Integration page. Groups.io updates the integration and returns to the Trello Integrations page.

19 Managing integrations with outside services
88 Updated: Mar. 18, 2022 Groups.io Group Owners Manual
19.5.4 Removing a Trello integration
1. In the left navigation menu on the group’s website, select Admin > Integrations. The Group Integrations page appears.
2. In the Trello Integration panel, click the Edit Trello Integrations button.
3. On the Trello Integrations page, select the checkbox for the integration you want to remove. You can select more than one if you want to remove multiple Trello integrations.
4. Click the Remove Boards button at the bottom of the page.
5. When the Verify Removal confirmation popup appears, click Yes. The integration is removed from the Trello Integrations page.

20 Promoting your group
Groups.io Group Owners Manual Updated: Mar. 18, 2022 89
20 Promoting your group Groups.io provides some tools to help you promote your group. In the left navigation menu on your group’s website, select Admin > Promote to access tools you can use to:
• Promote your group on Facebook and Twitter.
• Send a customized email to your friends with a link to join the group.
• Embed a signup form on a website or blog.
Also, if your group is listed in the public directory of groups, ensure that your group’s title or description includes the appropriate keywords to help prospective members find your group easily when they search the directory.
Note: The Promote option is not available in subgroups.

21 Exporting or downloading your group’s data
90 Updated: Mar. 18, 2022 Groups.io Group Owners Manual
21 Exporting or downloading your group’s data
21.1 Downloading your group’s member list
1. In the left navigation menu on the group’s website, select Admin > Members.
2. At the top of the Members page, click the Download button. Groups.io displays a new page that contains the member list in comma-separated values (CSV) format.
3. Copy the content on the page and paste it into the application of your choice.
Note: In the User Status column of the downloaded list, a value of 2 (inactive) means the user’s Groups.io account was disabled by Groups.io management. The subscription records associated with an inactive account remain in the system and are accessible only by Groups.io management.
21.2 Exporting your group’s message archive and other group content
1. In the left navigation menu on the group’s website, select Admin > Settings.
2. At the top of the Settings page, click the Export Group Data button.
3. On the Export Group Data page, select the checkboxes for the content you want to export. The checkboxes that are available depend on the group’s plan level:
• In all groups:
o Group Info
o Member List (contains more extensive information than a list downloaded from the Members page)
o Member Notices
o Messages
o Activity Log
o Hashtags
• In Premium and Enterprise groups and in legacy Basic groups (those created before August 24, 2020):
o Polls
o Photos Exception: The system-generated Emailed Photos album is not included with content exported from the Photos section.
o Files
o Events
o Databases
o Chats
o Wiki
Note: If your group contains subgroups, you can choose to export data from those subgroups as well.
4. Click the Export Group Data button at the bottom of the page.
Groups.io gathers the selected data into a compressed zip archive and, generally within 10 minutes, sends you an email message with a link to the data file. The link is valid for 24 hours.

21 Exporting or downloading your group’s data
Groups.io Group Owners Manual Updated: Mar. 18, 2022 91

22 Taking donations and reviewing payment activity
92 Updated: Mar. 18, 2022 Groups.io Group Owners Manual
22 Taking donations and reviewing payment activity
22.1 Overview
Premium and Enterprise groups can set up donation requests to ask their members to donate to the group. Members in groups that have open donation requests will see a Donations entry on the left navigation menu at the group’s website. They can select that entry to view the donation requests and make donations.
Groups.io uses Stripe to accept credit card payments. To accept donations in your group, you need to have a Stripe account (Stripe accounts are free) and connect to it from your group. Then you can create donation requests in your group, and your members can donate using credit cards.
As of June 2, 2020, the Groups.io processing fee is 2% plus Stripe’s credit card processing fee.
Note: Members who donate do not need to have Stripe accounts.
22.2 Setting up a Stripe account
1. In the left navigation menu on the group’s website, select Admin > Donations.
2. On the resulting Donations page, click the Connect to Stripe button, which takes you to the Stripe website.
3. To set up a new Stripe account for your group, complete the fields on the Stripe page.
Tips:
○ Use your group’s name as the account name, legal business name, and in the statement descriptor (for example, “groupname Donations”).
○ Provide your group’s website (https://groups.io/g/groupname) as the business website.
○ Add/attach a bank account and set up a Direct Debit, then set up a payment schedule.
4. At the bottom of the page, click the Authorize access to this account button. You are then returned to the Donations page in Groups.io.
22.3 Creating a donation request
1. In the left navigation menu on the group’s website, select Admin > Donations. 2. On the Donations page, click the Create A Donation Request button. 3. Complete the Donation Request page.
Note: The amount you enter in the Ask Amount field is the amount of the total donation, not an individual donation amount that you are requesting from each member. If you want to leave the total open-ended (not provide a specific amount), leave the dollar amount as 0.
4. Click the Create button at the bottom of the page.
The donation request is now open, and members can submit donations.

22 Taking donations and reviewing payment activity
Groups.io Group Owners Manual Updated: Mar. 18, 2022 93
22.4 Closing or reopening a donation request
When donations are complete, you can close the donation request:
1. In the left navigation menu on the group’s website, select Admin > Donations. 2. On the Donations page, click the donation request you want to close. 3. On the Donation Request page, click the Close button.
To reopen a closed donation request so members can donate to it again:
1. Display the Donations page. 2. Click the Open button at the top, and select Closed from the dropdown menu. 3. Locate and click the closed donation request that you want to reopen. 4. On the Donation Request page, click the Reopen button.
22.5 Viewing open and closed donation requests
In the left navigation menu on the group’s website, select Admin > Donations. The Donations page lists open donation requests by default. To see a list of closed donation requests, click the Open button at the top of the page and select Closed from the dropdown menu.
22.6 Reviewing donation request and payment activity
1. In the left navigation menu on the group’s website, select Admin > Activity. 2. On the Activity page, click the Payment Activity button. All activities related to donation
requests are listed. Note: If the group allows sponsorships, the Payment Activity page lists sponsorship activities as well.
3. If you want to filter the activity results for donations, select one of these options from the Actions list and click Search:
• Donation request closed
• Donation request reopened
• Donation request updated
• Donation requested
• Member donated
• Member donated failed
• Stripe account disconnected

23 Locking and unlocking groups and subgroups
94 Updated: Mar. 18, 2022 Groups.io Group Owners Manual
23 Locking and unlocking groups and subgroups Premium and Enterprise groups can lock their group (and any subgroups), which preserves the archive on Groups.io but prevents members from posting messages to it or making changes to any other group content such as files, photos, and databases.
To lock a group or subgroup:
1. In the left navigation menu on the group’s or subgroup’s website, select Admin > Settings.
2. Scroll to the bottom of the Settings page and click the Lock Group button.
3. When the Verify Lock confirmation popup appears, click Yes.
If you decide to unlock the group or subgroup:
1. In the left navigation menu on the group’s or subgroup’s website, select Admin > Settings.
2. On the Settings page, click the Unlock Group button.
3. When the Verify Unlock confirmation popup appears, click Yes.
Note: Groups.io automatically locks any subgroups that were created in:
• A free Basic group that was created after Monday, February 8, 2021 at 9:00 a.m. U.S. Pacific Time, then upgraded to Premium, then later downgraded back to Basic
• A trial Premium group that is downgraded to a Basic group
Those subgroups are locked until the Basic group is upgraded again.

24 Banning domains from the group
Groups.io Group Owners Manual Updated: Mar. 18, 2022 95
24 Banning domains from the group
Premium and Enterprise groups can prevent nonmembers from submitting join requests or sending messages to a group or subgroup by adding domain names to a list of domains that are banned in the group or subgroup.
To add a domain to the Banned Domains list:
1. In the left navigation menu on the group’s or subgroup’s website, select Admin > Domains. The Banned Domains page appears.
2. In the Domain to ban field, enter the domain to be banned. Do not include the @ symbol.
3. Click the Ban Domain button. The domain is added to the list of banned domains at the top of the page.
Note:
• Adding the domain name of existing members has no effect on those members. They will still be subject to any group and subgroup posting restrictions that are in place.
• In a group that has subgroups, banning a domain in the parent group also bans that domain in its subgroups.
• The Join This Group button (or, in restricted groups, the Apply For Membership In This Group button) on the group’s home page will be visible to people in a banned domain if they are not logged in to Groups.io (if they are logged in to Groups.io, the button is not visible to them). Someone in a domain that was banned by a group and who is not logged in to Groups.io will see a notice in a red box stating “You are not allowed to subscribe to the group with that domain” if they try to join the group through the Join This Group (or Apply For Membership In This Group) button on that group’s home page.
To remove a domain from the Banned Domains list:
1. In the left navigation menu on the group’s or subgroup’s website, select Admin > Domains.
2. In the list of banned domains at the top of the page, click the blue x next to the domain that you want to remove from the list.

25 Creating group aliases
96 Updated: Mar. 18, 2022 Groups.io Group Owners Manual
25 Creating group aliases Premium and Enterprise groups can create aliases for their group that members can use in place of the name assigned to the group when it was created. For example, an alias might be easier than the actual group name for some group members to remember. If your group’s members tend to use variations of the group’s name, you can create aliases for the variations (if the aliases are not already used by other groups). Those aliases would then take members to the main group’s website at Groups.io, and members could also use the aliases to send email messages to the group.
Note: Subgroups can also have aliases.
Group aliases could include different forms of the group’s name, such as:
• A singular form or a plural form
• An abbreviated form or an expanded form
• A form that includes hyphens or a form that does not
To create a group alias:
1. In the left navigation menu on the group’s website, select Admin > Aliases.
2. On the Aliases page, enter an alternate name for your group in the Group Alias field. Note: As with group names, aliases cannot contain spaces, plus signs, slashes, periods, or underscores (hyphens are allowed), and they are limited to a maximum of 34 characters.
3. Click the Add Group Alias button. The alias appears at the top of the page.
4. Repeat steps 2 and 3 for any other aliases you want to add.
To remove a group alias:
1. In the left navigation menu on the group’s website, select Admin > Aliases.
2. In the list of group aliases at the top of the page, click the blue x next to the alias that you want to remove.

26 Using subgroups
Groups.io Group Owners Manual Updated: Mar. 18, 2022 97
26 Using subgroups
26.1 Overview
Premium and Enterprise groups (and Basic groups that existed before January 15, 2020) can have subgroups. A subgroup is a group within another group. Subgroups have all the functionality of normal groups, but for someone to be a member of a subgroup, that person must first be a member of the primary (parent) group. Also, subgroups are not listed in the public directory of groups.
Once someone is a member of the parent group, they can subscribe directly to the subgroup (if permitted), they can be added directly to the subgroup, or they can ask to join the subgroup (if it is restricted).
You can use subgroups for subsets of your primary group’s membership. For example, an organization could use a subgroup for its board of directors or use several subgroups for different committees. Or you could create subgroups for different subject areas that are related to your primary group. The GroupManagersForum wiki contains additional information on why one might want to use subgroups.
Note:
• Each subgroup has the same amount of allotted storage space as its parent group.
• Subgroups cannot contain additional subgroups. Groups.io supports only one level of subgroups.
• You can create subgroups during a 30-day free trial of a Premium group. However, if you decide not to continue with a paid Premium plan after the 30 days are up, those subgroups will be locked (they will not be deleted, in case you decide to upgrade the group in the future).
26.2 Creating a subgroup
1. On your primary (parent) group’s website, select Subgroups on the left navigation menu.
2. On the Subgroups page, click the Create Subgroup button.
3. Complete the fields on the Create Subgroup page:
• Subgroup Email Address: Enter the name of your subgroup, up to 34 characters long. This name will appear in the subgroup’s email address and also in the URL of your subgroup on the Groups.io website. The email address has the form [email protected]. (For more information on subgroup email addresses, see Subdomain addressing in the GroupManagersForum wiki.)
Note: The name cannot contain spaces, plus signs, slashes, or underscores. (Hyphens and periods are allowed.)
• Description: Enter a description of your subgroup. This description will be displayed on your subgroup’s home page and on the parent group’s home page (if you choose to list the subgroup there).

26 Using subgroups
98 Updated: Mar. 18, 2022 Groups.io Group Owners Manual
• Visibility: This option controls whether your subgroup is listed on your parent group’s home page and whether its message archive is visible to the general public, only to parent group members, or only to subgroup members. Select the option you want to use for your subgroup.
! Important: When you make a message archive private (viewable only by parent group members or subgroup members), you cannot change it later to be publicly viewable. Therefore, at this stage, you should be certain about what visibility you want your subgroup’s message archive to have.
Visibility option Description
Subgroup listed in parent group, messages publicly viewable
The subgroup will be listed on the parent group’s home page, and its message archive will be able to be viewed by the general public and by members of the parent group. In addition:
• The contents of subgroup messages will be discoverable by web search engines.
• An RSS feed link will be created automatically and listed in the Group Information section on the subgroup’s home page.
Subgroup listed in parent group, messages viewable by parent group members
The subgroup will be listed on the parent group’s home page, and its message archive will be able to be viewed by all members of the parent group. Message content in the subgroup will not be discoverable by web search engines.
Subgroup listed in parent group, messages viewable by subgroup members only
The subgroup will be listed on the parent group’s home page, and the message archive will be able to be viewed only by members of the subgroup. Message content in the subgroup will not be discoverable by web search engines.
Subgroup not listed in parent group, messages viewable by subgroup members only
The subgroup will not be listed on the parent group’s home page, and its message archive will be able to be viewed only by members of the subgroup. Message content in the subgroup will not be discoverable by web search engines.
Subgroup not listed in parent group, messages publicly viewable
The subgroup will not be listed on the parent group’s home page, but its message archive will be able to be viewed by the general public and by members of the parent group. In addition:
• Message content in the subgroup will be discoverable by web search engines.
• An RSS feed link will be created automatically and listed in the Group Information section on the subgroup’s home page.
4. Click the Create Subgroup button located at the bottom of the page.
Now you can customize the subgroup’s settings (including adding the subgroup to a category), create member notices, and add members of the parent group to the subgroup (either by inviting them to join or, if the group is not a Premium trial group, by adding them directly).

26 Using subgroups
Groups.io Group Owners Manual Updated: Mar. 18, 2022 99
Note:
• After you create the first subgroup, the parent group and subgroup will not be available for a short period of time while the group’s DNS information is updated. Typically, the delay in availability lasts only a few minutes.
• If you invite someone to join a subgroup who is not a member of the parent group, they will be added to the parent group automatically when they accept the subgroup invitation.
26.3 Using subgroup categories
If your group has a number of subgroups, you can organize the subgroups in categories.
To create a subgroup category:
1. On the parent group’s website, in the left navigation menu, select Subgroups. 2. On the Subgroups page, click the Categories button. 3. On the Subgroup Categories page, click the Add Subgroup Category button. 4. Complete the resulting page:
• In the Name field, enter a name for the category.
• In the Description field, enter a description of the category.
• If you want to limit the number of subgroups in this category that group members can belong to, enter that number in the Max Number of Subgroups field. (Leave the default value of 0 if you do not want to limit the number of subgroups in this category that members can belong to.)
5. Click the Add button at the bottom of the page. 6. Repeat steps 2 through 5 for any more categories you want to add.
On the Subgroup Categories page, you can click a down arrow or up arrow next to a category name to move that category down or up in the list.
To add a subgroup to a category:
1. Go to the subgroup’s website. 2. In the left navigation menu, select Admin > Settings. 3. On the Settings page, scroll to the end of the General panel. 4. In the Subgroup Category list, select the category you want to assign to the subgroup. 5. Scroll to the bottom of the page and click the Update Group button. The next time you view
the Subgroups page, the category is listed, enclosed in square brackets, next to the subgroup’s name. Subgroups that are in the same category are listed together.
To modify or delete a subgroup category:
1. On the parent group’s website, in the left navigation menu, select Subgroups. 2. On the Subgroups page, click the Categories button. 3. On the Subgroup Categories page, click the name of the category you want to modify or
delete, and take the desired action. To:
• Change the category’s name or edit its description: Make the changes in the applicable field, then click the Update button at the bottom of the page.
• Delete the category: Click the Delete button at the bottom of the page. When the Verify Delete confirmation popup appears, click Yes.

27 Renaming groups
100 Updated: Mar. 18, 2022 Groups.io Group Owners Manual
27 Renaming groups
27.1 Considerations
If you want to rename your group, you should try to do it before the group has a large number of members and messages. Consider these ramifications of renaming a group:
• Members’ subscriptions to the group will be unaffected, but members will have to:
o Update their email address books to send to the new group email address.
o Update their browser bookmarks or favorites to the new group URL.
• Groups.io does not parse existing group content for group-related links and update them to the new URL. Therefore, many links to group content in the message archive, on your group’s home page, and in your group’s wiki will likely result in “page not found” messages. The group’s reply-to address and many of the links in group message footers will also be affected.
• Members who have subscribed to the group calendar from their email client or an external calendar (for example, Google) will need to update that subscription because the group calendar’s URL will change.
• Several member notices contain the group name in the subject and message text when they are generated. You will need to manually update those notices.
• The group’s subject tag is not updated automatically. You will need to update it manually on the group’s Settings page.
27.2 Renaming a group
1. In the left navigation menu on the group’s website, select Admin > Settings to display the main Settings page.
2. In the General panel:
• Change the Group Title and Email Address fields as desired.
• Update the Subject Tag field to reflect the new name.
3. In the Message Formatting panel, update the Message Footer field to reflect the new name.
4. Click the Update Group button at the bottom of the page.
Note:
• It might take some time for the renamed group to function normally because, due to the subdomain addressing used by Groups.io, any change to the root email address has to be propagated through the DNS entries (so the new group URL resolves into an IP address). This process can take several hours.
• Renaming your main group also changes the URL of any associated subgroups.
28 Upgrading or downgrading groups
Groups.io Group Owners Manual Updated: Mar. 18, 2022 101
28 Upgrading or downgrading groups
28.1 Upgrading a Basic group
If you have a Basic group and you decide you want to upgrade it to a Premium or Enterprise group:
1. In the left navigation menu on the group’s website, select Admin > Upgrade.
2. On the Billing page that appears, click the View/Change Plan button at the upper right.
3. On the Upgrade Plan page that appears, click the Upgrade button next to the plan you want to upgrade to.
4. Follow the subsequent instructions.
Note:
• It is not possible to change an existing Basic group to a free Premium 30-day trial group.
• If no credit card is on file when the time comes for the group’s paid plan to be renewed, and the group has insufficient funds in its sponsorship reserve, the system sends an overdue notice to all group owners and moderators stating that the group has two weeks to pay the invoice (minus any sponsorship reserve amount) or the group will be automatically downgraded. Be aware that Groups.io currently has no mechanism to automatically pay an invoice if additional sponsorship amounts come in to cover it.
28.2 Downgrading a Premium or Enterprise group
If you have a paid Premium or Enterprise group and you decide you want to downgrade it to a lower or free plan:
1. In the left navigation menu on the group’s website, select Admin > Billing.
2. On the Billing page that appears, click the View/Change Plan button at the upper right.
3. On the Upgrade Plan page that appears, click the Downgrade button for the plan you want to downgrade to.
4. Follow the subsequent instructions.
The downgrade will take effect after the currently paid period ends. At that time, the group will lose the features that are specific to its previous plan type (see the Groups.io Plans And Pricing page). For example, if you downgrade a Premium group to a Basic (free) group:
• The storage space allocation goes from 30 GB to 1 GB.
• Any subgroups are locked. Exception: If your group was created before January 15, 2020, subgroups will remain accessible because Basic groups created before that date were able to have subgroups. (This exception applies to Basic groups created before January 15, 2020 that were upgraded either before or after that date as well as to Premium groups created before that date.)
• All features become unavailable except those related to sending and managing messages. However, nothing is deleted in case you decide to upgrade again in the future. Exception: If your group was created before August 24, 2020, the downgraded Basic group will retain the calendar, chat, database, member directory, files, photos, poll, and wiki features.
• If the group was created after February 8, 2021 at 9:00 a.m. U.S. Pacific Time and gained more than 100 members, no one else can join the group unless the member list is reduced to fewer than 100 members or the group is upgraded again.

29 Deleting a group
102 Updated: Mar. 18, 2022 Groups.io Group Owners Manual
29 Deleting a group 1. In the left navigation menu on the group’s (or subgroup’s) website, select Admin > Settings
to display the main Settings page.
2. Scroll to the bottom of the page.
3. Look for and click the red Delete Group button on the right-hand side.
4. Follow the resulting instructions.
Note: After a group is deleted, its name cannot be reused (unless someone specifically contacts Groups.io support and asks to be able to use the name again). If you think you might want to use that group name again or make it available for others to use, rename the group to some nonsense name before you delete it. Exception: The name of a deleted subgroup can be reused. There might be a short delay until that name is available again.

30 Features available for Enterprise groups only
Groups.io Group Owners Manual Updated: Mar. 18, 2022 103
30 Features available for Enterprise groups only
30.1 Overview
An Enterprise group is a white-labeled version of Groups.io, on a unique domain, with its own logo and, optionally, its own home page. The color scheme is the same as for Groups.io’s website.
Enterprise groups have all of the features that are available to Basic and Premium groups as well as these additional, Enterprise-only features:
• Custom domain
• Custom logo
• Fully customizable home page
• Custom enterprise-specific settings
You set up these features after upgrading your group to an Enterprise group and receiving a “welcome” email message from Groups.io.
30.2 Setting up a custom domain or subdomain
30.2.1 Setting up a custom domain
1. Decide which domain you want to use for the group. Tip: Consider using a subdomain for the group instead of a top-level domain because using a subdomain gives your organization more flexibility. See Setting up a custom subdomain.
2. Delegate the DNS server settings for the domain to dns1.groups.io and dns2.groups.io. You must complete this step with the company where your domain is registered. You can use either of these methods:
• Contact your domain registrar’s support department for assistance.
• Do it yourself by logging into your account at your domain registrar and replacing any existing DNS servers with dns1.groups.io and dns2.groups.io. You might be able to find instructions on your domain registrar’s website.
3. After the domain’s DNS server settings are changed, contact Groups.io support and provide:
• The name of the Enterprise group
• The domain name Groups.io support then takes the necessary steps to complete the domain setup.
30.2.2 Setting up a custom subdomain
Groups.io typically recommends that an Enterprise group use a subdomain for the group instead of a top-level domain (for example, groups.example.com rather than example.com). Using a subdomain for the group gives your organization more flexibility because you can continue hosting the top-level domain with your current provider, leaving any existing content in place.
To set up a custom subdomain:
1. Decide which subdomain you want to use for the group. 2. Contact your domain registrar and ask for their assistance (or look for instructions on their
website) in adding two name server (NS) record settings for the subdomain. The NS records should look like these examples:
• groups.example.com in NS dns1.groups.io
• groups.example.com in NS dns2.groups.io ! Important: Do not change the DNS servers of your top-level domain.
3. After the NS records are changed, contact Groups.io support and provide:
• The name of the Enterprise group
• The subdomain name Groups.io support then takes the necessary steps to complete the subdomain setup.

30 Features available for Enterprise groups only
104 Updated: Mar. 18, 2022 Groups.io Group Owners Manual
30.3 Adding a custom logo and custom email header and footer graphics
A custom logo graphic for the group's website must:
• Be in PNG format
• Have a transparent background
• Look good on a dark-colored background
• Have dimensions of 400 pixels wide x 100 pixels high
Enterprise groups can also change the header and footer graphics that appear in digest and summary emails. Those graphics must:
• Be in JPEG format
• For a header, have dimensions of 800 pixels wide x 93 pixels high
• For a footer, have dimensions of 800 pixels wide x 86 pixels high
To have a custom logo, header, and footer graphic added to your Enterprise group, email the image files to Groups.io support.
30.4 Customizing the home page displayed to users who are not logged in
With an Enterprise group, you can customize the home page that is displayed when someone who is not logged in to the group goes to the group’s URL. If you do not customize this home page, the normal main group home page is used.
To customize this home page:
1. Create a wiki page that has the content and format of your desired home page. Note: Because this page is displayed when someone who is not logged in goes to the group’s domain, it must contain links to the group’s /login page and /register page.
2. Contact Groups.io support and let them know which wiki page to use as the home page. Groups.io support then changes the applicable setting to display that page as the home page.

30 Features available for Enterprise groups only
Groups.io Group Owners Manual Updated: Mar. 18, 2022 105
30.5 Customizing Enterprise group settings
30.5.1 Displaying the Enterprise Settings page
Enterprise groups have an additional entry, Enterprise Settings, on the group home page that you see when you are logged in. Example:
Select Enterprise Settings to display a page containing these settings:
• Enterprise Title
• Timezone
• Disable Signup
• Disable +1 Functionality
• Google Analytics Code
• Login Page Text
• No Account Text
• Single Sign On
Note: After you enter or change settings on the Enterprise Settings page, scroll to the bottom of the page and click the Update Settings button.
30.5.2 Enterprise Title
In this field, enter a title for your Enterprise group. This title is used on the group’s website to reference the enterprise.

30 Features available for Enterprise groups only
106 Updated: Mar. 18, 2022 Groups.io Group Owners Manual
30.5.3 Timezone
From the list, select the default timezone to use for displaying times on the group’s website. This timezone is applied to the accounts of users who simply register on the Enterprise domain and to those who join the group and register at the same time.
Note: A change to this setting applies only to new users of Groups.io; a change here does not affect existing group members.
30.5.4 Disable Signup
Select this checkbox to prevent anyone who is not logged in to the group from registering through the group’s website or accessing any of the group’s web pages.
30.5.5 Disable +1 Functionality
Select this checkbox to disable the automatic conversion of “+1” email messages to likes.
30.5.6 Google Analytics Code
If you want to use Google Analytics to collect data from your group’s website, enter the Google Analytics tracking code in this field.
30.5.7 Login Page Text
If you want to replace the standard text provided by Groups.io at the bottom of the login page, enter the replacement text in this field.
30.5.8 No Account Text
If you want to replace the standard text provided by Groups.io on the “send login link” page, enter the replacement text in this field.
30.5.9 Single Sign On
If you are going to use Single Sign On (SSO) for your group, complete the Single Sign On panel on the Enterprise Settings page:
• Provider: Select your SSO provider from the list.
• Client ID: Enter the client ID supplied by your SSO provider.
• Client Secret: Enter the client secret supplied by your SSO provider.
• Domain: Enter the domain supplied by your SSO provider.
Note: For the SSO callback URL, use https://groups.io/ssologin.

31 About Groups.io billing
Groups.io Group Owners Manual Updated: Mar. 18, 2022 107
31 About Groups.io billing
31.1 Group payors
The payor in a paid Premium group or an Enterprise group is the owner or moderator whose Groups.io account contains the credit card or debit card that is used to pay for the group’s plan. Only one payor can be associated with a paid group. Typically, a group owner is the payor, but a moderator can be the payor if they have the Billing privilege.
Note: A group that uses the sponsorship feature to pay its plan fees does not need to rely on a specific payor as long as the group’s sponsorship reserve contains sufficient funds to pay the fees. For more information, see Using the sponsorship feature to defray Groups.io hosting costs.
31.2 Billing notifications
In groups that are billed annually, payors receive a renewal notification email from Groups.io 14 days in advance of the billing date.
In groups that are billed monthly, no notifications are sent in advance of the billing date.
Groups are billed on the day of the month on which the group was originally created or upgraded.
If a credit or debit card fails during the billing process (for example, if it has expired), the payor for the group receives a warning email from Groups.io. The payor has 14 days to fix the issue and pay the invoice. Another warning email is sent to the payor after 7 days if the issue has not been fixed by then; this warning is also sent to the group’s owners and moderators. If the issue still has not been fixed by the 14th day, the group is downgraded and the payor, owners, and moderators receive an email notification.
Note:
• For monthly groups created or upgraded on the 31st day of the month: When billing comes due for a shorter month, the group is billed on the last day of the shorter month. The billing date remains the 31st, and billing occurs on the 31st in the months that have 31 days.
• Groups.io does not retry billing a group for a given month. If an issue occurs with the billing for that month, the payor must manually pay the overdue invoice (by selecting Admin > Billing from the group’s left navigation menu).
• If a group’s payor has deleted their Groups.io account: On the day the group is to be billed, Groups.io sends an email to all owners of the group telling them someone needs to become the payor for the group. The owners have 14 days to remedy the situation, with a warning after 7 days if it is not yet resolved.

31 About Groups.io billing
108 Updated: Mar. 18, 2022 Groups.io Group Owners Manual
31.3 Updating the credit card or debit card on file
! Important: Credit cards and debit cards are associated with Groups.io user accounts, not with individual groups. If you have more than one group and need to use different cards for them, you will need to have a different owner account (or moderator account with the Billing privilege) for each group.
To update the credit card or debit card on file:
1. Go to your Groups.io account and select Billing in the left navigation menu.
2. On the Billing page, in the Credit Card On File panel, click the Update Payment Method button.
3. On the Update Credit Card page, enter the new card information and click the Update Credit Card button.
Note: You can also update the card from within the group by selecting Admin > Billing from the group’s left navigation menu. On the resulting Billing page, in the Payment panel, click the Update Payment Method button at the right. That action takes you to the Update Credit Card page in your Groups.io account.
31.4 Changing the group’s payor
The group member who is to be the new payor must be either an owner of the group or a moderator with at least the Billing privilege.
The member who is to be the new payor follows these steps:
1. Log in to Groups.io (if necessary).
2. Go to the group’s website and select Admin > Billing from the left navigation menu.
3. On the Billing page, in the Current Plan panel, click the Set Me As Payor button.
Note: If the new payor does not already have a credit or debit card on file in their Groups.io account, they can enter it at that point.

32 Additional information
Groups.io Group Owners Manual Updated: Mar. 18, 2022 109
32 Additional information
32.1 Standard group email addresses
All groups have several standard email addresses to which group members can send empty email messages for different purposes. Through these email addresses, members can join or leave the group or change certain subscription options by email instead of having to go to the group’s website.
! Important: After someone sends a message to most of these email addresses, they receive a confirmation request message from Groups.io. They must respond to that confirmation request to complete the requested action.
Note: Substitute the group’s actual name for groupname in the addresses.
Members use this address: To:
[email protected] Join a group.
[email protected] Leave (unsubscribe from) a group.
[email protected] Receive an email message containing a list of these addresses. Note: A confirmation request message is not sent in this case.
[email protected] Receive plain-format digests instead of individual messages.
[email protected] Receive full-featured digests instead of individual messages.
[email protected] Receive a daily summary instead of individual messages.
[email protected] Receive individual messages instead of a summary or digest.
[email protected] Receive only special notices.
[email protected] Stop receiving messages by email (they can still read messages on the group’s website).
[email protected] Contact the group owners. Note: A confirmation request message is not sent in this case.
32.2 Groups.io bounce handling
When a group message that is sent to a member through email cannot be delivered, the nondelivery event is called a bounce.
Groups.io deals with these types of bounces:
• Soft bounce: Caused by a problem that is expected to resolve itself automatically after some period of time (such as a temporarily unavailable email server)
• Hard bounce: Caused by an issue that would require human intervention to fix (such as an invalid email address or a full inbox)

32 Additional information
110 Updated: Mar. 18, 2022 Groups.io Group Owners Manual
Sometimes, it is difficult for Groups.io to determine whether a bounce is soft or hard. In this situation, the system treats it as a soft bounce.
Note: Bouncing affects all groups the member is subscribed to through the Groups.io account that the bouncing email address is registered with. Effectively, the member’s Groups.io account is bouncing.
The overall bounce handling process in Groups.io is:
Step 1: On receiving a bounce for the first time, the system tries to determine—through a combination of the type of bounce and the frequency of the bouncing—whether the account is bouncing often enough and seriously enough to require action.
Step 2: If action is required, the system sets the account’s status to Bouncing, stops sending group emails to it, and begins trying to reach the account holder via bounce probe emails (see an example) notifying them that the account is bouncing.
Step 3: If the account holder:
• Responds to one of the bounce probes: The account is taken out of bounce handling and goes back to normal.
• Does not respond to any bounce probes within a certain period of time: The system sets the account’s status to Bounced and stops sending emails of any kind to it.
When an account is Bouncing or Bounced, the system takes these actions:
• Logs entries in the activity logs of all the account’s groups stating that the account is bouncing, to inform group moderators.
• Displays a blue B (for a Bouncing account) or a red B (for a Bounced account) next to the account’s email address in the member lists of all its groups.
• Includes the account in the “Bouncing” member lists of its groups. (The account continues to appear in the regular member lists as well.)
The affected members are notified that they are Bouncing or Bounced. They are given a chance to “unbounce” their accounts through a banner that is displayed at the top of the Groups.io site whenever they are logged in.
! Important: Group owners and moderators cannot do anything to “unbounce” members’ accounts. Members must address the underlying problem themselves.
32.3 Topic threading algorithm
Groups.io uses this algorithm to thread messages into topics:
• If the message contains threading information (a References and/or In-Reply-To field in the message header that matches the ID of a message in an existing topic), and the subject line matches the subject line of the referenced message, add that message to the topic.
• When a message does not contain any threading information:
o If the message was posted on the group’s website through the New Topic function (that is, it was not entered as a reply), assume it is the start of a new topic.
o If the subject starts with Re:, look for a message with a matching subject that was posted within the last 30 days.
o If the subject does not start with Re:, look for a message with a matching subject that was posted within the last 2 days.

32 Additional information
Groups.io Group Owners Manual Updated: Mar. 18, 2022 111
When comparing subject lines, the algorithm ignores:
• Prefixes such as Re: that often are automatically added to replies.
• The group’s subject tag.
• Hashtags that are added to or removed from the subject line.
Note: Group owners and moderators can merge separate topics into one topic or split an existing topic into separate topics.
32.4 Member badges and topic icons
32.4.1 Member badges
The table below lists the colored badges (icons) that might appear in the entries in the member list and on other group pages (such as the Pending Messages page and Your Groups home page). On the group’s website, you can hover your pointer over a badge to see its meaning.
Note: Members with no badge in their entries are allowed to post according to the group’s message moderation setting.
Badge text Badge image Meaning Description
A Max. Attachment Size Limit
In the Advanced Preferences panel on their Subscription page, the member has set a maximum size for attachments that are emailed to them.
B (blue)
Bouncing Groups.io has stopped delivering group messages to this address but is attempting to contact it by sending bounce probes.
B (red)
Bounced Groups.io has given up trying to send anything to this email address.
Claimed by Claimed by [moderator name]
This pending member has been claimed by the moderator listed in the badge. Note: This badge appears only when the member is pending approval.
F Following Only In the Advanced Preferences panel on their Subscription page, the member has selected the Following Only option.
FF Following Only With First Message Also
In the Advanced Preferences panel on their Subscription page, the member has selected the Following Only option and the First Message Also checkbox.
M Moderated The member’s posting privilege is set to Override: moderated.
MF Moderate First Message
The member’s posting privilege is set to Override: moderate the first message of every topic this person starts.

32 Additional information
112 Updated: Mar. 18, 2022 Groups.io Group Owners Manual
Badge text Badge image Meaning Description
Mod Moderator The member is a moderator of the group. Note: Groups can have more than one moderator.
MT Moderate Started Topics
The member’s posting privilege is set to Override: moderate all messages of every topic this person starts.
NC Not Confirmed A prospective member has requested to join the group by email or through the group’s website, and they need to respond to the confirmation email message sent by Groups.io or log in to Groups.io. After the member is confirmed, this badge is removed. Note: In a Premium or Enterprise group, owners and moderators can directly confirm NC members. If the Premium or Enterprise group is a restricted group, approving a pending member who is NC confirms their membership automatically.
NMM New Member Moderated
The number following this badge is the number of approved posts (1, 2, 3, or 4) required before the member is automatically moved off new member moderation.
NM Non Member The person who posted the message is not a member of the group. Note: This badge appears only in groups that allow nonmembers to post. See Customizing group settings > Message policy settings.
NP Not Allowed to Post
The member’s posting privilege is set to Override: not allowed to post.
Owner Owner The member is a designated owner of the group. Note: Groups can have more than one owner.
P Posting Always Allowed
The member’s posting privilege is set to Override: not moderated.
R Auto Follow Replies
In the Advanced Preferences panel on their Subscription page, the member has selected the Auto Follow Replies checkbox.

32 Additional information
Groups.io Group Owners Manual Updated: Mar. 18, 2022 113
32.4.2 Topic icons
Certain icons might appear on topic subject lines:
Icon Description
The topic is locked.
The topic is moderated.
The topic is “sticky” (that is, pinned to the top of the group’s Topics page).
The topic contains attachments.
The topic’s Reply To setting is “Reply to topic followers only.”
The poll is closed. Note: This x icon appears only on the group’s Polls page.
The number in the circle varies and indicates the number of messages within the topic, including the original message that created the topic. Note: Topics with only one message (that is, they have no replies) have no number indicator.
This topic is designated a special notice. Note: This badge appears only when the topic is pending approval.
This topic or message has been claimed by the moderator listed in the badge. Note: This badge appears only when the topic or message is pending approval.
This topic or message has been edited by a moderator who then saved the edited version without approving it. This action also results in the appearance of the “Claimed by” badge. Note: This badge appears only when the topic or message is pending approval.
32.5 API access and documentation
Groups.io provides an application programming interface (API) that is open to anyone who uses Groups.io. The API is documented at https://groups.io/api. You can also join the [email protected] group.
! Important: The API is under active development and subject to change.

33 Acknowledgements
114 Updated: Mar. 18, 2022 Groups.io Group Owners Manual
33 Acknowledgements Much appreciation goes to the dedicated volunteers who devote their time and expertise to responding to questions in the Group_Help and GroupManagersForum groups and to maintaining the wiki in the GroupManagersForum group. Information posted in those groups provided the basis for a significant amount of the content in this documentation. Thank you!

34 Revision history
Groups.io Group Owners Manual Updated: Mar. 18, 2022 115
34 Revision history
Release date Notes
18 March 2022 • Revised notes in the Locked Group notice topic and Locking and unlocking groups and subgroups topic to state that subgroups are locked systematically when Premium groups created after February 8, 2021, or trial Premium groups, are downgraded to free Basic groups (https://beta.groups.io/g/main/message/31651).
• In the note in Locked Topic notice, revised the note to state that owners and moderators cannot reply to locked topics (https://beta.groups.io/g/main/message/31636).
• Revised Locking topics to remove the text stating that owners and moderators can reply to locked topics and to reflect the addition of the new Lock Topic After Posting checkbox that appears for owners/moderators who create topics or replies on group websites (https://beta.groups.io/g/main/message/31636).
• In the table of member badges under Additional information > Member badges and topic icons, added a “Badge text” column for searchability (https://beta.groups.io/g/docs/message/409).
25 February 2022 • In Enabling and disabling web/app notifications, deleted the note that said Groups.io was supported only in mobile browsers because a Groups.io mobile app is now available for both iOS and Android devices (https://beta.groups.io/g/docs/message/406).
• In the note in Deleting a group, added an exception stating that a subgroup’s name can be reused (https://groups.io/g/GroupManagersForum/message/40135 and replies).
28 January 2022 • In Downloading your group’s member list, added a note explaining the “inactive” status in the User Status column of a downloaded list (https://beta.groups.io/g/docs/message/347).
• Added the message number indicator to the table in Topic icons (under Additional information > Member badges and topic icons) (https://beta.groups.io/g/docs/message/385).
• Updated the copyright date to 2022 on the title page of the PDF version.
20 December 2021 • In Promoting your group, added a note that the Promote option is not available in subgroups (prompted by https://groups.io/g/GroupManagersForum/message/39978).
• In the PDF version, reformatted the page layout to provide gutter space in the left margin for binding (assuming two-sided printing) and to make it more suitable for printing on either A4 or U.S. letter sized paper. Also added the updated date to the page footers. (Prompted by the discussion that ensued in the beta group starting with https://beta.groups.io/g/main/message/30984.)

34 Revision history
116 Updated: Mar. 18, 2022 Groups.io Group Owners Manual
Release date Notes
22 November 2021 • Under Managing member notices, added a topic for the new Group Sponsorship notice (https://beta.groups.io/g/main/message/30888).
• In Using the sponsorship feature to defray Groups.io hosting costs, added a tip about creating a Group Sponsorship member notice.
12 November 2021 • Under Managing moderators and additional owners, updated some notes to state that moderators cannot remove owners from groups (https://beta.groups.io/g/main/message/30783).
• Under Managing group topics and messages > Handling pending messages, added more information about what happens with claimed messages, including a new subtopic called Working with claimed pending messages.
• In the new Working with claimed pending messages subtopic mentioned above, included information about the Undo button that appears after a pending message has been edited and saved (https://beta.groups.io/g/docs/message/347).
• Under Managing members > Handling pending members, added more information about what happens with claimed pending members.
• In Locking topics, added a statement that if a locked topic is also moderated, replies from owners or moderators to that topic go through moderation (https://beta.groups.io/g/docs/message/372).
22 October 2021 • In Customizing group settings > Message formatting settings > Attachments, added a note to the Moderate option description that attachments sent by members who have the Override: not moderated setting are not moderated (https://beta.groups.io/g/main/message/30627).
15 October 2021 • Updated About Groups.io billing > Billing notifications regarding who is notified when a glitch occurs in the billing process (https://beta.groups.io/g/main/message/30586).
• In the Overview topic under Managing group topics and messages > Handling pending messages, added a tip about visiting the new Pending home page (https://beta.groups.io/g/main/message/30571).
• Changed “Recent Bounces” link and page references to just “Bounces” (https://beta.groups.io/g/main/message/30514).
08 October 2021 • Under Managing member notices, updated the Creating, editing, or deleting member notices topic, the Monthly Reminder notice topic, and the Welcome notice topic to mention that multiple Monthly Reminder notices and multiple Welcome notices can be set to Active Message (https://beta.groups.io/g/docs/message/357 and https://beta.groups.io/g/main/message/30458).
• In Banning a member, added a note that in Premium and Enterprise groups, banned members are included in the Past Members list

34 Revision history
Groups.io Group Owners Manual Updated: Mar. 18, 2022 117
Release date Notes
(prompted by the discussion in https://beta.groups.io/g/main/message/30362).
24 September 2021 • Added a new About Groups.io billing topic before the Additional information topic (https://beta.groups.io/g/docs/message/331).
• Added the Closed Poll icon to the list in Additional information > Member badges and topic icons > Topic icons (https://beta.groups.io/g/docs/message/353).
10 September 2021 • Added the Special badge to the list in Additional information > Member badges and topic icons > Topic icons (https://beta.groups.io/g/docs/message/329).
• Added a link to “hamburger icon” references to a definition in Wikipedia (https://beta.groups.io/g/docs/message/336).
• Added the Moderator Edited badge to the list in Additional information > Member badges and topic icons > Topic icons (https://beta.groups.io/g/docs/message/347). Also added the Claimed by badge to that list as well as to the list in Member badges, for completeness.
• In Exporting your group’s message archive and other group content, added polls to the list of items that can be exported (https://beta.groups.io/g/main/message/29706).
June 11, 2021 • Under Managing member notices, added a topic for the new Locked Topic member notice (https://beta.groups.io/g/main/message/29548).
• Updated Managing group topics and messages > Locking topics to mention the new Locked Topic member notice and the new feature that allows owners and moderators to reply to locked topics without needing to unlock them first and relock them afterward (https://beta.groups.io/g/main/message/29548).
• Updated Managing group topics and messages > Editing the properties of topics in the archive to mention the new Locked Topic member notice (https://beta.groups.io/g/main/message/29548).
• Changed references to Note To Member notices (including the title of the Note To Member notice topic under Managing member notices) to Message To Member, to reflect a change to that notice’s name for consistency with the “Message to member” activity log entry that was implemented on May 12 (https://beta.groups.io/g/main/message/29459).
30 April 2021 • Updated Customizing group settings > General settings > Allow Sponsorships to state that members can contribute via credit card, debit card, or PayPal; previously, only contributing via credit card was mentioned (https://beta.groups.io/g/docs/message/288).
• Updated the note in Customizing group settings > Message policy settings > Allow Nonmembers to Post to mention that the system does

34 Revision history
118 Updated: Mar. 18, 2022 Groups.io Group Owners Manual
Release date Notes
some checking for known spammers (https://beta.groups.io/g/docs/message/288).
16 April 2021 • Updated the table in Managing hashtags > Viewing, creating, modifying, and deleting hashtags > Creating a hashtag to include the new Footer field (https://beta.groups.io/g/main/message/29080).
• Under Inviting people to join a group, added notes to the Overview topic and the Tracking, resending, or canceling invitations topic that invitations expire after 14 days (per the discussion beginning with https://beta.groups.io/g/main/message/29113).
• In the Member badges topic under Additional information, updated the description of the NC badge (per the discussion beginning with https://groups.io/g/GroupManagersForum/message/37884).
09 April 2021 • Updated Managing members > Working with the member list > Reviewing the member list to document the new member list filtering feature (https://beta.groups.io/g/main/message/28976). Also revised mentions of the previous Members button dropdown list throughout the manual.
• Updated the Locked Group notice topic, the Locking and unlocking groups and subgroups topic, and the Downgrading a Premium or Enterprise group topic to mention the situation in which a free Basic group can be locked systematically (https://beta.groups.io/g/docs/message/286).
29 March 2021 • Updated Managing moderator notifications about group activity > Overview to mention the new Member Notifications panel that was added to the Edit Subscription page (https://beta.groups.io/g/main/message/28839).
19 March 2021 • In Managing group topics and messages > Handling pending messages > Handling pending messages on the group’s website, added a mention of moderated xxx-notice system hashtags to the note about the blue Notification badge (https://beta.groups.io/g/docs/message/281).
12 March 2021 • Added a note about the blue Notification badge to Managing group topics and messages > Handling pending messages > Handling pending messages on the group’s website (https://beta.groups.io/g/docs/message/277).
26 February 2021 • Updated these topics to include information, or add more information, about RSS feeds in groups with public archives (https://beta.groups.io/g/docs/message/272):
o Creating a group (in the table of visibility options in step 8)
o Managing integrations with outside services > Feed integrations > Overview (in the note)

34 Revision history
Groups.io Group Owners Manual Updated: Mar. 18, 2022 119
Release date Notes
o Managing integrations with outside services > Feed integrations > Adding a feed integration (new note in step 4)
o Using subgroups > Creating a subgroup (in the table of visibility options in step 3)
• In Customizing group settings > Message policy settings > Max Photo Size in Email, added a note that only images that are larger than 100x100 pixels are displayed in the Emailed Photos album (https://beta.groups.io/g/docs/message/273).
12 February 2021 • In Managing members > Premium and Enterprise member management options > Editing members’ email addresses, added a note that you cannot change the email address of someone who is a moderator or owner of a group (https://beta.groups.io/g/main/message/28288).
• In Managing members > Working with the member list > Displaying an individual member’s record, added “except the checkbox” (https://beta.groups.io/g/docs/message/254). Also added that clicking the checkbox selects the member’s row for use with the Actions button.
• In Features available for Enterprise groups only > Customizing Enterprise group settings > Displaying the Enterprise Settings page, corrected the location of the Enterprise Settings menu item and added a screenshot. (Previously, the Enterprise Settings item was incorrectly documented as being on the Admin menu.)
• In Managing members > Moderating individual members, in step 4, replaced the bare-bones list of member moderation settings with a table that includes descriptions of the settings and their corresponding badges.
• In Setting default email options and user settings for group members > Default Subscription Settings panel, moved the description of the Auto Follow Replies checkbox to the table in the Message Selection topic (previously, that checkbox was documented in its own Replies topic), to correspond to changes in the user interface (https://beta.groups.io/g/main/message/28450).
05 February 2021 • In Additional information > Member badges and topic icons > Member badges:
o Reworded the first paragraph and added information about hovering your pointer over a badge to see its meaning.
o Changed the Meaning column entry for the P badge from “Posting Allowed” to “Posting Always Allowed” (https://beta.groups.io/g/docs/message/236).
o Added an entry for the red NM badge (https://beta.groups.io/g/docs/message/246).
• In Customizing group settings > Message policy settings, added information to the Allow Nonmembers to Post topic about the red NM

34 Revision history
120 Updated: Mar. 18, 2022 Groups.io Group Owners Manual
Release date Notes
badge and the red “Non Member” label (https://beta.groups.io/g/docs/message/246).
• Under Managing member notices, revised the Direct Add notice topic (https://beta.groups.io/g/docs/message/248).
29 January 2021 • In Customizing group settings > Message policy settings > Disable Editing Messages, added a note that members can always delete their own messages regardless of this setting (https://beta.groups.io/g/docs/message/221).
• In Customizing group settings, moved the Subject Tag topic from Message formatting settings to General settings to reflect the corresponding change in the user interface, and updated the applicable references (the field was moved from the Message Formatting panel to the General panel on the Settings page) (https://beta.groups.io/g/main/message/28089).
• In Using the sponsorship feature to defray Groups.io hosting costs, in the second Note bullet, clarified that sponsorship amounts apply to the fees for the sponsored group (https://beta.groups.io/g/docs/message/226).
• In Managing members > Banning and unbanning members > Banning a member, added notes about what happens when a banned member tries to go to the group’s home page or rejoin the group (https://beta.groups.io/g/docs/message/227).
• Updated Using the sponsorship feature to defray Groups.io hosting costs to mention that members can pay via PayPal (https://beta.groups.io/g/main/message/28236).
22 January 2021 • Added new topics to document the sponsorship feature that was implemented on January 13 (https://beta.groups.io/g/main/message/27874):
o Using the sponsorship feature to defray Groups.io hosting costs o Customizing group settings > General settings > Allow
Sponsorships o Reviewing the group’s activity log > Reviewing payment activity
• In Upgrading a Basic group, added a note about what happens if no credit card is on file when a group’s plan is due to be renewed and the group has insufficient funds in its sponsorship reserve (https://beta.groups.io/g/main/message/27883).
• In Creating a group, in step 6, added an exception note that subgroup names can contain periods; and in Using subgroups > Creating a subgroup, in step 3, removed “periods” from the list of prohibited characters and added it to the parenthetical statement about characters that are allowed (https://beta.groups.io/g/main/message/28045 and https://beta.groups.io/g/docs/message/219).
• In Banning domains from the group, added a note describing what happens when someone who is in a domain that was banned from a

34 Revision history
Groups.io Group Owners Manual Updated: Mar. 18, 2022 121
Release date Notes
group tries to join the group via the group’s website (https://beta.groups.io/g/docs/message/214).
• In Customizing group settings > Message policy settings > Hashtag permissions, removed “A copy of the original message is saved online as a draft for editing, and the bounce message will include a link to that draft” from the description of the second option (https://beta.groups.io/g/docs/message/220).
• In Additional information > Member badges and topic icons > Topic icons, added the “Reply to topic followers only” icon (https://groups.io/g/GroupManagersForum/message/36504).
08 January 2021 • In Customizing settings for Premium and Enterprise groups > Polls, added a reference and link to the Working with polls topic in the Groups.io Members Manual (https://beta.groups.io/g/docs/message/199).
• In Managing member notices > Pending Subscription notice, added a reference and link to Managing members > Handling pending members (https://beta.groups.io/g/docs/message/202).
• In Inviting people to join a group > Sending invitations to join the group and in Premium and Enterprise member management options > Adding members directly, added a note about how the system handles inviting or adding an email address that is an email alias of an existing member (https://beta.groups.io/g/main/message/27614).
• In Premium and Enterprise member management options > Editing members’ email addresses, added a note about what happens if an edited address already belongs to a Groups.io account (https://beta.groups.io/g/docs/message/203).
• Updated the copyright date to 2021 on the title page of the PDF version.
04 December 2020 • Updated the topic Changing the home page image and group icon to mention that the button for uploading a file is labeled either “Choose File” or “Browse,” depending on the web browser (https://groups.io/g/Group_Help/topic/78675401).
20 November 2020 • Under Managing group topics and messages, added the topic Deleting individual messages (https://beta.groups.io/g/docs/message/182).
06 November 2020 • In Managing member notices > Removed Member notice, added a note that the Removed Member notice is not sent to members who are removed through a bulk removal (https://beta.groups.io/g/docs/message/173).
30 October 2020 • In Creating a group, added a note to step 9 about error messages that are displayed in the case of an in-use or invalid group name (https://beta.groups.io/g/docs/message/165).
• In Message Moderation (under Customizing group settings > Spam control and moderation settings), added “unless the corresponding

34 Revision history
122 Updated: Mar. 18, 2022 Groups.io Group Owners Manual
Release date Notes
hashtag is modified to be moderated” to the end of the note about the system hashtags for certain group notices (https://beta.groups.io/g/docs/message/165).
• In Max Photo Size in Email (under Customizing group settings > Message policy settings), removed the erroneous occurrence of “legacy” in the reference to Basic groups in the first bullet item in the note (https://beta.groups.io/g/docs/message/165).
• In the Overview topic under Managing hashtags, added a note that hashtags can contain numerals but cannot consist of only numerals (https://beta.groups.io/g/docs/message/166).
• In Sending invitations to join the group, corrected the format examples in step 3 (https://beta.groups.io/g/docs/message/168 and https://beta.groups.io/g/docs/message/169).
• In Adding members directly, added more information about email address formats and uploading text files, for consistency with Sending invitations to the group, and also added that a delivery option can be included with email addresses.
• Corrected the instructions in Handling members marked as Not Confirmed (https://beta.groups.io/g/docs/message/171).
• At the beginning of the Managing members section:
o Added a new level 2 Working with the member list topic and moved Reviewing the member list under that topic.
o Added new Displaying the member list and Displaying an individual member’s record topics under Working with the member list.
o Added a new level 2 Adding or updating members’ display names topic (https://beta.groups.io/g/docs/message/170).
09 October 2020 • In Downgrading a Premium or Enterprise group, corrected the Admin > Upgrade reference in step 1 to Admin > Billing (https://beta.groups.io/g/docs/message/163).
• Added a new topic, Replying to a message from the owner email address, to document the new feature (https://beta.groups.io/g/main/message/26375).
28 September 2020 • In Editing members’ email addresses, added a note that changing an email address affects all the groups the member is subscribed to at that address (https://beta.groups.io/g/docs/message/157).
• In Making a member an owner or moderator, added a statement to the “Edit Archives” permission that it also allows moderators to view poll results (https://beta.groups.io/g/docs/message/158).
18 September 2020 • Updated the information about the Direct Add and Invite notices to reflect the implementation of an Active Message checkbox for those notice types (https://beta.groups.io/g/main/message/26259).

34 Revision history
Groups.io Group Owners Manual Updated: Mar. 18, 2022 123
Release date Notes
• In the Hashtag uses topic, revised the table row about muting messages to include information about following/unfollowing messages.
11 September 2020 • Documented the new “reply to topic followers only” feature (https://beta.groups.io/g/main/message/26104):
o Added the new Topic Followers Only setting to the table in Message policy settings > Reply To.
o In Editing the properties of topics in the archive, added a note about the new Reply to topic followers setting.
o In the Creating a hashtag and Modifying a hashtag topics (under Viewing, creating, modifying, and deleting hashtags), added a note about the new Reply to topic followers setting.
• Added “Canceled event,” “Locked event,” and “Unlocked event” to the list in the Calendar activity topic (https://beta.groups.io/g/main/message/26119).
• In Downgrading a Premium or Enterprise group, added a note that subgroups will remain accessible if the group was created before January 15, 2020.
28 August 2020 • Under Calendar activity, updated the “RSVP Maybe” item to “RSVP Not Sure” (https://beta.groups.io/g/docs/message/142).
• In Downgrading a Premium or Enterprise group, added a note saying groups that were created before August 24, 2020 will retain the calendar and other now-Premium features after being downgraded to a Basic group.
24 August 2020 • Revised and reorganized the content to reflect the changes to Basic groups that were implemented as of August 24, 2020. As of that date, only the functions related to sending and managing messages are available in new Basic groups, and all the other Groups.io features are available only in Premium and Enterprise groups (and in legacy Basic groups created before that date). The reorganization included renaming some topics as well as removing the Features available in Premium and Enterprise groups only topic and incorporating its content into other topics.
• Removed links from topics mentioned in this revision history because they became too time-consuming to maintain.
14 August 2020 • Updated the documentation of settings that were moved in the user interface due to the impending changes to Basic groups:
o Moved the Member directory visibility topic from the Privacy settings topic to the Settings for Groups.io features topic.
o Moved the Message reposting settings topic to the Settings for Groups.io features topic (formerly, it was its own topic under

34 Revision history
124 Updated: Mar. 18, 2022 Groups.io Group Owners Manual
Release date Notes
Customizing group settings). Revised the instructions in Allowing message reposting accordingly.
o Added a Max Photo Size in Email topic to the Message policy settings topic and moved its content from the table in the Photo settings topic under Settings for Groups.io features.
02 August 2020 • In Locking topics, removed the note that locking a poll topic also closes the poll because that change was reverted (https://beta.groups.io/g/main/message/25855).
31 July 2020 • In Locking topics, added a note that locking a poll topic also closes the poll.
• In Banning domains from the group, added a note that banning a domain in a parent group also bans the domain in its subgroups.
24 July 2020 • Made minor updates in applicable topics to reflect the Premium trial feature that was released on July 17. One of those updates was renaming the Creating a Basic group topic to Creating a group.
17 July 2020 • Updated the steps in the Creating a Basic group topic to reflect the new flow for creating a Basic group and to eliminate the nested table in the step about selecting the Visibility setting.
• Added a note to the Exporting your group’s message archive and other group content topic about the Emailed Photos album not being included in a data export (https://beta.groups.io/g/docs/message/129).
• Moved the Conventions used in this documentation topic to before the Introduction topic (and, in the PDF version, started the heading numbering with the Introduction topic).
10 July 2020 • Added or updated content for the new and revised notifications features:
o Added a new Managing moderator notifications about group activity topic.
o Updated the opening paragraph in Handling pending members > Overview and Handling pending messages > Overview.
o Added an entry about receiving web/app notifications to the table in the Hashtag uses topic
o Updated the System hashtags topic.
o Updated the hashtag name in Managing member notices > Group Guidelines notice from #guidelines to #guidelines-notice, and added a note about the interaction between the “Special” setting in the hashtag and the “Send monthly as special” setting in the notice.
o Added a note in Managing member notices > Monthly Reminder notice about the new #monthly-reminder hashtag and the interaction

34 Revision history
Groups.io Group Owners Manual Updated: Mar. 18, 2022 125
Release date Notes
between the “Special” setting in that hashtag and the new “Send monthly as special” setting in the notice.
o Under Spam control and moderation settings, added a note to the Message Moderation topic about the system #xxx-notice hashtags that bypass that setting.
o Added Push notification and Web/app notification entries to the glossary.
• Removed the Glossary section because the glossary is now available as a separate, standalone resource in the Groups.io Help Center.
• In the File activity topic, added the actions related to folders, which were missing from the list before.
• In the Photo activity topic, added “Moved photo” to the list of actions (new action added in this release of Groups.io).
• Under Features available for Enterprise groups only, corrected a typo in the second example in step 2 of Setting up a custom subdomain.
• Incorporated edits noted in https://beta.groups.io/g/docs/message/127.
05 June 2020 • In Taking donations and reviewing payment activity > Overview, updated the Groups.io donation processing fee information (ref. https://beta.groups.io/g/main/message/25180).
• Moved the list of member badges from Reviewing the member list to a new Member badges and topic icons topic under Additional information and added a list of topic icons (https://beta.groups.io/g/docs/message/104).
22 May 2020 • Under Additional information, added a new topic, Topic threading algorithm (https://beta.groups.io/g/docs/message/84).
• (PDF version only) Changed the page numbering to start at 1 after the table of contents.
• Added links to topics mentioned in this revision history. (Previously, they were text-only references.)
01 May 2020 • Incorporated edits noted in https://beta.groups.io/g/docs/message/83 (including adding a topic on downgrading a Premium or Enterprise plan) and in https://beta.groups.io/g/docs/message/86.
• In the list of features available for Premium and Enterprise groups, added an item about the increased size limit for uploaded files and photos (https://beta.groups.io/g/main/message/24816).

34 Revision history
126 Updated: Mar. 18, 2022 Groups.io Group Owners Manual
Release date Notes
17 April 2020 • Added links to the Members Manual in the Requesting and tracking RSVPs to calendar events topic and the Including map view in database tables topic.
• In the Reviewing the member list topic, added Past to the list of items on the Members button dropdown menu (with a statement that it’s available only in Premium and Enterprise groups).
• In the Email Delivery topic, corrected a statement in the No Email table entry that erroneously said special notices were still sent even if that setting was applied (https://beta.groups.io/g/docs/message/63).
• Added a statement to the Profile glossary entry about profiles being located in the Identity section of a member’s Groups.io account page (https://beta.groups.io/g/docs/message/52).
• Added a new Handling members marked as Not Confirmed topic under Managing members (per https://groups.io/g/GroupManagersForum/message/31063 and an email from a GMF moderator requesting the info for Basic groups be added to the documentation).
• Added this Revision history topic.
08 April 2020 Initial publication.