working with photo story 3b
TRANSCRIPT

Working with Photo Story 3Photo Story is all about digital storytelling using images that you have collected. It is an easy process which makes it simple to create digital stories. You are allowed to import most image formats, including .bmp, .dib, .eps, .gif, .jhif, .jpe, .jpeg, .jpg, .pcd, .pcx, .png, .psd, .rle, .tga, and .tif. You can import pictures from your computer or a network folder. For each story, you can import up to 300 pictures.
1. On the “Import and arrange your pictures” screen click “Import Pictures.”
2. Browse for the image/images that you would like to include in your photo story. To make things easier, you can select several pictures by holding down the Ctrl key and click “OK.”
3. You will notice that your images appear in the “film strip” section of the “Import and arrange you pictures” screen. Select an image in the “film strip.”
4. With the image selected click the “Next” button and add a title to your slide.
5. Click “Next” button and press the “Record Narration” button. Remember, the narration is recorded on the slide that is currently selected. F.Y.I. You can record up to five minutes of narration per slide.
6. During this step you will be able to add background music to your picture. To “Learn more about adding background music” click here. When finished click “Next”
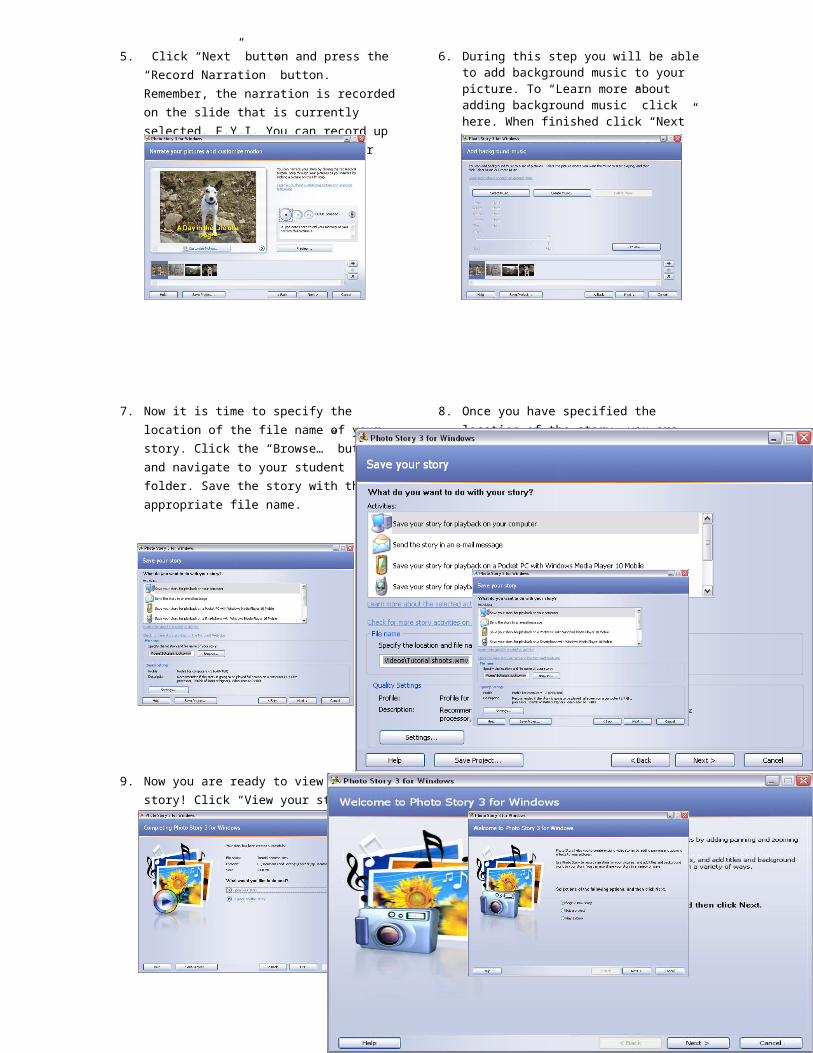
7. Now it is time to specify the location of the file name of your story. Click the “Browse…” button and navigate to your student folder. Save the story with the appropriate file name.
8. Once you have specified the location of the story, you are ready to save your project. Click the “Save Project…” button, navigate back to your student folder, and save your project with the same name you as you did in Step 7. Click the “Next” button.
9. Now you are ready to view your story! Click “View your story.”
10. Once you have viewed your story, you can always edit it from the Welcome to Photo Story 3 screen.
Some Editing Symbols
Note: Screen captures obtained through Photo Story 3. Retrieved on 2007, November 2 and 2007, November 3.