word 2007 more formatting - aeromaniacs heman leeaeromaniacs.com/public/manuals/word2007p1/lesson...
TRANSCRIPT

Word 2007
More Formatting Objectives
Quick formatting shortcuts. More paragraph formatting. Using Format Painter AutoText and AutoCorrect.

Word 2007 4.2 10/8/2011

Lesson Four: More Formatting
Word 2007 4.3 10/8/2011
Contents Page
Show formatting marks ....................................................................................... 4.5
Delete a paragraph ................................................................................................ 4.5
Hide formatting marks ........................................................................................ 4.5
Name and save your document ......................................................................... 4.6
Copy text ................................................................................................................... 4.6
Paste text .................................................................................................................. 4.7
Move through a document and select text .................................................... 4.7
Delete characters ................................................................................................... 4.8
Open an existing document ................................................................................ 4.8
Change the Overtype Mode ................................................................................ 4.9
Insert Overtype Exercise .................................................................................. 4.10
Undo and Redo commands .............................................................................. 4.10
Drag text to move it ............................................................................................ 4.12
The clipboard ....................................................................................................... 4.12
Cut, copy and paste text .................................................................................... 4.13
Copy a picture ...................................................................................................... 4.15
Navigational Hot Keys and Techniques ...................................................... 4.16
Change Case .......................................................................................................... 4.17
Shading ................................................................................................................... 4.17
Borders & Shading ............................................................................................. 4.18
Exercise - Paragraph Formatting .................................................................. 4.18
Hanging Indents – Everything BUT the first line is indented: ............. 4.22
First Line Indent .................................................................................................. 4.23
The Format Painter Button: ..................................................................................... 4.24
Paste Special ......................................................................................................... 4.24

Word 2007 4.4 10/8/2011
Live Preview ......................................................................................................... 4.25
4.AutoText ............................................................................................................. 4.26
AutoCorrect .......................................................................................................... 4.28
Notes ....................................................................................................................... 4.30
Lesson Four: More Formatting
Word 2007 4.5 10/8/2011
Show formatting marks
To help you understand paragraphs, you can set Word to show you the hidden formatting marks it uses to record document information such as paragraphs, tabs, spaces, etc. Sometimes viewing these symbols helps you see more clearly how your page is formatted.
Click the ¶ button on the in the Paragraph group under the Home
tab. This button enables you to show or to hide the formatting
marks in your document. Now you see various special marks, which
the program embeds into your text. Notice the paragraph marks
at the end of each paragraph in your document. They look like the
toolbar button (¶).
Delete a paragraph
Click before the ¶ mark, and click Delete Now, place the
insertion point at the beginning of your new second paragraph.
Press the Backspace key two times. You have one paragraph again.
Each backspace eliminated one of the paragraph marks you put in
earlier when you pressed the Enter key. The Paragraph marks no
longer show there.
Hide formatting marks
For some, it can be confusing to view the formatting marks.
To hide the formatting marks, click ¶ button again. The program
displays just the text with no formatting marks.

Word 2007 4.6 10/8/2011
Name and save your document
You must save your work if you want to use it again. You will save the document you have just created in the My Documents folder on the C: drive of the computer. Since this is a new document, you must give it a name when you save it. Choose a name that will be meaningful to you and will help you to identify your work in the future. The file name may contain up to 256 characters including blanks. Microsoft Word automatically adds a three-letter extension (.doc) to designate it as a Word document.
Exercise 1
1. Click the Office button and click Save As. The Save As
dialog box appears.
Note: Whether you click Save or Save As, if this is the first time you are saving a document, Word displays the Save As dialog box to permit you to name your document.
2. Click the arrow on the Save in box and click Documents if
this is not displayed in the Save in box..
3. Click in the File name list box and highlight the text in the
box. Type paragraphs to replace the highlighted text.
4. Click the Save button. You have saved the document on your
disk.
If you are working on a document of some length, it is a good practice to save the document often and not wait until you complete the document to save it. Always save your file before doing major editing, before printing and before using the spelling checker. If you make changes, save the file again.
Copy text
In order to make the document longer for the next exercise, you will copy the existing text and then paste it a couple of times.
Exercise 2

Lesson Four: More Formatting
Word 2007 4.7 10/8/2011
1. Click the Home tab, Editing group, click Select and then
click Select All.
2. Click the Copy button. The text is copied to the invisible
clipboard.
Paste text
Exercise 3
1. Click in the document at the end of the last word. Press the
Enter key twice to make some space. You have moved the
insertion point down.
2. From the Home tab, click Paste. The text is pasted at the
insertion point and the copy is still on the clipboard.
3. Repeat steps 1 and 2 to make the document even longer.
Move through a document and select text
Use the paragraphs document that you have created to do the following exercise to practice what you have learned so far.
Exercise 4
1. Hold the Ctrl key down and press the Home key (Ctrl +
Home). The insertion point is now positioned at the top of
your document.
2. Hold the Ctrl key down and press the Right Arrow key five
times. The insertion point is now positioned in front of the
Word 2007 4.8 10/8/2011
sixth word.
3. Double-click the any word the first paragraph. Type it now
at the end of the text if you did not already type it and then
double-click it. The word is now selected.
4. Place the pointer in the left margin beside the first line of
text until it becomes an arrow and click once. The first line
of your document is now selected.
5. Click anywhere in the white space in your document to
unselect the selected text. The insertion point is now at the
place where you clicked.
Delete characters
There are two ways to correct mistakes in text that involve just a few characters: Press the Backspace key to delete characters to the left of the insertion point or press the Delete key to delete characters to the right of the insertion point.
Exercise 5
1. Click to place the insertion point between the “a” and the “k”
in the word “make” in the first sentence you typed. Press
the Delete key twice. You have erased the letters “ke”.
2. Press the Backspace key twice. You deleted the letters “ma.”
3. Type the word are. The word “make” is replaced by the word
“are” in the first sentence.
.
Open an existing document
You will open a file that is on your student disk.
Exercise 6

Lesson Four: More Formatting
Word 2007 4.9 10/8/2011
1. Click the Open button on the toolbar.
2. Click the arrow on the Look in box and click on the
appropriate drive that holds your student files, 3 ½ Floppy
(A:) or CD drive D:.
3. Double-click the icon next to 1Editing Exercise to open the
file.
Change the Overtype Mode
It's a vestige of the very first PC word processing programs. Before word wrap, there was no way to automatically handle characters being pushed off the right edge of the screen, so an Insert mode would not be very useful. Overtype was the rule, and you edited the text back into a paragraph by hand. When word processors became smart enough to handle word wrap, Overtype mode became virtually obsolete. If you have Word 2007, here's a way to turn off the darned Insert key forever:
Exercise 7
1. 1Click the round Office button in the upper-left corner of
the window.
2. Click the Word Options button.
3. Click Advanced.
4. Uncheck the "Use the Insert key to control Overtype mode"
checkbox.
5. Click OK.
Word 2007 4.10 10/8/2011
Insert Overtype Exercise
Exercise 8
1. Click to place the insertion point at the top of the open
document before the first sentence.
2. Press the Enter key a few times to make some space before
the rest of the text in the document.
3. Then click at the top of the document; the insertion point
will appear below the top margin on the page.
4. This exercise will introduce you to Overtype and Insert. Or
type just the first few words.
5. Click in front of the first “e” in exercise and type This and
press the spacebar. You are in Insert mode and what you
type is inserted before the word “exercise.”
6. Click to place the insertion point in front of “This” at the
beginning of the sentence you just typed.
7. Press the Insert key on the keyboard. The Insert key
“toggles” between Insert and Overtype.
8. Type all or part of the following sentence. When you in
Overtype mode, typing replaces text.
9. The insertion bar appears to be eating the characters in
front of it.
10. Press the Insert key to return to the insert mode. The OVR
indicator becomes faded. Now you know what happens if you
press the Insert key.
Undo and Redo commands
The Undo command in the Edit menu and on the toolbar reverses your last action. For example, if you select (highlight) a sentence, and you accidentally press the letter M on the keyboard, you will replace the whole sentence with the letter M. You can recover the sentence by clicking the Edit menu and clicking Undo or by clicking the Undo button on the toolbar to undo the effects of up to

Lesson Four: More Formatting
Word 2007 4.11 10/8/2011
the last 100 actions. After you click Undo, the Redo button next to it becomes active (see Figure 1.4). If you undo an action and then decide you really do want to take that action, you can click Redo.
Figure 1.4 Undo and Redo buttons
Exercise 9
1. Click in the left margin to select the first line that you typed in
step 6 of the previous section or type a word or two at the top of
the page and select the line.
2. Press any letter on the keyboard. The sentence you selected is
replaced by the letter you typed.
3. Click Undo button on the Quick Access menu. The last action you
took, pressing the letter, is “undone” and the selected line is
restored.
4. Double-click the word “the” at the beginning of the line you
restored in the last step or click any word. The word is selected.
5. Now type an. The word “an” replaces the selected word.
6. Go back to the original word by clicking the Undo button on the
toolbar (see Figure 1.4). Word undoes your typing, and you have
the original word back.
7. Click the Redo button to return to “an.”
8. Click the Undo button or click the Undo button several times in a
row to see the effect on your last few changes to the document.
Then click Redo until you are back to the current text.
Note: A few operations cannot be undone. A label Cannot Undo appears in the Edit menu when the command is not available.
Word 2007 4.12 10/8/2011
Drag text to move it
You can move text from one area of a document to another without retyping it. You can drag text to a new location or you can copy or cut text and paste it back into the document at a new location. Dragging text is quick and easy if you can see both the source and destination on the screen at the same time.
Exercise 10
1. Place the mouse pointer to at the beginning of the second
paragraph.
2. Press and hold down the mouse button and drag the pointer to
the end of the phrase to select it then release the mouse button.
The phrase is highlighted.
3. Press and hold down the mouse button anywhere within the
selected phrase. The pointer is in the shape of an arrow. While
the text is selected, a gray line appears at the tip of the arrow to
help you place the text where you want to move it.
4. Drag the selected phrase to the end of the line. When you
release the mouse button the text is moved to its new location.
5. Click Undo Move or click the Undo button to restore the
phrase to its original position.
6. Click Redo Move or click the Redo button on the toolbar to
move the phrase back again.
The clipboard
It is sometimes easier to cut or copy the text to be moved. This makes use of the clipboard. You can’t see the clipboard. The clipboard is the part of your computer’s memory where text or a graphic you have cut or copied from a document is stored temporarily.

Lesson Four: More Formatting
Word 2007 4.13 10/8/2011
Cut, copy and paste text
Cut, copy and paste are among the most basic and frequently used editing tools. You can use the Edit menu or the buttons on the toolbar (see Figure. 1.5). Note: The Cut and Copy buttons will appear faded unless you have something selected in your document. The Paste button will appear faded unless you have previously cut or copied something that could be pasted.
Figure 1.5 Cut, Copy, Paste buttons
Cut—delete the selected item from your document but save a copy on the clipboard.
Copy—leave the selected item in your document and save a copy on the clipboard.
Paste—insert the contents of the clipboard into a document at the insertion point. The item still remains on the clipboard until you cut or copy something else or shut down your computer.
Cut & Paste Exercise 11
1. Open 1editing exercise.doc
2. Edit the poem Twinkle, Twinkle Little Star. The title is at the top
of the section, next to the number 3. The poem looks familiar but
the words and sentences are in the wrong order. Your challenge is
to correct the mistakes using the Cut, Copy and Paste tools. No
typing is required.
3. Click in the left margin (arrow pointer) next to the third line
below the title of the poem to select “Twinkle, twinkle little star.”
The text is correct but two things are wrong: the line is in the

Word 2007 4.14 10/8/2011
wrong place and the poem should contain this line in two places.
4. Click the Cut button to delete the selected text from the
document (see Figure 1.5). The line “Twinkle, twinkle little star,”
is on the clipboard but it no longer appears in the document.
5. Click to place the insertion point before “How...” on the first line
of the poem.
6. Click the Paste button on the toolbar.
a. “Twinkle, twinkle little star” is now the first line of the poem.
7. If necessary, press the Enter key to move “How I wonder what
you are.” to the next line if it is on the same line as “Twinkle,
twinkle…”
Exercise 12 - Finish editing using Cut, Copy and Paste
Follow the steps below to put the rest of the poem in the correct order. Edit for following:
Like a diamond in the sky. Twinkle, twinkle little star, How I wonder what you are. Up above the world so high, Twinkle, twinkle little star, How I wonder what you are.
1. Select the line “Up above the world so high” and click the Cut
button on the toolbar. The selected line is on the clipboard
and no longer appears in the document.
Lesson Four: More Formatting
Word 2007 4.15 10/8/2011
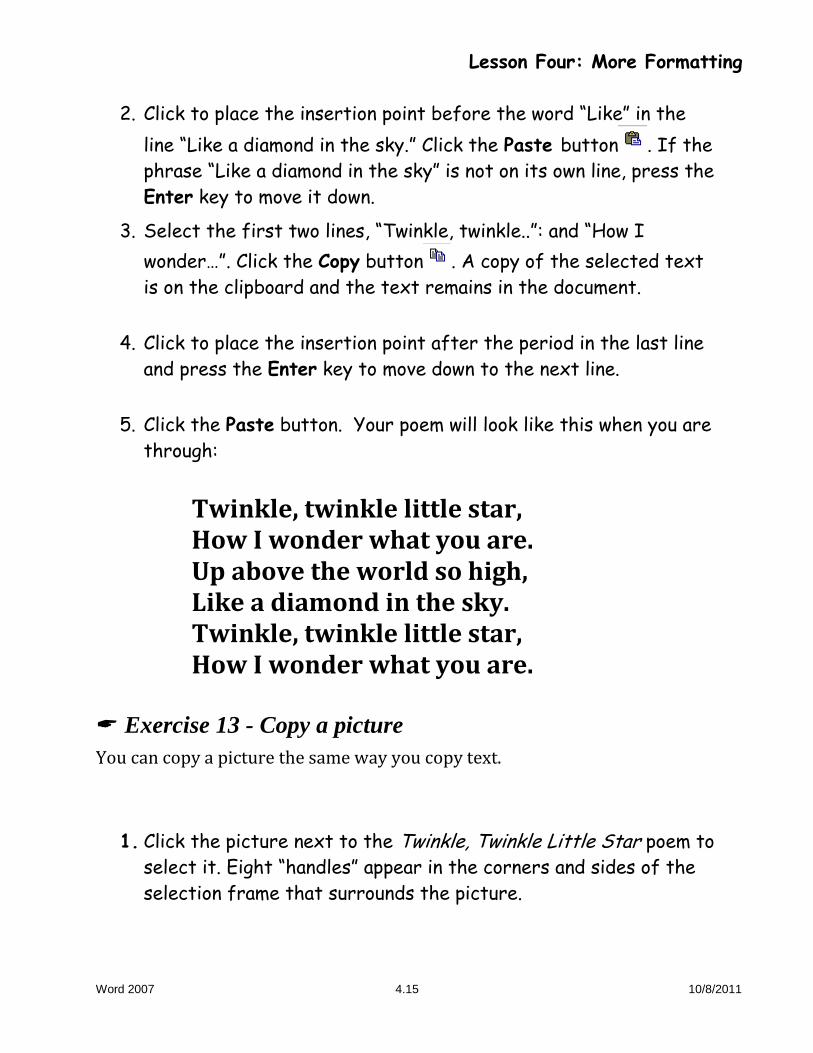
2. Click to place the insertion point before the word “Like” in the
line “Like a diamond in the sky.” Click the Paste button . If the
phrase “Like a diamond in the sky” is not on its own line, press the
Enter key to move it down.
3. Select the first two lines, “Twinkle, twinkle..”: and “How I
wonder…”. Click the Copy button . A copy of the selected text
is on the clipboard and the text remains in the document.
4. Click to place the insertion point after the period in the last line
and press the Enter key to move down to the next line.
5. Click the Paste button. Your poem will look like this when you are
through:
Twinkle, twinkle little star, How I wonder what you are. Up above the world so high, Like a diamond in the sky. Twinkle, twinkle little star, How I wonder what you are.
Exercise 13 - Copy a picture
You can copy a picture the same way you copy text.
1. Click the picture next to the Twinkle, Twinkle Little Star poem to
select it. Eight “handles” appear in the corners and sides of the
selection frame that surrounds the picture.

Word 2007 4.16 10/8/2011
2. Click the Edit menu and click Copy or click the Copy button. A
copy of the picture is on the clipboard.
3. Press Ctrl+End to place the insertion point at the end of your
document and press Enter twice to create two blank lines.
4. Click the Edit menu and click Paste or click the Paste button. A
copy of the picture appears at the bottom of your exercise.
5. Save the changes.
Since you have already saved the document with a name, you
can just save the changes to it.
Click the Office Button and click Save As, change the filename
and click the Save button on the dialog box.
Navigational Hot Keys and Techniques
Exercise 1. Use Word Hot Keys
Open File Sample File.doc ( Click anywhere in the middle of the first paragraph. Practice using these Navigational Hot Keys:
1. Ctrl + Home Takes you to the top of your document
2. Ctrl + End
Takes you to the end of your document
3. Ctrl + N Takes you to a new blank document
4. END
Go to the end of a line
5. HOME Go to the beginning of a line
6. DOUBLE-CLICK
Highlights a single word

Lesson Four: More Formatting
Word 2007 4.17 10/8/2011
7. TRIPLE-CLICK
Highlights a paragraph
8. Ctrl + CLICK Highlights a sentence
Change Case
Exercise 14 - Use the Change Case command
File Sample Docment.doc
Select the words Peet’s Coffee This is an example of Title Case (every word begins with a capital letter). On the Home tab, in the Font group, click Change Case (as shown in the diagram below), and then click the capitalization option that you want.
Change Peet’s Coffee to all upper case letters using the Change Case option
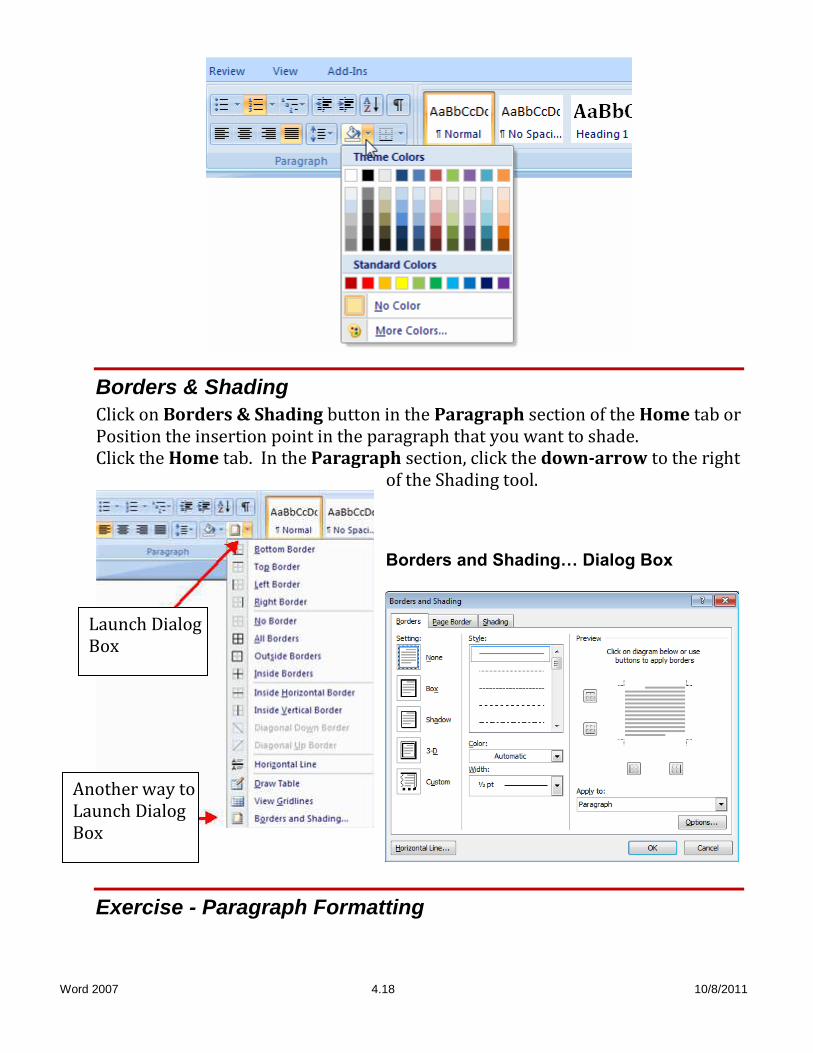
Shading
Position the insertion point in the paragraph that you want to shade. Click the Home tab. In the Paragraph section, click the down-arrow to the right of the Shading tool.
Word 2007 4.18 10/8/2011
Borders & Shading
Click on Borders & Shading button in the Paragraph section of the Home tab or Position the insertion point in the paragraph that you want to shade. Click the Home tab. In the Paragraph section, click the down-arrow to the right
of the Shading tool.
Borders and Shading… Dialog Box
Exercise - Paragraph Formatting
Another way to Launch Dialog Box
Launch Dialog Box
Lesson Four: More Formatting
Word 2007 4.19 10/8/2011
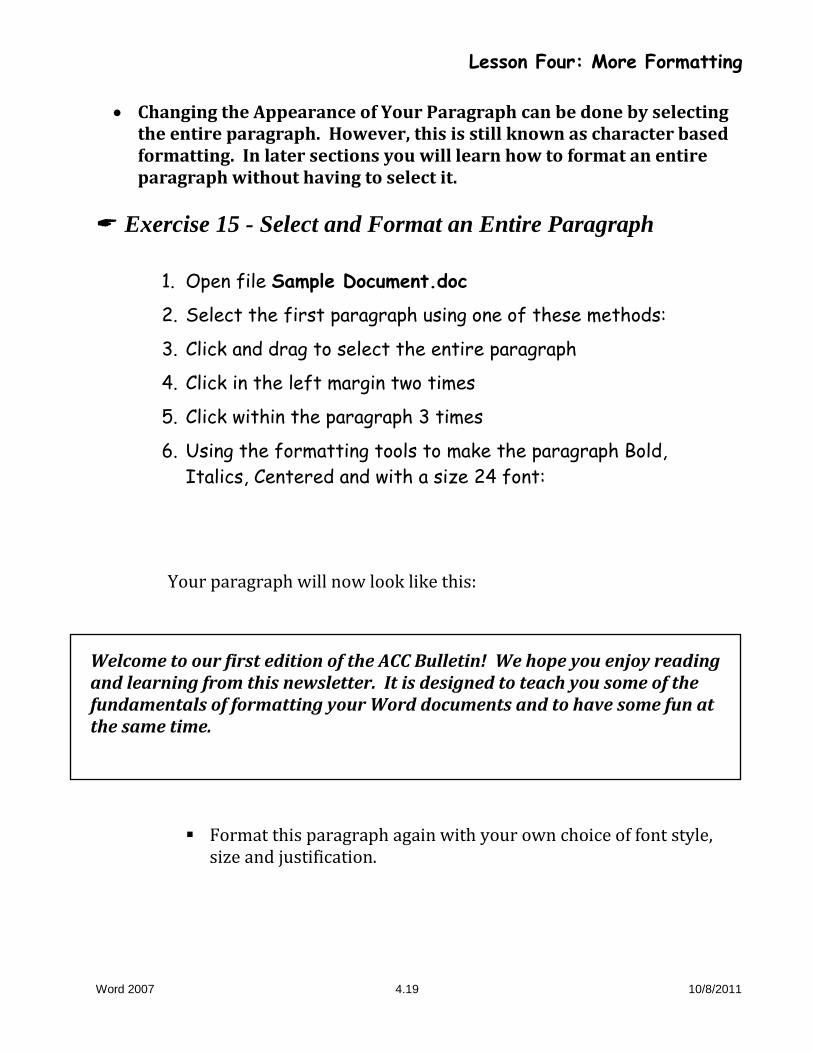
Changing the Appearance of Your Paragraph can be done by selecting the entire paragraph. However, this is still known as character based formatting. In later sections you will learn how to format an entire paragraph without having to select it.
Exercise 15 - Select and Format an Entire Paragraph
1. Open file Sample Document.doc
2. Select the first paragraph using one of these methods:
3. Click and drag to select the entire paragraph
4. Click in the left margin two times
5. Click within the paragraph 3 times
6. Using the formatting tools to make the paragraph Bold,
Italics, Centered and with a size 24 font:
Your paragraph will now look like this:
Format this paragraph again with your own choice of font style, size and justification.
Welcome to our first edition of the ACC Bulletin! We hope you enjoy reading and learning from this newsletter. It is designed to teach you some of the fundamentals of formatting your Word documents and to have some fun at the same time.
Word 2007 4.20 10/8/2011
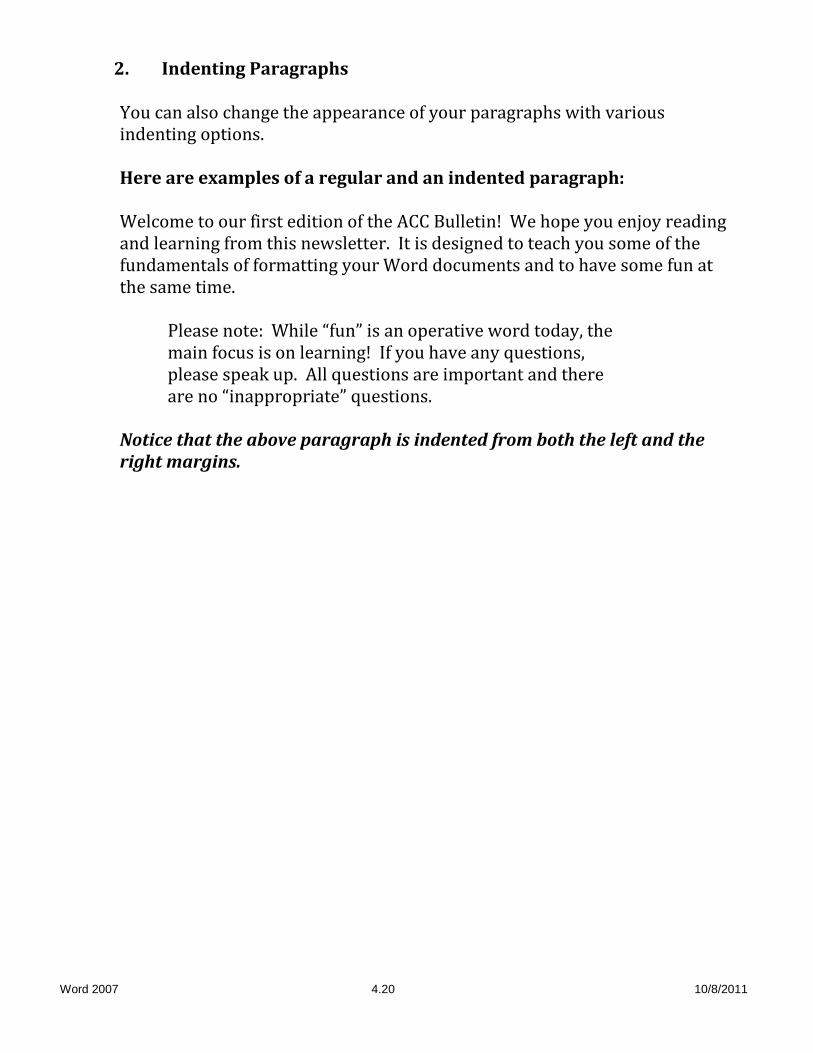
2. Indenting Paragraphs
You can also change the appearance of your paragraphs with various indenting options. Here are examples of a regular and an indented paragraph: Welcome to our first edition of the ACC Bulletin! We hope you enjoy reading and learning from this newsletter. It is designed to teach you some of the fundamentals of formatting your Word documents and to have some fun at the same time.
Please note: While “fun” is an operative word today, the main focus is on learning! If you have any questions, please speak up. All questions are important and there are no “inappropriate” questions.
Notice that the above paragraph is indented from both the left and the right margins.
Lesson Four: More Formatting
Word 2007 4.21 10/8/2011
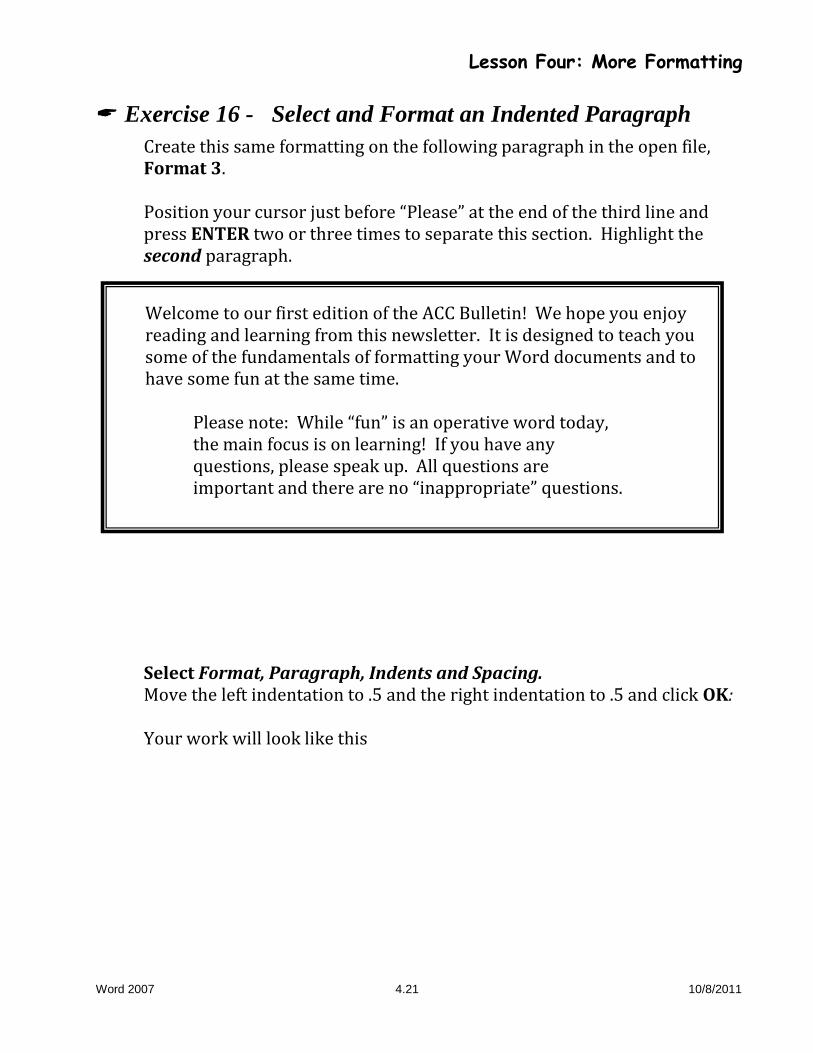
Exercise 16 - Select and Format an Indented Paragraph
Create this same formatting on the following paragraph in the open file, Format 3.
Position your cursor just before “Please” at the end of the third line and press ENTER two or three times to separate this section. Highlight the second paragraph.
Select Format, Paragraph, Indents and Spacing. Move the left indentation to .5 and the right indentation to .5 and click OK:
Your work will look like this
Welcome to our first edition of the ACC Bulletin! We hope you enjoy reading and learning from this newsletter. It is designed to teach you some of the fundamentals of formatting your Word documents and to have some fun at the same time.
Please note: While “fun” is an operative word today, the main focus is on learning! If you have any questions, please speak up. All questions are important and there are no “inappropriate” questions.
Word 2007 4.22 10/8/2011
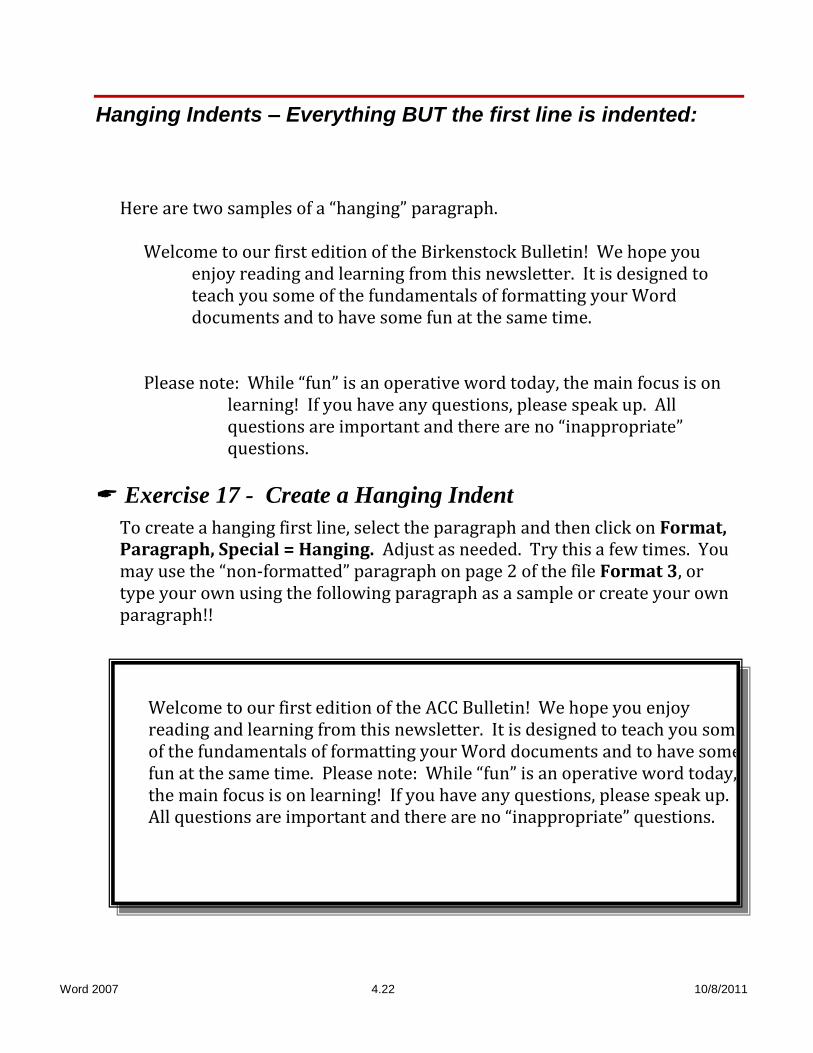
Hanging Indents – Everything BUT the first line is indented:
Here are two samples of a “hanging” paragraph.
Welcome to our first edition of the Birkenstock Bulletin! We hope you
enjoy reading and learning from this newsletter. It is designed to teach you some of the fundamentals of formatting your Word documents and to have some fun at the same time.
Please note: While “fun” is an operative word today, the main focus is on learning! If you have any questions, please speak up. All questions are important and there are no “inappropriate” questions.
Exercise 17 - Create a Hanging Indent
To create a hanging first line, select the paragraph and then click on Format, Paragraph, Special = Hanging. Adjust as needed. Try this a few times. You may use the “non-formatted” paragraph on page 2 of the file Format 3, or type your own using the following paragraph as a sample or create your own paragraph!!
Welcome to our first edition of the ACC Bulletin! We hope you enjoy reading and learning from this newsletter. It is designed to teach you some of the fundamentals of formatting your Word documents and to have some fun at the same time. Please note: While “fun” is an operative word today, the main focus is on learning! If you have any questions, please speak up. All questions are important and there are no “inappropriate” questions.

Lesson Four: More Formatting
Word 2007 4.23 10/8/2011
First Line Indent
Welcome to our first edition of the Birkenstock Bulletin! We hope
you enjoy reading and learning from this newsletter. It is designed to teach you some of the fundamentals of formatting your Word documents and to have some fun at the same time.
Please note: While “fun” is an operative word
today, the main focus is on learning! If you have any
questions, please speak up. All questions are important
and there are no “inappropriate” questions.
Exercise 18 - Indent First Line Only
To do this, select the paragraph and then click on FORMAT, PARAGRAPH, SPECIAL = FIRST LINE. Adjust as needed. Try this a few times using the paragraph on page 3 of the file Format 3 or type your own paragraph.
Using Ruler Marks The Top triangle will indent the first line of a paragraph
The Bottom triangle will indent all lines after the first line.
The Rectangle will indent the entire paragraph.
Exercise 2. Use Ruler Marks Try using these formatting tools with the paragraph on page 4 of the file Format 3.

Word 2007 4.24 10/8/2011
The Format Painter Button: This button allows you to copy character and paragraph formats. Select the text with the formatting you want to copy, click the Format Painter button, click the text on which you want to apply this formatting.
Exercise 19 - Use the Format Painter
Use the following steps to make the words Excel and PowerPoint look exactly the same:
1. Select the text that has the formatting you want to copy (in this case,
you must select the entire word) 2. Click one time on the Format Painter 3. Select the text where you want to apply the formatting Tip: To copy the selected formatting to several locations, double-click the Format Painter. Click on the Format Painter one time when finished to turn it off.
Paste Special
The Paste Special feature can be use the change the format of text when inserting into your document. When copying text from the web, it is best to paste without any format. The text will be inserting into the current default format of your document.

Lesson Four: More Formatting
Word 2007 4.25 10/8/2011
Paste Special Dialog 1
Live Preview
Microsoft has added a new feature to Word 2007 called Live Preview. When you select a portion of text, it updates automatically as you move your mouse over buttons on the toolbar. It also works with items in lists, such as font styles and font faces. Live Preview does not make permanent changes to your document. Rather, like its name suggests, it simply allows you to preview changes.

Word 2007 4.26 10/8/2011
AutoText
Word provides many built-in AutoText entries (such as salutations and closings) that are available when you create letters. You can also create your own entries for special recurring situations. By default, Word makes the AutoText entry available to all documents.
Exercise 20 -Add AutoText to Quick Access Tool Bar
The AutoText feature is incorporated as a gallery into the expanded capabilities provided by the Quick Parts feature (Document Parts, Building Blocks) in Microsoft Office Word 2007. Tip You can add the AutoText command to the Quick Access Toolbar by doing the following:
1. Click the Microsoft Office Button
2. Click Word Options.
3. On the left list box, click Customize .
4. Click the arrow to the right of Choose commands.
5. Scroll down to Commands Not in the Ribbon and click.
6. Select AutoText and click the Add button.
7. Click OK command button.
Exercise 21 - Add AutoText Text Entries
1. Select text to be added. This can be a few words, multiple
paragraphs, fields, graphics, tables or most anything.
2. Click the AutoText button, and then click Save Selection to
AutoText Gallery (or push Alt + F3).
3. Type in a Name for the AutoText. You will either use this
Lesson Four: More Formatting
Word 2007 4.27 10/8/2011
name to identify this AutoText in a list or to manually enter
the AutoText by typing the name. The name can include
letters, numbers, spaces and punctuation. The list of
AutoText entries will display alphabetically, you can override
that by starting AutoText names with spaces or punctuation.
4. TheGallery: box should show AutoText .
5. Adding a Category: will force the list of AutoText entries to
be grouped by the category names. This would be good if you
need AutoText entries organized by project or document
type.
6. Description is just for your own reference.
7. Save in: Building Blocks.dotx basically means you’ll get the
message about Building Blocks.dotx has changed, do you want
to keep the changes when you exit out of Word. In order to
keep the new AutoText entries, you would need to answer
Yes.
8. Options: allows you to Insert content only (just as it was
created), Insert content in its own paragraph (paragraph
mark will be added to end of AutoText) or Insert content in
its own page (page breaks will be added before and after the
AutoText).
9. Click OK to finish.
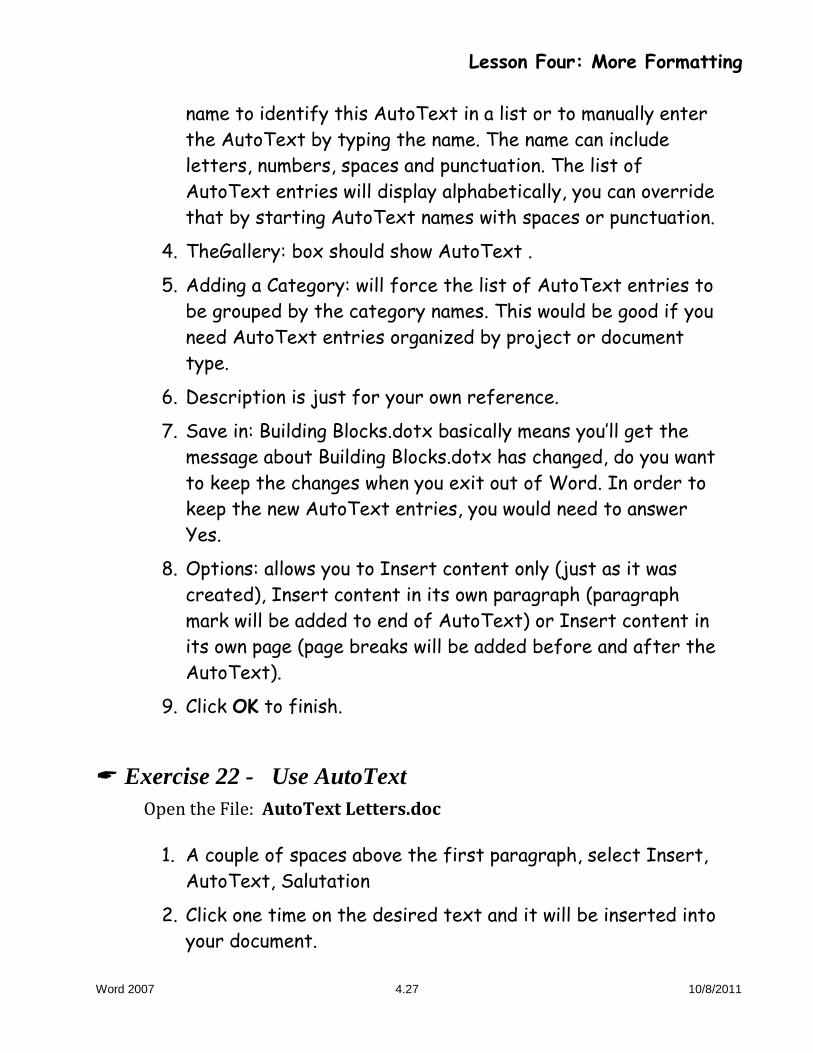
Exercise 22 - Use AutoText
Open the File: AutoText Letters.doc
1. A couple of spaces above the first paragraph, select Insert,
AutoText, Salutation
2. Click one time on the desired text and it will be inserted into
your document.

Word 2007 4.28 10/8/2011
Exercise 23 - Create your own AutoText entry:
1. Highlight to select the first paragraph (how many clicks to
select a paragraph?)
2. Select Insert, AutoText, New
3. Name the AutoText entry Letter1, click OK
4. Open a blank document.
5. Insert your new AutoText paragraph:
6. Select Insert, AutoText, AutoText
7. Click on the name of your new AutoText.
8. Click Insert.
AutoCorrect
Word will automatically replace words as you type. AutoCorrect is often used for frequently misspelled words, but this tool can also be used to replace text automatically. For example, you can ask Word to always replace the letters HCC with E. M. Hart Community Center
Exercise 24 - Create your own AutoCorrect entry:
To customize AutoCorrect in Word 2007, follow these steps:
1. Click the Office button
2. Select Word Options
3. Click Proofing in the left pane
4. Click the AutoCorrect Options button
5. Select the AutoCorrect tab
6. Under Replace, type HCC

Lesson Four: More Formatting
Word 2007 4.29 10/8/2011
7. Under With, type Ethel M. Hart Community Center
Your AutoCorrect dialog box will look like the example below:
1. Click OK
2. In your open document, type the letters HCC and space.
Note: ACC students can type ACC for Asian Community Center.

Word 2007 4.30 10/8/2011
Notes