woodwind techniques notebook - jesse · pdf filewoodwind techniques notebook jesse nolan...
TRANSCRIPT

Woodwind Techniques Notebook
Jesse Nolan Indiana University
Spring 2002

General Woodwind Notes
I. Pitches & Note Names 1) Pitches
a) CC – BB: Second C below the bass clef; lowest C on a piano through first B below the bass clef; lowest B on a piano. C – B: First C below the bass clef through B on second line of bass clef. c1 – b1: First C below treble clef (middle C) through B on middle line of treble clef. c2 – b2: C on third space of treble clef through first B above treble clef. c3 – b3: First C above treble clef through second B above treble clef. c4 - : Second C above the treble clef and higher.
II. Posture
1) Attributes
a) Head should be held in a natural position with the chin straight (not looking up or down). b) The body should be upright (erect), not stiff or sloughed. c) The shoulders should be back but relaxed. d) The arms should be held naturally, not against or away from body. e) Both feet should be flat on the floor.
2) Importance of Posture
Good posture is so important because a player cannot breathe properly or provide proper breathe support without good posture. Therefore, good posture allows for a natural and relaxed breathing process and enables the player to produce a good tone through proper air support.
III. Breathing
1) Steps in the breathing process
a) Inhalation: taking a quick breath into the lungs. b) Suspension: the split second at which the breath turns around in the lungs. This
occurs just before exhalation and allows the player to form the embouchure, ready the tongue, and conceptualize the tone to be played.
c) Exhalation: Firming of the stomach muscles which allows the breathe to be released in a fine stream of air.
2) Description of breathing process
a) First, the student must take a quick breath into the lungs through the mouth as if trying to
catch his/her breath. This can be done without removing the mouthpiece from the mouth. b) More air can be taken in quickly than by a prolonged breathing process.

c) Once the breath has been taken the student must exhale while forming the embouchure and articulating the reed. I would not explain the process of suspension as it is such a short period of time and the beginning clarinetists should not have to worry about this b/c he/she might actually pause before exhaling.
IV. Vibrato 1) Description of Vibrato
a) Vibrato is a non-measurable pulsation of air that changes the pitch and/or intensity of the
tone. b) It gives warmth to the tone of a note and may be used to draw attention to a particular
note or to intensify a passage by increasing the speed of vibrato. 2) Types of Vibrato
a) Jaw vibrato: slight up and down motion of the jaw. Used on saxophone and clarinet. b) Diaphragmatic vibrato: diaphragm moves air faster into the basic air stream. Used on
flute, oboe, and bassoon.

Flute Notes
I. The Flute Family 1) Instruments
a) Piccolo: Written in C and sounds an octave higher than written b) Eb flute: Written in Eb and sounds a minor 3rd higher than written. c) Concert C flute: Written in C and sounds as written d) Alto flute: Written in G and sounds a P4 lower than writer. e) Bass flute: Written in C and sounds an octave lower than written.
2) Flute & Piccolo
a) Same written range b) Piccolo has no C or C# c) Piccolo sounds 8va
II. Fingering Systems 1) Theobald Boehm developed the first fingering system. 2) Cooper system is now available to flutists. III. Formation of Embouchure 1) Teaching the embouchure of flute can be accomplished in a few ways:
a) Have the students imagine they are blowing through a straw, or have them put the tip of
their finger in their mouth and blow on it. This helps them conceptualize the correct embouchure. The straw, or finger, should then be replaced by the head joint alone.
b) Make sure the students are not pulling back the corners or causing undue tension on their muscles.
c) Tell the students to make sure they are not clenching their jaw, and to have their teeth apart.
2) Apeture
An aperture is the oval shaped hole between the lips that is formed by making the embouchure.
3) Problems
A cupid’s bow, which is actually a dip or tab in the top center of the top lip, forms a double aperture, which means that air is escaping from 2 holes. The student must close one of these holes and play only out of the other for success on the flute. This can be hard, especially for the beginner, and a student with this phenomenon should be discouraged from the flute in the option exists to start them on another instrument.
IV. Tone Production 1) Tone Production on Head Joint
It is advantageous for the student to start blowing on the head joint first because it allows them to focus solely on their air support and embouchure, without worrying about their fingers or how they are holding the flute, etc. Also, it enables them to carefully inspect their embouchure and blowing technique with a mirror. If they can produce a decent tone on the head joint, then producing a tone on the flute should be relatively easy.
V. Assembly of Instrument 1) Flute
a) Place the case in your lap and open it so that the latches have to flip upwards. b) The three parts of the flute are the head joint, which is the solid piece with no keys and
just a hole on top of a raised plate, the middle joint, the long section with keys, and the foot joint, the short section with the keys.
c) Place your little finger underneath the end of the middle joint and remove it from the case. Notice one end with engraving on it that says the brand of the flute.
d) Remove the head joint from the case and carefully, without pressing down any keys on the middle joint, twist the head joint into the middle joint on the end with the engraving so that a little of the unpolished edge of the head joint can be seen outside the middle joint. Do not push it all the way in.
e) Lift the foot joint out of the case and while holding the flute in one hand twist it on the other end of the middle joint with the heel of the hand (without pressing any keys).
f) Twist the foot joint so the rod is splitting the center of the keys on the middle joint. g) Twist the head joint so that it lines up with the keys on the middle joint.
VI. Holding / Hand Position 1) Balance Points
a) The embouchure plate against the chin b) The base of the left first finger c) The right thumb against the side of the flute
2) Hand Position
a) Left Hand:
i. The body of the flute should rest in the cradle formed at the base of the left first finger (between the base and the second joint of the first finger).
ii. The left wrist is bent so that the palm is almost vertical allowing the little finger to rest lightly on the Ab key.
iii. The left thumb should contact the B natural key just above (toward the tip of the thumb) the middle joint of the thumb.
iv. The finger pad of the first, second, and third fingers (both hands) should fall exactly in the middle of their respective keys.
v.

b) Right Hand:
i. The right first, second, and third fingers operate the lower three keys (excluding trill keys) on the middle joint. These three fingers should be perpendicular to the flute with curved fingers (as used in playing the piano).
ii. The little finger is responsible for the three (or four-low b natural) keys of the foot joint, but should slightly touch the Eb key.
iii. The right wrist should not be bent. iv. The right thumb should be against and below the side of the flute opposite the
first trill key.
VII. Tonguing 1) Tonguing should be taught when the student can make a tone on the flute. 2) Teaching tonguing can be accomplished the following way:
a) On the head joint (then on the flute) have the student make a tone with a “breath” attack. b) Have the student say “Too” repeatedly on the flute by tonguing the back of their teeth. c) Have the students alternate between “Hoo” and “Too.” d) Make sure the students are not moving their jaws while tounging and listen for a heavy,
accented release of the airstream which is the cause of moving the entire tongue. 3) Double Tonguing
a) Double tonguing is the process of producing a double accent (tongue) by the use of a special method which involves creating one sound with the tongue (by tonguing the back of the teeth) and the second in the mouth.
b) An effective syllable used for this is “Dah-Gah, Dah-Gah, etc.” It should be introduced to the student only after the student has matured on the flute and can produce a characteristic tone.
VIII. Tuning / Pitch Adjustments 1) Overall Tuning
a) Between the head joint and the middle joint. b) If the pitch is sharp, the head joint must be pulled out slightly. c) If the pitch is flat, the head joint should be pushed in slightly.
2) Tuning Individual Notes
a) Blowing more into the flute rather than across the hole. This can be accomplished by moving the jaw forward or backwards.
b) The pitch can be changed by moving the head. Sharper pitch can be attained by raising the head, and flatter by lowering the head.
c) Rolling the head joint in and out can change the pitch. Rolling out makes the pitch sharper, and rolling in makes it flatter.
d) Changing the velocity of the air stream can make the pitch flatter or sharper. As the velocity of the air increases the pitch gets sharper as well as louder, and vice versa.

3) Specific Pitch Issues
a) The worst note concerning pitch is C#2. The way to rectify this problem is to blow more into the flute rather than blowing across the hole.
IX. Care of Instrument 1) Polish?
a) Silver polish should not be used because it can rot pads and “gum-up” the action of the keys.
2) Head Joint Cap
The student should not twist the cap on the head joint as a nervous habit because it can alter the position of the head joint cork, which is responsible for maintaining overall pitch of the instrument. Should the cork shift, the pitch may become extremely sharp or flat even by making adjustments at the tuning joint.
X. Fingerings 1) Fingering comparison between clarinet and flute – Similarities:
a) F2 (+Eb key), G2 (+Eb key), A2 (+Eb key), B2,
2) Thumb Bb
a) The thumb Bb can be used in technical passages when there is no B natural in the passage.
3) Notes without Eb Key
a) C1, C#1, D1, D2, Bb3, B3, C4 4) Difficulty with upper register
a) The student MUST learn the correct fingerings for this octave even though they may seem awkward at first.
b) The student must move faster air over the hole of the flute rather than into it. c) A smaller aperture must be created
5) Open Hole Keys
a) An open hole key is a key that has the middle of it missing so that the actual pad of the finger covers the tone hole.
b) This allows the flutist to shade notes and tune notes more accurately by half-holing, etc..

6) Plateau Key
a) A plateau key is a closed hole key that when depressed covers the entire tone hole. XI. Miscellaneous 1) Some Famous Flutists
a) Jean-Pierre Rampal b) James Galway c) Julius Baker d) Robert Dick e) Alain Marion f) Hubert Laws
2) Some Flute Makers
a) Yamaha b) Emerson c) Gemeinhardt
3) Some Flute Options
a) Nickel Silver plated b) Low B foot c) French or Conservatory (open hole) system

Clarinet Notes
I. Clarinet Family 1) Members
a) Eb soprano clarinet (Eefer): Sounds up a minor 3rd. b) Bb soprano clarinet: Sounds down a major 2nd. c) A clarinet: Sounds down a minor 3rd. d) Eb alto clarinet: Sounds down a major 6th. e) Bb bass clarinet: Sounds down a major 9th. f) Eb Contra Alto (Contrabass) clarinet: Sounds down an octave plus a major 6th. g) Bb Contrabass clarinet: Sounds down two octaves plus a major 2nd.
2) Bell on Lower Clarinets
a) The bell on the lower clarinets allows them to reach a low Eb, or another note that needs the extra length provided by the bell.
b) The key is located just below the low E key on the right little finger. 3) Registers of Clarinet
a) Chalumeau (e – f#1) b) Throat (g1 – Bb1) c) Clarion (b1 – c3) d) High/Altissimo (c#3 – c4)
II. Assembly 1) Reed/Mouthpiece/Ligature
a) Before the reed or ligature is placed on the mouthpiece, one should check for a bent ligature or a warped/cracked reed. These two factors can hinder tone production.
b) Secondly, the reed should be soaked, either in the players mouth while he/she is putting together the instrument, or in a small vile of water.
c) After the instrument is together, and the mouthpiece is on the barrel, the player should slide the ligature down onto the mouthpiece with the screws facing the correct direction.
d) Once the ligature is loosely in place, the player should slide the butt of the reed down under the ligature and onto the mouthpiece until only a hair of black mouthpiece can be seen above the reed.
e) Next, the player should check the butt of the reed to make sure that it is even and symmetrically in the mouthpiece and not off to one side.
f) The ligature can now be secured in place and tightened around the cane (butt) of the reed and not on any part of the face of the reed.
g) Tighten the screws until they “offer resistance” and no further b/c they will break and/or cause poor production of tone.
2) Whole Instrument
a) Open the case with the latches pointing up so that they must be pulled down when
unsnapping them.
b) Put the reed in your mouth or in a vile of water so that it may begin soaking. c) Take the lower joint and the upper joint and align them. Screw them into one another so
that no more cork can be seen and so they are tightly pressed together. Cork grease may be needed if the corks are dry. DO NOT wiggle the pieces onto each other. This will cause the cork to rip.
d) Twist the bell onto the bottom of the lower joint in a similar fashion. e) Twist the barrel and the mouthpiece (w/out ligature) together (it only fits snuggly one
way.) f) Twist the barrel/mouthpiece combination onto the upper joint of the clarinet so that the
center of the flat side (slope) of the mouthpiece is aligned with the register key and the thumbrest.
g) Place the ligature on the mouthpiece and follow the steps above for assembling the reed/ligature/mouthpiece combination.
III. Holding / Hand Position 1) Attributes
a) The side of the right thumb should be pressed up against the thumb rest so that the fatty part of the thumb is pressing against the instrument and the thumbnail is facing the player.
b) The right little finger should slightly touch the F key and all the other fingers should remain close to (no more than an inch) above the tone holes they cover on the lower joint.
c) When it is time to cover the tone holes it should be done by the finger pad (fatty part of finger), not the finger tip. Any leakage of air out of the tone holes will cause an inability to produce the desired tone.
d) The wrist of the right hand should be flat, not bent. Bending the right wrist will cause an inability to properly cover the tone holes and will be uncomfortable.
e) The left thumb should be placed over the thumb hole at a 45 degree angle so that the fattest part of the thumb covers the thumbhole. The thumb should overlap the thumbhole enough so that with a slight movement it can press the register key.
f) The first left finger should be placed over the Ab key to the first ring key. The second and third fingers should be angled downward slightly so that they may cover the rest of the tone holes on the upper joint.
g) The left little finger should rest on the low E key – NOT behind the instrument. h) The clarinet should be held at a 40 degree angle to the upper body.
IV. Embouchure / Tone Production / Articulation 1) Embouchure Problems
a) Improper reed strength: stiff reeds can cause biting and will not vibrate for a beginner
player b/c they are too thick. Too thin reeds cause uncontrolled vibration and a similar sound.
b) Pulling the corners back – DON’T SMILE! c) Biting: lower jaw pinches the reed. d) Amount of mouthpiece: too much mouthpiece causes squeaking and too little causes
pinched sounds. e) Lipstick: hinders the vibration of a reed.
2) Tone Production (Mouthpiece) a) First the reed must be soaked and properly placed in the mouthpiece as outlined above. b) The student should pull the teeth (and lips) slightly apart with a normal relaxed facial
position. c) Without moving the corners of the mouth, the lower lip should be stretched slightly
across the bottom teeth so that the lip is tight. This will create a pointed chin. d) The mouthpiece should be placed up against the top of the teeth. e) Bring the bottom lip up without moving the chin, and keep the mouthpiece at a 45 degree
angle. f) Both lips should be tightened firmly around the mouthpiece without biting the
mouthpiece or pulling the corners back. g) The student should then blow into the mouthpiece and try to produce a concert c2 as a
starting point. h) Make sure the student does not puff out the cheeks.
3) Articulation
a) The top of the tongue – just behind the tip – touches the tip of the reed. b) The tongue needs to be curved slightly downward – but always remaining as flat as
possible – in the mouth. V. Tuning 1) Overall & Joint Tuning
a) The clarinet should be tuned to an open G. This is the pitch that the barrel joint (between barrel and upper joint) should be tuned to.
b) Middle Joint: should be tuned to a low C (c1). c) Bell Joint: should be tuned to a third space C (c2).
2) Pitch Adjustments
a) Individual notes can be adjusted by lowering the jaw slightly. This is only to make a
minor adjustment. If the pitch is farther out of tune the embouchure, mouthpiece, reed, and ligature should be checked.
VI. Fingerings 1) Register Key
a) The clarinet overblows the interval of a 12th when the register key is pressed. That is, a note a twelfth higher than the one that is being fingered will come out of the horn.
2) Chromatic Fingerings
a) b: Thumbhole; First 3 fingers of L hand; Middle finger of R hand. b) f#1: Thumbhole; bottom two keys on right side (1sk, 2sk). c) f#2: Thumbhole & register key; First 3 fingers on L hand; First finger of R hand; Key
between 2nd & 3rd tone holes of R hand (BCH).

VII. Miscellaneous 1) Makers of Clarinets
a) Yamaha b) Leblanc c) Selmer d) Buffet

Saxophone Notes
I. Saxophone Family 1) Invention
a) Adolphe Saxe invented the saxophone in the 1840s. 2) Members
a) Bb Soprano Saxophone: sounds a major second lower than written b) Eb Alto Saxophone: sounds a major sixth lower than written c) Bb Tenor Saxophone: sounds a major ninth lower than written d) Eb Baritone Saxophone: sounds an octave plus a major sixth lower than written. e) Also included are the sopranino (smallest) and bass (saxophone), although these are less
common. 3) Range
a) The basic written range is Bb (below treble clef) to f3 II. Sound / Tone Production 1) Initial Sound
a) The first sound should be made only with the mouthpiece and the neck. This allows the student to concentrate on the basics of forming the embouchure and tone production without becoming hindered by fingerings.
b) The reed should be wet and properly placed on the mouth piece and the ligature by sliding the butt of the reed down under the ligature, leaving just the tip of the facing of the mouthpiece visible above the reed. The screws should then be gently tightened. The mouthpiece should be carefully twisted approximately half-way onto the cork of the neck.
c) To make the first sound: i. Open the teeth by dropping the lower jaw.
ii. Form the lips into an “O” shape. The lower lip should not necessarily roll in, although the red part of the lip may be forced back over the teeth slightly by the mouthpiece.
iii. Insert the mouthpiece into the mouth. The teeth should rest on the top of the mouthpiece.
iv. Bring the bottom lip up to the reed and keep the chin flat. v. The corners of the mouth should be drawn in toward the mouthpiece and the top
lip down, forming a tight embouchure. This prevents air from escaping. vi. The student should then try to blow through the mouthpiece.
III. Saxophone Parts, Attributes, & Assembly 1) Parts
a) Neck b) Mouthpiece

c) Ligature d) Body e) Neckstrap
2) Attributes
a) Fulcrum: The fulcrum of the mouthpiece is the point at which the mouthpiece curves away from the reed.
b) Stopper: The stopper must be put into the sax while in storage because the octave key can bend if it is not.
c) Neckstrap: The neckstrap supports the weight of the saxophone. The hands only serve to balance it.
3) Assembly
a) Remove the saxophone from the case by grasping the bell. Remove the stopper from the body of the sax.
b) Hook the neckstrap into the hook on the back of the body of saxophone. c) Put the neckstrap around the neck and soak reed in mouth or water vile. d) Remove the mouthpiece and ligature from the case and insert the reed onto the mouth
piece by sliding the butt of the reed down under the ligature, leaving just the tip of the facing of the mouthpiece visible above the reed. The screws should then be gently tightened.
e) Remove the neck from the case and gently screw the mouthpiece/reed/ligature combination about halfway onto the cork on the neck, being careful not to bend the screws on the ligature or grasping the octave key.
f) Loosen the screw at the top of the body and insert the neck into the saxophone. Tighten the screw.
g) Adjust the neckstrap so that the mouthpiece can be easily inserted into the mouth without having to move the head up or down.
IV. Hand Position 1) Attributes of good hand position
a) The right thumb is under the thumbrest between the end of the thumb and the joint of the thumb.
b) The saxophone should be balanced by the thumbs with the top teeth serving as an anchor. c) The neckstrap supports the weight of the instrument and should be adjusted so that the
mouthpiece can be easily inserted into the mouth without having to move the head. d) The right hand fingers should be arched with the finger pads of the first three fingers
resting on the pearl keys on the lower portion of the instrument. The little finger should touch the low C key.
e) The left should be primarily on the thumb rest, but the tip of it should rest lightly on the octave key (without pressing it down) so that it can be easily pressed. This thumb should be at a 45 degree angle and should not be vertical or horizontal.
f) The fingers of the left hand should be arched so that the insides of the fingers are over the palm keys. The first finger should touch the second pearl key from the top.
g) The left second finger skips the small pearl key and falls on the next larger pearl key. h) The left third finger rests on the next or bottom pearl key with the little finger resting
lightly on the G# key.

i) V. Embouchure / Tonguing 1) Embouchure Anchor Point
The top front teeth should rest firmly on the top of the mouthpiece. This is the anchor point of the embouchure and should not change.
2) Sax vs. Clarinet Embouchure
The lower lip should be brought up to the reed but should NOT be stretched across the teeth like on clarinet.
3) Sax vs. Clarinet Tongue Placement
The tip of the tongue curves up to touch the lower tip of the reed rather than arched high toward the roof of the mouth as on clarinet.
4) Anchor Tonguing
Anchoring the tip of the tongue at the back of the bottom teeth and touching the portion of the tongue that normally touches the reed to the tip of the reed. This is helpful for fixing tonguing problems with students who use too much tongue.
5) Articulation
The tip of the tongue should curve slightly up to touch the lower tip of the reed. VI. Fingerings 1) Register Key
The saxophone overblows an octave when the register key is pressed. 2) Chromatic Fingerings
a) Chromatic F#: R – 1,2,3 / L –1, F# key b) Chromatic C: R – 1 / L – 2nd palm key c) Chromatic Bb: 1 and 1 fingering)
3) Fingering Comparison
Clarinet Flute Saxophone F2 F2 F1, F2 G2 G2 G1, G2 D2 D1 D1, D2 Eb2 Eb1 E2 E1, E2
VII. Tuning / Pitch 1) Break The break on saxophone is located at D2. 2) Overall Tuning
a) Overall pitch should be regulated at the neck and the mouthpiece joint of the sax. b) If the pitch is flat, the mouthpiece should be pushed farther onto the cork. c) If the pitch is sharp, the mouthpiece should be pulled slightly out from the cork.
3) Individual Notes
The pitch of individual notes can be changed by slightly dropping the jaw or adding certain keys.
VIII. Mouthpiece / Reed / Ligature 1) Mouthpieces
a) The stock Yamaha or Selmer mouthpiece is usually fine for beginner students. b) C* could also be recommended.
2) Reeds
a) The beginner is best if using Vandoren Blue Box 2 strength reeds. b) The junior high student should progress to a harder Vandoren reed such as a 2 ½. c) Others include Lavoz medium hard and Rico Royal 2 ½. d) The high school student should be playing on a Vandoren 3 or possibly a 3 ½.
3) Ligatures
a) Rovner b) BG Traditional c) Vandoren Optimum d) Bay e) Winslow

Oboe Notes
I. Oboe Family 1) Members
a) Oboe b) English Horn
II. Assembly 1) Joints
a) Bell joint b) Lower joint c) Upper joint
2) Instructions
a) The reed should be soaked in water while assembling the instrument. b) Put the case in the lap, being careful to open it the correct way so as to not dump the oboe
out. c) Lift the end of the lower joint out of the case. Be careful not to put pressure on any of the
keys. d) Pick up the bell out of the case, being careful not to bend any mechanisms. e) Gently twist these two joints together so that the bridge key is aligned. f) Remove the upper joint from the case, being careful not to bend any of the keys. g) Gently twist the upper and lower joints together. The bridge mechanisms between these
two joints should be watched carefully so that the two side mechanisms on the lower joint move under the upper joint bridge keys. Make sure the bridge mechanisms are aligned.
h) After the reed has been moistened properly, gently slide/twist the reed in place. It should be pushed in as far as possible.
III. Hand Position 1) Attributes
a) The right thumbnail should be in the middle of the thumbrest. b) The right little finger should lightly touch the lower little finger key (Eb key). c) The right first, second and third fingers should arch slightly so that the finger pads are
just above the three plateau keys on the lower joint. The fingers should feel the keys even though they are not pressed.
d) The left thumb will be perpendicular to the oboe just below the octave key. The left thumb rests on the wood of the instrument.
e) The left hand should be positioned so that the first finger arches over the second octave key.
f) The left second and third fingers slant down to the second and third plateau key of the upper joint. The second finger should be arched and the third finger almost flat to reach the third plateau key.
g) The left little finger should lightly touch the upper little finger key (G# key), but must be ready to press any of the little finger keys (Bb, B, Eb, F).
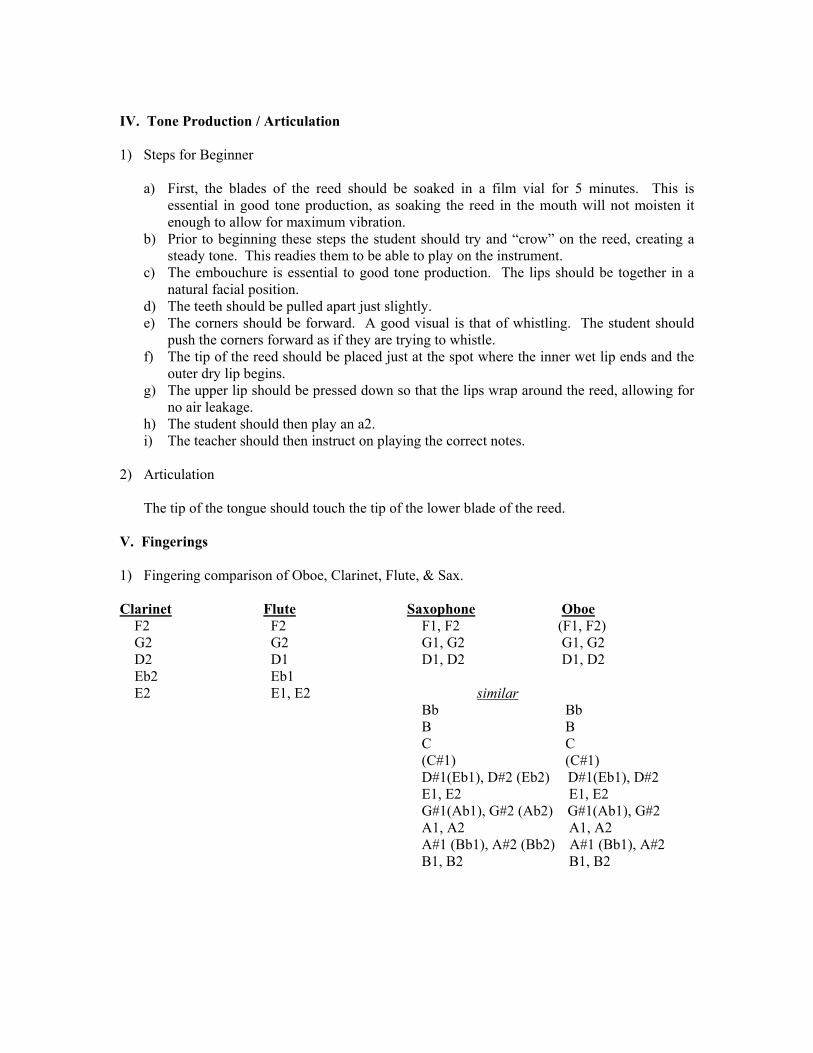
IV. Tone Production / Articulation 1) Steps for Beginner
a) First, the blades of the reed should be soaked in a film vial for 5 minutes. This is essential in good tone production, as soaking the reed in the mouth will not moisten it enough to allow for maximum vibration.
b) Prior to beginning these steps the student should try and “crow” on the reed, creating a steady tone. This readies them to be able to play on the instrument.
c) The embouchure is essential to good tone production. The lips should be together in a natural facial position.
d) The teeth should be pulled apart just slightly. e) The corners should be forward. A good visual is that of whistling. The student should
push the corners forward as if they are trying to whistle. f) The tip of the reed should be placed just at the spot where the inner wet lip ends and the
outer dry lip begins. g) The upper lip should be pressed down so that the lips wrap around the reed, allowing for
no air leakage. h) The student should then play an a2. i) The teacher should then instruct on playing the correct notes.
2) Articulation
The tip of the tongue should touch the tip of the lower blade of the reed. V. Fingerings 1) Fingering comparison of Oboe, Clarinet, Flute, & Sax. Clarinet Flute Saxophone Oboe F2 F2 F1, F2 (F1, F2) G2 G2 G1, G2 G1, G2 D2 D1 D1, D2 D1, D2 Eb2 Eb1 E2 E1, E2 similar Bb Bb B B C C (C#1) (C#1) D#1(Eb1), D#2 (Eb2) D#1(Eb1), D#2 E1, E2 E1, E2 G#1(Ab1), G#2 (Ab2) G#1(Ab1), G#2 A1, A2 A1, A2 A#1 (Bb1), A#2 (Bb2) A#1 (Bb1), A#2 B1, B2 B1, B2

2) Alternate fingerings for f1 & f2. F1: a) Left Hand: 3 fingers + Eb key Right Hand: 1st & 3rd fingers + Eb key b) Left Hand: 3 fingers + F key Right Hand: 1st & 2nd fingers F2: a) Left Hand: 3 fingers + Eb key + 1st Octave Key Right Hand: 1st & 3rd fingers + Eb key b) Left Hand: 3 fingers + F key + 1st Octave Key Right Hand: 1st & 2nd fingers 3) Alternate Resonance Key
The Eb key can be used to add resonance to f if there is no resonance key for forked f. 4) Forked F
The forked f fingering should be used anytime the right third finger is used on a nore (bb, b, c, c#1, d1, eb1, c#2, d2, or eb2) before or after the F.
5) Octave Key
E2, f2, f#2 (gb2), g2, g#2 (ab2) 6) Second vs. First Octave Key
When the 2nd octave key is pressed it negates the pressing of the first octave key. 7) Second Octave Key Notes
A2, a#2 (bb2), b3, c3 8) Automatic Half Hole
a) A half hole is where half of the hole is open (vented) so that the proper in tune pitch can be sounded. Instead of covering the hole half-way with the finger however, the oboe has a special key that covers the hole while having a small hole in the middle of it to allow the proper venting of this note.
b) C#2 (Db2), D2, D#3 (Eb2), D3, D#3 (Eb3), E3, F3 9) Alternate Eb Key
The alternate Eb key should be used anytime a Db (low Db or fourth line Db) or low C precedes of follows Eb.
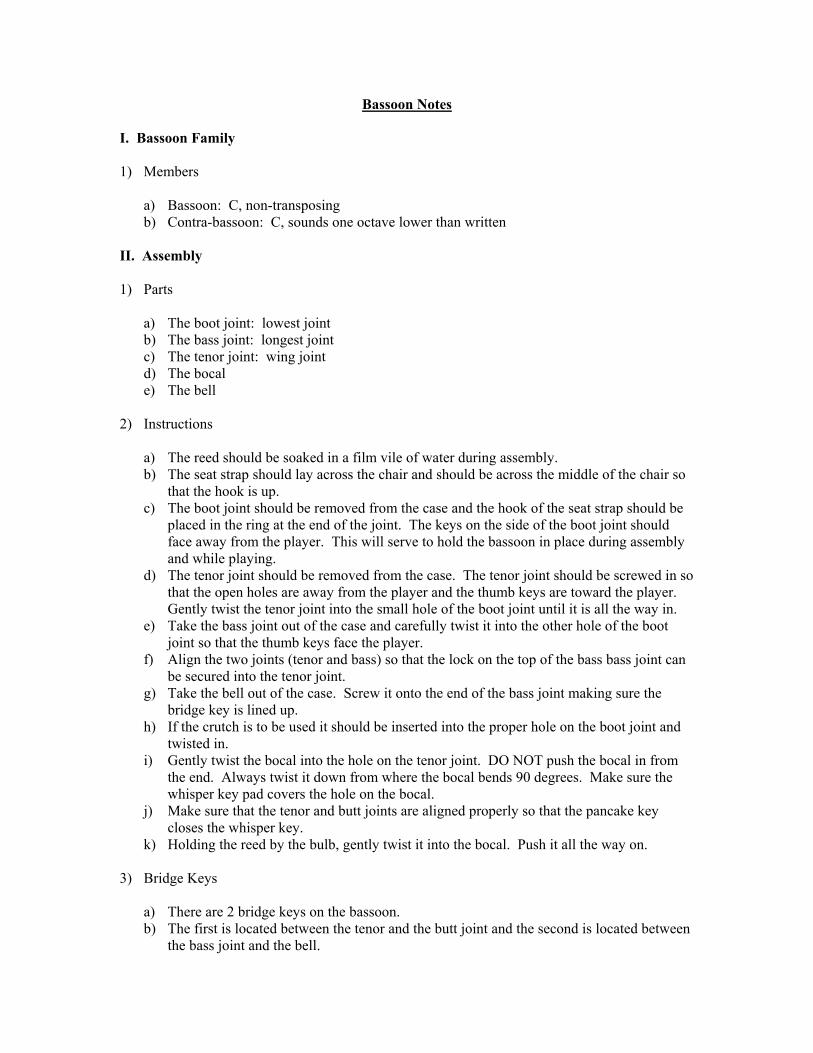
Bassoon Notes
I. Bassoon Family 1) Members
a) Bassoon: C, non-transposing b) Contra-bassoon: C, sounds one octave lower than written
II. Assembly 1) Parts
a) The boot joint: lowest joint b) The bass joint: longest joint c) The tenor joint: wing joint d) The bocal e) The bell
2) Instructions
a) The reed should be soaked in a film vile of water during assembly. b) The seat strap should lay across the chair and should be across the middle of the chair so
that the hook is up. c) The boot joint should be removed from the case and the hook of the seat strap should be
placed in the ring at the end of the joint. The keys on the side of the boot joint should face away from the player. This will serve to hold the bassoon in place during assembly and while playing.
d) The tenor joint should be removed from the case. The tenor joint should be screwed in so that the open holes are away from the player and the thumb keys are toward the player. Gently twist the tenor joint into the small hole of the boot joint until it is all the way in.
e) Take the bass joint out of the case and carefully twist it into the other hole of the boot joint so that the thumb keys face the player.
f) Align the two joints (tenor and bass) so that the lock on the top of the bass bass joint can be secured into the tenor joint.
g) Take the bell out of the case. Screw it onto the end of the bass joint making sure the bridge key is lined up.
h) If the crutch is to be used it should be inserted into the proper hole on the boot joint and twisted in.
i) Gently twist the bocal into the hole on the tenor joint. DO NOT push the bocal in from the end. Always twist it down from where the bocal bends 90 degrees. Make sure the whisper key pad covers the hole on the bocal.
j) Make sure that the tenor and butt joints are aligned properly so that the pancake key closes the whisper key.
k) Holding the reed by the bulb, gently twist it into the bocal. Push it all the way on. 3) Bridge Keys
a) There are 2 bridge keys on the bassoon. b) The first is located between the tenor and the butt joint and the second is located between
the bass joint and the bell.
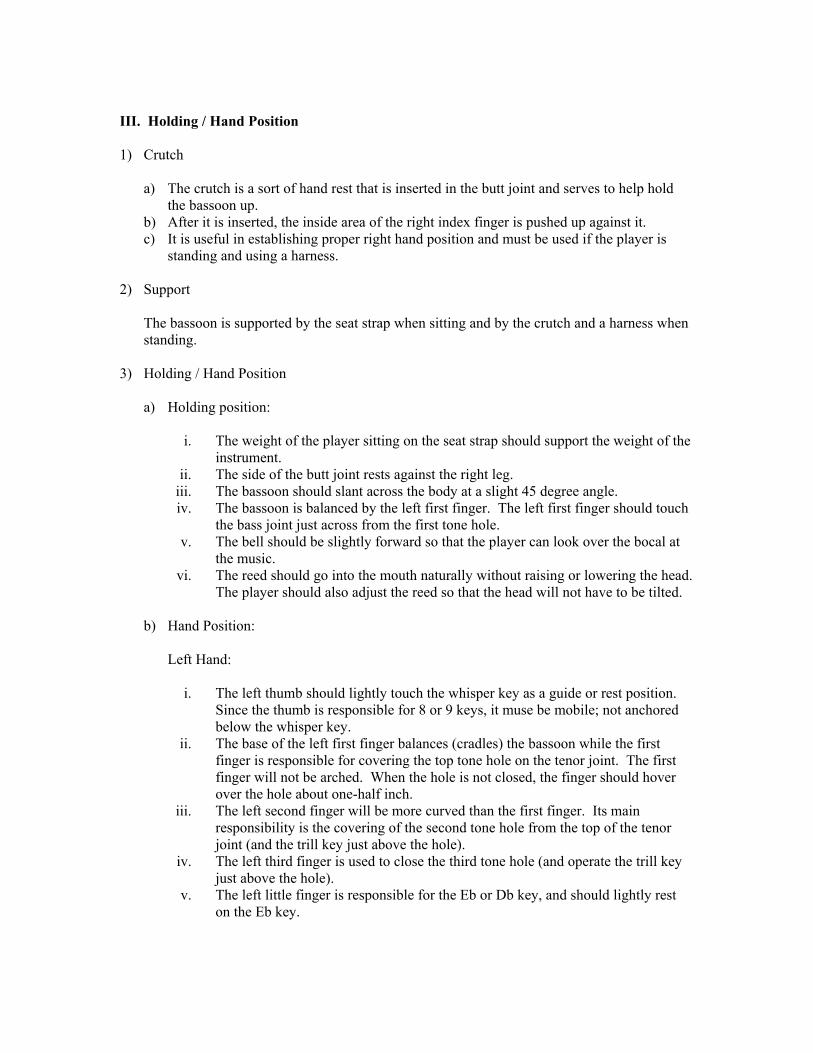
III. Holding / Hand Position 1) Crutch
a) The crutch is a sort of hand rest that is inserted in the butt joint and serves to help hold the bassoon up.
b) After it is inserted, the inside area of the right index finger is pushed up against it. c) It is useful in establishing proper right hand position and must be used if the player is
standing and using a harness. 2) Support
The bassoon is supported by the seat strap when sitting and by the crutch and a harness when standing.
3) Holding / Hand Position
a) Holding position:
i. The weight of the player sitting on the seat strap should support the weight of the instrument.
ii. The side of the butt joint rests against the right leg. iii. The bassoon should slant across the body at a slight 45 degree angle. iv. The bassoon is balanced by the left first finger. The left first finger should touch
the bass joint just across from the first tone hole. v. The bell should be slightly forward so that the player can look over the bocal at
the music. vi. The reed should go into the mouth naturally without raising or lowering the head.
The player should also adjust the reed so that the head will not have to be tilted.
b) Hand Position:
Left Hand:
i. The left thumb should lightly touch the whisper key as a guide or rest position. Since the thumb is responsible for 8 or 9 keys, it muse be mobile; not anchored below the whisper key.
ii. The base of the left first finger balances (cradles) the bassoon while the first finger is responsible for covering the top tone hole on the tenor joint. The first finger will not be arched. When the hole is not closed, the finger should hover over the hole about one-half inch.
iii. The left second finger will be more curved than the first finger. Its main responsibility is the covering of the second tone hole from the top of the tenor joint (and the trill key just above the hole).
iv. The left third finger is used to close the third tone hole (and operate the trill key just above the hole).
v. The left little finger is responsible for the Eb or Db key, and should lightly rest on the Eb key.
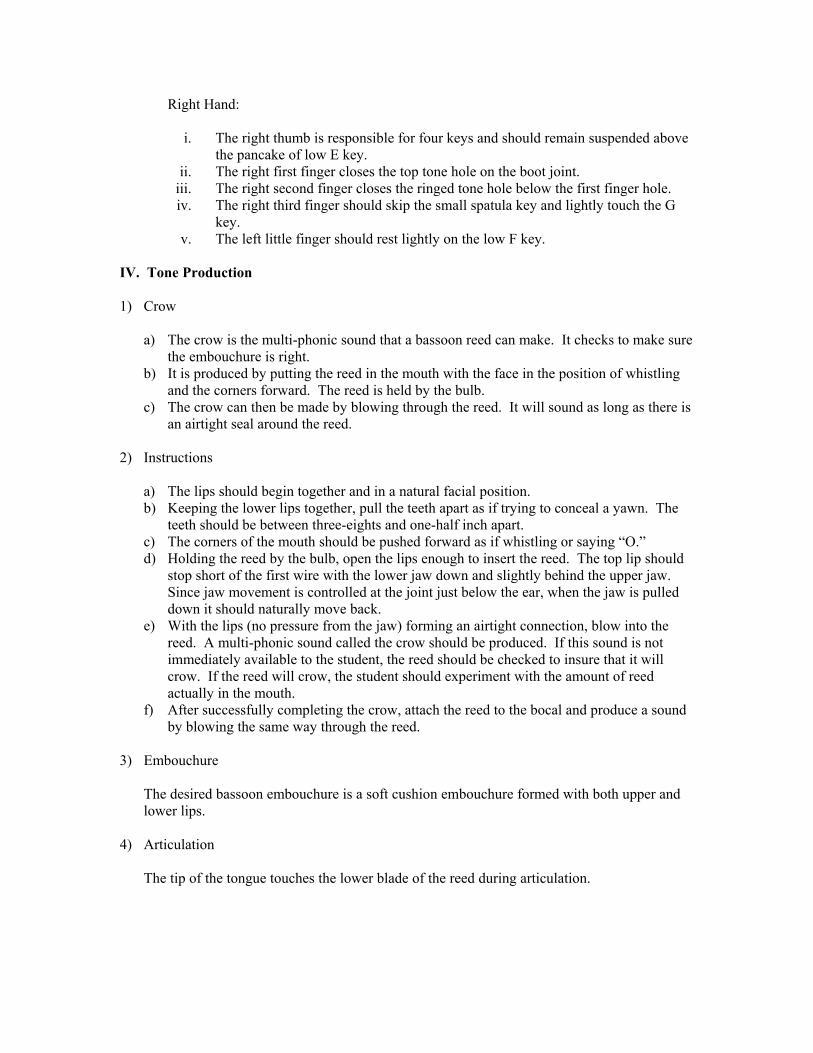
Right Hand:
i. The right thumb is responsible for four keys and should remain suspended above the pancake of low E key.
ii. The right first finger closes the top tone hole on the boot joint. iii. The right second finger closes the ringed tone hole below the first finger hole. iv. The right third finger should skip the small spatula key and lightly touch the G
key. v. The left little finger should rest lightly on the low F key.
IV. Tone Production 1) Crow
a) The crow is the multi-phonic sound that a bassoon reed can make. It checks to make sure the embouchure is right.
b) It is produced by putting the reed in the mouth with the face in the position of whistling and the corners forward. The reed is held by the bulb.
c) The crow can then be made by blowing through the reed. It will sound as long as there is an airtight seal around the reed.
2) Instructions
a) The lips should begin together and in a natural facial position. b) Keeping the lower lips together, pull the teeth apart as if trying to conceal a yawn. The
teeth should be between three-eights and one-half inch apart. c) The corners of the mouth should be pushed forward as if whistling or saying “O.” d) Holding the reed by the bulb, open the lips enough to insert the reed. The top lip should
stop short of the first wire with the lower jaw down and slightly behind the upper jaw. Since jaw movement is controlled at the joint just below the ear, when the jaw is pulled down it should naturally move back.
e) With the lips (no pressure from the jaw) forming an airtight connection, blow into the reed. A multi-phonic sound called the crow should be produced. If this sound is not immediately available to the student, the reed should be checked to insure that it will crow. If the reed will crow, the student should experiment with the amount of reed actually in the mouth.
f) After successfully completing the crow, attach the reed to the bocal and produce a sound by blowing the same way through the reed.
3) Embouchure
The desired bassoon embouchure is a soft cushion embouchure formed with both upper and lower lips.
4) Articulation
The tip of the tongue touches the lower blade of the reed during articulation.
V. Fingerings 1) Systems
a) Primary: The name of this primary fingering system is called the German or Heckel system.
b) Alternate: The alternate fingering system is called the French or Conservatory system. 2) Pancake Key
The pancake key automatically closes the whisper key pad. 3) Whisper Key
The whisper key itself is required to be closed for all notes from F – ab 4) Half Hole
a) Notes: Low F#, G, G#. b) Oboe vs. Bassoon
i. On oboe there is a plateau key with a vented hole in it that creates the half-hole. ii. On bassoon, the player must close only half the hole with his/her finger.
c) “Doctoring” i. The principle note that may need doctoring on bassoon is third space Eb.
ii. Simply adding the left little finger Eb or Db may help. Miscellaneous 1) Clefs
a) Bass b) Tenor
2) Bocal
The #2 bocal is the standard size bocal for bassoonists.