wiring guide - honeywelluk.com · wiring guide issue 17 home. contents ... all wiring must be in...
TRANSCRIPT

Wiring GuideIssue 17
Home

ContentsSection Title Page
Introduction /Contact us/Wiring Notes 3 - 4
Wiring plans Sundial S Plan 5 -7 Sundial S Plan Plus 8 Sundial Y Plan 9 - 11 Sundial C Plan 12 - 13 Sundial C Plan Plus 14 Sundial W Plan 15 Smart Fit 16 - 17
Wiring Guides Boiler Wiring 18 Programmer Wiring 19 Valve Wiring 20 Frost Thermostats 21
Fault finding Wired Sundial Y Plan 22 - 23 Wired Sundial S & S Plan Plus 24 – 25 Wired Sundial C Plan 26 – 27 Wired Sundial W Plan 28 – 29 Boiler Plus 29 Wireless Room Thermostat Fault Finding 30 Wiring Centre 31 Re-binding of wireless products 32 – 34 OpenTherm 34
Other information Training and further information 35
These wiring diagrams are for guidance only and at the time of publication represent the latest information available to us from other manufacturers. Honeywell reserve the right at any time and without notice to change any product, specification or any other information contained in this publication and cannot accept any responsibility for loss or damage arising out of any errors that may inadvertently be contained herein.
Whilst Honeywell takes all reasonably practical steps to design and manufacture its products to comply with the requirements of the Health and Safety at Work Act 1974, all products must be properly used and purchasers are reminded that their obligations under the Act are to ensure that the installation and operation of such products at a place of work should be safe and without risk to them.

Honeywell has been manufacturing heating controls for over 100 years
and is the UK leader for quality, efficiency and reliability.
This book contains wiring advice to assist with installing Honeywell
heating controls in a variety of systems. Our range includes many
wired and wireless models and this guide will help you complete the required wiring of our range
of timers; programmers and thermostats.
All wiring should be carried out by a competent installer or electrician.
Contact Us Visit our Web site at www.honeywelluk.com
Installer Training Tel: 01344 656352Email: [email protected]
Email: [email protected] Web: www.honeywelluk.com
Literature Our literature can be downloaded from www.honeywelluk.com
Technical SupportPhone: Contact our dedicated Technical support line on 0300 130 1299 and select Option 2 Email: [email protected] Web: www.honeywelluk.com (see Support section)
Any boiler. Any systemOur Heating controls are compatible with any boiler and any system including 24–230V on/off and OpenTherm® appliances such as gas & oil boilers, combi boilers and heat pumps.
The wireless versions also control zone valve applications that provide time control of stored domestic hot water and two heating zone applications (S Plan Plus).
ALL OF OUR PROGRAMMABLETHERMOSTATS ARE BOILER
PLUS COMPLIANT
Honeywelluk.com/boilerplus
3

The Sundial Plan diagrams in this guide are designed for ease of wiring to a 10 way junction box (Honeywell part number 42002116-001). Where three plans are illustrated there is one for wired, wireless and wireless enabled controls.
Connect the controls, pump, boiler and 230 Volt fused supply to the junction box terminals indicated by the arrows in the diagrams next to each control, other electrical device or circuit. These diagrams should be read in conjunction with product installation instructions.
A list of boilers can be found on page 16. Boilers with built in programmers must be wired in accordance with the manufacturers instructions.
ALL WIRING MUST BE IN ACCORDANCE WITH IEE & BUILDING REGULATIONS AND IN SOME CASES, NOTIFIABLE TO BUILDING CONTROL.
A list of programmers can be found on page 19. The room thermostat and programmer are for use with fixed wiring only; the cylinder thermostat may be used with fixed wiring or flexible cable; the motorised valves are supplied fitted with a one metre length of heat resistant cable.
A switch (having contact separation of at least 3mm in all poles) must be incorporated in the fixed wiring as a means of disconnecting the mains supply.
The heating system must be appropriately fused for attached appliances. The diagrams refer only to 3 amp fuses for gas appliances throughout. Use a 5 amp fuse for oil where appropriate. The T6360B room thermostat, L641A cylinder thermostat and Honeywell range of programmers are Class II (double insulated) devices. Earth terminals, where provided, are for earth parking purposes only. All earth conductors inside the programmer and room thermostat must be appropriately sleeved. The zone valves are Class I devices and must be connected to a suitable earth.
System wiring notes
10 way junction box 42002116-001
4

L N
230V50Hz
3A RATED
ST9400A/C
V4043HZONE VALVE
HTG
V4043HZONE VALVE
HW
MOTOR
GREY
GREY
BROW
N
BROW
N
ORAN
GE
ORAN
GE
BLUE
BLUE
G/YELLOW
G/YE
LLOW
1 C
L641ACYLINDER
STAT.
MOTOR
BOILER
N LPUMP
1 2 3 4 5 6 7 8 9 10
LN
HW HTG
LN
HW HTG L
N
2 1
T6360BROOM STAT.
3
L N
230V50Hz
3A RATED
V4043HZONE VALVE
HTG
V4043HZONE VALVE
DHW
E
MOTOR
GREY
GREY
BROW
N
BROW
N
ORAN
GE
ORAN
GE
BLUE
BLUE
G/YELLOW
G/YE
LLOW
2 1
1 C
T6360BROOM STAT. L641A
CYLINDERSTAT.3
MOTOR
BOILER
N LPUMP
1 2 3 4 5 6
L PL SL
N
LNE
HWHTG
ST9400PROGRAMMER
7 8 9 10
If using a 6 wire or 1” BSP V4043H on either circuit, the white wire is not needed and must be made electrically safe.
Fully Pumped System only
For list of central heating boilers to attach to this circuit - see page 18.For list of programmers to attach to this circuit - see page 19.When circuit is wired as above: Completed wiring will be as line drawing below.
Wired
For Frost Protection information - see page 21
Note:1. It is recommended that either the 10
way junction box or Sundial Wiring Centre should be used to ensure first time, fault free wiring.
2. If using the V4043H1080 (1” BSP) or V4043H1106 (28mm), the white wire must be electrically isolated.3. For wiring other room thermostats see above**.
Pump overrun
10 way junction box. Honeywell part no.:
42002116-001
Sundial S Plan
5

L N
230V50Hz
3A RATED
V4043HZONE VALVE
HTG
V4043HZONE VALVE
DHW
E
MOTOR
GREY
GREY
BROW
N
BROW
N
ORAN
GE
ORAN
GE
BLUE
BLUE
G/YELLOW
G/YE
LLOW
2 1
1 C
T6360BROOM STAT. L641A
CYLINDERSTAT.3
MOTOR
BOILER
N LPUMP
1 2 3 4 5 6
L PL SL
N
LNE
HWHTG
ST9400PROGRAMMER
7 8 9 10
L N
230V50Hz
3A RATED
ST9400A/C
V4043HZONE VALVE
HTG
V4043HZONE VALVE
HW
MOTOR
GREY
GREY
BROW
N
BROW
N
ORAN
GE
ORAN
GE
BLUE
BLUE
G/YELLOW
G/YE
LLOW
1 C
L641ACYLINDER
STAT.
MOTOR
BOILER
N LPUMP
1 2 3 4 5 6 7 8 9 10
L
N
RECEIVERBDR91
LN A B
LN
34
L N
230V50Hz
3A RATED
ST9400A/C
V4043HZONE VALVE
HTG
V4043HZONE VALVE
HW
MOTOR
GREY
GREY
BROW
N
BROW
N
ORAN
GE
ORAN
GE
BLUE
BLUE
G/YELLOW
G/YE
LLOW
1 C
L641ACYLINDER
STAT.
MOTOR
BOILER
N LPUMP
1 2 3 4 5 6 7 8 9 10
LN
HW HTG
LN
HW L
N
RECEIVER
LN A B
LINK
Note:1. It is recommended that either the 10 way
junction box or Sundial Wiring Centre should be used to ensure first time, fault free wiring.
2. If using the V4043H1080 (1” BSP) or V4043H1106 (28mm), the white wire
must be electrically isolated.3. The same terminal numbers are used on the receiver for both the DT92E and Y6630D wireless room thermostats.
Sundial S Plan Wireless room thermostat
Sundial S Plan Wireless programmable room thermostat
L N
230V50Hz
3A RATED
V4043HZONE VALVE
HTG
V4043HZONE VALVE
DHW
E
MOTOR
GREY
GREY
BROW
N
BROW
N
ORAN
GE
ORAN
GE
BLUE
BLUE
G/YELLOW
G/YE
LLOW
2 1
1 C
T6360BROOM STAT. L641A
CYLINDERSTAT.3
MOTOR
BOILER
N LPUMP
1 2 3 4 5 6
L PL SL
N
LNE
HWHTG
ST9400PROGRAMMER
7 8 9 10T series programmable
thermostats
For Frost Protection information - see page 21
DT92E wireless room thermostat
Y87RF room thermostat
Pump overrun
Pump overrun
6

L N
230V50Hz
3A RATED
V4043HZONE VALVE
HTG
V4043HZONE VALVE
HW
MOTOR
GREY
GREY
BROW
N
BROW
N
ORAN
GE
ORAN
GE
BLUE
BLUE
G/YELLOW
G/YE
LLOW
1 C
L641ACYLINDER
STAT.
MOTOR
BOILER
N LPUMP
LINK
1 2 3 4 5 6 7 8 9 10
L
N
LN
BE
T6R-HW RECIEVER(LINK L TO A&D INTERNALLY)
L N
230V50Hz
3A RATED
V4043HZONE VALVE
HTG
V4043HZONE VALVE
DHW
E
MOTOR
GREY
GREY
BROW
N
BROW
N
ORAN
GE
ORAN
GE
BLUE
BLUE
G/YELLOW
G/YE
LLOW
2 1
1 C
T6360BROOM STAT. L641A
CYLINDERSTAT.3
MOTOR
BOILER
N LPUMP
1 2 3 4 5 6
L PL SL
N
LNE
HWHTG
ST9400PROGRAMMER
7 8 9 10
L N
230V50Hz
3A RATED
V4043HZONE VALVE
HTG
V4043HZONE VALVE
HW
MOTOR
GREY
GREY
BROW
N
BROW
N
ORAN
GE
ORAN
GE
BLUE
BLUE
G/YELLOW
G/YE
LLOW
1 C
L641ACYLINDER
STAT.
MOTOR
BOILER
N LPUMP
LINK
1 2 3 4 5 6 7 8 9 10
L
N
LN
34
ST9420PROGRAMMER
Sundial S Plan Wireless enabled room thermostat (Sundial RF2 Pack 2)
DT92E wireless room thermostat
ST9420 programmer
Pump overrun
L N
230V50Hz
3A RATED
V4043HZONE VALVE
HTG
V4043HZONE VALVE
DHW
E
MOTOR
GREY
GREY
BROW
N
BROW
N
ORAN
GE
ORAN
GE
BLUE
BLUE
G/YELLOW
G/YE
LLOW
2 1
1 C
T6360BROOM STAT. L641A
CYLINDERSTAT.3
MOTOR
BOILER
N LPUMP
1 2 3 4 5 6
L PL SL
N
LNE
HWHTG
ST9400PROGRAMMER
7 8 9 10
Note:1. It is recommended that either the 10 way junction box or Sundial Wiring Centre should be used to ensure first time, fault free wiring.2. If using the V4043H1080 (1” BSP) or
V4043H1106 (28mm), the white wire must be electrically isolated.
3. If replacing an old wired thermostat remove cabling and add a link between terminals 4 and 5 as shown.
Sundial S Plan T6R-HW smart thermostat with timed hot water control
T6-HW Programmable Thermostat
Pump overrun
Note:1. It is recommended that either the 10 way junction box or Sundial Wiring Centre should be used to ensure first time, fault free wiring.2. If using the V4043H1080 (1” BSP) or
V4043H1106 (28mm), the white wire must be electrically isolated.
3. If replacing an old wired thermostat remove cabling and add a link between terminals 4 and 5 as shown.
7

A BL L D EN
RECEIVERT-HW
V4043HZONE 2
HTG
GY OBL BRGRGY OBL BRGRGY OBL BRGR
BOILER
L
N
L N
230V50Hz
3A RATED
V4043HZONE 1
HTG
V4043HHOT WATER
GREY
BROW
N
ORANGE
BLUE
G/YE
LLOW
A BL LN
N LPUMP
C 1 2CYLINDERRECEIVER
T6
1 2 3 4 5 6 7 8 9 10
L N
230V50Hz
3A RATED
V4043HZONE VALVE
HTG
V4043HZONE VALVE
DHW
E
MOTOR
GREY
GREY
BROW
N
BROW
N
ORAN
GE
ORAN
GE
BLUE
BLUE
G/YELLOW
G/YE
LLOW
2 1
1 C
T6360BROOM STAT. L641A
CYLINDERSTAT.3
MOTOR
BOILER
N LPUMP
1 2 3 4 5 6
L PL SL
N
LNE
HWHTG
ST9400PROGRAMMER
7 8 9 10
L N
230V50Hz
3A RATED
V4043HZONE VALVE
HTG
V4043HZONE VALVE
DHW
E
MOTOR
GREY
GREY
BROW
N
BROW
N
ORAN
GE
ORAN
GE
BLUE
BLUE
G/YELLOW
G/YE
LLOW
2 1
1 C
T6360BROOM STAT. L641A
CYLINDERSTAT.3
MOTOR
BOILER
N LPUMP
1 2 3 4 5 6
L PL SL
N
LNE
HWHTG
ST9400PROGRAMMER
7 8 9 10
Note:1. It is recommended that either the 10 way junction box or Sundial Wiring Centre should be used to ensure first time, fault free wiring.2. If using the V4043H1080 (1” BSP)
or V4043H1106 (28mm), the white wire must be electrically isolated.3. For wiring other room thermostats see above**.
Sundial S Plan Plus
Sundial S Plan Plus T series wireless relay
For Frost Protection information - see page 21
Pump overrun
Pump overrun
L N
230V50Hz
3A RATED
ST9400A/C
V4043HZONE VALVE
HTG1
V4043HZONE VALVE
HW
MOTOR
GREY
GREY
GREY
BROW
N
BROW
NBROW
N
ORAN
GE
ORAN
GE
ORAN
GE
BLUE
BLUE BLUE
G/YE
LLOW
G/YE
LLOW
G/YE
LLOW
2 11 C
A B
T6360BROOM STAT.
L641ACYLINDER
STAT.
CM900 SERIESPROGRAMMABLE
STAT.
3
MOTOR
V4043HZONE VALVE
HTG2
MOTOR
BOILER
N LPUMP
1 2 3 4 5 6 7 8 9 10
LN
HW HTG
LN
L
N
HW HTG
Note:1. It is recommended that either the
10 way junction box or Sundial Wiring Centre should
be used to ensure first time, fault free wiring.2. If using the V4043H1080 (1” BSP) or V4043H1106 (28mm), the white wire must be electrically isolated.3. For wiring other room thermostats see above**.
8

L N
230V50Hz
3A RATED
V4043HZONE VALVE
HTG
V4043HZONE VALVE
DHW
E
MOTOR
GREY
GREY
BROW
N
BROW
N
ORAN
GE
ORAN
GE
BLUE
BLUE
G/YELLOW
G/YE
LLOW
2 1
1 C
T6360BROOM STAT. L641A
CYLINDERSTAT.3
MOTOR
BOILER
N LPUMP
1 2 3 4 5 6
L PL SL
N
LNE
HWHTG
ST9400PROGRAMMER
7 8 9 10
Fully Pumped System only
For list of central heating boilers to attach to this circuit - see page 18.For list of programmers to attach to this circuit - see page 19.When circuit is wired as above: Completed wiring will be as line drawing below.
Wired
For Frost Protection information - see page 21
Note:1. It is recommended that either the
10 way junction box or Sundial Wiring Centre should be used to ensure first time, fault free wiring.
2. For wiring other room thermostats see above**.
Pump overrun
10 way junction box. Honeywell part no.:
42002116-001
Sundial Y Plan
L N
230V50Hz
3A RATED
ST9400A/C
GREY
WHI
TE
ORAN
GE
BLUE
G/YE
LLOW
2 1 2C
T6360BROOM STAT.
L641ACYLINDER
STAT.
V4073AMID POSITION
ZONE VALVE
31
BOILER
N LPUMP
1 2 3 4 5 6 7 8 9 10
LN
HW O
NHW
OFF
HTG L
N
9

L N
230V50Hz
3A RATED
GREY
WHI
TE
ORAN
GE
BLUE
G/YE
LLOW
2C
L641ACYLINDER
STAT.
V4073AMID POSITION
ZONE VALVE
1
1 2 3 4 5 6 7 8 9 10
RECEIVER
LN A B
ST9100A/C
LN
HW O
NHW
OFF
BOILER
N LPUMP
L
N
L N
230V50Hz
3A RATED
V4043HZONE VALVE
HTG
V4043HZONE VALVE
DHW
E
MOTOR
GREY
GREY
BROW
N
BROW
N
ORAN
GE
ORAN
GE
BLUE
BLUE
G/YELLOW
G/YE
LLOW
2 1
1 C
T6360BROOM STAT. L641A
CYLINDERSTAT.3
MOTOR
BOILER
N LPUMP
1 2 3 4 5 6
L PL SL
N
LNE
HWHTG
ST9400PROGRAMMER
7 8 9 10
Note:1. It is recommended that either the 10
way junction box or Sundial Wiring Centre should be used to ensure first time, fault free wiring.
2. If using the V4043H1080 (1” BSP) or V4043H1106 (28mm), the white wire
must be electrically isolated.
Sundial Y Plan Wireless room thermostat
Sundial Y Plan Wireless programmable room
L N
230V50Hz
3A RATED
V4043HZONE VALVE
HTG
V4043HZONE VALVE
DHW
E
MOTOR
GREY
GREY
BROW
N
BROW
N
ORAN
GE
ORAN
GE
BLUE
BLUE
G/YELLOW
G/YE
LLOW
2 1
1 C
T6360BROOM STAT. L641A
CYLINDERSTAT.3
MOTOR
BOILER
N LPUMP
1 2 3 4 5 6
L PL SL
N
LNE
HWHTG
ST9400PROGRAMMER
7 8 9 10
T series programmable thermostats
For Frost Protection information - see page 21
DT92E wireless room thermostat
Y87RF room thermostat
Pump overrun
Pump overrun
L N
230V50Hz
3A RATED
GREY
WHI
TE
ORAN
GE
BLUE
G/YE
LLOW
2C
L641ACYLINDER
STAT.
V4073AMID POSITION
ZONE VALVE
1
1 2 3 4 5 6 7 8 9 10
RECEIVERBDR91
LN A B
BOILER
N LPUMP
L
N
ST9100A/CLN
34
Note:1. It is recommended that either the 10
way junction box or Sundial Wiring Centre should be used to ensure first time, fault free wiring.
2. If using the V4043H1080 (1” BSP) or V4043H1106 (28mm),
the white wire must be electrically isolated.
10

L N
230V50Hz
3A RATED
V4043HZONE VALVE
HTG
V4043HZONE VALVE
DHW
E
MOTOR
GREY
GREY
BROW
N
BROW
N
ORAN
GE
ORAN
GE
BLUE
BLUE
G/YELLOW
G/YE
LLOW
2 1
1 C
T6360BROOM STAT. L641A
CYLINDERSTAT.3
MOTOR
BOILER
N LPUMP
1 2 3 4 5 6
L PL SL
N
LNE
HWHTG
ST9400PROGRAMMER
7 8 9 10
L N
230V50Hz
3A RATED
V4043HZONE VALVE
HTG
V4043HZONE VALVE
DHW
E
MOTOR
GREY
GREY
BROW
N
BROW
N
ORAN
GE
ORAN
GE
BLUE
BLUE
G/YELLOW
G/YE
LLOW
2 1
1 C
T6360BROOM STAT. L641A
CYLINDERSTAT.3
MOTOR
BOILER
N LPUMP
1 2 3 4 5 6
L PL SL
N
LNE
HWHTG
ST9400PROGRAMMER
7 8 9 10
Sundial Y Plan Wireless enabled room thermostat (Sundial RF2 Pack 2)
Sundial Y Plan T6R-HW thermostat with timed hot water control
DT92E wireless room thermostat
Pump overrun
Pump overrun
LN
134
ST9100A/CPROGRAMMER
L N
230V50Hz
3A RATED
GREY
WHI
TE
ORAN
GE
BLUE
G/YE
LLOW
2C
L641ACYLINDER
STAT.
V4073AMID POSITION
ZONE VALVE
1
1 2 3 4 5 6 7 8 9 10
BOILER
N LPUMP
L
N
LN
134
ST9100A/CPROGRAMMER
L N
230V50Hz
3A RATED
GREY
WHI
TE
ORAN
GE
BLUE
G/YE
LLOW
2C
L641ACYLINDER
STAT.
V4073AMID POSITION
ZONE VALVE
1
1 2 3 4 5 6 7 8 9 10
BOILER
N LPUMP
L
N
Note:1. It is recommended that either the
10 way junction box or Sundial Wiring Centre should be used to ensure first time, fault free wiring.
Note:1. It is recommended that either the
10 way junction box or Sundial Wiring Centre should be used to ensure first time, fault free wiring.
ST9420 programmer
T6-HW Programmable Thermostat
11

L N
230V50Hz
3A RATED
ST9400A/C
V4043H28mm
ZONE VALVE
GREY
BROW
N ORAN
GE
BLUE
G/YELLOW
WHITELINK
2 1 1 C
T6360BROOM STAT.
L641ACYLINDER
STAT.
3
MOTOR
BOILER
N LPUMP
1 2 3 4 5 6 7 8 9 10
LN
HW HTG
LN
HW HTG L
N
Link terminals 5-9 in the 10 way junction box. This plan does not comply with current to modern building regulations — we recommend upgrading the control system for either a S Plan or Y Plan system.
For list of central heating boilers to attach to this circuit - see page 18.For list of programmers to attach to this circuit - see page 19.When circuit is wired as above: Completed wiring will be as line drawing below.
For Frost Protection information - see page 21
Note:1. It is recommended that either the 10
way junction box or Sundial Wiring Centre should be used to ensure first time, fault free wiring.
2. For wiring other room thermostats see above**.
10 way junction box. Honeywell part no.:
42002116-001
Sundial C Plan Gravity hot water, pumped central heating
12

L N
230V50Hz
3A RATED
ST9400A/C
V4043H28mm
ZONE VALVE
GREY
BROW
N ORAN
GE
BLUE
G/YELLOW
WHITELINK
C1
L641ACYLINDER
STAT.
MOTOR
BOILER
N LPUMP
1 2 3 4 5 6 7 8 9 10
LN
HW HTG
LN
HW HTG L
N
RECEIVERBDR91
LN A B
This plan does not comply with current modern building regulations — we recommend replacing the control system for either a S Plan or Y Plan system.
Note:1. It is recommended that either the 10
way junction box or Sundial Wiring Centre should be used to ensure first time, fault free wiring.
2. The same terminal numbers are used on the reciver for both the DT92E and Y6630D wireless room thermostats.
Sundial C Plan Wireless room thermostat
Sundial C Plan Wireless enabled room thermostat
For Frost Protection information - see page 21
DT92E wireless room thermostat
Y87RF room thermostat
L N
230V50Hz
3A RATED
V4043H28mm
ZONE VALVE
GREY
BROW
N ORAN
GE
BLUE
G/YELLOW
WHITELINK
C1
L641ACYLINDER
STAT.
MOTOR
BOILER
N LPUMP
1 2 3 4 5 6 7 8 9 10
L
N
LN
34
ST9100A/CPROGRAMMER
Note:1. It is recommended that either the 10
way junction box or Sundial Wiring Centre should be used to ensure first time, fault free wiring.
2. The same terminal numbers are used on the reciver for both the DT92E and Y6630D wireless room thermostats.
DT92E wireless room thermostat
ST9100A/C programmer
13

L N
230V50Hz
3A RATED
ST9400A/C
V4043H28mm
ZONE VALVEHW
V4043H22mm
ZONE VALVEHTG
GREYGR
EY
BROW
N
BROW
N
ORAN
GE
ORAN
GE
BLUE
BLUE
G/YELLOW
G/YE
LLOW
WHITE
2 1
C1
T6360BROOM STAT.
L641ACYLINDER
STAT.3
MOTOR
BOILER
N LPUMP
1 2 3 4 5 6 7 8 9 10
LN
HW HTG
LN
HW HTG L
N
MOTOR
For list of central heating boilers to attach to this circuit - see page 16.For list of programmers to attach to this circuit - see page 17.When circuit is wired as above: Completed wiring will be as line drawing below.
For Frost Protection information - see page 21
Note:1. It is recommended that either the 10
way junction box or Sundial Wiring Centre should be used to ensure first time, fault free wiring.
2. For wiring other room thermostats see above**.
10 way junction box. Honeywell part no.:
42002116-001
Sundial C Plan Plus Gravity hot water, pumped central heating
14

L N
230V50Hz
3A RATED
V4043HZONE VALVE
HTG
V4043HZONE VALVE
DHW
E
MOTOR
GREY
GREY
BROW
N
BROW
N
ORAN
GE
ORAN
GE
BLUE
BLUE
G/YELLOW
G/YE
LLOW
2 1
1 C
T6360BROOM STAT. L641A
CYLINDERSTAT.3
MOTOR
BOILER
N LPUMP
1 2 3 4 5 6
L PL SL
N
LNE
HWHTG
ST9400PROGRAMMER
7 8 9 10
For list of central heating boilers to attach to this circuit - see page 18.For list of programmers to attach to this circuit - see page 19.When circuit is wired as above: Completed wiring will be as line drawing below.
For Frost Protection information - see page 21
Note:1. It is recommended that either the
10 way junction box or Sundial Wiring Centre should be used to ensure first time, fault free wiring.
2. For wiring other room thermostats see above**.
Pump overrun
10 way junction box. Honeywell part no.:
42002116-001
Sundial W Plan
Fully Pumped System only (hot water priority)
L N
230V50Hz
3A RATED BROW
NBLUE
G/YE
LLOW
2 1 2C
T6360BROOM STAT.
L641ACYLINDER
STAT.
V4044CDIVERTER
VALVE
31
1 2 3 4 5 6 7 8 9 10
ST9400A/C
LN
HW HTG
LN
HW HTG
N LPUMP
BOILER
L
N
15

Smartfit S Plan System connected for pump overrun boiler
Smartfit
A
B
S PLAN
CYLINDERSENSOR
3 PORTVALVE
(Y)
CHVALVE
(S)
HWVALVE
(S)
ACCESSORYPORT
FROSTSTAT
ROOMUNIT
Y PLAN
HWVALVE
CHVALVE
CYLINDERSENSOR
BOILER
N L
PUMP
LSL
PLN
ROOM UNIT
MAINS
BOILERPUM
P
N
L
LSL
PLN
N
L
MAINS
BOILERPUM
P
N
L
LSL
PLN
N
L
POLARITYFREE
L N
230V 50Hz3A RATED
A
B
S PLAN
CYLINDERSENSOR
3 PORTVALVE
(Y)
CHVALVE
(S)
HWVALVE
(S)
ACCESSORYPORT
Y PLAN
NOTUSED
3 - PORTVALVE
CYLINDERSENSOR
POLARITYFREE
BOILER
N L
PUMP
L
N
ROOM UNIT
MAINS
BOILERPUM
P
N
L
LSL
PLN
N
L
MAINS
BOILERPUM
P
N
L
LSL
PLN
N
L
L N
230V 50Hz3A RATED
FROSTSTAT
ROOMUNIT
Smartfit Y Plan System connected for basic boiler
16

Smartfit has now been discontinued. Replacement components are no longer available. The need to replace faulty components will mean the heating system will need upgrading to either a S Plan or Y Plan system. In the event of a problem, a fault code will be displayed on the Room Unit display. Before removing Base Unit cover, isolate mains.
Fault Codes
Smartfit
Fault Code Description ActionBlank display No display a) Switch system off then on again
b) Check that power is supplied to the base unitc) Check room unit connections at base unit and room unit
F1 Room Sensor Fault a) Replace room unitF2 S Plan - Central heating valve open circuit
Y Plan - 3 Port valve open circuita) Check valve connections at base unit and valveb) Check valve cable for open circuit c) Change actuator
F3 S Plan - Central heating valve short circuit Y Plan - 3 Port valve short circuit
a) Ensure valve is plugged into correct socket b) Check valve connections at base unit and valve c) Check valve cable for short circuitd) Change actuator
F4 S Plan - Central heating valve jammed Y Plan - 3 port valve jammed
a) Check actuator is fitted to the valveb) Check actuator drives valve full travel. If not, remove actuator and check actuator will drive for at least 10 seconds c) Use manual lever on actuator to free valve d) Check valve for blockage and clear
F5 S Plan - Hot water valve open circuit a) See F2 corrective actionF5 Y Plan - Incorrect system selection switch
positiona) Ensure system selection switch in base unit is set to Y Plan position*
F6 S Plan - Hot water valve short circuit a) See F3 corrective actionF6 Y Plan - Incorrect system selection switch
positiona) Ensure system selection switch in base unit is set to Y Plan position*
F7 S Plan - Hot water valve jammed a) See F4 corrective actionF7 Y Plan - Incorrect system selection switch
positiona) Ensure system selection switch in base unit is set to Y Plan position*
F8 Cylinder sensor short circuit a) Ensure cylinder sensor is plugged into correct socket b) Change cylinder sensor
F9 Cylinder sensor open circuit a) Ensure cylinder sensor is plugged into correct socket b) Change cylinder sensor
F10 Valve in cylinder sensor socket a) Reconnect valve to correct socketF11 Valve or cylinder sensor in accessory port a) Reconnect valve or cylinder sensor to correct socketF12 Communication fault between room unit
and base unita) Check room unit wiring b) Switch system off then on again c) Replace room unit d) Replace base unit
F13 Configuration fault a) Replace room unitF14 System selection switch fault a) Check system selection switch in base unit is set to Y or S Plan position
depending on the plan you have* b) Move switch across to plan you don’t want then back to correct plan* c) Replace base unit
F15 Plug in hot water socket a) Remove plug in hot water socket and connect to correct socketF16 Remote room unit fault a) Check remote room unit wiring
b) Replace remote room unitF17 Outside sensor short circuit a) Check outside sensor wiringF18 Outside sensor open circuit a) Check outside sensor wiringF19 to F22 Not used in S or Y Plan systems Not used in S or Y Plan systemsF23 No automatic time set (ATS) signal for
5 daysa) Check ATS module is attached correctly b) De-select and then re-select ATS in Installer Mode c) Refer to ATS installer guide for detailed fault finding
F24 Internal fault a) Replace room unit
*When changing the system selection switch the power must be off. 17

Terminal Block
Boiler Pump
L N E Pump Demand N ES Plan 9 10 3 2 1 9 10 2 3S Plan Plus
9 10 3 2 1 9 10 2 3
Y Plan 9 8 3 2 1 9 8 2 3C Plan 9 10 3 2 1 9 10 2 3C Plan Plus
9 10 3 2 1 9 10 2 3
W Plan 9 7 3 2 1 9 7 2 3Regular Boiler
Boiler Name
Boiler Pump
Alpha CD18R L N E PL N EInTec2 20/30SE
L N E
CD 13/18/24R
L N E PL N E
Baxi 200 N E N E400 N E N E LEcoblue Advance 13/16/19/21/25/30
N E N E L
Ecoblue 12/15/18/21/24
N E N E L
Ecoblue 12/15/18/21/24/28/32
L N E
Glow-worm
Energy X1-L X1-N X1-E N E LEnergy X1-L X1-N X1-EEasicom 3 X1-L X1-N X1-E N E LEasicom 3 X1-L X1-N X1-EUltimate 2 X1-L X1-N X1-E N E LUltimate 2 X1-L X1-N X1-E
Ideal Mexico HE L1 N E N E LLogic Heat L N E N E LLogic+ Heat L N E N E LLogic System
L N E
Logic+ System
L N E
Vogue System
L N E
Intergas HRE SB X2-2 X2-4 EHRE OV X2-2 X2-4 E
Potterton Assure N E N E LAssure L N EPromax N E N E LPromax L N E
Vaillant EcoFIT Pure X1-L X1-N X1-EEcoTec L N EEcoFIT Pure X1-L X1-N X1-EEcoTec L N E
Worcester 100-W X1-L X1-N X1-E N E LGreenstar CDi Classic
L N E
Greenstar i L N EGreenstar CDi Classic
L N E LZ / LN
E
Greenstar Ri L N E LP / LN
E
Greenstar Ri Compact
L N E Htg L/
N/E
Combi Boilers
Name Boiler Mains Volt Free
Alpha InTec2 20/30SE
E N L 1 2
InTec2 25/28XE
E N L 1 2
InTec 30/34C
E N L 1 2
InTec 30/40GS
E N L 1 2
Eco2 Plus E N L 1 2Baxi 100 E N L M1-1 M1-2
200 E N L X4-1 X4-2400 E N L X4-1 X4-2600 E N L M1-1 M1-2Duotec 24/28/33/40
E N L 1 2
EcoBlueAdvance 24/28/33/40
E N L M1-1 M1-2
Eco Blue Plus 24/28/33
E N L M1-1 M1-2
Platinum 24/28/33/40
E N L 1 2
Glow-worm
Easicom 3 E N L X1-L X1-RTBetacom 3 E N L X1-L X1-RTUltimate 2 E N L X1-L X1-RTEnergy E N L X1-L X1-RTLogic+ System
E N L 1 2
Ideal Logic Combi
E N L RS/T-1 RS/T-2
Logic+ Combi E N L RS/T-1 RS/T-2
Vogue Combi E N L RS/T-1 RS/T-2
Intergas Rapid E X2-4 X2-2 X2-1 X2-3 X4-6 X2-7Eco RF E X2-4 X2-2 X2-1 X2-3 X4-6 X2-7HRE E X2-4 X2-2 X2-1 X2-3 X4-6 X2-7
Potterton Assure E N L G1 G2 M1 M2Promax E N L G1 G2 M1 M2Promax Ultra E N L G1 G2 M1 M2
Vaillant EcoFITPure
E N L X1-L X1-RT
EcoTec E N L RT230 RT230 RT24 RT24Viessmann Vitodens 050 E N L Kit
7582789required
X9.1 X9.2
Vitodens 100 E N L X1-L X1-1Worcester Greenstar CDi
ClassicE N L LS LR
GreenstarHighflow CDi
E N L LS LR
Greenstar CDiCompact
E N L 230V Out-L
LR(HTG)
Greenstar SiClassic
E N L 230V Out-L
LR(HTG)
Greenstar i E N L 230V Out-L
LR(HTG)
Oil Boilers Boiler Name Boiler PumpBoulter Bonus L E N L N EEsse 60, 80, 100 10 E 3 L N EGrant Multi Pass
50/701 4 2 L N E
Potterton Statesman L E N L N ERayburn 368K Range BLK E N L L N E
Heatranger PL SWL E N L N E
Boiler Wiring
1. This information is only provided as a guide. The boiler manufacturer's installation instructions should always be consulted to confirm the correct connections.
2. Some boilers may require the removal of links and/or parameter changes. Please consult the boiler manufacturer's instructions for details.
3. For boilers not listed please consult the boiler manufacturer's instructions or their technical support dept.
Notes:
18

Programmer Wiring
CM900 & CM700 Replacement guide The CM range of Programmable thermostats is being superseded by newer, more technically advanced products—here’s a handy replacement guide
CM model Programming and Wiring
Replace with Reason Replace with Reason
CM701 One day wired version T4 1, 5/2 & 7 day wired model
T6 1, 5/2 & 7 day wired model
CM707 Seven day wired version T4 1, 5/2 & 7 day wired model
T6 1, 5/2 & 7 day wired model
CM721 One day wireless version T4R 5/2 & 7 day wireless model
T6R 1, 5/2 & 7 day wireless model
CM727 Seven day wireless version
T4R 5/2 & 7 day wireless model
T6R 5/2 & 7 day wireless model
CM901 One day wired version T4 1, 5/2 & 7 day wired model
T6 1, 5/2 & 7 day wired model
CM907 Seven day wireless version
T4 1, 5/2 & 7 day wired model
T6 1, 5/2 & 7 day wired model
CM921 One day wireless version T4R 5/2 & 7 day wireless model
T6R 1, 5/2 & 7 day wireless model
CM927 Seven day wireless version
T4R 5/2 & 7 day wireless model
T6R 1, 5/2 & 7 day wireless model
Models best for OpenTherm Boiler control
T4M 5/2 & 7 day wired model
T6R 1, 5/2 & 7 day wireless model or T6 wired model
CM921 Hot Water Control T6R-HW 1, 5/2 & 7 day wireless model
Connect onto terminal block numbers
123467
Programmer Interchange HW OFF
HW ON CH ON E N L
Honeywell ST9400, ST9440, ST9500 1 3 4 E N LHoneywell ST6450, ST6400, ST6300 1 3 4 E N LHoneywell ST6200 3 4 E N LHoneywell ST699B, ST799A, (Link L5-8) 7 6 3 N LHoneywell ST7100 7 6 5 E N LProgrammer in RF2 Pack 2 1 3 4 E N LProgrammer in RF2 Pack 3 1 3 4 E N LProgrammer in RF2 Pack 5 Help N L
Automatic energy efficiency
Automatic energy efficiency PLUS sm
art connected control
19

Replacement Wiring Guide for the old V4073A1005 to all new V4073A modelsThe old valve had 6 wires and a relay plugged into one end. When replacing this old model with the newer model, wire the new valve colour for colour apart from the Brown wire which is missing from the new valve.
{ON SINGLE CHANNEL TIME SWITCHESOmit Brown wire and reverse C & 1 on the cylinder thermostat.
ON DOUBLE CHANNEL PROGRAMMERS i.e. separate switching outputs for Heating and Hot Water circuits.Omit Brown wire and reverse C & 1 on the cylinder thermostat.
1. For programmers capable of selecting heating only: Run extra cable from the Grey wire on the valve to the HOT WATER OFF terminal on the programmer.
2. For programmers NOT capable of selecting heating only: This extra cable is NOT required and MUST NOT be included.
EXCEPT:1. ON RANDALL 4033 PROGRAMMERRemove wire that connects to cylinder thermostat 1 at JUNCTION BOX end and re-connect to Orange wire connection of mid-position valve. Disconnect wire at Terminal 1 on programmer, isolate and make safe. Add link in programmer back plate between Terminals 1 and 6. NB. If the Randall 4033 has been used as a junction box, any wires going into terminal 1 should be removed and re-connected into a spare terminal connector (not supplied by Honeywell).
2. ON SANGAMO 410 FORM 1 PROGRAMMERFollow instructions for Randall 4033, except on programmer base plate, disconnect wire on Terminal 3 and add link between 3 and 6 on baseplate of Programmer.
Valve Wiring
Programmer Interchange E N S/L HW ON
CH ON
HW OFF
Honeywell V4073A GY BL OR WH GRACL 679H340 GY BL OR WH GRACL 679B340 GY BL OR WH GRDanfoss/Randall DVM-3M GY BL OR WH GRDanfoss/Randall HSA3 GY BL OR WH GRDrayton Flowshare 2 GY BL OR WH GRGrasslin/Tower MP 22C GY BL OR WH GRLandis & Gyr MAV322 GY BL OR WH GRPegler/Sunvic SD2701 GY BL OR WH GRPegler/Sunvic SDV2211 GY BL OR WH GRPegler/Sunvic SD1701 GY BL OR BR GRPotterton/Myson PMV3 GY BL OR BR GRPotterton/Myson MSV322 BL OR WH GRSopac ZV20-EB GY BL RE WH GRSwitchmaster MIDI GY BL RE OR YE WHDanfoss Heatshare GY BL RE OR YE WH
Model E N S/L Motor PL
Honeywell V4043H GY BL OR BR GRACL 679H308-30L1 GY BL OR BR GRACL 679B308-30L1 GY BL BK BR WHDanfoss/Randall DVM-2C GY BL OR BR GRDanfoss/Randall HP2A BL OR BR GRDrayton GY BL OR BR GRLandis & Gyr ZAV222 GY BL OR BR GRPegler/Sunvic SZV 1212 BL OR BR GRPotterton/Myson PMV43 GY BL OR BR GRRandall HPA2 GY BL OR BR GRSopac ZV20-2-EB GY BL RE WH GRSwitchmaster Auto Z GY BL OR BR GRTower/Grasslin MV2-22C GY BL OR BR GR
Sunvic V*203 GY BL OR YE(White wire - make electrically safe) Connect Grey wire on V4043H to permanent live.
MOTORISED VALVE INTERCHANGEABILITY GUIDE
Add Link
GY = Green/YellowYE = Yellow
BK = BlackBL = Blue
BR = BrownRE = Red
OR = OrangeWH = White
GR = Grey
20

TO ROOMUNIT
FROSTPROTECTION
W4672A1009SMARTFIT BASE UNIT
ROOMUNIT
1 3
C 1
T8360B FROSTTHERMOSTAT
T8675A PIPETHERMOSTAT
1 3
1
2
CPERMANENTLIVE
T4360A1009FROST
THERMOSTAT
L641B1004PIPE
THERMOSTAT
V4043H28MM
ONTO 10-WAY JUNCTIONBOX, TERMINNAL...
NOT USED
C PLAN /C PLAN PLUSWHITE5
V4043HS PLAN /S PLAN PLUSBROWN5
V4073AY PLAN
WHITE5
BOILER
W PLANLIVE TO BOILER & PUMP7
T4360 Frost Thermostat and L641B Pipe ThermostatTo reduce the risk of frozen pipework during severe cold weather, Frost Protection can be installed to protect either the whole central heating system or the boiler and localised pipework. These controls are designed to override the Programmer and Room Thermostat controls whether wired, wireless or wireless enabled.
If a Frost Thermostat only is to be installed to protect the whole central heating system, it must be sited where a rise and fall in heated air temperature can be detected, i.e. in a room with a radiator, and set to 12-16°C. This function is built in to programmable thermostats and Sundial RF².
If the Frost Thermostat is installed outside the heated area, i.e. in a boiler room, garage or attic space, it is strongly recommended that a Pipe Thermostat be used as well to ensure that overheating of the property does not occur. The Frost Thermostat should be set to 5°C. The Pipe Thermostat will sense a rise in water temperature in the pipework and then switch the system off. It should be sited on the boiler return, set at 25°C and wired as below.
Mains Voltage Frost Kit: K42008628-001T4360 Frost Thermostat and L641B Low-Limit Pipe Thermostat
(Recommend 1mm2 240Vac rated cable)
Smartfit Frost Kit: K42009706-001(this is obsolete and no longer available)T8630B Frost Thermostat and T8675A
Low-Limit Pipe Thermostat
(Recommend 2-core doorbell 10Vdc rated wire)
(Mains Voltage Frost Kit cannot be used on Smartfit)
When a Frost Thermostat is installed on a central heating system, the fused spur should only be switched off for servicing and maintenance. If the heating system is to be switched off for any other reason, eg. holiday, then switching must only be carried out at the Programmer or Timeswitch, otherwise the Frost Protection is disabled.
Frost Thermostats
21

The table opposite gives guidance on a quick electrical check for installed wired Sundial Y Plans to help in commissioning and to pin-point the source of any electrical problems.Remember the Golden Rule when you have a problem. First of all check your wiring. Only start suspecting faulty components after you are satisfied all wiring is correct.
The following notes will help to identify faulty components.
Cylinder StatFirst of all, make sure you have wired to the correct terminals.
Terminal C (common) is the Left Hand terminal.Terminal 1 is the Middle terminal. Terminal 2 is the Right Hand terminal.
Suspect the cylinder thermostat is faulty only if Terminal 1 does not become live when calling for Hot Water, or Terminal 2 does not become live when satisfied. (Make sure that Terminal C is live in both cases). While checking, disconnect Terminals 1 and 2 to prevent false readings due to backfeed.
Room Stat1) Remove wire from Terminal 3.2) Live to Terminal 1.3) Turn stat to call, if no live on 3 then faulty.
Suspect the room stat is faulty only if Terminal 3 is not live when calling for heat. (Make sure Terminal 1 is live). While checking, disconnect wiring from Terminal 3 to prevent false readings due to backfeed.
Mid-Position ValveSuspect the V4073A valve is faulty only if the valve does not operate as specified in the following checks (these should be done in order 1, 2, 3, 4, 5 and 6).
Valve open for Heating only1. Switch off mains supply. Disconnect Grey
and White wires from appropriate junction box terminals. Reconnect both Grey and White wires to permanent live terminal in junction box.
2. Switch on mains supply. Valve motor should now move to fully open heating Port A. The motor should stop automatically when Port A is open, and stay in this position as long as power is applied to White and Grey wires. When Port A is fully open, the Orange wire becomes live, to start pump and boiler.
Double check by feeling that Port A outlet is getting progressively warmer.
Valve open for DHW only3. Switch off mains supply. The valve should now
automatically return to open DHW Port B and close Heating Port A.
4. Isolate Grey and White wires and make safe. Remove cylinder stat wire from Terminal 6 in junction box and connect to permanent live. Switch on fused spur, cylinder thermostat must be set to call for heat, pump and boiler should start.
Valve open for both DHW and Heating5. Switch off mains supply. Replace cylinder stat
wire to Terminal 6. Isolate and make safe Grey wire and connect White wire to permanent live. Switch on mains supply, motor should now move to mid-position and stop automatically. Cylinder thermostat must be set to call for heat. Both ports A & B are now open for Hot Water and Heating. Boiler and pump should start.
Double check by feeling that pipe outlets from ports A & B become progressively warmer.6. Switch off mains supply, reconnect White and
Grey wires to junction box terminals. If this check completes satisfactorily, the problem is not the valve, but elsewhere in the circuit.
ProgrammerSuspect the programmer only:(a) After you have made sure that any links required
are in place,(b) After you have made sure that the Programmer
has power – to the correct terminal,(c) After you have made sure that the Programmer
timing is set up correctly (see individual Programmer User Guide as appropriate),
(d) If live does not appear at Heating ON Terminal when Heating only is selected on continuous or timed,
(e) If live does not appear at Hot Water ON Terminal when Hot Water only is selected on continuous or timed,
(f) If live does not appear on Hot Water OFF terminal with Hot Water OFF on programmer.
Sundial Y Plan
22

Sundial Y PlanProgrammer Switch Position
Heating only selected Hot Water only selected Hot Water and Heating selected
Programmer Live on both ‘CH ON’ & ‘HW OFF’ Terminals.
Live on ‘HW ON’ Terminal. Live on both ‘CH ON’ & ‘HW ON’ Terminals.
T6360B Room Thermostat
Set to call for Heat. Live on Terminals 1 & 3.
No live on any terminal. (See note 2 for Terminal 3).
Set to call for Heat. Live on Terminals 1 & 3.
L641A Cylinder Thermostat
Nominal 90 volts. Live on Terminals1 & 2 (Note Terminal 1 only becomes 240 volt live after V4073A valve opens and Boiler fires). (See notes below).
Set to call for Hot Water. Live on Terminals C & 1.(See note 2 for Terminal 2).
Set to call for Hot Water. Live on Terminals C & 1. (See note 2 for Terminal 2).
V4073A 3 Port Mid-Position Valve
Live on Grey, White and Orangewires.Valve opens to Port A for Central Heating (CH).
Live on Orange wire only (See note 2 for Grey and White wires) Valve not energised. Port B open for Domestic Hot Water(DHW).
Live on White wire and Orange wire. (See note 2 for Grey wire). Valve in mid position for CH and DHW.
Boiler and Pump Boiler and pump fired via live feed from Orange wire.
Boiler and pump fired via live feed from Terminal 1 on cylinder stat.
Boiler and pump fired via live feed from Terminal 1 on cylinder stat and Orange wire.
Notes:1. Any checks to be undertaken on electrical wiring must only be made by a suitably qualified electrician or
other competent person.2. Low A.C. voltage may appear on specified wire or terminals due to back feed from V4073A valve. If in doubt,
disconnect Grey or White wire as appropriate, or check with meter for full 240V.3. Blue wire on valve must be connected to neutral.4. Terminal 2 on the T6360B room thermostat must always be connected to neutral.5. Ensure that any links required in programmer are in place.6. Earth connection (Green/Yellow) must be made on valve.7. Earth connection not needed on room stat or cylinder stat.
SEE NOTES OPPOSITE IF YOU HAVE A PROBLEM
23

The table opposite gives guidance on a quick electrical check for installed wired Sundial S Plan and wired S Plan Plus to help in commissioning and to pin-point the source of any electrical problems. Remember the Golden Rule when you have a problem. First of all check your wiring. Only start suspecting faulty components after you are satisfied all wiring is correct.
The following notes will help to identify faulty components.
Cylinder StatFirst of all, make sure you have wired to the correct terminals.
Terminal C (common) is the Left Hand terminal.Terminal 1 is the Middle terminal. Terminal 2 is the Right Hand terminal.
Suspect the cylinder thermostat is faulty only if Terminal C not live when calling for Hot Water.
Room Stat1) Remove wire from Terminal 3.2) Live to Terminal 1.3) Turn stat to call, if no live on 3 then faulty.
Suspect the room stat is faulty only if Terminal 3 is not live when calling for heat. (Make sure Terminal 1 is live). While checking, disconnect wiring from Terminal 3 to prevent false readings due to backfeed.
Zone ValvesSuspect a motorised valve is faulty only:
1. If the motor fails to rotate with live applied to the Brown wire and neutral to the Blue wire. (Motor can be viewed with valve cover removed).
Note that the motor stops automatically when the valve is fully open and stays in this condition as long as live is applied to the Brown wire.
The valve automatically closes under spring return when live is removed from the Brown wire.
The Orange wire only becomes live after the valve has fully opened (Make sure the Grey wire is live).
3. If the boiler and pump continues to run when the cylinder stat and room stat is satisfied and the clock is in OFF position.
ProgrammerSuspect the programmer only:
(a) After you have made sure that any links required are in place.
(b) After you have made sure that the Programmer has power – to the correct Terminal.
(c) After you have made sure that the Programmer timing is set up correctly (see individual Programmer User Guide as appropriate).
(d) If live does not appear at Heating ON Terminal when Heating is selected on continuous or timed.
(e) If live does not appear at Hot Water ON Terminal when Hot Water only is selected on continuous or timed.
Sundial S Plan and S Plan Plus
24

Sundial S Plan and S Plan PlusProgrammer Switch Position
Heating only selected Hot Water only selected Hot Water and Heating selected
Programmer Live on both ‘CH ON’ Terminal. Live on ‘HW ON’ Terminal. Live on both ‘HW ON’ & ‘CH ON’ Terminals.
T6360B Room Thermostat
Set to call for Heat. Live on Terminals 1 & 3.
No live on any terminal. Set to call for Heat. Live on Terminals 1 & 3.
L641A Cylinder Thermostat
No live on any terminal Set to call for Hot Water. Live on Terminals C & 1.
Set to call for Hot Water. Live on Terminals C & 1.
V4043H Heating Zone Valve
Live on Brown, Grey and Orange wires.
Live on Grey and Orange wires. Live on Brown, Grey and Orange wires.
V4043H Hot Water Zone Valve
Live on Grey and Orange wires Live on Brown, Grey and Orange wires.
Live on Brown, Grey and Orange wires.
Boiler and Pump Boiler and pump fired via live feed from Orange wire.
Boiler and pump fired via live feed from Orange wire.
Boiler and pump fired via live feed from Orange wire.
Notes:1. Any checks to be undertaken on electrical wiring must only be made by a suitably qualified electrician or
other competent person.2. Grey wire on both Heating and Hot Water zone valves must be connected to permanent live.3. Blue wire on both Heating and Hot Water zone valves must be connected to neutral.4. Terminal 2 on the T6360B room thermostat must always be connected to neutral.5. Ensure that any links required in programmer are in place.6. Earth connection (Green/Yellow) must be made on valve.7. With 28mm or 1 inch V4043H valves the White wire is not used and must be made electrically safe.
SEE NOTES OPPOSITE IF YOU HAVE A PROBLEM
25

The table opposite gives guidance on a quick electrical check for installed wired Sundial C Plans to help in commissioning and to pin-point the source of any electrical problems.Remember the Golden Rule when you have a problem. First of all check your wiring. Only start suspecting faulty components after you are satisfied all wiring is correct.
The following notes will help to identify faulty components.
Cylinder StatFirst of all, make sure you have wired to the correct terminals.
Terminal C (common) is the Left Hand terminal.Terminal 1 is the Middle terminal. Terminal 2 is the Right Hand terminal.
Suspect the cylinder thermostat is faulty only if Terminal C is not live when calling for Hot Water.
Room Stat1) Remove wire from Terminal 3.2) Live to Terminal 1.3) Turn stat to call, if no live on 3 then faulty.
Suspect the room stat is faulty only if Terminal 3 is not live when calling for Heat. (Make sure Terminal 1 is live). While checking, disconnect wiring from Terminal 3 to prevent false readings due to backfeed.
Zone ValveSuspect the valve is faulty only:1. If the motor fails to rotate with live applied to the
Brown wire and neutral to the Blue wire. (Motor can be viewed with valve cover removed).
Note that the motor stops automatically when the valve is fully open and stays in this condition as long as live is applied to the Brown wire.
2. If the boiler continues to run when the cylinder stat and/or room stat is satisfied and/or the clock is in OFF position.
3. (a) SWITCH OFF mains supply. (b) Disconnect Brown wire to valve, and terminate
safely. (c) Disconnect White wire and re-connect to
permanent live terminal at junction box. (d) Disconnect pump live connection at junction
box and re-connect to permanent live terminal.
(e) SWITCH ON mains supply. (f) Valve should remain closed, Orange wire
should become live to fire boiler.
4. (a) SWITCH OFF mains supply. (b) Restore White wire and pump live connections
to original positions at junction box. (c) Connect Brown wire to permanent live
terminal at junction box. (d) Ensure Grey wire is connected to permanent
live. (e) SWITCH ON mains supply.
Valve should now motor open. When fully open, Orange wire should become live to fire Boiler.
SWITCH OFF mains supply. Restore Brown wire to original Terminal on junction box.
If these checks complete satisfactorily, the problem is not on valve but elsewhere in circuit.
Note that a V4043H1106 (28mm) or V4043H1080 (1 inch BSP) valve is required for the C Plan.
ProgrammerSuspect the programmer only:
(a) After you have made sure that any links required are in place.
(b) After you have made sure that the Programmer has power – to the correct terminal.
(c) After you have made sure that the Programmer timing is set up correctly (see individual Programmer User Guide as appropriate).
(d) If live does not appear at Heating ON Terminal when Heating only is selected on continuous or timed.
(e) If live does not appear at Hot Water ON Terminal when Hot Water only is selected on continuous or timed.
Sundial C Plan
26

Sundial C PlanProgrammer Switch Position
Heating only selected Hot Water only selected Hot Water and Heating selected
Programmer Live on ‘CH ON’ Terminal. Live on ‘HW ON’Terminal.
Live on both ‘HW ON’ & ‘CH ON’ Terminals.
T6360B Room Thermostat
Set to call for Heat. Live on Terminals 1 & 3.
No live on any terminal. Set to call for Heat. Live on Terminals 1 & 3.
L641A Cylinder Thermostat
No live on any Terminal. Set to call for Hot Water. Live on Terminals C & 1.
Set to call for Hot Water. Live on Terminals C & 1.
V4043H Hot Water Zone Valve
Live on Grey, White and Orangewires.
Live on Brown, Grey and Orange wires.
Live on Brown, White, Grey and Orange wires.
Boiler and Pump Boiler fired via Orange wire, room stat Terminal 3 runs pump.
Boiler fired via Orange wire. Boiler fired via Orange wire, room stat Terminal 3 runs pump.
Notes:1. Any checks to be undertaken on electrical wiring must only be made by a suitably qualified electrician or
other competent person.2. Grey wire on both Heating and Hot Water zone valves must be connected to permanent live.3. Blue wire on both Heating and Hot Water zone valves must be connected to neutral.4. Terminal 2 on the T6360B room thermostat must always be connected to neutral.5. Ensure that any links required in programmer are in place.6. Earth connection (Green/Yellow) must be made on valve.7. With 28mm or 1 inch V4043H valves the White wire is not used and must be made electrically safe.
SEE NOTES OPPOSITE IF YOU HAVE A PROBLEM
27
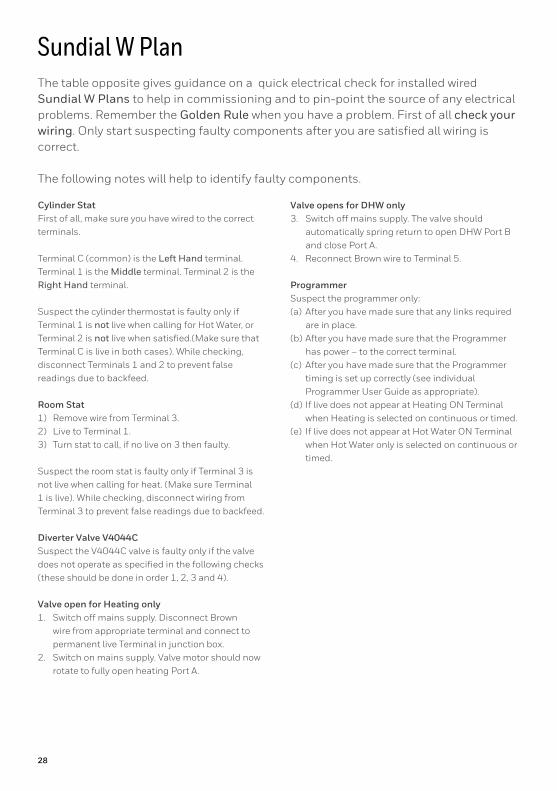
The table opposite gives guidance on a quick electrical check for installed wired Sundial W Plans to help in commissioning and to pin-point the source of any electrical problems. Remember the Golden Rule when you have a problem. First of all check your wiring. Only start suspecting faulty components after you are satisfied all wiring is correct.
The following notes will help to identify faulty components.
Cylinder StatFirst of all, make sure you have wired to the correct terminals.
Terminal C (common) is the Left Hand terminal.Terminal 1 is the Middle terminal. Terminal 2 is the Right Hand terminal.
Suspect the cylinder thermostat is faulty only if Terminal 1 is not live when calling for Hot Water, or Terminal 2 is not live when satisfied.(Make sure that Terminal C is live in both cases). While checking, disconnect Terminals 1 and 2 to prevent false readings due to backfeed.
Room Stat1) Remove wire from Terminal 3.2) Live to Terminal 1.3) Turn stat to call, if no live on 3 then faulty.
Suspect the room stat is faulty only if Terminal 3 is not live when calling for heat. (Make sure Terminal 1 is live). While checking, disconnect wiring from Terminal 3 to prevent false readings due to backfeed.
Diverter Valve V4044CSuspect the V4044C valve is faulty only if the valve does not operate as specified in the following checks (these should be done in order 1, 2, 3 and 4).
Valve open for Heating only1. Switch off mains supply. Disconnect Brown
wire from appropriate terminal and connect to permanent live Terminal in junction box.
2. Switch on mains supply. Valve motor should now rotate to fully open heating Port A.
Valve opens for DHW only3. Switch off mains supply. The valve should
automatically spring return to open DHW Port B and close Port A.
4. Reconnect Brown wire to Terminal 5.
ProgrammerSuspect the programmer only:(a) After you have made sure that any links required
are in place.(b) After you have made sure that the Programmer
has power – to the correct terminal.(c) After you have made sure that the Programmer
timing is set up correctly (see individual Programmer User Guide as appropriate).
(d) If live does not appear at Heating ON Terminal when Heating is selected on continuous or timed.
(e) If live does not appear at Hot Water ON Terminal when Hot Water only is selected on continuous or timed.
Sundial W Plan
28

Sundial W PlanProgrammer Switch Position
Hot Water only selected Hot Water and Heating selected
Programmer Live on ‘HW ON’Terminal.
Live on both ‘CH ON’ & ‘HW ON’ Terminals.
T6360B Room Thermostat
No live on any terminal. Set to call for Heat. Live on Terminals 1 & 3.
L641A Cylinder Thermostat
Set to call for Hot Water. Live on Terminals C & 1.
Set to call for Hot Water. Live on Terminals C & 1.
V4044C Diverter Valve
Valve not energised Port B open for Domestic Hot Water.
Live on Brown wire only. When D.H.W. satisfied.
Boiler and Pump Boiler and pump fired via live feed from Terminal C on cylinder stat.
Boiler and pump fired via live feed from Terminal C on cylinder stat and 3 on room stat.
Notes:1. Any checks to be undertaken on electrical wiring must only be made by a suitably qualified electrician or
other competent person.2. Blue wire on diverter valve must be connected to neutral.3. Terminal 2 on the T6360B room thermostat must always be connected to neutral.4. Ensure that any links required in programmer are in place.5. Earth connection (Green/Yellow) must be made on valve.
SEE NOTES OPPOSITE IF YOU HAVE A PROBLEM
All gas boilers in England must have ‘controls that programme the system to come on and off at set times, and set the temperature’. This is commonly known as boiler interlock.
Additionally, if you are fitting a gas combi boiler, you must fit at least one additional energy efficiency measure:• A heat flue recovery system OR• Weather compensation OR• Load compensation OR• Fit a Smart Control that provides with automation AND optimisation features
All Honeywell programmable thermostats are Boiler Plus Ready. For further information visit www.honeywelluk.com/boilerplus.
Boiler Plus
29

Symptom Cause Resolution
Steady red tight on wireless relay. Comms lost with all bound room units. Please check for posinioning of the room unit and the relay, eg not near other wireless devices or large metal objects. If the unit worked fine for some time then developed this issue please check for new items introruced into the vicinity and check batteries in room unit. If symptom repeats, conduct a signal strength check.
Slow Flashing red light on relay unit, (3 seconds on, 3 seconds off).
It is possible to bind up to 4 units to the relay. This signal indicates that one of these units has lost comms.
If there are supposed to be more than one unit communicating with the relay then check for positioning as above. If there is only one room unit then rebind making sure to delete all previous binding information as following guide.
Medium flashing red light on wireless relay (0.5 seconds on, 0.5 seconds off).
Wireless relay has been put into binding mode and may have had the previous binding deleted.
Re bind room thernostat to wireless relay (see followng guide).
Quick flashing red light on wireless relay (0.1 seconds on, 0.9 seconds off).
Wireless relay has had the previous binding deleted or is an unbound new unit.
Re bind room thernostat to wireless relay (see followng guide).
Any of the above with a steady green tight.
The above causes still apply but the green light indicates that one of the bound units is still operating correctly and the boiler is being fired.
Follow appropriate cure above.
Red led Constantly on and the green LED flashes once 0.1 sec on and 3 sec off.
The relay was left in binding mode and did not receive the binding message from the thermostat within 3 minutes.
Repeat binding process (see following guide).
Red led Constantly on and the green LED flashes twice 0.1 sec on and 3 sec off.
Miss bound or attempting to do something that is not possible.
Delete all binding and repeat following guide below. If symptom persists then please contact technical support for guidance on the application that is being attempted.
Red led Constantly on and the green LED flashes three times 0.1 sec on and 3 sec off.
Red led Constantly on and the green LED flashes four times 0.1 sec on and 3 sec off.
Red led Constantly on and the green LED flashes five times 0.1 sec on and 3 sec off.
If your heating is not responding to your wireless thermostat the first thing to check is to see if the thermostat is communicating with the wireless relay that is connected to the boiler. There are a few common symptoms and these can easily be checked. First check that the thermostat has fresh batteries and that they are correctly installed.
Locate the wireless relay box, this is probably mounted close to your boiler ot in the airing cupboard. It looks like this.
It has two small lights which display information about the operation of the heating system. The table below gives you information regarding what the lights mean.
Wireless Room Thermostat Fault Finding
30

Wireless Room Thermostat Fault Finding
COMPONENTS LAYOUT
A simple alternative to using this guide and a conventional junction box, is the Honeywell Sundial Plans Wiring Centre (Part number 42005748-001). This provides a clearly marked terminal block for each component in the system with each wire having its own terminal.
For frost protection connect the FROST THERMOSTAT T4360A as follows:
S PlanFrost thermostat Terminal 1 to HW OFF on programmer block. Frost thermostat Terminal 3 to WHITE on MID POS/HW VALVE terminal block.
Y PlanFrost thermostat Terminal 1 to GREY and frost thermostat Terminal 3 to BROWN on HTG VALVE terminal block.
C PlanFrost thermostat Terminal 1 to GREY and Frost thermostat Terminal 3 to ORANGE on HTG VALVE terminal block.
If using Programmer (not basic Time Clock) Cut link 1
FOR FULLY PUMPED SYSTEMSFOR S PLAN (two zone valves) Cut links L2 and L4.
If boiler requires pump overrun Cut link L3 also.If using a 28mm or 1” BSP V4043H the WHITE wire must be isolated and
made safe. Do not connect to a terminal.FOR Y PLAN (mid position valve) Cut links L4 and L5.
If boiler requires pump overrun Cut link L6 also.
FOR GRAVITY PRIMARY SYSTEMSFOR C PLAN (one 28mm zone valve) Cut links L2 and L3.
If Room Thermostat is not being used, link terminals 1 and 3 at the ROOM STAT connector block.
BOILER CONNECTIONS
Wiring Centre
LS/L
NE
P/L
Pump Overrun Boilers Wiring Centre Basic Boilers
Permanent Live
Switch Live
Neutral
Earth
Pump Live
Switch Live
Neutral
Earth
31

Rebinding the T6 series wireless thermostatThe Lyric T6R Smart Thermostat wireless thermostat comes pre-bound from the factory. The binding operation described below is only required if: The Lyric T6R thermostat or Receiver box is replaced. The Lyric T6R thermostat or Receiver box has incorrect or no binding data stored. The Thermostat will indicate the Alert message: NO RECEIVER BOX BINDING and the Receiver box status LED remains green blinking signifying that there is no communication from thermostat or the Receiver box status LED does not light up signifying that it is not bound.
To re-establish the binding between the wireless T6 series programmable thermostat, please follow these steps.
Re-Binding the BDR91 Wireless Receiver If you need to re-establish the binding relationship between a Honeywell wireless thermostat that uses the BDR91 Wireless Receiver, please follow the following instructions.
Preparing the BDR91 Wireless Receiver to re-accept the binding signal (this applies when working with all Honeywell thermostats).
Step 1 It is important to delete any previous binding from the relay memory before starting. On the BDR91 Wireless relay unit, press and hold the button wait until the red light starts to flash – continue holding until it changes to a fast flash then release.
Please note that the receiver box will exit binding mode after 3 minutes.
Re-binding of wireless products
STAGE 1 Press and hold for 15 secThe red light will flash on for 0.1 sec and be off for 0.9 sec
1
Reset
Status LED Button
1. Reset the receiver by using a paper clip to push the Rest button (a small hole on the side of the receiver box)
2. Put the Receiver box into binding mode by pressing the button for 3 seconds. The LED light in the button will flash amber
3. Enable binding in the thermostat: a) Enter the Advanced menu by pressing the menu button for 5 seconds b) Navigate to the Binding Screen c) Select Clear Binding and confirm d) Select Bind and the binding signal will be sent 3. When the binding is successful the Thermostat screen will show SUCCESS and
the receiver box LED light in the button will show green4. When the binding is not successful the Thermostat screen will show FAILED
32

STAGE 2 Press and hold for 5 secThe red light will flash on for 0.5 sec and be off for 0.5 sec
2Step 2 Press and hold the button again for 5 seconds (until the red LED blinks slowly). Then release. Now follow the steps to re-bind the specific Honeywell thermostat in the table below:
CMT900 & CMT700 range of Wireless Programmable Room Thermostats
DT92E Wireless Digital Room Thermostat
Move the room thermostat slider to the OFF (CMT900) position or press the off button (CMT700) and press the and buttons together along with the button. The unit will display “InSt” and ‘CONTROL BINDING’.
Press and hold the power button for 2 seconds to put the unit into standby.
Press the green button to send the binding signal out to the Relay Box. The red LED on the relay is switched off to confirm successful binding operation. If the red LED still flashes push the button again until binding is successful.
Press the up and down arrows together for 3 seconds – it should say INst.
Return the slider to AUTO (CMT900) or press the AUTO button (CMT700).
Press the down arrow – it should say COnt.
Press the up arrow three times – it should say CLr.
Follow appropriate cure above.
Press the power button once to clear any previous binding data.
Press the up arrow – it should say Cont.
Press the power button to send the binding signal to the wireless relay.
The screen will return to normal and the red light will disappear from the relay.
Press the power button for 5s and the screen will return to normal.
OKOKOK
OK
OK
33

Many Honeywell Programmable Thermostats provide OpenTherm control of applicable OpenTherm boilers. The following information should be considered when specifying these thermostats for OpenTherm Boilers.
OpenTherm Information
Y6630D Wireless Room Thermostat Y87RF Wireless Room Thermostat
Note The Y6630D uses the HC60 relay unit, but clearing the memory and putting the unit into listening mode is the same as the BDR91.
Take the front cover off of the thermostat.
Touch and hold on the left touch zone for approximately 10 seconds.
Press the “send” button (bottom right of the thermostat body).
The screen for binding the Boiler Relay is now displayed.
The red light on the receiver should disappear if it has been successful.
When the symbol ‘bo’ is flashing, briefly touch the left touch zone to send the binding signal, at which point the symbol will flash several times.
The Y6630D thermostat is being phased out and it is recommended that a new digital room thermostat such as the DT90/92 or the Y87RF is fitted in its place.
If binding has been successful the number indicates the signal strength (1 = min to 5 = max).
If binding fails, appears on screen. Please try again.
Press the power button once to clear any previous binding data.
The red LED on the Boiler Relay will turn off when binding has been successful.
Product OpenTherm Setting information
T4M - Wired OpenTherm heating control. optional WC curve setting and internal reference - no support for DHW setpoint.
T4R - Wireless OpenTherm heating control. no support for DHW setpoint.
T6 - Wired OpenTherm heating control. support for DHW setpoint and overnight preheat disable for combi boiler applications.
T6R - Wireless OpenTherm heating control. Support for DHW setpoint and overnight preheat disable for combi boiler applications.
T6R-HW (2 channel receiver) Wireless OpenTherm heating and hot water timed control.
Support for DHW setpoint and overnight preheat disable, plus timed hot water control for storage combis and system boilers.
OK
OK
OK
34

Introduction to Heating Controls (standard training)Expand your knowledge of heating and water controls. Receive expert training on one of our one day installer courses.
You may also wish to consider some of the other training courses we offer. To find out more visit www.honeywelluk.com.
• Wireless controls• Zoning• Sundial plans• Frost protection• Control selection• Hands on wiring• Fault finding• Learn about the latest products• Energy conservation• Part L Building Regulations• Boiler Plus
TrainingInstaller training courses
There is a wealth of information about our products available from the Honeywell website at www.honeywelluk.com
Accessing more information
35

For more informationwww.honeywelluk.com
Honeywell Heating ControlsHoneywell House, Bracknell
Berkshire, RG12 1EB
Tel: 01344 656000
Fax: 01344 656240
E-mail: [email protected]
www.honeywelluk.com
EN9H 3351 UK01 R0418 © 2018 Honeywell International Inc. All rights reserved.