webaccess on apache-tomcat - pedago on tomcat.pdf · apache/tomcat and have them installed and...
TRANSCRIPT

1
Installing GroupWise WebAccess withApache/Tomcat on NetWare
By: Jim Michael, Novell Support Connection Sysop
Introduction
This guide describes the necessary steps to get GroupWise WebAccess running withApache/Tomcat on NetWare 5.1. Because Tomcat is not a “supported” servlet enginefor WebAccess it is largely a manual configuration, but straightforward nonetheless.The following instructions assume no knowledge of Tomcat or Apache, and will guideyou step-by-step through getting everything installed. If you are already familiar withApache/Tomcat and have them installed and working on your NetWare server, you canskip forward to the Install WebAccess section. The basic steps are as follows:
1) Upgrade the NetWare JVM if necessary2) Install Tomcat and test3) Install Apache, integrate it with Tomcat and test4) Install and configure the WebAccess servlets5) Run it!
The remainder of this guide will detail each step, but before we dive in I must alert thereader to one caveat regarding WebAccess on Tomcat: At the time of this writing,WebAccess on Tomcat is unsupported by Novell, so use it at your own risk. That said, itis quite stable in my experience.
Upgrade the JVM
Running WebAccess on Tomcat requires the NetWare JVM version 1.2.2 or later, andhas been sucessfully tested with the 1.2.2 through 1.3.1 JVMs. Unfortunately, thisbrings up another potential caveat: Upgrading the JVM from 1.1.7x to a newer versionmay cause other NetWare applications that rely on Java to malfunction. For example,ZENworks for Desktops and ZENworks for Servers seem to be particularly sensitive tothe JVM version they run against. Consequently, I don’t recommend installingWebAccess with Apache/Tomcat to a server on which you have other Java-dependentapplications running without first testing that configuration thoroughly in a non-production environment.
To avoid confusion, I will be using the following conventions throughout thisguide:
<tomcat> in a path indicates the Tomcat “root”. That is, the directory off of sys:that Tomcat was extracted to. <server> in a URL indicates either your webserver’s IP address or DNS host name, whichever is appropriate, eghttp://<server> could be http://www.yourcompany.com or http://192.168.1.50.
2
If you need to upgrade the JVM, download it from http://support.novell.com.
With any of the available NetWare JVMs, installation is as simple as stopping thecurrent JVM by typing
java –exit
at the server console, then running the JVMxxx.EXE from a Windows workstation andfollowing the prompts. After the installation completes, type
java
to load the new JVM. Verify the version by typing
modules java
at the console.
Install and Test Tomcat
Tomcat is developed under the umbrella of the “Jakarta” project, which encompassesmany Java-based projects, and is the reference implementation of the Java Servlet andJavaServer Pages technologies. At the time of this writing Tomcat 3.x is at releaseversion 3.3.1, and can be downloaded from
http://jakarta.apache.org/builds/jakarta-tomcat/release/v3.3.1/bin/
Download jakarta-tomcat-3.3.1.zip. If there is a later released 3.x version of Tomcaton the site, download that. Beware that the Apache and Jakarta web sites have beenknown to change their structure periodically. If you can’t get to the above URL, searchyour way through http://jakarta.apache.org to find the Tomcat binaries. Oh, and whileyou’re at the site, go ahead and download MOD_JK.NLM from
http://jakarta.apache.org/builds/jakarta-tomcat/release/v3.3.1/bin/netware/i386/
This is the connector that allows Tomcat to plug into the Apache web server, which wewill cover in the next section.
Note that Tomcat version 4.x is also released. This is a completely differentanimal than the 3.x codebase, and this document does not cover runningWebAccess on the 4.x versions at all.
3
Expand jakarta-tomcat-3.3.1.zip (or whatever version you downloaded) to the root ofthe SYS: volume on your NetWare server. Assuming you are installing version 3.3.1, thefile should expand to the following directory structure:
sys:\jakarta-tomcat-3.3.1 \bin \conf \docs \lib \logs \modules \native \webapps
The \bin directory contains Tomcat startup scripts for Unix and Windows. Since none ofthese apply to NetWare, it can be safely ignored.
The \conf directory contains Tomcat configuration files as well as Apache and NESintegration files.
The \docs directory contains Tomcat documentation, and can be safely ignored for thepurposes of running WebAccess.
The \lib directory contains Tomcat .jar files critical to its operation.
The \logs directory contains log files that Tomcat writes out during operation. Tomcatlogging is completely configurable via the \conf files.
The \native directory contains Tomcat web server connector source code, and can beignored for the purposes of running WebAccess.
The \webapps directory is where all the action takes place. This is where theWebAccess servlets will ultimately be installed (to a “container” beneath this directoryto be precise.)
Configure Tomcat
The first order of business is to create a Tomcat startup file, in the form of the familiarNetWare “ncf” file. Start by creating sys:\system\tomcat.ncf in any text editor, andadd the following commands:
envset TOMCAT_HOME=<tomcat>envset TOMCAT_CLASSPATH=$TOMCAT_HOME\lib\tomcat.jar
java -nsac -snTomcat -envCWD=$TOMCAT_HOME -classpath $TOMCAT_CLASSPATH -Dtomcat.home=$TOMCAT_HOME org.apache.tomcat.startup.Main -f$TOMCAT_HOME/conf/server.xml %1
You will need to modify the TOMCAT_HOME variable to reflect the correct Tomcatpath. In our example install, this is sys:\jakarta-tomcat-3.3.1. The envset commandsshould each be on a single line, not wrapped as they may appear in this text. The Javaload command should be on a single line as well.
This startup file tells Tomcat where to find its class libraries, and loads it into the JVMwith its own NetWare console screen titled “Tomcat.” This will give Tomcat its own
4
home on the server console, and will keep runtime messages from cluttering up themain console. You should now be able to load Tomcat with the following commands:
javatomcat
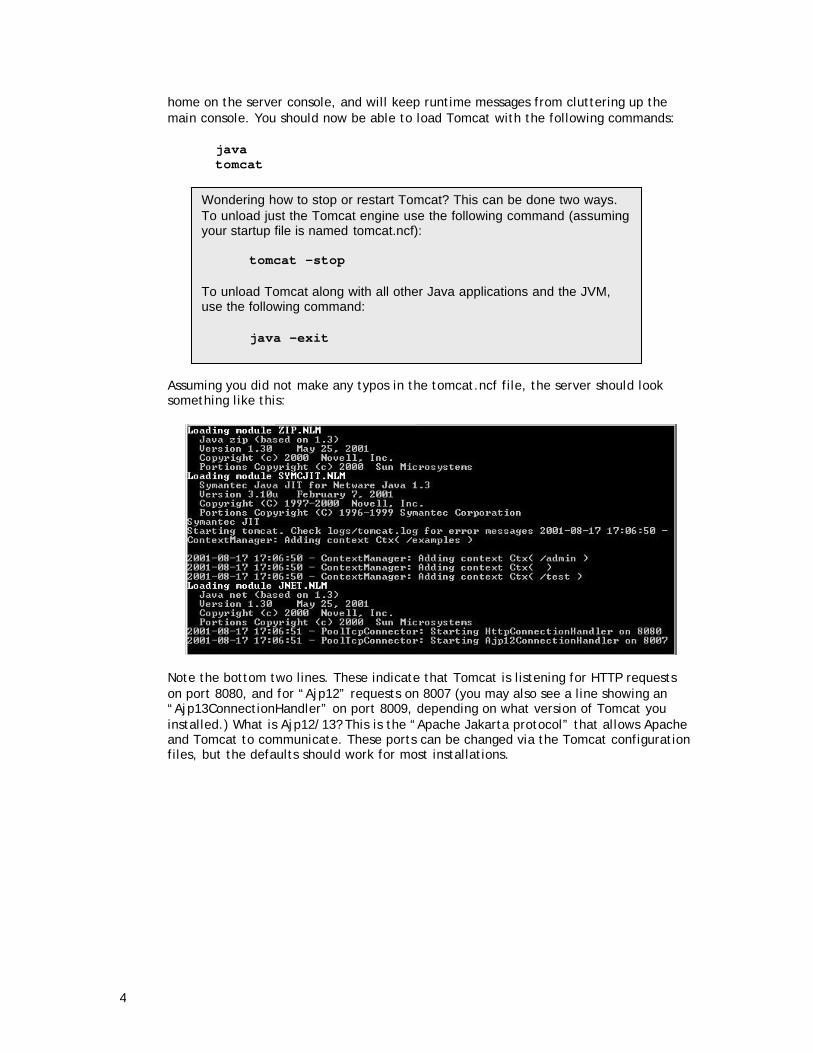
Assuming you did not make any typos in the tomcat.ncf file, the server should looksomething like this:
Note the bottom two lines. These indicate that Tomcat is listening for HTTP requestson port 8080, and for “Ajp12” requests on 8007 (you may also see a line showing an“Ajp13ConnectionHandler” on port 8009, depending on what version of Tomcat youinstalled.) What is Ajp12/13? This is the “Apache Jakarta protocol” that allows Apacheand Tomcat to communicate. These ports can be changed via the Tomcat configurationfiles, but the defaults should work for most installations.
Wondering how to stop or restart Tomcat? This can be done two ways.To unload just the Tomcat engine use the following command (assumingyour startup file is named tomcat.ncf):
tomcat -stop
To unload Tomcat along with all other Java applications and the JVM,use the following command:
java –exit

5
At this point Tomcat is running, waiting for requests. To find out if it works, fire upyour browser and point it at
http://<server>:8080
Assuming you did not yet disable HTTP in Tomcat, you should see a page similar to this
BorderManager admins will certainly recognize 8080 as the default port for forwardproxy on BorderManager servers. If for some reason you’re going to run WebAccesswith Apache/Tomcat on a BorderManager box, you will need to change Tomcat’sHTTP port. This is easily done by opening the <tomcat>\conf\server.xml file in a texteditor and searching for the “Connectors” section. Simply changeHttp10Interceptor port="8080” tag to a port that doesn’t conflict with anyother services and restart Tomcat.
Alternatively, you can simple disable the HTTP server within Tomcat altogether(recommended). This HTTP server is not a robust server like Apache, and isnormally only used for testing Tomcat when its not integrated with a “real” webserver such as Apache, and its not necessary at all for WebAccess functionality.
To disable the HTTP server in Tomcat, edit <tomcat>\conf\server.xml and go to the“Connectors” section and simply comment out the entire HTTP connector section.Specifically, add <!-- just prior to the new http adapter. Attributes line,and add --> just after the closing “Http10Interceptor” tag. Save the file andrestart Tomcat, and you should see that the line indicating Tomcat is listening on8080 is gone.

6
If you successfully get to this page, congratulations! You now have a fully-functioningJava server running on NetWare. For the curious, go ahead and try out the JSP andServlet examples. They are very basic examples of what can be done with a Javaapplication server. For those of us that just want to get WebAccess running, let’s moveon…

7
Install Apache
The NetWare version of Apache can be found at
http://httpd.apache.org/dist/httpd/binaries/netware/
At the time of this writing, the current version is 1.3.24, found inapache_1.3.24_netware-mp.zip. If there is a newer version, download that. TheApache web site has been known to unexpectedly change structure on occasion, so ifyou don’t find the NetWare binaries in this location, go to http://www.apache.org/and search around for the new location of the binaries.
Like Tomcat, there is no installation routine for Apache. Simply extract the zip file tothe root of the SYS: volume, which should create the following directory structure:
sys:\apache \cgi-bin \conf \htdocs \icons \logs \modules
The \cgi-bin directory is where CGI scripts to be executed by the web server areplaced. It can be ignored for the purposes of running WebAccess
The \conf directory contains Apache configuration files.
The \htdocs directory is the default web document root directory for Apache. This iswhere we will install the WebAccess static content shortly.
The \icons directory is a standard location used to map to image files. It can be ignoredfor the purposes of running WebAccess.
The \logs directory contains access logs Apache writes out during operation.
The \modules directory contains Apache “modules”, which are pieces of code thatextend the functionality of the web server. This is where the Tomcat plug-in will beinstalled shortly.
Getting Apache configured and running is surprisingly simple. Opensys:\apache\conf\httpd.conf in a text editor such as WordPad. While the sheer numberof configuration parameters in this file may seem daunting, only a few are necessaryfor our purposes.
1) Search for the ServerRoot "sys:/apache" line. If you extracted Apache to thedefault location, no changes are necessary. If you installed Apache to someother location, modify this line to reflect the correct path.
2) Search for the ServerName line. Edit this to reflect either your server’s DNShost name or IP address.
3) Save the httpd.conf file and exit

8
4) Add sys:\apache (or whatever location you installed Apache to) to the searchpath. At the NetWare console, type
SEARCH ADD SYS:\APACHE
Add this to your sys:\system\autoexec.ncf file so that the search mapping isadded every time the server restarts.
At this point, typing
apache
at the NetWare console should result in a screen similar to this:
While this screen is admittedly sparse, it does tell us that Apache is running andlistening on port 80. Load up a browser and point it at http://<server>. You shouldsee a page similar to this:

9
You now have Apache successfully running on NetWare. Any content you place underthe \apache\htdocs directory structure can be served up (assuming you did not changethe default document location in httpd.conf). All that’s left to do is get Tomcatplugged into Apache, and install the WebAccess servlets.
Integrate Tomcat and Apache
Start by copying mod_jk.nlm to the \apache\modules directory. If you did not downloadthis module previously, it can be found at
http://jakarta.apache.org
in the Tomcat binaries section. By “integrating” Apache with Tomcat, we are talkingabout configuring Apache to hand-off requests for servlets or JSP pages to Tomcat,rather than trying to render this content itself. This is accomplished via URL mappingsthat Apache must be made aware of, which is easily done by adding a single commandto the Apache \conf\httpd.conf file:
Include "sys:/<tomcat>/conf/jk/mod_jk.conf"
This line can be added to the very end of the httpd.conf file, and references“mod_jk.conf” in the Tomcat /jk/conf directory. This file contains the necessarymodule load commands and servlet mappings to let Apache know how to handle servletand JSP requests. Save the httpd.conf file.
Now open sys:/<tomcat>/jk/conf/mod_jk.conf. Change the LoadModule line to:
LoadModule jk_module modules/mod_jk.nlm
Change the JkWorkersFile line to:
JkWorkersFile sys:/<tomcat>/jk/conf/workers.properties
Change all “ajp12” text to “ajp13”. The reason for this will be explained in the SecureWebAccess section.
At this point, save the mod_jk.conf file, and restart the web server by typing thefollowing commands at the server:
unload apacheload apache
You may have noticed the mod_jk.conf file in the \auto directory, andwonder why we don’t use that. This file is automatically generated byTomcat each time it starts, and Tomcat makes a “best guess” as to whichmappings will be necessary for Apache based on its servlet definitions.However, using this file can be limiting for doing other things like SSL(which we will cover later.) In addition, since this file gets regeneratedevery time Tomcat starts, its impossible to customize the settings as theywill be overritten at the next reboot, thus I like to avoid the auto-generatedfile altogether.

10
If all goes well, you should see a screen similar to this:
In addition to the wealth of information provided by the previous Apache console <g>,we can now see a line showing that Apache has loaded the MOD_JK.NLM module,indicating that Tomcat is successfully “plugged in” to Apache. To give it a test run,point your browser at
http://<server>/servlet/SnoopServlet (case is important!)

11
You should see a screen similar to this:
While this page shows some interesting things, the important part is that we’vesuccessfully pointed our browser at Apache and requested a servlet (SnoopServlet isincluded as an example with Tomcat). Apache handed that request off to Tomcat,which ran the servlet and passed the resulting HTML back to Apache, which thenreturned it to the browser. Whew!
To recap, we now have a functioning web server, integrated with a functioning Javaapplication server. Now all that’s left is to install and configure the WebAccess servletsinto this environment.
Install WebAccess
As was mentioned at the beginning of this guide, getting WebAccess working withApache and Tomcat is largely a manual configuration. Since the installation routinedoesn’t “know” how to install WebAccess to run on Apache/Tomcat, we have to trick ita little bit here and there. The first step is to start the WebAccess installation byrunning
<GroupWise SDD>\software\internet\webaccess\setup.exe
Click through the prompts and select the components of WebAccess you wish to install.We will choose all three components
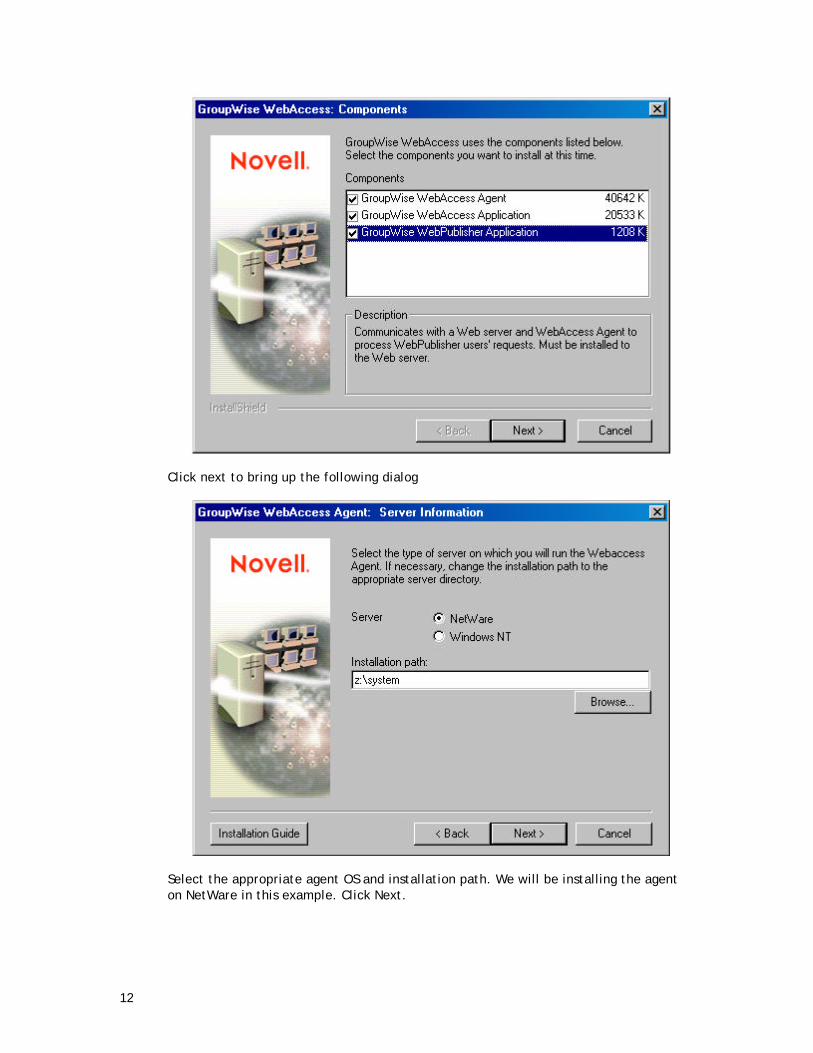
12
Click next to bring up the following dialog
Select the appropriate agent OS and installation path. We will be installing the agenton NetWare in this example. Click Next.

13
On this screen, choose either the IP address or DNS host name of the server. Click Next.
Here we specify the path to the GroupWise domain we’re installing the WebAccessagent to, as well as the gateway name. Since WebAccess is being installed to aNetWare server named WEB in this example, I’ll call the gateway directory WA60WEB.Click Next. If you get a message stating that the directory does not exist, click Yes tohave the installation create it for you.
14
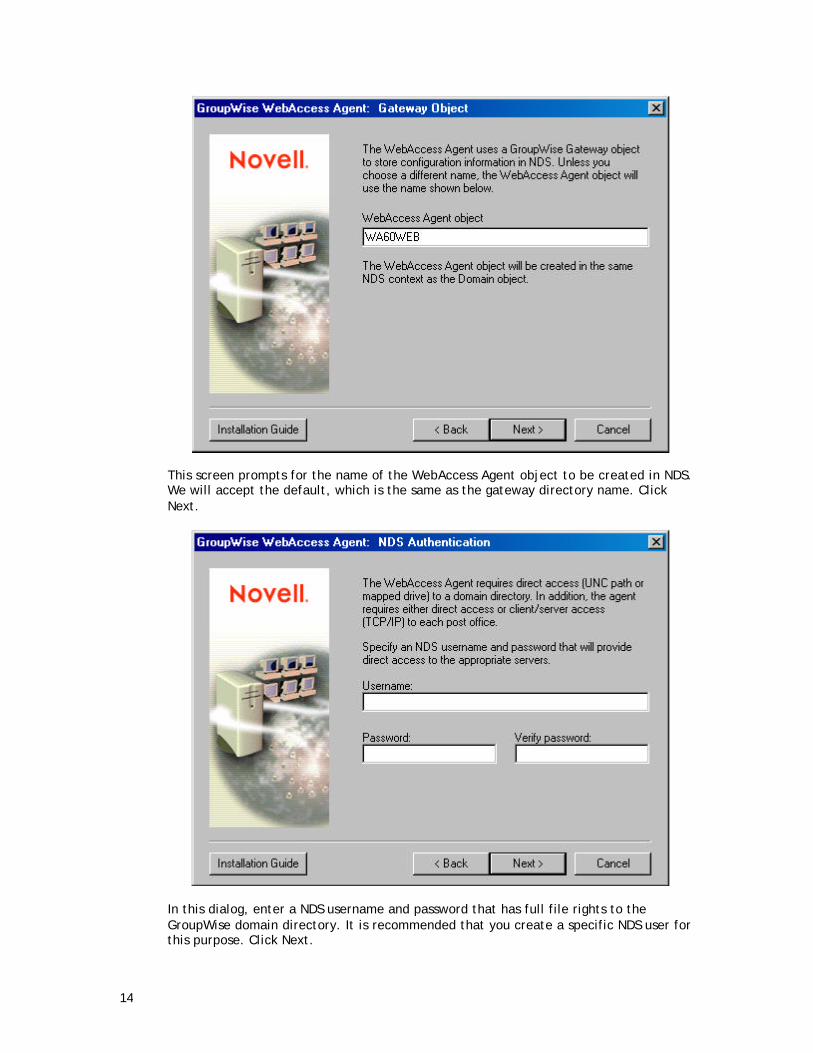
This screen prompts for the name of the WebAccess Agent object to be created in NDS.We will accept the default, which is the same as the gateway directory name. ClickNext.
In this dialog, enter a NDS username and password that has full file rights to theGroupWise domain directory. It is recommended that you create a specific NDS user forthis purpose. Click Next.
15
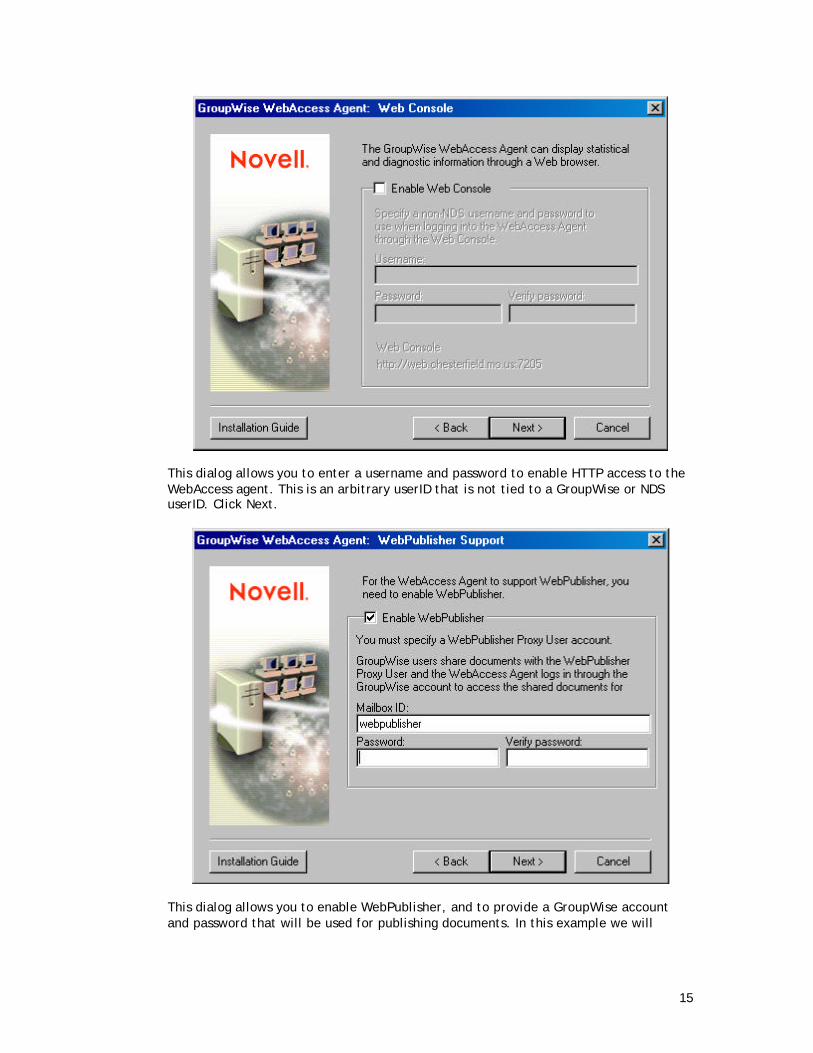
This dialog allows you to enter a username and password to enable HTTP access to theWebAccess agent. This is an arbitrary userID that is not tied to a GroupWise or NDSuserID. Click Next.
This dialog allows you to enable WebPublisher, and to provide a GroupWise accountand password that will be used for publishing documents. In this example we will

16
enable WebPublisher and specify the Mailbox ID and password for the GroupWise user“webpublisher.” Click Next.
This dialog allows us to choose the libraries we want to be made available viaWebPublisher. For this example we will choose all libraries in the system. Click Next.
17
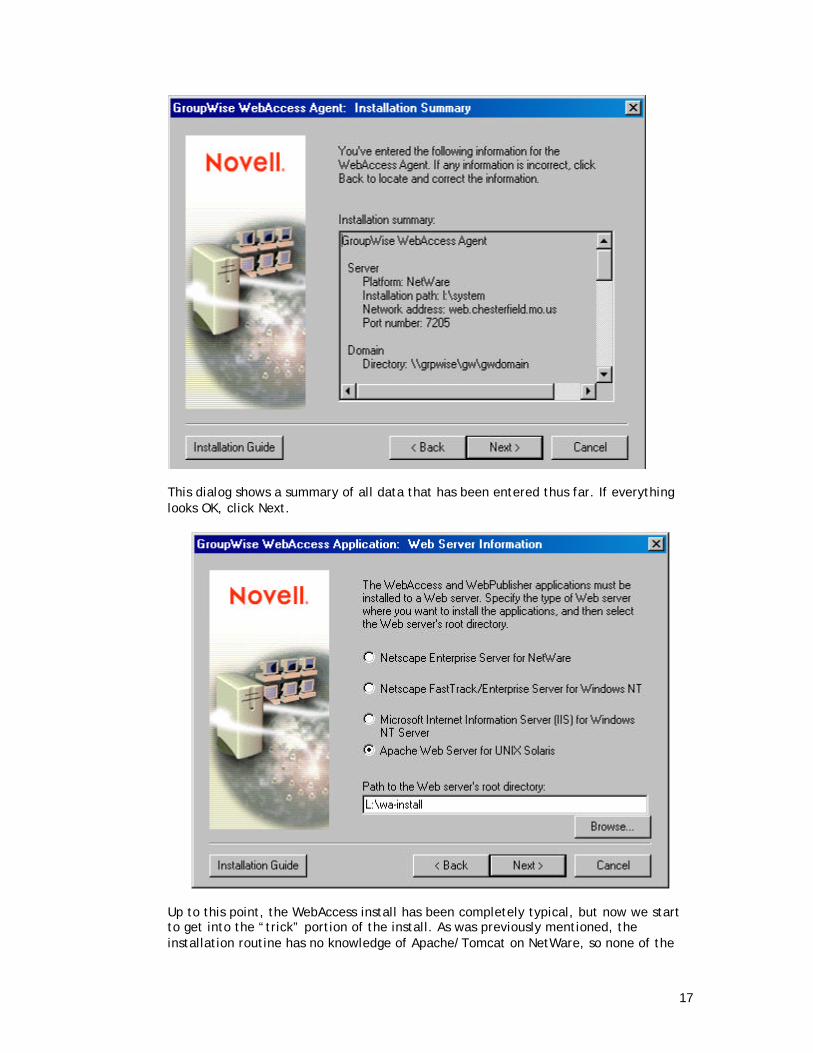
This dialog shows a summary of all data that has been entered thus far. If everythinglooks OK, click Next.
Up to this point, the WebAccess install has been completely typical, but now we startto get into the “trick” portion of the install. As was previously mentioned, theinstallation routine has no knowledge of Apache/Tomcat on NetWare, so none of the
18
available web server options truly apply. Instead, we must choose the closest “fit” andconfigure manually from there.
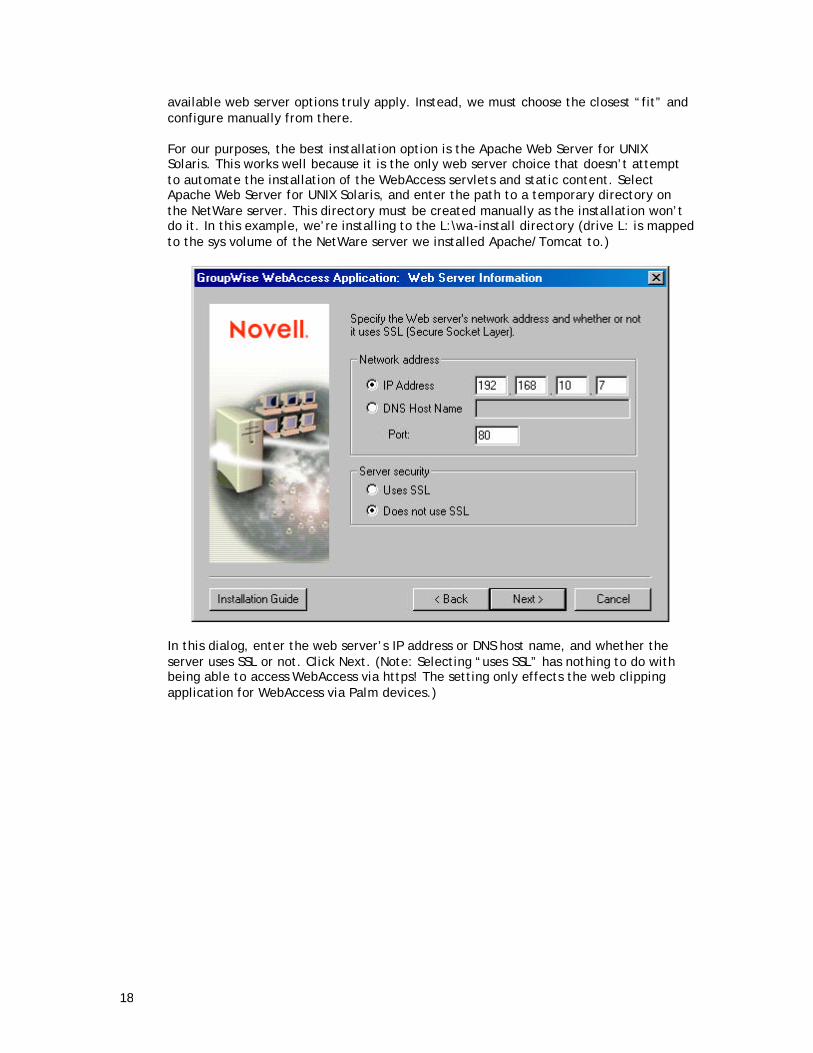
For our purposes, the best installation option is the Apache Web Server for UNIXSolaris. This works well because it is the only web server choice that doesn’t attemptto automate the installation of the WebAccess servlets and static content. SelectApache Web Server for UNIX Solaris, and enter the path to a temporary directory onthe NetWare server. This directory must be created manually as the installation won’tdo it. In this example, we’re installing to the L:\wa-install directory (drive L: is mappedto the sys volume of the NetWare server we installed Apache/Tomcat to.)
In this dialog, enter the web server’s IP address or DNS host name, and whether theserver uses SSL or not. Click Next. (Note: Selecting “uses SSL” has nothing to do withbeing able to access WebAccess via https! The setting only effects the web clippingapplication for WebAccess via Palm devices.)

19
This dialog shows a final summary of all information entered thus far, and what optionswill be installed. Click Next to perform the installation.
After the install copies the necessary files and creates the WebAccess objects in NDS,this dialog should appear. Click Next, then Finish to exit the installation program.
20
Configure WebAccess
At this point, you should have a new gateway object in NDS, a new gateway directoryunder \<GroupWise domain>\wpgate, and seven files sitting in the temporary installdirectory you created on the web server, in our case sys:\wa-install.
Four of these files are “tar” archives, typically used on Unix/Linux systems, butWindows programs such as WinZip have no trouble dealing with them. If you cannotextract a tar file on your system, don’t panic. You can find the same files in ZIP formatunder<GroupWise SDD>\software\internet\webaccess\other.
Extract the various files as follows:
1) Extract webaccess.tar (or zip) to the root of the NetWare server. This willcreate the following directory structure:
sys:\novell \webaccess \webpublisher
2) Extract webaccessdocs.tar (or zip) to sys:\apache\htdocs. If you changedthe default document directory for Apache, extract the file to thatdirectory instead. This will create a large directory structure undersys:\apache\htdocs beginning with \com\novell. These directories containall of the static content (images and help files) for WebAccess. Apache willserve these up directly, without involving Tomcat.
Copy the index.html file in the install directory to sys:\apache\htdocs. Notethat this will replace the default Apache index.html page, so if you don’twant your existing index page replaced, rename the WebAccess one tosomething else like webacc.html, then link to this file from whatever pageyou wish.
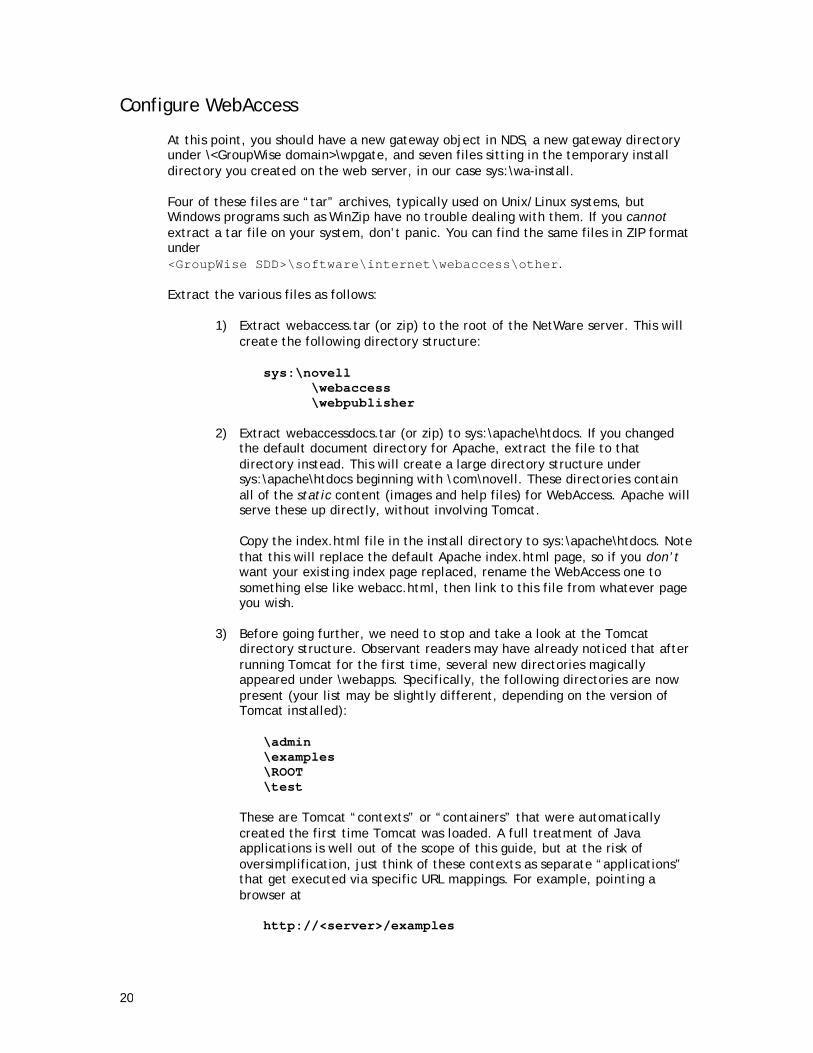
3) Before going further, we need to stop and take a look at the Tomcatdirectory structure. Observant readers may have already noticed that afterrunning Tomcat for the first time, several new directories magicallyappeared under \webapps. Specifically, the following directories are nowpresent (your list may be slightly different, depending on the version ofTomcat installed):
\admin\examples\ROOT\test
These are Tomcat “contexts” or “containers” that were automaticallycreated the first time Tomcat was loaded. A full treatment of Javaapplications is well out of the scope of this guide, but at the risk ofoversimplification, just think of these contexts as separate “applications”that get executed via specific URL mappings. For example, pointing abrowser at
http://<server>/examples

21
will cause Apache to hand off this request to Tomcat, which in turn looksinto the examples context for an application to “run.” In this case, the“application” is just some example JSP pages and servlets, but that’s thebasic idea. As you can see, Tomcat created several default contexts -- mostself-explanatory -- but we are particularly interested in the ROOT context.
As luck would have it, all URLs referencing /servlet are mapped to theROOT context. Since the WebAccess templates reference the servlets via a/servlet URL, this provides us with a convenient location to place theservlets and supporting libraries without having to modify a singleWebAccess template. This is very important, because having to modify theWebAccess templates to look for the servlets in a location other than/servlet would be a maintenance and upgrade nightmare to say the least.That said, lets get back to extracting the WebAccess files.
Create a \lib directory under sys:\<tomcat>\webapps\ROOT\WEB-INF
Extract webaccessjars.tar (or zip) tosys:\<tomcat>\webapps\ROOT\WEB-INF\lib
4) Extract webaccessservlets.tar (or zip) tosys:\<tomcat>\webapps\ROOT\WEB-INF\classes
Now we need to edit some configuration files. (I did say this was a manualconfiguration…)
1) Open sys:\<tomcat>\webapps\ROOT\WEB-INF\web.xml in WordPad, andadd the following text between the <web-app> and </web-app> tags.
<!-- WebAccess servlet --> <servlet> <servlet-name> webacc </servlet-name> <servlet-class> com.novell.webaccess.WebAccessServlet </servlet-class> <init-param> <param-name>Config</param-name> <param-value>sys:/novell/webaccess/webacc.cfg</param-value> </init-param> <load-on-startup/> </servlet>
<!-- WebAccess SpellCheck servlet --> <servlet> <servlet-name> spellchk </servlet-name> <servlet-class> com.novell.collexion.spell.servlet.SpellServlet </servlet-class> <init-param> <param-name>Config</param-name> <param-value>sys:/novell/webaccess/spellchk.cfg</param-value> </init-param> <load-on-startup/> </servlet>
(continued on next page…)
22
<!-- WebPublisher servlet --> <servlet> <servlet-name> webpub
</servlet-name> <servlet-class> com.novell.webpublisher.WebPublisherServlet </servlet-class> <init-param> <param-name>Config</param-name> <param-value>sys:/novell/webpublisher/webpub.cfg</param-value> </init-param> <load-on-startup/> </servlet>
<servlet-mapping> <servlet-name> webacc </servlet-name> <url-pattern> /webacc/* </url-pattern> </servlet-mapping>
<servlet-mapping> <servlet-name> spellchk </servlet-name> <url-pattern> /spellchk/* </url-pattern> </servlet-mapping>
<servlet-mapping> <servlet-name> webpub </servlet-name> <url-pattern> /webpub/* </url-pattern> </servlet-mapping>
Spacing is not critical in an XML file, but indenting appropriately greatly increasesreadability. Be very careful to get everything entered exactly as shown (servlets arecase-sensitive!) and to close all tags. This file is the Tomcat equivalent of theservlets.properties file used in the old Novell Servlet Gateway, and simply tells Tomcatwhat servlets to load for this context, and how to load them. Save this file andcontinue.
Open sys:\novell\webaccess\webacc.cfg in a text editor. Edit the Templates.path=line to reflect the correct location of the templates. In our example, this is
/jakarta-tomcat-3.3.1/webapps/ROOT/WEB-INF/classes/com/novell/webaccess/templates
This line should not wrap, as it may appear in this text. Again, pay close attention tocase and use forward slashes. Assuming you did not change the location of the staticfiles, etc, nothing else should need to be modified in this file at this time. Save the fileand continue.
Now open sys:\novell\webaccess\spellchk.cfg in a text editor. Edit theSpeller.Dictionary.path= line to reflect the correct location of the dictionary files. Inour example, this is

23
/jakarta-tomcat-3.3.1/webapps/ROOT/WEB-INF/classes/com/novell/collexion/morphology/data
This line should not wrap, as it may appear in this text. Save the file and continue.
Since we’re also installing WebPublisher in this example, we need to edit its config filein a similar way. Open sys:\novell\webpublisher\webpub.cfg in a text editor. Edit theTemplates.path= line to reflect the correct location of the templates. In our example,this is
/jakarta-tomcat-3.3.1/webapps/ROOT/WEB-INF/classes/com/novell/webpublisher/templates
This line should not wrap, as it may appear in this text.
Now scroll to the end of the webpub.cfg file and change the line
Provider.GWDOC.Config.file=/novell/webpublisher/commgr.cfg
to a UNC path like this:
Provider.GWDOC.Config.file=\\web\sys\novell\webpublisher\commgr.cfg
In this example, the NetWare server is called WEB. Obviously, you’ll need to changethis to whatever your NetWare server is called. Failure to make this change will cause a“500” error when you attempt to open WebPublisher. Assuming you did not change thelocation of the static files, etc, nothing else should need to be modified in this file atthis time. Save the file and continue.
Now copy the commgr.cfg file from the WebAccess gateway directory (under<domain>\wpgate) to both sys:\novell\webaccess and sys:\novell\webpublisher. This filecontains the encyption key and IP address information the servlets need tocommunicate with the WebAccess gateway.
At this point, we’re ready to fire up WebAccess. Restart the server, then reload Java,Tomcat and Apache. Start the WebAccess gateway by typing the following command atthe server:
strtweb
If all systems are “go”, point your browser at
http://<server>
24
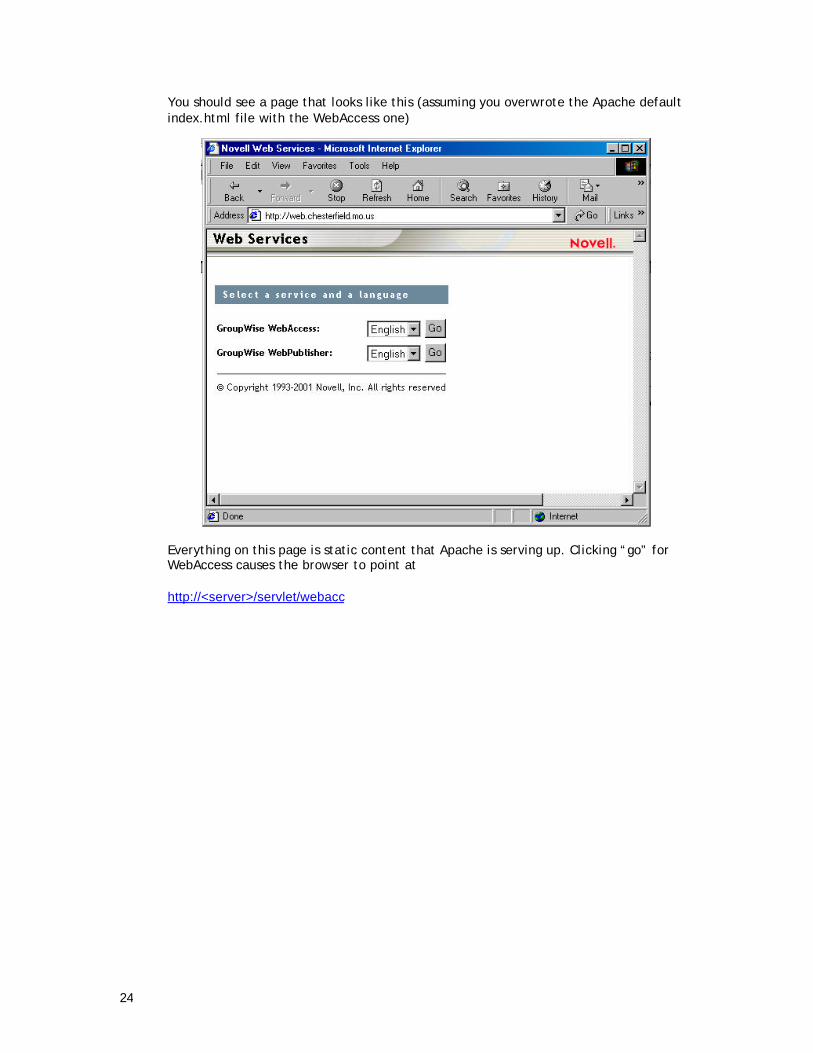
You should see a page that looks like this (assuming you overwrote the Apache defaultindex.html file with the WebAccess one)
Everything on this page is static content that Apache is serving up. Clicking “go” forWebAccess causes the browser to point at
http://<server>/servlet/webacc
25
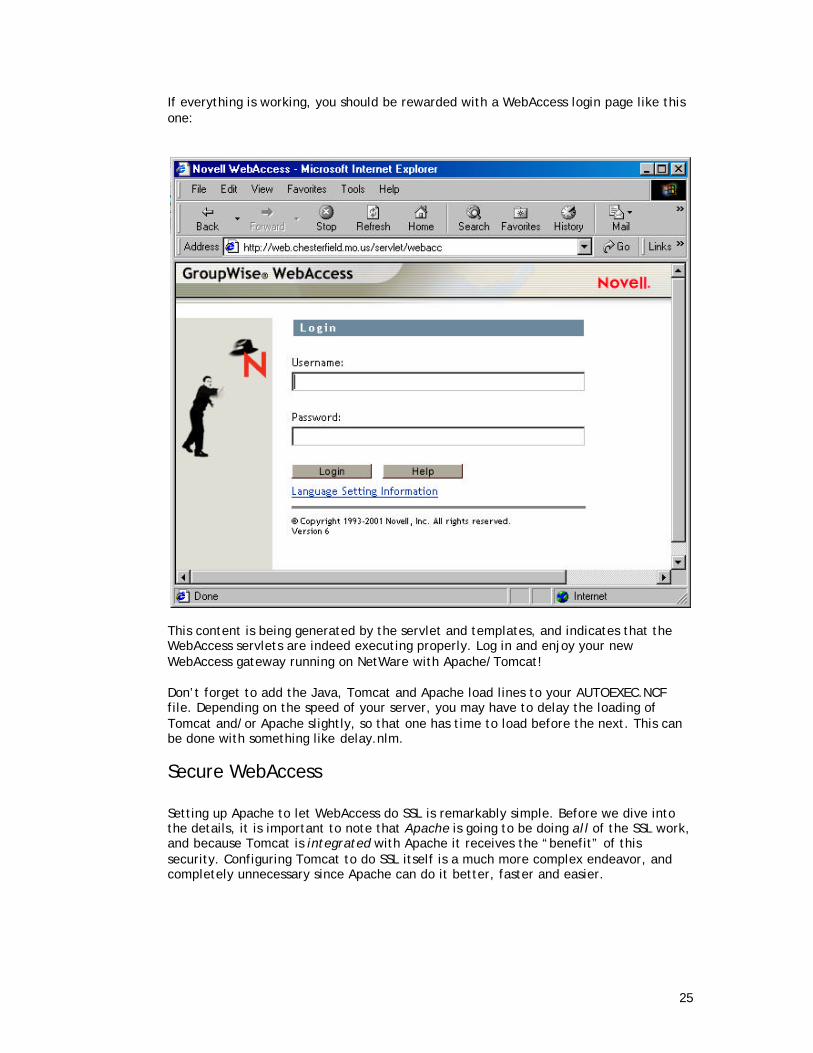
If everything is working, you should be rewarded with a WebAccess login page like thisone:
This content is being generated by the servlet and templates, and indicates that theWebAccess servlets are indeed executing properly. Log in and enjoy your newWebAccess gateway running on NetWare with Apache/Tomcat!
Don’t forget to add the Java, Tomcat and Apache load lines to your AUTOEXEC.NCFfile. Depending on the speed of your server, you may have to delay the loading ofTomcat and/or Apache slightly, so that one has time to load before the next. This canbe done with something like delay.nlm.
Secure WebAccess
Setting up Apache to let WebAccess do SSL is remarkably simple. Before we dive intothe details, it is important to note that Apache is going to be doing all of the SSL work,and because Tomcat is integrated with Apache it receives the “benefit” of thissecurity. Configuring Tomcat to do SSL itself is a much more complex endeavor, andcompletely unnecessary since Apache can do it better, faster and easier.
26
So… you now have WebAccess working on Apache/Tomcat, and want to allow SSLaccess to it. Start by opening the Apache HTTPD.CONF file, and un-commenting thisline:
LoadModule tls_module modules/mod_tls.nlm
Now save the file, restart Apache… and its ready to do SSL. I did say it was remarkablysimple… try it out by going to https://<server>/servlet/webacc
You should get prompted with the familiar “validate certificate” prompt that pops upwhen the browser sees a NetWare certificate it can’t validate to a trusted root (whichof course is every NetWare certificate.) Which certificate is Apache using? Again, lookin your Apache HTTPD.CONF file and scroll to the end. There you should see a directivesimilar to this:
<IfModule mod_tls.c> SecureListen 443 "SSL GWMail-Apache"</IfModule>
In this example, I’m using a KMO certificate I created called GWMail-Apache. By defaultyou’ll probably see the “SSL CertificateIP” or “SSL CertificateDNS being used. I choseto create my own certificate specifically for this instance of Apache because we accessour WebAccess via https://gwmail.domain.com, thus I needed a certificate createdwith that domain to avoid the “certificate name does not match” error the browserthrows at you when you use a certificate that does not match the domain/ip of therequest.
Another common request is to force users to use https when running WebAccess. Inmost cases, disabling port 80 on the web server is not a valid option because the webserver is often used for other non-secure sites. So, what then? You simply need toexercise the built-in “redirect” directive within Apache.
Say users can get to your WebAccess site by going to http://gwmail.yourdomain.com aswell as https://gwmail.yourdomain.com All you need to do is tell apache to redirectthe browser to the https:// URL whenever it sees the user trying to go to WebAccess.
Open the Apache HTTPD.CONF file and scroll down to the section where it talks aboutRedirects (the redirect directive can really go just about anywhere in the file, but itmakes sense to put it in the standard place.) Now simply add this line and save the file:
Redirect /servlet/webacc https://<server>/servlet/webacc
That’s all there is to it. Now users will be forced to the https:// URL for webaccess,and will simply not be able to access it via http:// any longer. This redirect onlyeffects URLs containing /servlet/webacc, so the the Apache server can safely keepon handling port 80 requests for other URLs.
End.

27