schoolwires.henry.k12.ga.usschoolwires.henry.k12.ga.us/cms/lib08/ga01000549/ce… · web...
TRANSCRIPT

Photography Project Ideas1. Water
water drop artThe basic idea with this project is to suspend a container of liquid and let drops fall through a small hole, then capture the resulting splash. Timing the shutter as the splash is created is everything. We achieved good results using two flashguns set to their lowest power (1/128th), an aperture of f/22 and water mixed with Xanthan gum to make a more viscous solution. We also used a SplashArtKit from phototrigger which helped to regulate the size and frequency of the drops.indoor splash shotsFor this project you’ll need a flashgun that you can fire remotely, a container with clear sides for your water, a coloured background and a tripod. Set up the container and backdrop, then position the flash over the container. With the camera on a tripod and set to manual focus and exposure – f/8, ISO 200 and the fastest shutter speed that will work with your flash – drop the object into the water and fire the shutter as it hits.
2. Light light spiralsYou’ll need to attach a torch, suspended by string, to an open area of ceiling. Fit the widest lens you have on your camera, and mount it on a tripod pointing straight up. With the light turned on, autofocus on the tip of the torch and set the lens to manual focus to lock the setting in. With an aperture of f/11 or f/16 dialled in, use Bulb mode and a remote release to keep the shutter open for a minute or so as you send the torch spinning in the dark…still life light trailsLight trails can be used in all kinds of photography, but they’re perfect for a creative still life project. You can use a regular Maglite torch, but try removing the end to reveal the bulb and make the light more direct. Use some electrical tape to attach a coloured sweet wrapper, which you can use as a makeshift ‘gel’. Set the canera’s shutter speed to around 30 secs with an aperture of around f/8, then start moving the torch within the frame before pressing the shutter. Continue the movement throughout the exposure. Here, we suspended the torch from a piece of string and made a gentle circular movement to create a spiral around the bottle.cross-polarisation or PrismThis fun project exploits the effect that polarised light has on some plastics. You’ll need two polarising filters – ideally one of these should be a sheet of polarising film. You can pick up an A4 sheet of Lee 239 polarising film for £50 (try www.robertwhite.co.uk or www.pnta.com ). The sheet of film should be placed on a lightbox or in front of the only light source. An iPad screen and most computer screens have a polarising filter built in, so if you don’t have a sheet of polarising film you can always experiment by creating a white document to fill the screen. Simply attach the circular polariser to the camera lens and rotate it to make the colours appear in clear plastic items
3. Foodfood landscapesSpice up your food photography! All you need is a set of model figures – Hornby 00 gauge figures are perfect, as they’re available in a wide range of poses. Preiser has a great range too. The most important aspect is to establish a sense of narrative. Here you can see that there’s a conversation between the characters, with the mountaineer on the ‘mash face’ being helped by his colleagues on the ground.fine-art foodTry turning your dinner ingredients into photo art using just a lightbox and a very sharp knife. Slice fruit and vegetables as thinly and evenly as possible, then place them on the

lightbox. With the camera positioned directly above, use Live View to focus manually on the details. Set an aperture of f/8 to give adequate depth of field, and dial in some exposure compensation of +1 to +3 stops as the bright light can fool the camera’s meter into underexposure.
4. Oil and Waterflowers in iceA relatively inexpensive way of taking ‘kitchen sink’ close-ups that look great blown up as wall art. Freeze flowers in plastic containers of distilled or de-ionised water (available through your local auto or hardware store). The flowers will float, so try to weigh them down or fasten them in place so that they freeze under the water. Place the block of ice on top of a clear bowl or glass in a white sink or plate, so that the light can bounce through from below. Position a flashgun off to one side, angled down towards it, and shoot from the opposite side.abstracts in oilOil floating on the surface of water is a great way to make striking abstracts. This table-top photo project exploits the refractive quality of oil and bubbles to accentuate and distort colours. All you need to do is place a few drops of cooking oil on the surface of water in a glass dish. Make sure the dish is supported about 25cm about the table top, then place coloured paper under it and use an anglepoise lamp or flashgun to light the paper.
5. ReflectionsSunlight reflecting oily reflectionsThis project follows a similar theme to the previous one, but here the patterns are created by a cover over the light rather than a coloured background. First, make a cover for an anglepoise lamp using acetate, card and tape. Use masking tape to attach it, but make sure it isn’t touching the bulb, and keep the light off when you’re not shooting. Place a full bucket of water in front of the lamp, add a few drops of cooking oil. Stir up the oil, get in close and shoot.
6. Abstractpsychedelic soap filmThis is a wonderful project that makes for vibrant desktop wallpaper or abstract wall art. You’ll need liquid soap mixed with glycerine for long-lasting soap film, plus a wire loop, a black cloth background and a macro lens of at least 100mm. The colours created by soap film only appear when hit by light from a certain angle, so set up near a north-facing window and shoot from around 45 degrees.refractive artLight bends when it passes through water, causing the objects behind to change appearance. This is called refraction, and you’ll make use of this phenomenon in this arty photo project. All you need is a few glasses, a flashgun, a tripod and a black-and-white pattern print. Simply place the pattern in the background with the glasses in front. Fill them with different levels of water and move the pattern backwards or forwards to fine-tune the effect.
7. Close-ups kitchen close-upsYour kitchen is an ideal location for shooting a macro project. Its reflective surfaces can be used to create interesting backgrounds for your shots, and a shallow depth of field can transform the most mundane of objects you’ll find there. Creating a triptych of images can

result in a piece of fantastic wall art for your kitchen too, although it’s important to think about how they’re going to work together before you start shooting. Here, 3 objects – a fork, a bowl of cereal and coffee granules – were all shot from a similar angle, with the impression of height linking the sequence.School time close-upsSimilar to the project above, shoot a triptych of items or situations at school in extreme close up. Again if you shoot them from a similar angel the group will be more cohesive.
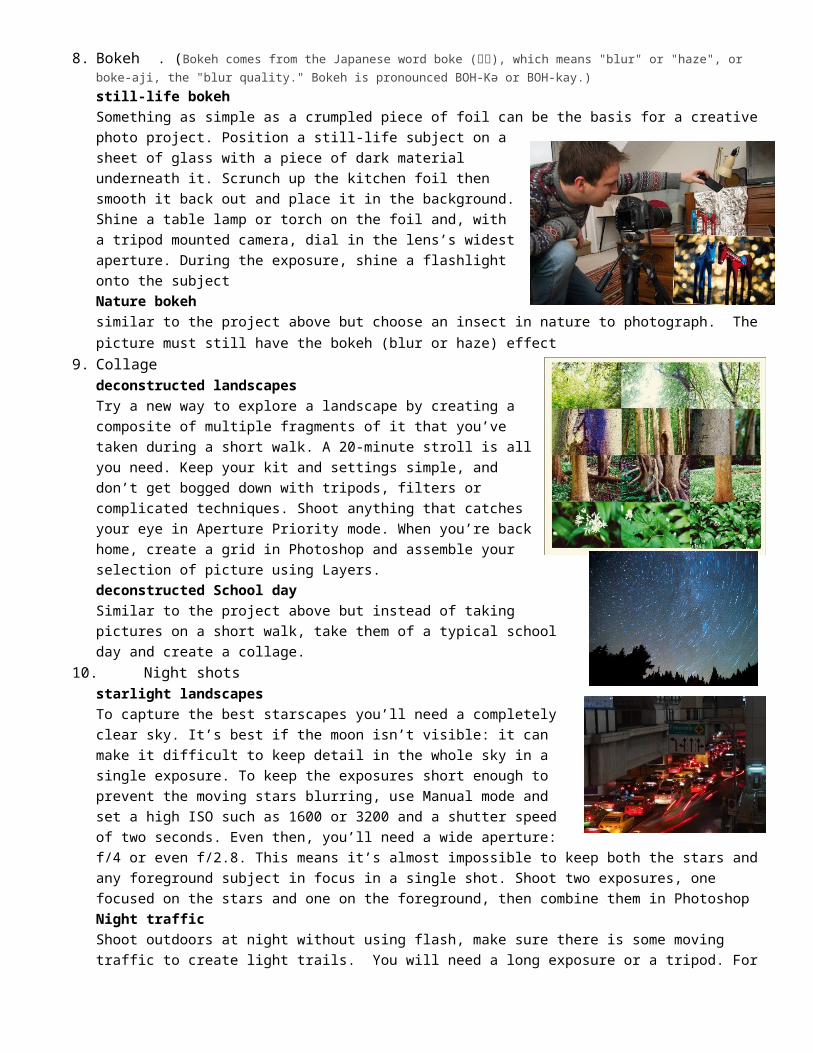
8. Bokeh . (Bokeh comes from the Japanese word boke (ボケ), which means "blur" or "haze", or boke-aji, the "blur quality." Bokeh is pronounced BOH-Kə or BOH-kay.)still-life bokeh Something as simple as a crumpled piece of foil can be the basis for a creative photo project. Position a still-life subject on a sheet of glass with a piece of dark material underneath it. Scrunch up the kitchen foil then smooth it back out and place it in the background. Shine a table lamp or torch on the foil and, with a tripod mounted camera, dial in the lens’s widest aperture. During the exposure, shine a flashlight onto the subjectNature bokeh similar to the project above but choose an insect in nature to photograph. The picture must still have the bokeh (blur or haze) effect
9. Collagedeconstructed landscapesTry a new way to explore a landscape by creating a composite of multiple fragments of it that you’ve taken during a short walk. A 20-minute stroll is all you need. Keep your kit and settings simple, and don’t get bogged down with tripods, filters or complicated techniques. Shoot anything that catches your eye in Aperture Priority mode. When you’re back home, create a grid in Photoshop and assemble your selection of picture using Layers.deconstructed School daySimilar to the project above but instead of taking pictures on a short walk, take them of a typical school day and create a collage.
10. Night shotsstarlight landscapes To capture the best starscapes you’ll need a completely clear sky. It’s best if the moon isn’t visible: it can make it difficult to keep detail in the whole sky in a single exposure. To keep the exposures short enough to prevent the moving stars blurring, use Manual mode and set a high ISO such as 1600 or 3200 and a shutter speed of two seconds. Even then, you’ll need a wide aperture: f/4 or even f/2.8. This means it’s almost impossible to keep both the stars and any foreground subject in focus in a single shot. Shoot two exposures, one focused on the stars and one on the foreground, then combine them in PhotoshopNight traffic Shoot outdoors at night without using flash, make sure there is some moving traffic to create light trails. You will need a long exposure or a tripod. For this project, challenge yourself to only use available light and a high ISO setting.
11. Un-inspiredshoot the uninspiringWrite down a list of locations or items that you find dull, depressing, ugly, boring or annoying. Now push yourself to make beautiful and interesting photographs of these un-photogenic subjects.
12. Inspiredoptical illusionsThis project uses forced perspective to play tricks on a viewer’s perception of the relationship between differently sized objects in a photo. The best way to approach this is to shoot a recognizable subject and get them to pretend that they are interacting with a much larger object or subject, which is actually in the background. Choose a small aperture to provide a large depth of field that will enhance the effect.
13. Alternate Realitiessmall world Photographing miniature toys and models in real-world environments is a popular photo project and one that you can easily fit around your day job. Try taking a small prop with you and photographing it in a range of situations – everywhere from the daily commute to a weekend stroll. To blend the model in with the rest of the scene you’ll need to get close to the subject and balance the light. Land of GiantsSimilar to the project above, you will need to use strategic placement to make it appear as if your subject is a giant or supersized.
14. ABC - 123A-Z photos Shoot a photo word or saying made up of letters on road signs and shop fronts, or find objects and shapes that resemble letters. For example, the frame of swings in a play-park forming the letter A, or the curve of a rivers forming an S-shape1-100Similar to creating a photographic alphabet, shoot objects that illustrate the numbers 1 to 25 or some significant set of numbers. You can take pictures of subjects that add up to each number, or shoot objects that resemble the numbers.
15. Facesfaces in unusual places An easy and fun photo idea: train your eyes to spot ‘faces’ unintentionally formed by everyday objects. Everything from a pair of bath taps to a manhole cover is fair game.(minimum of 10) See the Faces in Places blog for inspiration.strangers projectAnother classic project, although this one demands some guts. The idea here is to ‘simply’ talk to and then photograph 10 strangers in the street., drumming up the courage to approach your first portrait sitter is the biggest challenge.
16. Body PartsSeries of 10 Shoot a series of 10 photos that focus on one body part (ex: 10 different hands in different positions). Try to have the same background or setting so that there is cohesion in the series.
17. Faceless portraitsfaceless portraits Take a portrait of a different person every day of the week (7 photos) without including their face in the frame. How can you reveal aspects of their personality without the aid of eye contact and expression? Use the environment, the lighting, colors,

props other parts of their body – particularly their hands – to reveal character instead.
18. 15 days of photosthe world at your feetAt the same time every day for 15 days, take a picture of what you see at your feet. Choose a time during the lunch hour, as this gives you a great excuse to head out and find a new location. Use a wide-angle lens and include your legs and feet in the frame.scavenger hunt Ask someone to write down a list of 15 things on a set of cards – there should be a different, easily accessible subject on each one, while you write down 5 - 10 photographic treatments on another set (such as ‘black and white’, ‘long exposure’, ‘50mm’ and ‘zoom burst’). Pick a card at random from each pile and ‘fulfil the requirements. (one a day for 15 days
19. Black and WhiteA week of mono The title of this project says it all. Challenge yourself to shoot nothing but black and white photographs. Learning to see in black and white and spot subjects and scenes with the most potential is half the battle when it comes to shooting in mono, and committing a week to it can help to develop your eye. (one option is to shoot in RAW, but change the Picture Style setting on your camera to Monochrome. This will give you a black and white preview on the rear screen, while still recording a full-color RAW file that you can convert later to mono later in software.)a month of mono with a touch of color This project is similar to the one above but instead of only having a black and white picture, you will add the color back to one object in the picture to create a focal point..
20. Angle of viewWorm’s eye view Shoot a series of 5 photographs from the view of a worm (from on the ground looking up. Be sure that the subject matter is interesting and that you have a focal point for your picture. Bird’s eye viewShoot a series of 5 photographs similar to the above
project but from
the view of a bird (from above looking down)