web-based ide for interfacing view controller · 2010-12-20 · web-based ide for interfacing view...
TRANSCRIPT

Web-based IDE for Interfacing View Controller
A Writing Project
Presented to
The Faculty of the Department of Computer Science
San José State University
In Partial Fulfillment
Of the Requirements for the Degree
Master of Science
by
Tejasvi Palvai
Dec 2010
i

© 2010
Tejasvi Palvai
ALL RIGHTS RESERVED
ii

SAN JOSÉ STATE UNIVERSITY
The Undersigned Writing Project Committee Approves the Project Titled
Web Based IDE for Interfacing View Controller
by
Tejasvi Palvai
APPROVED FOR THE DEPARTMENT OF COMPUTER SCIENCE
Dr. Chris Pollett, Department of Computer Science 12/02/2010
Dr. Mark Stamp, Department of Computer Science 12/02/2010
Dr. Robert Chun, Department of Computer Science 12/02/2010
iii

ABSTRACT
The main idea of this project is to develop a web-based IDE, which helps users to
avoid installing or configuring the Desktop IDE. It also enables users to create
XHTML pages using the drag and drop mechanism in Struts. Struts extends the
Java Servlet API to encourage developers to adopt the MVC (Model-View-
Controller) architecture. In this project, a web application for interfacing the view
and controller parts of the MVC architecture was developed. This web-based IDE
connects the View and Controller components when the user drags and drops
HTML elements in the UI of the IDE. With this project, users can create dynamic
web pages without having any knowledge in XHTML or any server side language.

ACKNOWLEDGEMENTS
I am grateful for my advisor, Dr. Chris Pollett, for his suggestions and constant
guidance throughout my master’s project, and also for my committee members,
Dr. Mark Stamp and Dr. Robert Chun, for their time and effort.
I would like to thank my good friends Swathi, Deepti and Sugi for their help, and
feedback. I would also like to thank my husband, Vipan Nalla, for his
encouragement and constant support.

Table of Contents
1. Introduction----------------------------------------------------------------------1
2. Tools Used ----------------------------------------------------------------------4
2.1. My Eclipse-----------------------------------------------------------------4
2.2. Tomcat Server-------------------------------------------------------------4
2.3. Struts------------------------------------------------------------------------5
2.4. Firebug ---------------------------------------------------------------------6
2.5. CKEditor -------------------------------------------------------------------6
2.6. Java--------------------------------------------------------------------------6
3. Preliminary work---------------------------------------------------------------7
3.1 Developing a demo struts application ----------------------------------7
3.2 Comparison of JavaScript frameworks --------------------------------8
3.3 Developing the view page ---------------------------------------------10
4. Directory structure for struts -----------------------------------------------13
4.1 Server side ----------------------------------------------------------------13
4.2 Client side-----------------------------------------------------------------13
4.3 Configuration files-------------------------------------------------------14
4.3.1 Struts-config -------------------------------------------------------14
5 Login page-------- -----------------------------------------------------------17
5.1 User authentication-----------------------------------------------------17
5.2 Database table-----------------------------------------------------------18

6 Tree Structure for Projects------------------------------------------------19
6.1 Project creation in server---------------------------------------------19
6.2 Implementation--------------------------------------------------------21
7 Horizontal Menu-----------------------------------------------------------24
7.1 Modal box--------------------------------------------------------------24
7.2 Implementation -------------------------------------------------------25
8 Tabs for View --------------------------------------------------------------27
8.1 JQuery Tab ------------------------------------------------------------27
8.2 Design and Edit--------------------------------------------------------27
9 Tools-------------------------------------------------------------------------30
9.1 Drag and Drop---------------------------------------------------------30
9.2 Right Click on HTML elements------------------------------------30
10 Performance----------------------------------------------------------------33
10.1 Operating System--------------------------------------------------33
10.2 Browser compatibility---------------------------------------------33
10.3 Issues ----------------------------------------------------------------33
10.4 Usability Testing---------------------------------------------------34
10.4.1 Results---------------------------------------------------------34
11 Conclusion -----------------------------------------------------------------36
12 References------------------------------------------------------------------37

List of Figures
Figure 1: Struts Demo ----------------------------------------------------------8
Figure 2: Drag and drop example----------------------------------------------9
Figure 3: View part of IDE----------------------------------------------------12
Figure 4: Directory structure---------------------------------------------------16
Figure 5: Login page------------------------------------------------------------18
Figure 6: Tree Structure of user projects-------------------------------------20
Figure 7: IDE with Editor------------------------------------------------------22
Figure 8: Horizontal bar--------------------------------------------------------24
Figure 9: Horizontal bar with dropdowns------------------------------------24
Figure 10: Modal box-----------------------------------------------------------25
Figure 11: Popup Window-----------------------------------------------------26
Figure 12: Edit mode-----------------------------------------------------------29
Figure 13: Design mode--------------------------------------------------------29
Figure 14: Drop down of html elements-------------------------------------31
Figure 15: Attribute setting----------------------------------------------------32
Tables
Table 1: Test results using Slick speed-------------------------------------10
Table 2: Results---------------------------------------------------------------43

1 INTRODUCTION
An IDE (Integrated development environment) is a software application that
provides comprehensive facilities like a source code editor, compiler, and a
debugger for software development. There are many IDEs available for
programmers, such as Eclipse, Net Beans, emacs, JDeveloper, textmate and
intellijs. However, these IDEs are desktop-based applications. Users have to install
and run them from scratch. Even after installing, these desktop IDEs take some
time in loading the entire application and opening the editor. To avoid all these
complications, Web-based IDEs are emerging which make life easier for any
software developer.
A Web-based IDE is an online programming environment with a file manager and
a console interface for compiling and executing. It also supports computer
languages like Java, C, C++, php, html and many more.
The main advantages of Web-based IDEs when compared to a desktop IDEs are:
i) Instant Development and Code Testing: Web-based ide avoids installing
or configuring any desktop IDE, thus users can begin to write any code
without wasting time in environment setting or configurations.
ii) Accessing the Code from anywhere: Since web-based IDE is an online
service, it can be accessed from anywhere there is we have internet
connection.

iii) Layout: Web applications tend to be sparser in information density,
using white space, font changes, and other layout techniques to guide
the user in certain focused directions.
iv) Increases visual sophistication: Web users tend to expect a higher
degree of visual sophistication from their applications. Animation,
transparency and even sound cues are fairly common.
An example of a web-based IDE, which already exists, is Bespin. It is a product of
Mozilla Labs (which is a part of Mozilla). It is a web-based integrated
development environment (editor) that allows developers to collaborate on code-
based projects. Bespin features a code editor with syntax highlighting and access
to frequently used actions via the Command Bar. Work can be resumed from any
browser at any time without the need to save.
The main disadvantage of Bespin [3] is that at present it supports only JavaScript,
HTML, CSS code and also it is compatible only with Firefox browser. In Internet
Explorer ,this IDE failed with JavaScript errors. Also, the present version has
sluggishness in the cursor movement.
This web-based IDE is similar to Bespin but has the drag and drop functionality. It
supports many computer languages like Java, Html, JavaScript, JSP and many
more. This project was developed using the Struts and JQuery framework and is

based on MVC architecture (Model-View-Controller). With this IDE, users can
create database tables, insert the data into the tables, and also create any queries to
retrieve the data from the tables without actually knowing any SQL.
This project mainly focused on interfacing between the View and Controller of
MVC.
With this web-based IDE, users can create html elements using the drag and drop
functionality. These elements can be made dynamic when connected to the
controller components. Without any prior knowledge of XHTML and server side
languages, one can create dynamic web pages. This IDE requires a browser like
Firefox or Google Chrome. When the users type the url of this web-based IDE, it
redirects them to Login page. If they are new users, this IDE asks them to register.
After logging in successfully, users can create, delete and manage their own
projects.

2) Tools
2.1) MyEclipse
MyEclipse is a desktop IDE tool for developing any software applications
(includes web applications) and supports full life cycle of application
development. It has an application development environment for languages like
Java, XML, JSP, databases and server connectors to optimize development,
deployment, testing and also portability. It works on Windows, Linux, and also on
Apple's OS X .
Main features of MyEclipse are:
a) It has inbuilt Spring, Java Server Faces and Spring frameworks in it which
makes a developer life easy.
b) It provides rich development of client side content.
c) It provides Database development
d) It is also inexpensive and gets better with advance features with each release.
2.2 Tomcat Server
Tomcat server was used to host our Web application (i.e. Web based IDE). It is
one of the most popular web servers. It is free, reliable and also easy to configure.
It includes features like CGI, SSL, and virtual domains. Tomcat is primarily used
to serve both static content and dynamic web pages on the World Wide Web.

Many web applications are designed expecting the environment and features it
provides.
When a user requests a page on a browser, it redirects the page to the respective
web server. The web server fetches the requested page and sends it to the web
browser.
2.3 Struts
The Framework that was used develop this web application is Struts [2]. The
reason to choose Struts and not any other frameworks (like Spring, Java Server
Faces) is because it has got excellent support for Tag library (which has wide
industry acceptance) and also it is easy to Integrate with client side technologies. It
is an open source framework based on Model-View-Controller architecture.
MVC [1] is considered an architectural pattern used in software engineering. It
separates the business logic and application data from the presentation data to the
user. In this project, the model is responsible for providing the data from the
database and storing it into the database .In general, Model is not a database. It is
both the data and business logic that is needed to manipulate the data in the
application. View represents the user view of the applications and is responsible
for taking the input from the user, whereas the Controller is the intermediary
between Model and View. The Controller receives input and initiates a response
by making calls on model objects. A controller accepts input from the user and
instructs the model and view port to perform actions based on that input. This
project is mainly focused on developing the interface between the view and
controller of the MVC.
2.4 Firebug
Firebug is software, which integrates with the Firefox. It is one of the very
important and powerful tools in web development. It helped me in finding the
errors and debugging the HTML, JQuery, CSS and XML on the web page of this
project.
2.5 CKEditor
It is an open source text editor, which can be used inside the web pages. It is a
powerful tool and it has ready to use plugins and buttons, which made it easy to
integrate in my web-Based IDE. It is compatible with almost all the Internet web
browsers such as Explorer, Firefox, Google Chrome, Safari and Opera.
2.6 Java
To write the server side code, Java language was used in this project. Java’s
portable nature (write once and run anywhere) makes it one of the most popular
computer languages and is widely used in many of the web applications and
developing application software. The client side applications was developed using
Java server pages(JSP).

3 Preliminary work:
As a part of preliminary work, the research on Web based IDEs was done and also
came up with the tools required to develop this project. Understood the Struts
framework and MVC architecture. The whole work was divided into four
different deliverables.
3.1: Developing the Demo Struts Application:
In the very first deliverable, a basic Struts application to get comfortable working
with Struts was developed. This is a simple web application, which has a login
page, and when the user enters his username and password, it validates them
and takes necessary actions. If any of the columns are left empty or entered
incorrectly, then the user will be redirected to failure.jsp, which prompts the
user to enter the login details again correctly. If all the details are entered
correctly, the user is authenticated and will be redirected to the success.jsp.

The following figure is the snapshots of login page and success page
Figure 1: Struts Demo
3.2 Comparison of JavaScript framework
In the second deliverable, the various JavaScript frameworks [6] like JQuery,
YUI[8] (Yahoo Use Interface), DOJO were compared and selected the appropriate
framework for my project. To perform this, a Drag and Drop example was

developed using all the three frameworks. With this example, one can drag and
drop the courses from one department to another department.
Following is the screen shot for the example. In the figure, there are two
departments, Computer Science and Computer Engineering. Users can drag and
drop the courses from one department to another department. This was
implemented by using JQuery [7], YUI and DOJO.
Figure 2- Drag and drop example
Using the Drag and Drop example, the three frameworks were tested and
following are the results.
Memory Testing: YUI uses more memory when compared to JQuery and DOJO.
For the example shown above, YUI took around 78k and JQuery used 65 k of
memory. This was tested using task manager in windows. JQuery performs well in
almost all the browsers and also has highly effective and short code. It was very
fast in Firefox, where as YUI was slow compared to JQuery and DOJO

Dojo is not compatible in Internet Explorer 8, Mozilla Firefox 3.1, Beta2 and
Safari 3.2.1
Following are the test results Using Slick speed.
Table 1)) Test results using Slick speed.
In many browsers and for some of the selectors tests, Dojo Query and YUI did not
work or were not compatible, where as JQuery passed them all.
Hence decided to use JQuery framework for my project.
3.3 Developing the Web page
In the third and fourth deliverable, designed and implemented the View part of the
Web-based IDE. The entire view part is divided into five different components:
top bar, right bar, left bar, central part and the bottom part. The bottom of the IDE

has the trash bin. The main purpose of doing this is to make the user interface
more user friendly. The implementation of each function is done during the next
semester.
The left part of the IDE is for managing the projects. These projects appear in a
tree structure .The main project folder has various subfolders and each subfolder is
a project created by the user. The left side of IDE also has a controller div. It has
various controller files and each file has different functions from Action file
(Action.java).
The top part is the horizontal menu bar. It is a horizontal and standard menu bar.
The top-level menu items are next to each other from left to right, and all other
submenu items are stacked vertically. The right most part of the IDE has html
elements (like title, button, table, form and file) Users can create forms and drag
and drop these elements onto the form. The central part is the edit part. It is for
writing and reading the code in any language.
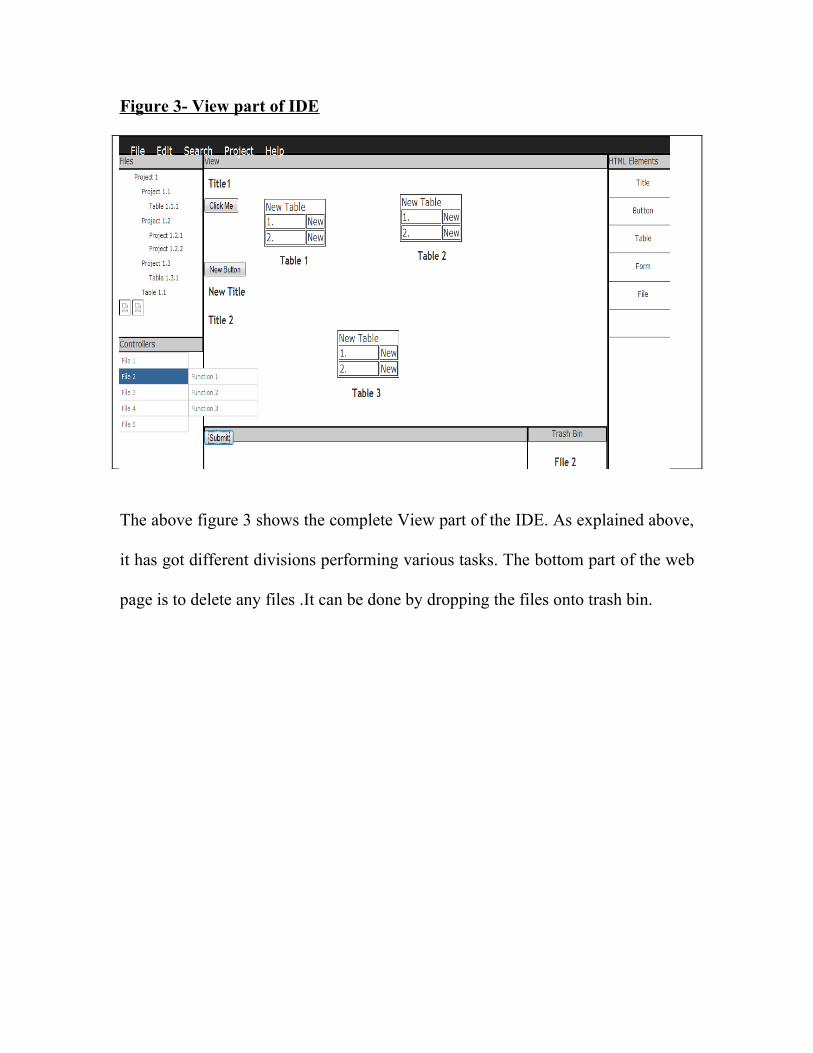
Figure 3- View part of IDE
The above figure 3 shows the complete View part of the IDE. As explained above,
it has got different divisions performing various tasks. The bottom part of the web
page is to delete any files .It can be done by dropping the files onto trash bin.

4) Directory Structure for Struts:
The figure: 3 shows the directory structure of this particular web application
project. The folder name of this project is ‘strutswebproject’.
4.1 Server Side files
The Struts framework has a well-defined directory structure. All Action files
(CreationAction.java,ParsingAction.java,ReadAction.java) are kept under
com.visualbuilder.struts.action.These are controller files.
In com.visualbuilder.struts.beans, the form files were kept. They are typically
written using Java beans.
4.2 Client side files
Next we need to create a WEB ROOT folder, which has the entire client side files.
One of the vital components of this web root folder is WEB_INF .It contains the
configuration information in web.xml and struts-config.xml files, classes that are
called by Java server pages (JSP) and also class files for servlets for our web
application. The other html and jsp pages used in this project are Welcome.html,
which is a login page, web based IDE.jsp, which has the main web page, and
logout.html .It is this page that appears when users log out from the web IDE.

4.3 Configuration files
These files are very important and describe how to deploy any web-based
application in a Servlet container such as Apache or Tomcat. It is mainly used for
establishing the connection between web application and web container.
The following is the servlet mapping in the web.xml file.
<servlet-mapping>
<servlet-name>action</servlet-name>
<url-pattern>*.do</url-pattern>
</servlet-mapping>
4.3.1 Struts-config
Struts-config.xml contains three important elements used to describe actions:
i) form-beans: These form-beans contain FormBean definitions along with
name and type.
ii) global-forwards: these global-forwards contain Global Forwards
definitions.
iii) action-mapping: contains action definitions. It uses an action element for
each action defined.

The following code is one of the action-mappings in the struts-config.xml file.
<action-mappings >
<action name="CreatioForm" path="/File"
type="com.visualbuilder.struts.action.CreationAction"
validate="true"input="Web Based IDE.jsp">
<forward name="success" path="/Web Based IDE.jsp"/>
</action>
</action-mappings
Web root folder also has a META_INF folder. It contains meta information and
has all the .jar files. These are created when we write a jarfile. The other folders
worth mentioning are the CSS (Cascading Styling Sheet). This folder has different
.css files required for styling the main web page. The JavaScript folder has all the
js files.It has both the open source js files like jquery.min.js, jquery-ui.js and also
the files written by me for developing this IDE (for example, files are
dnd.js,dnd1.js,read_write.js)
This project also has different libraries like struts libraries, J2EE libraries and Java
run time environment System library.
The following figure: 4 shows the directory structure of this project.

Figure 4-Directory Structure

5 Login Page:
The Login Page of this web application is ‘welcome.html’. As the name suggests,
this page was developed using HTML. The welcome.html page will be in the
WEB-INF folder, and we need to declare a welcome file in the web.xml
configuration file.
One can access the project root with the url http://localhost:8080/strutswebproject/
where strutswebproject is the project folder name. This url will redirect to
http://localhost:8080/StrutsExample/WEB-INF/Welcome.html/internally
The welcome file inside Web.xml is as follows:
<welcome-file-list>
<welcome-file>Welcome.html
</welcome-file>
</welcome-file-list.
5.1 User authentication:
The welcome page has a text field to enter the user name and another text field to
get the password. This form also has ‘submit’ and ‘cancel’ buttons. When clicking
on the submit button, and if the user is authenticated, it will redirect the welcome
page to the Web-based IDE.jsp page. The cancel button is used to reset the text
fields in the form.

If the user is new to this application, they can create a new account by clicking
the’new user?’ link. On clicking this link, a popup window opens up and users can
register. If the user enters a incorrect password or if they forget the password, they
can always reset the password by clicking the "forgot the password" link.
The following figure shows the login page of Web IDE.
Figure 5: Login page
5.2 Database table
The database table name “user_table” was created in the database ‘MYSQL’ to
store the entire user ID and passwords. The table has columns such as email,
username and password. The primary key of this database table is “Email ID” of
the user.

6 Tree structure for projects
The left most part of the IDE has the div called ‘Files’. The users can create and
manage different projects. When a user creates a new project, a folder with that
name is created in the server. The reason for storing the newly created project in
the server instead of the database is to avoid any synchronization problems, i.e. if
a user deletes a particular project in the server, it needs to be reflected in the
database. This project is mainly on the Interfacing the View and Controller of
MVC in this project and not on the Model.
6.1 Project creation in server
The Struts based project folder (created by the user) in the view creates three
different sub folders (Action, Model, Web-Inf) in the server. The Action folder has
the Action. java , which is a controller file. The Form folder has a Form. java file
and Web-Inf has three different files, namely Index.jsp, Struts-config.xml and
web-xml files. The Web.xml file defines the Action Servlet, which is the
controller piece that is provided by the Struts framework and maps URI (Uniform
resource indicator).
Action.java extends org.apache.struts.action.Action class. It is a controller, which
handles the requests and decides what kind of server-side model objects can be
invoked. Based on the outcome of this, it selects the next view.

Form.java extends org.apache.struts.action.ActionForm class. It decides the set of
properties that reflect the input form and writes the get and set method for each
property. It also has a ‘Validate ()’ method which validates the user input.
In Validate method, if the fields are empty or if the user enters a incorrect
password, the errors are added to ActionErrors () method.
The following figure: 6 show the list of projects created by users and also the list
of files under each project.
Figure 6: Tree structure of user projects
6.2 Implementation:
When a user creates a new project with a name, the value gets stored in a string
called “file” in the CreationForm.java. In controller file (CreationAction.java) the
ActionForm object was typecasted to a variable (webform) so that we can access
the form variables by using getter and setter methods. The webform.getFile ()
method gets the name from the model and creates the folder in the server. We can
get the path of the server by ‘getServlet (). getServletContext().getRealPath()’;
method. Once the folder gets created in the server, all the sub folders are traversed
through and all the files (Action. java, Form. java, index.jsp, struts-config.xml,
web.xml) in them are stored in an array. This array is later converted to string
buffer and this buffer is sent to the client side to display the files in the view.
request.setAttribute(“ProjectUserName”, Buffer); method sends the string buffer to
the client and in the view side, the values can be retrieved by using:
<%StringBuffervalues= (StringBuffer) request.getAttribute ("FolderName"); %>
Once the buffer value is retrieved, for each project an ‘ul’ element is created and
for each file inside the folder, an ‘li’ element is created. All the li elements are
appended to the ul element.
The path of the files is retrieved in a similar way as the file names and is set as
attributes to the file names. When the user clicks on a file to read or write the code,
an Ajax call is made with the pathname to the ReadAction.java file. This java file

reads the contents of the file from server and returns the string buffer. When the
user writes and saves the file, it gets stored in the server and the user can return
back and read all the content.
Figure 7: IDE with editor
The figure: 7 above shows all the projects created by the users and each project
has files on the left-hand side of the IDE. When the user clicks on a file, an editor
opens on the view part of the IDE
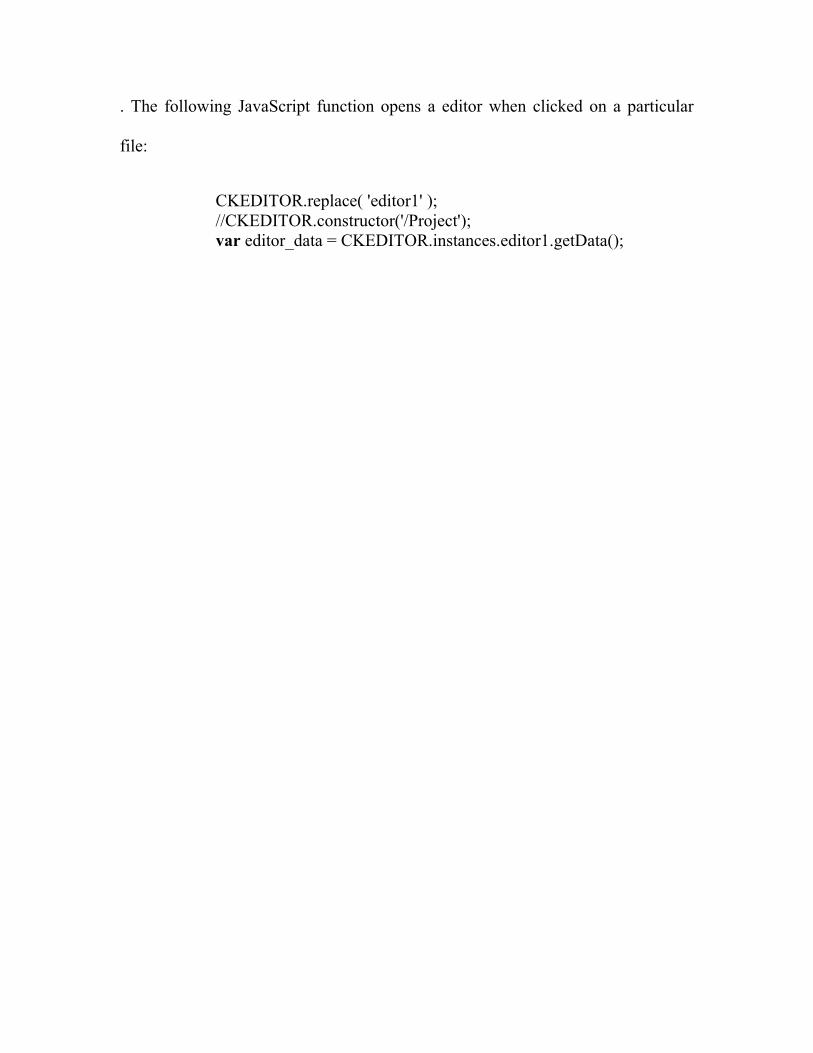
. The following JavaScript function opens a editor when clicked on a particular
file:
CKEDITOR.replace( 'editor1' );//CKEDITOR.constructor('/Project');var editor_data = CKEDITOR.instances.editor1.getData();

7 Horizontal Menu
The horizontal navigation of the web-based IDE has File and help items. The top-
level menu items are next to each other from left to right, and all other submenu items
are stacked vertically. New files can be created and deleted. The file has New
Project, Close Project and Logout, whereas Help has ‘About’. Users can even
create a new project here by clicking the ‘New Project’ dropdown. When the user
clicks on new project, a Modal box opens and they can enter the project name
given in the place provided.
Figure 8 Horizontal bar
Figure:98 Horizontal bar with dropdowns
7.1 Modal box:
A Modal box is developed using JavaScript and is a technique for developing
dialog boxes without using any popups. It uses Ajax for loading content. To
invoke a Modal box all we need to do is call the method Modalbox.show (params).

The figure:10 shows a Modal box. This pops up when the user clicks onto one of
the drop downs to create a project.
Figure 10 Modal box
7.2 Implementation:
When the user clicks on the ‘About’, a popup box opens up describing the Web-
based IDE and also provides a link to the report and contact information to the
user if they have any issues or concerns about this IDE.
This popup box is generated by a JavaScript code and the file is a simple HTML
file ‘About.html’. The following JavaScript code opens a window with a height of
350 and a width of 400.
Function popitup(url) {s
newwindow=window.open(url,'name','height=350,width=400');if (window. Focus)
{newwindow.focus()}return false;

Figure 11 is the window that pops up when clicked on the dropdown of About. It
clearly describes about this web based IDE
Figure 11 Popup window

8 Tabs for View
The central part of the IDE has two different tabs, one is Design and another one
is Edit- each set to similar height and width (125 and 100 respectively). The
reason for having two tabs is to make this IDE user friendly and also to separate
design mode from the coding part.
8.1 JQuery Tabs
To develop these tabs, unordered lists for tabs were used. Each list item. i.e. tab
has an attribute of ‘href’ which matches with the ID of the “tab_content_view”
div. This will be very important once we have JQuery pull off the actions. The
following is the html code to get the tabs
<ul class="tabs_view">
<li><a id = 'design' href="#tab1">Design</a></li>
<li><a id = 'edit' href="#tab2">Edit</a></li>
</ul>
8.2 Design and Edit
Design tab is for visualizing the result of the code in the edit tab, where as edit tab
is for writing and editing the code. Once the code is edited and saved, the output
can be seen in the design tab. CSS file for this is in IDE.CSS file, which is inside

the CSS folder. When the user clicks on a particular file to view or edit, he can
see the file only on the edit tab. This is implemented by using JQuery.
When clicked on the Design tab, all the content on the edit tab is passed to a
function called ‘htmlspecialchars_decode’which decode the special characters and
returns the string. In the returned string, all the special characters like ‘ ’ are
replaced with space and this resultant string is converted to html and appended to
the id of design tab.
The following is the JavaScript code:
$("#design"). click(function () {var h = htmlspecialchars_decode($('#tab2 textarea#editor1').val());alert($('#tab2 textarea#editor1').val());h = h.replace(" ", " ");$('#viewarea'). html(' ').html(h);
});
When clicked on the edit tab, the html that is on the design tab is passed to a
function called ‘html entities’, which replaces html strings, and the resulting string
is added to the edit tab.
The following figure 11 shows code in html in Edit mode, whereas, Figure 12
shows the design of the html code in edit mode.

Figure: 12 Edit mode
Figure 13 Design Mode
9 Tools

The right side of the IDE has HTML elements. The main aim of these tools is to
develop dynamic web pages by dragging and dropping these html elements onto
web pages. These elements are made dynamic by connecting them to controller
components. The various html elements that were used in this project are Labels,
Text fields, Text area, drop downs, check boxes, Radio buttons, and the normal
buttons.
9.1 Drag and Drop
These elements are made draggable [11] and droppable onto the view area by
using the methods $(“. Class”). draggable () and $(“. class). droppable (). In the
drop function, the parameters (like width, height and border) for these html
elements will be set. All the html elements must be dropped onto the view form
only. They cannot be dropped anywhere else on the view area.
9.2 Right click on html elements:
Once the elements are dropped onto the view form, right clicking on them can set
the attributes to each of these. All the elements have the similar right click options,
i.e. edit and delete. On clicking the delete, it will delete that html element on the
view form. Clicking on Edit can set the attributes to the elements.
For the html element label, the attributes that are needed to set are label name and
label value. For field element, they are name, value, text type, and password type.
Similarly text area has placeholder and title attributes.

The dropdown has options and values. These values can be extracted from the
Action.java. Action.java file is parsed and all the methods in this file will be the
values in the drop down list. This parsing of action file is done in Java.
The following figure: 14 demonstrate the drag and drop of html elements onto the
view form. It also shows the right click demonstration of html element (label).
Similarly all the elements on the right side can be right clicked to set the attributes.
Figure 14 Drag drop of html elements
Figure 15 Attribute setting

Figure 15 above demonstrates the attribute modal box that pops up when a user
right clicks on a html element. All the html elements have different attributes and
can be set only on right clicking on that particular element. When the modal box
pops up, everything else on the IDE gets disabled and only this pop up box gets
highlighted. This is done to make sure the user sets the attribute for any element

10 Performances
10.1 Operating system
This web-based IDE was tested both on Windows and OSX. It works really fast on
both these operating systems. Since this web application was developed on
windows, to make it work on OSX one need to make some styling changes in CSS
files.
10.2 Browser Compatibility:
This web application is compatible with Mozilla firefox, Internet explorer (even
with the recent version of IE), Google Chrome and Safari. At this point there are
no performance issues with the browser compatibility. The Firefox takes more
memory for this application compared to the Internet explorer and Google Chrome
(found this using the task manager in the windows).
From the developer’s point of view, Firefox is best as we can debug, analyze the
code and also can detect any code errors instantly with the help of Firebug tool.
10.3 Issues
The present version of the web-based IDE does not have any performance issues
like sluggishness in the cursor movement (Unlike Bespin). This IDE even switches
very quickly between different files just like the desktop IDE.

At present this IDE supports only struts based projects. In future, it can be
enhanced to support other frameworks like cake php, spring, java server faces and
also normal projects (without following any particular frameworks).
The other main challenge with these IDEs is, one must have Internet connection to
have access to their code.
10.4 Usability Testing
Usability testing [9] is a process, which is used to test or evaluate an application or
product by testing it on different users. This is very important phase in any product
as it gives immediate results on how the end users use the product.
This web application was tested on few users and also compared this web
application with other existing applications. Bespin and Aurorasdk were compared
with the Web-based IDE discussed in this report. Bespin and Aurorasdk are also
web-based IDEs which presently exist.
10.4.1 Results:
Results show that:
i) Bespin and Aurorasdk take more time in creating new projects and
switching between the files when compared to this web IDE. This was
tested using Java method (System.currentTimeMillis();). (This provides
the time in milliseconds)

The reason for less time is because there were not any Ajax calls from
client side to server side.
ii) Used Ajax calls for reading and writing to the files which are in the
server. Even here IDE developed by me took less time when compared
to the Aurorasdk
The following table shows the time taken to perform various functions in two
different IDE.
Table2 : Results
Web-Based IDE SJSU BespinLoading a IDE 248 ms 650 ms
Creating a project 1.22 s 1.34 sWriting to files 41 ms 710 msSaving a file 810 ms 1.03 s

11 Conclusion
In this project, a web application using Java was developed and the report focused
on the advantages of web-based IDEs over desktop application IDE and detailed
implementation of how this web application is developed. This IDE increases the
productivity of developers and at the same time promotes the use of open source
standards. The scalability, speed, and productivity of this web ide is comparable to
any desktop application. There are no performance issues with this ide and it
supports many web browsers.
The ‘coding in the cloud’ concept already attracted many developers across the
globe and will become the mainstream integrated development environment in
near future.
This web application can be extended to support many frameworks and
applications in future

12 References
[1] Implementing MVC architecture using Struts
http://www.oracle.com/technology/sample_code/tech/java/j2ee/jintdemo/tutorials/
Struts.html
[2] Struts tutorial by Benmira free http://benmira.free.fr/en/j2ee/struts3.htm
[3] Bespin Web-based IDE http://www.rotorcreative.com/interactive_bespin.php#
[4] Aurorasdk- A Web-based IDE inside your Browser
http://code.google.com/p/aurorasdk/
[5] ECCO – A Web-based IDE inside your Browser http://ecco.sourceforge.net/
[6] JavaScript Frameworks:http://blog.creonfx.com/javascript/mootools-vs-jquery-
vs-prototype-vs-yui-vs-dojo-comparison-revised
[7] JQuery documentation http://jqueryui.com/demos/tabs/
[8] Yahoo User Interface http://developer.yahoo.com/yui/
[9] Usability Testing http://en.wikipedia.org/wiki/Usability_testing
[10] JavaScript properties http://www.quirksmode.org/js/events_properties.html
[11] JQuery UI Draggable and droppable http://jqueryui.com/demos/draggable/