web application
TRANSCRIPT

1
Web Application
How to navigate DirectAdmin and phpMyAdmin
Creating a Database:
1. Log into the DirectAdmin dashboard using your UWin credentials at
https://myweb.cs.uwindsor.ca:2222/
2. On the left-hand side hover the Control Panel icon and click Account Manager -> MySQL
Management.
3. To create a new database, click Create new Database.
4. The creation menu will require you to input a “Database Name”, “Database User”, and
“Database Password”. By default, the “Database User” will be the same as the
“Database Name” (change if you want).
Creating a Table for a Database:
1. To make changes and create tables for an existing database in your DirectAdmin
account, click on phpMyAdmin on the right-hand side of the screen. You can also
navigate to phpMyAdmin through Account Manager -> MySQL Management and click
on the phpMyAdmin icon. Finally, you can also access it through the link with your UWin
credentials. https://myweb.cs.uwindsor.ca/phpMyAdmin/index.php
2. On the left-hand side of the screen, you will see a list of your created databases. Click on
a created database to modify it.
3. When no tables are available, a menu will request that you input a table “Name” and
“Number of Columns”. Click the Go button on the right to continue.
4. Input the values of the columns of the table and click the Save button to finish.
5. Alternatively, if you can write SQL statements to be executed under the SQL tab. You
may also import SQL files under Import and clicking Browse or drag and drop the file.
6. If you are inserting dates through SQL statements it must be in MySql format “YYYY-
MM-DD" eg. 1999-1-23 or 2021-12-21 (avoid two-digit years as it is ambiguous)
7. Importing the company schema should be done in the order of: company_schema,
employeedata, deptdata, projectdata, worksondata, deptlocationdata, dependentdata
Accessing Domain Files:
1. Within the DirectAdmin Control Panel click System Info & Files -> File Manager
2. By default, you will have one domain available to you under the URL
userid.myweb.cs.uwindsor.ca. Replace userid with your UWin ID.
3. Within “/public_html” is the files for the last domain created. This will access the last
created domain. For specific domains go to /domains/(your domain)/public_html/
2
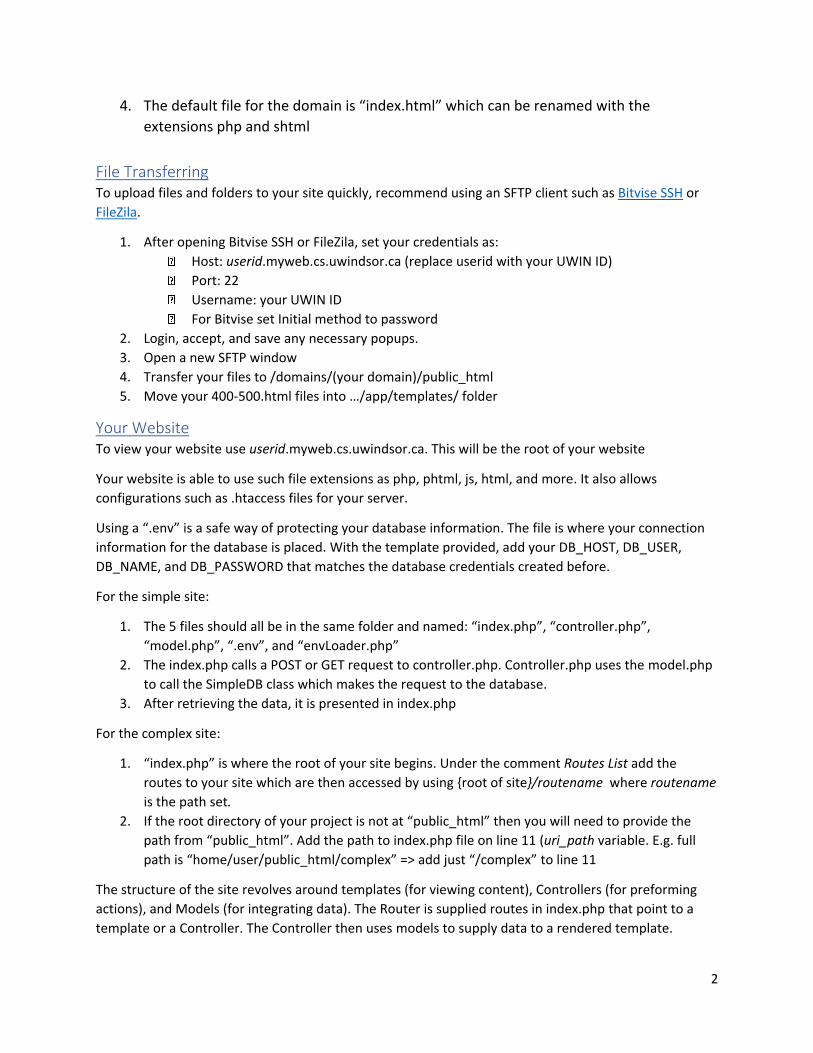
4. The default file for the domain is “index.html” which can be renamed with the
extensions php and shtml
File Transferring To upload files and folders to your site quickly, recommend using an SFTP client such as Bitvise SSH or
FileZila.
1. After opening Bitvise SSH or FileZila, set your credentials as:
Host: userid.myweb.cs.uwindsor.ca (replace userid with your UWIN ID)
Port: 22
Username: your UWIN ID
For Bitvise set Initial method to password
2. Login, accept, and save any necessary popups.
3. Open a new SFTP window
4. Transfer your files to /domains/(your domain)/public_html
5. Move your 400-500.html files into …/app/templates/ folder
Your Website To view your website use userid.myweb.cs.uwindsor.ca. This will be the root of your website
Your website is able to use such file extensions as php, phtml, js, html, and more. It also allows
configurations such as .htaccess files for your server.
Using a “.env” is a safe way of protecting your database information. The file is where your connection
information for the database is placed. With the template provided, add your DB_HOST, DB_USER,
DB_NAME, and DB_PASSWORD that matches the database credentials created before.
For the simple site:
1. The 5 files should all be in the same folder and named: “index.php”, “controller.php”,
“model.php”, “.env”, and “envLoader.php”
2. The index.php calls a POST or GET request to controller.php. Controller.php uses the model.php
to call the SimpleDB class which makes the request to the database.
3. After retrieving the data, it is presented in index.php
For the complex site:
1. “index.php” is where the root of your site begins. Under the comment Routes List add the
routes to your site which are then accessed by using {root of site}/routename where routename
is the path set.
2. If the root directory of your project is not at “public_html” then you will need to provide the
path from “public_html”. Add the path to index.php file on line 11 (uri_path variable. E.g. full
path is “home/user/public_html/complex” => add just “/complex” to line 11
The structure of the site revolves around templates (for viewing content), Controllers (for preforming
actions), and Models (for integrating data). The Router is supplied routes in index.php that point to a
template or a Controller. The Controller then uses models to supply data to a rendered template.

3
3. Routes are added by calling $app->router->add(); It takes a URL path (routename) and a
method. The method is a two-element array with the 0 index being the Controller or template
file to use and 1 index being the controller method to use (get, post, update, or delete)
4. When making a new Controller, extend the \general\Controller class and create a method
corresponding to the action to want to use. At the end of the method call $this->render() which
takes the template name (not extension) and parameters.
5. A template is any html or phtml file added to /app/templates/. By default, there is main.phtml
and 400-500 files. Main.phtml is the layout file for your header and footer. The parameters you
passed into the render method become the variables available in the view.
6. To access the database, it is best to create a model the describes an entity in the database.
Extend the \general\Model whereby you can have access to the Query object. The new model
should contain a list of attributes related to the database and a primary key to use.
7. For instance if you want to get a single Employee you can create an Employee object and use
$employee = Employee::find(id); with the employee id/ssn.
8. A model can find, findAll, load data to it, and save.
9. Using the $this->query Object you can create more complex methods. Query object can select,
insert, update, and delete. Constructing a statement can be done by connecting methods
together. An example execution for SQL statement SELECT * FROM table WHERE attribute =
value;
$this->query->setType(‘collection’);
$data = $this->query->where(attribute, value)->select(‘*’);
10. You can opt to using $this->query->raw($sql, $params), to pass a PDO style SQL statement.
Database Tools
SQL Developer Setup:
Local Download – Go to https://www.oracle.com/tools/downloads/sqldev-downloads.html and
download the appropriate file for your PC. Sign in (Or create a new account) to
complete the download. After download is complete, extract folder to a location
on your PC. Open the folder and run “sqldeveloper”
NoMachine - Login to noMachine. Right click anywhere on the desktop screen. Click “Open in
Terminal”. Do not access it through “/Application/Programming/” at this time.
Run command “sqldeveloper”. When prompted with providing the full path to
the JDK type use “/usr/lib/jvm/oracle-java8-jdk-amd64".
Connecting: To connect to your database on CS servers:
1. Under connections click on the green plus button or double click connections
2. For the connection details use

4
Connection Name: cs01
Username: your UWindsor
Password: your password
Hostname: oracle.cs.uwindsor.ca
Port: 1521
SID: cs01
The following Figure showing the connection to our CS database server with your UWindsor_id as
discussed on slide 9 of the Comp 4150 Course notes, Part B, Oracle PL/SQL also shows the pictorial
display of the use of the above listed parameters for connecting with SQL developer more easily.
Figure on Slide 9 of Part B: Oracle PL/SQL Course Notes: Connection with SQL Developer
Usage You can access different database objects by navigating to the left under connections and opening the
dropdown menu of your database cs01.
5
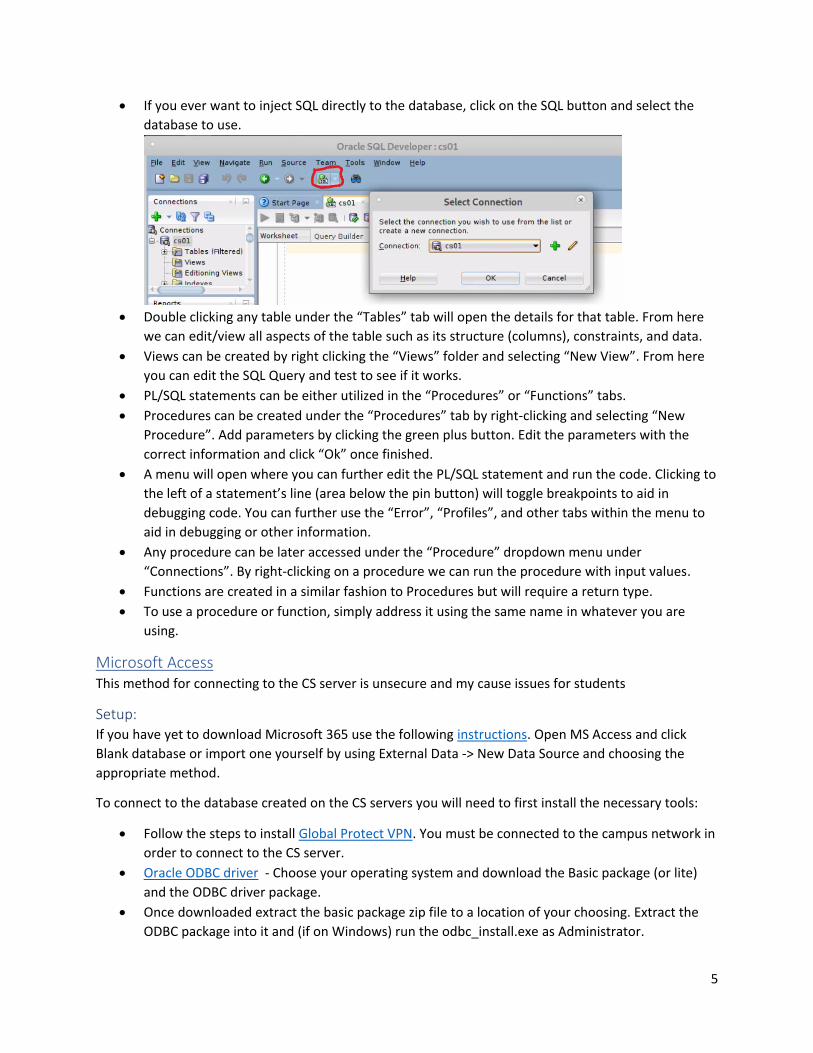
If you ever want to inject SQL directly to the database, click on the SQL button and select the
database to use.
Double clicking any table under the “Tables” tab will open the details for that table. From here
we can edit/view all aspects of the table such as its structure (columns), constraints, and data.
Views can be created by right clicking the “Views” folder and selecting “New View”. From here
you can edit the SQL Query and test to see if it works.
PL/SQL statements can be either utilized in the “Procedures” or “Functions” tabs.
Procedures can be created under the “Procedures” tab by right-clicking and selecting “New
Procedure”. Add parameters by clicking the green plus button. Edit the parameters with the
correct information and click “Ok” once finished.
A menu will open where you can further edit the PL/SQL statement and run the code. Clicking to
the left of a statement’s line (area below the pin button) will toggle breakpoints to aid in
debugging code. You can further use the “Error”, “Profiles”, and other tabs within the menu to
aid in debugging or other information.
Any procedure can be later accessed under the “Procedure” dropdown menu under
“Connections”. By right-clicking on a procedure we can run the procedure with input values.
Functions are created in a similar fashion to Procedures but will require a return type.
To use a procedure or function, simply address it using the same name in whatever you are
using.
Microsoft Access This method for connecting to the CS server is unsecure and my cause issues for students
Setup: If you have yet to download Microsoft 365 use the following instructions. Open MS Access and click
Blank database or import one yourself by using External Data -> New Data Source and choosing the
appropriate method.
To connect to the database created on the CS servers you will need to first install the necessary tools:
Follow the steps to install Global Protect VPN. You must be connected to the campus network in
order to connect to the CS server.
Oracle ODBC driver - Choose your operating system and download the Basic package (or lite)
and the ODBC driver package.
Once downloaded extract the basic package zip file to a location of your choosing. Extract the
ODBC package into it and (if on Windows) run the odbc_install.exe as Administrator.
6
In the folder create a path for your “tnsnames.ora” file. By default, Oracle will use
{path}\network\admin so create this is your folder and add the “tnsnames.ora” file. E.g.
C:\oracle\client\network\admin\tnsnames.ora
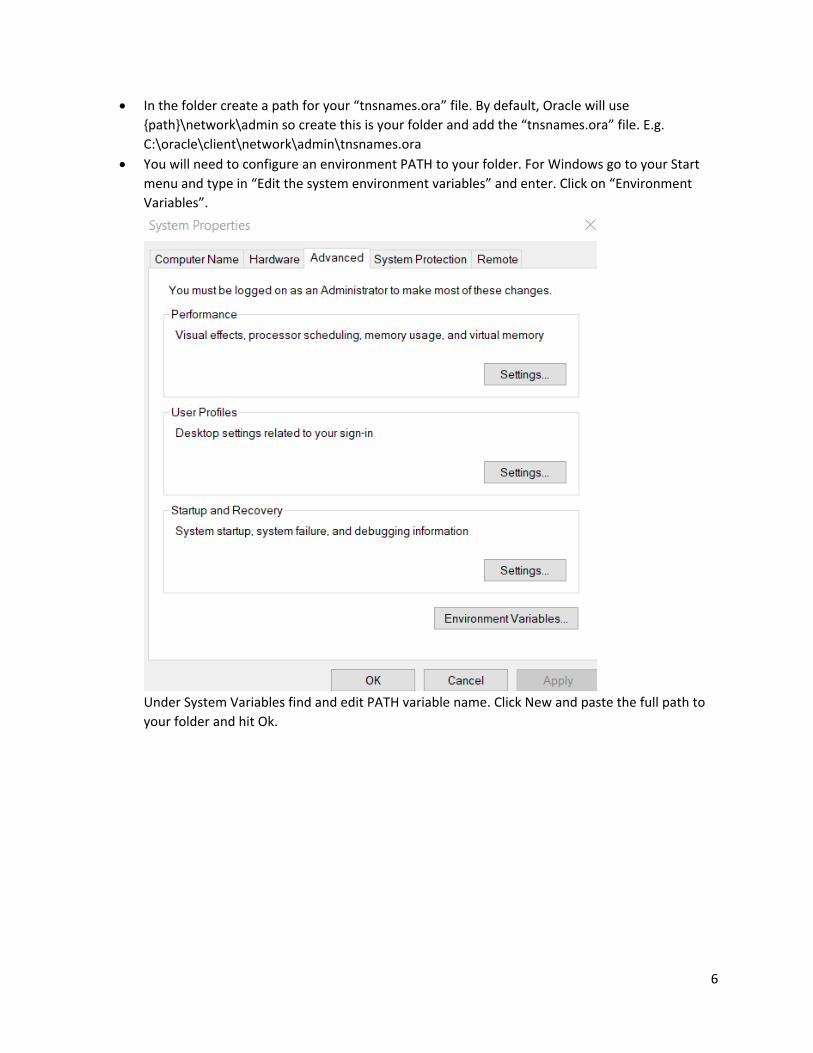
You will need to configure an environment PATH to your folder. For Windows go to your Start
menu and type in “Edit the system environment variables” and enter. Click on “Environment
Variables”.
Under System Variables find and edit PATH variable name. Click New and paste the full path to
your folder and hit Ok.

7
To verify that the driver is correctly installed go to Control Panel -> Administrative Tools and
click on “ODBC Data Sources”. Under Drivers you should see the Oracle in instant_19_11 driver
Go to the “User DSN” tab and click “Add”
Select the Oracle driver and input the information below
o Data Source Name: {Any name. E.g. cs01}
o Description: {Any description. E.g. CS database connection}
o TNS Service Name: CSUWIN
o User ID: {Your UWindsor user id}
8
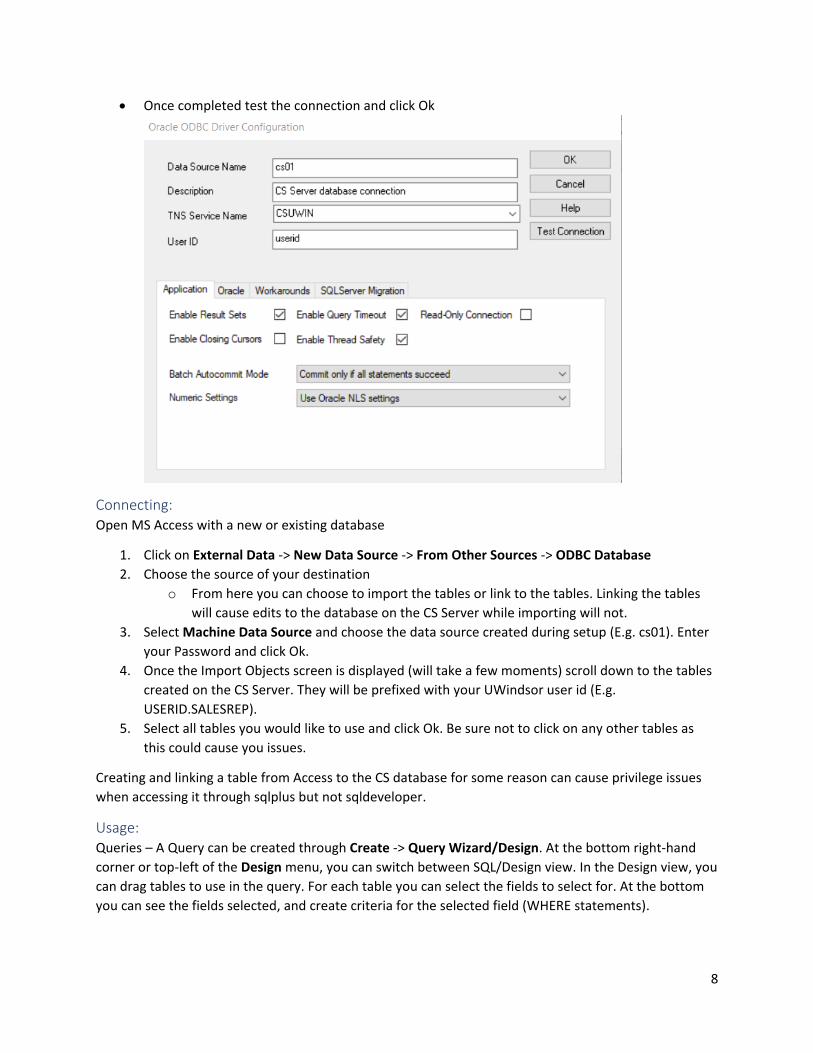
Once completed test the connection and click Ok
Connecting: Open MS Access with a new or existing database
1. Click on External Data -> New Data Source -> From Other Sources -> ODBC Database
2. Choose the source of your destination
o From here you can choose to import the tables or link to the tables. Linking the tables
will cause edits to the database on the CS Server while importing will not.
3. Select Machine Data Source and choose the data source created during setup (E.g. cs01). Enter
your Password and click Ok.
4. Once the Import Objects screen is displayed (will take a few moments) scroll down to the tables
created on the CS Server. They will be prefixed with your UWindsor user id (E.g.
USERID.SALESREP).
5. Select all tables you would like to use and click Ok. Be sure not to click on any other tables as
this could cause you issues.
Creating and linking a table from Access to the CS database for some reason can cause privilege issues
when accessing it through sqlplus but not sqldeveloper.
Usage: Queries – A Query can be created through Create -> Query Wizard/Design. At the bottom right-hand
corner or top-left of the Design menu, you can switch between SQL/Design view. In the Design view, you
can drag tables to use in the query. For each table you can select the fields to select for. At the bottom
you can see the fields selected, and create criteria for the selected field (WHERE statements).
9
Relationships view - By default when importing tables from the CS server, tables will not show their
relationships. To add relationships to the database got to Database Tools -> Relationships. On the right-
hand side drag and drop all the tables the need relationships connected to them. For each table click
and drag the field that to would like to link to the field you would like to like to. A menu will appear to
adjust any settings for the relationship. When you are finished adjusting the settings click “Create”.
These relationships will be known throughout the database features.
MS Access Forms for end-user design
Troubleshooting
If you have trouble logging into DirectAdmin, try resetting your password using
http://cs.uwindsor.ca/password and then clearing your cache and cookies.
If you are unable to view your sites, make sure that your index.php file is directly in the
/public_html directory or you have correctly defined the path in the index.php file.
If your form is not submitting properly then check the path to your controller is correct in
template.php. Check that your table and tuple values in controller.php are equivalent to the
database created in phpMyAdmin. Make sure that the credentials in .env match with your
database created in DirectAdmin. Use the error message provided after submitting to your
database to determine further errors.
A good way of checking variables throughout your site is using ‘var_dump()’ command. Use it as
the following for better readability.
echo '<pre>';var_dump($data);echo '</pre>';
NoMachine installtion help https://help.cs.uwindsor.ca/mediawiki/index.php/NoMachine
In NoMachine, SQL Developer can be found under Applications/Programming but is easiest to
access through the command prompt using the command sqldeveloper. If you have trouble
scrolling down, try using the arrow keys. If the issue persists, try a combination of arrow keys,
scrolling, and moving your pointer to the bottom of the list.
For further help with SQL Developer check out
https://docs.oracle.com/cd/E12151_01/doc.150/e12152/intro.htm#RPTUG10100
When connecting through MS Access make sure that:
Your VPN is connected to the campus network
Oracle drivers are correctly installed
Your “tnsnames.ora” file is in “{path to oracle instant client}\network\admin\” folder
There is a PATH variable pointing to the path of your oracle instant client