web agent installation guide for iplanet siteminder 12...ca technologies product references this...
TRANSCRIPT

Web Agent Installation Guide for iPlanet 12.51
CA SiteMinder®®
2nd Edition

This Documentation, which includes embedded help systems and electronically distributed materials (hereinafter referred to as the “Documentation”), is for your informational purposes only and is subject to change or withdrawal by CA at any time.
This Documentation may not be copied, transferred, reproduced, disclosed, modified or duplicated, in whole or in part, without the prior written consent of CA. This Documentation is confidential and proprietary information of CA and may not be disclosed by you or used for any purpose other than as may be permitted in (i) a separate agreement between you and CA governing your use of the CA software to which the Documentation relates; or (ii) a separate confidentiality agreement between you and CA.
Notwithstanding the foregoing, if you are a licensed user of the software product(s) addressed in the Documentation, you may print or otherwise make available a reasonable number of copies of the Documentation for internal use by you and your employees in connection with that software, provided that all CA copyright notices and legends are affixed to each reproduced copy.
The right to print or otherwise make available copies of the Documentation is limited to the period during which the applicable license for such software remains in full force and effect. Should the license terminate for any reason, it is your responsibility to certify in writing to CA that all copies and partial copies of the Documentation have been returned to CA or destroyed.
TO THE EXTENT PERMITTED BY APPLICABLE LAW, CA PROVIDES THIS DOCUMENTATION “AS IS” WITHOUT WARRANTY OF ANY KIND, INCLUDING WITHOUT LIMITATION, ANY IMPLIED WARRANTIES OF MERCHANTABILITY, FITNESS FOR A PARTICULAR PURPOSE, OR NONINFRINGEMENT. IN NO EVENT WILL CA BE LIABLE TO YOU OR ANY THIRD PARTY FOR ANY LOSS OR DAMAGE, DIRECT OR INDIRECT, FROM THE USE OF THIS DOCUMENTATION, INCLUDING WITHOUT LIMITATION, LOST PROFITS, LOST INVESTMENT, BUSINESS INTERRUPTION, GOODWILL, OR LOST DATA, EVEN IF CA IS EXPRESSLY ADVISED IN ADVANCE OF THE POSSIBILITY OF SUCH LOSS OR DAMAGE.
The use of any software product referenced in the Documentation is governed by the applicable license agreement and such license agreement is not modified in any way by the terms of this notice.
The manufacturer of this Documentation is CA.
Provided with “Restricted Rights.” Use, duplication or disclosure by the United States Government is subject to the restrictions set forth in FAR Sections 12.212, 52.227-14, and 52.227-19(c)(1) - (2) and DFARS Section 252.227-7014(b)(3), as applicable, or their successors.
Copyright © 2015 CA. All rights reserved. All trademarks, trade names, service marks, and logos referenced herein belong to their respective companies.

CA Technologies Product References
This document references the following CA Technologies products:
■ CA SiteMinder®
■ CA IdentityMinder™
(formerly CA Identity Manager)
■ CA SiteMinder® Web Services Security (formerly CA SOA Security Manager)
Contact CA Technologies
Contact CA Support
For your convenience, CA Technologies provides one site where you can access the information that you need for your Home Office, Small Business, and Enterprise CA Technologies products. At http://ca.com/support, you can access the following resources:
■ Online and telephone contact information for technical assistance and customer services
■ Information about user communities and forums
■ Product and documentation downloads
■ CA Support policies and guidelines
■ Other helpful resources appropriate for your product
Providing Feedback About Product Documentation
If you have comments or questions about CA Technologies product documentation, you can send a message to [email protected].
To provide feedback about CA Technologies product documentation, complete our short customer survey which is available on the CA Support website at http://ca.com/docs.

Contents 5
Contents
Chapter 1: Preparation 9
Only Oracle iPlanet Web Server Procedures in this Guide ........................................................................................... 9
Hardware Requirements for CA SiteMinder® Agents ................................................................................................ 10
Preparation Roadmap for Oracle iPlanet web servers ............................................................................................... 11
How to Prepare for a Web Agent Installation on an Oracle iPlanet Web Server ....................................................... 12
Locate the Platform Support Matrix ................................................................................................................... 12
Oracle iPlanet Web Server Preparations for UNIX .............................................................................................. 13
Oracle iPlanet Web Server Preparations for Linux .............................................................................................. 14
Policy Server Requirements ................................................................................................................................ 16
Chapter 2: Install and Configure an Oracle iPlanet Agent on Windows 19
Agent Installation Compared to Agent Configuration ................................................................................................ 19
How to Install and Configure the Agent for Oracle iPlanet on Windows ................................................................... 20
Gather the Information for the Installation Program ......................................................................................... 20
Run the Installation Program on Windows ......................................................................................................... 21
Gather the Information Required by the Configuration Program on Windows ................................................. 21
Run the Web Agent Configuration Program on Windows .................................................................................. 24
Run the Unattended or Silent Installation and Configuration Programs for Subsequent Agents on Windows ............................................................................................................................................................. 26
Apply CA SiteMinder® Changes to Oracle iPlanet Configuration Files with Oracle iPlanet Administration Server Console for SunOne 6.1 Servers ...................................................................................... 27
Manually Configure Non-Default Server Instances, Virtual Servers, or Reverse Proxies for Oracle iPlanet Web Servers ............................................................................................................................................ 28
(Optional) Improve Server Performance with httpd.conf File Changes .............................................................. 30
Chapter 3: Install and Configure an Oracle iPlanet Agent on UNIX/Linux 31
Agent Installation Compared to Agent Configuration ................................................................................................ 31
How to Install and Configure a CA SiteMinder® Agent for Oracle iPlanet on UNIX/Linux ......................................... 32
Gather the Information for the Installation ........................................................................................................ 32
Run the Installation Program on UNIX/Linux ...................................................................................................... 33
Gather the Information that the Configuration Program Requires on UNIX/Linux ............................................ 33
Source the Agent Environment Script on UNIX or Linux ..................................................................................... 36
Set the Library Path Variable on UNIX or Linux ................................................................................................... 37
Run the Web Agent Configuration Program on UNIX/Linux ............................................................................... 37
Run the Unattended or Silent Installation and Configuration Programs for Agents on UNIX/Linux .................. 39

6 Web Agent Installation Guide for iPlanet
Apply CA SiteMinder® Changes to Oracle iPlanet Configuration Files with Oracle iPlanet Administration Server Console for SunOne 6.1 Servers ...................................................................................... 40
Manually Configure Non-default Server Instances, Virtual Servers, or Reverse Proxies for Oracle iPlanet Web Servers ............................................................................................................................................ 41
Modify the Oracle iPlanet Startup Script to Prevent Crashes when the Server Stops ........................................ 42
Chapter 4: Dynamic Policy Server Clusters 45
Connect a Web Agent to a Dynamic Policy Server Cluster ......................................................................................... 46
Chapter 5: Starting and Stopping Web Agents 47
Enable a Web Agent ................................................................................................................................................... 47
Disable a Web Agent .................................................................................................................................................. 48
Chapter 6: Upgrade a Web Agent to 12.51 49
Agent for Oracle iPlanet Upgrade Roadmap .............................................................................................................. 50
How to Upgrade an Agent for Oracle iPlanet ............................................................................................................. 51
Upgrade Process from CA SiteMinder® r6.x........................................................................................................ 52
Upgrade Process from CA SiteMinder® r12.0 ..................................................................................................... 53
Ensure LD_PRELOAD Variable Does Not Conflict with Existing Agent ................................................................ 53
Run the Installation Wizard to Upgrade your Agent on Windows ...................................................................... 54
Run the Installation Wizard to Upgrade your Agent on UNIX/Linux ................................................................... 55
Source the Agent Environment Script After an Upgrade on UNIX/Linux ............................................................ 55
Set the Library Path Variable Before Configuring your Upgraded Agent on UNIX/Linux .................................... 56
Configure your Upgraded Agent on Windows .................................................................................................... 57
Configure your Upgraded Agent on UNIX/Linux ................................................................................................. 58
Apply Changes to your Upgraded CA SiteMinder® Files with the iPlanet Administration Console .................... 58
Manually Configure any Non-Default Server Instances for your Upgraded CA SiteMinder® Agent ................... 59
Chapter 7: Operating System Tuning for Agents 63
Tune the Shared Memory Segments .......................................................................................................................... 64
How to Tune the Solaris 10 Resource Controls .......................................................................................................... 66
Chapter 8: Uninstall a Web Agent 67
Notes About Uninstalling Web Agents ....................................................................................................................... 67
Uninstall a Web Agent from a Windows Operating Environment ............................................................................. 68
Uninstall an Oracle iPlanet Agent from a UNIX System ............................................................................................. 70

Contents 7
Chapter 9: Troubleshooting 73
Web Server Starts but Web Agent Not Enabled ........................................................................................................ 73
smget Error Message When Web Server Starts ......................................................................................................... 73
Reconfigured Web Agent Won't Operate .................................................................................................................. 74
Oracle iPlanet Web Server Fails at Runtime ............................................................................................................... 74
Non-english Input Characters Contain Junk Characters ............................................................................................. 75
Appendix A: Worksheets 77
Agent Installation Worksheet .................................................................................................................................... 77
Agent Configuration Worksheet ................................................................................................................................ 77
Index 79


Chapter 1: Preparation 9
Chapter 1: Preparation
This section contains the following topics:
Only Oracle iPlanet Web Server Procedures in this Guide (see page 9) Hardware Requirements for CA SiteMinder® Agents (see page 10) Preparation Roadmap for Oracle iPlanet web servers (see page 11) How to Prepare for a Web Agent Installation on an Oracle iPlanet Web Server (see page 12)
Only Oracle iPlanet Web Server Procedures in this Guide
This guide only contains procedures for installing or configuring CA SiteMinder® agents on Oracle iPlanet web servers.
To install or configure a CA SiteMinder® agent on any other type of web server or operating environment, see one of the following guides:
■ Web Agent Installation Guide for Apache-based servers.
■ Web Agent Installation Guide for Domino.
■ Web Agent Installation Guide for IIS.

Hardware Requirements for CA SiteMinder® Agents
10 Web Agent Installation Guide for iPlanet
Hardware Requirements for CA SiteMinder® Agents
Computers hosting CA SiteMinder® agents require the following hardware:
Windows operating environment requirements
agents operating on Windows operating environments require the following hardware:
■ CPU: x86 or x64
■ Memory: 2-GB system RAM.
■ Available disk space:
■ 2-GB free disk space in the installation location.
■ .5-GB free disk space in the temporary location.
UNIX operating environment requirements
Agents operating on UNIX operating environments require the following hardware:
■ CPU:
■ Solaris operating environment: SPARC
■ Red Hat operating environment: x86 or x64
■ Memory: 2-GB system RAM.
■ Available disk space:
■ 2-GB free disk space in the installation location.
■ .5-GB free disk space in /temp.
Note: Daily operation of the agent requires 10 MB of free disk space in /tmp. The agent creates files and named pipes under /tmp. The path to which these files and pipes are created cannot be changed.

Preparation Roadmap for Oracle iPlanet web servers
Chapter 1: Preparation 11
Preparation Roadmap for Oracle iPlanet web servers
The following illustration describes how to prepare your web server before you install a CA SiteMinder® agent:

How to Prepare for a Web Agent Installation on an Oracle iPlanet Web Server
12 Web Agent Installation Guide for iPlanet
How to Prepare for a Web Agent Installation on an Oracle iPlanet Web Server
To prepare for a CA SiteMinder® agent installation on an Oracle iPlanet server, use the following process:
1. Locate the Platform Support Matrix (see page 12). Verify that your web server supports the version of the CA SiteMinder® agent that you want to install.
2. Verify that you have an account with one of the following types of privileges for your web server:
■ Administrative privileges (for the Windows operating environment)
■ Root privileges (for the UNIX or Linux operating environments)
3. Configure the appropriate additional settings that a CA SiteMinder® Agent requires using one of the following lists:
■ Oracle iPlanet web server preparations for UNIX operating environments (see page 13).
■ Oracle iPlanet web server preparations for Linux operating environments (see page 14).
4. Verify that the Policy Server is installed and configured (see page 16).
5. Review the known issues section of the Web Agent Release Notes.
Locate the Platform Support Matrix
Use the Platform Support Matrix to verify that the operating environment and other required third-party components are supported.
Follow these steps:
1. Go to the CA Support site.
2. Click Product Pages.
3. Enter the product name and click Enter.
4. Open popular links and click Informational Documentation Index.
5. Click Platform Support Matrices.
Note: You can download the latest JDK and JRE versions at the Oracle Developer Network.
Technology Partners and CA Validated Products
The latest list of partners and their validated products.
How to Prepare for a Web Agent Installation on an Oracle iPlanet Web Server
Chapter 1: Preparation 13
Oracle iPlanet Web Server Preparations for UNIX
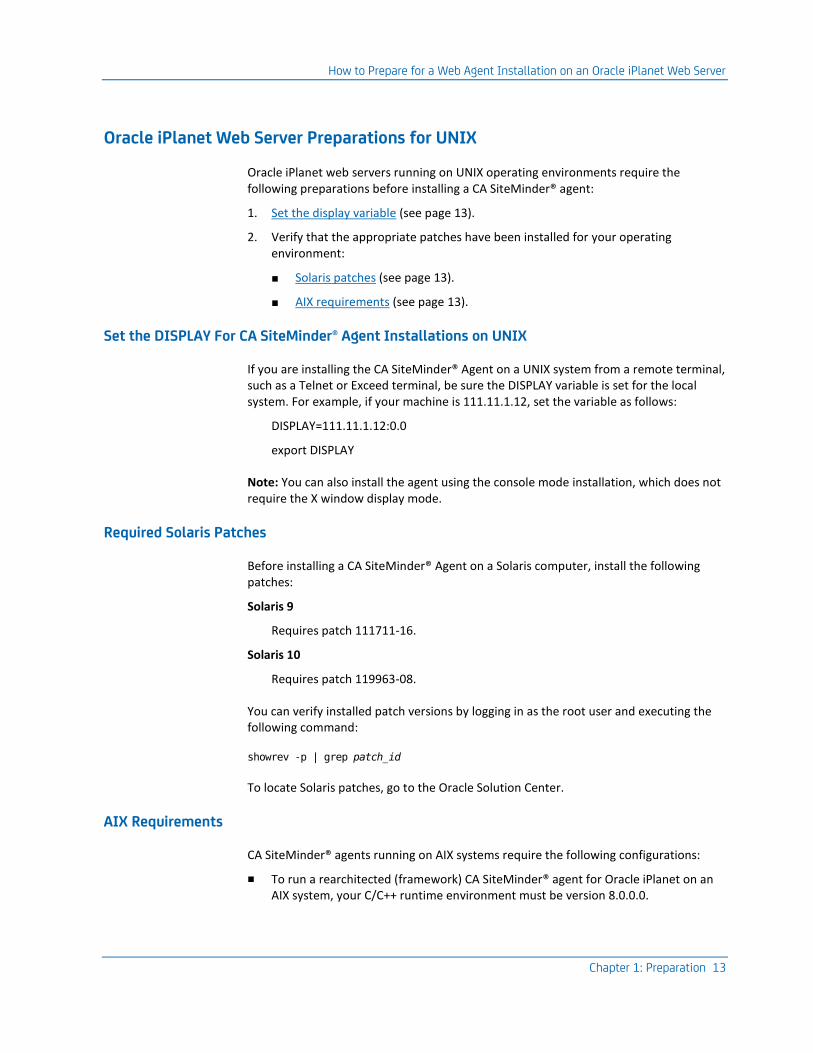
Oracle iPlanet web servers running on UNIX operating environments require the following preparations before installing a CA SiteMinder® agent:
1. Set the display variable (see page 13).
2. Verify that the appropriate patches have been installed for your operating environment:
■ Solaris patches (see page 13).
■ AIX requirements (see page 13).
Set the DISPLAY For CA SiteMinder® Agent Installations on UNIX
If you are installing the CA SiteMinder® Agent on a UNIX system from a remote terminal, such as a Telnet or Exceed terminal, be sure the DISPLAY variable is set for the local system. For example, if your machine is 111.11.1.12, set the variable as follows:
DISPLAY=111.11.1.12:0.0
export DISPLAY
Note: You can also install the agent using the console mode installation, which does not require the X window display mode.
Required Solaris Patches
Before installing a CA SiteMinder® Agent on a Solaris computer, install the following patches:
Solaris 9
Requires patch 111711-16.
Solaris 10
Requires patch 119963-08.
You can verify installed patch versions by logging in as the root user and executing the following command:
showrev -p | grep patch_id
To locate Solaris patches, go to the Oracle Solution Center.
AIX Requirements
CA SiteMinder® agents running on AIX systems require the following configurations:
■ To run a rearchitected (framework) CA SiteMinder® agent for Oracle iPlanet on an AIX system, your C/C++ runtime environment must be version 8.0.0.0.

How to Prepare for a Web Agent Installation on an Oracle iPlanet Web Server
14 Web Agent Installation Guide for iPlanet
Oracle iPlanet Web Server Preparations for Linux
Oracle iPlanet web servers running on Linux operating environments require the following preparations before installing a CA SiteMinder® agent:
1. Verify that the required patches are installed (see page 14).
2. Verify that the required libraries are installed.
Required Linux Patches
The following Linux patches are required:
For Web Agents running on 64-bit Linux systems
■ Binutils 2.17
■ GCC 4.1.0
Required Linux Libraries
Certain library files are required for components operating on Linux operating environments. Failure to install the correct libraries can cause the following error:
java.lang.UnsatisfiedLinkError
If you are installing, configuring, or upgrading a Linux version of this component, the following packages are required on the host system:
Red Hat 5.x:
■ compat–gcc-34-c++-3.4.6-patch_version.I386
■ libstdc++-4.x.x-x.el5.i686.rpm
■ libidn.so.11.rpm
■ ncurses

How to Prepare for a Web Agent Installation on an Oracle iPlanet Web Server
Chapter 1: Preparation 15
Red Hat 6.x:
■ libstdc++-4.x.x-x.el6.i686.rpm
■ libidn-1.18-2.el6.i686
■ libXext.i686.rpm
■ libXrender.i686.rpm
■ linXtst.i686.rpm
■ libidn.so.11.rpm
■ ncurses
Additionally, for Red Hat 6.x (64-bit):
All the RPM packages that are required for 64-bit Red Hat 6.x are 32-bit packages.
■ libXau-1.0.5-1.el6.i686.rpm
■ libxcb-1.5-1.el6.i686.rpm
■ compat-db42-4.2.52-15.el6.i686.rpm
■ compat-db43-4.3.29-15.el6.i686.rpm
■ libX11-1.3-2.el6.i686.rpm
■ libXrender-0.9.5-1.el6.i686.rpm
■ libexpat.so.1 (provided by expat-2.0.1-11.el6_2.i686.rpm)
■ libfreetype.so.6 (provided by freetype-2.3.11-6.el6_2.9.i686.rpm)
■ libfontconfig.so.1 (provided by fontconfig-2.8.0-3.el6.i686.rpm)
■ libICE-1.0.6-1.el6.i686.rpm
■ libuuid-2.17.2-12.7.el6.i686.rpm
■ libSM-1.1.0-7.1.el6.i686.rpm
■ libXext-1.1-3.el6.i686.rpm
■ compat-libstdc++-33-3.2.3-69.el6.i686.rpm
■ compat-db-4.6.21-15.el6.i686.rpm
■ libXi-1.3-3.el6.i686.rpm
■ libXtst-1.0.99.2-3.el6.i686.rpm
■ libXft-2.1.13-4.1.el6.i686.rpm
■ libXt-1.0.7-1.el6.i686.rpm
■ libXp-1.0.0-15.1.el6.i686.rpm
■ libstdc++.i686.rpm
■ compat-libtermcap.rpm

How to Prepare for a Web Agent Installation on an Oracle iPlanet Web Server
16 Web Agent Installation Guide for iPlanet
■ libidn.i686.rpm
■ ncurses
Policy Server Requirements
Verify the following criteria:
■ Your Policy Server is installed and configured.
■ Your Policy server can communicate with the computer where you plan to install the agent.
To install and configure a CA SiteMinder® agent, a Policy Server requires at least the following items:
■ A CA SiteMinder® administrator that has the right to register trusted hosts.
A trusted host is a client computer where one or more CA SiteMinder® Agents are installed and registered with the Policy Server. The CA SiteMinder® administrator must have permissions to register trusted hosts with the Policy Server. Registering a trusted host creates a unique trusted host name object on the Policy Server.
■ An Agent identity
An Agent identity establishes a mapping between the Policy Server and the name or IP address of the web server instance hosting an Agent. You define an Agent identity from the Agents object in the Administrative UI. You assign it a name and specify the Agent type as a Web Agent.
■ A Host Configuration Object (HCO)
The host configuration object on the Policy Server defines the communication between the agent and the Policy Server that occurs after an initial connection. The Initial connections use the parameters in the SmHost.conf file.

How to Prepare for a Web Agent Installation on an Oracle iPlanet Web Server
Chapter 1: Preparation 17
■ Agent Configuration Object (ACO)
This object includes the parameters that define the agent configuration. All CA SiteMinder® agents require at least one of the following configuration parameters that are defined in the ACO:
AgentName
Defines the identity of the web agent. This identity links the name and the IP address or FQDN of each web server instance hosting an Agent.
The value of the DefaultAgentName is used instead of the AgentName parameter if any of the following events occur:
■ The AgentName parameter is disabled.
■ The value of AgentName parameter is empty.
■ The values of the AgentName parameter do not match any existing agent object.
Note: This parameter can have more than one value. Use the multivalue option when setting this parameter in an Agent Configuration Object. For local configuration files, add each value to a separate line in the file.
Default: No default
Limit: Multiple values are allowed, but each AgentName parameter has a 4,000 character limit. Create additional AgentName parameters as needed by adding a character to the parameter name. For example, AgentName, AgentName1, AgentName2.
Limits: Must contain 7-bit ASCII characters in the range of 32-127, and include one or more printable characters. Cannot contain the ampersand (&) and asterisk (*) characters. The value is not case-sensitive. For example, the names MyAgent and myagent are treated the same.
Example: myagent1,192.168.0.0 (IPV4)
Example: myagent2, 2001:DB8::/32 (IPV6)
Example: myagent,www.example.com
Example (multiple AgentName parameters): AgentName1, AgentName2, AgentName3. The value of each AgentNamenumber parameter is limited to 4,000 characters.
DefaultAgentName
Defines a name that the agent uses to process requests. The value for DefaultAgentName is used for requests on an IP address or interface when no agent name value exists in the AgentName parameter.
If you are using virtual servers, you can set up your CA SiteMinder® environment quickly by using a DefaultAgentName. Using DefaultAgentName means that you do not need to define a separate agent for each virtual server.

How to Prepare for a Web Agent Installation on an Oracle iPlanet Web Server
18 Web Agent Installation Guide for iPlanet
Important! If you do not specify a value for the DefaultAgentName parameter, then the value of the AgentName parameter requires every agent identity in its list. Otherwise, the Policy Server cannot tie policies to the agent.
Default: No default.
Limit: Multiple values are allowed.
Limits: Must contain 7-bit ASCII characters in the range of 32-127, and include one or more printable characters. Cannot contain the ampersand (&) and asterisk (*) characters. The value is not case-sensitive. For example, the names MyAgent and myagent are treated the same.

Chapter 2: Install and Configure an Oracle iPlanet Agent on Windows 19
Chapter 2: Install and Configure an Oracle iPlanet Agent on Windows
This section contains the following topics:
Agent Installation Compared to Agent Configuration (see page 19) How to Install and Configure the Agent for Oracle iPlanet on Windows (see page 20)
Agent Installation Compared to Agent Configuration
The concepts of installation and configuration have specific meanings when used to describe CA SiteMinder® agents.
Installation means installing the CA SiteMinder® agent software on a computer system. For example, installing an agent creates directories and copies the CA SiteMinder® agent software and other settings to the computer.
Configuration occurs after installation and means the act of preparing the CA SiteMinder® agent software for a specific web server on a computer. This preparation includes registering the agent with CA SiteMinder® Policy Servers, and creating a runtime server instance for the web server that is installed on the computer.
Use the wizard-based installation and configuration programs to install and configure your agent on your first web server. The wizard-based programs create a .properties file.
Use the .properties file and the respective executable file to install or configure the agent silently on additional web servers.

How to Install and Configure the Agent for Oracle iPlanet on Windows
20 Web Agent Installation Guide for iPlanet
How to Install and Configure the Agent for Oracle iPlanet on Windows
Installing and configuring the CA SiteMinder® Agent for Oracle iPlanet involves several separate procedures. To install and configure the Agent for Oracle iPlanet, use the following process:
1. Gather the information for the installation program (see page 20).
2. Run the wizard based installation program (see page 21).
3. Gather the information for the configuration program (see page 21).
4. Run the wizard based configuration program (see page 24).
5. (Optional) Install and configure additional Agents for Oracle IPlanet silently (see page 26).
6. Determine if your Agent for Oracle iPlanet requires any of the following additional configuration steps:
■ (For SunOne 6.1 web servers only) If you want to use the Oracle iPlanet Administration Server console, apply the CA SiteMinder® changes to the configuration files of the Oracle iPlanet web server (see page 27).
■ (Except SunOne/Sun Java 7.0 web servers) Manually configure any nondefault server instances, reverse proxies, or virtual servers for CA SiteMinder® (see page 28).
■ (Optional) Improve server performance with httpd.conf file changes (see page 30).
Gather the Information for the Installation Program
Gather the following information about your web server before running the installation program for the agent:
Installation Directory
Specifies the location of the agent binary files on your web server. The web_agent_home variable is set to this location.
Limit: The product requires the name "webagent" for the bottom directory in the path

How to Install and Configure the Agent for Oracle iPlanet on Windows
Chapter 2: Install and Configure an Oracle iPlanet Agent on Windows 21
Run the Installation Program on Windows
The installation program for the agent installs the agent on one computer at a time using the Windows operating environment. This installation program can be run in wizard or console modes. The wizard and console-based installation programs also create a .properties file for subsequent installations and configurations using the unattended or silent method with the same settings.
For example, suppose the Agents in your environment use the same web server version, installation directory, Agent Configuration Object and Policy Servers. Use the installation wizard or console-based installation program for your first installation. Afterwards, you could create your own script to run the installation program with the .properties file the wizard or console-based installation program created.
Follow these steps:
1. Copy the Web Agent installation executable file to a temporary directory on your web server.
2. Do one of the following steps:
■ For wizard-based installations, right-click the installation executable file, and then select Run as Administrator.
■ For console-based installations, open a command line window and run the executable as shown in the following example:
executable_file_name.exe -i console
3. Use the information that you gathered previously to complete the installation.
Gather the Information Required by the Configuration Program on Windows
Gather the following information about the environment for the product before running the configuration program for the agent:
Register Host
Indicates whether you want to register a trusted host. This registration creates a trusted host object in the Policy Server and an SmHost.conf file on the web server. The agent uses this information to make an initial connection to Policy Servers when it starts. Register each agent instance as a trusted host only once.
Default:Yes
Options: Yes, No
Admin User Name
Specifies the name of a CA SiteMinder® user with Administrative privileges that is already defined in the Policy Server. This CA SiteMinder® user account requires privileges to register trusted hosts.
How to Install and Configure the Agent for Oracle iPlanet on Windows
22 Web Agent Installation Guide for iPlanet
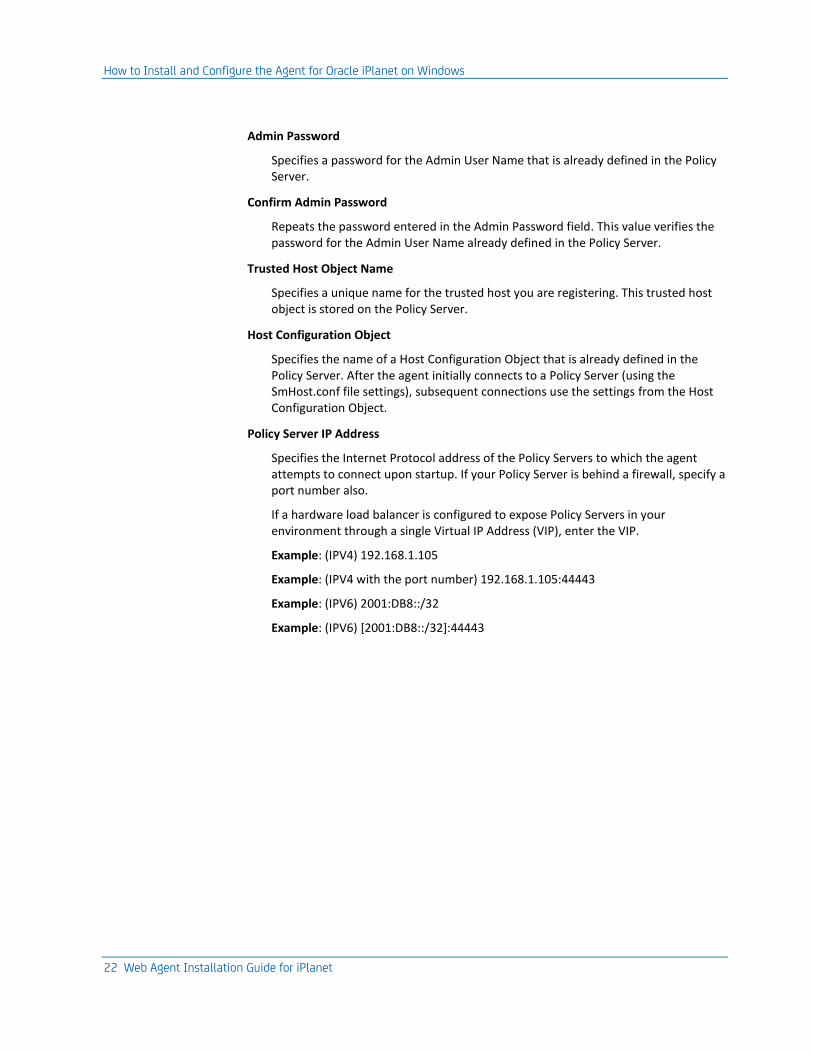
Admin Password
Specifies a password for the Admin User Name that is already defined in the Policy Server.
Confirm Admin Password
Repeats the password entered in the Admin Password field. This value verifies the password for the Admin User Name already defined in the Policy Server.
Trusted Host Object Name
Specifies a unique name for the trusted host you are registering. This trusted host object is stored on the Policy Server.
Host Configuration Object
Specifies the name of a Host Configuration Object that is already defined in the Policy Server. After the agent initially connects to a Policy Server (using the SmHost.conf file settings), subsequent connections use the settings from the Host Configuration Object.
Policy Server IP Address
Specifies the Internet Protocol address of the Policy Servers to which the agent attempts to connect upon startup. If your Policy Server is behind a firewall, specify a port number also.
If a hardware load balancer is configured to expose Policy Servers in your environment through a single Virtual IP Address (VIP), enter the VIP.
Example: (IPV4) 192.168.1.105
Example: (IPV4 with the port number) 192.168.1.105:44443
Example: (IPV6) 2001:DB8::/32
Example: (IPV6) [2001:DB8::/32]:44443

How to Install and Configure the Agent for Oracle iPlanet on Windows
Chapter 2: Install and Configure an Oracle iPlanet Agent on Windows 23
FIPS Mode Setting
Specifies one of the following algorithms:
FIPS Compatibility/AES Compatibility
Uses algorithms existing in previous versions of CA SiteMinder® to encrypt sensitive data and is compatible with previous versions of CA SiteMinder®. If your organization does not require the use of FIPS-compliant algorithms, use this option.
FIPS Migration/AES Migration
Allows a transition from FIPS-compatibility mode to FIPS-only mode. In FIPS-migration mode, CA SiteMinder® environment continues to use existing CA SiteMinder® encryption algorithms as you reencrypt existing sensitive data using FIPS-compliant algorithms.
FIPS Only/AES Only
Uses only FIPS-compliant algorithms to encrypt sensitive data in the CA SiteMinder® environment. This setting does not interoperate with, nor is backwards-compatible with, previous versions of CA SiteMinder®.
Default: FIPS Compatibility/AES Compatibility
FIPS is a US government computer security standard that accredits cryptographic modules which meet the Advanced Encryption Standard (AES).
Important! Use a compatible FIPS/AES mode (or a combination of compatible modes) for both the CA SiteMinder® agent and the Policy Server.
Name
Specifies the name of the SmHost.conf file which contains the settings the Web Agent uses to make initial connections to a Policy Server.
Default: SmHost.conf
Location
Specifies the directory where the SmHost.conf file is stored.
Default: web_agent_home\config
Enable Shared Secret Rollover
Select this check box to change the shared secret that the Policy Server uses to encrypt communications to the Web Agents.
Select Servers
This step has multiple screens. The first screen indicates the server type (Apache), and the next screen displays the web server instances that the configuration program finds on the computer. Select the check boxes of the server type, and the instances you want to configure. Clear the check boxes of those instances from which you want to remove CA SiteMinder® protection.

How to Install and Configure the Agent for Oracle iPlanet on Windows
24 Web Agent Installation Guide for iPlanet
Apache 2.4.x Install Location
Specifies the location of the installation directory for your Apache-based server (version 2.4 or higher).
Agent Configuration Object Name
Specifies the name of an agent configuration object (ACO) already defined on the Policy Server.
Default: AgentObj
Advanced Authentication Scheme Dialog
Specifies the advanced authentication scheme for the web server instances you selected previously.
Run the Web Agent Configuration Program on Windows
After gathering the information for your agent configuration, run the agent configuration program. This program creates an agent runtime instance for the web servers running on your computer.
This configuration program is wizard or console based, depending on the option you select. Running the configuration program in the wizard or console modes once creates a properties file. Use the properties file to run unattended configurations on other computers with same operating environment in the future.
Follow these steps:
1. Open the following directory on your web server:
web_agent_home\install_config_info
web_agent_home
Indicates the directory where the CA SiteMinder® agent is installed on your web server.
Default (Windows 32-bit installations only): C:\Program Files\CA\webagent
Default (Windows 64-bit installations only): C:\Program Files\CA\webagent\win64
Default (Windows 32-bit applications operating on 64-bit systems [Wow64]): C:\Program Files (x86)\webagent\win32
2. Use one of the following configuration methods:
■ For a GUI-based configuration, go to Step 3.
■ For a console-based configuration, go to Step 5.
3. Right-click the following executable, and then select Run as Administrator:
ca-wa-config.exe

How to Install and Configure the Agent for Oracle iPlanet on Windows
Chapter 2: Install and Configure an Oracle iPlanet Agent on Windows 25
4. Go to Step 8.
5. Open a Command Prompt window with Administrator privileges.
6. Navigate to the executable file listed previously, and then run it with the following switch:
-i console
7. Go to Step 8.
8. Follow the prompts shown in the configuration program. Provide the requested values from your agent configuration worksheet.
The agent runtime instance is created for your web servers.

How to Install and Configure the Agent for Oracle iPlanet on Windows
26 Web Agent Installation Guide for iPlanet
Run the Unattended or Silent Installation and Configuration Programs for Subsequent Agents on Windows
The unattended or silent installation option can help you automate the installation and configuration process. This method saves time if you have a large CA SiteMinder® environment that uses many agents with identical settings.
For example, suppose the Agents in your environment use the same web server version, installation directory, Agent Configuration Object and Policy Servers. Use the installation wizard or console-based installation program for your first installation. Afterwards, you could create your own script to run the installation program with the .properties file the wizard or console-based installation program created.
Follow these steps:
1. Run the following wizards on your first web server (in the order shown):
a. The CA SiteMinder® Web Agent Installation wizard.
b. The CA SiteMinder® Web Agent Configuration wizard.
2. Locate the following file on your first web server:
web_agent_home\install_config_info\ca-wa-installer.properties
Note: If the path contains spaces, surround it with quotes.
web_agent_home
Indicates the directory where the CA SiteMinder® agent is installed on your web server.
Default (Windows 32-bit installations only): C:\Program Files\CA\webagent
Default (Windows 64-bit installations only): C:\Program Files\CA\webagent\win64
Default (Windows 32-bit applications operating on 64-bit systems [Wow64]): C:\Program Files (x86)\webagent\win32
3. Perform each of the following steps on the other web servers in your environment:
Note: To automate this process, create your own customized script to execute these files on your systems. Use any scripting language that you want.
a. Create a temporary directory on the subsequent web server.
b. Copy the following files from the first web server (Steps 1 and 2) to the temporary directory on your subsequent web server:
■ The CA SiteMinder® Web Agent Installation executable file.
■ CA SiteMinder® ca-wa-installer properties file.
c. Open a Command Prompt window with Administrative privileges in the temporary directory.
d. Run the following command:

How to Install and Configure the Agent for Oracle iPlanet on Windows
Chapter 2: Install and Configure an Oracle iPlanet Agent on Windows 27
agent_executable -f properties_file -i silent
The CA SiteMinder® agent is installed and configured on the subsequent server silently.
e. (Optional) Delete the temporary directory from your subsequent web server.
4. Repeat Step 3 for each additional web server in your CA SiteMinder® environment that uses the configuration that the settings in your ca-wa-installer.properties file specify.
Apply CA SiteMinder® Changes to Oracle iPlanet Configuration Files with Oracle iPlanet Administration Server Console for SunOne 6.1 Servers
The Agent Configuration Wizard modifies the default obj.conf, and mime.types files that the Oracle iPlanet web server uses.
If you are using version 6.1 of a SunOne web server, and you plan to use the Oracle iPlanet Administration console, apply the changes to these files before using the console. If you do not apply the changes using the console first, the changes that are made for your CA SiteMinder® configuration could be corrupted. If you lose your configuration, run the configuration program again.
Note: The agent adds settings to the obj.conf file of the Oracle iPlanet web server when the Agent is configured to support an advanced authentication scheme. CA SiteMinder® does not remove these settings later. Edit the obj.conf file manually to remove any obsolete settings.
Follow these steps:
1. Log in to the Oracle iPlanet Administration Server console.
2. From the Servers tab, select the web server with the CA SiteMinder® agent installed and click Manage.
3. In the right corner of the dialog, click Apply.
A warning message about loading the modified configuration files appears.
4. Click Load Configuration Files.
5. Exit the console.
6. Restart the web server.
7. Optimize the Agent for Oracle iPlanet by tuning the shared memory segments.
The CA SiteMinder® changes are applied.
More Information
Reconfigured Web Agent Won't Operate (see page 74)

How to Install and Configure the Agent for Oracle iPlanet on Windows
28 Web Agent Installation Guide for iPlanet
Manually Configure Non-Default Server Instances, Virtual Servers, or Reverse Proxies for Oracle iPlanet Web Servers
The CA SiteMinder® Web Agent Configuration wizard only configures the default instance of your Oracle iPlanet web server. To configure a different instance of the Oracle iPlanet web server for CA SiteMinder®, manually edit the obj.conf file that is associated with that server instance. Examples of server instances that need manual configuration include:
■ Servers installed in a nondefault directory
■ Servers that you want to configure as a reverse proxy. We recommend configuring the reverse proxy using your Oracle iPlanet interface before adding the CA SiteMinder® settings to the obj.conf file.
Note: The CA SiteMinder® Agent Configuration wizard only modifies the default obj.conf file on the Oracle iPlanet (formerly Sun Java System) web server. To protect other instances or reverse proxy deployments with CA SiteMinder®, copy the CA SiteMinder® settings from the default obj.conf file to any respective instance_name-obj.conf files. For example, your web server created an obj.conf file when you installed it, but you later added a server instance named my_server.example.com. To protect resources on my_server.example.com with CA SiteMinder®, copy the CA SiteMinder® settings the wizard added from the obj.conf file to the my_server.example.com-obj.conf file.
■ Virtual servers on the same computer
Note: SunOne/Sun Java 7.0 web servers do not require these manual configuration steps.
Follow these steps:
1. Locate the directory of the server instance you want to configure.
2. Open the obj.conf file with a text editor.
3. Locate the following line:
<Object name="default">
4. Insert a new line below the previous one, and then add the following text:
AuthTrans fn="SiteMinderAgent"
5. Locate the following line:
AuthTrans fn="match-browser" browser="*MSIE*" ssl-unclean-shutdown="true"
6. Insert a new line below the previous one, and then add the following text:
NameTrans fn="pfx2dir" from="/siteminderagent/pwcgi" dir="web_agent_home/pw"
name="cgi"
NameTrans fn="pfx2dir" from="/siteminderagent/pw" dir="web_agent_home/pw"
NameTrans fn="pfx2dir" from="/siteminderagent/jpw" dir="web_agent_home/jpw"

How to Install and Configure the Agent for Oracle iPlanet on Windows
Chapter 2: Install and Configure an Oracle iPlanet Agent on Windows 29
NameTrans fn="pfx2dir" from="/siteminderagent/redirectjsp"
dir="web_agent_home/affwebservices/redirectjsp"
NameTrans fn="pfx2dir" from="/siteminderagent/certoptional"
dir="web_agent_home/samples"
NameTrans fn="pfx2dir" from="/siteminderagent" dir="web_agent_home/samples"
NameTrans fn="pfx2dir" from="/siteminderagent/pwservlet"
dir=web_agent_home/jpw"
web_agent_home
Indicates the directory where the CA SiteMinder® agent is installed on your web server.
Default (Windows 32-bit installations only): C:\Program Files\CA\webagent
Default (Windows 64-bit installations only): C:\Program Files\CA\webagent\win64
Default (Windows 32-bit applications operating on 64-bit systems [Wow64]): C:\Program Files (x86)\webagent\win32
7. Locate the following line:
NameTrans fn="ntrans-j2ee" name="j2ee"
8. Insert a new line below the previous one, and then add the following text:
PathCheck fn="SmRequireAuth"
9. Remove the following line:
NameTrans fn="pfx2dir" from="/mc-icons" dir="C:/Program
Files/Sun/WebServer7.0/lib/icons" name="es-internal"
10. Locate the following line:
ObjectType fn="force-type" type="text/plain"
11. Insert a new line below the previous one, and then add the following text:
Service method="(GET|POST)" fn="SmAdvancedAuth"
12. Save the obj.conf file.
The Oracle iPlanet web server is manually configured.

How to Install and Configure the Agent for Oracle iPlanet on Windows
30 Web Agent Installation Guide for iPlanet
(Optional) Improve Server Performance with httpd.conf File Changes
You can improve server performance by modifying the default configuration settings in the httpd.conf file; however, these changes are not required:
Follow these steps:
1. For Oracle iPlanet web servers, assign a higher priority level to your Apache20WebAgent.dll file than any other auth modules or access modules on your web server.
2. For low-traffic websites, define the following directives:
■ Set MaxRequestsPerChild>1000 or Set MaxRequestsPerChild=0
■ MinSpareServers >5
■ MaxSpareServers>10
■ StartServers=MinSpareServers>5
3. For high-traffic websites, define the following directives:
■ Set MaxRequestsPerChild>3000 or Set MaxRequestsPerChild=0
■ MinSpareServers >10
■ MaxSpareServers>15
■ StartServers=MinSpareServers>10

Chapter 3: Install and Configure an Oracle iPlanet Agent on UNIX/Linux 31
Chapter 3: Install and Configure an Oracle iPlanet Agent on UNIX/Linux
This section contains the following topics:
Agent Installation Compared to Agent Configuration (see page 31) How to Install and Configure a CA SiteMinder® Agent for Oracle iPlanet on UNIX/Linux (see page 32)
Agent Installation Compared to Agent Configuration
The concepts of installation and configuration have specific meanings when used to describe CA SiteMinder® agents.
Installation means installing the CA SiteMinder® agent software on a computer system. For example, installing an agent creates directories and copies the CA SiteMinder® agent software and other settings to the computer.
Configuration occurs after installation and means the act of preparing the CA SiteMinder® agent software for a specific web server on a computer. This preparation includes registering the agent with CA SiteMinder® Policy Servers, and creating a runtime server instance for the web server that is installed on the computer.
Use the wizard-based installation and configuration programs to install and configure your agent on your first web server. The wizard-based programs create a .properties file.
Use the .properties file and the respective executable file to install or configure the agent silently on additional web servers.

How to Install and Configure a CA SiteMinder® Agent for Oracle iPlanet on UNIX/Linux
32 Web Agent Installation Guide for iPlanet
How to Install and Configure a CA SiteMinder® Agent for Oracle iPlanet on UNIX/Linux
Installing and configuring the CA SiteMinder® Agent for Oracle iPlanet involves several separate procedures. To install and configure the Agent for Oracle iPlanet, use the following process:
1. Gather the information for the installation program (see page 32).
2. Run the wizard based installation program (see page 33).
3. Gather the information for the configuration program (see page 33).
4. Source the agent environment script (see page 36).
5. Set the library path variable (see page 37).
6. Run the wizard based configuration program (see page 37).
7. (Optional) Install and configure additional Agents for Oracle IPlanet silently (see page 39).
8. Determine if your Agent for Oracle iPlanet requires any of the following additional configuration steps:
■ (For SunOne 6.1 web servers only) If you want to use the Oracle iPlanet Administration Server console, apply the CA SiteMinder® changes to the configuration files of the Oracle iPlanet web server (see page 40).
■ (Except SunOne 7.0/Sun Java 7.0 web servers) Manually configure any nondefault server instances, reverse proxies, or virtual servers for CA SiteMinder® (see page 41).
■ For Solaris 9 SP3 and Solaris 10, modify the startup script (see page 42).
Gather the Information for the Installation
Gather the following information about your web server before running the installation program for the agent:
Installation Directory
Specifies the location of the agent binary files on your web server. The web_agent_home variable is set to this location.
Limit: The product requires the name webagent for the bottom directory in the path.

How to Install and Configure a CA SiteMinder® Agent for Oracle iPlanet on UNIX/Linux
Chapter 3: Install and Configure an Oracle iPlanet Agent on UNIX/Linux 33
Run the Installation Program on UNIX/Linux
The installation program for the CA SiteMinder® agent installs the agent on one computer at a time using the UNIX or Linux operating environments. This installation program can be run in wizard or console modes. The wizard and console-based installation program also creates a .properties file for subsequent installations and configurations using the unattended or silent method with the same settings.
For example, suppose the Agents in your environment use the same web server version, installation directory, Agent Configuration Object and Policy Servers. Use the installation wizard or console-based installation program for your first installation. Afterwards, you could create your own script to run the installation program with the .properties file the wizard or console-based installation program created.
Follow these steps:
1. Copy CA SiteMinder® agent installation executable file to a temporary directory on your web server.
2. Log in as a root user.
3. Do one of the following steps:
■ For wizard-based installations, run the installation executable file.
■ For console-based installations, open a command-line window and run the executable as shown in the following example:
executable_file_name.exe -i console
4. Use the information from your agent Installation worksheet to complete the installation program.
Gather the Information that the Configuration Program Requires on UNIX/Linux
Gather the following information about the environment for the product before running the configuration program for the agent:
Register Host
Indicates whether you want to register a trusted host. This registration creates a trusted host object in the Policy Server and an SmHost.conf file on the web server. The agent uses this information to make an initial connection to Policy Servers when it starts. Register each agent instance as a trusted host only once.
Default:Yes
Options: Yes, No
Admin User Name
Specifies the name of a CA SiteMinder® user with Administrative privileges that is already defined in the Policy Server. This CA SiteMinder® user account requires privileges to register trusted hosts.

How to Install and Configure a CA SiteMinder® Agent for Oracle iPlanet on UNIX/Linux
34 Web Agent Installation Guide for iPlanet
Admin Password
Specifies a password for the Admin User Name that is already defined in the Policy Server.
Confirm Admin Password
Repeats the password entered in the Admin Password field. This value verifies the password for the Admin User Name already defined in the Policy Server.
Trusted Host Object Name
Specifies a unique name for the trusted host you are registering. This trusted host object is stored on the Policy Server.
Host Configuration Object
Specifies the name of a Host Configuration Object that is already defined in the Policy Server. After the agent initially connects to a Policy Server (using the SmHost.conf file settings), subsequent connections use the settings from the Host Configuration Object.
Policy Server IP Address
Specifies the Internet Protocol address of the Policy Servers to which the agent attempts to connect upon startup. If your Policy Server is behind a firewall, specify a port number also.
If a hardware load balancer is configured to expose Policy Servers in your environment through a single Virtual IP Address (VIP), enter the VIP.
Example: (IPV4) 192.168.1.105
Example: (IPV4 with the port number) 192.168.1.105:44443
Example: (IPV6) 2001:DB8::/32
Example: (IPV6) [2001:DB8::/32]:44443

How to Install and Configure a CA SiteMinder® Agent for Oracle iPlanet on UNIX/Linux
Chapter 3: Install and Configure an Oracle iPlanet Agent on UNIX/Linux 35
FIPS Mode Setting
Specifies one of the following algorithms:
FIPS Compatibility/AES Compatibility
Uses algorithms existing in previous versions of CA SiteMinder® to encrypt sensitive data and is compatible with previous versions of CA SiteMinder®. If your organization does not require the use of FIPS-compliant algorithms, use this option.
FIPS Migration/AES Migration
Allows a transition from FIPS-compatibility mode to FIPS-only mode. In FIPS-migration mode, CA SiteMinder® environment continues to use existing CA SiteMinder® encryption algorithms as you reencrypt existing sensitive data using FIPS-compliant algorithms.
FIPS Only/AES Only
Uses only FIPS-compliant algorithms to encrypt sensitive data in the CA SiteMinder® environment. This setting does not interoperate with, nor is backwards-compatible with, previous versions of CA SiteMinder®.
Default: FIPS Compatibility/AES Compatibility
FIPS is a US government computer security standard that accredits cryptographic modules which meet the Advanced Encryption Standard (AES).
Important! Use a compatible FIPS/AES mode (or a combination of compatible modes) for both the CA SiteMinder® agent and the Policy Server.
Name
Specifies the name of the SmHost.conf file which contains the settings the Web Agent uses to make initial connections to a Policy Server.
Default: SmHost.conf
Location
Specifies the directory where the SmHost.conf file is stored.
Default: web_agent_home\config
Enable Shared Secret Rollover
Select this check box to change the shared secret that the Policy Server uses to encrypt communications to the Web Agents.
Select Servers
Indicates the web server instances that the configuration program finds on the computer. Select the check boxes of the instances you want to configure. Clear the check boxes of those instances from which you want to remove CA SiteMinder® protection.

How to Install and Configure a CA SiteMinder® Agent for Oracle iPlanet on UNIX/Linux
36 Web Agent Installation Guide for iPlanet
Agent Configuration Object Name
Specifies the name of an agent configuration object (ACO) already defined on the Policy Server.
Default: AgentObj
Advanced Authentication Scheme Dialog
Specifies the advanced authentication scheme for the web server instances you selected previously.
Source the Agent Environment Script on UNIX or Linux
The agent installation program creates an environment script in the following directory:
web_agent_home/ca_wa_env.sh
web_agent_home
Indicates the directory where the CA SiteMinder® Agent is installed.
Default (UNIX/Linux installations): /opt/ca/webagent
For most Apache-based web servers, source this script after doing any of the following tasks:
■ Running the agent configuration program.
■ Starting the web server.
Note: If you perform all the previous tasks in the same shell, only source the script once.
For the embedded Apache web server included with RedHat Linux, do one of the following tasks:
■ Source the script before starting the httpd service.
■ Source the script in the following file (instead of starting it manually each time):
/etc/init.d/htppd

How to Install and Configure a CA SiteMinder® Agent for Oracle iPlanet on UNIX/Linux
Chapter 3: Install and Configure an Oracle iPlanet Agent on UNIX/Linux 37
Set the Library Path Variable on UNIX or Linux
Set the library path variable on UNIX or Linux systems before running the agent configuration program.
The following table lists the library path variables for the various UNIX and Linux operating environments:
Operating System Name of Library Path Variable
AIX LIBPATH
Linux LD_LIBRARY_PATH
Solaris LD_LIBRARY_PATH
Set the value of the library path variable to the web_agent_home/bin directory.
web_agent_home
Indicates the directory where the CA SiteMinder® Agent is installed.
Default (UNIX/Linux installations): /opt/ca/webagent
Run the Web Agent Configuration Program on UNIX/Linux
After gathering the information for your agent configuration, run the agent configuration program. This program creates an agent runtime instance for the web servers running on your computer.
This configuration program is wizard or console based, depending on the option you select. Running the configuration program in the wizard or console mode once creates a properties file. Use the properties file to run unattended configurations on other computers with same operating environment in the future.
Follow these steps:
1. Open the following directory on your web server:
web_agent_home/install_config_info
web_agent_home
Indicates the directory where the CA SiteMinder® Agent is installed.
Default (UNIX/Linux installations): /opt/ca/webagent
2. Use one of the following configuration methods:
■ For a GUI-based configuration, go to Step 3.
■ For a console-based configuration, go to Step 5.

How to Install and Configure a CA SiteMinder® Agent for Oracle iPlanet on UNIX/Linux
38 Web Agent Installation Guide for iPlanet
3. Run the following executable file:
ca-wa-config.bin
4. Go to Step 8.
5. Open a Command Prompt window with root privileges.
6. Navigate to the executable file listed previously, and then run it with the following switch:
-i console
7. Go to Step 8.
8. Follow the prompts shown in the configuration program. Provide the requested values from your agent configuration worksheet.
The agent runtime instance is created for your web servers.

How to Install and Configure a CA SiteMinder® Agent for Oracle iPlanet on UNIX/Linux
Chapter 3: Install and Configure an Oracle iPlanet Agent on UNIX/Linux 39
Run the Unattended or Silent Installation and Configuration Programs for Agents on UNIX/Linux
The unattended or silent installation option can help you automate the installation and configuration process. This method saves time if you have a large CA SiteMinder® environment that uses many agents with identical settings.
For example, suppose the Agents in your environment use the same web server version, installation directory, Agent Configuration Object and Policy Servers. Use the installation wizard or console-based installation program for your first installation. Afterwards, you could create your own script to run the installation program with the .properties file the wizard or console-based installation program created.
Follow these steps:
1. Run the following wizards on your first web server (in the order shown):
a. The CA SiteMinder® Web Agent Installation wizard.
b. The CA SiteMinder® Web Agent Configuration wizard.
2. Locate the following file on your first web server:
web_agent_home/install_config_info/ca-wa-installer.properties
Note: If the path contains spaces, surround it with quotes.
web_agent_home
Indicates the directory where the CA SiteMinder® Agent is installed.
Default (UNIX/Linux installations): /opt/ca/webagent
3. Perform each of the following steps on the subsequent web server:
Note: To automate this process, create your own customized script to execute these files on your systems. Use any scripting language that you want.
a. Create a temporary directory on the subsequent web server.
b. Copy the following files from the web server where you ran the wizards (from Steps 1 and 2) to the temporary directory on your subsequent web server:
■ The CA SiteMinder® Web Agent Installation executable file.
■ CA SiteMinder® ca-wa-installer properties file.
c. Open a Command Prompt window with root privileges in the temporary directory.
d. Run the following command:
agent_executable.bin -f properties_file -i silent
The CA SiteMinder® agent is installed and configured on the web server silently.
e. (Optional) Delete the temporary directory from your web server.

How to Install and Configure a CA SiteMinder® Agent for Oracle iPlanet on UNIX/Linux
40 Web Agent Installation Guide for iPlanet
4. Repeat Step 3 for each additional web server in your CA SiteMinder® environment that uses the configuration that the settings in your ca-wa-installer.properties file specify.
Apply CA SiteMinder® Changes to Oracle iPlanet Configuration Files with Oracle iPlanet Administration Server Console for SunOne 6.1 Servers
The Agent Configuration Wizard modifies the default obj.conf, and mime.types files that the Oracle iPlanet web server uses.
If you are using version 6.1 of a SunOne web server, and you plan to use the Oracle iPlanet Administration console, apply the changes to these files before using the console. If you do not apply the changes using the console first, the changes that are made for your CA SiteMinder® configuration could be corrupted. If you lose your configuration, run the configuration program again.
Note: The agent adds settings to the obj.conf file of the Oracle iPlanet web server when the Agent is configured to support an advanced authentication scheme. CA SiteMinder® does not remove these settings later. Edit the obj.conf file manually to remove any obsolete settings.
Follow these steps:
1. Log in to the Oracle iPlanet Administration Server console.
2. From the Servers tab, select the web server with the CA SiteMinder® agent installed and click Manage.
3. In the right corner of the dialog, click Apply.
A warning message about loading the modified configuration files appears.
4. Click Load Configuration Files.
5. Exit the console.
6. Restart the web server.
7. Optimize the Agent for Oracle iPlanet by tuning the shared memory segments.
The CA SiteMinder® changes are applied.
More information:
Reconfigured Web Agent Won't Operate (see page 74)

How to Install and Configure a CA SiteMinder® Agent for Oracle iPlanet on UNIX/Linux
Chapter 3: Install and Configure an Oracle iPlanet Agent on UNIX/Linux 41
Manually Configure Non-default Server Instances, Virtual Servers, or Reverse Proxies for Oracle iPlanet Web Servers
The CA SiteMinder® Web Agent Configuration wizard only configures the default instance of your Oracle iPlanet web server. To configure a different instance of the Oracle iPlanet web server for CA SiteMinder®, manually edit the obj.conf file that is associated with that server instance. Examples of server instances that need manual configuration include:
■ Servers installed in a nondefault directory
■ Servers that you want to configure as a reverse proxy. We recommend configuring the reverse proxy using your Oracle iPlanet interface before adding the CA SiteMinder® settings to the obj.conf file.
Note: The CA SiteMinder® Agent Configuration wizard only modifies the default obj.conf file on the Oracle iPlanet (formerly Sun Java System) web server. To protect other instances or reverse proxy deployments with CA SiteMinder®, copy the CA SiteMinder® settings from the default obj.conf file to any respective instance_name-obj.conf files. For example, your web server created an obj.conf file when you installed it, but you later added a server instance named my_server.example.com. To protect resources on my_server.example.com with CA SiteMinder®, copy the CA SiteMinder® settings the wizard added from the obj.conf file to the my_server.example.com-obj.conf file.
■ Virtual servers on the same computer
Note: SunOne 7.0 web servers do not require these manual configuration steps.
Follow these steps:
1. Locate the directory of the server instance you want to configure.
2. Open the obj.conf file with a text editor.
3. Locate the following line:
<Object name="default">
4. Insert a new line below the previous one, and then add the following text:
AuthTrans fn="SiteMinderAgent"
5. Locate the following line:
AuthTrans fn="match-browser" browser="*MSIE*" ssl-unclean-shutdown="true"
6. Insert a new line below the previous one, and then add the following text:
NameTrans fn="pfx2dir" from="/siteminderagent/pwcgi" dir="web_agent_home/pw"
name="cgi"
NameTrans fn="pfx2dir" from="/siteminderagent/pw" dir="web_agent_home/pw"
NameTrans fn="pfx2dir" from="/siteminderagent/jpw" dir="web_agent_home/jpw"
NameTrans fn="pfx2dir" from="/siteminderagent/redirectjsp"
dir="web_agent_home/affwebservices/redirectjsp"
How to Install and Configure a CA SiteMinder® Agent for Oracle iPlanet on UNIX/Linux
42 Web Agent Installation Guide for iPlanet
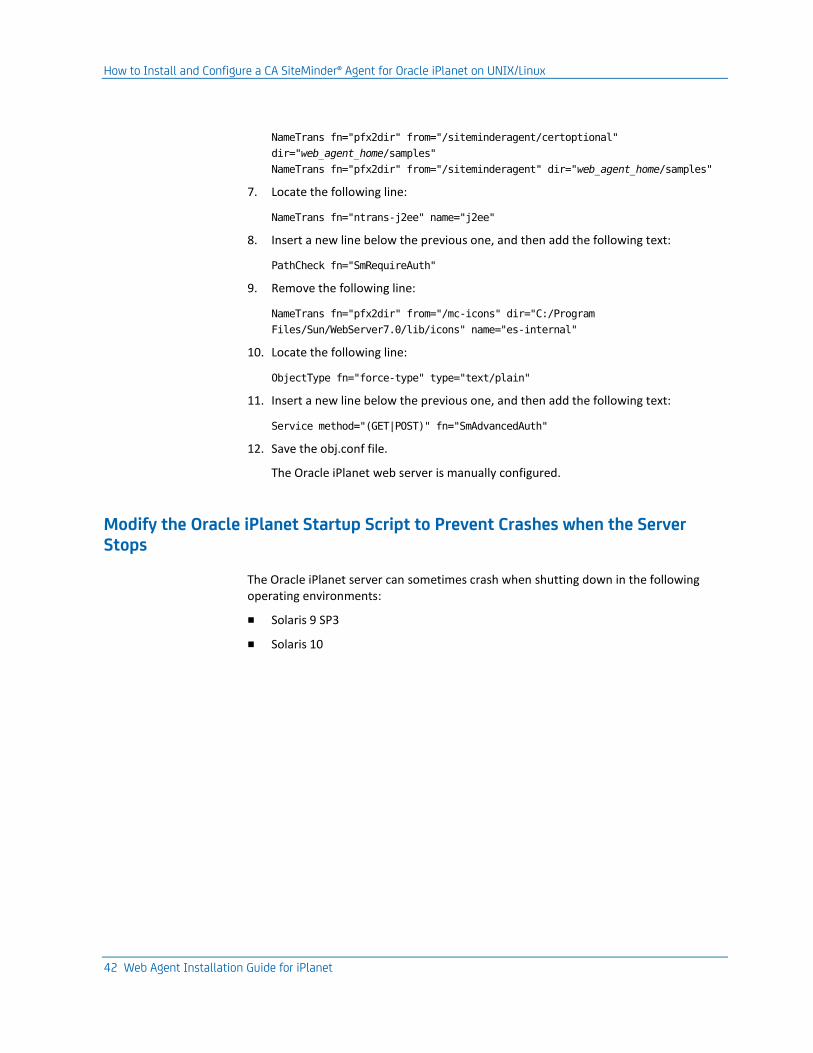
NameTrans fn="pfx2dir" from="/siteminderagent/certoptional"
dir="web_agent_home/samples"
NameTrans fn="pfx2dir" from="/siteminderagent" dir="web_agent_home/samples"
7. Locate the following line:
NameTrans fn="ntrans-j2ee" name="j2ee"
8. Insert a new line below the previous one, and then add the following text:
PathCheck fn="SmRequireAuth"
9. Remove the following line:
NameTrans fn="pfx2dir" from="/mc-icons" dir="C:/Program
Files/Sun/WebServer7.0/lib/icons" name="es-internal"
10. Locate the following line:
ObjectType fn="force-type" type="text/plain"
11. Insert a new line below the previous one, and then add the following text:
Service method="(GET|POST)" fn="SmAdvancedAuth"
12. Save the obj.conf file.
The Oracle iPlanet web server is manually configured.
Modify the Oracle iPlanet Startup Script to Prevent Crashes when the Server Stops
The Oracle iPlanet server can sometimes crash when shutting down in the following operating environments:
■ Solaris 9 SP3
■ Solaris 10

How to Install and Configure a CA SiteMinder® Agent for Oracle iPlanet on UNIX/Linux
Chapter 3: Install and Configure an Oracle iPlanet Agent on UNIX/Linux 43
Modify the startserv script to prevent the Oracle iPlanet web server from crashing when shuttng down.
Follow these steps:
1. Open the following file with a text editor:
sunone_instance_directory/bin/startserv
sunone_instance_directory
Indicates the directory of the SunOne web server instance.
2. Locate the following line:
LIBUMEM_32=/usr/lib/libumem.so
3. Add a comment character in the beginning of the previous line. See the following example:
#LIBUMEM_32=/usr/lib/libumem.so
4. Locate the following line:
LIBUMEM_64=/usr/lib/64/libumem.so
5. Add a comment character in the beginning of the previous line. See the following example:
#LIBUMEM_64=/usr/lib/64/libumem.so
6. Save the file and close the text editor.
The Oracle iPlanet startup script is modified.


Chapter 4: Dynamic Policy Server Clusters 45
Chapter 4: Dynamic Policy Server Clusters
Earlier versions of CA SiteMinder® agents did not automatically discover when Policy Servers were added or removed from a cluster. The agents recognized the changes only after their respective web servers were restarted.
CA SiteMinder® 12.51 supports dynamic Policy Server clusters. Agents automatically discover Policy Servers that are added or removed from an existing cluster when dynamic Policy Server Clusters are enabled.
For example, suppose that your agent connects to a cluster of the following Policy Servers:
■ 192.168.2.100
■ 192.168.2.101
■ 192.168.2.103
■ 192.168.2.104
Suppose that you later decide to remove the server 192.168.2.103 to upgrade its operating system. In this situation, enabling dynamic Policy Server clusters lets your agents recognize the change in the membership of the cluster without restarting.
Restart your web server if you do any of the following tasks:
■ Change the configuration of an existing Policy Server (using the configuration wizard).
■ Create a Policy Server cluster.
■ Delete a Policy Server cluster.
■ Change the values for any of the following Policy Server settings:
– EnableFailOver
– MaxSocketsPerPort
– MinSocketsPerPort
– NewSocketStep
– RequestTimeout

Connect a Web Agent to a Dynamic Policy Server Cluster
46 Web Agent Installation Guide for iPlanet
Connect a Web Agent to a Dynamic Policy Server Cluster
You can connect a Web Agent to one or more dynamic Policy Server clusters by modifying the SmHost.conf file on your web server.
Follow these steps:
1. Open the following file with a text editor:
web_agent_home\config\SmHost.conf
web_agent_home
Indicates the directory where the CA SiteMinder® agent is installed on your web server.
Default (Windows 32-bit installations only): C:\Program Files\CA\webagent
Default (Windows 64-bit installations only): C:\Program Files\CA\webagent\win64
Default (Windows 32-bit applications operating on 64-bit systems [Wow64]): C:\Program Files (x86)\webagent\win32
2. Do one of the following tasks:
If this Web Agent has never been connected to dynamic cluster of Policy Servers before, create a line (anywhere in the file) with the following text:
enableDynamicHCO="YES"
■ If this Web Agent has previously been connected to a dynamic cluster of Policy Servers, change the value of the existing enableDynamicHCO parameter from "NO" to "YES".
1. Save the SmHost.conf file, and then close the text editor.
2. Restart your web server.
The Web Agent is connected to dynamic Policy Server clusters.

Chapter 5: Starting and Stopping Web Agents 47
Chapter 5: Starting and Stopping Web Agents
Enable a Web Agent
Configure your agent parameters and then enable the agent to protect the resources on the web server.
Note: No resources are protected until you also define policies in the CA SiteMinder® Policy Server.
Follow these steps:
1. Open the WebAgent.conf file with a text editor.
Note: Agents for IIS installed on 64-bit operating environments have two WebAgent.conf files. One file for 32-bit Windows applications. The other file is for 64-bit Windows applications. Modify both WebAgent.conf files when starting or stopping the Agent for IIS.
2. Change the value of the EnableWebAgent parameter to yes.
3. Save and close the WebAgent.conf file.
4. Restart the web server (the web server itself, not the computer on which it runs).
The Web Agent is enabled.
More information:
Modify the Oracle iPlanet Startup Script to Prevent Crashes when the Server Stops (see page 42)

Disable a Web Agent
48 Web Agent Installation Guide for iPlanet
Disable a Web Agent
If you want to stop the Web Agent from protecting the resources on your web server, disable the Web Agent.
Follow these steps:
1. Open the WebAgent.conf file with a text editor.
Note: Agents for IIS installed on 64-bit operating environments have two WebAgent.conf files. One file for 32-bit Windows applications. The other file is for 64-bit Windows applications. Modify both WebAgent.conf files when starting or stopping the Agent for IIS.
2. Change the value of the EnableWebAgent parameter to no.
3. Save and close the WebAgent.conf file.
4. Restart the web server (the web server itself, not the computer on which it runs).
The Web Agent is disabled.

Chapter 6: Upgrade a Web Agent to 12.51 49
Chapter 6: Upgrade a Web Agent to 12.51
This section contains the following topics:
Agent for Oracle iPlanet Upgrade Roadmap (see page 50) How to Upgrade an Agent for Oracle iPlanet (see page 51)

Agent for Oracle iPlanet Upgrade Roadmap
50 Web Agent Installation Guide for iPlanet
Agent for Oracle iPlanet Upgrade Roadmap
The following illustration describes how to upgrade a CA SiteMinder® Agent for Oracle iPlanet to r12.5:

How to Upgrade an Agent for Oracle iPlanet
Chapter 6: Upgrade a Web Agent to 12.51 51
How to Upgrade an Agent for Oracle iPlanet
Upgrading a CA SiteMinder® agent for Oracle iPlanet involves several separate procedures. To prepare for an upgrade of your agent, follow these steps:
1. Use one of the following diagrams to verify that you are in the proper step of the CA SiteMinder® upgrade process for an agent upgrade:
■ Upgrade process from r6.x.
■ Upgrade process from r12.0.
2. Create backup copies of any customized CA SiteMinder® files on your web server. Examples of files you could have customized after installing or configuring your agent include the following files:
■ LocalConfig.conf
■ WebAgent.conf
3. Gather information for the following CA SiteMinder® programs.
■ Agent installation wizard.
■ Agent configuration wizard.
4. If you are upgrading an agent on a UNIX/Linux operating environment, clear the LD_PRELOAD variable (see page 53). Otherwise, continue with the next step.
5. Use one of the following procedures to upgrade your agent:
■ Run the installation wizard for Windows operating environments (see page 54).
■ Run the installation wizard for UNIX/Linux operating environments (see page 55).
6. If you are upgrading an agent on a UNIX/Linux operating environment do the following tasks (Otherwise, continue with Step 7):
■ Source the agent environment script on the upgraded agent (see page 55).
■ Set the LD_LIBRARYPATH variable (see page 56).
7. Use one of the following procedures to configure the upgraded agent:
■ Configure your upgraded agent on Windows operating environments (see page 57).
■ Configure your upgraded agent on UNIX/Linux operating environments (see page 58).
8. If you plan to use the Oracle iPlanet Administration console, apply the changes to your upgraded CA SiteMinder® configuration files (see page 58).
9. Manually configure any nondefault Oracle iPlanet server instances (see page 59).

How to Upgrade an Agent for Oracle iPlanet
52 Web Agent Installation Guide for iPlanet
Upgrade Process from CA SiteMinder® r6.x
An agent upgrade to 12.51 from r6.x occurs at stage three of the CA SiteMinder® upgrade process, as shown in the following illustration:
Figure 1: r6 SP5 migration. Stages 1 through 3
Note: For more information about the CA SiteMinder® upgrade process, see the Upgrade Guide.
How to Upgrade an Agent for Oracle iPlanet
Chapter 6: Upgrade a Web Agent to 12.51 53
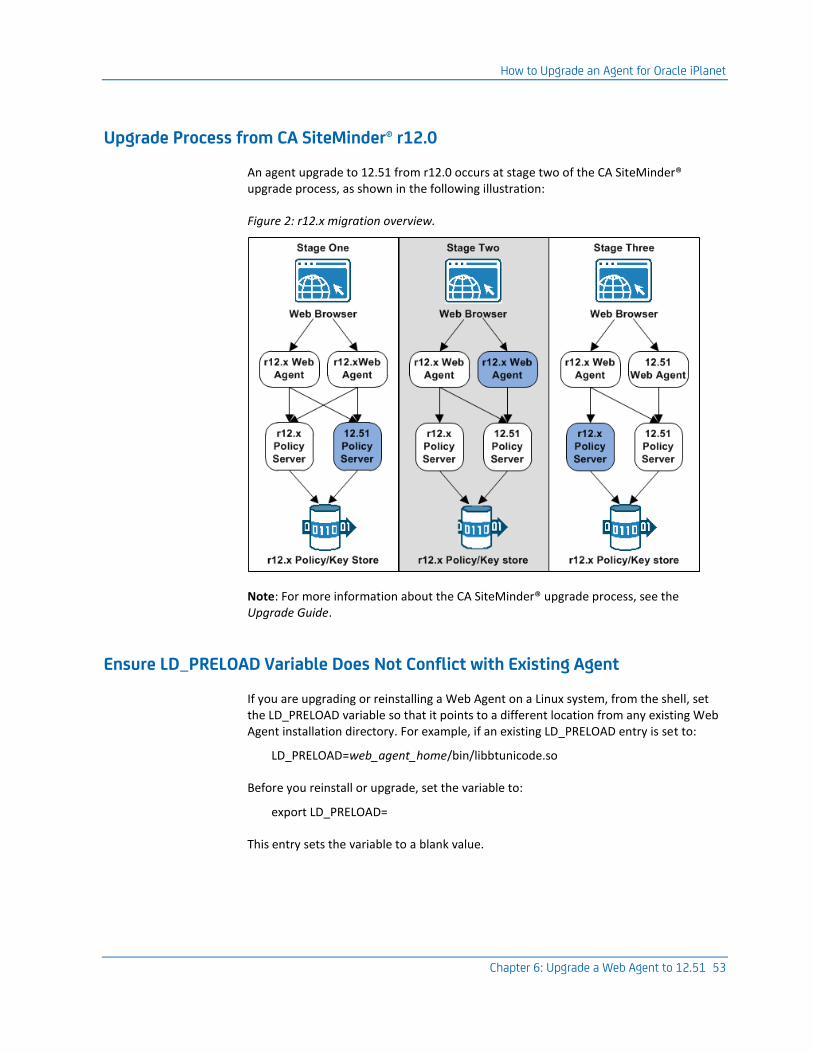
Upgrade Process from CA SiteMinder® r12.0
An agent upgrade to 12.51 from r12.0 occurs at stage two of the CA SiteMinder® upgrade process, as shown in the following illustration:
Figure 2: r12.x migration overview.
Note: For more information about the CA SiteMinder® upgrade process, see the Upgrade Guide.
Ensure LD_PRELOAD Variable Does Not Conflict with Existing Agent
If you are upgrading or reinstalling a Web Agent on a Linux system, from the shell, set the LD_PRELOAD variable so that it points to a different location from any existing Web Agent installation directory. For example, if an existing LD_PRELOAD entry is set to:
LD_PRELOAD=web_agent_home/bin/libbtunicode.so
Before you reinstall or upgrade, set the variable to:
export LD_PRELOAD=
This entry sets the variable to a blank value.
How to Upgrade an Agent for Oracle iPlanet
54 Web Agent Installation Guide for iPlanet
Run the Installation Wizard to Upgrade your Agent on Windows
The installation program for the agent installs the agent on one computer at a time using the Windows operating environment. This installation program can be run in wizard or console modes. The wizard and console-based installation programs also create a .properties file for subsequent installations and configurations using the unattended or silent method with the same settings.
For example, suppose the Agents in your environment use the same web server version, installation directory, Agent Configuration Object and Policy Servers. Use the installation wizard or console-based installation program for your first installation. Afterwards, you could create your own script to run the installation program with the .properties file the wizard or console-based installation program created.
Follow these steps:
1. Copy the Web Agent installation executable file to a temporary directory on your web server.
2. Do one of the following steps:
■ For wizard-based installations, right-click the installation executable file, and then select Run as Administrator.
■ For console-based installations, open a command line window and run the executable as shown in the following example:
executable_file_name.exe -i console
3. Use the information that you gathered previously to complete the installation.

How to Upgrade an Agent for Oracle iPlanet
Chapter 6: Upgrade a Web Agent to 12.51 55
Run the Installation Wizard to Upgrade your Agent on UNIX/Linux
The installation program for the CA SiteMinder® agent installs the agent on one computer at a time using the UNIX or Linux operating environments. This installation program can be run in wizard or console modes. The wizard and console-based installation program also creates a .properties file for subsequent installations and configurations using the unattended or silent method with the same settings.
For example, suppose the Agents in your environment use the same web server version, installation directory, Agent Configuration Object and Policy Servers. Use the installation wizard or console-based installation program for your first installation. Afterwards, you could create your own script to run the installation program with the .properties file the wizard or console-based installation program created.
Follow these steps:
1. Copy CA SiteMinder® agent installation executable file to a temporary directory on your web server.
2. Log in as a root user.
3. Do one of the following steps:
■ For wizard-based installations, run the installation executable file.
■ For console-based installations, open a command-line window and run the executable as shown in the following example:
executable_file_name.exe -i console
4. Use the information from your agent Installation worksheet to complete the installation program.
Source the Agent Environment Script After an Upgrade on UNIX/Linux
The agent installation program creates an environment script in the following directory:
web_agent_home/ca_wa_env.sh
web_agent_home
Indicates the directory where the CA SiteMinder® Agent is installed.
Default (UNIX/Linux installations): /opt/ca/webagent
For most Apache-based web servers, source this script after doing any of the following tasks:
■ Running the agent configuration program.
■ Starting the web server.
Note: If you perform all the previous tasks in the same shell, only source the script once.

How to Upgrade an Agent for Oracle iPlanet
56 Web Agent Installation Guide for iPlanet
For the embedded Apache web server included with RedHat Linux, do one of the following tasks:
■ Source the script before starting the httpd service.
■ Source the script in the following file (instead of starting it manually each time):
/etc/init.d/htppd
Set the Library Path Variable Before Configuring your Upgraded Agent on UNIX/Linux
Set the library path variable on UNIX or Linux systems before running the agent configuration program.
The following table lists the library path variables for the various UNIX and Linux operating environments:
Operating System Name of Library Path Variable
AIX LIBPATH
Linux LD_LIBRARY_PATH
Solaris LD_LIBRARY_PATH
Set the value of the library path variable to the web_agent_home/bin directory.
web_agent_home
Indicates the directory where the CA SiteMinder® Agent is installed.
Default (UNIX/Linux installations): /opt/ca/webagent

How to Upgrade an Agent for Oracle iPlanet
Chapter 6: Upgrade a Web Agent to 12.51 57
Configure your Upgraded Agent on Windows
After gathering the information for your agent configuration, run the agent configuration program. This program creates an agent runtime instance for the web servers running on your computer.
This configuration program is wizard or console based, depending on the option you select. Running the configuration program in the wizard or console mode once creates a properties file. Use the properties file to run unattended configurations on other computers with same operating environment in the future.
Follow these steps:
1. Open the following directory on your web server:
web_agent_home\install_config_info
web_agent_home
Indicates the directory where the CA SiteMinder® agent is installed on your web server.
Default (Windows 32-bit installations only): C:\Program Files\CA\webagent
Default (Windows 64-bit installations only): C:\Program Files\CA\webagent\win64
Default (Windows 32-bit applications operating on 64-bit systems [Wow64]): C:\Program Files (x86)\webagent\win32
2. Use one of the following configuration methods:
■ For a GUI-based configuration, go to Step 3.
■ For a console-based configuration, go to Step 5.
3. Right-click the following executable, and then select Run as Administrator:
ca-wa-config.exe
4. Go to Step 8.
5. Open a Command Prompt window with Administrator privileges.
6. Navigate to the executable file listed previously, and then run it with the following switch:
-i console
7. Go to Step 8.
8. Follow the prompts shown in the configuration program. Provide the requested values from your agent configuration worksheet.
The agent runtime instance is created for your web servers.

How to Upgrade an Agent for Oracle iPlanet
58 Web Agent Installation Guide for iPlanet
Configure your Upgraded Agent on UNIX/Linux
After gathering the information for your agent configuration, run the agent configuration program. This program creates an agent runtime instance for the web servers running on your computer.
This configuration program is wizard or console based, depending on the option you select. Running the configuration program in the wizard or console mode once creates a properties file. Use the properties file to run unattended configurations on other computers with same operating environment in the future.
Follow these steps:
1. Open the following directory on your web server:
web_agent_home/install_config_info
web_agent_home
Indicates the directory where the CA SiteMinder® Agent is installed.
Default (UNIX/Linux installations): /opt/ca/webagent
2. Use one of the following configuration methods:
■ For a GUI-based configuration, go to Step 3.
■ For a console-based configuration, go to Step 5.
3. Run the following executable file:
ca-wa-config.bin
4. Go to Step 8.
5. Open a Command Prompt window with root privileges.
6. Navigate to the executable file listed previously, and then run it with the following switch:
-i console
7. Go to Step 8.
8. Follow the prompts shown in the configuration program. Provide the requested values from your agent configuration worksheet.
The agent runtime instance is created for your web servers.
Apply Changes to your Upgraded CA SiteMinder® Files with the iPlanet Administration Console
The Agent Configuration Wizard modifies the default obj.conf, and mime.types files that the Oracle iPlanet web server uses.

How to Upgrade an Agent for Oracle iPlanet
Chapter 6: Upgrade a Web Agent to 12.51 59
If you are using version 6.1 of a SunOne web server, and you plan to use the Oracle iPlanet Administration console, apply the changes to these files before using the console. If you do not apply the changes using the console first, the changes that are made for your CA SiteMinder® configuration could be corrupted. If you lose your configuration, run the configuration program again.
Note: The agent adds settings to the obj.conf file of the Oracle iPlanet web server when the Agent is configured to support an advanced authentication scheme. CA SiteMinder® does not remove these settings later. Edit the obj.conf file manually to remove any obsolete settings.
Follow these steps:
1. Log in to the Oracle iPlanet Administration Server console.
2. From the Servers tab, select the web server with the CA SiteMinder® agent installed and click Manage.
3. In the right corner of the dialog, click Apply.
A warning message about loading the modified configuration files appears.
4. Click Load Configuration Files.
5. Exit the console.
6. Restart the web server.
7. Optimize the Agent for Oracle iPlanet by tuning the shared memory segments.
The CA SiteMinder® changes are applied.
Manually Configure any Non-Default Server Instances for your Upgraded CA SiteMinder® Agent
The CA SiteMinder® Web Agent Configuration wizard only configures the default instance of your Oracle iPlanet web server. To configure a different instance of the Oracle iPlanet web server for CA SiteMinder®, manually edit the obj.conf file that is associated with that server instance. Examples of server instances that need manual configuration include:
■ Servers installed in a nondefault directory
■ Servers that you want to configure as a reverse proxy. We recommend configuring the reverse proxy using your Oracle iPlanet interface before adding the CA SiteMinder® settings to the obj.conf file.

How to Upgrade an Agent for Oracle iPlanet
60 Web Agent Installation Guide for iPlanet
Note: The CA SiteMinder® Agent Configuration wizard only modifies the default obj.conf file on the Oracle iPlanet (formerly Sun Java System) web server. To protect other instances or reverse proxy deployments with CA SiteMinder®, copy the CA SiteMinder® settings from the default obj.conf file to any respective instance_name-obj.conf files. For example, your web server created an obj.conf file when you installed it, but you later added a server instance named my_server.example.com. To protect resources on my_server.example.com with CA SiteMinder®, copy the CA SiteMinder® settings the wizard added from the obj.conf file to the my_server.example.com-obj.conf file.
■ Virtual servers on the same computer
Note: SunOne/Sun Java 7.0 web servers do not require these manual configuration steps.
Follow these steps:
1. Locate the directory of the server instance you want to configure.
2. Open the obj.conf file with a text editor.
3. Locate the following line:
<Object name="default">
4. Insert a new line below the previous one, and then add the following text:
AuthTrans fn="SiteMinderAgent"
5. Locate the following line:
AuthTrans fn="match-browser" browser="*MSIE*" ssl-unclean-shutdown="true"
6. Insert a new line below the previous one, and then add the following text:
NameTrans fn="pfx2dir" from="/siteminderagent/pwcgi" dir="web_agent_home/pw"
name="cgi"
NameTrans fn="pfx2dir" from="/siteminderagent/pw" dir="web_agent_home/pw"
NameTrans fn="pfx2dir" from="/siteminderagent/jpw" dir="web_agent_home/jpw"
NameTrans fn="pfx2dir" from="/siteminderagent/redirectjsp"
dir="web_agent_home/affwebservices/redirectjsp"

How to Upgrade an Agent for Oracle iPlanet
Chapter 6: Upgrade a Web Agent to 12.51 61
NameTrans fn="pfx2dir" from="/siteminderagent/certoptional"
dir="web_agent_home/samples"
NameTrans fn="pfx2dir" from="/siteminderagent" dir="web_agent_home/samples"
NameTrans fn="pfx2dir" from="/siteminderagent/pwservlet"
dir=web_agent_home/jpw"
web_agent_home
Indicates the directory where the CA SiteMinder® agent is installed on your web server.
Default (Windows 32-bit installations only): C:\Program Files\CA\webagent
Default (Windows 64-bit installations only): C:\Program Files\CA\webagent\win64
Default (Windows 32-bit applications operating on 64-bit systems [Wow64]): C:\Program Files (x86)\webagent\win32
7. Locate the following line:
NameTrans fn="ntrans-j2ee" name="j2ee"
8. Insert a new line below the previous one, and then add the following text:
PathCheck fn="SmRequireAuth"
9. Remove the following line:
NameTrans fn="pfx2dir" from="/mc-icons" dir="C:/Program
Files/Sun/WebServer7.0/lib/icons" name="es-internal"
10. Locate the following line:
ObjectType fn="force-type" type="text/plain"
11. Insert a new line below the previous one, and then add the following text:
Service method="(GET|POST)" fn="SmAdvancedAuth"
12. Save the obj.conf file.
The Oracle iPlanet web server is manually configured.


Chapter 7: Operating System Tuning for Agents 63
Chapter 7: Operating System Tuning for Agents
This section contains the following topics:
Tune the Shared Memory Segments (see page 64) How to Tune the Solaris 10 Resource Controls (see page 66)
Tune the Shared Memory Segments
64 Web Agent Installation Guide for iPlanet
Tune the Shared Memory Segments
If you install an Oracle iPlanet agent on Solaris systems, tune the shared memory settings of the operating environment for the agent to function correctly. By increasing the shared memory segments or your operating environment, you improve the performance of the Agent. The variables that control shared memory segments are defined in the specification file of your operating environment.
For AIX operating environments, run the following command before starting an Oracle iPlanet web server:
export EXTSHM=ON
Note: Sometimes Linux operating environments require tuning the shared memory segments. For more information about the shared memory segments and how to tune them, see the documentation for your particular operating environment.
Follow these steps:
1. Follow the appropriate procedure for your operating environment:
■ Solaris: Open the /etc/system file, using the editor of your choice.
2. Modify the shared memory variables using one of the following methods:
■ Solaris: Add the variables shown in the following list and configure them using the recommended settings shown in the examples. Use the following syntax:
set shmsys:shminfo_shmmax=33554432
shmsys:shminfo_shmmax
Specifies the maximum shared memory segment size. Controls the maximum size of the Agent resource and session cache.
Note: To estimate the amount of memory segments that are required, allocate 4 KBs per entry in each cache, or view cache usage statistics in the OneView Monitor. See the Web Agent Configuration Guide for more information about using the OneView Monitor.
Example: 33554432 (32 MB) for busy sites that require large caches.
shmsys:shminfo_shmmin
(Not required for Solaris) Minimum shared memory segment size. Controls the minimum size of the Agent resource and session cache.

Tune the Shared Memory Segments
Chapter 7: Operating System Tuning for Agents 65
shmsys:shminfo_shmmni
Specifies the maximum number of shared memory segments that can exist simultaneously, systemwide.
Example: (except Solaris 9) N/A
Example: (Solaris 9) 200
shmsys:shminfo_shmseg
(Not required for Solaris 9) Specifies the maximum number of shared memory segments per process.
Example: 24
semsys:seminfo_semmni
Specifies the number of semaphore identifiers. Use 11 for every instance of the Agent that you run on the system.
Example: (except Solaris 9) 100
Example: (Solaris 9) 200
semsys:seminfo_semmns
Specifies the number of semaphores in the system. Use 10 for every instance of the Agent that you run on the system.
Example: (Solaris 9) 100
Example: (Solaris 9) 400
semsys:seminfo_semmnu
Specifies the number of processes using the undo facility. For optimal performance, set the semmnu value greater than the number of Oracle iPlanet web server processes running on the system at any one time. Exceed the maxprocs setting by 200 or more.
Example: (Solaris 9) 200
3. Save your changes then exit the file or the utility.
4. Reboot the system.
5. Verify your changes by entering the command:
$ sysdef -i

How to Tune the Solaris 10 Resource Controls
66 Web Agent Installation Guide for iPlanet
How to Tune the Solaris 10 Resource Controls
Tune the resource controls at the project level to improve the performance of the agent.
Note: See your Solaris documentation for more information.
Tuning the resource controls on Solaris 10 uses the following process:
1. Determine the project that is associated with the user account under which the Web Agent runs.
2. Increase the settings for any of the following resource controls of that project:
project.max-shm-ids
Specifies the maximum shared memory IDs for a project.
project.max-sem-ids
Specifies the maximum number of semaphore IDs for a project.
project.max-msg-ids
Specifies the maximum number of message queue IDs for a project.
project.max-shm-memory
Specifies the total amount of shared memory allowed for a project.
process.max-sem-nsems
Specifies the maximum number of semaphores allowed per semaphore set.
process.max-sem-ops
Specifies the maximum number of semaphore operations allowed per semop.
process.max-msg-messages
Specifies the maximum number of messages on a message queue.
process.max-msg-qbytes
Specifies the maximum number of bytes of messages on a message queue.

Chapter 8: Uninstall a Web Agent 67
Chapter 8: Uninstall a Web Agent
This section contains the following topics:
Notes About Uninstalling Web Agents (see page 67) Uninstall a Web Agent from a Windows Operating Environment (see page 68) Uninstall an Oracle iPlanet Agent from a UNIX System (see page 70)
Notes About Uninstalling Web Agents
Be aware of the following:
■ All Web Agents for all installed web servers will be uninstalled.
■ The Password Services and Forms directories, (pw_default, jpw_default, samples_default) will be removed. However, the non-default copies of these directories (pw, jpw, samples) are not removed because these directories may contain customized files.

Uninstall a Web Agent from a Windows Operating Environment
68 Web Agent Installation Guide for iPlanet
Uninstall a Web Agent from a Windows Operating Environment
Before you un–install the CA SiteMinder® Web Agent from a Windows operating environment, consider making backup copies of your registry settings and Web Agent configuration settings.
Be aware of the following:
■ All Web Agents for all installed web servers will be uninstalled.
■ The Password Services and Forms directories, (pw_default, jpw_default, samples_default) will be removed. However, the non-default copies of these directories (pw, jpw, samples) are not removed because these directories may contain customized files.
Follow these steps:
1. Stop the web server.
2. Remove the configuration settings for the agents on your server with one of the following procedures:
■ To un-configure the agent with the wizard, go to Step 3.
■ To un-configure the agent with the console-based program, go to Step 6.
3. Click Start, All Programs, CA, CA SiteMinder®.
A shortcut to the Web Agent Configuration wizard appears.
4. Right-click the shortcut, and then select Run as administrator.
Important! If you are running this wizard on Windows Server 2008, run the executable file with administrator permissions. Use these permissions even if you are logged in to the system as an administrator. For more information, see the release notes for your CA SiteMinder® component.
The Web Agent Configuration wizard starts.
5. Clear the check boxes from the agent instances configured on your web server, and complete the wizard.
6. Open a Command Prompt window with root privileges.
7. Navigate to the ca-wa-config.exe file, and then run it with the following switch:
-i console
8. Un-configure the agent instances configured on your web server. Wait for the configuration program to finish, then go to Step 9.
9. Choose one of the following procedures:
■ To remove the Web Agent using the wizard, go to Step 10.
■ To remove the Web Agent using the console-based program, go to Step 15.
10. Click Start, Control Panel, Programs and Features.

Uninstall a Web Agent from a Windows Operating Environment
Chapter 8: Uninstall a Web Agent 69
A list of installed programs appears.
11. Click CA CA SiteMinder® Web Agent version_number.
12. Click Uninstall/Change.
The uninstallation wizard appears.
13. Review the information in the Uninstall CA SiteMinder® Web Agent dialog, then click Uninstall.
The wizard removes the web agent.
14. Wait for the wizard to finish, then go to Step 17.
15. Open a command-line window.
16. Navigate to the following directory.
web_agent_home
web_agent_home
Indicates the directory where the CA SiteMinder® Agent is installed on your web server.
Default (Windows 32-bit installations of CA SiteMinder® IIS Web Agents only): C:\Program Files\CA\webagent
Default (Windows 64-bit installations [CA SiteMinder® Web Agents for IIS only]): C:\Program Files\CA\webagent\win64
Default (Windows 32-bit applications operating on 64-bit systems [Wow64 with CA SiteMinder® Web Agents for IIS only]): C:\Program Files (x86)\webagent\win32
17. Run the following command:
ca-wa-uninstall.cmd -i console
18. Wait for the un–installation program to finish, then go to Step 19.
19. Start the web server.
Important! Delete the ZeroG registry file from the following location after uninstalling the Web Agent: C:\Program Files\ZeroG Registry\com.zerog.registry.xml

Uninstall an Oracle iPlanet Agent from a UNIX System
70 Web Agent Installation Guide for iPlanet
Uninstall an Oracle iPlanet Agent from a UNIX System
These instructions are for GUI and Console Mode removal.
Note: Removing a Web Agent from a 64-bit SuSE Linux 10 system requires additional preparations.
Be aware of the following:
■ All Web Agents for all installed web servers will be uninstalled.
■ The Password Services and Forms directories, (pw_default, jpw_default, samples_default) will be removed. However, the non-default copies of these directories (pw, jpw, samples) are not removed because these directories may contain customized files.
The steps for the two modes are the same, with these exceptions for Console Mode:
■ Select an option by entering a corresponding number.
■ Press Enter after each step to proceed through the process.
Note: Before you uninstall, we recommend copying your agent configuration settings to have as a backup.
Follow these steps:
1. Stop the web server.
2. Log in to the UNIX system.
3. Run the configuration wizard to remove the configuration settings of the agents that you want to remove.
4. Navigate to the directory where the Web Agent is installed: web_agent_home/install_config_info/ca-wa-uninstall
5. Verify that the unistallation program has execute permissions. For example, use the following command:
chmod +x ca–wa–uninstall
6. From a console window, enter one of the following commands:
■ GUI mode: ./ca–wa–uninstall
■ Console mode: ./ca–wa–uninstall -i console
The uninstallation program starts.
7. Read the information in the dialog to confirm the removal of the Web Agent, then click Uninstall. The Web Agent is removed from the system.
8. Click Done to exit the uninstallation program.
9. Change to your home directory (the current directory has been deleted).

Uninstall an Oracle iPlanet Agent from a UNIX System
Chapter 8: Uninstall a Web Agent 71
10. Restart the web servers.
Note: For Oracle iPlanet web servers, the obj.conf, magnus.conf, and mime.types files are restored to their original settings that existed before the agent was installed.


Chapter 9: Troubleshooting 73
Chapter 9: Troubleshooting
This section contains the following topics:
Web Server Starts but Web Agent Not Enabled (see page 73) smget Error Message When Web Server Starts (see page 73) Reconfigured Web Agent Won't Operate (see page 74) Oracle iPlanet Web Server Fails at Runtime (see page 74) Non-english Input Characters Contain Junk Characters (see page 75)
Web Server Starts but Web Agent Not Enabled
Symptom:
The Web Agent is not enabled even though the web server has started.
Solution:
Open the WebAgent.conf file, and then set the EnableWebAgent parameter to yes.
smget Error Message When Web Server Starts
Valid on Oracle iPlanet web servers
Symptom:
When starting the Web Server, you see the message:
shmget failed. You may be trying to make a cache that is too large.
Solution:
Make the recommended adjustments to the shared memory segments.
More information:
How to Tune the Solaris 10 Resource Controls (see page 66)

Reconfigured Web Agent Won't Operate
74 Web Agent Installation Guide for iPlanet
Reconfigured Web Agent Won't Operate
Valid on Oracle iPlanet web servers
Symptom:
Web Agent configuration changes are not in the obj.conf file. The Web Agent cannot operate.
Solution:
The Oracle iPlanet Administration console was used to make server modifications before the changes the Agent configuration program made to the obj.conf were applied. Reconfigure the Web Agent.
More information:
Apply CA SiteMinder® Changes to Oracle iPlanet Configuration Files with Oracle iPlanet Administration Server Console for SunOne 6.1 Servers (see page 27) Apply CA SiteMinder® Changes to Oracle iPlanet Configuration Files with Oracle iPlanet Administration Server Console for SunOne 6.1 Servers (see page 40)
Oracle iPlanet Web Server Fails at Runtime
Symptom:
Oracle iPlanet web server is failing at run time.
Solution:
Set the value of the StackSize setting (in the magnus.conf file of the Oracle iPlanet server) to 256 KB. The magnus.conf file is located in:
Oracle_iPlanet_home/web_server_instance/config

Non-english Input Characters Contain Junk Characters
Chapter 9: Troubleshooting 75
Non-english Input Characters Contain Junk Characters
Valid on UNIX/Linux
Symptom:
Some non-English input characters are not displayed correctly in the console window.
Solution:
Verify the terminal settings of your console window. Confirm that the console does not clear high (eight) bit of input characters. Execute the following command:
stty –istrip


Appendix A: Worksheets 77
Appendix A: Worksheets
This section contains the following topics:
Agent Installation Worksheet (see page 77) Agent Configuration Worksheet (see page 77)
Agent Installation Worksheet
Use the following table to record the information that the agent installation program requires:
Information Needed Your Value
Installation Directory
Agent Configuration Worksheet
Use the following table to record the information that the agent configuration program requires:
Information Needed Your Value
Host Registration (Yes/No)
Admin User Name
Admin Password
Enable Shared Secret Rollover
Trusted Host Name
Host Configuration Object
IP Address
FIPS Mode Setting
SmHost.conf file Name
SmHost.conf file Location
Select Server
Agent Configuration Object Name

Agent Configuration Worksheet
78 Web Agent Installation Guide for iPlanet
Information Needed Your Value
Advanced Authentication Scheme Dialog

Index 79
Index
(
(Optional) Improve Server Performance with httpd.conf File Changes • 30
A
Agent Configuration Worksheet • 77 Agent for Oracle iPlanet Upgrade Roadmap • 50 Agent Installation Compared to Agent Configuration
• 19, 31 Agent Installation Worksheet • 77 AIX Requirements • 13 Apply CA SiteMinder® Changes to Oracle iPlanet
Configuration Files with Oracle iPlanet Administration Server Console for SunOne 6.1 Servers • 27, 40
Apply Changes to your Upgraded CA SiteMinder® Files with the iPlanet Administration Console • 58
C
CA Technologies Product References • 3 Configure your Upgraded Agent on UNIX/Linux • 58 Configure your Upgraded Agent on Windows • 57 Connect a Web Agent to a Dynamic Policy Server
Cluster • 46 Contact CA Technologies • 3
D
Disable a Web Agent • 48 Dynamic Policy Server Clusters • 45
E
Enable a Web Agent • 47 Ensure LD_PRELOAD Variable Does Not Conflict with
Existing Agent • 53
G
Gather the Information for the Installation • 32 Gather the Information for the Installation Program
• 20 Gather the Information Required by the
Configuration Program on Windows • 21 Gather the Information that the Configuration
Program Requires on UNIX/Linux • 33
H
Hardware Requirements for CA SiteMinder® Agents • 10
How to Install and Configure a CA SiteMinder® Agent for Oracle iPlanet on UNIX/Linux • 32
How to Install and Configure the Agent for Oracle iPlanet on Windows • 20
How to Prepare for a Web Agent Installation on an Oracle iPlanet Web Server • 12
How to Tune the Solaris 10 Resource Controls • 66 How to Upgrade an Agent for Oracle iPlanet • 51
I
Install and Configure an Oracle iPlanet Agent on UNIX/Linux • 31
Install and Configure an Oracle iPlanet Agent on Windows • 19
L
Locate the Platform Support Matrix • 12
M
Manually Configure any Non-Default Server Instances for your Upgraded CA SiteMinder® Agent • 59
Manually Configure Non-default Server Instances, Virtual Servers, or Reverse Proxies for Oracle iPlanet Web Servers • 41
Manually Configure Non-Default Server Instances, Virtual Servers, or Reverse Proxies for Oracle iPlanet Web Servers • 28
Modify the Oracle iPlanet Startup Script to Prevent Crashes when the Server Stops • 42
N
Non-english Input Characters Contain Junk Characters • 75
Notes About Uninstalling Web Agents • 67
O
Only Oracle iPlanet Web Server Procedures in this Guide • 9
Operating System Tuning for Agents • 63

80 Web Agent Installation Guide for iPlanet
Oracle iPlanet Web Server Fails at Runtime • 74 Oracle iPlanet Web Server Preparations for Linux •
14 Oracle iPlanet Web Server Preparations for UNIX •
13
P
Policy Server Requirements • 16 Preparation • 9 Preparation Roadmap for Oracle iPlanet web servers
• 11
R
Reconfigured Web Agent Won't Operate • 74 Required Linux Libraries • 14 Required Linux Patches • 14 Required Solaris Patches • 13 Run the Installation Program on UNIX/Linux • 33 Run the Installation Program on Windows • 21 Run the Installation Wizard to Upgrade your Agent
on UNIX/Linux • 55 Run the Installation Wizard to Upgrade your Agent
on Windows • 54 Run the Unattended or Silent Installation and
Configuration Programs for Agents on UNIX/Linux • 39
Run the Unattended or Silent Installation and Configuration Programs for Subsequent Agents on Windows • 26
Run the Web Agent Configuration Program on UNIX/Linux • 37
Run the Web Agent Configuration Program on Windows • 24
S
Set the DISPLAY For CA SiteMinder® Agent Installations on UNIX • 13
Set the Library Path Variable Before Configuring your Upgraded Agent on UNIX/Linux • 56
Set the Library Path Variable on UNIX or Linux • 37 smget Error Message When Web Server Starts • 73 Source the Agent Environment Script After an
Upgrade on UNIX/Linux • 55 Source the Agent Environment Script on UNIX or
Linux • 36 Starting and Stopping Web Agents • 47
T
Troubleshooting • 73 Tune the Shared Memory Segments • 64
U
Uninstall a Web Agent • 67 Uninstall a Web Agent from a Windows Operating
Environment • 68 Uninstall an Oracle iPlanet Agent from a UNIX
System • 70 Upgrade a Web Agent to 12.51 • 49 Upgrade Process from CA SiteMinder® r12.0 • 53 Upgrade Process from CA SiteMinder® r6.x • 52 upgrading
setting LD_PRELOAD • 53
W
Web Server Starts but Web Agent Not Enabled • 73 Worksheets • 77