wa bicycle commute guide - washington state … bicycle commute guide was originally developed in...
TRANSCRIPT

Bicycle Commute Guide
Washington State

AuthorLarry Leveen, OlyBikes, Olympia, WA
EditorsCharlotte Claybrooke, Washington State Department of TransportationSusan Horst, Whatcom Council of Governments
Designgood eye designphotos: Julie DeFoer, Ryan Duclos, Wendy Scholtz
Acknowledgements
This Bicycle Commute Guide was originally developed in 1997 as a project of Capital Bicycling Club & Climate Solutions. Other sponsors included: Intercity Transit, Washington State Department of Ecology, Washington Department of General Administration, Washington State Department of Transportation and Washington Traffic Safety Commission.
Washington State Bicycle Commute GuideAn introduction to the fun and rewarding art of bicycle commutingSponsored by: Washington State Department of Transportation
The following people helped to create the first edition:
Sheldon Brown, Mike Cobb, Joan Cullen, Mike Dornfeld, Lance Durbin, Bob Flor, John Forester, Toril Frost, Mike Harbour, Meg Kester, Jim Lazar, John Moffat, Bill Moritz, Dick Nuse, Stan Springer, Bill Swan, Michael Van Gelder, and the Internet bicycle community.
For information on acquiring copies of the guide, contact Ian Macek at 360-705-7596.

This guide will prepare you for the fun and rewarding art of bicycle commuting. Ready…Set…Ride!
Why Bike Commute? ........4Bike Commute Options
Bike Basics ........................5Bike Fit
Outfitting Your Bike .........5Headlights & TaillightsCarrying Cargo: Racks, Panniers & TrailersToolsFendersMirrors
Outfitting Yourself ............7Safety ClothingComfort ClothingCold Weather Clothing Tips
Riding Safely & Legally ....9Traffic Laws and CyclingRiding in TrafficRiding in the RainRiding at NightDealing with Harassment
Doing the Commute .......12Getting StartedTalk With Your EmployerDressing for WorkWashing Up
Bicycle Security ..............14U-LocksCable LocksQuick Releases
You Can Do It! .................16
Bicycle Tech Talk .............17Bike Fit TipsSpecial Fit Notes for WomenSaddle ChoiceUsing Quick ReleasesHelmet Fit & AdjustmentSafe Bike Checklist
Resources ......... back coverOrganizations & WebsitesBooksco
nten
ts:
Washington State LawRCW 46.61.755Every person riding a bicycle upon a roadway shall be granted all of the rights and shall be subject to all of the duties applicable to the driver of a vehicle…

4 | WASHINGTON STATE BICYCLE COMMUTE GUIDE
The morning air is clear and crisp as you set out for work on your bicycle. As you head down the street and begin to limber up you notice how your neighbor’s garden has grown over the past few weeks. You exchange a friendly wave with someone out for a morning run. It’s amazing, just a few months ago your bike sat in the corner of your garage, waiting for a fair-weather weekend to come along. Now you use it daily for commutes and errands and the travel coffee mug in your car is gathering dust. The accessories and clothing that help you bike commute in all conditions are quickly being paid for by savings in gasoline and reduced wear and tear on your car. Soon you will actually be saving money.
Waiting in line at a traffic light, you notice that most of the cars only have one occupant. What if they were on bikes or buses or carpooling, you wonder — how much traffic congestion would that reduce? When you first started bike commuting, you were thankful for that traffic light because it was a chance to catch your breath, but now your fitness has improved to the point that only biking up the big hill on your route makes you breathe hard. You used to call that hill “Little Rainier,” but now it’s just another part of your morning.
You are feeling awake and motivated as you pull into your workplace and lock your bike right next to the entrance of the building, while car drivers troll around the parking lot, searching for empty spaces. Once inside, you head for the bathroom to clean up and change clothes. Ten minutes later, you are in your office, energized and ready for the day ahead. Outside, your bike awaits your imminent return for a relaxing ride home after work…
Why Bike Commute?Cycling is a quiet, clean, efficient, healthy and fun way to travel. Since half of all daily trips in this country are five miles or less, bicycling is a practical way to travel to and from work or school, or for doing errands. Combined with transit and other travel options, cycling can also be part of a commute over longer distances. Bike commuting is easy but it may require some small adjustments in your daily routine. This guide was created to ease the transition and make the experience safer and more enjoyable. If you’re new to bike commuting, it may take a little while to develop your routine. But be persistent — you’ll not only arrive at work alert and motivated and back at home relaxed, you’ll save a lot of money too! Even veteran commuters should find some helpful tips in this guide.
Bike Commute Options
If doing your whole commute by bike is impractical or you need to build up your fitness, try these alternatives:
Ride to a bus stop or park-and-ride •and take the bus the rest of the way to work. When taking your bike on transit vehicles, ask your local transit agency for instructions and always communicate with drivers before you load and unload your bike.
Ride to a park-and-ride facility and •secure your bike at a parking rack or in a locker, (contact your local transit agency for more information on bicycle accommodations).
Drive to a park-and-ride facility with •your bike, cycle to work from there.
Bike to a co-worker’s and carpool from •there.
Drive to work and cycle home. The •next day, ride to work and then drive home.
Combine biking with a vanpool if •possible. Ask the vanpool manager to mount a bike rack on the vehicle. Then you can take the vanpool in the morning and cycle home in the afternoon.

WASHINGTON STATE BICYCLE COMMUTE GUIDE | 5
Bike BasicsMake sure your gear is up to the task of commuting, starting with your bicycle. “City miles” cause more wear and tear on bikes than most other types of riding because of the frequent starts and stops, gear shifting, cargo loads – even possible bangs and dings of dealing with bike parking. Therefore, get a bicycle with better quality parts, such as all-metal pedals and derailers, as well as aluminum (not steel) rims. Such bikes may cost a little more up front, but will pay dividends in terms of being more dependable and safer, and making your commute more enjoyable.
Bike FitProper bike sizing and fit are extremely important. Having too large or too small a bike can make it difficult to control and can lead to discomfort or injury. As a general rule for road bicycles, you should have one inch of clearance between the top tube and your crotch as you stand astride the bike. Clearance should be approximately two inches for a “hybrid” or “cross” bike and three to four inches for a mountain bike. See Bicycle Tech Talk at the end of this guide for more information on proper bike fit.
Outfitting Your BikeCertain accessories can make bike commuting safer and more enjoyable. Prioritize spending on safety-related items. Keep in mind that you get what you pay for and since bike commuting is very economical, you will save money in the long run by purchasing quality items. To make choosing among the wide variety of bicycle accessories a less daunting task, think about your needs, talk to friends and employees at your local bike shop and read equipment reviews in bicycle publications or on the Internet.
Headlights & TaillightsHeadlights are required by law for night riding (white “steady beam” — not flashing) and taillights (red, may flash) are a good addition to the required rear red reflector. Lights vary greatly in their quality of construction, mounting design, amount of light they supply and “run time.” Bicycle headlights are divided into three categories:
Non-rechargeable headlights:• While these lights are inexpensive initially, battery costs pile up and so does the hazardous waste they create in spent batteries. Also, while they help people see you, they are not bright enough to let you see what you are rolling over – including flat-causing debris and unsafe road surfaces. You can usually purchase rechargeable batteries and a charger separately to use with such systems.Rechargeable headlights:• Larger up-front costs are more than made up for by savings from reusable batteries. Also, these systems tend to be much brighter, enhancing rider safety, by throwing enough light to see by at bicycle speed. They often have other user-friendly features helpful for commuters.Generator-powered lights:• No more worrying if you remembered to recharge your light system with generators — if you can pedal, you have light! Generators have come a long way in the past few years, but generally still are not as bright as higher-end rechargable headlights. Nicer generator lights remain lit for a couple minutes when the bicycle stops moving, allowing it to remain visible to other road users.

6 | WASHINGTON STATE BICYCLE COMMUTE GUIDE
Regardless of what system you use, consider keeping a small spare headlight with you on your commutes in case you forget your main light or it is not usable (due to dead batteries or mechanical failure). Make sure the spare light can be mounted on your handlebars or on your helmet.
Carrying Cargo: Racks, Panniers & TrailersConsider installing a cargo rack and panniers (cargo holders that mount on racks) to enable you to carry items to work or school. Carrying loads on racks instead of in a backpack makes riding more comfortable: the bike, not your arms, carries the load; and your back will be able to ventilate better. It is also safer; rack–loading lowers your bike’s center of gravity. Another tool that is useful for carrying things, particularly bulky or very heavy items, is a bike trailer. Like other accessories, racks, panniers and trailers vary widely in their quality. Try out various types to decide which design you like best. You may need to put items in plastic bags to keep them dry if your panniers or trailer are not waterproof or do not have rain covers.
Tip: to prevent rack bolts from unscrewing due to road vibration, use “threadlocker” (a weak glue, applied to the threads of bolts/screws) available at most hardware stores.
ToolsIt’s a good idea to carry a basic tool kit with a small set of allen wrenches, a tire patch kit, and tire levers. Mount a pump on your frame as well and make sure you know how to fix a flat before you need to! Flat repair is often featured in print and online bicycling resources and is always included in repair manuals. Products such as puncture-resistant tires and tubes and “tire liners” can help prevent flats — inquire at your local bike shop. Include a rag and non-latex gloves in your tool kit to help you stay clean in the event of a mechanical problem. Carry round-trip emergency bus fare to help you to arrive at work on time in case you encounter a problem you cannot address immediately.
FendersFenders are a must for cycling in wet conditions. They nearly eliminate spray from your wheels, keeping you drier, cleaner, and more comfortable. They also keep your bike cleaner, reducing the need for maintenance. Various designs of fenders are available, but the more wheel coverage a fender offers, the better. Bicycles vary greatly, so bring yours to a local bike shop so they can help you choose fenders that will work for your needs. Again, using “threadlocker” on all fasteners helps them stay put.
MirrorsMany cyclists use mirrors to keep track of traffic behind them. Mirrors come in two basic types: helmet-mounted and bar-mounted. Helmet-mounted mirrors are constantly in your field of view, requiring just a quick glance to check the road behind, but some find them distracting. Bar-mounted mirrors are more out of the way, but their images are often subject to vibration from the road. Although mirrors can help you keep tabs on traffic, they are not a substitute for looking behind you before changing lanes. This is a skill that must be practiced to avoid swerving (see Proper Cycling Form later in this guide).

WASHINGTON STATE BICYCLE COMMUTE GUIDE | 7
Outfitting YourselfOutfitting yourself for bike commuting consists of wearing safety and comfort clothing. Safety clothing should be your priority, while comfort clothing can make your commute more enjoyable.
Safety Clothing
HelmetsOf the 1200 deaths that occur annually in the U.S. from bicycle accidents, 75% are due to head injuries. Using a helmet can reduce the chance and severity of injury and may even save your life. It can only do so if properly sized, adjusted and consistently worn (see the Bicycle Tech Talk section for information on helmet-fit). Here are some important points about helmet use:
The helmet should be worn level on your head. If tilted back, it will not protect your •forehead.Bicycle helmets are designed to withstand one crash only. Structural damage is not •always visible, so always replace a helmet that has been in a crash and never buy used helmets.Light or fluorescent-colored helmets make you more visible to motorists. Reflective •tape, available at bike shops, can be applied to helmets to enhance visibility at night.You can never tell when a crash is going to occur, so wear your helmet every time •you ride, no matter how short the trip.
GlovesGloves are both safety clothing and comfort clothing. They protect hands in the event of a crash (we instinctually try to catch ourselves during a fall), improve grip and reduce road vibration. Heavier, full-finger gloves make riding in cold or wet weather comfortable. Truly waterproof gloves tend to be very insulating and might be too warm for some cyclists.
Visibility ClothingWearing clothing or accessories (e.g. reflective arm/leg bands, vests) that make you more conspicuous can help make up for the fact that drivers often are not used to scanning for objects smaller than cars. In daylight conditions, fluorescent or light-colored items are very visible, but at night, reflective items are most effective at increasing your visibility. Use a combination of the two — and lights — for the greatest benefit. Motorists often appreciate your efforts to make yourself more visible to them and may be more considerate.

8 | WASHINGTON STATE BICYCLE COMMUTE GUIDE
Comfort Clothing
Bike ShortsCycling shorts reduce friction in the crotch/thigh and often provide some cushioning. For short commutes, they may not be necessary, but for longer commutes, they can be crucial. They are designed to stick to you and slide against the bike’s saddle, whereas regular clothing with stick to the saddle and slide against your body, causing abrasion. There are purpose-made baggy shorts or “skorts” (sport skirts) for cycling, or you can wear shorts or a skirt over standard bike shorts for a more casual look.
Rain GearRain gear comes in two main types: breathable and non-breathable. Non-breathable fabric can cause you to overheat and sweat, though
even breathable fabrics can be overtaxed by vigorous cycling. The effectiveness of rain gear depends a lot on the ventilation it offers. Look for large “pit-zips” in the jacket to allow perspiration to evaporate. Rain pants should be long enough to cover the top of your footwear to help keep your feet dry. The cuffs of the pants should cinch snugly against your ankles to keep them from getting snagged on anything (like your bike’s chainrings). Despite the low-light conditions of rainy weather, black rain pants (and black rain jacket sleeves) are a good idea because they hide dirt best. Most raingear includes ample reflective material to help improve visibility.
FootwearIdeal cycling footwear is stiff-soled, waterproof and comfortable to do some walking in. Some cyclists use special shoes but common footwear such as hiking boots or sneakers may suffice for your commute. “High-top” cut, waterproof footwear, tucked under rain pants (the way roof shingles overlap) will do a great job at keeping your feet dry. You can also get waterproof booties that fit over most any footwear (even dress shoes). Some booties are form-fitting, but restrict your choice of footwear, others are baggier, but allow any shoe to be worn.
Drying out wet shoes can be a challenge — some cyclists use special cycling sandals (which dry fast because they have less material/coverage than regular shoes) and waterproof socks to deal with this issue. Others keep nice shoes at work, and commute in footwear they don’t need to keep dry or clean. There are many options and approaches. Experiment to see what footwear and techniques gives you the best combination of comfort, efficiency and convenience.

WASHINGTON STATE BICYCLE COMMUTE GUIDE | 9
Cold Weather Clothing Tips
Remember the cool-weather-cycling axiom: “If you are warm when you leave home, you are over-dressed.” You may feel chilly at first, but remember, cycling generates significant heat and you will warm up after a few minutes in the saddle. In cold weather, put a thin, wicking layer against your skin to keep yourself dry. Then use an insulating layer on top of that, and finally, if you need, a wind or rain jacket. Make sure the jacket has full front zippers and/or pit-zips to allow for ventilation.
Ear warmers and head coverings like hats or balaclavas enable you to cycle comfortably in cold weather. Head coverings may require helmet readjustment. Thin head coverings can be kept in your rain/wind jacket pocket for when you need them. Temperature and weather on your ride home can be quite different than when you rode to work. A variety of clothing layers, head coverings and gloves will keep you comfortable coming and going.
If you have to be wet (due to rain or perspiration), at least be warm. Avoid wearing cotton, which loses its ability to insulate when wet. Stick with either lightweight wool or synthetics which stay warm when wet. Wool tends to resist getting smelly much better than synthetics, and can be a better choice if you do not have shower facilities at work. Fine merino wool is very comfortable and among the best material for cycling clothing.
Riding Safely & LegallyRiding safely and legally starts with having a well-maintained bike. See the Safe Bike Checklist in the Bicycle Tech Talk section to make sure your bicycle is in proper working condition.
Traffic Laws and CyclingIn Effective Cycling, John Forester writes, “Cyclists fare best when they act and are treated as drivers of vehicles.” Why? When cyclists follow traffic laws they travel in a predictable fashion, communicating their intentions to other road users. It’s not just a good idea, it’s the law — state law defines bicycles as vehicles and requires cyclists to follow all traffic laws (see Resources).
Always remember to:Ride in the direction of traffic.•Obey all traffic signals including stop signs and lights.•Travel as far to the right in the travel lane as is safe when moving slower than traffic, •except when utilizing a left-turn lane or avoiding a right-turn lane when traveling straight.Always pass on the left (although overtaking other vehicles when you are either utilizing •a bike lane or are in a right-turn lane is legal).Utilize turn lanes when available.•Signal prior to turning or changing lanes.•

10 | WASHINGTON STATE BICYCLE COMMUTE GUIDE
Signal Before Turning/Changing Lanes:For left turns: extend the left arm straight out to the side.For right turns: extend the left arm to the side, bend elbow and point hand upward or extend the right arm straight out to the side. Both are legal signals for right turns.To signal for a stop or a decrease in speed: extend the left arm to the side, bend elbow and point hand downward.
Riding in TrafficHere are some more tips to help you ride safely and predictably:
Maintain as straight a line of travel as possible — avoid swerving in •and out of the parking lane. Keep approximately three feet from parked cars so that an opened door will not obstruct your path. This will also make you more visible to drivers approaching from side streets or driveways.Be alert when riding in traffic. Continually scan for potential hazards •such as road debris, potholes, car doors that may suddenly open in your path, other road users pulling into your path from side roads or driveways, etc.Cycling two abreast in Washington State is legal, though it is illegal to •block the flow of traffic.Ride with confidence and make eye contact with other road users.•At stop signs and lights, do not advance to the stop line by passing •cars on the right. Instead, wait in the traffic queue unless you are in a striped bike lane or utilizing a turn lane.At intersections, position yourself in the rightmost lane (or portion of •it) that best reflects your travel intentions (i.e. use through lanes only when traveling straight, use dedicated turn lanes only when turning). When using turn lanes that serve two destinations (i.e. a left and •straight or a right and straight lane), ride on the side of the lane nearest your destination.It is legal (and safest) to occupy the center of a travel lane when you •are traveling at traffic speed or when cars cannot pass you safely (see sidebar, “Taking the Lane” page 11).Sidewalk riding is more dangerous than street riding (and in some •areas is illegal) due to reduced sight distances and reaction times (both for you and other road users). If you must use the sidewalk, be extremely cautious, especially when making the transition to and from the roadway, and always yield to pedestrians.Washington State law says that cyclists may, but are not required •to, use bike lanes, paths or shoulders. Be aware that although bike paths may not have auto traffic, they may have other users who are less predictable, which can make paths more dangerous than streets. Keep alert for pedestrians, skaters, pets and less-experienced cyclists. Communicate with these path users as you would with motorists, and announce your intention to pass them (preferably on their left).
Utilize the rightmost lane or portion of a lane that goes to your destination.

WASHINGTON STATE BICYCLE COMMUTE GUIDE | 11
Riding in the RainRiding in wet conditions affects your bike’s handling. Remember these wet-weather cycling tips:
Allow more time for braking. Decelerate before initiating turns.•Sewer covers, grates and traffic-lane striping are slippery when wet. Avoid •braking or turning while traveling on them.Avoid puddles which may hide potholes or other road-surface irregularities •that can cause you to lose control.Rain is usually accompanied by decreased visibility, so take appropriate •precautions (see Outfitting Your Bike and Safety Clothing sections).
Riding at NightAt night, road hazards are less visible to you, and you are less visible to drivers. State law requires you to use a white headlight visible for 500 feet and a red rear reflector. Blinking red lights are effective, but are not necessarily an acceptable substitute for a rear red reflector. If you use only a blinking rear light, make sure it also complies with state law as a reflector. Using both a rear light and a red reflector is a good idea. Rear lights can fail (e.g. dead batteries, electronic or mechanical failure) and reflectors need incoming light to function (and not all road users have and use proper headlights).
Additional reflectors or reflective tape on any moving part of the bike (wheels, pedals, etc.) will increase your visibility. Helmets, the highest point on your body when cycling, are also good places for reflective tape and front and rear lights. Helmet-mounted headlights illuminate wherever you look and allow you to get other drivers’ attention by momentarily aiming your headlight at them.
Think you’ve got all the visibility bases covered? See how you look to motorists by having a friend wear your visibility clothing and ride your light-equipped bike at night while you drive a car. Shine your car’s headlights on them from the front, sides and back. You may find the results illuminating!
Sewer GratesSome sewer grates can trap or deflect front wheels, causing loss of control, so look for and avoid them. Public works departments are often willing to retrofit such grates with “bike-friendly” models. Help them out by calling and telling them where the safer grates are needed.
Taking the Lane
Washington State law requires cyclists to ride as far to the right as is safe, not as far to the right as is possible. There is a crucial difference. Assess the situation to decide how far towards the center of the lane you need to travel to be safe versus unduly delaying motorized traffic. Taking the full lane is generally safest when traveling for short stretches on lower speed roads (20-25mph). On higher speed roads, it may be safer to reduce your speed and stay further to the right rather than compete with faster vehicles for the full lane.
You may find it necessary to take the lane in the following kinds of situations:
when traveling at traffic speed and •you need to prevent motorists from inadvertently cutting you off;when descending a hill and you •need extra space (for reaction time) due to your speed;when lane width does not permit •a motorized vehicle behind you to safely pass;when road conditions (potholes, •road debris or parked cars) preclude you from riding farther to the right.
Be aware that many motorists neither understand that you have the right to take the lane in these situations (or at all), nor may they see road condition hazards you are trying to avoid.

12 | WASHINGTON STATE BICYCLE COMMUTE GUIDE
Crossing Train TracksTrain tracks, a significant hazard for cyclists, can almost always be crossed safely by taking a few precautions:
Approach the tracks at a 90-degree angle (square up to them beforehand).•Unweight your front wheel slightly (shift your weight backwards) and stand •with knees and elbows bent as you cross, in order to absorb road shock from the uneven road surface.Tracks are slippery, so do not alter your course or speed as you cross them •(also important for utility grates like sewer covers).
Dealing with HarassmentMost motorists are courteous and happy to share the road with cyclists, but unfortunately, the small minority of drivers who are rude or threatening stand out. Harassment can make a commute unenjoyable or even dangerous. Fortunately, it rarely occurs. If harassed, try to keep your cool and remember that your safety is the priority. You will rarely convince an irate motorist to share the road, and besides, you don’t want to provoke a person unstable enough to harass you in the first place. Your best bet is to develop your riding skills, know your rights, ride legally and try to keep calm in the event you are harassed. Noting a car’s license plate, description and occupants may help when reporting an incident to the authorities.
Doing the CommuteGetting StartedPlan your commute route before you ride it the first time, then test it out on a day off. Prepare for your test ride as if you were actually going to work so that you get a good idea of how long it will really take you. Leave a little early the first few times you bike commute until you get used to the routine and your fitness builds up. Consider asking around the workplace for bike commute buddies to ride with. You may find others who already bike commute or are considering doing so.
The best commute route to choose can be a matter of preference. Roads with more traffic are usually more direct and can save you time. Also, they are more likely to have facilities like bike lanes and transit. The enjoyment and comfort of using minor streets or off-street paths might offset their shortcomings of having fewer services or not directly serving your destination. Your preferences might change as you get more experience, so look over time, try a few different options.
Proper Cycling Form
BrakingBrakes are among the most important parts of your bike to keep in good working order. The front brake delivers approximately 70% of a bicycle’s stopping power, yet many underutilize it because they are afraid of flipping the bike. By shifting your weight backwards as you brake, your bike will remain more stable. The harder you need to brake, the more you should shift your weight backwards. For maximum stability, brake before (not during) a turn, especially in wet or gravelly conditions.
Looking BehindCyclists often swerve when they look over their shoulders prior to changing lanes or initiating turns. To minimize this tendency, concentrate on isolating your shoulders from your neck as you move your head to look. Try bringing your chin to the shoulder you want to look over instead of just turning your head to the side. Practice this technique while riding in an empty parking lot until you can look without swerving.
Getting the Most from Your Multi-Speed BikeUsing a multi-speed bicycle is similar to driving a “stick-shift” car — you shift gears in order to keep the engine revving at a reasonable pace. On a bicycle, you are the engine, and you should use the gears to allow pedaling with minimal effort. A “cadence,” or pace, of 60-80 revolutions per minute is a good target for novice cyclists, with higher cadences appropriate as one becomes more skilled. On a quiet but hilly road, try pedaling at a constant cadence (not constant speed) up and down the hills by using different gears. Shifting in order to maintain a comfortable pedal cadence may initially require a little practice but will soon become intuitive. Pedaling at a higher cadence is better for your knees and will allow you to ride faster and farther. Bicycles have come a
long way in terms of their user-friendliness. Still, you can help your bike perform even better by both anticipating the need to shift, and, when shifting, to reduce your pedaling force.

WASHINGTON STATE BICYCLE COMMUTE GUIDE | 13
Talk With Your EmployerLet your supervisors know that you’re going to start bike commuting and ask for their support. If you work at a large organization, you may be helping your workplace meet the requirements of the Commute Trip Reduction Law, but even small employers should be supportive of employees improving their health and making the community more livable by bicycling. Your employer can help by supplying secure bike parking, places to hang both your biking and working clothes, and facilities for washing up. Some employers even pay workers to commute by bike. Spread the word that you are bike commuting — you might even inspire your colleagues to join you in cycling to work!
Dressing for WorkIf your office has an informal dress code, you might find it easy to bike in your work clothes, especially on sunny days. If your work requires that you wear formal business clothing most or all of the time, or you have a lengthy commute that makes biking in your work clothes impractical, you’ll probably find it easier to leave a variety of clothing at your office. Some commuters transfer almost their entire business wardrobes to their offices! At work, you can keep your clothes tidy by storing them in a locker room or in your office. You can use part of a desk drawer to hold small, foldable items and hang the rest in a locker, closet, or behind a door in your office.
Suit separates, like jackets, slacks and skirts, are ideal for keeping at work because they require •infrequent cleaning and need only be switched as seasons change. When they need cleaning or pressing, look for a cleaner near your office or one that provides pick-up and delivery service. Or, swap clothing on days that you drive, carpool, or take transit.If you plan to bring your work clothes in daily on your bike, it’s a good idea to keep at least one •neutral shirt or blouse at your workplace in case you forget. Pack easily wrinkled clothing by rolling several pieces together, with the least-likely-to-wrinkle clothes on the inside.Cotton knit dresses, separates, and sweaters don’t wrinkle easily, can be stored in a drawer, •and can look as formal as pressed shirts and skirts.Keep a supply of dress shoes in the colors you need at the office (your shoes will also last •longer from not being worn outside as often!).It’s handy to keep a stash of accessories like ties and scarves, socks, stockings, and clean •underwear in your office.
Washing UpCleaning up after your bike commute can be done at even the smallest work places, but it’s more pleasant if your office has shower facilities. At a minimum, you can get satisfactorily washed up with a wash cloth and small towel in your office restroom. As with your clothing, don’t forget to keep a stash of the toiletries and clean towels you’ll need at your office. If your workplace doesn’t have showers and you aren’t comfortable without one, find a nearby gym where you can shower and change. Then you can walk, ride slowly, or take transit to work. If you want to get more exercise, but can’t clean up adequately at work, bike in at a moderate pace or take the bus with your bike to avoid getting sweaty before work. In the afternoon, make your bike ride home your workout.

14 | WASHINGTON STATE BICYCLE COMMUTE GUIDE
Bicycle SecurityNothing is theft-proof and no locking system is perfect, but you can take steps to ensure that your bike is a less-attractive target to a thief:
Consider where and how long your bike must be parked when •deciding how to secure it. If possible, keep your bike in your office or in a secured room or bike locker at your workplace.If your bike must be parked outside, lock your frame and •both wheels to an immovable object. Don’t lock your bike to a sign or other object that can be easily unbolted, bent, cut or removed. Pick a well-traveled, lighted place — thieves dislike working in exposed areas (secure bike lockers are an exception, of course).Consider leaving your heavy U-lock at work, locked to the •bike parking rack, and carrying a lighter cable lock with you for quick errands. At work, use both locks because thieves will need different tools to defeat each type of lock. This requires more time and risk for the thief. When not in use, cable locks can be wrapped around the •seatpost and U-locks can often be carried on a rear rack. This frees up space on the frame for other accessories.Many lock manufacturers offer warranties that will cover the •cost of a replacement if your bike is stolen while using their lock. Be aware that such insurance may not be free. Read product fine print.Seatposts and saddles are surprisingly common targets for •opportunistic theft when they are held on the bike by a quick release. Consider either replacing the quick release with a more secure “binder bolt” or locking your seatpost/saddle (ask your local bike shop for options). Alternately, remove them from the bike when locking it up. Careful though, seatposts are necessarily greasy and can dirty your clothing, and getting rain in your bike frame may harm it depending on what it is made out of.Take all easily removed accessories (pumps, lights, speedometer, •etc.) with you when leaving your bike unattended. Remember quick-release means easy to remove for you or anybody else.

WASHINGTON STATE BICYCLE COMMUTE GUIDE | 15
U-LocksU-locks are among the strongest locks available, but they are heavy and rigid — if they cannot get around an object such as a pipe or tree, they cannot secure your bike. One of the main ways U-locks are broken is by inserting tools inside the “U” to pry it open. Minimize this space by getting as small a U-lock as is practical. Then, take up the remaining space by locking your front wheel along with the rear wheel and frame when securing your bike. Sometimes, for lower-risk situation, like a quick errand, locking your front wheel and bike frame to a rack is sufficient. If your bike has a suspension (shock) fork, you’ll likely need a U-lock with a longer shackle (the curved part). Bring your bike to your local shop to help ensure you get a lock that meets your needs.
Cable LocksCable locks offer more flexibility and are lighter weight than U-locks. Because they are significantly less secure, they’re best used in well-traveled areas and on quick errands. Cables with built-in locks are lighter and more convenient than those that require a separate combination or padlock. However, separate cables and locks offer more configuration options. This can be handy when using different racks or when being joined by another cyclist for lunch or an errand. Some cable locks are opened with keys while others are combination locks. You won’t have to keep track of a key if you choose one with a combination lock.
The Downside of Quick Releases
Quick releases are handy (see page 17) but are a security liability that can result in stolen wheels, a saddle/seatpost or almost an entire bike! When locking your bike, secure all parts held on by quick releases – and never lock just a bicycle’s quick release wheel to a parking rack. You can replace wheel and seatpost quick releases with security binders that open with a unique key sold with them. This will protect your investment and allow you to carry a small and tough u-lock. As a bonus, you’ll only have to lock your frame to secure your whole bike.
16 | WASHINGTON STATE BICYCLE COMMUTE GUIDE
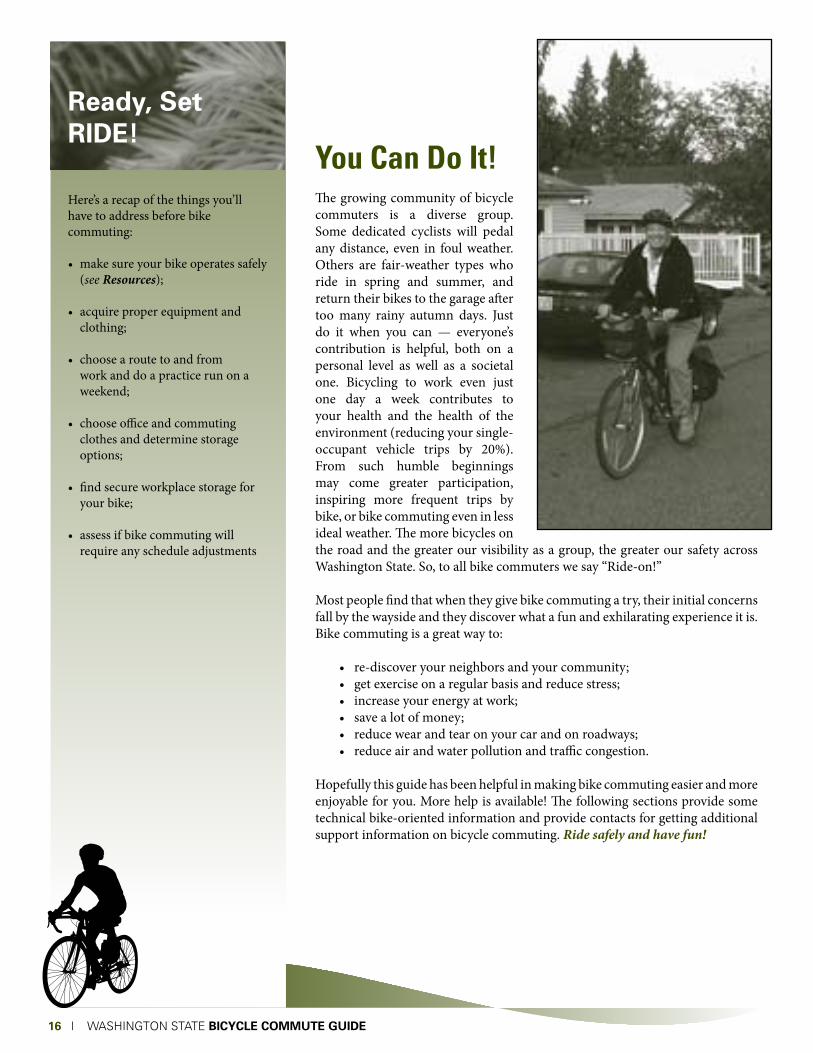
You Can Do It!The growing community of bicycle commuters is a diverse group. Some dedicated cyclists will pedal any distance, even in foul weather. Others are fair-weather types who ride in spring and summer, and return their bikes to the garage after too many rainy autumn days. Just do it when you can — everyone’s contribution is helpful, both on a personal level as well as a societal one. Bicycling to work even just one day a week contributes to your health and the health of the environment (reducing your single-occupant vehicle trips by 20%). From such humble beginnings may come greater participation, inspiring more frequent trips by bike, or bike commuting even in less ideal weather. The more bicycles on the road and the greater our visibility as a group, the greater our safety across Washington State. So, to all bike commuters we say “Ride-on!”
Most people find that when they give bike commuting a try, their initial concerns fall by the wayside and they discover what a fun and exhilarating experience it is. Bike commuting is a great way to:
•re-discoveryourneighborsandyourcommunity;•getexerciseonaregularbasisandreducestress;•increaseyourenergyatwork;•savealotofmoney;•reducewearandtearonyourcarandonroadways;•reduceairandwaterpollutionandtrafficcongestion.
Hopefully this guide has been helpful in making bike commuting easier and more enjoyable for you. More help is available! The following sections provide some technical bike-oriented information and provide contacts for getting additional support information on bicycle commuting. Ride safely and have fun!
Ready, Set RIDE!
Here’s a recap of the things you’ll have to address before bike commuting:
make sure your bike operates safely •(see Resources);
acquire proper equipment and •clothing;
choose a route to and from •work and do a practice run on a weekend;
choose office and commuting •clothes and determine storage options;
find secure workplace storage for •your bike;
assess if bike commuting will •require any schedule adjustments

WASHINGTON STATE BICYCLE COMMUTE GUIDE | 17
Bicycle Tech TalkThis section has tips on how to adjust a properly sized bicycle, how to make sure your bike is in good operating condition, how to adjust your helmet and how to properly use quick releases.
Bike Fit TipsHeight, body proportions and personal flexibility determine how your bike should be set up. Different things work for different folks – there is no single correct position. Here are some general guidelines and goals of proper fit:• Yourbikeposition should allowyour arms to remain slightlybent tohelp
provide shock absorption. •Forsafety,youshouldbeabletocompletelyenclosethehandlebarwithyour
hands, and easily reach the brake levers with your fingers. Many brake levers can be adjusted to provide proper reach for smaller hands.
• Youmaywanttoalterthedistancetoorpositionofthehandlebarssothatyour back, neck, arms and hands are comfortable. Adjusting stem height or exchanging the stem and /or handlebars can help offer proper positioning.
•Seatpostheightshouldbeadjustedsothatthereisaslightbendinyourkneewhen your leg is at the bottom of a pedal stroke.
•Fore/aftsaddlepositionandtilt:Adjustthesaddlesothatwithcranksparallelto the ground (nine o’clock and three o’clock positions), a line descending from just below your forward kneecap will pass through the pedal axle. This is just a general rule of thumb — alter it as you like. Adjust the saddle so it is level initially, and make small adjustments if necessary.
Saddle material is also an important issue for commuters. Lycra-covered saddles may be comfortable in dry weather, but absorb water in the rain, so that sitting on one yields a very unpleasant experience! Instead, choose either a vinyl or leather-over foam saddle for wet weather. Some experienced riders prefer a “tensioned leather” saddle, though these require more care to keep from getting wet (riding them wet ruins them). Waterproof saddle covers are available – inquire at your local bike shop.
Quick ReleasesMany bicycles are equipped with quick releases that hold the seatpost height adjustment and clamp the wheels to your bicycle’s frame and fork. Learning the proper way to use quick releases is very important for safe bicycle operation and, fortunately, it’s very easy.
Quick releases have a lever on one side and an adjusting nut on the other. The lever is used only to open and close the quick release, while the adjusting nut is used to change how soon the clamping force is applied as the lever is closed. When correctly adjusted, clamping action will start when the lever is about half way through its travel. Practice using your quick releases by opening and closing them a few times while changing the adjusting nut’s position.
Special Fit Notes for Women
Most bikes are designed for men’s proportions, but women’s proportions can differ (their torsos, arms and hands are often smaller and their “sit bones” are spaced wider). As a result, women may need to spend a little extra time to achieve proper bike fit, but having a comfortable bicycle is well worth the effort. Bikes specifically designed to better fit women’s proportions are becoming available. Alternatively, an existing bike may be retrofitted with items like shorter stems, wider saddles and smaller brake levers. Talk to your local bike shop for more information.
Saddle choiceSaddle choice is a very important and a very individual thing. The goal is to support the sit bones of your pelvis (i.e. not soft tissue in your crotch). If you have not been cycling, your tush may not be used to bearing weight this way. As a result, you may experience some soreness until you build up what we jokingly call “butt callus”. While it may be tempting to find the biggest, cushiest saddle out there, don’t forget that if your sit bones are not supported, they can’t bear your weight, which means soft tissue will – ouch! The same warning goes for saddles with a rounder shape when viewed from the back. If its profile “falls off ” too quickly at the edges, your sit bones will not be properly supported.
Some saddles have holes in them, a significant split down the middle, or a smaller “nose” (or no nose at all). If you like those, fine, just remember that the saddle is one of your “control surfaces” so make sure the one you use is not only comfy, but allows you to help “steer with your rear.”
Remember, there is a big difference in a test ride around the block and a multi-mile commute to and from work. Better bike shops will allow you to test a saddle in real-world conditions and return or exchange saddles until you find one that works for you.

18 | WASHINGTON STATE BICYCLE COMMUTE GUIDE
Remember to follow these rules when using quick releases:Make sure wheel axles are properly inserted and centered in the fork/ •frame before closing the quick releases.When closed, most quick-release levers curve towards the bike, and •the word “close” or “closed” can be seen. These visual cues can help you notice when quick releases are and are not used properly.Rotate the whole quick release so that when the lever is closed, it is •not aligned on top of the bike’s frame or fork. You’ll get three distinct advantages: your fingers can grab the frame/fork and you can use the heel of your hand to close the lever which makes it easier, the quick release lever closes farther/fully, and the next time you want to open the lever, you can get your fingers behind it and do so!Check all quick releases prior to riding.•
Helmet Fit & AdjustmentSince helmets can reduce the chance and severity of head injury, making sure your helmet fits and is correctly adjusted is one of the most important prerequisites to safe cycling. Follow the four steps below to adjust your helmet. Periodically recheck the adjustment of your helmet.
Helmet Sizing:1. Right out of the box, the helmet should fit your general head shape. Ignoring the straps for now, place the helmet on your head, making sure it is level. Wiggle the helmet around — if there is significant side-to-side or front-to-back movement, it is too large or is the wrong shape or both, and it will not work properly. If you are having trouble getting past this first step when shopping for helmets, try other models or brands; certain manufacturers’ helmets run narrow, while others’ run wide. Never base your helmet purchase on price. Base it on fit. Your health is a precious resource.Adjusting the Slider Buckles:2. Ignoring the chin buckle for now, adjust each pair of straps so that the slider buckles are situated just below your earlobes, perhaps a tad in front of them so that the strap in front of your ear is a bit more vertical than the one behind your ear. You’ll need to take any slack created below the slider buckle through the chin buckle. This step can be difficult but it is very important. Use a mirror to help.Adjusting the Chin Buckle:3. Adjust the straps so that when the chin buckle is closed it is roughly centered under the jawbones. On most helmets, two straps go through the chin buckle. Be sure to adjust both of them or the helmet will not fit properly.Final Check:4. When the chin buckle is engaged, all straps should be snug against the head. If any of the straps aren’t snug, readjust them now, keeping in mind the previous steps. When the helmet is properly adjusted, you should be able to slip a finger under the straps. The straps should snap back into position when you remove your finger, though. Do a final check of the helmet fit by gently yet firmly trying to push it off your head from the front, back and the sides. If the helmet is easy to push off, yet all straps are properly adjusted, try another model and/or make of helmet.
WASHINGTON STATE BICYCLE COMMUTE GUIDE | 19
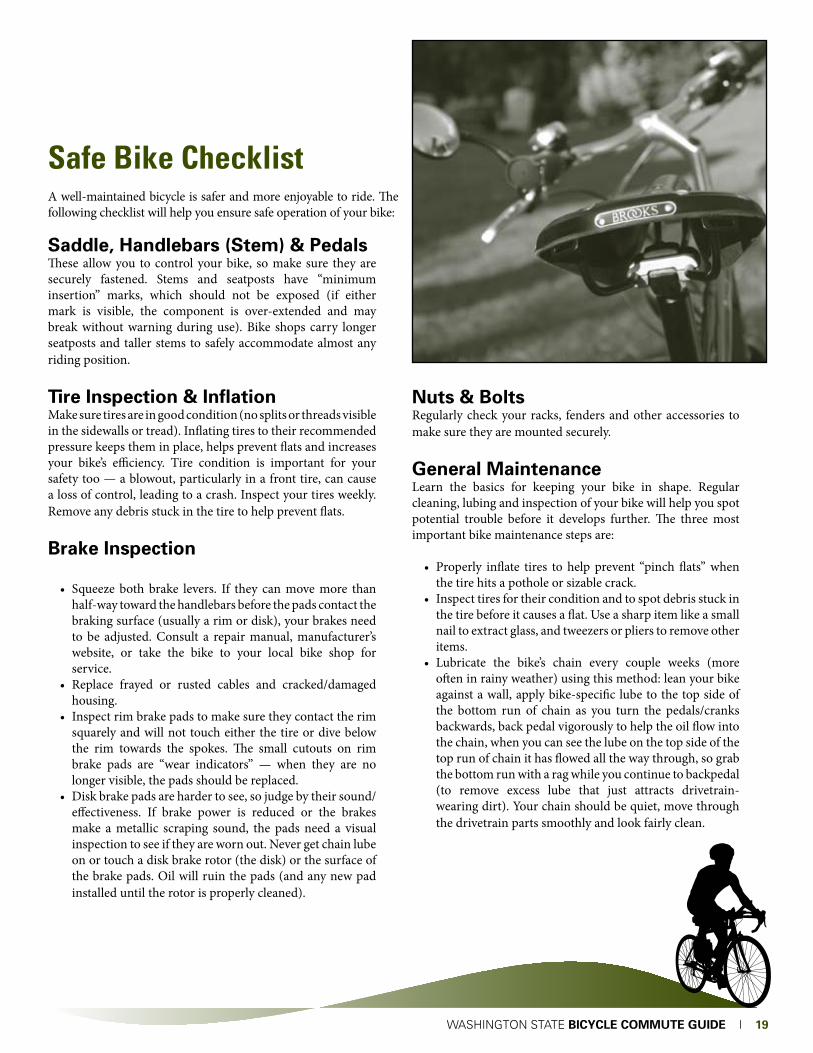
Saddle, Handlebars (Stem) & PedalsThese allow you to control your bike, so make sure they are securely fastened. Stems and seatposts have “minimum insertion” marks, which should not be exposed (if either mark is visible, the component is over-extended and may break without warning during use). Bike shops carry longer seatposts and taller stems to safely accommodate almost any riding position.
Tire Inspection & InflationMake sure tires are in good condition (no splits or threads visible in the sidewalls or tread). Inflating tires to their recommended pressure keeps them in place, helps prevent flats and increases your bike’s efficiency. Tire condition is important for your safety too — a blowout, particularly in a front tire, can cause a loss of control, leading to a crash. Inspect your tires weekly. Remove any debris stuck in the tire to help prevent flats.
Brake Inspection
•Squeeze bothbrake levers. If they canmovemore thanhalf-way toward the handlebars before the pads contact the braking surface (usually a rim or disk), your brakes need to be adjusted. Consult a repair manual, manufacturer’s website, or take the bike to your local bike shop for service.
•Replace frayed or rusted cables and cracked/damagedhousing.
•Inspectrimbrakepadstomakesuretheycontacttherimsquarely and will not touch either the tire or dive below the rim towards the spokes. The small cutouts on rim brake pads are “wear indicators” — when they are no longer visible, the pads should be replaced.
•Diskbrakepadsarehardertosee,sojudgebytheirsound/effectiveness. If brake power is reduced or the brakes make a metallic scraping sound, the pads need a visual inspection to see if they are worn out. Never get chain lube on or touch a disk brake rotor (the disk) or the surface of the brake pads. Oil will ruin the pads (and any new pad installed until the rotor is properly cleaned).
Nuts & BoltsRegularly check your racks, fenders and other accessories to make sure they are mounted securely.
General MaintenanceLearn the basics for keeping your bike in shape. Regular cleaning, lubing and inspection of your bike will help you spot potential trouble before it develops further. The three most important bike maintenance steps are:
•Properly inflate tires tohelpprevent “pinchflats”whenthe tire hits a pothole or sizable crack.
•Inspecttiresfortheirconditionandtospotdebrisstuckinthe tire before it causes a flat. Use a sharp item like a small nail to extract glass, and tweezers or pliers to remove other items.
•Lubricate the bike’s chain every couple weeks (moreoften in rainy weather) using this method: lean your bike against a wall, apply bike-specific lube to the top side of the bottom run of chain as you turn the pedals/cranks backwards, back pedal vigorously to help the oil flow into the chain, when you can see the lube on the top side of the top run of chain it has flowed all the way through, so grab the bottom run with a rag while you continue to backpedal (to remove excess lube that just attracts drivetrain-wearing dirt). Your chain should be quiet, move through the drivetrain parts smoothly and look fairly clean.
Safe Bike ChecklistA well-maintained bicycle is safer and more enjoyable to ride. The following checklist will help you ensure safe operation of your bike:

Resources
Organizations & WebsitesBicycle Alliance of Washington(state advocacy & safety information)www.bicyclealliance.org206-224-9252
Transportation Choices Coalitionwww.transportationchoices.org206-329-2336
Washington State Dept of Transportation Bicycle & Pedestrian Programwww.wsdot.wa.gov/bike360-705-7258
Washington Traffic Safety Commission (safety information)www.wtsc.wa.gov/programs/walkbike.php360-753-6197
League of American Bicyclists (national advocacy & safety information)www.bikeleague.org202-822-1333
Pedestrian and Bicycle Information Center (great page on benefits of bicycling)www.bicyclinginfo.org
Bike Clubs (local advocacy, safety and support information — ask at bike shops)
Transit Agencies (information on bike accommodations — look in the phone book)
BooksA Woman’s Guide to Cycling by Susan Weaver. This book contains a lot of moral support from the many women Weaver interviewed about cycling.
Effective Cycling by John Forester. The ultimate guide to safe and efficient cycling
Bicycling Street Smarts by Allen, John S. A great booklet with situation-specific tips on riding safely and legally.