ventilador de techo lynstead - lowes holidaypdf.lowes.com/useandcareguides/836071008726_use.pdf ·...
TRANSCRIPT

1
LYNSTEAD CEILING FAN
ITEM #0357400
MODEL #00872
UL MODEL #LSD52
Español p. 14
Serial Number Purchase Date
Harbor Breeze ® is a registered trademark of LF, LLC. All Rights Reserved.
Questions, problems, missing parts? Before returning to your retailer, call our customer service department at 1-800-643-0067, 8 a.m. - 6 p.m., EST, Monday - Thursday, 8 a.m. - 5 p.m., EST, Friday.
ATTACH YOUR RECEIPT HERE
Lowes.com/harborbreezeEB 1418814
VENTILADOR DE TECHOLYNSTEAD
ARTÍCULO #0357400
MODELO #00872
MODELO UL #LSD52
Lowes.com/harborbreeze
Harbor Breeze ® es una marca registrada de LF, LLC. Todos los derechos reservados.
¿Preguntas, problemas, piezas faltantes? Antes de volver a la tienda, llame a nuestro Departamento de Servicio al Cliente al 1-800-643-0067, de lunes a jueves de 8 a.m. a 6 p.m., hora estándar del Este, o los viernes de 8 a.m. a 5 p.m., hora estándar del Este.
ADJUNTE SU RECIBO AQUÍ
Número de serie Fecha de compra
32
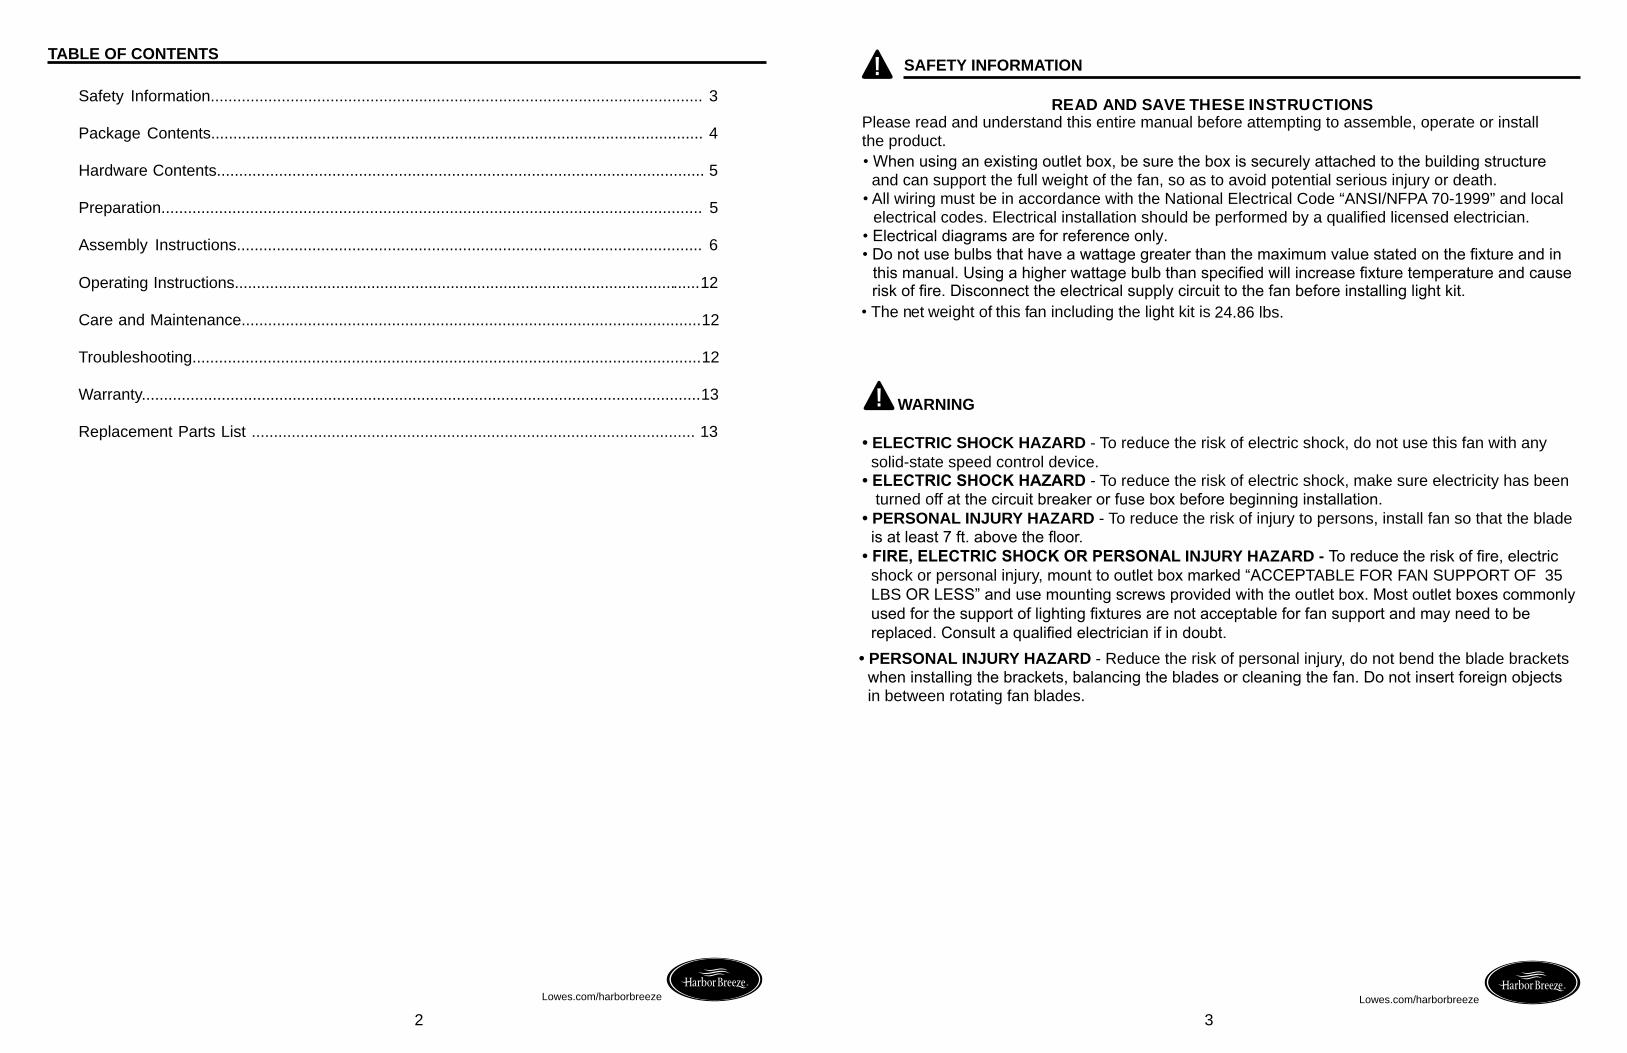
TABLE OF CONTENTS
Safety Information............................................................................................................... 3
Package Contents............................................................................................................... 4
Hardware Contents.............................................................................................................. 5
Preparation.......................................................................................................................... 5
Assembly Instructions......................................................................................................... 6
Operating Instructions.......................................................................................................... 12
Care and Maintenance........................................................................................................ 12
Troubleshooting................................................................................................................... 12
Warranty.............................................................................................................................. 13
Replacement Parts List .................................................................................................... 13
Lowes.com/harborbreeze Lowes.com/harborbreeze
Please read and understand this entire manual before attempting to assemble, operate or install the product. • When using an existing outlet box, be sure the box is securely attached to the building structure and can support the full weight of the fan, so as to avoid potential serious injury or death. • All wiring must be in accordance with the National Electrical Code “ANSI/NFPA 70-1999” and local
electrical codes. Electrical installation should be performed by a qualified licensed electrician.• Electrical diagrams are for reference only.
• Do not use bulbs that have a wattage greater than the maximum value stated on the fixture and in
this manual. Using a higher wattage bulb than specified will increase fixture temperature and cause risk of fire. Disconnect the electrical supply circuit to the fan before installing light kit.
• The net weight of this fan including the light kit is
READ AND SAVE THESE INSTRUCTIONS
24.86 lbs.
WARNING
• ELECTRIC SHOCK HAZARD - To reduce the risk of electric shock, do not use this fan with any solid-state speed control device. • ELECTRIC SHOCK HAZARD - To reduce the risk of electric shock, make sure electricity has been turned off at the circuit breaker or fuse box before beginning installation.• PERSONAL INJURY HAZARD - To reduce the risk of injury to persons, install fan so that the blade
• FIRE, ELECTRIC SHOCK OR PERSONAL INJURY HAZARD - shock or personal injury, mount to outlet box marked “ACCEPTABLE FOR FAN SUPPORT OF 35 LBS OR LESS” and use mounting screws provided with the outlet box. Most outlet boxes commonly
• PERSONAL INJURY HAZARD - Reduce the risk of personal injury, do not bend the blade brackets when installing the brackets, balancing the blades or cleaning the fan. Do not insert foreign objects in between rotating fan blades.
SAFETY INFORMATION
54
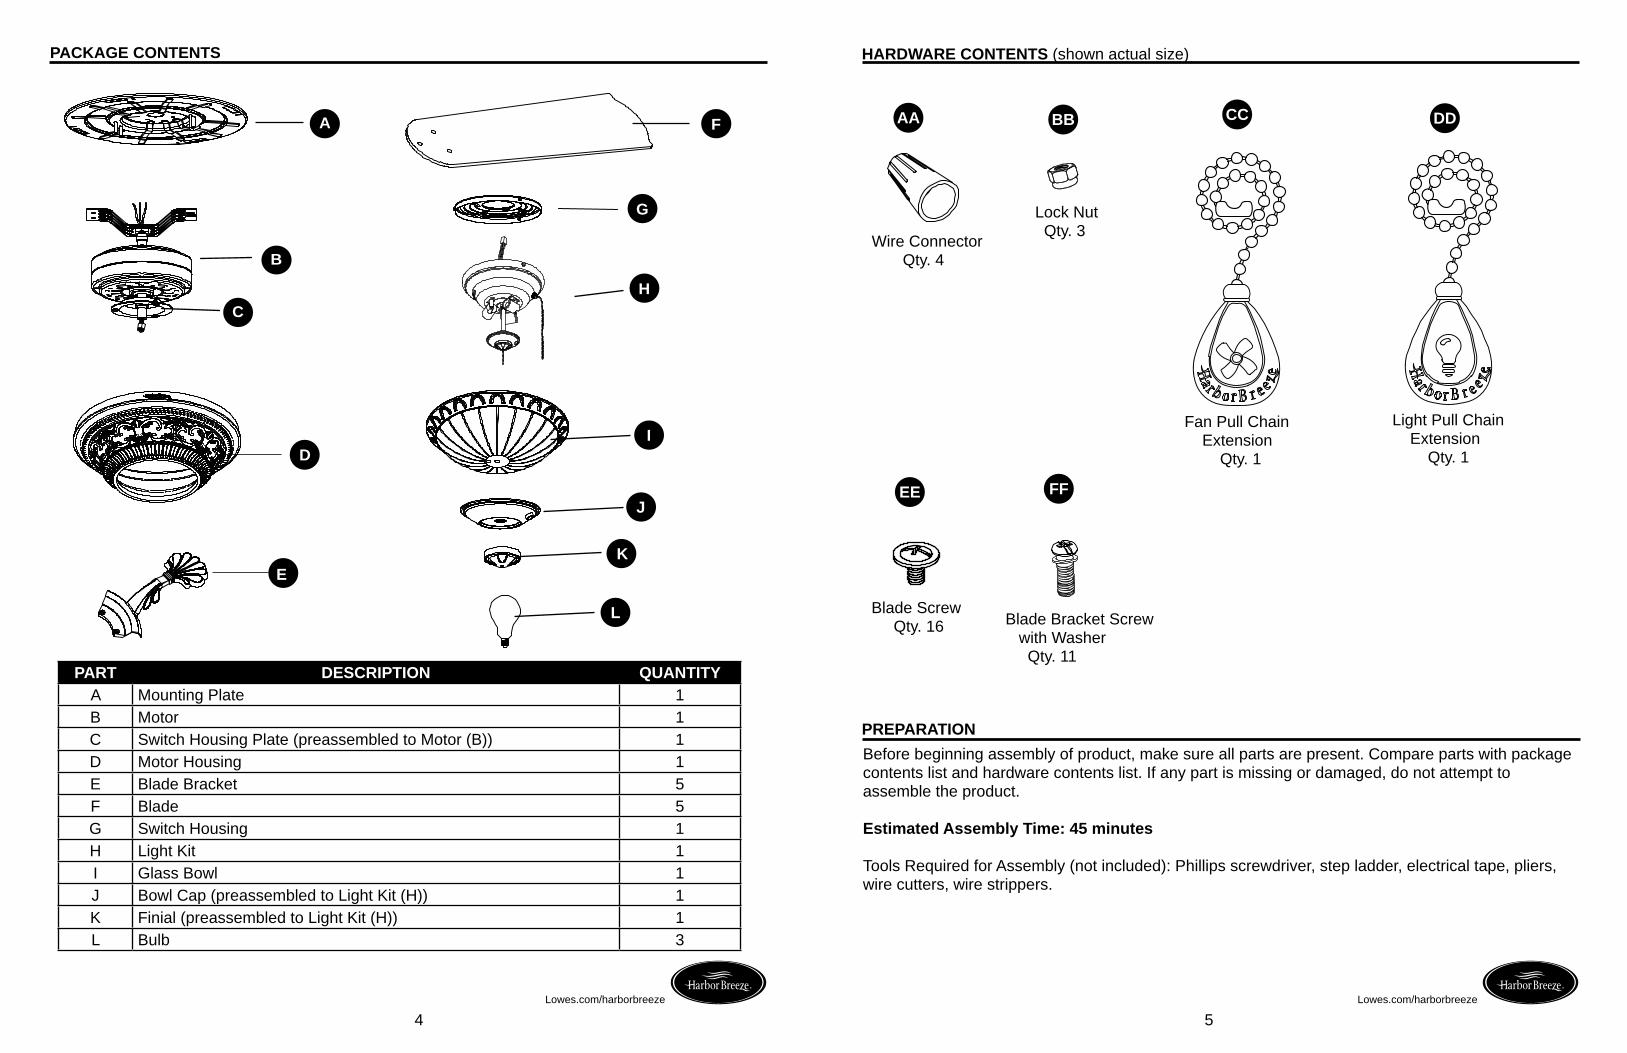
PREPARATION
Lowes.com/harborbreeze Lowes.com/harborbreeze
HARDWARE CONTENTS (shown actual size)
CC DDBB
EE FF
AA
Wire Connector Qty. 4
Lock Nut Qty. 3
Blade Screw Qty. 16 Blade Bracket Screw
with Washer
Qty. 11
Fan Pull Chain Extension Qty. 1
PACKAGE CONTENTS
B
A
C
F
G
H
DI
J
K
L
PART DESCRIPTION QUANTITYA Mounting Plate 1B Motor 1C Switch Housing Plate (preassembled to Motor (B)) 1D Motor Housing 1E Blade Bracket 5F Blade 5G Switch Housing 1H Light Kit 1I Glass Bowl 1J Bowl Cap (preassembled to Light Kit (H)) 1K Finial (preassembled to Light Kit (H)) 1L Bulb 3
E
Light Pull Chain Extension Qty. 1
Before beginning assembly of product, make sure all parts are present. Compare parts with package contents list and hardware contents list. If any part is missing or damaged, do not attempt to assemble the product.
Estimated Assembly Time: 45 minutes
Tools Required for Assembly (not included): Phillips screwdriver, step ladder, electrical tape, pliers, wire cutters, wire strippers.
6 7
ASSEMBLY INSTRUCTIONS ASSEMBLY INSTRUCTIONS
1 4
5
6
Lowes.com/harborbreeze Lowes.com/harborbreeze
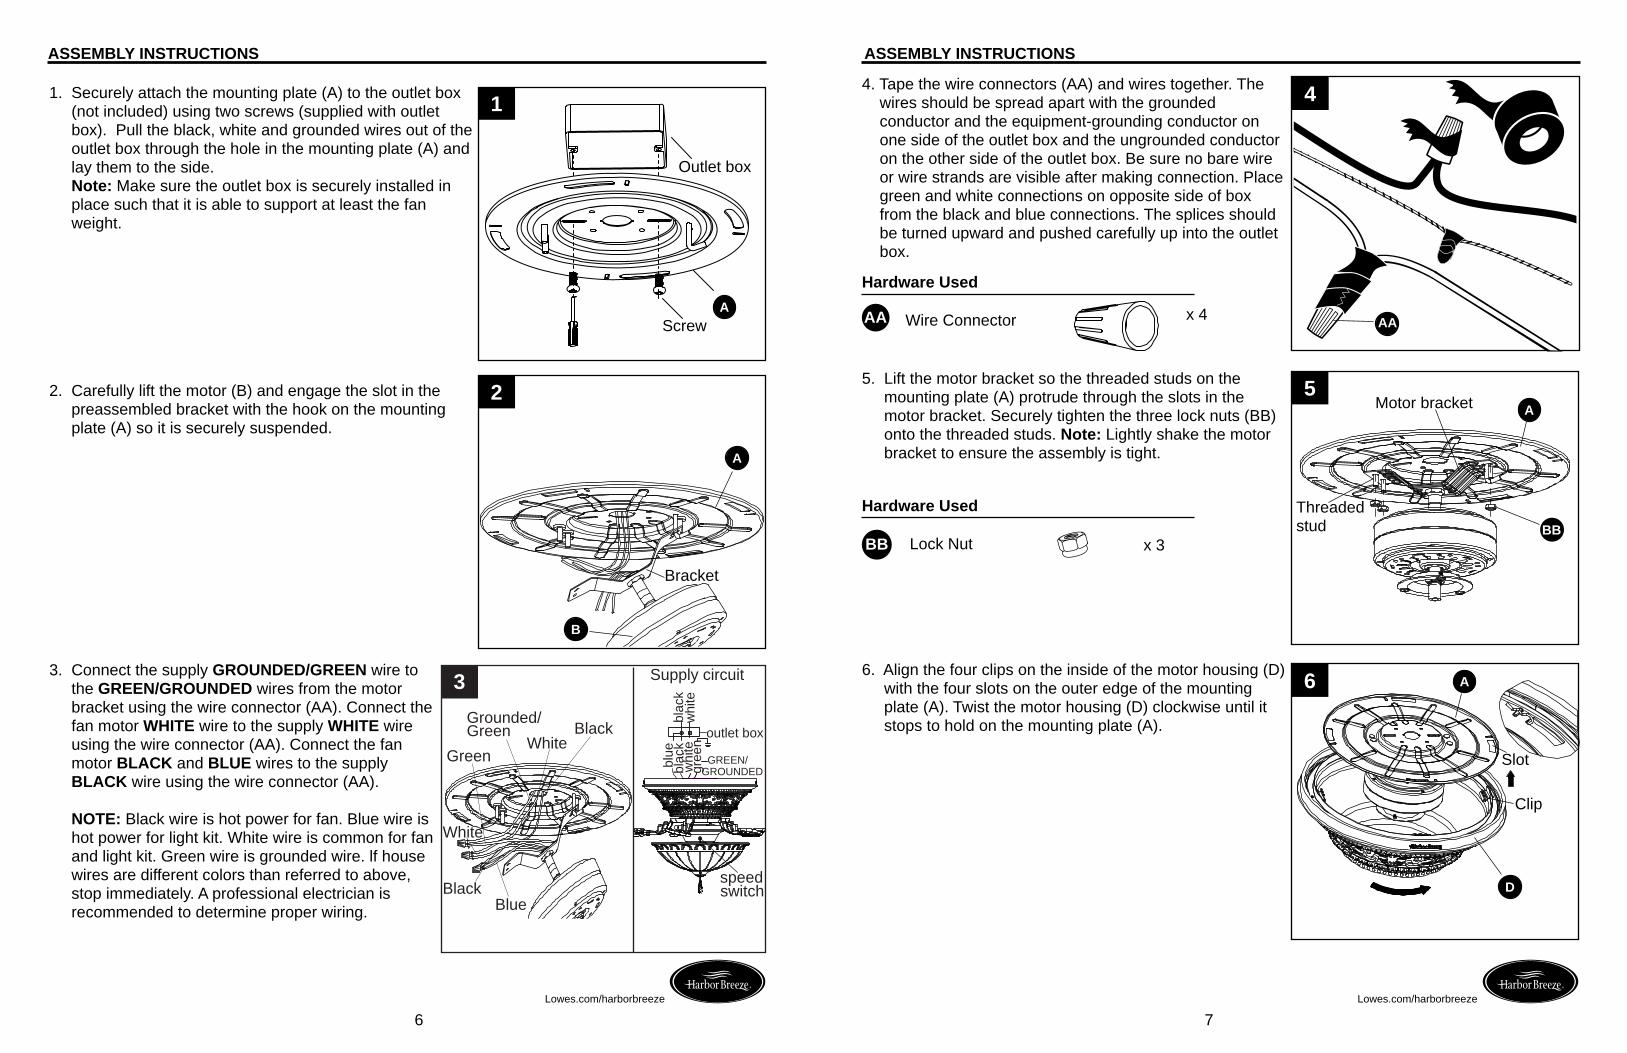
1. Securely attach the mounting plate (A) to the outlet box (not included) using two screws (supplied with outlet box). Pull the black, white and grounded wires out of the outlet box through the hole in the mounting plate (A) and lay them to the side. Note: Make sure the outlet box is securely installed in place such that it is able to support at least the fan weight.
2. Carefully lift the motor (B) and engage the slot in the preassembled bracket with the hook on the mounting plate (A) so it is securely suspended.
3. Connect the supply GROUNDED/GREEN wire to the GREEN/GROUNDED wires from the motor bracket using the wire connector (AA). Connect the fan motor WHITE wire to the supply WHITE wire using the wire connector (AA). Connect the fan motor BLACK and BLUE wires to the supply BLACK wire using the wire connector (AA).
NOTE: Black wire is hot power for fan. Blue wire is hot power for light kit. White wire is common for fan and light kit. Green wire is grounded wire. lf house wires are different colors than referred to above, stop immediately. A professional electrician is recommended to determine proper wiring.
4. Tape the wire connectors (AA) and wires together. The wires should be spread apart with the grounded conductor and the equipment-grounding conductor on one side of the outlet box and the ungrounded conductor on the other side of the outlet box. Be sure no bare wire or wire strands are visible after making connection. Place green and white connections on opposite side of box from the black and blue connections. The splices should be turned upward and pushed carefully up into the outlet box.
5. Lift the motor bracket so the threaded studs on the mounting plate (A) protrude through the slots in the motor bracket. Securely tighten the three lock nuts (BB) onto the threaded studs. Note: Lightly shake the motor bracket to ensure the assembly is tight.
6. Align the four clips on the inside of the motor housing (D) with the four slots on the outer edge of the mounting plate (A). Twist the motor housing (D) clockwise until it stops to hold on the mounting plate (A).
A
A
B
E
B
Outlet box
Screw
2
Bracket
Threaded stud
Motor bracket
BB
A
BB
Hardware Used
x 3
Clip
Slot
Hardware Used
x 4AA AA
A
D
Wire Connector
Lock Nut
3Grounded/Green Black
White
Green
BlackBlue
Whiteoutlet box
blue
blac
kw
hite
gree
nw
hite
GREEN/
blac
kSupply circuit
speed switch
GROUNDED

8 9
ASSEMBLY INSTRUCTIONS ASSEMBLY INSTRUCTIONS
9
Lowes.com/harborbreeze Lowes.com/harborbreezeLowes.com/harborbreeze Lowes.com/harborbreeze
7. Attach a blade (F) to a blade bracket (E) using the blade screws (EE). Tighten each blade screw (EE) securely. Repeat for the remaining blades (F).
8. Align the holes between the blade bracket (E) and motor (B). Install the blade assembly to the motor (B) using blade bracket screws with washers (FF). Tighten each blade bracket screw with washer (FF) securely. Repeat for the remaining blade assemblies.
10. Insert the wires from the motor (B) through the middle hole in the switch housing (G). Attach the switch housing (G) to the switch housing plate (C). Align the keyslot holes and twist to lock. Replace the screw previously removed (Step 9, page 8) and tighten all three screws.
11. Remove the preassembled screws from the switch housing (G).
12. Connect male plug from fan to female plug from the light kit (H).
9. Loosen two screws and remove one screw from the switch housing plate (C).
7
8
E
Hardware Used
EE
D
10
F
E
EE
E
E
B
C
B
FF
FF
Hardware Used
FF Blade Bracket Screw with Washer
x 11
11
G
G
Screw
12
JJ
Male plug Female plug
HScrew
ScrewKeyslot hole
GC
Blade Screw x 16

1110Lowes.com/harborbreeze Lowes.com/harborbreezeLowes.com/harborbreeze Lowes.com/harborbreeze
ASSEMBLY INSTRUCTIONS ASSEMBLY INSTRUCTIONSASSEMBLY INSTRUCTIONS ASSEMBLY INSTRUCTIONS
13. Attach light kit (H) to switch housing (G). Align the holes between the switch housing (G) and light kit (H). Install screws previously removed (Step 11, page 9) and securely tighten.
14. Install the bulbs (L) into sockets.
15. Remove the preassembled rubber washer, hex nut,
13
D14
L
15
JK
Rubber washer
Hex nut
H
D
16
17
18
16. Place glass bowl (I) on the preassembled pipe on light kit (H) pull chain through side hole of glass bowl (I). Make sure pull chain hangs clear and is not tangled in light kit (H) socket. Thread light kit pull chain through center hole of glass bowl (I).
Note: Two people are recommended for this step.
17. Place previously removed rubber washer and hex nut (Step 15, page 10) onto the pipe and securely tighten. Pass the fan pull chain through the side hole of
over pipe and securely tighten.
18. Attach the fan pull chain extension (CC) and light kit pull chain extension (DD) to corresponding chains.
Hardware Used
x 1 Fan Pull Chain Extension
Light Pull Chain Extension x 1DD
ScrewH
G
I
Rubber washer
Hex nut
JK
DD CC
CC
12Lowes.com/harborbreezeLowes.com/harborbreeze
Printed in ChinaHarbor Breeze® is a registered trademark of LF, LLC. All rights
reserved.
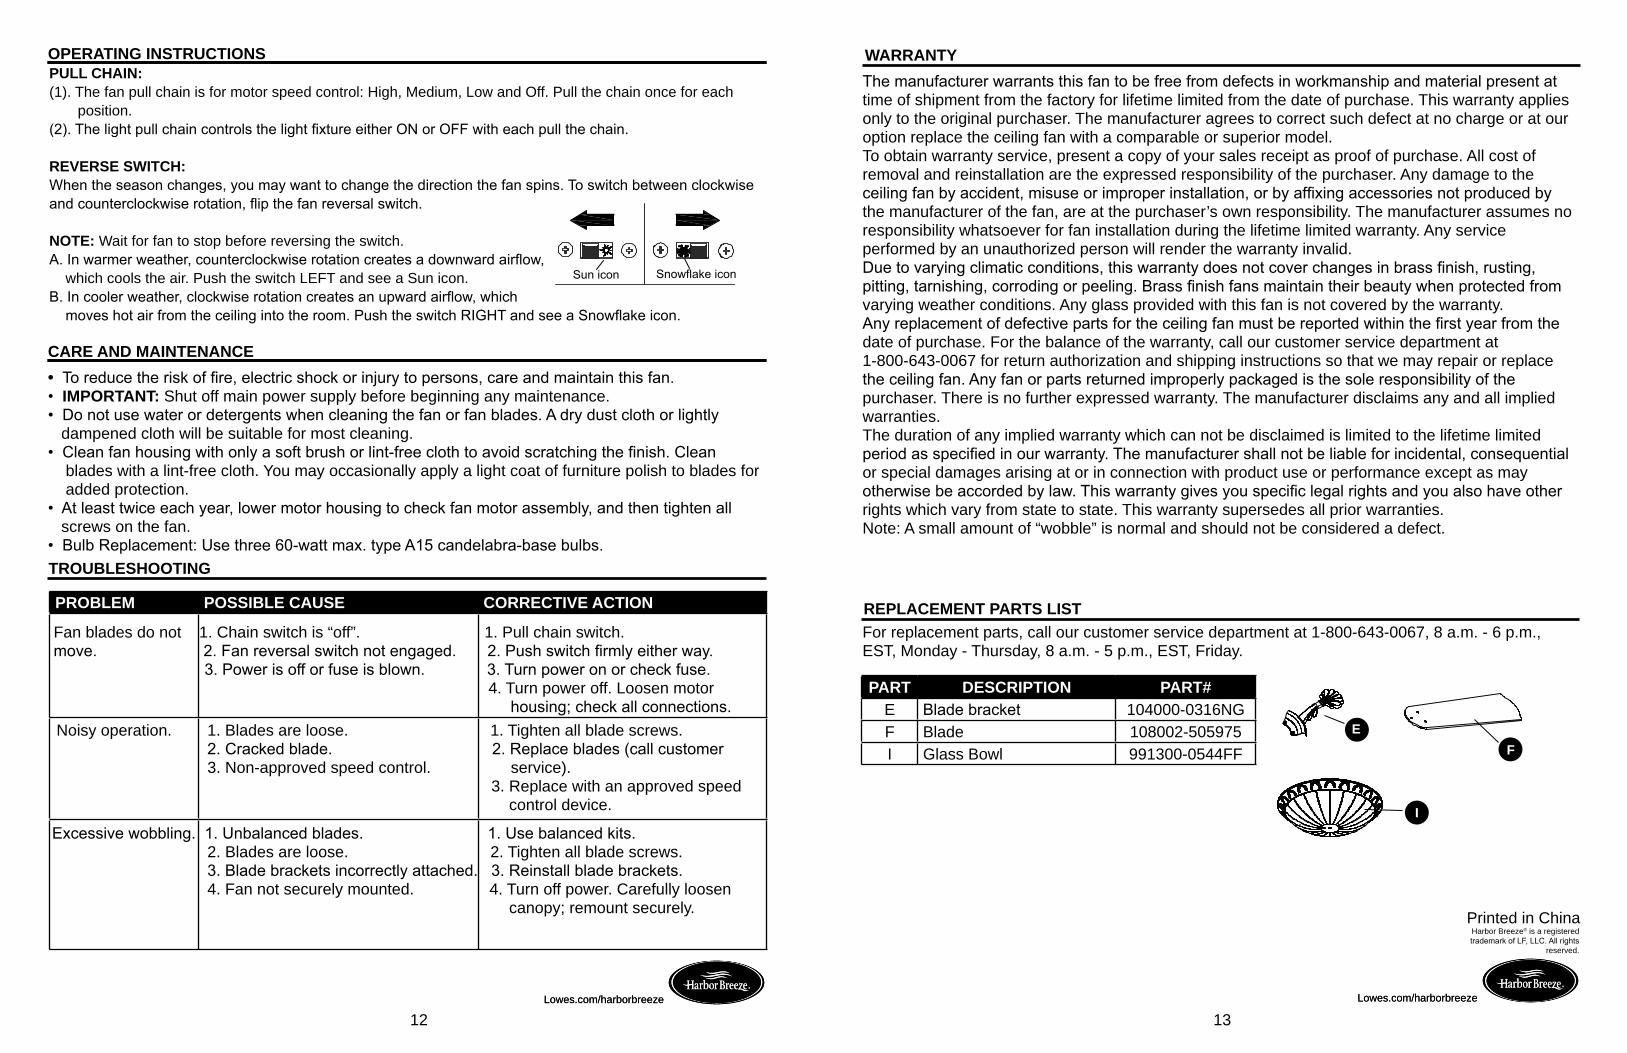
OPERATING INSTRUCTIONSPULL CHAIN:(1). The fan pull chain is for motor speed control: High, Medium, Low and Off. Pull the chain once for each position.(2). The light pull chain controls the light fixture either ON or OFF with each pull the chain.
REVERSE SWITCH:When the season changes, you may want to change the direction the fan spins. To switch between clockwise and counterclockwise rotation, flip the fan reversal switch.
NOTE: Wait for fan to stop before reversing the switch.A. In warmer weather, counterclockwise rotation creates a downward airflow, which cools the air. Push the switch LEFT and see a Sun icon. B. In cooler weather, clockwise rotation creates an upward airflow, which moves hot air from the ceiling into the room. Push the switch RIGHT and see a Snowflake icon.
Sun icon Snowflake icon
CARE AND MAINTENANCE• To reduce the risk of fire, electric shock or injury to persons, care and maintain this fan.• IMPORTANT: Shut off main power supply before beginning any maintenance.• Do not use water or detergents when cleaning the fan or fan blades. A dry dust cloth or lightly dampened cloth will be suitable for most cleaning.• Clean fan housing with only a soft brush or lint-free cloth to avoid scratching the finish. Clean blades with a lint-free cloth. You may occasionally apply a light coat of furniture polish to blades for added protection.• At least twice each year, lower motor housing to check fan motor assembly, and then tighten all screws on the fan.• Bulb Replacement: Use three 60-watt max. type A15 candelabra-base bulbs.
Lowes.com/harborbreezeLowes.com/harborbreeze
TROUBLESHOOTING
HH
II
PROBLEM POSSIBLE CAUSE CORRECTIVE ACTION
Excessive wobbling. 1. Unbalanced blades. 1. Use balanced kits. 2. Blades are loose. 2. Tighten all blade screws. 3. Blade brackets incorrectly attached. 3. Reinstall blade brackets. 4. Fan not securely mounted. 4. Turn off power. Carefully loosen canopy; remount securely.
Noisy operation. 1. Blades are loose. 1. Tighten all blade screws. 2. Cracked blade. 2. Replace blades (call customer 3. Non-approved speed control. service). 3. Replace with an approved speed control device.
Fan blades do not 1. Chain switch is “off”. 1. Pull chain switch. move. 2. Fan reversal switch not engaged. 2. Push switch firmly either way. 3. Power is off or fuse is blown. 3. Turn power on or check fuse. 4. Turn power off. Loosen motor housing; check all connections.
WARRANTY
REPLACEMENT PARTS LISTFor replacement parts, call our customer service department at 1-800-643-0067, 8 a.m. - 6 p.m., EST, Monday - Thursday, 8 a.m. - 5 p.m., EST, Friday.
PART DESCRIPTION PART#E Blade bracket 104000-0316NGF Blade 108002-505975I Glass Bowl 991300-0544FF
D
EF
I
13
The manufacturer warrants this fan to be free from defects in workmanship and material present at time of shipment from the factory for lifetime limited from the date of purchase. This warranty applies only to the original purchaser. The manufacturer agrees to correct such defect at no charge or at our option replace the ceiling fan with a comparable or superior model.To obtain warranty service, present a copy of your sales receipt as proof of purchase. All cost of removal and reinstallation are the expressed responsibility of the purchaser. Any damage to the ceiling fan by accident, misuse or improper installation, or by affixing accessories not produced by the manufacturer of the fan, are at the purchaser’s own responsibility. The manufacturer assumes no responsibility whatsoever for fan installation during the lifetime limited warranty. Any service performed by an unauthorized person will render the warranty invalid.Due to varying climatic conditions, this warranty does not cover changes in brass finish, rusting, pitting, tarnishing, corroding or peeling. Brass finish fans maintain their beauty when protected fromvarying weather conditions. Any glass provided with this fan is not covered by the warranty. Any replacement of defective parts for the ceiling fan must be reported within the first year from thedate of purchase. For the balance of the warranty, call our customer service department at1-800-643-0067 for return authorization and shipping instructions so that we may repair or replace the ceiling fan. Any fan or parts returned improperly packaged is the sole responsibility of the purchaser. There is no further expressed warranty. The manufacturer disclaims any and all implied warranties.The duration of any implied warranty which can not be disclaimed is limited to the lifetime limited period as specified in our warranty. The manufacturer shall not be liable for incidental, consequential or special damages arising at or in connection with product use or performance except as may otherwise be accorded by law. This warranty gives you specific legal rights and you also have other rights which vary from state to state. This warranty supersedes all prior warranties.Note: A small amount of “wobble” is normal and should not be considered a defect.