v2k3d. table of contents – page 1 what to expect from this training getting started recommended...
TRANSCRIPT

V2K3DV2K3D

Table of Contents – Page 1Table of Contents – Page 1
What to expect from this trainingWhat to expect from this training Getting StartedGetting Started
Recommended HardwareRecommended Hardware Display SettingsDisplay Settings Windows TermsWindows Terms Logging InLogging In Setting V2K3D DefaultsSetting V2K3D Defaults
How to Create a CustomerHow to Create a Customer How to Create an OrderHow to Create an Order

Table of Contents – Page 2Table of Contents – Page 2
How to Create a RoomHow to Create a Room How to Create a WallHow to Create a Wall How to Create a Window or DoorHow to Create a Window or Door Getting Started with TreatmentsGetting Started with Treatments The Treatment EditorThe Treatment Editor Copying Treatments and other ElementsCopying Treatments and other Elements Saving / Exporting OrdersSaving / Exporting Orders Submitting OrdersSubmitting Orders Updating V2K3DUpdating V2K3D
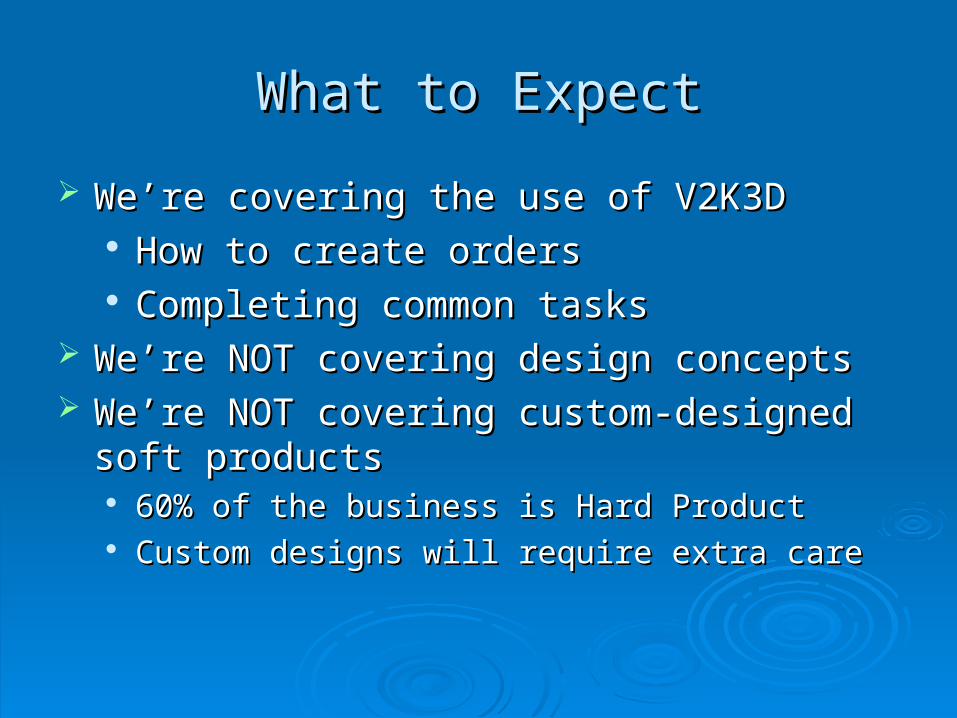
What to ExpectWhat to Expect
We’re covering the use of V2K3DWe’re covering the use of V2K3D How to create ordersHow to create orders Completing common tasksCompleting common tasks
We’re NOT covering design conceptsWe’re NOT covering design concepts We’re NOT covering custom-designed soft We’re NOT covering custom-designed soft
productsproducts 60% of the business is Hard Product60% of the business is Hard Product Custom designs will require extra careCustom designs will require extra care
Getting StartedGetting Started
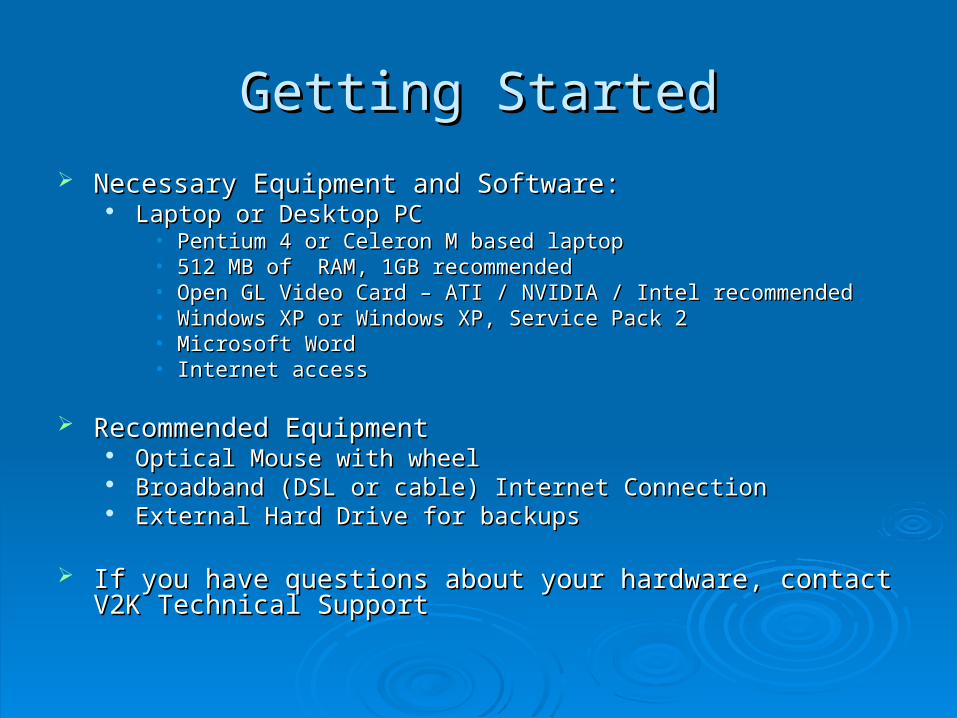
Necessary Equipment and Software:Necessary Equipment and Software: Laptop or Desktop PCLaptop or Desktop PC
• Pentium 4 or Celeron M based laptopPentium 4 or Celeron M based laptop• 512 MB of RAM, 1GB recommended512 MB of RAM, 1GB recommended• Open GL Video Card – ATI / NVIDIA / Intel recommendedOpen GL Video Card – ATI / NVIDIA / Intel recommended• Windows XP or Windows XP, Service Pack 2Windows XP or Windows XP, Service Pack 2• Microsoft WordMicrosoft Word• Internet accessInternet access
Recommended EquipmentRecommended Equipment Optical Mouse with wheelOptical Mouse with wheel Broadband (DSL or cable) Internet ConnectionBroadband (DSL or cable) Internet Connection External Hard Drive for backupsExternal Hard Drive for backups
If you have questions about your hardware, contact V2K Technical If you have questions about your hardware, contact V2K Technical SupportSupport

Getting StartedGetting Started
Display Settings Display Settings Open Control PanelOpen Control Panel Open DisplayOpen Display Click on the ‘Settings’ tabClick on the ‘Settings’ tab Set Screen Resolution to 1024 x 768 or more. Watch for Set Screen Resolution to 1024 x 768 or more. Watch for
aspect ratiosaspect ratios Set Color Quality to 16-bit or higherSet Color Quality to 16-bit or higher
• Newer computers will accept 24-bit and 32-bit settingsNewer computers will accept 24-bit and 32-bit settings Click ‘Apply’ and then ‘OK’Click ‘Apply’ and then ‘OK’
800 x 600 resolution can be used, but it causes a 800 x 600 resolution can be used, but it causes a need for scrollingneed for scrolling
Computer Display Settings are now set!Computer Display Settings are now set!

Windows TerminologyWindows Terminology
There are certain terms that are helpful to know:There are certain terms that are helpful to know: Menu Bar – this is a set of commands like “file”, Menu Bar – this is a set of commands like “file”,
“edit”, “view”, “tools” and “help”“edit”, “view”, “tools” and “help” Tool Bar – this is a set of icons that call frequently Tool Bar – this is a set of icons that call frequently
used commandsused commands Dialogue Box – this is a box that asks for input, Dialogue Box – this is a box that asks for input,
such as saving a filesuch as saving a file Scroll Bar – a control that lets you navigate Scroll Bar – a control that lets you navigate
through a dialogue boxthrough a dialogue box Drop Down Box – a box that drops and displays Drop Down Box – a box that drops and displays
options to choose fromoptions to choose from Context Menu – a menu that appears when the Context Menu – a menu that appears when the
right mouse button is clicked.right mouse button is clicked.

V2K3D TermsV2K3D Terms
These terms are unique to V2K3DThese terms are unique to V2K3D Scene – this is the area that shows your customer’s Scene – this is the area that shows your customer’s
room including walls, windows and treatmentsroom including walls, windows and treatments Catalog – this is a list of elements and products that Catalog – this is a list of elements and products that
can be applied to a scenecan be applied to a scene• ““Elements” are virtual objects such as walls and Elements” are virtual objects such as walls and
windows. Treatments are elements in a scene windows. Treatments are elements in a scene as wellas well
View Bar this is a bar that focuses the camera to View Bar this is a bar that focuses the camera to various spots of the scene. This sits just above the various spots of the scene. This sits just above the scenescene
Collapse Button – a small button that allows you to Collapse Button – a small button that allows you to hide parts of the screenhide parts of the screen

This is the “Menu Bar”
This is the “Tool Bar”
This is the “View Bar”
This is the “Scene”
This is the “Catalog”
This is a “Collapse Button”

This is a ‘scroll bar’
This is a drop down

Logging into V2K3DLogging into V2K3D
Launch V2K3D from the desktop iconLaunch V2K3D from the desktop icon Login Screen Appears:Login Screen Appears:
Enter your Username and Password. Remember, the Username is capital letters and the password is lower case!
After you’ve entered your information, click the ‘Login’ button.

Setting Defaults in V2K3DSetting Defaults in V2K3D
Defaults will let you choose how the Defaults will let you choose how the application looks and acts. application looks and acts. • Floor, ceiling and wall colors can be set hereFloor, ceiling and wall colors can be set here• Tax and margin ratesTax and margin rates• V2K3D’s color scheme can be set here as well.V2K3D’s color scheme can be set here as well.
To set your preferences:To set your preferences:• Choose ‘Tools’ from the Menu BarChoose ‘Tools’ from the Menu Bar• Select ‘Options’Select ‘Options’• A new window will openA new window will open
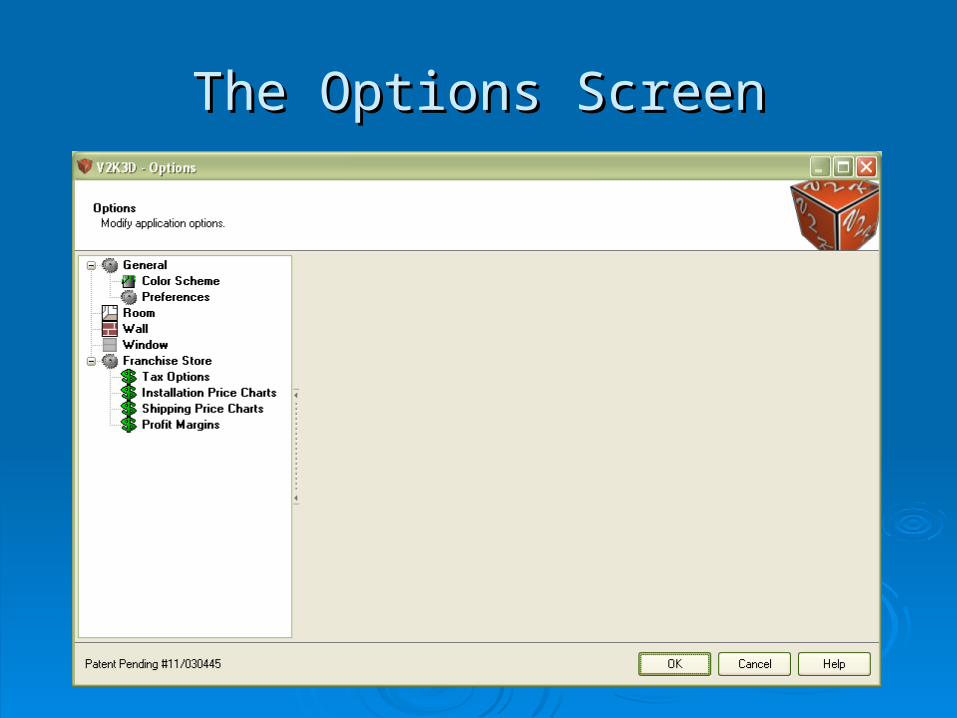
The Options ScreenThe Options Screen

Setting General OptionsSetting General Options
The color scheme and program The color scheme and program preferences can be set herepreferences can be set here Color scheme can be set to match your Color scheme can be set to match your
Windows theme (within reason)Windows theme (within reason) Preferences Preferences
• 3D or Flat mode,3D or Flat mode,• Set your default lighting modeSet your default lighting mode• V2K3D starts up maximized.V2K3D starts up maximized.
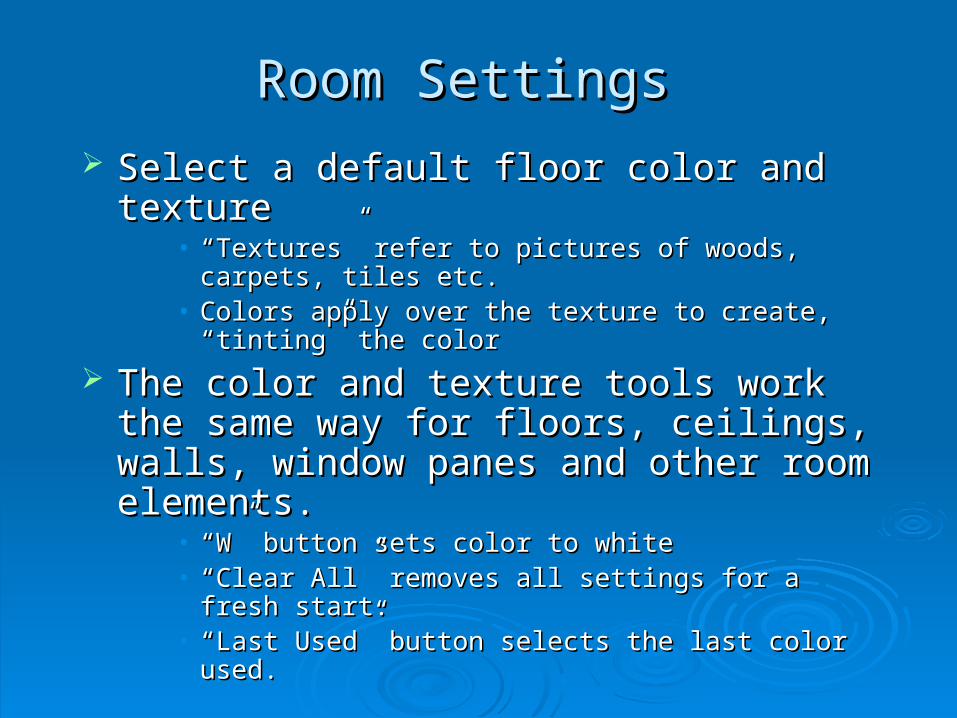
Room SettingsRoom Settings
Select a default floor color and textureSelect a default floor color and texture• ““Textures” refer to pictures of woods, carpets, tiles etc.Textures” refer to pictures of woods, carpets, tiles etc.• Colors apply over the texture to create, “tinting” the colorColors apply over the texture to create, “tinting” the color
The color and texture tools work the same The color and texture tools work the same way for floors, ceilings, walls, window panes way for floors, ceilings, walls, window panes and other room elements.and other room elements.
• ““W” button sets color to whiteW” button sets color to white• ““Clear All” removes all settings for a fresh start.Clear All” removes all settings for a fresh start.• ““Last Used” button selects the last color used.Last Used” button selects the last color used.

Wall SettingsWall Settings
Colors and Textures work the same as Colors and Textures work the same as Room SettingsRoom Settings
Default Wall Width and Height can be set.Default Wall Width and Height can be set. Default Room Angle can be setDefault Room Angle can be set
More about room angles laterMore about room angles later

Franchise SettingsFranchise Settings
Taxes, Installation Prices, Shipping Prices and Profit Taxes, Installation Prices, Shipping Prices and Profit Margins can be set here.Margins can be set here. Can be customized on each orderCan be customized on each order Designed to be flexibleDesigned to be flexible
• Different products can be taxed differentlyDifferent products can be taxed differently Example: Hard and soft products can be taxed Example: Hard and soft products can be taxed
differently than installation or shipping.differently than installation or shipping. Needs to be configured to your location’s specific Needs to be configured to your location’s specific
needs.needs.

Tax SettingsTax Settings
Tax Types have a description fieldTax Types have a description field Example: Tax 1 field can be State Tax, Tax 2 can be Example: Tax 1 field can be State Tax, Tax 2 can be
County Tax and Tax 3 can be City TaxCounty Tax and Tax 3 can be City Tax Each product line can have all taxes or no taxes Each product line can have all taxes or no taxes
assigned.assigned.• Hard ProductsHard Products• FabricFabric• HardwareHardware• LaborLabor• InstallationInstallation• ShippingShipping

Installation PricesInstallation Prices
Installation prices can be set at the Installation prices can be set at the treatment leveltreatment level This allows more time consuming treatments This allows more time consuming treatments
to be priced accuratelyto be priced accurately Prices can be set for complex treatments as Prices can be set for complex treatments as
wellwell Installation can be treated as a profit center Installation can be treated as a profit center
as well when practical (the “+20% rule”)as well when practical (the “+20% rule”)

Shipping / Installation PricesShipping / Installation Prices
Can be set at the style levelCan be set at the style level Can be set by:Can be set by:
Unit / PieceUnit / Piece Length (Inches, feet)Length (Inches, feet) Yards or WidthsYards or Widths
Cost Factor is used to convert retail back Cost Factor is used to convert retail back to COGSto COGS
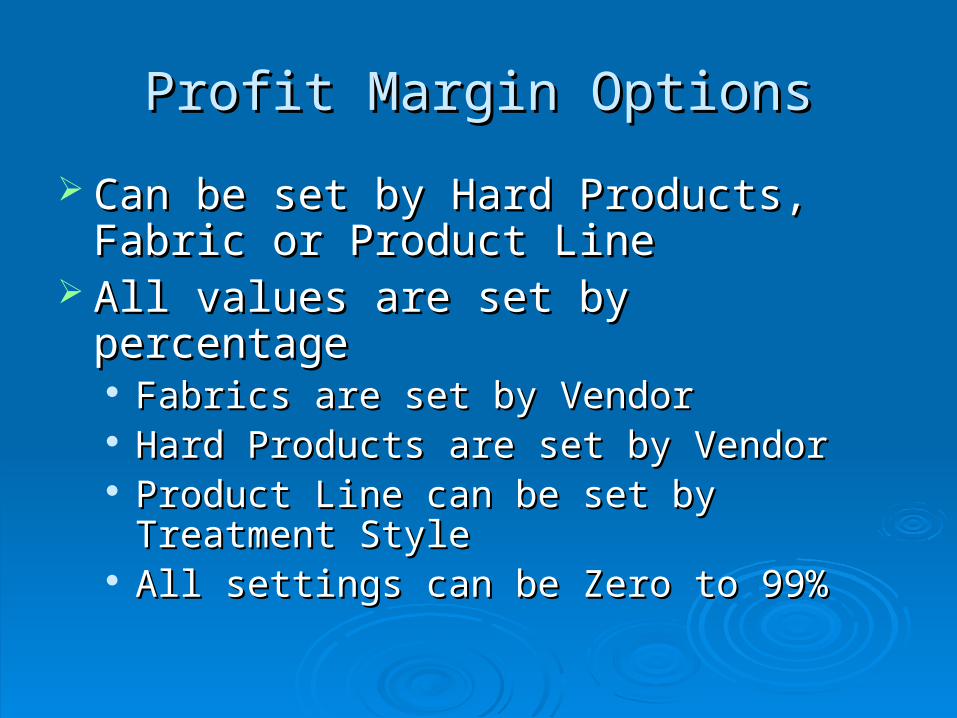
Profit Margin OptionsProfit Margin Options
Can be set by Hard Products, Fabric or Can be set by Hard Products, Fabric or Product LineProduct Line
All values are set by percentageAll values are set by percentage Fabrics are set by VendorFabrics are set by Vendor Hard Products are set by VendorHard Products are set by Vendor Product Line can be set by Treatment StyleProduct Line can be set by Treatment Style All settings can be Zero to 99%All settings can be Zero to 99%
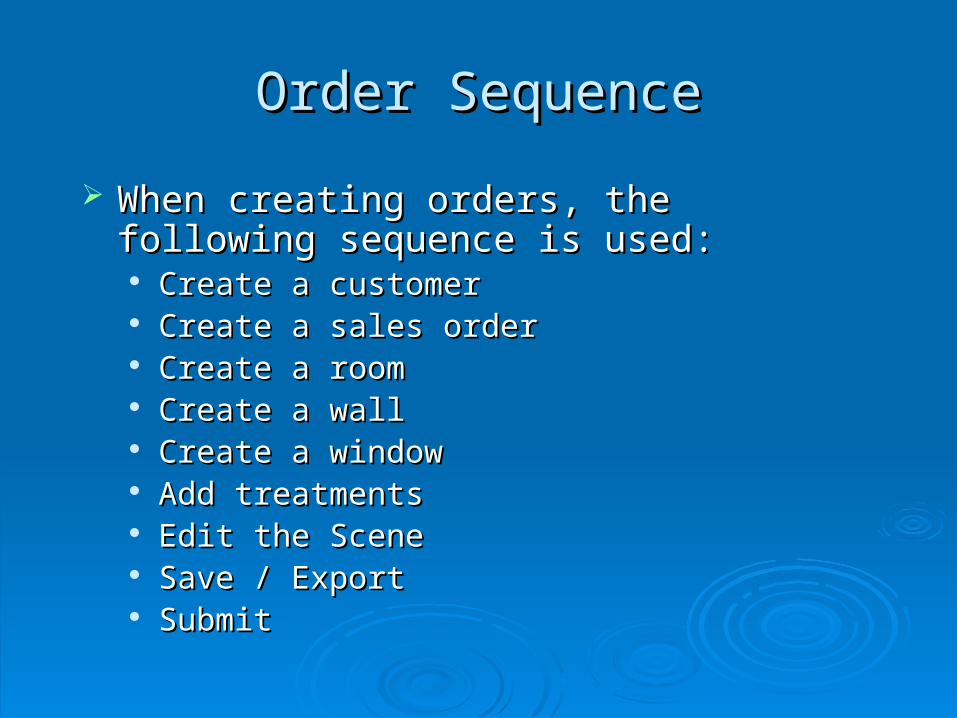
Order SequenceOrder Sequence
When creating orders, the following sequence When creating orders, the following sequence is used:is used: Create a customerCreate a customer Create a sales orderCreate a sales order Create a room Create a room Create a wallCreate a wall Create a windowCreate a window Add treatmentsAdd treatments Edit the SceneEdit the Scene Save / ExportSave / Export SubmitSubmit

Create a CustomerCreate a Customer
This is the first step in creating an orderThis is the first step in creating an order Can be started from Tool bar, File Menu or shortcutCan be started from Tool bar, File Menu or shortcut
The Customer Listing Dialogue will appear.The Customer Listing Dialogue will appear.• If this is your first order, select the ‘New’ buttonIf this is your first order, select the ‘New’ button• If there are customers listed and you want a new order for an If there are customers listed and you want a new order for an
existing customer, highlight the customer and select ‘OK’existing customer, highlight the customer and select ‘OK’• To delete an existing customer, highlight the customer and To delete an existing customer, highlight the customer and
select the ‘Delete’ button. You will be asked to confirm if you select the ‘Delete’ button. You will be asked to confirm if you want to delete. This cannot be undone!want to delete. This cannot be undone!
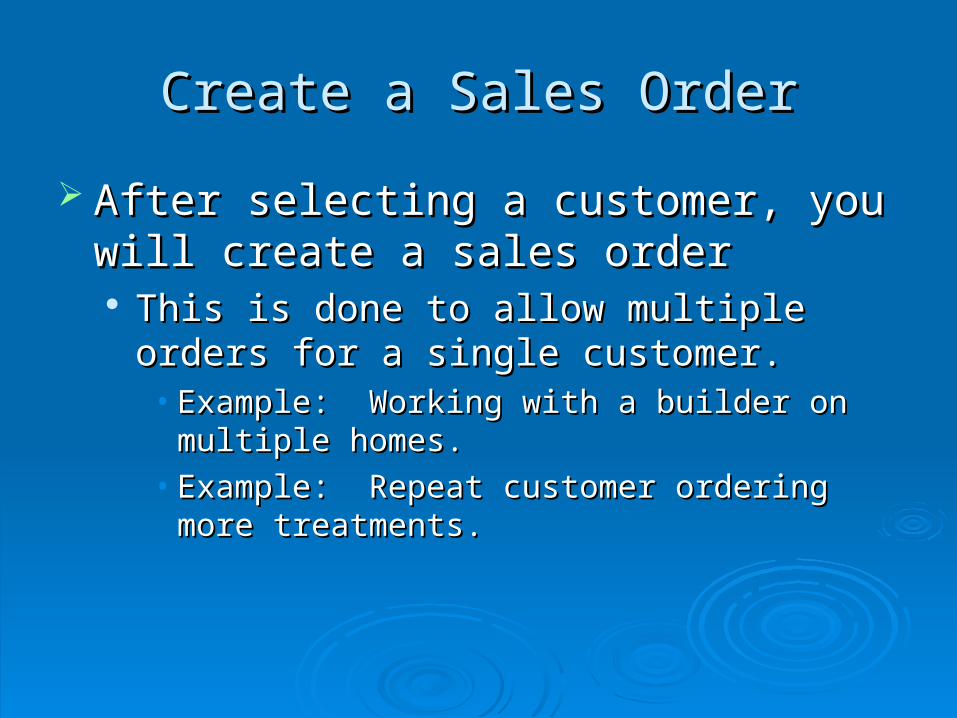
Create a Sales OrderCreate a Sales Order
After selecting a customer, you will create After selecting a customer, you will create a sales ordera sales order This is done to allow multiple orders for a This is done to allow multiple orders for a
single customer.single customer.• Example: Working with a builder on multiple Example: Working with a builder on multiple
homes.homes.• Example: Repeat customer ordering more Example: Repeat customer ordering more
treatments.treatments.

Create an Order – Part 1Create an Order – Part 1
Remember: A customer has to be created before an Remember: A customer has to be created before an order can be created!order can be created!
Once a customer is selected, the Sales Order Listing Once a customer is selected, the Sales Order Listing screen will openscreen will open
If there are no orders, select ‘New’ to create an order. If there are no orders, select ‘New’ to create an order. This will open Sales Order Properties This will open Sales Order Properties This screen is used to record information about This screen is used to record information about
the quote date, lead source and comments. the quote date, lead source and comments. Click ‘OK’ to continueClick ‘OK’ to continue

Sales Order Listing – Part 2Sales Order Listing – Part 2
Once you’ve completed the Sales Order Properties Once you’ve completed the Sales Order Properties screen, clicking ‘OK’ returns you to the Sales Order screen, clicking ‘OK’ returns you to the Sales Order Listing screen.Listing screen. Select the desired order to work with by highlighting it Select the desired order to work with by highlighting it
with the mouse and click ‘OK’with the mouse and click ‘OK’ To delete an order, highlight the order and click on the To delete an order, highlight the order and click on the
‘delete’ button. You will be asked to confirm. This ‘delete’ button. You will be asked to confirm. This action cannot be undone!action cannot be undone!
Existing orders can be edited with the ‘Properties’ Existing orders can be edited with the ‘Properties’ button. This opens the Sales Order Properties button. This opens the Sales Order Properties screen.screen.
Once you’re completed this screen, you’re ready to start Once you’re completed this screen, you’re ready to start creating a scene!creating a scene!
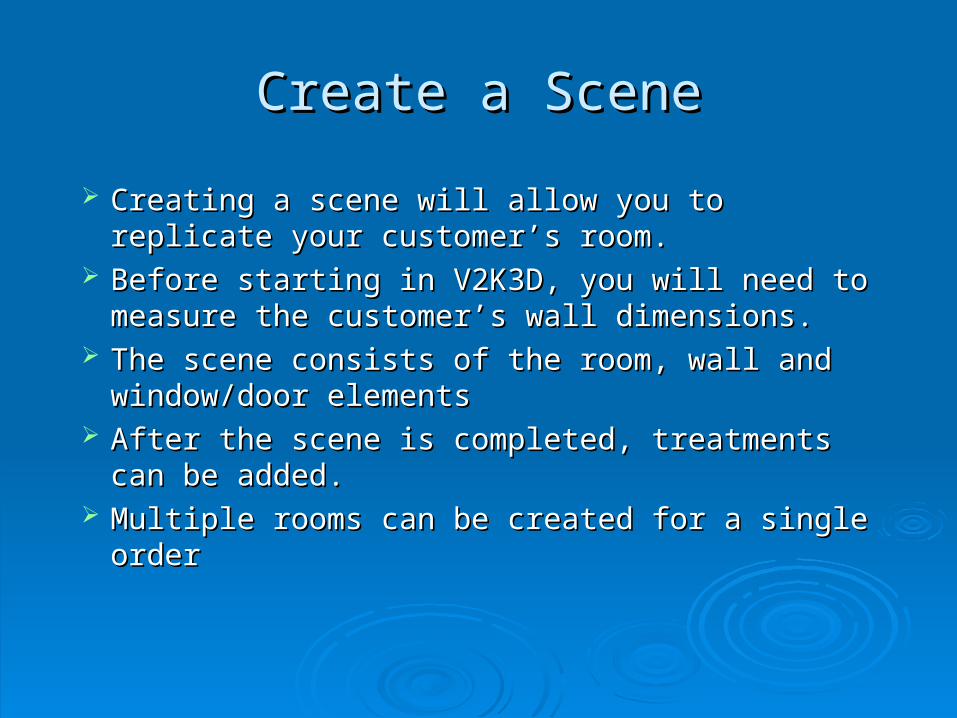
Create a SceneCreate a Scene
Creating a scene will allow you to replicate your Creating a scene will allow you to replicate your customer’s room.customer’s room.
Before starting in V2K3D, you will need to Before starting in V2K3D, you will need to measure the customer’s wall dimensions.measure the customer’s wall dimensions.
The scene consists of the room, wall and The scene consists of the room, wall and window/door elementswindow/door elements
After the scene is completed, treatments can be After the scene is completed, treatments can be added.added.
Multiple rooms can be created for a single orderMultiple rooms can be created for a single order

Navigating in the SceneNavigating in the Scene
The keyboard and the mouse can be used to move the “camera” around The keyboard and the mouse can be used to move the “camera” around the scenethe scene
This is only available when the scene is populated with objectsThis is only available when the scene is populated with objects By Keyboard: By Keyboard:
The left and right arrow keys will move you left and right. Up and down The left and right arrow keys will move you left and right. Up and down move you towards and away from walls. move you towards and away from walls.
Using Ctrl+ the arrow keys will simulate moving your head left, right, up and Using Ctrl+ the arrow keys will simulate moving your head left, right, up and down. down.
By Mouse: By Mouse: Click the mouse wheel (it acts like a button!) and moving the wheel will Click the mouse wheel (it acts like a button!) and moving the wheel will
move you towards and away from walls. move you towards and away from walls. Clicking and holding the mouse wheel button will let you move the camera Clicking and holding the mouse wheel button will let you move the camera
around the room. around the room. Clicking and holding the mouse wheel button while holding the ‘Alt’ key will Clicking and holding the mouse wheel button while holding the ‘Alt’ key will
allow you to move the camera to simulate the movement of your head.allow you to move the camera to simulate the movement of your head. Using the full screen for the sceneUsing the full screen for the scene
There is a collapse button to hide the catalog viewThere is a collapse button to hide the catalog view

The View BarThe View Bar
There are “3d” and “Classic” Views are the two ways to use it:There are “3d” and “Classic” Views are the two ways to use it: Click on the “View Rooms”, “View Walls”, “View Windows” or Click on the “View Rooms”, “View Walls”, “View Windows” or
“View Treatments” buttons to re-position the camera“View Treatments” buttons to re-position the camera Right-Click on the buttonsRight-Click on the buttons
• This displays the valid options between rooms and wallsThis displays the valid options between rooms and walls LightingLighting
Select a lighting model, feel free to experiment. Take note that Select a lighting model, feel free to experiment. Take note that some lighting models are built to simulate nightsome lighting models are built to simulate night
3D / Flat View3D / Flat View Allows you to toggle between 3D and 2DAllows you to toggle between 3D and 2D

The Tool Bar – Part 1The Tool Bar – Part 1
Quick icons for common actionsQuick icons for common actions New New OpenOpen SaveSave CloseClose CutCut Copy Copy PastePaste
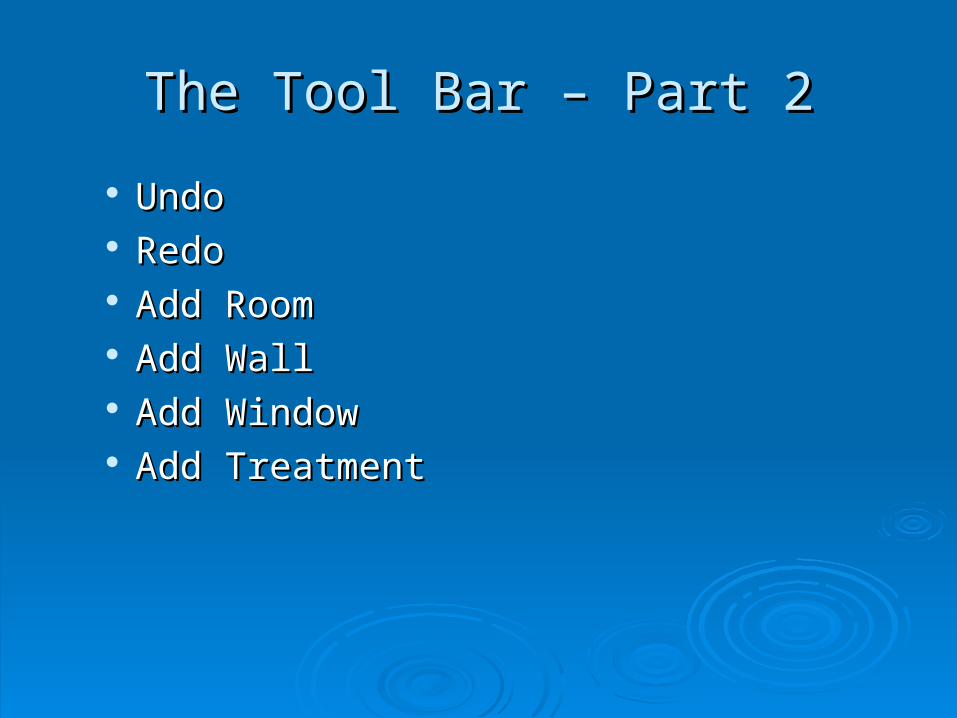
The Tool Bar – Part 2The Tool Bar – Part 2
UndoUndo RedoRedo Add RoomAdd Room Add WallAdd Wall Add WindowAdd Window Add Treatment Add Treatment

MeasuringMeasuring
Measure outside width and heightMeasure outside width and height Measure inside width and heightMeasure inside width and height
Frames / Mullions need to be measured Frames / Mullions need to be measured now for display and ordering purposesnow for display and ordering purposes
Inside measures are important for inside Inside measures are important for inside mounts. FTA is accounted for. mounts. FTA is accounted for.
Center to Center measurements aren’t as Center to Center measurements aren’t as useful anymore because they don’t capture useful anymore because they don’t capture mullions as accurately.mullions as accurately.
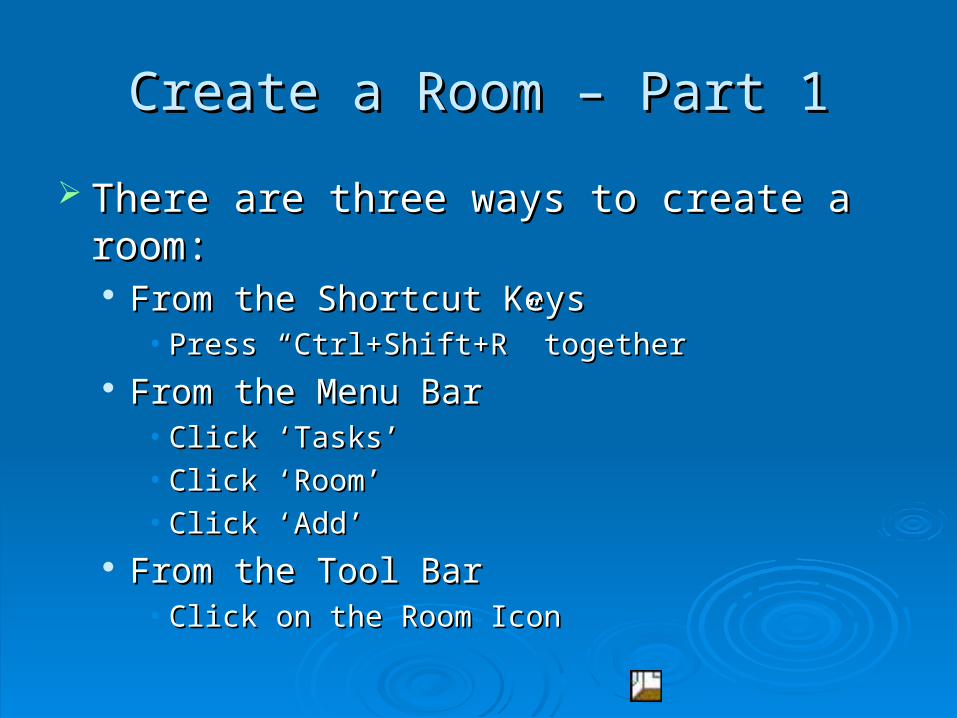
Create a Room – Part 1Create a Room – Part 1
There are three ways to create a room:There are three ways to create a room: From the Shortcut KeysFrom the Shortcut Keys
• Press “Ctrl+Shift+R” togetherPress “Ctrl+Shift+R” together From the Menu BarFrom the Menu Bar
• Click ‘Tasks’Click ‘Tasks’• Click ‘Room’Click ‘Room’• Click ‘Add’Click ‘Add’
From the Tool BarFrom the Tool Bar• Click on the Room Icon Click on the Room Icon

Create a Room – Part 2Create a Room – Part 2
Once the command to create a room has started, the Once the command to create a room has started, the Room Properties Editor will appearRoom Properties Editor will appear
This screen allows you to select the floor and ceiling This screen allows you to select the floor and ceiling textures if you want something different than the textures if you want something different than the defaults.defaults.
The room’s pricing information is available on the The room’s pricing information is available on the ‘Pricing Summary’ tab.‘Pricing Summary’ tab.
Yes, walls appear but they’re placeholdersYes, walls appear but they’re placeholders

Before Proceeding…Before Proceeding…
Yes, walls appear but they’re not ready for Yes, walls appear but they’re not ready for windows windows
They’re called “placeholders” or “Dallas They’re called “placeholders” or “Dallas Lines”Lines”
SOMETHING has to hold up the ceiling!!!SOMETHING has to hold up the ceiling!!!

Create a Wall – Part 1Create a Wall – Part 1
This will add a “real” wall to the sceneThis will add a “real” wall to the scene Works much like creating a roomWorks much like creating a room There are three ways to create a room:There are three ways to create a room:
From the Shortcut KeysFrom the Shortcut Keys• Press “Ctrl+Shift+W” togetherPress “Ctrl+Shift+W” together
From the Menu BarFrom the Menu Bar• Click ‘Tasks’Click ‘Tasks’• Click ‘Wall’Click ‘Wall’• Click ‘Add’Click ‘Add’
From the Tool BarFrom the Tool Bar• Click on the Wall IconClick on the Wall Icon

Create a Wall – Part 2Create a Wall – Part 2
The Wall Properties Editor will appearThe Wall Properties Editor will appear Works a lot like Room Properties. Colors and Works a lot like Room Properties. Colors and
Textures can be selected if you desire a Textures can be selected if you desire a different look than the defaultsdifferent look than the defaults
Width and Height can be adjustedWidth and Height can be adjusted Room Angles can be adjusted – This is handy Room Angles can be adjusted – This is handy
for unusual room shapesfor unusual room shapes

Create a Window – Part 1Create a Window – Part 1
From the Shortcut KeysFrom the Shortcut Keys• Press “Ctrl+Shift+G” togetherPress “Ctrl+Shift+G” together
From the Menu BarFrom the Menu Bar• Click ‘Tasks’Click ‘Tasks’• Click ‘Window’Click ‘Window’• Click ‘Add’Click ‘Add’
From the Tool BarFrom the Tool Bar• Click on the Room Icon Click on the Room Icon
Drag and Drop from Catalog ViewDrag and Drop from Catalog View

Create a Window – Part 2Create a Window – Part 2
If you added a window from the Tool Bar or the If you added a window from the Tool Bar or the Shortcut Key Combination…Shortcut Key Combination… The Window Catalog will appearThe Window Catalog will appear
• From the drop down box, select the category of From the drop down box, select the category of window to add: bay, box, bow, single, double, window to add: bay, box, bow, single, double, or tripleor triple
• Highlight the desired window and click ‘OK’Highlight the desired window and click ‘OK’ The Window Group Properties will appearThe Window Group Properties will appear Skip to Part 3 for instructions using the editorSkip to Part 3 for instructions using the editor
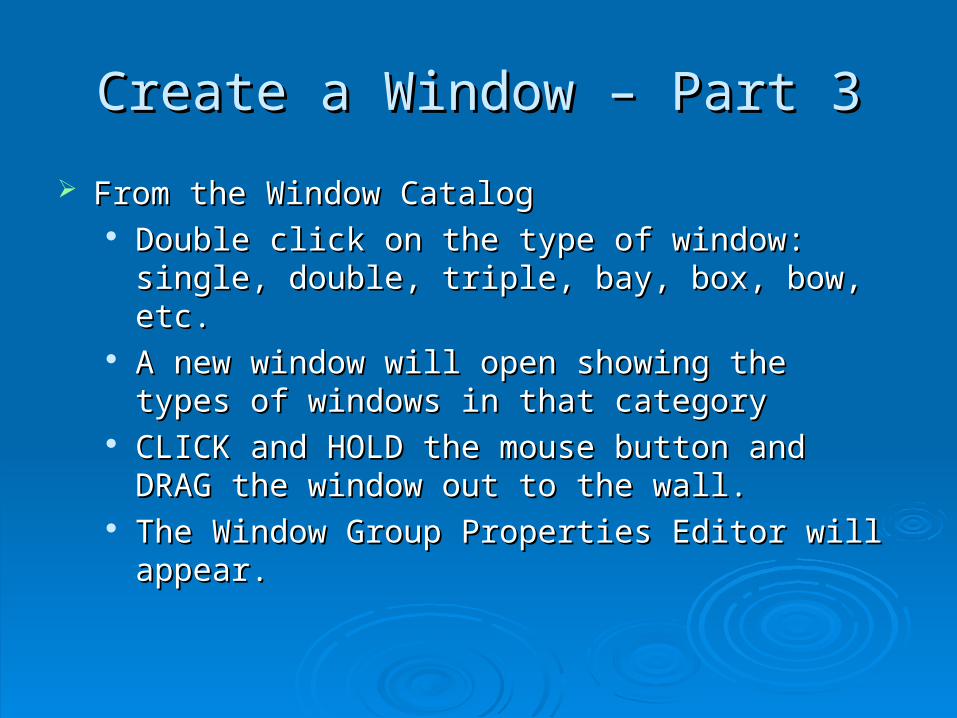
Create a Window – Part 3Create a Window – Part 3
From the Window CatalogFrom the Window Catalog Double click on the type of window: single, double, Double click on the type of window: single, double,
triple, bay, box, bow, etc.triple, bay, box, bow, etc. A new window will open showing the types of A new window will open showing the types of
windows in that categorywindows in that category CLICK and HOLD the mouse button and DRAG the CLICK and HOLD the mouse button and DRAG the
window out to the wall. window out to the wall. The Window Group Properties Editor will appear.The Window Group Properties Editor will appear.

Create a Window – Part 4Create a Window – Part 4
The Window Group Properties Editor is used to The Window Group Properties Editor is used to position a window on the wall.position a window on the wall.
The window frame color and texture can be The window frame color and texture can be selectedselected
The width, height, to floor and left space can be The width, height, to floor and left space can be defineddefined
There are buttons to center the windows There are buttons to center the windows horizontally and vertically for quick placementhorizontally and vertically for quick placement

Create a Window – Part 5Create a Window – Part 5
Once a window is placed on a wall, it can be further Once a window is placed on a wall, it can be further edited. This is done from the Window Propertiesedited. This is done from the Window Properties Frames can be edited much like rooms and wallsFrames can be edited much like rooms and walls Frame widths can be setFrame widths can be set Mullion Columns and Rows can be set for extra Mullion Columns and Rows can be set for extra
realismrealism Pane appearance can be used to select the Pane appearance can be used to select the
“opaqueness” of window panes“opaqueness” of window panes

Bay /Bow/ Box WindowsBay /Bow/ Box Windows
Bay windows have unique features:Bay windows have unique features: Breaks 1 wall into 5. The 3 windows that Breaks 1 wall into 5. The 3 windows that
make the bay and 2 “wings”make the bay and 2 “wings” Even though there are 3 walls, the windows Even though there are 3 walls, the windows
can be treated as a single window groupcan be treated as a single window group Editing the height of the window will simulate Editing the height of the window will simulate
bow and box windows. bow and box windows.

Multiple WindowsMultiple Windows
When placing multiple (double, triple, bay) When placing multiple (double, triple, bay) windows they form a window groupwindows they form a window group
Treatments can be stretched across a Treatments can be stretched across a group, applied to each window in the group, applied to each window in the group or to a single windowgroup or to a single window

Creating Windows - NotesCreating Windows - Notes
Sometimes in the real world, windows are more complicated than Sometimes in the real world, windows are more complicated than what V2K3D offerswhat V2K3D offers
Be creative! Sometimes a complex window can be simulated by Be creative! Sometimes a complex window can be simulated by putting several windows together, don’t be afraid to try this putting several windows together, don’t be afraid to try this techniquetechnique
If creativity fails, fall back to the basics…If creativity fails, fall back to the basics…• Remember, the object is to cover a window, not make a Remember, the object is to cover a window, not make a
scale model of the customer’s home. Oftentimes a simple scale model of the customer’s home. Oftentimes a simple rectangular window will do the job if a window can’t be rectangular window will do the job if a window can’t be perfectly replicated. This is especially true of outside perfectly replicated. This is especially true of outside mounted treatments.mounted treatments.

Adding TreatmentsAdding Treatments
Treatments are added from the Treatment Catalog or Treatments are added from the Treatment Catalog or via drag-and-drop from the catalog view.via drag-and-drop from the catalog view.
Each treatment has its own Treatment EditorEach treatment has its own Treatment Editor Treatment Editor has two components:Treatment Editor has two components:
• Component ViewComponent View• Pricing summary tabPricing summary tab
Component View changes based on productComponent View changes based on product Treatments price according to the margins set in Treatments price according to the margins set in
options.options.

Placing a Treatment on the ScenePlacing a Treatment on the Scene
From the Menu BarFrom the Menu Bar Select Tasks, Treatments and AddSelect Tasks, Treatments and Add
From the Tool BarFrom the Tool Bar Use the Treatment IconUse the Treatment Icon
Shortcut Key:Shortcut Key: Ctrl+shift+tCtrl+shift+t
Drag and Drop from the Catalog ViewDrag and Drop from the Catalog View

Treatment Editor – Part 1Treatment Editor – Part 1 All versions of the treatment editor contain:All versions of the treatment editor contain: Component ViewComponent View
Measurement and Position of the treatment Measurement and Position of the treatment relative to the windowrelative to the window
Vendor and Product line informationVendor and Product line information Sample Treatment Image (file attachment)Sample Treatment Image (file attachment) Purchase Order CommentsPurchase Order Comments
Pricing SummaryPricing Summary

Treatment Editor – Part 2Treatment Editor – Part 2
Treatment Editor refreshes itself based on the productTreatment Editor refreshes itself based on the product Customizes itself based on the type of treatmentCustomizes itself based on the type of treatment This allows only valid selections on a productThis allows only valid selections on a product
• Consider this example: Krohn’s and DSC both offer 2” Consider this example: Krohn’s and DSC both offer 2” Wood blinds but offer different options on valances and Wood blinds but offer different options on valances and slat colors. The treatment editor refresh will prevent slat colors. The treatment editor refresh will prevent Krohn’s colors being added to a DSC blind or vice versa.Krohn’s colors being added to a DSC blind or vice versa.
• Refreshes “on the go”Refreshes “on the go” Treatments can be “locked” to prevent editingTreatments can be “locked” to prevent editing Can be reopened at any time until the order is Can be reopened at any time until the order is
submittedsubmitted
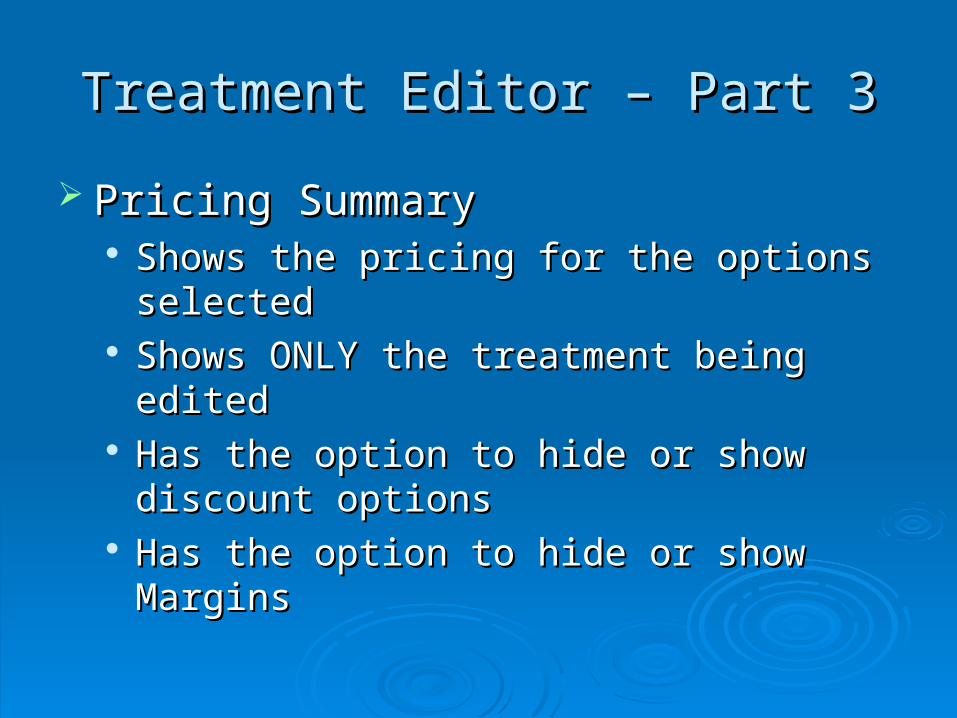
Treatment Editor – Part 3Treatment Editor – Part 3
Pricing SummaryPricing Summary Shows the pricing for the options selectedShows the pricing for the options selected Shows ONLY the treatment being editedShows ONLY the treatment being edited Has the option to hide or show discount Has the option to hide or show discount
optionsoptions Has the option to hide or show MarginsHas the option to hide or show Margins

Treatment Editor – Fabric Library –Treatment Editor – Fabric Library –Part 1Part 1
Accessed from the Treatment Editor – Fabric Accessed from the Treatment Editor – Fabric AreaArea
Scroll to bottom, press “texture”Scroll to bottom, press “texture” The Fabric Library opensThe Fabric Library opens Two Tabs: New Search and FavoritesTwo Tabs: New Search and Favorites
New Search lets you search fabrics on New Search lets you search fabrics on many criteriamany criteria
Favorites can be set for easy switching Favorites can be set for easy switching between selectionsbetween selections

Treatment Editor – Fabric Library – Treatment Editor – Fabric Library – Part 2Part 2
SearchingSearching Multiple Searches can be run on different criteriaMultiple Searches can be run on different criteria
• ColorColor• PatternPattern• VendorVendor• StyleStyle
Searches can be modified and re-runSearches can be modified and re-run• Adding or removing search criteriaAdding or removing search criteria
Search criteria have to defined and then moved to the Search criteria have to defined and then moved to the search box.search box.
Results can be marked as favorites from different searchesResults can be marked as favorites from different searches

Treatment Editor – Fabric Library – Treatment Editor – Fabric Library – Part 3Part 3
Favorites stay marked for each orderFavorites stay marked for each order Can be added to other treatmentsCan be added to other treatments
• ExampleExample Favorites only stay with current orderFavorites only stay with current order No limit on number of favoritesNo limit on number of favorites

Treatment Editor - NotesTreatment Editor - Notes
Don’t forget to see if a scroll bar is presentDon’t forget to see if a scroll bar is present Options have checkboxes!Options have checkboxes!
Example 1: Wood blinds have multiple valances. Example 1: Wood blinds have multiple valances. The one you’ve selected will have a check box The one you’ve selected will have a check box marked on the right side of the screenmarked on the right side of the screen
Example 2: Draperies and Curtains have Example 2: Draperies and Curtains have decorative rods, check the box to select the rods decorative rods, check the box to select the rods or tab tops instead of the standard pockets.or tab tops instead of the standard pockets.
Watch for the Collapse Buttons!Watch for the Collapse Buttons! Discounts and Margins are hidden by defaultDiscounts and Margins are hidden by default

Adding HardwareAdding Hardware
Drag hardware from the catalog Drag hardware from the catalog Sort by vendor ORSort by vendor OR Sort by item typeSort by item type
If there are multiple treatments on a window, you’ll be If there are multiple treatments on a window, you’ll be asked which treatment to add the hardware to.asked which treatment to add the hardware to.
Hardware doesn’t add to the scene but adds to the order Hardware doesn’t add to the scene but adds to the order totals. Images can be viewed from the catalogtotals. Images can be viewed from the catalog
Upgrades to the hardware piece are already plannedUpgrades to the hardware piece are already planned

Treatment ErrorsTreatment Errors
Appears only when there is an issue with Appears only when there is an issue with the product selectionsthe product selections
Explains the problemExplains the problem Can be corrected in the Treatment Editor Can be corrected in the Treatment Editor

Copying TreatmentsCopying Treatments
Sometimes you’ll want to copy a treatment from one Sometimes you’ll want to copy a treatment from one window to anotherwindow to another Right click on the treatment you want to copy. This Right click on the treatment you want to copy. This
is called the sourceis called the source A menu showing the order, room, wall, window and A menu showing the order, room, wall, window and
treatment will appear. Select the treatment and on treatment will appear. Select the treatment and on the secondary menu, select “copy”the secondary menu, select “copy”
Navigate in the room to the window you want to Navigate in the room to the window you want to copy to (the target). Right click on the window, copy to (the target). Right click on the window, select ‘window’ from the menu and finally select select ‘window’ from the menu and finally select “paste treatment”“paste treatment”

More on Copy and PasteMore on Copy and Paste
Copying windows and walls works similar to the Copying windows and walls works similar to the copy of treatmentscopy of treatments
Pasting a wall will paste the windows and Pasting a wall will paste the windows and treatments from the sourcetreatments from the source
Pasting a window will add treatments as wellPasting a window will add treatments as well Pasting a room will add all elements as copiedPasting a room will add all elements as copied
RepeatRepeat
Repeat acts differently in V2K3D than V2KRepeat acts differently in V2K3D than V2K Repeat works across walls and roomsRepeat works across walls and rooms Repeat ONLY repeats properties, not the treatment Repeat ONLY repeats properties, not the treatment
itself.itself. Examples:Examples:
• Repeating a window across a room or wall will transfer the Repeating a window across a room or wall will transfer the other windowsother windows
• Repeating a treatment will repeat the properties for matching Repeating a treatment will repeat the properties for matching styles.styles.
Wood blinds will take the Vendor, color, etc.Wood blinds will take the Vendor, color, etc. Currently, V2K3D doesn’t support repeating between left and Currently, V2K3D doesn’t support repeating between left and
right drapery/curtain panels.right drapery/curtain panels.

ReportingReporting
Reports require MS Word be installed on your Reports require MS Word be installed on your computercomputer
Reports show summary and detailed information Reports show summary and detailed information at these levels:at these levels: Sales OrderSales Order Window GroupWindow Group WindowWindow TreatmentTreatment

Saving OrdersSaving Orders
Saving your order preserves your work – editing can still occur after Saving your order preserves your work – editing can still occur after savingsaving
SaveSave Saves order “as is” Saves order “as is” From the Menu Bar, choose “File” and “Save”From the Menu Bar, choose “File” and “Save” Shortcut key “Ctrl+s”Shortcut key “Ctrl+s” Use the disk icon on the tool barUse the disk icon on the tool bar
Save AsSave As Allows you to save the order to a different customer and/or orderAllows you to save the order to a different customer and/or order From the Menu Bar, choose “File” and “Save As”From the Menu Bar, choose “File” and “Save As” Shortcut key “Ctrl+shift+s”Shortcut key “Ctrl+shift+s”
ExportExport Saves as a .vsp file. This is encrypted and cannot be edited without Saves as a .vsp file. This is encrypted and cannot be edited without
V2K3D. This is really handy for sending to product specialists at V2K.V2K3D. This is really handy for sending to product specialists at V2K.

Submitting OrdersSubmitting Orders
Orders CANNOT be changed at this point!!!Orders CANNOT be changed at this point!!! Before you submit an order:Before you submit an order:
Make sure your order is correctMake sure your order is correct Get a signed contract and warranty with the Get a signed contract and warranty with the
customercustomer Save the orderSave the order Establish an Internet connectionEstablish an Internet connection
To submit:To submit: Click ‘File’Click ‘File’ Select ‘Submit’Select ‘Submit’
The Order will send to V2K when an Internet The Order will send to V2K when an Internet connection is availableconnection is available

Updating V2K3DUpdating V2K3D
Establish Internet ConnectionEstablish Internet Connection Launch the “Franchise Center”Launch the “Franchise Center” Login with your username and passwordLogin with your username and password Click “Update My V2K3D”Click “Update My V2K3D”
Progress bar will openProgress bar will open Close when update is finishedClose when update is finished

Coming in 2006Coming in 2006
Dynamic Window GroupsDynamic Window Groups New productsNew products
ShuttersShutters JabotsJabots RosettesRosettes Arch TreatmentsArch Treatments
New ReportsNew Reports

Final ThoughtsFinal Thoughts
Technical support is available from V2K, Technical support is available from V2K, please check the website and help files please check the website and help files before calling.before calling.
Please email your suggestions to V2K and Please email your suggestions to V2K and upgrade requests before callingupgrade requests before calling