v-cube - solve the v-cubestorer/jimpuzzles/... · the example that will be used will be solving...
TRANSCRIPT

V-CUBE - Solve the V-CUBE http://www.v-cubes.com/solutions_1.php
1 of 2 2/24/09 1:18 AM
Home Page History Products Solutions Multimedia Contact
Solve V-CUBE Start Page Step 2: Matching Edge
Groups Step 3: Solving as a 3x3
Step 1: Solving the Centers Step 2a: Special Edge Cases
Step 1a: Solving Two
Opposite Centers
Step 1b: Solving Two
Adjacent Centers
Step 1c: Solving the Final
Centers
V-CUBE Solution Web Page is an offer of Frank Morris & Clancy
Cohran
( www.bigcubes.com )
Contact the cube Masters for questions or comments!
Solve the V-CUBE Start Page
Here we will be showing a generalized method to solve all V-CUBES 4-11, and will work for larger sized
cubes as well. This is a method that is based off of the reduction strategy, so you will need to be able to
solve a 3x3 cube. A brief outline of the method is as follows:
Solution Step One: Solve Centers
Solution Step Two: Solve Edges
Solution Step Three: Solve as 3x3
In following areas of the website, we will break down each of these steps into detailed ideas for you to
follow. The example that will be used will be solving with a 6x6, since it has extra parity resolution
steps, but this method works for all sizes of cubes. This reduction method will enable you to solve any
sized big cube with a little practice and patience.
We will provide an example solve to follow along, the scramble below has been checked, so apply it to
your 6x6 cube starting with black as the Up face, and green as the Front. If any notation is confusing,
please check our notation page for clarification, good luck!
Scramble:
d2 R2 B D2 U' r2 3f' l' 3r2 r D' d2 3u' l' 3u' U2 l' r' u' L 3u2 B2 D 3u' f' r2 3u' B2 F u l 3f 3u2
u' b2 F2 r2 F d' 3u2 b2 d' u' b2 F' D2 d r b2 F L 3r2 3f f D L 3r r' R2 D' 3u2 u L' l r' B2 l 3r
R' D' u' L' r R' D B f' u r B2

V-CUBE - Solve the V-CUBE http://www.v-cubes.com/solutions_1.php
2 of 2 2/24/09 1:18 AM
Testing our cubes Online Shop
All rights reserved Copyright © 2000 - 2023 Verdes Innovations S.A. | Design & Development Bitamin
Click to find more
Watch speedcubing champions challenging V-CUBE
technology!
SSLV-CUBES Website has been validated
and is authentic. This Website also
uses SSL for secure transactions.
Visit Our Online Shop and order your V-CUBE!

V-CUBE - Solve the V-CUBE http://www.v-cubes.com/solutions_11.php
1 of 2 2/24/09 1:19 AM
Home Page History Products Solutions Multimedia Contact
Solve V-CUBE Start Page Step 2: Matching Edge
Groups Step 3: Solving as a 3x3
Step 1: Solving the Centers Step 2a: Special Edge Cases
Step 1a: Solving Two
Opposite Centers
Step 1b: Solving Two
Adjacent Centers
Step 1c: Solving the Final
Centers
V-CUBE Solution Web Page is an offer of Frank Morris & Clancy
Cohran
( www.bigcubes.com )
Contact the cube Masters for questions or comments!
Testing our cubes Online Shop
V-CUBE Solution Step 1: Solving the Centers
Here is what the first step will accomplish: a complete set of centers, leaving only the outside edges and
corners.
We will be breaking this into three sub-steps: two opposite centers, next two adjacent centers, then the
last two centers which will also be adjacent. You can solve opposite centers, but it's not recommended
as its difficult to see both layers you're working on at once. One idea is to pick a color that stands out
very clearly to you among the other colors. This will help you find pieces with less struggle.
To start, you should know that the center on this cube is comprised of 4 1x4 'strips'. The 7x7 would have
5 1x5 strips. So generically speaking, you will have a box in the middle with size (n-2) x (n-2) where n
is the size of the cube, and each box will be comprised of a number of these strips.
Watch speedcubing champions challenging V-CUBE
technology!
Visit Our Online Shop and order your V-CUBE!

V-CUBE - Solve the V-CUBE http://www.v-cubes.com/solutions_11.php
2 of 2 2/24/09 1:19 AM
All rights reserved Copyright © 2000 - 2023 Verdes Innovations S.A. | Design & Development Bitamin
Click to find moreSSL
V-CUBES Website has been validated
and is authentic. This Website also
uses SSL for secure transactions.
V-CUBE - Solve the V-CUBE http://www.v-cubes.com/solutions_1a.php
1 of 2 2/24/09 1:20 AM
Home Page History Products Solutions Multimedia Contact
Solve V-CUBE Start Page Step 2: Matching Edge
Groups Step 3: Solving as a 3x3
Step 1: Solving the Centers Step 2a: Special Edge Cases
Step 1a: Solving Two
Opposite Centers
Step 1b: Solving Two
Adjacent Centers
Step 1c: Solving the Final
Centers
V-CUBE Solution Web Page is an offer of Frank Morris & Clancy
Cohran
( www.bigcubes.com )
Contact the cube Masters for questions or comments!
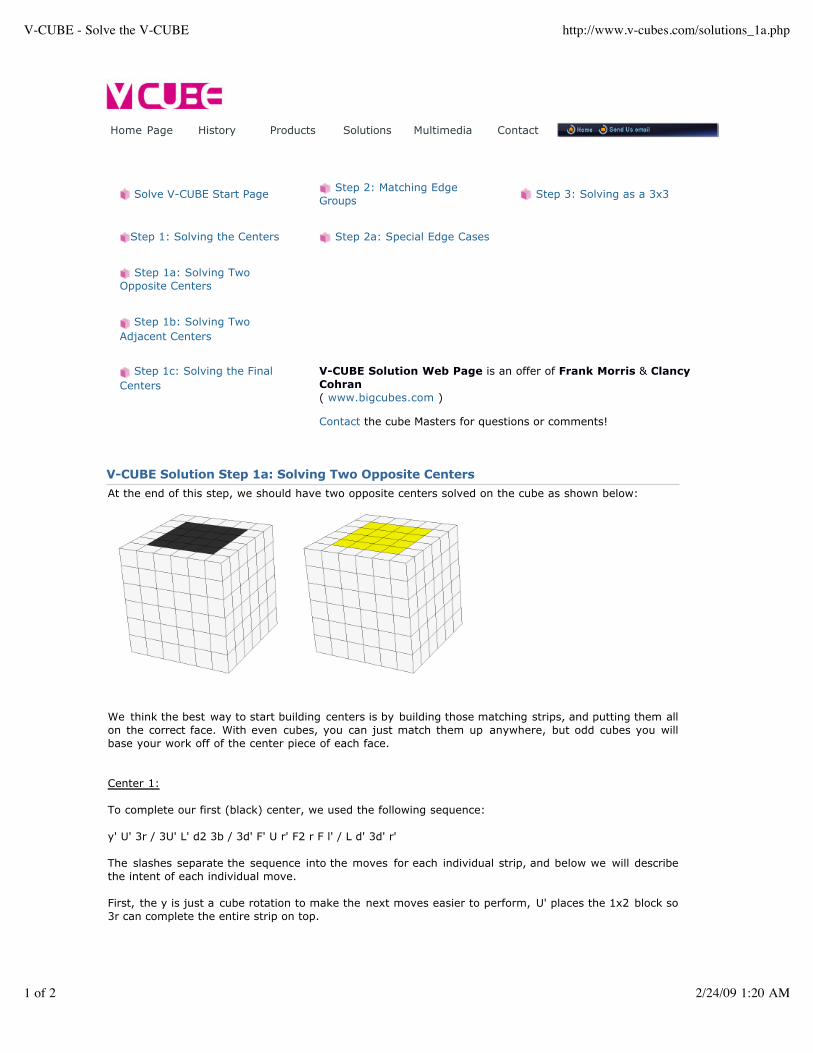
V-CUBE Solution Step 1a: Solving Two Opposite Centers
We think the best way to start building centers is by building those matching strips, and putting them all
on the correct face. With even cubes, you can just match them up anywhere, but odd cubes you will
base your work off of the center piece of each face.
Center 1:
To complete our first (black) center, we used the following sequence:
y' U' 3r / 3U' L' d2 3b / 3d' F' U r' F2 r F l' / L d' 3d' r'
The slashes separate the sequence into the moves for each individual strip, and below we will describe
the intent of each individual move.
First, the y is just a cube rotation to make the next moves easier to perform, U' places the 1x2 block so
3r can complete the entire strip on top.
At the end of this step, we should have two opposite centers solved on the cube as shown below:

V-CUBE - Solve the V-CUBE http://www.v-cubes.com/solutions_1a.php
2 of 2 2/24/09 1:20 AM
Testing our cubes Online Shop
All rights reserved Copyright © 2000 - 2023 Verdes Innovations S.A. | Design & Development Bitamin
The next move, 3U', places the 3rd piece of our second strip on the R face. Then L' places the piece we
use in the 2D layer, and then d2 puts the final piece of the strip into place. 3b places this new strip next
to the strip we already built on top, completing 2 strips on the top of our cube.
3d' makes a nice 2x1 block on the F face, just missing its 2 corners. F' U are setup moves to line up the
extra corner in the top layer with the block on the front face. The next 3 moves complete the strip, and
we recommend you take special notice of this pattern because it occurs frequently, and is a great trick to
have in your repertoire. F l' are the final two moves to put the third strip into place.
L postitions the edge on the Left face for matching the corner to it with the D' move. 3d' matches the
bottom and top 2 groups on the back face, and r' puts it into place, completing our first center!
This center is usually pretty easy to complete since we don't have any other completed centers to worry
about messing up. Our next center will take more moves to complete because of the new restrictions
resulting from the solved face. Remember there are many, many ways to complete any center, and you
have six to choose from, so try and make your life as easy as possible by choosing easy starts and
familar patterns.
Center 2:
Now since we have finished the black center to start, we will finish its opposite (yellow) center next, and
our next sequence starts with x2, putting the completed center on the D face. How we chose to build
each strip is shown below, but with less detail than above. Try and walk through the sequences
backwards and forwards and see for yourself what each move is doing.
Yellow Strip 1: F' R 2U 3u 3b' U2 3b
This completes a strip on the L face and puts it into the top. Notice how parts of the bottom solved
center come out of place, but are quickly restored at the end after we store the new strip in the U layer.
Yellow Strip 2: L u'd F2 u d' U2 3b' U2 3b
This is an interesting pattern. We switch the yellows to a verticle arragement with the L, then transfer
our two outside edges to the front face; F2 repositions them so the deep-cut moves will make another
line on the L face. The last 4 moves place the strip in the top. Notice again the technique used to put this
strip in.
Yellow Strip 3: 3D y' r U2 r'
This pattern is very easy, we drop in the final piece of the strip, do a cube rotation to make the
placement friendlier for the hands, replace an unfixed line with a fixed one with the r, U2 to save it, then
r' to restore our bottom center.
Yellow Strip 4: 3D L' 3u' u' L' u' U' l' U2 l
This final strip should be pretty straight forward after the previous examples, so see if you can figure out
what each move is doing.
Click to find more
Watch speedcubing champions challenging V-CUBE
technology!
SSLV-CUBES Website has been validated
and is authentic. This Website also
uses SSL for secure transactions.
Visit Our Online Shop and order your V-CUBE!
V-CUBE - Solve the V-CUBE http://www.v-cubes.com/solutions_1b.php
1 of 2 2/24/09 1:20 AM
Home Page History Products Solutions Multimedia Contact
Solve V-CUBE Start Page Step 2: Matching Edge
Groups Step 3: Solving as a 3x3
Step 1: Solving the Centers Step 2a: Special Edge Cases
Step 1a: Solving Two
Opposite Centers
Step 1b: Solving Two
Adjacent Centers
Step 1c: Solving the Final
Centers
V-CUBE Solution Web Page is an offer of Frank Morris & Clancy
Cohran
( www.bigcubes.com )
Contact the cube Masters for questions or comments!
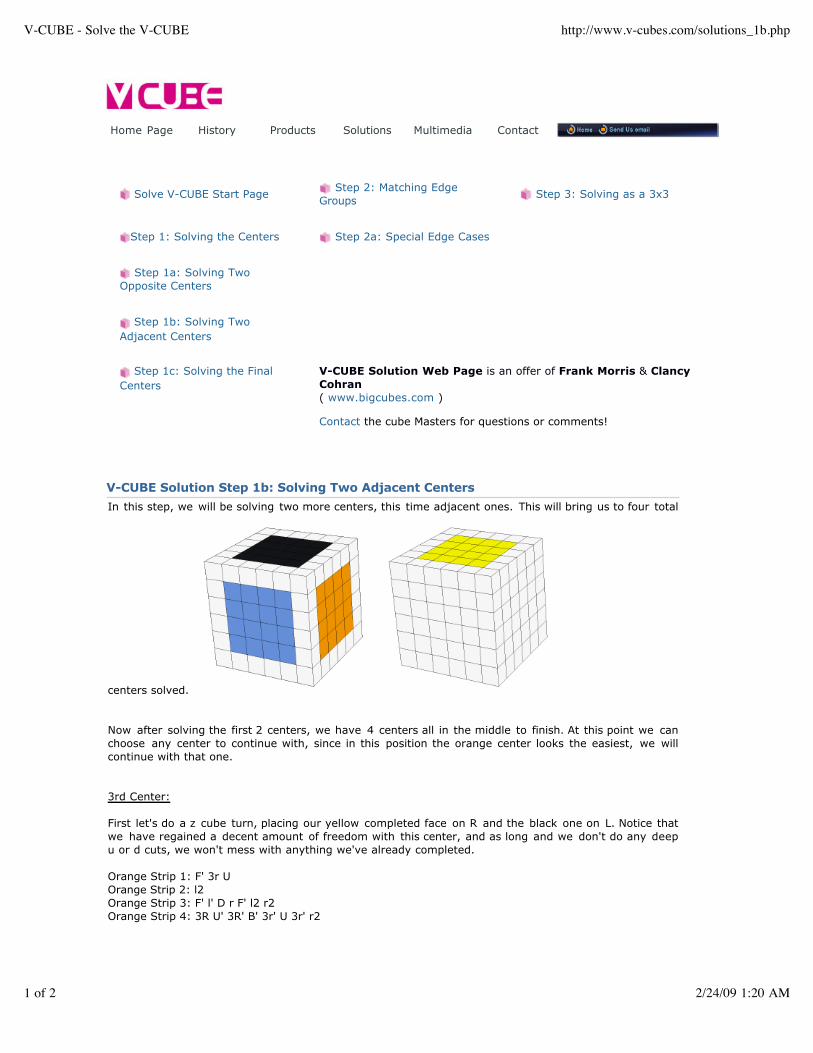
V-CUBE Solution Step 1b: Solving Two Adjacent Centers
In this step, we will be solving two more centers, this time adjacent ones. This will bring us to four total
centers solved.
Now after solving the first 2 centers, we have 4 centers all in the middle to finish. At this point we can
choose any center to continue with, since in this position the orange center looks the easiest, we will
continue with that one.
3rd Center:
First let's do a z cube turn, placing our yellow completed face on R and the black one on L. Notice that
we have regained a decent amount of freedom with this center, and as long and we don't do any deep
u or d cuts, we won't mess with anything we've already completed.
Orange Strip 1: F' 3r U
Orange Strip 2: l2
Orange Strip 3: F' l' D r F' l2 r2
Orange Strip 4: 3R U' 3R' B' 3r' U 3r' r2

V-CUBE - Solve the V-CUBE http://www.v-cubes.com/solutions_1b.php
2 of 2 2/24/09 1:20 AM
Testing our cubes Online Shop
All rights reserved Copyright © 2000 - 2023 Verdes Innovations S.A. | Design & Development Bitamin
Odd vs. Even:
Now is the time you must know if your cube has fixed centers. The easiest way to check this is to count
the pieces along an edge. If you count an odd number, your puzzle has fixed centers, and the piece in
the middle of each face tells you what color is going to belong on that face. If you count an even
number, your puzzle does not have fixed centers, so you will be responsible for assigning a color to each
face.
More importantly, you will be responsible for building the centers in the correct order for your cube to be
solvable and dealing with any parity problems that happen. After solving even cubes for a while, you will
be familiar enough with your color scheme that you will just know from memory what order to build
them in. For now, the best way is to check a corner. The three colors on that corner will tell you what
order is correct for your cube.
For example, if you've finished the yellow face, and see a corner that has blue, orange, and yellow you
can see that Blue Orange Yellow is in a clockwise direction. Following this idea and using your opposites
as a basis, you should easily be able to build 4 centers in their correct relative position.
Center 4:
Next we chose to build the blue center. See if you can tell what face (U or D) it will go on relative to the
orange face. If you figured out that it will go on the D face, you're correct, and will also see the reason
for our next move, the rotation x2. It brings the face where the blue pieces belong to the top, and puts
our fixed center on the B face.
Blue Strip 1: completed already!
Blue Strip 2: D 3r F 3r' 3R' F2 3R
Blue Strip 3: l' F' l F' 3L' F 3L 3r U2 3r'
Blue Strip 4: D' 3R F 3R' F' l F l' F' l F' l'
These moves should have started to become a little more familar by now, and the ideas are the same
here as they were on the second center. As always, try and see what each move does, and if you don't
understand a move, look at what happens to every face as a result, not just the ones you can see
easily. Also, notice things have gotten a lot more wiggly and we are running out of free faces to do our
matching and postitioning on. The final two centers will be even more restricted!
Click to find more
Watch speedcubing champions challenging V-CUBE
technology!
SSLV-CUBES Website has been validated
and is authentic. This Website also
uses SSL for secure transactions.
Visit Our Online Shop and order your V-CUBE!
V-CUBE - Solve the V-CUBE http://www.v-cubes.com/solutions_1c.php
1 of 2 2/24/09 1:20 AM
Home Page History Products Solutions Multimedia Contact
Solve V-CUBE Start Page Step 2: Matching Edge
Groups Step 3: Solving as a 3x3
Step 1: Solving the Centers Step 2a: Special Edge Cases
Step 1a: Solving Two
Opposite Centers
Step 1b: Solving Two
Adjacent Centers
Step 1c: Solving the Final
Centers
V-CUBE Solution Web Page is an offer of Frank Morris & Clancy
Cohran
( www.bigcubes.com )
Contact the cube Masters for questions or comments!
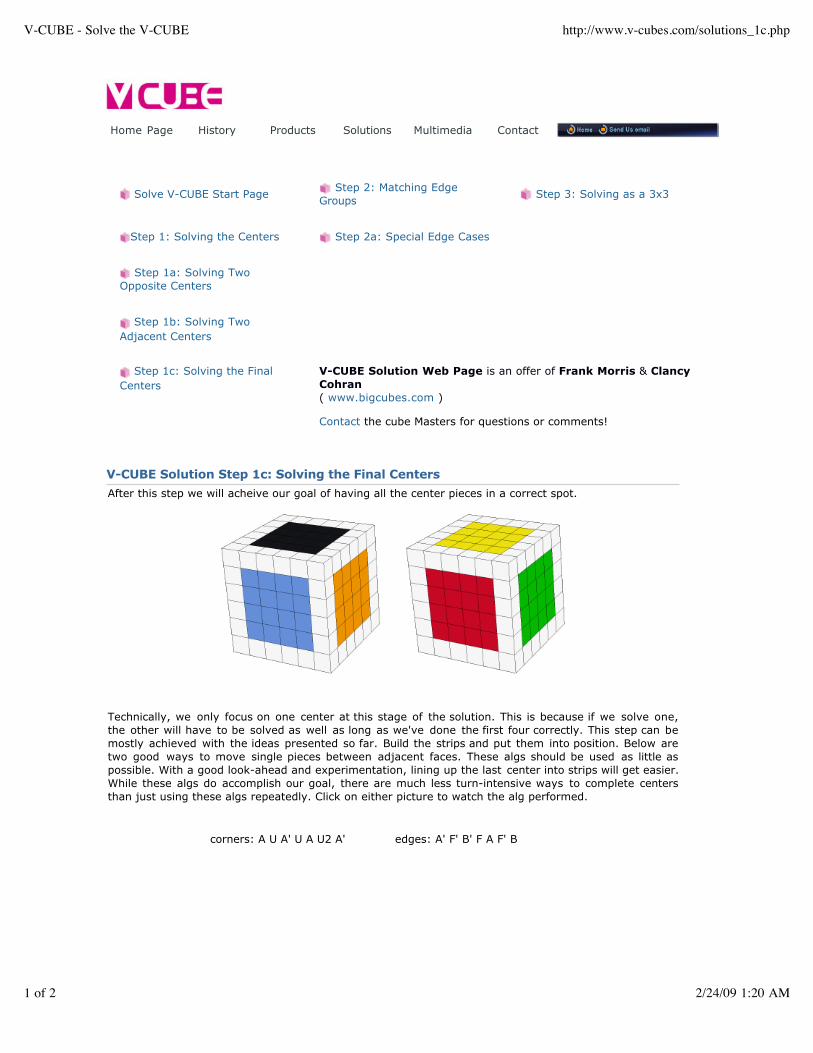
V-CUBE Solution Step 1c: Solving the Final Centers
After this step we will acheive our goal of having all the center pieces in a correct spot.
Technically, we only focus on one center at this stage of the solution. This is because if we solve one,
the other will have to be solved as well as long as we've done the first four correctly. This step can be
mostly achieved with the ideas presented so far. Build the strips and put them into position. Below are
two good ways to move single pieces between adjacent faces. These algs should be used as little as
possible. With a good look-ahead and experimentation, lining up the last center into strips will get easier.
While these algs do accomplish our goal, there are much less turn-intensive ways to complete centers
than just using these algs repeatedly. Click on either picture to watch the alg performed.
corners: A U A' U A U2 A' edges: A' F' B' F A F' B

V-CUBE - Solve the V-CUBE http://www.v-cubes.com/solutions_1c.php
2 of 2 2/24/09 1:20 AM
Testing our cubes Online Shop
All rights reserved Copyright © 2000 - 2023 Verdes Innovations S.A. | Design & Development Bitamin
In these examples, A is the slice that both our pieces to be swapped are originally on, and B is the slice it
lands on after we turn the F face. You can also switch opposite layer pieces with these algs by making
the A/B into half turns. While it's useful in some situations, we recommend avoiding opposite centers
except for the first two.
Example continued
First, do an x cube rotation. This is the primary reason for solving adjacent centers, as we can see all of
the center pieces we have left to postition on just the F and U faces. There are nearly unlimited ways to
complete this final center. We decided on completing the red center and to ignore the green pieces, as
we don't care how they get swapped around. We know if all the red centers are correct, the green ones
will have to be also, unless we make a mistake. Here we will also present more advanced examples of
grouping pieces together. Try and follow, and be sure to experiment and invent your own as well.
Red Strip 1&2: U' 3r U2 3r'U2 l'U2 l
This makes a red 2x4 block horizontally across the U face.
Most of the Rest: U r U2 r' F2 r' F' r F r' F r
This basically makes two strips with one piece missing and places them in the U face.
Final Piece 1: F2 r' F' 3L F r F'3L'
After the F2, this situation perfectly matches our edges example above.
Final Piece 2: l F 2R' F' l' F 3R
Notice that this is the same as above, just mirrored.
Click to find more
Watch speedcubing champions challenging V-CUBE
technology!
SSLV-CUBES Website has been validated
and is authentic. This Website also
uses SSL for secure transactions.
Visit Our Online Shop and order your V-CUBE!
V-CUBE - Solve the V-CUBE http://www.v-cubes.com/solutions_2a.php
1 of 3 2/24/09 1:20 AM
Home Page History Products Solutions Multimedia Contact
Solve V-CUBE Start Page Step 2: Matching Edge
Groups Step 3: Solving as a 3x3
Step 1: Solving the Centers Step 2a: Special Edge Cases
Step 1a: Solving Two
Opposite Centers
Step 1b: Solving Two
Adjacent Centers
Step 1c: Solving the Final
Centers
V-CUBE Solution Web Page is an offer of Frank Morris & Clancy
Cohran
( www.bigcubes.com )
Contact the cube Masters for questions or comments!
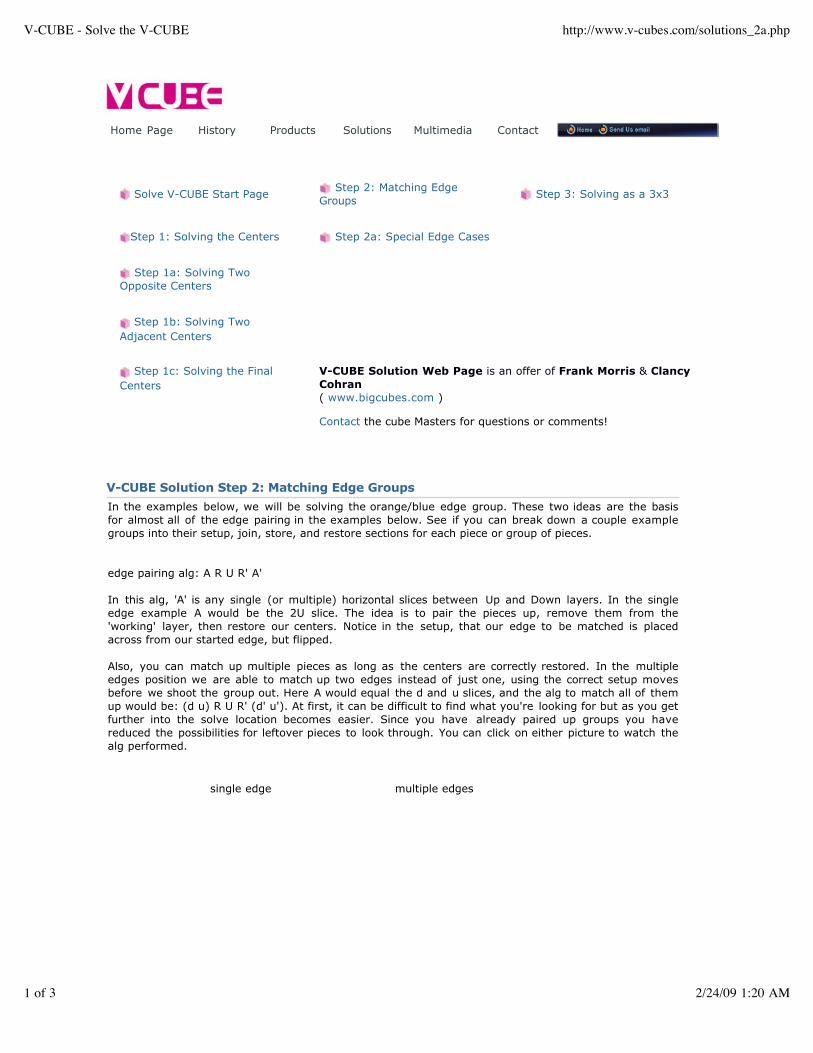
V-CUBE Solution Step 2: Matching Edge Groups
In the examples below, we will be solving the orange/blue edge group. These two ideas are the basis
for almost all of the edge pairing in the examples below. See if you can break down a couple example
groups into their setup, join, store, and restore sections for each piece or group of pieces.
edge pairing alg: A R U R' A'
In this alg, 'A' is any single (or multiple) horizontal slices between Up and Down layers. In the single
edge example A would be the 2U slice. The idea is to pair the pieces up, remove them from the
'working' layer, then restore our centers. Notice in the setup, that our edge to be matched is placed
across from our started edge, but flipped.
Also, you can match up multiple pieces as long as the centers are correctly restored. In the multiple
edges position we are able to match up two edges instead of just one, using the correct setup moves
before we shoot the group out. Here A would equal the d and u slices, and the alg to match all of them
up would be: (d u) R U R' (d' u'). At first, it can be difficult to find what you're looking for but as you get
further into the solve location becomes easier. Since you have already paired up groups you have
reduced the possibilities for leftover pieces to look through. You can click on either picture to watch the
alg performed.
single edge multiple edges
V-CUBE - Solve the V-CUBE http://www.v-cubes.com/solutions_2a.php
2 of 3 2/24/09 1:20 AM
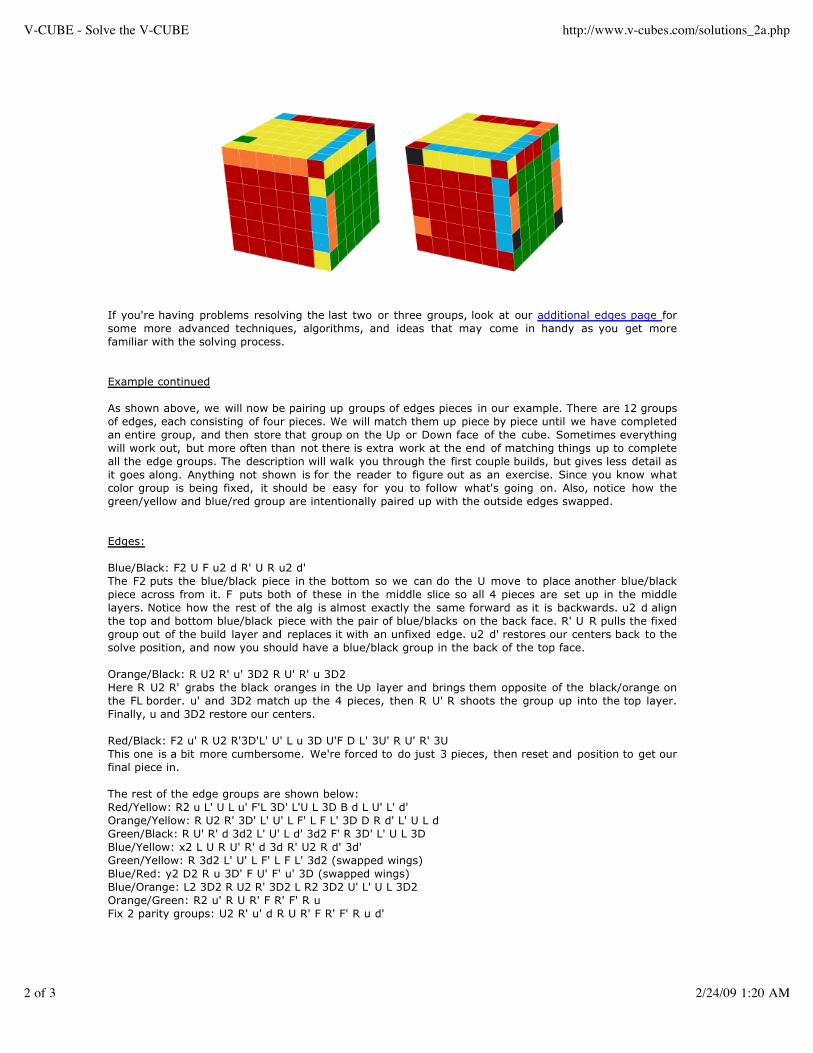
If you're having problems resolving the last two or three groups, look at our additional edges page for
some more advanced techniques, algorithms, and ideas that may come in handy as you get more
familiar with the solving process.
Example continued
As shown above, we will now be pairing up groups of edges pieces in our example. There are 12 groups
of edges, each consisting of four pieces. We will match them up piece by piece until we have completed
an entire group, and then store that group on the Up or Down face of the cube. Sometimes everything
will work out, but more often than not there is extra work at the end of matching things up to complete
all the edge groups. The description will walk you through the first couple builds, but gives less detail as
it goes along. Anything not shown is for the reader to figure out as an exercise. Since you know what
color group is being fixed, it should be easy for you to follow what's going on. Also, notice how the
green/yellow and blue/red group are intentionally paired up with the outside edges swapped.
Edges:
Blue/Black: F2 U F u2 d R' U R u2 d'
The F2 puts the blue/black piece in the bottom so we can do the U move to place another blue/black
piece across from it. F puts both of these in the middle slice so all 4 pieces are set up in the middle
layers. Notice how the rest of the alg is almost exactly the same forward as it is backwards. u2 d align
the top and bottom blue/black piece with the pair of blue/blacks on the back face. R' U R pulls the fixed
group out of the build layer and replaces it with an unfixed edge. u2 d' restores our centers back to the
solve position, and now you should have a blue/black group in the back of the top face.
Orange/Black: R U2 R' u' 3D2 R U' R' u 3D2
Here R U2 R' grabs the black oranges in the Up layer and brings them opposite of the black/orange on
the FL border. u' and 3D2 match up the 4 pieces, then R U' R shoots the group up into the top layer.
Finally, u and 3D2 restore our centers.
Red/Black: F2 u' R U2 R'3D'L' U' L u 3D U'F D L' 3U' R U' R' 3U
This one is a bit more cumbersome. We're forced to do just 3 pieces, then reset and position to get our
final piece in.
The rest of the edge groups are shown below:
Red/Yellow: R2 u L' U L u' F'L 3D' L'U L 3D B d L U' L' d'
Orange/Yellow: R U2 R' 3D' L' U' L F' L F L' 3D D R d' L' U L d
Green/Black: R U' R' d 3d2 L' U' L d' 3d2 F' R 3D' L' U L 3D
Blue/Yellow: x2 L U R U' R' d 3d R' U2 R d' 3d'
Green/Yellow: R 3d2 L' U' L F' L F L' 3d2 (swapped wings)
Blue/Red: y2 D2 R u 3D' F U' F' u' 3D (swapped wings)
Blue/Orange: L2 3D2 R U2 R' 3D2 L R2 3D2 U' L' U L 3D2
Orange/Green: R2 u' R U R' F R' F' R u
Fix 2 parity groups: U2 R' u' d R U R' F R' F' R u d'

V-CUBE - Solve the V-CUBE http://www.v-cubes.com/solutions_2a.php
3 of 3 2/24/09 1:20 AM
Testing our cubes Online Shop
All rights reserved Copyright © 2000 - 2023 Verdes Innovations S.A. | Design & Development Bitamin
Take special notice that we have stored the Green/Yellow group in BR and it still has the wings swapped.
Click to find more
Watch speedcubing champions challenging V-CUBE
technology!
SSLV-CUBES Website has been validated
and is authentic. This Website also
uses SSL for secure transactions.
Visit Our Online Shop and order your V-CUBE!
V-CUBE - Solve the V-CUBE http://www.v-cubes.com/solutions_2b.php
1 of 2 2/24/09 1:21 AM
Home Page History Products Solutions Multimedia Contact
Solve V-CUBE Start Page Step 2: Matching Edge
Groups Step 3: Solving as a 3x3
Step 1: Solving the Centers Step 2a: Special Edge Cases
Step 1a: Solving Two
Opposite Centers
Step 1b: Solving Two
Adjacent Centers
Step 1c: Solving the Final
Centers
V-CUBE Solution Web Page is an offer of Frank Morris & Clancy
Cohran
( www.bigcubes.com )
Contact the cube Masters for questions or comments!
V-CUBE Solution Step 2: Special Edge Cases
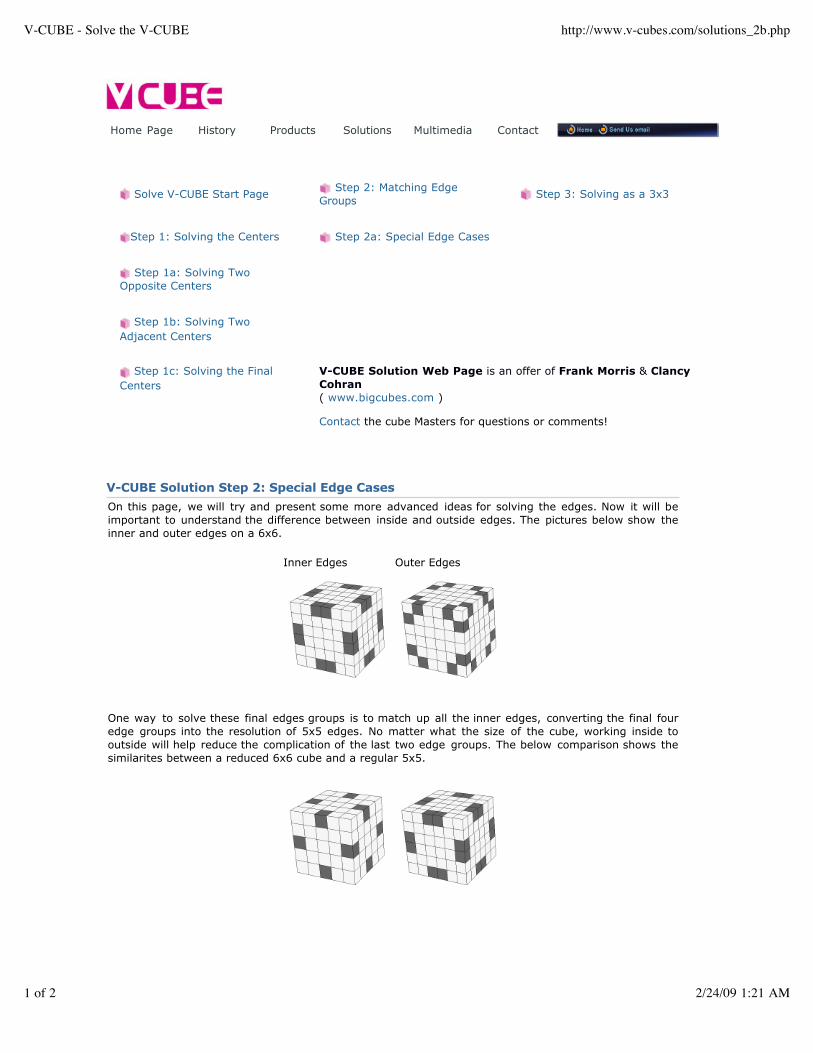
On this page, we will try and present some more advanced ideas for solving the edges. Now it will be
important to understand the difference between inside and outside edges. The pictures below show the
inner and outer edges on a 6x6.
Inner Edges Outer Edges
One way to solve these final edges groups is to match up all the inner edges, converting the final four
edge groups into the resolution of 5x5 edges. No matter what the size of the cube, working inside to
outside will help reduce the complication of the last two edge groups. The below comparison shows the
similarites between a reduced 6x6 cube and a regular 5x5.

V-CUBE - Solve the V-CUBE http://www.v-cubes.com/solutions_2b.php
2 of 2 2/24/09 1:21 AM
Testing our cubes Online Shop
All rights reserved Copyright © 2000 - 2023 Verdes Innovations S.A. | Design & Development Bitamin
To pair up these inside groups we use the same strategy as before, just being sure to work inside to
outside. Many times you will be left with just 2 edges groups to solve, below are the 3 algs you need to
finish the edges. The first is for even cubes with two inside edges needing to be swapped. Next is the
alg needed to pair up the final 2 groups of outside edges with their inner edge groups. (Notice that these
first two algs are basically the same, just different setup moves) The third algs is for when you get a
case where the last group's two outside wings need to be swapped. Click on the picture to see the alg
performed.
alg: 3d R U R' F R' F' R 3d' alg: d R U R' F R' F' R d'alg: r2 B2 U2 l U2 r' U2 r U2 F2 r F2
2l' B2 r2
Example continued
We have a case like the last example shown above, the Green/Yellow group is in BR. We'll do cube
rotations to get it to our FU spot, and apply the parity fix.
Green/Yellow: x' y r2 B2 U2 l U2 r' U2 r U2 F2 r F2 2l' B2 r2
Now you have successfully converted your 6x6 into a psuedo 3x3 cube!
Click to find more
Watch speedcubing champions challenging V-CUBE
technology!
SSLV-CUBES Website has been validated
and is authentic. This Website also
uses SSL for secure transactions.
Visit Our Online Shop and order your V-CUBE!
V-CUBE - Solve the V-CUBE http://www.v-cubes.com/solutions_3.php
1 of 3 2/24/09 1:21 AM
Home Page History Products Solutions Multimedia Contact
Solve V-CUBE Start Page Step 2: Matching Edge
Groups Step 3: Solving as a 3x3
Step 1: Solving the Centers Step 2a: Special Edge Cases
Step 1a: Solving Two
Opposite Centers
Step 1b: Solving Two
Adjacent Centers
Step 1c: Solving the Final
Centers
V-CUBE Solution Web Page is an offer of Frank Morris & Clancy
Cohran
( www.bigcubes.com )
Contact the cube Masters for questions or comments!
V-CUBE Solution Step 3: Solving as a 3x3
Here we will finally complete our goal of completely solving our V-cube. At this point you will notice all
the centers and edge groups are paired up so we can use our favorite 3x3 method to complete our
solve. We will address both even and odd cubes below.
Odd Cubes:
With odd cubes the final stage will be normal, solving exactly as a 3x3 would without any special cases
arising. As the size of the cube increases you will have to change/adapt your handling techniques to
keep this stage fast and smooth.
Even Cubes:
With even cubes the final stage will involve some special situations that only happen on even-numbered
cubes. The two algs below will resolve both of these problems. The two kinds of parities that arise are
the edge orientation parity and the permutation parity.
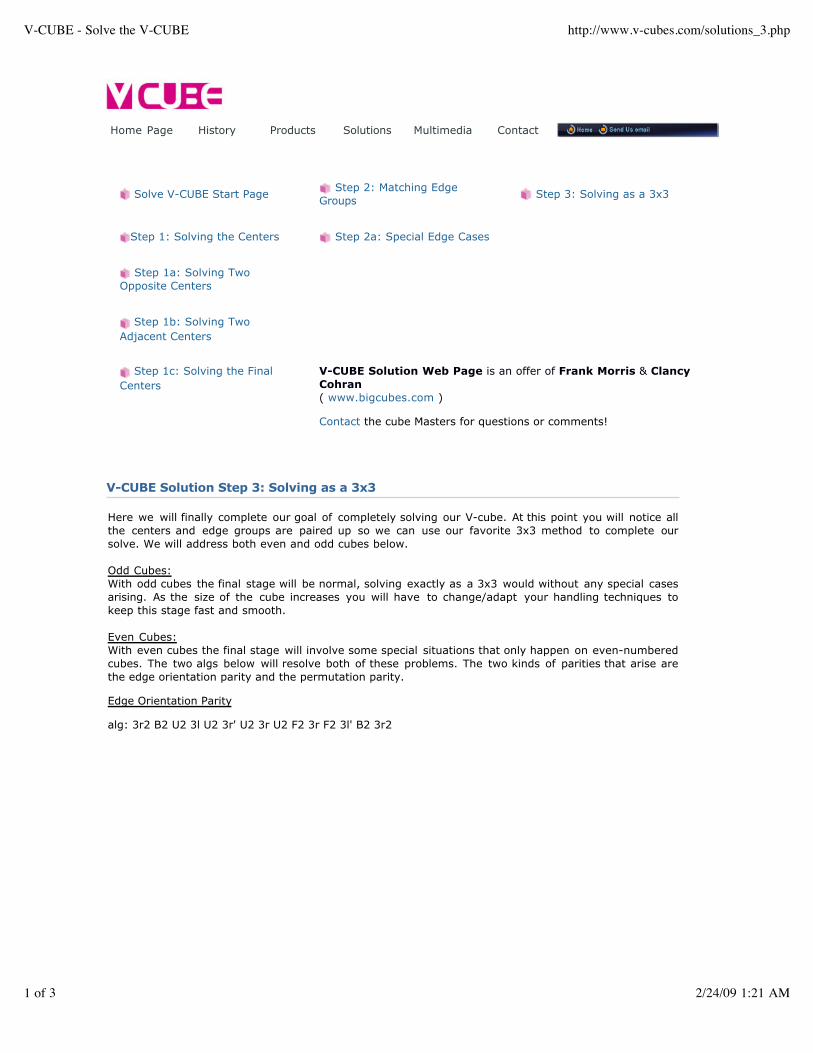
Edge Orientation Parity
alg: 3r2 B2 U2 3l U2 3r' U2 3r U2 F2 3r F2 3l' B2 3r2
V-CUBE - Solve the V-CUBE http://www.v-cubes.com/solutions_3.php
2 of 3 2/24/09 1:21 AM
This is the same alg used in the edge pairing step, but set up slightly different, with the L and R turns
cutting the cube in half instead of shallower cuts. In the above alg, the goal is to fix the badly oriented
edge, not the whole layer. You will know that you need this alg when you get to the last layer and have
an odd number of correct or incorrect edges. Click on the picture to watch the alg performed.
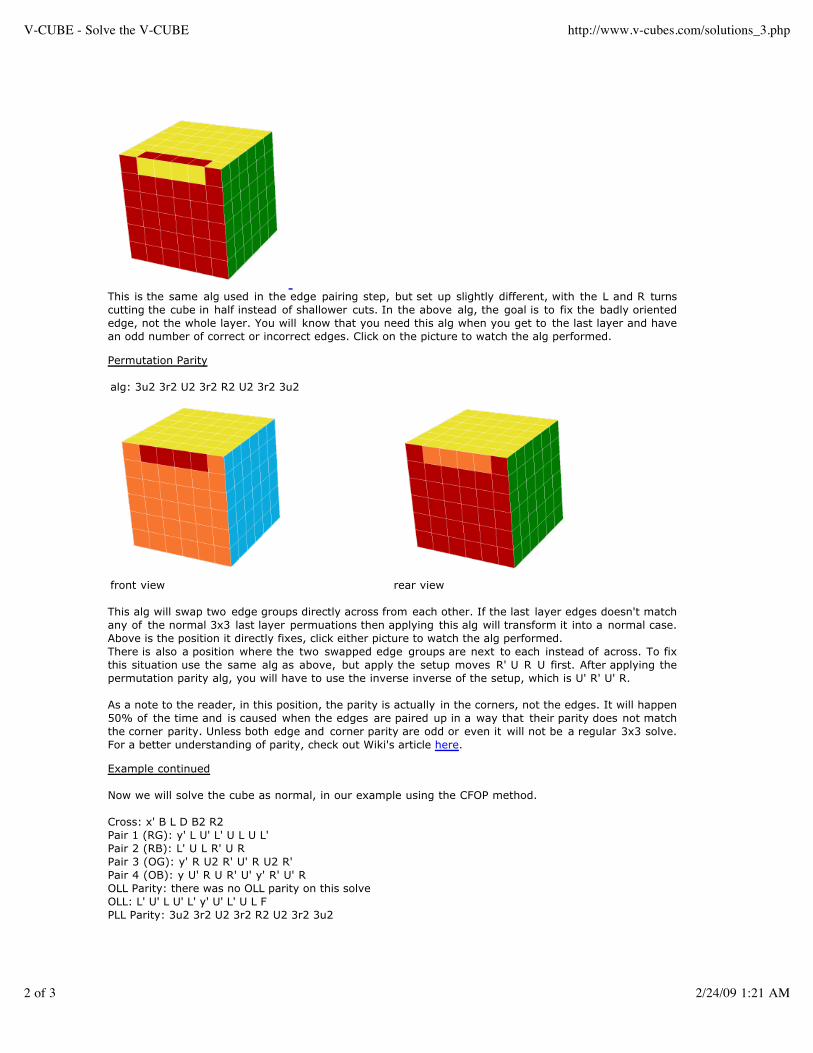
Permutation Parity
alg: 3u2 3r2 U2 3r2 R2 U2 3r2 3u2
front view rear view
This alg will swap two edge groups directly across from each other. If the last layer edges doesn't match
any of the normal 3x3 last layer permuations then applying this alg will transform it into a normal case.
Above is the position it directly fixes, click either picture to watch the alg performed.
There is also a position where the two swapped edge groups are next to each instead of across. To fix
this situation use the same alg as above, but apply the setup moves R' U R U first. After applying the
permutation parity alg, you will have to use the inverse inverse of the setup, which is U' R' U' R.
As a note to the reader, in this position, the parity is actually in the corners, not the edges. It will happen
50% of the time and is caused when the edges are paired up in a way that their parity does not match
the corner parity. Unless both edge and corner parity are odd or even it will not be a regular 3x3 solve.
For a better understanding of parity, check out Wiki's article here.
Example continued
Now we will solve the cube as normal, in our example using the CFOP method.
Cross: x' B L D B2 R2
Pair 1 (RG): y' L U' L' U L U L'
Pair 2 (RB): L' U L R' U R
Pair 3 (OG): y' R U2 R' U' R U2 R'
Pair 4 (OB): y U' R U R' U' y' R' U' R
OLL Parity: there was no OLL parity on this solve
OLL: L' U' L U' L' y' U' L' U L F
PLL Parity: 3u2 3r2 U2 3r2 R2 U2 3r2 3u2

V-CUBE - Solve the V-CUBE http://www.v-cubes.com/solutions_3.php
3 of 3 2/24/09 1:21 AM
Testing our cubes Online Shop
All rights reserved Copyright © 2000 - 2023 Verdes Innovations S.A. | Design & Development Bitamin
PLL: x' R U' R' U D R' D U' R' U R D2
You should now have a complete V-cube, congratulations! With practice and hard work you can become
one of the best in the world. Good luck, and remember to have fun!
Click to find more
Watch speedcubing champions challenging V-CUBE
technology!
SSLV-CUBES Website has been validated
and is authentic. This Website also
uses SSL for secure transactions.
Visit Our Online Shop and order your V-CUBE!