using the multi-trim feature in corel® videostudio® pro x4 · using the multi-trim feature...
TRANSCRIPT
Using the Multi-Trim feature
•What is Multi-Trim?•Accessing Multi-Trim.•Multi-Trim workspace•Trimming video into multiple clips•Adjusting trimmed clips
What you will learn:
® ®in Corel VideoStudio Pro X4
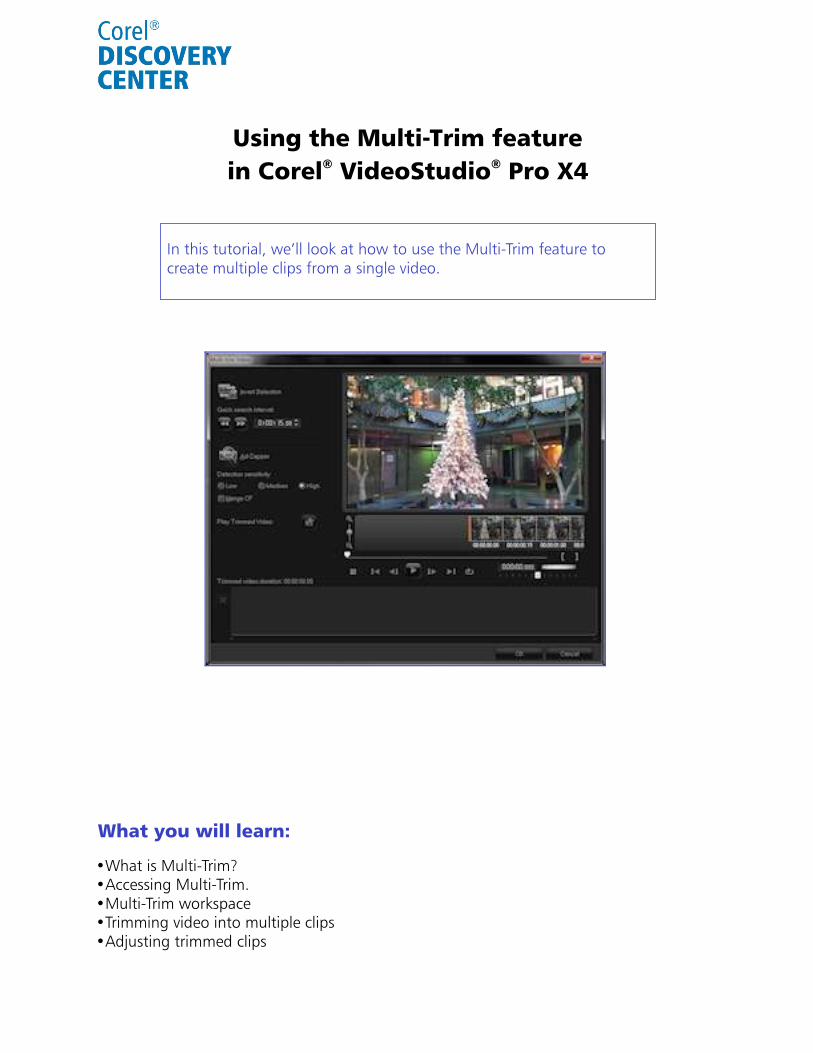
In this tutorial, we’ll look at how to use the Multi-Trim feature to create multiple clips from a single video.
What is Multi-Trim?
Accessing Multi-Trim
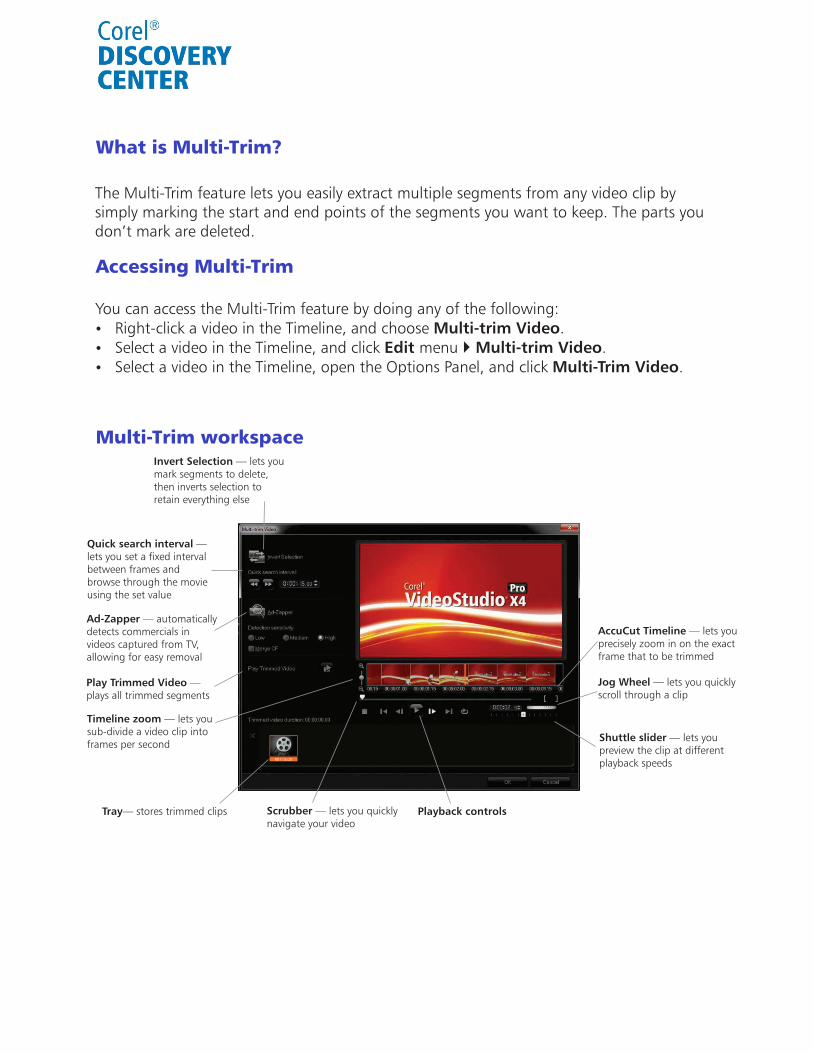
Multi-Trim workspace
The Multi-Trim feature lets you easily extract multiple segments from any video clip by simply marking the start and end points of the segments you want to keep. The parts you don’t mark are deleted.
You can access the Multi-Trim feature by doing any of the following: Right-click a video in the Timeline, and choose Multi-trim Video. Select a video in the Timeline, and click Edit menu Multi-trim Video. Select a video in the Timeline, open the Options Panel, and click Multi-Trim Video.
Invert Selection — lets you mark segments to delete, then inverts selection to retain everything else
Quick search interval — lets you set a fixed interval between frames and browse through the movie using the set value
Ad-Zapper — automatically detects commercials in videos captured from TV, allowing for easy removal
Play Trimmed Video — plays all trimmed segments
Timeline zoom — lets you sub-divide a video clip into frames per second
AccuCut Timeline — lets you precisely zoom in on the exact frame that to be trimmed
Jog Wheel — lets you quickly scroll through a clip
Shuttle slider — lets you preview the clip at different playback speeds
Scrubber — lets you quickly navigate your video
Playback controlsTray— stores trimmed clips
Trimming video into multiple clips
1. In the Edit Step panel, drag a clip to the Timeline.2. Double-click the clip to open the Options Panel.3. Click Multi-trim Video in the Options Panel. The Mult-trim Video dialog box appears.4. Click Play to determine which segments you want to keep.5. Choose the number of frames to display by dragging the Timeline zoom.6. Drag the Scrubber until you get to the part of the video that you want to use as the beginning frame of the first segment. 7. Click Set Mark-in button. You can also press F3 to mark the beginning of a trimmed clip.8. Drag the Scrubber to the point where you want the segment to end. You can also press F4 to mark the beginning of a trimmed clip.9. Click Set Mark-out button. Repeat steps 6 through 9 until you have marked all the segments you want keep.10. Click OK. The video segments that you kept are inserted on the Timeline.
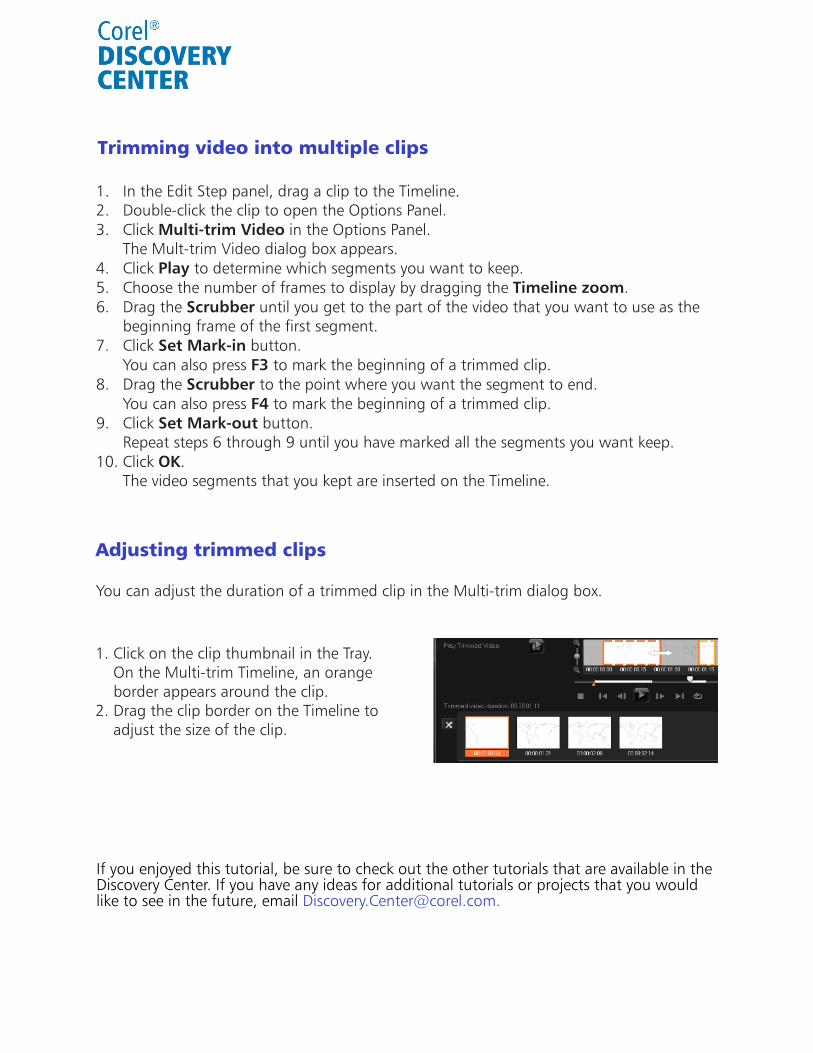
Adjusting trimmed clips
You can adjust the duration of a trimmed clip in the Multi-trim dialog box.
1. Click on the clip thumbnail in the Tray. On the Multi-trim Timeline, an orange border appears around the clip.2. Drag the clip border on the Timeline to adjust the size of the clip.
If you enjoyed this tutorial, be sure to check out the other tutorials that are available in the Discovery Center. If you have any ideas for additional tutorials or projects that you would like to see in the future, email [email protected].