using latex to write a phd thesis latex to write a phd thesis ... section entitled “gnu free...
TRANSCRIPT

Using LATEX to Write a PhD Thesis
Nicola L.C. Talbot
School of Computing SciencesUniversity of East AngliaNorwich. NR4 7TJ. U.K.
http://theoval.cmp.uea.ac.uk/~nlct/
Tuesday 6th November, 2007 (version 1.2)

Copyright c© 2007 Nicola L. C. TalbotPermission is granted to copy, distribute and/or modify this document under
the terms of the GNU Free Documentation License, Version 1.2 or any later versionpublished by the Free Software Foundation; with no Invariant Sections, no Front-Cover Texts, and no Back-Cover Texts. A copy of the license is included in thesection entitled “GNU Free Documentation License”.
The base URL for this document is: http://theoval.cmp.uea.ac.uk/~nlct/latex/thesis/
Any opinions made herein are my own, and do not necessarily reflect the opinionsof the University of East Anglia.

Abstract
This document is aimed at PhD students who want to use LATEX to typeset theirPhD thesis. If you are unfamiliar with LATEX I recommend that you first read LATEXfor Complete Novices [5].

Contents
1 Introduction 1
2 Getting Started 2
3 Splitting a Large Document into Several Files 43.1 Excluding Files . . . . . . . . . . . . . . . . . . . . . . . . . . . . . . 53.2 \input and \include . . . . . . . . . . . . . . . . . . . . . . . . . . 5
4 Changing the Document Style 74.1 Modifying Object Specific Text . . . . . . . . . . . . . . . . . . . . . 84.2 Changing the Section Headings . . . . . . . . . . . . . . . . . . . . . 94.3 Changing the Chapter Headings . . . . . . . . . . . . . . . . . . . . 104.4 Adding to the Table of Contents . . . . . . . . . . . . . . . . . . . . 114.5 Defining a New Page Style . . . . . . . . . . . . . . . . . . . . . . . . 11
5 Generating a Bibliography 135.1 Back-References . . . . . . . . . . . . . . . . . . . . . . . . . . . . . 185.2 Troubleshooting . . . . . . . . . . . . . . . . . . . . . . . . . . . . . . 22
6 Formatting 236.1 Double Spacing . . . . . . . . . . . . . . . . . . . . . . . . . . . . . . 236.2 Changing the Title Page . . . . . . . . . . . . . . . . . . . . . . . . . 236.3 Verbatim Text . . . . . . . . . . . . . . . . . . . . . . . . . . . . . . 256.4 Tabbing . . . . . . . . . . . . . . . . . . . . . . . . . . . . . . . . . . 266.5 Theorems and Algorithms . . . . . . . . . . . . . . . . . . . . . . . 27
7 Generating an Index or a Glossary 327.1 Generating an Index . . . . . . . . . . . . . . . . . . . . . . . . . . . 32
7.1.1 Troubleshooting . . . . . . . . . . . . . . . . . . . . . . . . . 357.2 Generating a Glossary . . . . . . . . . . . . . . . . . . . . . . . . . . 35
7.2.1 Defining Glossary Entries . . . . . . . . . . . . . . . . . . . . 367.2.2 Displaying Terms in the Document . . . . . . . . . . . . . . . 377.2.3 Displaying the Glossary . . . . . . . . . . . . . . . . . . . . . 397.2.4 Generating the Glossary Files . . . . . . . . . . . . . . . . . . 39
8 Too Many Unprocessed Floats 41
9 General Thesis Writing Advice 42
GNU Free Documentation License 441. APPLICABILITY AND DEFINITIONS . . . . . . . . . . . . . . . . . 442. VERBATIM COPYING . . . . . . . . . . . . . . . . . . . . . . . . . . 453. COPYING IN QUANTITY . . . . . . . . . . . . . . . . . . . . . . . . 454. MODIFICATIONS . . . . . . . . . . . . . . . . . . . . . . . . . . . . . 465. COMBINING DOCUMENTS . . . . . . . . . . . . . . . . . . . . . . . 476. COLLECTIONS OF DOCUMENTS . . . . . . . . . . . . . . . . . . . 487. AGGREGATION WITH INDEPENDENT WORKS . . . . . . . . . . 488. TRANSLATION . . . . . . . . . . . . . . . . . . . . . . . . . . . . . . 489. TERMINATION . . . . . . . . . . . . . . . . . . . . . . . . . . . . . . 4810. FUTURE REVISIONS OF THIS LICENSE . . . . . . . . . . . . . . 49ADDENDUM: How to use this License for your documents . . . . . . . . 49
Bibliography 50
Index 51
i
Chapter 1
Introduction
Many PhD students in the sciences are being encouraged to produce their PhD thesisin LATEX, particularly if their work involves a lot of mathematics. This documentis intended as a brief guide on how to structure your document, and how to definenew page styles, chapter headings and various other components that are usuallyrequired for a thesis. If you have never used LATEX before, I recommend that youfirst read LATEX for Complete Novices [5], as this document assumes you have abasic knowledge of LATEX.
Throughout this document, source code is illustrated using a typewriter font likethis:
This is an \textbf{example}.
Where both sample source code and the corresponding output is illustrated, thenthe source code is illustrated in the form:
↑Input
This is an \textbf{example}.↓Input
and the corresponding output is illustrated like this:
↑OutputThis is an example.↓Output
Command definitions are shown in a typewriter font in the form:
\documentclass[<options>]{<class file>} Definition
where words <like this> (such as <options> and <class file>) indicate the type ofthing you need to substitute. Note that the angle brackets are merely a visual aidto indicate that the text is a metasyntactic variable, so the angle brackets shouldnot appear in your code. For example if you want to use the report class file, youwould need to substitute <class file> with report, and if you want the a4paperoption, you would substitute <options> with a4paper, like this:
\documentclass[a4paper]{report}
Links to related topics in the UKTUG FAQ are displayed in the margin like this: [What is TEX?]
1

Chapter 2
Getting Started
If you have been told to use a particular class file, use that one, otherwise I recom-mend that you use the report or scrreprt class file. Before you start your document, [Replacing the standard
classes]consider first what kind of structure it should have. Unless you have been toldotherwise, I recommend that you start out with a skeletal document that lookssomething like the following:
\documentclass[a4paper]{report}
\begin{document}
\title{A Sample PhD Thesis}\author{A. N. Other}\date{July 2004}
\maketitle
\pagenumbering{roman}\tableofcontents\listoffigures\listoftables
\chapter*{Acknowledgements}
\begin{abstract}\end{abstract}
\pagenumbering{arabic}
\chapter{Introduction}\label{ch:intro}
\chapter{Technical Introduction}\label{ch:techintro}
\chapter{Method}\label{ch:method}
\chapter{Results}\label{ch:results}
\chapter{Conclusions}\label{ch:conc}
\bibliographystyle{plain}\bibliography{thesis}
\end{document}
If you do this, it will help ensure that your document has the correct structurebefore you begin with the actual contents of the document. (Note that the chaptertitles will naturally vary depending on your subject or institution, and you mayneed a different paper size if you are not in Europe. I have based the above onmy own PhD thesis which I wrote in the early to mid 1990s in the Department of
2
Electronic Systems Engineering at the University of Essex, and it may well not fityour own requirements.)
Note that I have included the lines
\bibliographystyle{plain}\bibliography{thesis}
however I haven’t yet created the bibliography database thesis.bib. I will coverthis in Chapter 5, but you will still be able to run the document through LATEX. Ifyou haven’t started yet, go ahead and try this. Creating a skeletal document canhave an amazing psychological effect on some people: for very little effort it canproduce a document several pages long, which can give you a sense of achievementwhich can help give you sufficient momentum to get started1.
If you are using the scrreprt class you can use the commands \frontmatter,\mainmatter and \backmatter to delineate the various logical divisions of yourdocument. These commands are also defined in some other classes, such as bookand memoir.
1but of course, it’s not guaranteed to work with everyone.
2. GETTING STARTED 3

Chapter 3
Splitting a Large Document intoSeveral Files
Some people prefer to place each chapter of a large document in a separate file. Youcan do this by using the command
\include{<filename>} Definition
If you only want to work on one or two chapters, you can tell LATEX to only includethose files using the command
\includeonly{<file list>} Definition
in the preamble, where <file list> is a comma separated list of files you wantincluded. LATEX will still read in all the cross-referencing information for the missingchapters, but won’t include them in the DVI file. There is a definite advantage tothis if you have, say, a large number of images in your results chapter, which youdon’t need when you’re working on, say, the technical introduction. You can stillreference all the figures in the omitted chapter, as long as you have previouslyLATEXed the document without the \includeonly command.
The example given in Chapter 2 can now be split into various files:File thesis.tex:
\documentclass[a4paper]{report}
\begin{document}
\title{A Sample PhD Thesis}\author{A. N. Other}\date{July 2004}
\maketitle
\pagenumbering{roman}\tableofcontents\listoffigures\listoftables
\chapter*{Acknowledgements}
\begin{abstract}\end{abstract}
\pagenumbering{arabic}
\include{intro}
\include{techintro}
\include{method}
\include{results}
\include{conc}
4

\bibliographystyle{plain}\bibliography{thesis}
\end{document}
File intro.tex:
\chapter{Introduction}\label{ch:intro}
File techintro.tex:
\chapter{Technical Introduction}\label{ch:techintro}
File method.tex:
\chapter{Method}\label{ch:method}
File results.tex:
\chapter{Results}\label{ch:results}
File conc.tex:
\chapter{Conclusions}\label{ch:conc}
If you only want to work on, say, the Method and the Results chapters, you canplace the following command in the preamble:
\includeonly{method,results}
3.1 Excluding Files
There is also a command called \excludeonly defined in the excludeonly packagewhich performs the reverse of \includeonly.
3.2 \input and \include
Some people become confused over the difference between \include and \input. [What’s going on in my\include commands?]
\input{<filename>} Definition
acts as though the contents of the file called <filename> were inserted into thedocument at the point where the \input command occurs. For example, if youhave a file called myfile.tex which contained the following lines:
Hello World!Goodbye World!
and you had another file called mydoc.tex which contained the following:
\documentclass{article}\begin{document}\input{myfile}\end{document}
then mydoc.tex is equivalent to
3. SPLITTING A LARGE DOCUMENT INTO SEVERAL FILES 5

\documentclass{article}\begin{document}Hello World!Goodbye World!\end{document}
Whereas
\include{<filename>} Definition
does more than simply read the contents of the file called <filename>.tex. Firstly,an associated auxiliary file is created called <filename>.aux. This file contains allthe cross-referencing information (produced by \label and \cite) that occurs in<filename>.tex. This means that any labels in the files that have been excluded(either by not being listed in \includeonly or by being listed in \excludeonly)can still be referenced in other parts of the document.
Secondly, \clearpage is issued, then the file name is checked to determine ifit is in the included list. If it is, the file contents will then be read and the cross-referencing information will be written to <filename>.tex, otherwise the file con-tents will be ignored. At the end of the file, another \clearpage is issued. This iswhy it makes sense to only use \include where the included file contains an entirechapter (including \chapter and corresponding \label commands.)
3. SPLITTING A LARGE DOCUMENT INTO SEVERAL FILES 6

Chapter 4
Changing the Document Style
It is possible to redefine \chapter, \section etc in order to change the heading stylefor your document. I recommend that you first write your thesis, and then worryabout changing the document style; the ability to do this is one of the advantagesof using LATEX over a word processor. Remember that writing your thesis is moreimportant than the layout. Whilst it may be that your school or department mayinsist on a certain style, it should not take precedence over the actual task of writing.
Some class files, such as the KOMA script classes (which include scrreprt men-tioned in Chapter 2) and the memoir class provide commands to help you modifythe document style. There are also packages available to help you modify the ap-pearance of chapter and section headings. Alternatively, you may prefer to write [The style of section
headings]your own class or package which will produce a document that conforms to yourschool’s guidelines (perhaps you have friends who may also benefit from this.)
If you want to know how a particular class or package will enable you to modifythe document style, then you should read the user guide for that class or package. Inthis tutorial I shall illustrate how you can create your own style which will be basedon the report class. Note that if you want to redefine commands such as \chapterand \section, using the methods described below, it is better to create a class orpackage rather than putting the commands directly in your document. There are [Learning to write LATEX
classes and packages]two main reasons for this: firstly, some of the commands involved use an @ characterwhich behaves differently depending on whether or not it occurs in a class/packageor in a normal .tex file, and secondly, if you place all these commands in your maindocument, you may confuse the spell checker or word count application1. [How many words have
you written?]So, should you create a package or a class file? Packages should be designed to beindependent of the class file. For example, the graphicx package works irrespectiveof whether you are using the report, article, slide etc class file. If the commands orenvironments that you want to define are somehow dependent on a particular classfile, then you should create a new class file that is based on the one you want. Ifyou are redefining chapter or section styles, then this is dependent on the overalldocument style, that is, it’s dependent on the class file. So, you should create a newclass file that modifies the existing one, rather than creating a package.
Let’s have an example. If you want to create a new class called, say, mythesis,you will need to create a file called mythesis.cls, and the start of your file shouldlook something like:
\NeedsTeXFormat{LaTeX2e}\ProvidesClass{mythesis}
Next you need to specify what to do with any options passed to this class file. Sincewe don’t need to define any new options for this example, we can simply pass alloptions on to the report class file:
\DeclareOption*{\PassOptionsToClass{\CurrentOption}{report}}
Once all options have been declared, they need to be processed:
\ProcessOptions
Now the report class needs to be loaded:
\LoadClass{report}
and the very last line of your file should have the command
\endinput
1for information on counting the number of words in your document, see the documentation forthe cmpreprt class file
7

The contents of this new class file should be inserted between the \LoadClass{report}and \endinput commands. You will then need to modify your source code, thesis.tex,so that it uses this new class file:
\documentclass[a4paper]{mythesis}
If the class file is only intended to conform to a specific university or school’s guide-lines, it makes more sense for your new class file to set the paper size to a fixedsize. For example, a European university may insist on A4 paper, in which case thepaper size is no longer an option. In this case you can either specify the paper sizeas an option to \LoadClass:
\LoadClass[a4paper]{report}
or you can load the geometry package, in which case the following line should goafter \LoadClass{report}2:
\RequirePackage[a4paper]{geometry}
Either way, you no longer need the a4paper option in your document:
\documentclass{mythesis}
If you need to set additional page layout parameters such as the margin widths,then it is better to use the geometry package. For example, to set the paper size toA4 with 1 inch margins do:
\RequirePackage[a4paper,margin=1in]{geometry}
See the geometry package documentation for further details. [Changing the marginsin LATEX]
4.1 Modifying Object Specific Text
The report class file defines various commands that produce words such as “Con-tents”, “Chapter”, “Bibliography”. These commands, and their default values are [How to change LATEX’s
“fixed names”]listed in Table 4.1.
Table 4.1: Default Names
\contentsname Contents\listfigurename List of Figures\listtablename List of Tables\bibname Bibliography\indexname Index\figurename Figure\tablename Table\partname Part\chaptername Chapter\appendixname Appendix\abstractname Abstract
So, suppose you want your figures and tables to be labelled Fig. and Tab. insteadof Figure and Table, then you could add the following lines to mythesis.cls:
\renewcommand{\figurename}{Fig.}\renewcommand{\tablename}{Tab.}
2Note that in a class or package you should use \RequirePackage instead of \usepackage
4. CHANGING THE DOCUMENT STYLE 8

4.2 Changing the Section Headings
It is possible to customise the way your section, subsection etc headings appearby redefining the corresponding commands \section, \subsection etc using thecommand:
\@startsection{<type>}{<level>}{<indent>}{<beforeskip>}{<afterskip>}{<style>}
Definition
The six arguments are as follows:
<type> The sectioning type. This should be one of: section, subsection,subsubsection, paragraph or subparagraph. (Note no backslash.)
<level> This is the sectioning level as indicated in Table 4.2.
<indent> This should be a length, specifying the indentation from the left margin.
<beforeskip> The absolute value of the <beforeskip> specifies how much verticaldistance to leave before the heading. If <beforeskip> is negative, the firstparagraph following the section heading will not be indented.
<afterskip> The absolute value of the <afterskip> specifies how much vertical dis-tance to leave after the heading. If <afterskip> is negative, the text followingthe sectioning command will appear on the same level as the section heading.
<style> The <style> are the declarations required to set the style of the heading(e.g. \itshape for an italic heading.) Note that the last command in <style>may be a command which takes a single argument, but all the others must bedeclarations.
(Remember that \paragraph and \subparagraph produce sub-sub-sub-sectionsand sub-sub-sub-sub-sections, respectively, though most class files suppress theirnumbering and give them a negative <afterskip>.) [How to create a
\subsubsubsection]
Table 4.2: Section Levels
part -1chapter 0section 1subsection 2subsubsection 3paragraph 4subparagraph 5
As an example, suppose you want to change the section headings so that theyappear in a large italic font, you could do something like:
\renewcommand{\section}{\@startsection{section}% % the name{1}% % the level{0mm}% % the indent{-\baselineskip}% % the before skip{0.5\baselineskip}% % the after skip{\normalfont\large\itshape}} % the style
As mentioned above, the final command within the <style> argument may be acommand which takes an argument, so you could also do something like:
\renewcommand{\section}{\@startsection{section}% % the name{1}% % the level
4. CHANGING THE DOCUMENT STYLE 9

{0mm}% % the indent{-\baselineskip}% % the before skip{0.5\baselineskip}% % the after skip{\normalfont\large\MakeUppercase}} % the style
which would convert the section heading to uppercase. See A Guide to LATEX [2]for further information.
There is a counter called secnumdepth that controls what level the sections havenumbers. The levels correspond to those shown in Table 4.2. By default this valueis 2, so only parts, chapters, sections and subsections have associated numbers. Youcan use \setcounter to change the value of secnumdepth. So, for example, if youwant the \paragraph command to produce a number, do
\settocounter{secnumdepth}{4}
4.3 Changing the Chapter Headings
If you want to change the chapter or part heading style, you can’t use \@startsection.Instead you should use the \secdef command. If you load report.cls into a texteditor, you will see that both the \part and \chapter commands use \secdef. Thedefinition of \chapter has the line
\secdef\@chapter\@schapter
and \part has the line
\secdef\@part\@spart
The first argument to \secdef tells LATEX what to do if the unstarred version isused, and the second argument tells LATEX what to do if the starred version is used.So the command
\chapter{Introduction}
will use the command \@chapter, whereas the command
\chapter*{Acknowledgements}
will use the command \@schapter. The commands \@chapter and \@schapteruse the commands \@makechapterhead and \@makeschapterhead, respectively, toformat the chapter heading, so if you want to change the chapter format, you willneed to redefine the commands \@makechapterhead and \@makeschapterhead. Theeasiest way to do this is to look for the code for these commands in report.clsand copy them over to your new class file, mythesis, described earlier, and edit theappropriate formatting commands.
For example, suppose you want a line to appear above and below the chapterheading, and have the chapter heading appear in small capitals, you could do:
\renewcommand{\@makechapterhead}[1]{%\vspace*{50\p@}%{\parindent \z@ \raggedright \normalfont\hrule % horizontal line\vspace{5pt}% % add vertical space\ifnum \c@secnumdepth >\m@ne
\huge\scshape \@chapapp\space \thechapter % Chapter number\par\nobreak\vskip 20\p@
\fi\interlinepenalty\@M\Huge \scshape #1\par % chapter title\vspace{5pt}% % add vertical space\hrule % horizontal rule
4. CHANGING THE DOCUMENT STYLE 10

\nobreak\vskip 40\p@
}}
\renewcommand{\@makeschapterhead}[1]{%\vspace*{50\p@}%{\parindent \z@ \raggedright\normalfont\hrule % horizontal line\vspace{5pt}% % add vertical space\interlinepenalty\@M\Huge \scshape #1\par % chapter title\vspace{5pt}% % add vertical space\hrule % horizontal line\nobreak\vskip 40\p@
}}
You can download the file mythesis.cls which includes all the examples coveredso far in this chapter.
4.4 Adding to the Table of Contents
Starred versions of the sectioning commands are not added to the table of contentsby default, but they can be added using:
\addcontentsline{<ext>}{<type>}{<text>} Definition
<ext> This should be the extension of the file where the contents are written. Sothis will be toc for the table of contents, lof for the list of figures and lotfor the list of tables.
<type> This is the type of object you are adding to the contents. e.g. chapter,section, figure.
<text> This is the text that should go in the contents.
For example, the bibliography is generated using a starred version of the \chaptercommand, so it doesn’t get added to the table of contents. To add it to the tableof contents, you can do
\addcontentsline{toc}{chapter}{\bibname}
The counter tocdepth controls the section level depth in the table of contents.The levels corresponding to the sections are shown Table 4.2.
The report class file sets tocdepth to 2, which means that only the parts, chap-ters, sections and subsections will be entered into the table of contents. You canuse \setcounter to change the value of tocdepth. For example, to also include thesubsubsections, paragraphs and subparagraphs, do: [The format of the Table
of Contents, etc.]\setcounter{tocdepth}{5}
4.5 Defining a New Page Style
There are two page styles pre-defined by LATEX3: empty and plain. These page [Alternative head- andfootlines in LATEX]styles can be selected either using:
\pagestyle{<style>} Definition
3most of the standard class files, including report, also define the page styles headings andmyheadings
4. CHANGING THE DOCUMENT STYLE 11

to change the style “from this point onwards”, or
\thispagestyle{<style>} Definition
to change the style for a specific page.Both these commands call the command \ps@<style>, and it is this command
which redefines the header and footer. So, \pagestyle{plain} calls the command\ps@plain which in turn calls the commands that redefine the header and footer,and \pagestyle{empty} calls the command \ps@empty and so on.
So, to define a new page style called, say, thesis, you first need to define acommand called \ps@thesis. Since the command name contains an @ character,this definition needs to go in a style file or class file.
The headers and footers for odd and even numbered pages can be specified byredefining the commands: \@oddhead, \@evenhead, \@oddfoot and \@evenfoot.
For example, suppose you want the new page style to have empty headers, andthe footers to contain the page number with a dash on either side (e.g. -12- ) centred,then you could do:
\newcommand{\ps@thesis}{\renewcommand{\@oddhead}{}% header blank\renewcommand{\@evenhead}{}% header blank\renewcommand{\@oddfoot}{\hfill-\thepage-\hfill}%\renewcommand{\@evenfoot}{\hfill-\thepage-\hfill}%
}
Note that if you are using the default oneside option to the report class file, onlythe \@oddhead and \@oddfoot commands will have any effect. If you want the oddand even numbered pages to be different, you must remember to use the twosideoption4. It is also possible to customise page styles using the fancyhdr package. SeeA Guide to LATEX [2] for an example.
Unless you are told otherwise, I recommend that you use the headings pagestyle for your thesis.
4this generally isn’t appropriate for a thesis
4. CHANGING THE DOCUMENT STYLE 12

Chapter 5
Generating a Bibliography
When you are writing a large document such as a PhD thesis, I strongly recommendthat you use BibTEX rather than typing up the bibliography in a thebibliographyenvironment. If you use BibTEX:
1. Only the references that you cite are included in the bibliography. (Examinerstend to fault uncited references1.)
2. References are displayed in a consistent manner.
3. Entries can be sorted in order of citation or alphabetically.
4. The style can easily be changed by simply using a different bibliography stylefile.
Recall that the example file listed in Chapter 2 had the lines:
\bibliographystyle{plain}\bibliography{thesis}
The command
\bibliographystyle{<style>} Definition
indicates which BibTEX style file (.bst) to use without the extension. The aboveexample uses plain.bst. The command
\bibliography{<database>} Definition
indicates which database (.bib) to use. The above example uses the databasethesis.bib, which we will need to create. Since the document currently doesn’thave any \cite commands, and thesis.bib does not yet exist, the DVI file doesnot yet have a bibliography.
There are many bibliography styles, but the basic ones are: [Choosing a bibliographystyle]
abbrv Entries sorted alphabetically with abbreviated first names, months and jour-nal names.
alpha Entries sorted alphabetically with the citation represented by abbreviatedauthor surname and year instead of a number.
plain Entries sorted alphabetically, with the citation represented by a number.
unsrt Entries sorted according to citation with the citation represented by a num-ber.
See A Guide to LATEX [2] or The LATEX Companion [1] for information about otherbibliography styles, and check with your supervisor to see if there is a particularstyle you should be using.
Entries in the bibliography database should have the following form: [Creating a BibTEXbibliography]
1When your examiners read through your thesis, they can check off each citation they encounteragainst your bibliography. When they reached the end of the thesis, they can then look throughthe bibliography for unchecked entries. One or two will appear the result of carelessness, whereasa large quantity will look like padding and may lead the examiners to suspect a certain amount ofduplicity on your part.
13

@<entry type>{<keyword>,<field name> = "<text>",
...
<field name> = "<text>"}
where <entry type> indicates the type of entry (e.g. book or article). Standardentry types are listed in Table 5.1.
Table 5.1: Standard BiBTeX entry types
article Article from a journalbook Published bookbooklet Printed work without a publisherconference Identical to inproceedingsinbook Part, chapter, section etc of a bookincollection A chapter of a book with its own author and titleinproceedings An article in a conference proceedingsmanual Technical documentationmastersthesis A master’s thesismisc Non-standard workphdthesis PhD thesisproceedings Conference proceedingstechreport Report published by an institutionunpublished Unpublished work with an author and title
Within an entry, <keyword> is a short label that is used to cite this work withthe \cite command. If you have written bibliographies with the thebibliographyenvironment, it’s the same as the argument to \bibitem. There then follows acomma-separated list of fields of the form <field name> = <value>. The <fieldname> indicates what kind of field it is, e.g. title, author. Table 5.2 lists thestandard fields. Note that some bibliography styles may define additional non-standard fields, such as email or url. See A Guide to LATEX [2] or The LATEX [URLS in BibTEX
bibliographies]Companion [1] for information about other fields not listed in Table 5.2.The required and optional fields for the standard entry types are listed in Ta-
ble 5.3. If an entry has a field that is neither required nor optional, BibTEX willignore it. This means that you can have a field called, say, abstract, which will beignored by the standard bibliography styles, but will be included if you use a bibli-ography style that has an abstract field. So you can store additional informationin the database which won’t appear in the bibliography.
BibTEX uses the European assumption that names are composed of forenames, [BibTEX sorting andname prefixes]an optional “von” part which starts with a lower case letter, a surname and an op-
tional “jr” part. In order to enable BibTEX to correctly identify these components,names must be entered in one of the following formats:
• <forenames> <von> <surname>
• <von> <surname>, <forenames>
• <von> <surname>, <jr>, <forenames>
Examples (using a style that converts forenames to initials): [Transcribed initials inBibTEX]
5. GENERATING A BIBLIOGRAPHY 14

Table 5.2: Standard BiBTeX fields
address Publisher/Institution’s addressauthor Author namesbooktitle Title of book where only a part of the book is being citedchapter Chapter or section numberedition The edition of the bookhowpublished How a non-standard work was publishedinstitution The institute sponsoring the workjournal The name of the journalmonth The month the work was publishednote Any additional informationnumber The number of the journal, technical report etcorganization Organization sponsoring conference or manualpages Page number or page rangepublisher Publisher’s nameschool Academic institution where thesis was writtenseries Name of a seriestitle The title of the worktype The type of technical reportvolume The volume number.
Table 5.3: Required and Optional Fields
Entry Type Required Fields Optional Fieldsarticle author, title, journal, year volume, month, note, number, pagesbook author or editor, title, publisher,
yearaddress, edition, volume or number,month, note, pages, series
booklet title author, address, howpublished, month,note, year
inbook author or editor, chapter or pages,title, publisher, year
address, edition, volume or number,month, note, series, type
incollection author, title, booktitle, publisher,year
address, chapter, editor, edition,volume or number, month, note, pages,series, type
inproceedings author, title, booktitle, year address, editor, volume or number,month, note, organization, pages,publisher, series, type
manual title author, address, edition, month, note,organization, year
mastersthesis author, title, school, year address, month, note, typemisc — author, howpublished, month, note,
title, yearphdthesis author, title, school, year address, month, note, typeproceedings title, year editor, organization, address, volume
or number, series, month, publisher,note
techreport author, title, institution, year type, number, address, month, noteunpublished author, title, note month, year
5. GENERATING A BIBLIOGRAPHY 15

Entry Output (“abbrv” style)"Alex Thomas von Neumann" A.T. von Neumann"John Chris {Smith Jones}" J.C. Smith Jones"van de Klee, Mary-Jane" M.-J. van de Klee"Smith, Jr, Fred John" F.J. Smith, Jr"Maria {\uppercase{d}e La} Cruz" M. De La Cruz
Compare the last example with: "Maria De La Cruz" which would produce: M.D. L. Cruz, which is incorrect. Let’s analyse this last example in more detail:BibTEX always expects the “von” part to start with a lower case letter, but De andLa both start with an upper case letter, so BibTEX will assume that these formpart of the forenames. However, BibTEX will ignore any LATEX commands such as\uppercase in \uppercase{d}e since it assumes that the command is an accentcommand. So when it parses \uppercase{d}e it will skip \uppercase and look at [Accents in
bibliographies]the following letter. In this case it is d which is lower case, so from BibTEX’s pointof view the word \uppercase{d}e starts with a lower case letter, so it is thereforethe “von” part. You can either do the same with the “La” part, or, as in the aboveexample, you can place it in the same group as \uppercase{d}e. If the names inyour bibliography don’t look correct, then it is likely that you haven’t followed thecorrect name format in your .bib file. (Note that this also applies to the names inthe editor field.)
Multiple authors should be separated by the keyword and. Here is an example [BibTEX doesn’tunderstand lists ofnames]
using the book entry:
@book{goossens97,author = "Goossens, Michel and Rahtz, Sebastian and
Mittelbach, Frank",title = "The \LaTeX\ graphics companion: illustrating
documents with \TeX\ and {PostScript}",publisher = "Addison Wesley Longman, Inc",year = 1997
}
In this example, the <keyword> is goossens97, so you cite the entry using thecommand \cite{goossens97}. The standard bibliography styles usually converttitles to lower case, so the name PostScript is enclosed in curly braces to preventthis from happening.
Note that curly braces {} can be used instead of double quotes. The aboveexample can just as easily be written:
@book{goossens97,author = {Goossens, Michel and Rahtz, Sebastian and
Mittelbach, Frank},title = {The \LaTeX\ graphics companion: illustrating
documents with \TeX\ and {PostScript}},publisher = {Addison Wesley Longman, Inc},year = 1997
}
Numbers (such as the year 1997) don’t need to be delimited with quotes orbraces. So you can have
pages = 10
but a page range would need to be written:
pages = "10--45"
Bibliography styles always have three-letter abbreviations for months: jan, feb,mar, etc. These should be used instead of typing them in explicitly, as their formatdepends on the bibliography style. These abbreviations should be entered withoutquotes. e.g.:
5. GENERATING A BIBLIOGRAPHY 16

@inproceedings{talbot97,author = "Talbot, Nicola and Cawley, Gavin",title = "A fast index assignment algorithm for
robust vector quantisation of image data",booktitle = "Proceedings of the I.E.E.E. International
Conference on Image Processing",address = "Santa Barbara, California, USA",month = oct,year = 1997
}
The following is an example of a bibliography database (you can download it ifyou want):
@book{goossens97,author = "Goossens, Michel and Rahtz, Sebastian and
Mittelbach, Frank",title = "The \LaTeX\ graphics companion: illustrating
documents with \TeX\ and {PostScript}",publisher = "Addison Wesley Longman, Inc",year = 1997
}
@inproceedings{talbot97,author = "Talbot, Nicola L. C. and Cawley, Gavin C.",title = "A fast index assignment algorithm for
robust vector quantisation of image data",booktitle = "Proceedings of the I.E.E.E. International
Conference on Image Processing",address = "Santa Barbara, California, USA",month = oct,year = 1997
}
@article{cawley96,author = "Cawley, Gavin C. and Talbot, Nicola L. C.",title = "A fast index assignment algorithm for vector
quantization over noisy transmission channels",journal = "I.E.E. Electronic Letters",number = 15,volume = 32,pages = "1343--1344",month = jul,year = 1996
}
@incollection{wainwright93,author = "Wainwright, Robert B.",title = "Hazards from {Northern} Native Foods",booktitle = "\emph{Clostridium botulinum}: Ecology and
Control in Foods",chapter = 12,pages = "305--322",editor = "Hauschild, Andreas H. W. and Dodds,
Karen L.",publisher = "Marcel Dekker, Inc",year = 1993
}
5. GENERATING A BIBLIOGRAPHY 17

Once you have set up your bibliography database, you will need to first LATEXyour document, then call BibTEX and then LATEX your document twice to get all thecross references up to date. If you are using TeXnicCenter, when you create a newproject, click on the ‘Uses BiBTeX’ option, and it will automatically call BibTEXwhen you click on the build icon. If you are using a command prompt, then if yourfile is called, say, thesis.tex, you will need to type the following commands: [“Normal” use of
BibTEX from LATEX]latex thesisbibtex thesislatex thesislatex thesis
Note that you are specifying the auxiliary file when calling BibTEX, without theextension. You can have a bibliography database that has a different name fromyour LATEX file, but you use the name of the auxiliary file2 when calling BibTEX.For example, if your thesis is saved in the file thesis.tex and your bibliographydatabase is saved in the file ref.bib, then you still need to do:
latex thesisbibtex thesislatex thesislatex thesis
In fact, you can use multiple bibliography databases (which isn’t the same as havingmultiple bibliographies in your document.) Suppose your references are defined [Multiple
bibliographies?]in the files ref1.bib and ref2.bib, then you need to specify both databases inthesis.tex:
\bibliography{ref1}\bibliography{ref2}
Alternatively you can specify the databases in a list:
\bibliography{ref1,ref2}
If you have references which you find yourself frequently using, such as your ownpublications, you may prefer to keep a .bib file containing these references in acentral location, such as in your local texmf tree. If you are using a UNIX-likeoperating system, this will typically be in ~/texmf/bibtex/bib/. If you are us-ing Windows, this may be in the folder c:\localtexmf\bibtex\bib\ but checkyour TEX installation documentation. If you do this, remember to refresh the TEXdatabase. [Installing things on a
(La)TeX system]Illustrations of some of the common bibliography styles are shown in Figures 5.1,5.2, 5.3, 5.4, 5.5, 5.6 and 5.7. Note that the apalike bibliography style requires theapalike package.
5.1 Back-References
The backref package supplied with the hyperref bundle will place a comma-separatedlist of section or page numbers on which the work was cited at the end of each itemin the bibliography. Each bibliography item in the thebibliography environment must [References from the
bibliography to thecitation]
be separated by a blank line, but as BibTEX does this automatically, you only needto worry about it if you are creating your thebibliography environment without theaid of BibTEX.
The list of numbers will by default refer to the page numbers in which thecorresponding \cite commands are located, but this can be changed to the sectionnumbers by passing the options ref to the backref package. If you are using thehyperref package, then the backref package will be loaded if you use the hyperrefpackage options backref or backref=section.
2This will typically have the same base name as your main document file, but may be differentif you are using a bibliography managing package such as bibunits.
5. GENERATING A BIBLIOGRAPHY 18

Bibliography
[1] G. C. Cawley and N. L. C. Talbot. A fast index assignment algorithm forvector quantization over noisy transmission channels. I.E.E. Electronic
Letters, 32(15):1343–1344, July 1996.
[2] M. Goossens, S. Rahtz, and F. Mittelbach. The LATEX graphics compan-
ion: illustrating documents with TEX and PostScript. Addison WesleyLongman, Inc, 1997.
[3] N. L. C. Talbot and G. C. Cawley. A fast index assignment algorithm forrobust vector quantisation of image data. In Proceedings of the I.E.E.E.
International Conference on Image Processing, Santa Barbara, California,USA, Oct. 1997.
[4] R. B. Wainwright. Hazards from Northern native foods. In A. H. W.Hauschild and K. L. Dodds, editors, Clostridium botulinum: Ecology
and Control in Foods, chapter 12, pages 305–322. Marcel Dekker, Inc,1993.
Figure 5.1: abbrv bibliography style
Bibliography
[1] Cawley, G. C., and Talbot, N. L. C. A fast index assignmentalgorithm for vector quantization over noisy transmission channels. I.E.E.
Electronic Letters 32, 15 (July 1996), 1343–1344.
[2] Goossens, M., Rahtz, S., and Mittelbach, F. The LATEX graphics
companion: illustrating documents with TEX and PostScript. AddisonWesley Longman, Inc, 1997.
[3] Talbot, N. L. C., and Cawley, G. C. A fast index assignment algo-rithm for robust vector quantisation of image data. In Proceedings of the
I.E.E.E. International Conference on Image Processing (Santa Barbara,California, USA, Oct. 1997).
[4] Wainwright, R. B. Hazards from Northern native foods. In Clostrid-ium botulinum: Ecology and Control in Foods, A. H. W. Hauschild andK. L. Dodds, Eds. Marcel Dekker, Inc, 1993, ch. 12, pp. 305–322.
Figure 5.2: acm bibliography style
5. GENERATING A BIBLIOGRAPHY 19

Bibliography
[CT96] Gavin C. Cawley and Nicola L. C. Talbot. A fast index assignmentalgorithm for vector quantization over noisy transmission channels.I.E.E. Electronic Letters, 32(15):1343–1344, July 1996.
[GRM97] Michel Goossens, Sebastian Rahtz, and Frank Mittelbach. The
LATEX graphics companion: illustrating documents with TEX and
PostScript. Addison Wesley Longman, Inc, 1997.
[TC97] Nicola L. C. Talbot and Gavin C. Cawley. A fast index assignmentalgorithm for robust vector quantisation of image data. In Proceed-
ings of the I.E.E.E. International Conference on Image Processing,Santa Barbara, California, USA, October 1997.
[Wai93] Robert B. Wainwright. Hazards from Northern native foods. InAndreas H. W. Hauschild and Karen L. Dodds, editors, Clostrid-ium botulinum: Ecology and Control in Foods, chapter 12, pages305–322. Marcel Dekker, Inc, 1993.
Figure 5.3: alpha bibliography style
Bibliography
[1] M. Goossens, S. Rahtz, and F. Mittelbach, The LATEX graphics compan-
ion: illustrating documents with TEX and PostScript. Addison WesleyLongman, Inc, 1997.
[2] N. L. C. Talbot and G. C. Cawley, “A fast index assignment algorithm forrobust vector quantisation of image data,” in Proceedings of the I.E.E.E.
International Conference on Image Processing, (Santa Barbara, Califor-nia, USA), Oct. 1997.
[3] G. C. Cawley and N. L. C. Talbot, “A fast index assignment algorithm forvector quantization over noisy transmission channels,” I.E.E. Electronic
Letters, vol. 32, pp. 1343–1344, July 1996.
[4] R. B. Wainwright, “Hazards from Northern native foods,” in Clostridiumbotulinum: Ecology and Control in Foods (A. H. W. Hauschild and K. L.Dodds, eds.), ch. 12, pp. 305–322, Marcel Dekker, Inc, 1993.
Figure 5.4: ieeetr bibliography style
5. GENERATING A BIBLIOGRAPHY 20

Bibliography
[1] Gavin C. Cawley and Nicola L. C. Talbot. A fast index assignmentalgorithm for vector quantization over noisy transmission channels. I.E.E.
Electronic Letters, 32(15):1343–1344, July 1996.
[2] Michel Goossens, Sebastian Rahtz, and Frank Mittelbach. The LATEX
graphics companion: illustrating documents with TEX and PostScript.Addison Wesley Longman, Inc, 1997.
[3] Nicola L. C. Talbot and Gavin C. Cawley. A fast index assignment algo-rithm for robust vector quantisation of image data. In Proceedings of the
I.E.E.E. International Conference on Image Processing, Santa Barbara,California, USA, October 1997.
[4] Robert B. Wainwright. Hazards from Northern native foods. In AndreasH. W. Hauschild and Karen L. Dodds, editors, Clostridium botulinum:
Ecology and Control in Foods, chapter 12, pages 305–322. Marcel Dekker,Inc, 1993.
Figure 5.5: plain bibliography style
Bibliography
[1] Michel Goossens, Sebastian Rahtz, and Frank Mittelbach. The LATEX
graphics companion: illustrating documents with TEX and PostScript.Addison Wesley Longman, Inc, 1997.
[2] Nicola L. C. Talbot and Gavin C. Cawley. A fast index assignment algo-rithm for robust vector quantisation of image data. In Proceedings of the
I.E.E.E. International Conference on Image Processing, Santa Barbara,California, USA, October 1997.
[3] Gavin C. Cawley and Nicola L. C. Talbot. A fast index assignmentalgorithm for vector quantization over noisy transmission channels. I.E.E.
Electronic Letters, 32(15):1343–1344, July 1996.
[4] Robert B. Wainwright. Hazards from Northern native foods. In AndreasH. W. Hauschild and Karen L. Dodds, editors, Clostridium botulinum:
Ecology and Control in Foods, chapter 12, pages 305–322. Marcel Dekker,Inc, 1993.
Figure 5.6: unsrt bibliography style
5. GENERATING A BIBLIOGRAPHY 21

Bibliography
Cawley, G. C. and Talbot, N. L. C. (1996). A fast index assignment algo-rithm for vector quantization over noisy transmission channels. I.E.E.
Electronic Letters, 32(15):1343–1344.
Goossens, M., Rahtz, S., and Mittelbach, F. (1997). The LATEX graphics
companion: illustrating documents with TEX and PostScript. AddisonWesley Longman, Inc.
Talbot, N. L. C. and Cawley, G. C. (1997). A fast index assignment algo-rithm for robust vector quantisation of image data. In Proceedings of the
I.E.E.E. International Conference on Image Processing, Santa Barbara,California, USA.
Wainwright, R. B. (1993). Hazards from Northern native foods. In Hauschild,A. H. W. and Dodds, K. L., editors, Clostridium botulinum: Ecology and
Control in Foods, chapter 12, pages 305–322. Marcel Dekker, Inc.
Figure 5.7: apalike bibliography style (requires apalike package)
The backref package uses the command \backref to control the format of thelist of back-references. Without the hyperref package, the list of back-references hasan introductory text supplied by \backrefpagesname or \backrefsectionsname.See the backref package documentation for further detail.
This document uses the backref package. The effect can be seen in the bibliog-raphy on page 50.
5.2 Troubleshooting
• BibTEX writes the thebibliography environment to a .bbl file, which is theninput into the document by \bibliography. If you have made a LATEX errorin the .bib file, this error will be copied to the .bbl file. If you have correctedthe error in the .bib file, but you are still getting an error when you LATEXyour document, try deleting the .bbl file.
• Remember to use double quotes or braces to delimit the field names in your.bib file.
• Remember to put a comma at the end of each field (except the last).
• It is better to only use alphanumerical characters in the keywords. Some punc-tuation characters such as - should be fine, but spaces are not recommended,and commas should definitely be avoided.
• The LATEX comment symbol (%) is not a comment character in a .bib file.
• If you have entered a field in the .bib file, but it doesn’t appear in the bibli-ography, check to make sure that the field is required or optional for that typeof entry, and check the spelling.
• Check the log file (.blg) generated by BibTEX for messages.
5. GENERATING A BIBLIOGRAPHY 22

Chapter 6
Formatting
6.1 Double Spacing
Double spacing is usually frowned upon in the world of modern typesetting, how-ever it is usually a requirement when you are writing a PhD thesis as it gives theexaminers extra space to write comments.
Double spacing can either be achieved using the setspace package, or by re-defining the value of \baselinestretch. The value depends on the font size (see [Double-spaced
documents in LATEX]Table 6.1). To switch back to single spacing set \baselinestretch back to 1.
Table 6.1: Double spacing values for \baselinestretch
Font Size 10pt 11pt 12pt\baselinestretch 1.67 1.62 1.66
For example, if you are using 12pt font, you will need the following line:
\renewcommand{\baselinestretch}{1.66}
It is however better to use the setspace package which provides the declarations\singlespacing, \onehalfspacing and \doublespacing.
6.2 Changing the Title Page
The title page style generated by \maketitle may not be appropriate for theschool/university’s specifications. If this is the case, you can use the titlepage envi-ronment instead. For example:
↑Input
\begin{titlepage}\begin{center}\vspace*{1in}{\LARGE A Sample PhD Thesis}\par\vspace{1.5in}{\large A. N. Other}\par\vfillA Thesis submitted for the degree of Doctor of Philosophy\par\vspace{0.5in}School of Computing Sciences\par\vspace{0.5in}University of East Anglia\par\vspace{0.5in}July 2004\end{center}\end{titlepage}
↓Input
The resulting output is shown in Figure 6.1.
23

A Sample PhD Thesis
A. N. Other
A Thesis submitted for the degree of Doctor of Philosophy
School of Computing Sciences
University of East Anglia
July 2004
Figure 6.1: Example Title Page
24

Check with your supervisor to see if there is a particular layout required for thetitle page. Note that some classes, such as memoir and scrreprt provide commandsto modify the title layout. The titling package also provides such facilities. [The style of document
titles]
6.3 Verbatim Text
There may be times when you want to include text exactly as you have typed itinto your source code. For example, you may want to include a short segment ofcomputer code. This can be done using the verbatim environment. For example: [Code listings in LATEX]
↑Input\begin{verbatim}
#include <stdio.h>
int main(){
printf{"Hello World\n"};
return 1;}
\end{verbatim} ↓Input
would produce the following output:
↑Output
#include <stdio.h>
int main(){
printf{"Hello World\n"};
return 1;}
↓Output
The contents of a file can be included verbatim using the command: [Including a file verbatimin LATEX]
\verbatiminput{<filename>} Definition
defined in the verbatim package. For example:
\verbatiminput{helloW.c}
where helloW.c is the filename (remember to use a forward slash / as a directorydivider, even if you are using Windows).
Note: it is not usually appropriate to have reams of listings in your thesis. Itcan annoy an examiner if you have included every single piece of code you havewritten during your PhD, as it comes across as padding to make it look as thoughyour thesis is a lot larger than it really is. (Examiners are not easily fooled, andit’s best not to irritate them as it is likely to make them less sympathetic towardsyou.) If you want to include listings in your thesis, check with your supervisor firstto find out whether or not it is appropriate.
6. FORMATTING 25
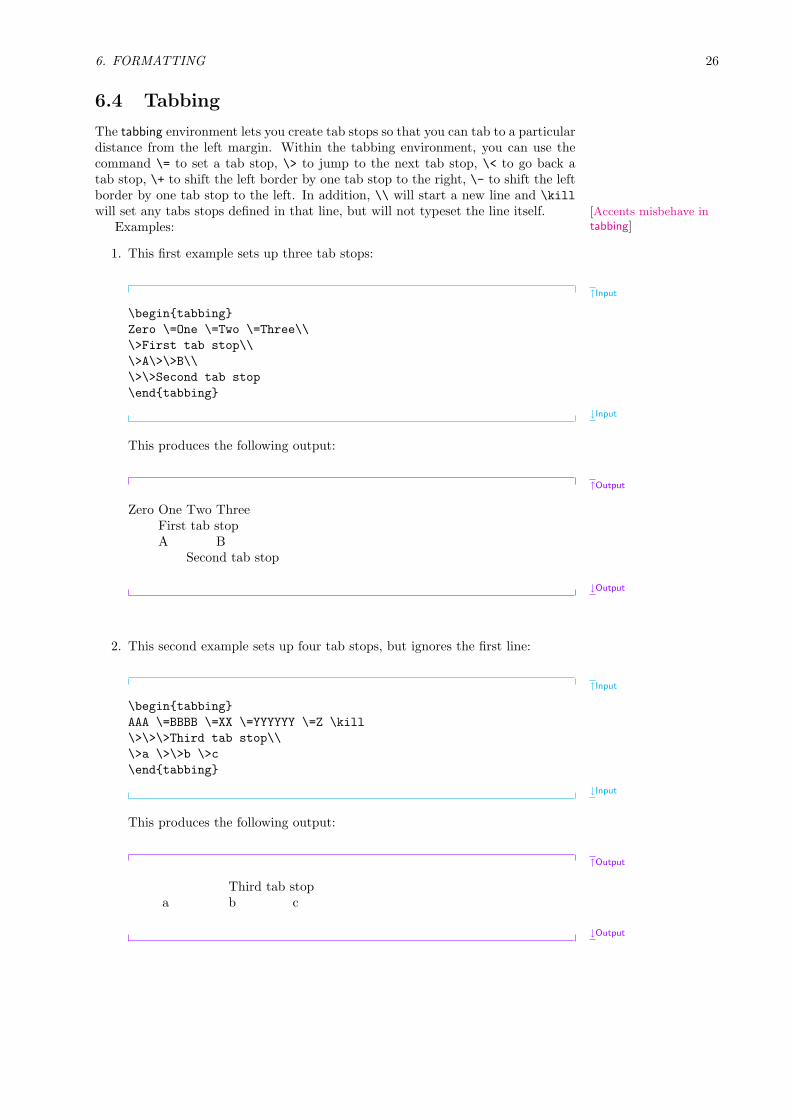
6.4 Tabbing
The tabbing environment lets you create tab stops so that you can tab to a particulardistance from the left margin. Within the tabbing environment, you can use thecommand \= to set a tab stop, \> to jump to the next tab stop, \< to go back atab stop, \+ to shift the left border by one tab stop to the right, \- to shift the leftborder by one tab stop to the left. In addition, \\ will start a new line and \killwill set any tabs stops defined in that line, but will not typeset the line itself. [Accents misbehave in
tabbing]Examples:
1. This first example sets up three tab stops:
↑Input
\begin{tabbing}Zero \=One \=Two \=Three\\\>First tab stop\\\>A\>\>B\\\>\>Second tab stop\end{tabbing}
↓Input
This produces the following output:
↑Output
Zero One Two ThreeFirst tab stopA B
Second tab stop
↓Output
2. This second example sets up four tab stops, but ignores the first line:
↑Input
\begin{tabbing}AAA \=BBBB \=XX \=YYYYYY \=Z \kill\>\>\>Third tab stop\\\>a \>\>b \>c\end{tabbing}
↓Input
This produces the following output:
↑Output
Third tab stopa b c
↓Output
6. FORMATTING 26

6.5 Theorems and Algorithms
A PhD thesis can often contain theorems, lemmas, definitions etc. These structurescan be created using the command
\newtheorem{<type>}{<title>}[<outer counter>] Definition
where <type> is the type of your structure (e.g. theorem), <title> is the word thatis printed in bold at the start of the structure (e.g. Theorem) and if the optionalargument <outer counter> is present, then the structure’s counter should dependon <outer counter> (as in the optional argument to \newcounter.)
You should typically define your new theorem either in the preamble or in apackage or class file. Once you have defined your new theorem, a new environmentis created whose name is given by <type>. This environment has an optionalargument that you can use to specify a caption for the structure.
Examples:
1. Define a theorem structure. The counter belonging to this structure is notdependent on any other counter:
↑Input
\newtheorem{theorem}{Theorem}
\begin{theorem}If $\lambda$ is an eigenvalue of $\mathbf{B}$ witheigenvector $\vec{\xi}$, then $\lambda^n$ is aneigenvalue of $\mathbf{B}^n$ with eigenvector $\vec{\xi}$.\end{theorem}
↓Input
This gives the following output:
↑Output
Theorem 1 If λ is an eigenvalue of B with eigenvector ~ξ, then λn is aneigenvalue of Bn with eigenvector ~ξ.
↓Output
(See LATEX for Complete Novices [5] if you want to know how to redefine the\vec command so that the vector appears in bold.)
2. In this example, the theorem is defined to be dependent on the chapter counter.The theorem counter will be reset each time a new chapter is started:
↑Input
\newtheorem{theorem}{Theorem}[chapter]
\begin{theorem}If $\lambda$ is an eigenvalue of $\mathbf{B}$ witheigenvector $\vec{\xi}$, then $\lambda^n$ is aneigenvalue of $\mathbf{B}^n$ with eigenvector $\vec{\xi}$.\end{theorem}
↓Input
This gives the following output:
↑Output
6. FORMATTING 27

Theorem 6.1 If λ is an eigenvalue of B with eigenvector ~ξ, then λn is aneigenvalue of Bn with eigenvector ~ξ.
↓Output
3. In this example, the theorem is given a caption:
↑Input
\newtheorem{theorem}{Theorem}[chapter]
\begin{theorem}[Eigenvector Powers]If $\lambda$ is an eigenvalue of $\mathbf{B}$ witheigenvector $\vec{\xi}$, then $\lambda^n$ is aneigenvalue of $\mathbf{B}^n$ with eigenvector $\vec{\xi}$.\end{theorem}
↓Input
This gives the following output:
↑Output
Theorem 6.1 (Eigenvector Powers) If λ is an eigenvalue of B with eigen-vector ~ξ, then λn is an eigenvalue of Bn with eigenvector ~ξ.
↓Output
4. In this example an algorithm structure is created. The commands \hfill\parare used to prevent the tabbing environment from running into the algorithmtitle.
↑Input
\newtheorem{algorithm}{Algorithm}
\begin{algorithm}[Gauss-Seidel Algorithm]\hfill\par\begin{tabbing}1. \=For $k=1$ to maximum number of iterations\\\>2. For \=$i=1$ to $n$\\\>\>Set\begin{math}x_i^{(k)} =\frac{b_i-\sum_{j=1}^{i-1}a_{ij}x_j^{(k)}
-\sum_{j=i+1}^{n}a_{ij}x_j^{(k-1)}}%{a_{ii}}
\end{math}\\\>3. If $\|\vec{x}^{(k)}-\vec{x}^{(k-1)}\| < \epsilon$,where $\epsilon$ is a specified stopping criteria, stop.\end{tabbing}\end{algorithm}
↓Input
This will give the following output:
↑Output
Algorithm 1 (Gauss-Seidel Algorithm)
6. FORMATTING 28

1. For k = 1 to maximum number of iterations2. For i = 1 to n
Set x(k)i =
bi−∑i−1
j=1aijx
(k)j
−∑n
j=i+1aijx
(k−1)j
aii
3. If ‖~x(k) − ~x(k−1)‖ < ε, where ε is a specified stopping criteria, stop.
↓Output
The last example doesn’t look right, as algorithms tend to be displayed in anupright font not an italic font. The package amsthm extends the functionality [Typesetting pseudocode
in LATEX]of \newtheorem and provides three theorem styles:
plain Title and number in bold, body in italic (default).
definition Title and number in bold, body in normal font.
remark Title and number in italic, body in normal font.
The above example can now be changed to:
↑Input
\theoremstyle{definition}\newtheorem{algorithm}{Algorithm}
\begin{algorithm}[Gauss-Seidel Algorithm]\hfill\par\begin{tabbing}1. \=For $k=1$ to maximum number of iterations\\\>2. For \=$i=1$ to $n$\\\>\>Set\begin{math}x_i^{(k)} =\frac{b_i-\sum_{j=1}^{i-1}a_{ij}x_j^{(k)}
-\sum_{j=i+1}^{n}a_{ij}x_j^{(k-1)}}%{a_{ii}}
\end{math}\\\>3. If $\|\vec{x}^{(k)}-\vec{x}^{(k-1)}\| < \epsilon$,where $\epsilon$ is a specified stopping criteria, stop.\end{tabbing}\end{algorithm}
↓Input
This will give the following output:
↑OutputAlgorithm 1 (Gauss-Seidel Algorithm)
1. For k = 1 to maximum number of iterations2. For i = 1 to n
Set x(k)i =
bi−∑i−1
j=1aijx
(k)j
−∑n
j=i+1aijx
(k−1)j
aii
3. If ‖~x(k) − ~x(k−1)‖ < ε, where ε is a specified stopping criteria, stop.
↓Output
6. FORMATTING 29

(You can download an example of this.)Alternatively, if you want your algorithms to behave like figures and tables, you
can use the \newfloat command defined in the float package:
\newfloat{<type>}{<placement>}{<ext>}[<outer counter>] Definition
where <type> is the name of your new float, <placement> is the default placementspecifier (t, b, p and h), <ext> is the extension for the list of <type> and as before,the presence of <outer counter> indicates that the counter associated with this newfloat should depend on <outer counter>.
You can also specify the style of your new floats by issuing the command:
\floatstyle{<style>} Definition
before defining your new floats, where <style> can be one of:
plain Same as the standard figure and table floats, except that the caption is alwaysplaced at the end of the float.
boxed The body of the float is placed in a box, and the caption is printed belowthe box.
ruled The caption is printed at the top with a rule above and below it, and thereis a rule at the end of the float.
The name associated with a float is defined using the command:
\floatname{<type>}{<name>} Definition
where <type> is the name of the float environment (as defined in \newfloat) and<name> is the name associated with that float.
The list of <type> can be produced using the command:
\listof{<type>}{<title>} Definition
So, instead of defining our algorithm environment using \newtheorem, we couldinstead define it using \newfloat as follows:
↑Input
\floatstyle{ruled}\newfloat{algorithm}{htbp}{loa}\floatname{algorithm}{Algorithm}
\begin{algorithm}\caption{Gauss-Seidel Algorithm}\label{alg:GS}
\begin{tabbing}1. \=For $k=1$ to maximum number of iterations\\\>2. For \=$i=1$ to $n$\\\>\>Set\begin{math}x_i^{(k)} =\frac{b_i-\sum_{j=1}^{i-1}a_{ij}x_j^{(k)}
-\sum_{j=i+1}^{n}a_{ij}x_j^{(k-1)}}{a_{ii}}\end{math}\\\>3. If $\|\vec{x}^{(k)}-\vec{x}^{(k-1)}\| < \epsilon$,where $\epsilon$ is a specified stopping criteria, stop.\end{tabbing}\end{algorithm}
6. FORMATTING 30

↓Input
This would produce the following output:
Algorithm 1 Gauss-Seidel Algorithm
1. For k = 1 to maximum number of iterations2. For i = 1 to n
Set x(k)i =
bi−∑i−1
j=1aijx
(k)j
−∑n
j=i+1aijx
(k−1)j
aii
3. If ‖~x(k) − ~x(k−1)‖ < ε, where ε is a specified stopping criteria, stop.
The following line can then go after the list of figures and list of tables:
\listof{algorithm}{List of Algorithms}
(You can download an example of this.)
6. FORMATTING 31

Chapter 7
Generating an Index or a Glossary
It is fairly straight-forward to create an index or glossary using LATEX, and using themakeindex application makes it even easier. It is a good idea to include a glossary ina thesis, particularly if there are any symbols or abbreviations in your document, asthere are a number of different ways some symbols can be interpreted. For example,x′ could mean the derivative of x or it could mean an updated value of x (or it couldeven mean the transpose of x, but in this case x should be formatted as a vector.) Itis not wise to assume that your reader uses the same notation as you. It isn’t quiteso common to include an index in a PhD thesis, however, the LATEX user’s guide [3]states that any nonfiction work of more than twenty pages ought to have an index.
7.1 Generating an Index
If you want to generate an index, you will need the command [Generating an index in(La)TeX]
\makeindex Definition
in the preamble. The command
\index{<entry>} Definition
is used to index <entry> at that point in the document. For example, the followingcode:
↑Input
Eigenvectors\index{eigenvector} are defined \ldots↓Input
will produce the output
↑OutputEigenvectors are defined . . .↓Output
and place the entry ‘eigenvector’ in the .idx file with the associated page number.Note that if you don’t use \makeindex in the preamble, no .idx file will be
created and \index will ignore its argument.The package makeidx provides the command
\printindex Definition
which should be placed at the point in the document where you want your index toappear.
Provided you have used \makeindex and \index, once you have LATEXed yourdocument, there will be a file with the extension .idx containing all the indexinginformation as a series of \indexentry commands. This command is not definedby LATEX, so you should not input the .idx file into your document. The .idx fileneeds to be processed by an external application such as makeindex to create a filewhich contains all the LATEX commands necessary to typeset the index. This newfile has the extension .ind, and it is this file which is input by \printindex on thenext LATEX run.
If you are using TeXnicCenter you will need to select “uses makeindex” whenyou create a new project, if you are using a command prompt, you will need to do:
latex filename.texmakeindex filename.idxlatex filename.tex
32

(where filename is the base name of your source file, e.g. thesis) If you are alsousing BibTEX, you will need to do:
latex filename.texbibtex filenamemakeindex filename.idxlatex filename.texlatex filename.tex
It’s a good idea to have sub-entries within an index, to assist the reader. Forexample, you may want to index the term “matrix”, but your document may men-tion many different types of matrices, such as diagonal, block or singular. In whichcase it would be better to index the term matrix for general occurrences, and havesub-entries indexing specific types of matrices, so that the matrix entry in the indexwould look something like:
matrix, 4, 10, 22–24
diagonal, 12
block, 20, 24
singular, 33
A sub-entry can be generated using the ! character. So the above can be generatedusing the following commands:
Preamble: \makeindexPage 4: \index{matrix}Page 10: \index{matrix}Page 12: \index{matrix!diagonal}Page 20: \index{matrix!block}Page 22: \index{matrix}Page 23: \index{matrix}Page 24: \index{matrix}Page 24: \index{matrix!block}Page 33: \index{matrix!singular}End of Doc: \printindex
Note that the same entries on pages 22, 23 and 24 have been turned into a pagerange 22–24. For larger page ranges, you can specify the start of the page rangeby appending |( to the end of the index entry and the end of the page range byappending |) to the end of the index entry. For example:
Preamble: \makeindexPage 4: \index{matrix}Page 10: \index{matrix}Page 12: \index{matrix!diagonal}Page 20: \index{matrix!block}Page 22: \index{matrix|(}Page 24: \index{matrix!block}Page 30: \index{matrix|)}Page 33: \index{matrix!singular}End of Doc: \printindex
would produce the following output in the index:
matrix, 4, 10, 22–30
diagonal, 12
block, 20, 24
singular, 33
7. GENERATING AN INDEX OR A GLOSSARY 33

An index entry can refer to another entry using |see{<reference>}1. For example,
\index{singular matrix|see{matrix, singular}}
would produce the entry
singular matrix, see matrix, singular
The format of the page number can be changed using |<style> where <style> isthe name of a formatting command without the backslash. Suppose in the aboveexample, the term “matrix” is defined on page 10, then you may want the pagenumber to appear in bold to indicate that this is a primary reference. The command\textbf produces bold text, so you would need to append |textbf to the indexentry2. For example, the code:
Preamble: \makeindexPage 4: \index{matrix}Page 10: \index{matrix|textbf}Page 12: \index{matrix!diagonal}Page 20: \index{matrix!block}Page 22: \index{matrix|(}Page 24: \index{matrix!block}Page 30: \index{matrix|)}Page 33: \index{matrix!singular}End of Doc: \printindex
would produce the following output in the index:
matrix, 4, 10, 22–30
diagonal, 12block, 20, 24singular, 33
Note that if you want to apply more than one formatting command, say you wantthe number to be bold and italic, then you should define a new command with oneargument which will set the argument in that font, for example:
\newcommand{\textbfit}[1]{\textit{\bfseries #1}}
and then use this command name (without the backslash) in the \index command.(It is possible to do, say \index{matrix|itshape\textbf}, but since \itshapeis a declaration, it will set the rest of your index in that shape, until counter-acted by another font changing command. You definitely must not do somethingalong the lines of \index{matrix|textit\textbf} since this will be equivalent to\textit{\textbf}{<page number>} which will of course produce an error fromLATEX since it is syntactically incorrect.)
The application makeindex sorts the index according to the entries specified,so the word “matrix” would come before the word “modulus”, but $\mu$ will besorted on the characters $, \, m, u and then $, so µ would come before “matrix”.This may not be appropriate, so it is possible to specify how to sort the entry andhow to format the entry separately using the @ character:
\index{mu@$\mu$}
In this case the sorting is performed on the string mu, so it will appear after theword “modulus”, but it will appear in the index as µ. For more information aboutgenerating an index see the LATEX user’s guide [3], The LATEX Companion [1] or AGuide to LATEX [2].
1This in fact tells makeindex to use the command \see{<reference>} which uses \seename totypeset the word “see”. The babel package will redefine this so that it uses the relevant translation,or you can redefine \seename using \renewcommand
2The argument to the formatting command will be the page number. In fact, \see takes twoarguments, the first is the redirection text which you must supply within the argument of \index
(as shown in the example) and the second argument is the page number which \see ignores
7. GENERATING AN INDEX OR A GLOSSARY 34

7.1.1 Troubleshooting
• My index hasn’t appeared.
1. Make sure you have the command \printindex at the place where youwant the index to appear (this command is defined in the makeidx pack-age).
2. Make sure you have the command \makeindex in the preamble.
3. Make sure you LATEX the document, then run makeindex, then LATEX thedocument again.
4. Check makeindex’s log file (which has the extension .ilg by default) forerror messages.
• I want to index the character ", @, ! or | but it’s not working.
If you want any of these symbols in your index, you will need to prepend thecharacter with the double quote symbol ". For example:
\index{"@}
will index the @ character.
• I have multiple entries of the same item. For example:
identity matrix, 10, 22-30
identity matrix, 4
Check to make sure the sort argument to each of the corresponding \indexcommands is the same, pay particular attention to spaces as makeindex willtreat the following entries differently:
\index{identity matrix}\index{identity matrix}
LATEX however, treats multiple spaces the same as a single space, so the textwill appear the same in the index.
• LATEX says that the command \printindex is undefined.
You have forgotten to load the makeidx package.
7.2 Generating a Glossary
There are a number of packages available to assist creating a glossary, these includemakeglos (analogous to makeidx), nomencl, glossaries3, glosstex and gloss. The firstthree use LATEX in conjunction with makeindex, glosstex uses LATEX in conjunctionwith makeindex and glosstex whilst gloss uses LATEX in conjunction with BibTEX.This document only describes glossaries. If you are interested in using the others,you should read their accompanying documentation.
The glossaries package has the advantage over makeglos and nomencl in that youdon’t have to worry about escaping makeindex’s special characters as they are dealtwith internally. The glossary information is set using keys and you can override thedefault plural form for plurals that aren’t formed by appending the letter “s” to thesingular form. In addition, you can specify alternative text for the first time theterm is used in the document, and you can also define an associated symbol. Thisguide gives a brief overview of the glossaries package. For further details you willneed to read the package documentation.
3The glossaries package has replaced the now obsolete glossary package
7. GENERATING AN INDEX OR A GLOSSARY 35

7.2.1 Defining Glossary Entries
Firstly, in order to make the glossary (or glossaries, if you have more than one)appear, you must use the command
\makeglossaries Definition
in the preamble. This is analogous to the \makeindex command described earlier.Next you need to define the terms you want to appear in the glossary. Again,
this must be done in the preamble. This is done using the command
\newglossaryentry{<label>}{<key-val list>} Definition
The first argument <label> is a unique label to allow you to refer to this entry inyour document text. The entry will only appear in the glossary if you have referredto it in the document using one of the commands listed later. The second argumentis a comma separated <key>=<value> list. Available keys are as follows:
name The name of the entry (as it will appear in the glossary)
description A brief description of this term (to appear in the glossary)
text How this entry will appear in the document text where the singular form isrequired. If this key is omitted, the value of the name key is used.
first How this entry will appear in the document text the first time it is used,where the first use requires the singular form. If this field is omitted, thevalue of the text key is used.
plural How this entry will appear in the document text where the plural form isrequired. If this key is omitted, the value is obtained by appending the letter“s” to the value of the text key.
firstplural How this entry will appear in the document text the first time it isused, where the first use requires the plural form. If this field is omitted, thevalue is obtained by appending the letter “s” to the value of the first key.
symbol This key is provided to allow the user to specify an associated symbol, butmost glossary styles ignore this value. If omitted, the value is set to \relax.
sort This value indicates how makeindex should sort this entry. If omitted, thevalue is given by the name key.
type This is the glossary type to which this entry belongs. If omitted, the mainglossary is assumed.
For example, the following defines the term “set” and assigns a brief description.The term is given the label set. This is the minimum amount of information youmust give:
\newglossaryentry{set}% the label{name=set, % the termdescription={a collection of objects} % a brief description}
The following entry also has an associated symbol:
\newglossaryentry{U} % the label{name={universal set}, % the termdescription={the set of all things} % a brief descriptionsymbol={\ensuremath{\mathcal{U}}} % the associated symbol}
The following example uses the vertical bar symbol | which is one of makeindex’sspecial characters, but the glossaries package deals with it behind the scenes, so Idon’t need to do anything special:
7. GENERATING AN INDEX OR A GLOSSARY 36

\newglossaryentry{card}% the label{name=cardinality, % the termdescription={the number of objects within a set}, % brief descriptionsymbol={\ensuremath{|\mathcal{S}|}} % the associated symbol}
The plural of the word “matrix” is “matrices” not “matrixs”, so the term needs theplural form set explicitly:
\newglossaryentry{matrix}% the label{name=matrix, % the termdescription={a rectangular table of elements}, % brief descriptionplural=matrices % the plural}
The glossaries package also provides the shortcut command
\newacronym[<key-val list>]{<label>}{<abbrv>}{<long>} Definition
This is equivalent to:
\newglossaryentry{<label>}{type=\acronymtype,name={<abbrv>},description={<long>},text={<abbrv>},first={<long> (<abbrv>)},plural={<abbrv>s},firstplural={<long>s (<abbrv>s)},<key-val list>}
Note that the glossary type is given as \acronymtype. This will be the mainglossary by default. If you specify the package option acronym then a new glossarytype will be created called acronym and \acronymtype will be set to this value.
7.2.2 Displaying Terms in the Document
Any glossary term that has been defined in the preamble using \newglossaryentryor \newacronym, as described above, can be used in the document text using oneof the commands described in this section. Note the term will only appear in theglossary if it has been used, in the same way that when you are using BibTEX, onlythose references you cite in the text will appear in the bibliography.
\glslink[<options>]{<label>}{<text>} Definition
This command adds the term given by <label> to the relevant glossary but insteadof displaying the term in the document, it displays <text> at that point. If youhave hyperlinks enabled (for example, you are using the hyperref or html package)the <text> will be a hyperlink to the relevant entry in the glossary. The optionalargument <options> is a comma separated <key>=<value> list which may takeany of the following keys:
format This specifies how to format the associated number for this entry. It isequivalent to the \index | special character, described in Section 7.1, where,as with \index, you should not include the initial backslash. As before, if youwant to specify, say bold italic, you will need to define a new command to dothis. Again you may also use ( and ) to denote a page range.
If you are using the hyperref or html package, you will need to use one of the\hyper<xx> commands that are defined by the glossaries package, such as\hyperbf, if you want to retain a hyperlink. If you instead use \textbf youwill lose the hyperlink. See the glossaries documentation for further details.
7. GENERATING AN INDEX OR A GLOSSARY 37

counter This specifies which counter to use for the associated number in the glos-sary entry. This is usually the page number, but can be changed to, say, thesection in which the term is used.
hyper This is a boolean key which can be used to enable/disable the hyperlink tothe relevant entry in the glossary. Note that setting hyper=true will onlyhave an effect if hyperlinks are supported (through loading the hyperref orhtml packages.)
\gls[<options>]{<label>}[<insert>] Definition
This is the same as \glslink except that the link text is determined from the valueof the text or first keys supplied when the term was defined by \newglossaryentry.The first optional argument is the same as that for \glslink. The final optionalargument <insert> allows you to insert some additional text into the link text. Bydefault, this will append <insert> to the end of the link text. One of the examplesabove defined a new glossary entry labelled matrix. Suppose in my document Iwant to write, say, “the matrix’s dimensions are given by n and m”, then I can do:
the \gls{matrix}[’s] dimensions are given by $n$ and $m$
The text “matrix’s” will appear as a link. Of course, you can simply do:
the \gls{matrix}’s dimensions are given by $n$ and $m$
If there are no hyperlinks (you haven’t loaded hyperref or html) then there will be nonoticeable difference between the two lines of code above4. If you do have hyperlinksenabled then the second way will look a little odd if you use the colorlinks hyperrefoption, and will look ugly if you use the default boxed link style.
\Gls[<options>]{<label>}[<insert>] Definition
This is like \gls except that the first letter of the link text is converted to uppercase in the event that the term appears at the start of a sentence.
\GLS[<options>]{<label>}[<insert>] Definition
This is like \gls except that the entire link text is converted to upper case. This isless useful as you shouldn’t use this command in titles or page headers in the sameway that you shouldn’t put commands such as \index in similar places. If you wanta glossary term to appear in a heading or title you should use
\glsdisplaytext{<label>} Definition
This produces the value assigned with the text key when the entry was defined, butit does not add any information to the glossary nor does it generate a hyperlink.There are also analogous commands \Glsentrytext (make the first letter uppercase), \glsentryfirst (the value assigned with first key) and \Glsentryfirst(as previous, but makes the first letter upper case.)
\glspl[<options>]{<label>}[<insert>] Definition
This is analogous to \gls but produces the plural form as specified by either theplural or firstplural keys. Again there are analogous commands
\Glspl[<options>]{<label>}[<insert>] Definition
\GLSpl[<options>]{<label>}[<insert>] Definition
4assuming you haven’t changed the way in which the inserted text is added.
7. GENERATING AN INDEX OR A GLOSSARY 38

The same caveats above apply here. If you want plural forms in headings then use\glsentryplural{<label>} or \Glsentryplural{<label>}, which are analogousto \glsentrytext and \Glsentrytext, or \glsentryfirstplural{<label>} or\Glsentryfirstplural{<label>}, which are analogous to \glsentryfirst and\Glsentryfirst.
You can add a line to the glossary without generating text using
\glsadd[<options>]{<label>} Definition
The optional argument is the same as that for \glslink except that the hyper keyhas no meaning since no text is generated by the command.
If you want to add all the entries you have defined for a given glossary, you cando so using
\glsaddall[<glossary list>] Definition
If you have defined additional glossaries, you can specify to add only those entrieswhich belong to the glossaries listed in <glossary list>.
7.2.3 Displaying the Glossary
To display the glossary, you can either use
\printglossary[<options>] Definition
or
\printglossaries Definition
at the point where you want the glossaries to appear. It is simpler to use just\printglossaries which will display the glossaries in the order in which they weredefined, otherwise you will need to specify a separate \printglossary for eachglossary.
The optional argument to \printglossary is a <key>=<value> list of options,where the following keys are defined:
type The value of this key specifies which glossary to display. If omitted the mainglossary is assumed.
title The glossary’s title (overriding the title specified when the glossary was de-fined.)
toctitle The title for the table of contents (if the toc package option is used.)
style The glossary style to use for this glossary. There are many predefined stylesavailable, check the glossaries documentation for details.
Remember that if you use the acronym package option, your document will haveat least two glossaries, so if you don’t use \printglossaries you would need to do
\printglossary[type=acronym]
to ensure that the list of acronyms appears.
7.2.4 Generating the Glossary Files
As with creating bibliographies with BibTEX and creating an index with makeindexit is necessary to use an external application in order to generate the files containingthe glossaries which are then loaded by \printglossary or \printglossaries.In this case we again use makeindex but more information is required than wasnecessary to create an index. If you miss this step, or if something goes wrong withthis step, the glossary will not appear in the document.
7. GENERATING AN INDEX OR A GLOSSARY 39

Recall that to make the glossaries appear, it was necessary to use the command\makeglossaries. This performs two functions: firstly, it allows the glossary infor-mation to be written to external files, secondly, it generates a customized makeindex.ist style file. This file needs to be passed to makeindex via the -s switch. In addi-tion, you need to specify the output file, and makeindex needs to be called separatelyfor each glossary. If you have multiple glossaries, but you specify them all in a singlecall to makeindex then it will concatenate all the entries into a single glossary. Ifyour main document file is called, say thesis.tex, then to create the main glossaryyou will need to do:
makeindex -s thesis.ist -t thesis.glg -o thesis.gls thesis.glo
If you have specified the acronym package option you will also need to do:
makeindex -s thesis.ist -t thesis.alg -o thesis.acr thesis.acn
If you have created any additional glossaries, you will need to do something similarfor each additional glossary. This is fairly cumbersome, so the glossaries packagecomes with a Perl script which will automate this process for you. All you have todo is specify the name of the auxiliary file without the extension, and makeindexwill be called the required number of times with the necessary settings.
If you want to add any extra information to the start or end of the glossary, youcan redefine the commands \glossarypreamble and \glossarypostamble. Thelatest version of the glossaries package can be downloaded from CTAN or from http://theoval.cmp.uea.ac.uk/~nlct/latex/packages/. The glossaries package has aFAQ available at http://theoval.cmp.uea.ac.uk/~nlct/latex/packages/faq/.
You can download for an example of how to create a list of acronyms or you candownload for an example of how to create a glossary containing symbols.
7. GENERATING AN INDEX OR A GLOSSARY 40

Chapter 8
Too Many Unprocessed Floats
A common problem PhD student’s encounter when writing a thesis is the “too manyunprocessed floats” error. This is usually caused by having too many figures and [“Too many unprocessed
floats]tables in the results chapter and not enough surrounding text. If this happens, thereare a number of things you can try doing:
1. Make sure you haven’t been too restrictive in where you want your floats togo. If you use a placement specifier, give LATEX as many options as possible.For example:
\begin{figure}[htbp]
which indicates that the figure can be placed “here” (h), at the top of a page(t), at the bottom of the page (b) or on a page solely consisting of floats(p). If you just use the h placement specifier then you are stating: “I wantit here and nowhere else!” If TEX can’t put it exactly here, then you havegiven no alternative place to put it, and it won’t get placed anywhere, unlessa \clearpage command is issued, at which point all remaining unprocessedfloats will be dumped at that point. If you are determined that an image mustbe placed exactly here then it should not be placed in a floating environment.
2. Try increasing the amount of text in the chapter. Remember that you shouldnever simply print all the figures and tables in a results chapter without dis-cussing them to some extent.
3. If all else fails, try using the \clearpage command. This forces all unprocessedfloats to be processed immediately, and start a new page. This may resultin the page ending prematurely, if you wish to avoid this, you can use theafterpage package, and use the command:
\afterpage{\clearpage}
For other problems, check the FAQ on the TEX Archive [4].
41

Chapter 9
General Thesis Writing Advice
This chapter is not specific to LATEX. Some of the points have already been men-tioned in asides or footnotes. Remember that each college or university or evenschool within a university may have different requirements, and requirements willalso vary according to country, so some of this advice may not apply to you. Iam writing from the point of view of an English scientist, and am basing it on myown experience and on the comments of English science-based PhD examiners andsupervisors. I cannot guarantee that your own department or university will agreewith them.
1. Find out the thesis style requirements from your supervisor or your depart-ment’s website. Many universities still require double-spaced, single sideddocuments with wide margins. Double-spacing is by and large looked downon in the world of typesetting, but this requirement for a PhD thesis has noth-ing to do with æsthetics or readability. In England the purpose of the PhDviva is to defend your work1. Before your viva, paper copies of your thesisare sent to your examiners. The double spacing and wide margins providethe examiners room to write the comments and criticisms they wish to raiseduring the viva, as well as any typographical corrections. Whilst they couldwrite these comments on a separate piece of paper, cross-referencing the rele-vant page in the thesis, it is more efficient for the comments to actually be onthe relevant page of the thesis. That way, as they go through the manuscriptduring your viva, they can easily see the comments, questions or criticismsthey wish to raise alongside the relevant text. If you present them with asingle-spaced document with narrow margins, you are effectively telling themthat you don’t want them to criticise your work!
2. Don’t try to pad your thesis with irrelevant information. This includes addingitems in your bibliography that are not referenced in the text, adding figuresor tables that are not explained in the text, and supplying all the source codeyou have written. The outcome of your viva will not depend on the physicalsize of your thesis, but on the clarity of your writing and on the quality ofyour work.
3. Clearly delineate your thesis through the use of chapters and sections, out-lining your original aims and objectives, an overview of the subject matterincluding references to other people’s work in the area, the methods you em-ployed to extend or innovate the field, your results and conclusions.
4. Make sure your references include some recent journal or conference papers toillustrate that you are aware of new developments in your field. Rememberthat due to the nature of publishing, most books are dated by the time theyreach the book shelves. Journal and conference papers are likely to be moreup-to-date2.
5. Always explain acronyms, technical terms and symbols. It is a good ideato include a glossary of terms, list of notation or list of acronyms to avoidconfusion.
6. If you have equations, make sure you explain the variables used, and how yougo from one equation to the next. Depending on your field, you might also
1I gather this is not the case in some other countries, where the viva is more informal, and thedecision to pass or fail you has already been made before your viva.
2Having said that, I know someone who submitted an article to a journal, and it took threeand a half years before the reviewers came back with comments. In the end, the author withdrewthe manuscript because by that time the topic was out of date.
42

consider clarifying the mathematics by providing graphical representations ofthe equations3.
7. If you include any graphs, bar charts, pie charts or any other form of dataplot, make sure it is clearly labelled and no distortion is introduced (such asusing three-dimensional bar charts or pie charts4.)
8. If you have used a computer application to generate numerical results, makesure you have some understanding of the underlying process and what theresults mean. This doesn’t necessarily mean that you need to understandcomplex computer code, or complex algorithms, but what you shouldn’t dois say something along the lines of “well, I clicked on this button, and it saidm = 0.678.” What is the purpose of the button? What does m represent?What does the result m = 0.678 signify? What value were you expectingor hoping to get? Numbers on their own are meaningless. If I ran into aroom shouting “I’ve got 42!” What does that mean? Forty-two what? Forty-two brilliant reviews? (Great!) Forty-two percent in an exam? (Not good.)Forty-two spots on my face? (Very bad!)
9. Don’t waste time worrying about the best way to word your thesis. Writefirst, then edit it later or you will never get started.
10. If your supervisor offers to edit chapters of your thesis, take them up on theiroffer! Such offers are not made out of politeness, but a desire to ensure thatyou pass. Don’t be embarrassed and worry that it’s not good enough, that’sthe whole point in your supervisor helping you improve it5.
11. Write in a clear concise manner. A thesis is a technical document, not anovel, so don’t be tempted to write something along the lines of: “I awaitedwith bated breath, my whole body quivering with excitement at the eageranticipation that my algorithm would prove superior to all others, and, ohjoy, my experiments proved me right.”
12. Don’t decorate your thesis with irrelevant clip art. It is unprofessional andhighly inappropriate in the sciences.
13. Make regular back-ups of your work. Be prepared for any of the following:accidentally deleting your thesis, accidentally overwriting your thesis withanother file, software failure, hardware failure, fire and theft.
Items 9 and 10 above were supplied by Dr Gavin Cawley6 who has been both aPhD supervisor and examiner.
3When I was a PhD student, I was once rendered speechless when asked to provide a graphicalillustration of an equation involving a quadruple summation that had no graphical meaning frommy point of view. Perhaps this was a drawback of being a mathematician doing a PhD in anelectronics department.
4The sole purpose of 3D pie charts or bar charts appears to be to look pretty and impress peoplewho have no understanding of mathematics.
5but don’t expect your supervisor to actually write your thesis!6School of Computing Sciences, University of East Anglia
9. GENERAL THESIS WRITING ADVICE 43

GNU Free Documentation License
Version 1.2, November 2002Copyright c© 2000,2001,2002 Free Software Foundation, Inc.
51 Franklin St, Fifth Floor, Boston, MA 02110-1301 USA
Everyone is permitted to copy and distribute verbatim copies of this licensedocument, but changing it is not allowed.
Preamble
The purpose of this License is to make a manual, textbook, or other functionaland useful document “free” in the sense of freedom: to assure everyone the effectivefreedom to copy and redistribute it, with or without modifying it, either commer-cially or noncommercially. Secondarily, this License preserves for the author andpublisher a way to get credit for their work, while not being considered responsiblefor modifications made by others.
This License is a kind of “copyleft”, which means that derivative works of thedocument must themselves be free in the same sense. It complements the GNUGeneral Public License, which is a copyleft license designed for free software.
We have designed this License in order to use it for manuals for free software,because free software needs free documentation: a free program should come withmanuals providing the same freedoms that the software does. But this License isnot limited to software manuals; it can be used for any textual work, regardless ofsubject matter or whether it is published as a printed book. We recommend thisLicense principally for works whose purpose is instruction or reference.
1. APPLICABILITY AND DEFINITIONS
This License applies to any manual or other work, in any medium, that containsa notice placed by the copyright holder saying it can be distributed under the termsof this License. Such a notice grants a world-wide, royalty-free license, unlimited induration, to use that work under the conditions stated herein. The “Document”,below, refers to any such manual or work. Any member of the public is a licensee,and is addressed as “you”. You accept the license if you copy, modify or distributethe work in a way requiring permission under copyright law.
A “Modified Version” of the Document means any work containing the Doc-ument or a portion of it, either copied verbatim, or with modifications and/ortranslated into another language.
A “Secondary Section” is a named appendix or a front-matter section of theDocument that deals exclusively with the relationship of the publishers or authors ofthe Document to the Document’s overall subject (or to related matters) and containsnothing that could fall directly within that overall subject. (Thus, if the Documentis in part a textbook of mathematics, a Secondary Section may not explain anymathematics.) The relationship could be a matter of historical connection with thesubject or with related matters, or of legal, commercial, philosophical, ethical orpolitical position regarding them.
The “Invariant Sections” are certain Secondary Sections whose titles are des-ignated, as being those of Invariant Sections, in the notice that says that the Docu-ment is released under this License. If a section does not fit the above definition ofSecondary then it is not allowed to be designated as Invariant. The Document maycontain zero Invariant Sections. If the Document does not identify any InvariantSections then there are none.
The “Cover Texts” are certain short passages of text that are listed, as Front-Cover Texts or Back-Cover Texts, in the notice that says that the Document isreleased under this License. A Front-Cover Text may be at most 5 words, and aBack-Cover Text may be at most 25 words.
44

A “Transparent” copy of the Document means a machine-readable copy, rep-resented in a format whose specification is available to the general public, that issuitable for revising the document straightforwardly with generic text editors or (forimages composed of pixels) generic paint programs or (for drawings) some widelyavailable drawing editor, and that is suitable for input to text formatters or forautomatic translation to a variety of formats suitable for input to text formatters.A copy made in an otherwise Transparent file format whose markup, or absenceof markup, has been arranged to thwart or discourage subsequent modification byreaders is not Transparent. An image format is not Transparent if used for anysubstantial amount of text. A copy that is not “Transparent” is called “Opaque”.
Examples of suitable formats for Transparent copies include plain ASCII with-out markup, Texinfo input format, LaTeX input format, SGML or XML using apublicly available DTD, and standard-conforming simple HTML, PostScript or PDFdesigned for human modification. Examples of transparent image formats includePNG, XCF and JPG. Opaque formats include proprietary formats that can beread and edited only by proprietary word processors, SGML or XML for which theDTD and/or processing tools are not generally available, and the machine-generatedHTML, PostScript or PDF produced by some word processors for output purposesonly.
The “Title Page” means, for a printed book, the title page itself, plus suchfollowing pages as are needed to hold, legibly, the material this License requires toappear in the title page. For works in formats which do not have any title pageas such, “Title Page” means the text near the most prominent appearance of thework’s title, preceding the beginning of the body of the text.
A section “Entitled XYZ” means a named subunit of the Document whose titleeither is precisely XYZ or contains XYZ in parentheses following text that trans-lates XYZ in another language. (Here XYZ stands for a specific section name men-tioned below, such as “Acknowledgements”, “Dedications”, “Endorsements”,or “History”.) To “Preserve the Title” of such a section when you modify theDocument means that it remains a section “Entitled XYZ” according to this defi-nition.
The Document may include Warranty Disclaimers next to the notice which statesthat this License applies to the Document. These Warranty Disclaimers are con-sidered to be included by reference in this License, but only as regards disclaimingwarranties: any other implication that these Warranty Disclaimers may have is voidand has no effect on the meaning of this License.
2. VERBATIM COPYING
You may copy and distribute the Document in any medium, either commerciallyor noncommercially, provided that this License, the copyright notices, and the licensenotice saying this License applies to the Document are reproduced in all copies, andthat you add no other conditions whatsoever to those of this License. You may notuse technical measures to obstruct or control the reading or further copying of thecopies you make or distribute. However, you may accept compensation in exchangefor copies. If you distribute a large enough number of copies you must also followthe conditions in section 3.
You may also lend copies, under the same conditions stated above, and you maypublicly display copies.
3. COPYING IN QUANTITY
If you publish printed copies (or copies in media that commonly have printedcovers) of the Document, numbering more than 100, and the Document’s licensenotice requires Cover Texts, you must enclose the copies in covers that carry, clearlyand legibly, all these Cover Texts: Front-Cover Texts on the front cover, and Back-Cover Texts on the back cover. Both covers must also clearly and legibly identifyyou as the publisher of these copies. The front cover must present the full title with
GNU Free Documentation License 45

all words of the title equally prominent and visible. You may add other material onthe covers in addition. Copying with changes limited to the covers, as long as theypreserve the title of the Document and satisfy these conditions, can be treated asverbatim copying in other respects.
If the required texts for either cover are too voluminous to fit legibly, you shouldput the first ones listed (as many as fit reasonably) on the actual cover, and continuethe rest onto adjacent pages.
If you publish or distribute Opaque copies of the Document numbering more than100, you must either include a machine-readable Transparent copy along with eachOpaque copy, or state in or with each Opaque copy a computer-network locationfrom which the general network-using public has access to download using public-standard network protocols a complete Transparent copy of the Document, free ofadded material. If you use the latter option, you must take reasonably prudentsteps, when you begin distribution of Opaque copies in quantity, to ensure that thisTransparent copy will remain thus accessible at the stated location until at least oneyear after the last time you distribute an Opaque copy (directly or through youragents or retailers) of that edition to the public.
It is requested, but not required, that you contact the authors of the Documentwell before redistributing any large number of copies, to give them a chance toprovide you with an updated version of the Document.
4. MODIFICATIONS
You may copy and distribute a Modified Version of the Document under theconditions of sections 2 and 3 above, provided that you release the Modified Ver-sion under precisely this License, with the Modified Version filling the role of theDocument, thus licensing distribution and modification of the Modified Version towhoever possesses a copy of it. In addition, you must do these things in the ModifiedVersion:
A. Use in the Title Page (and on the covers, if any) a title distinct from thatof the Document, and from those of previous versions (which should, if therewere any, be listed in the History section of the Document). You may use thesame title as a previous version if the original publisher of that version givespermission.
B. List on the Title Page, as authors, one or more persons or entities responsiblefor authorship of the modifications in the Modified Version, together with atleast five of the principal authors of the Document (all of its principal authors,if it has fewer than five), unless they release you from this requirement.
C. State on the Title page the name of the publisher of the Modified Version, asthe publisher.
D. Preserve all the copyright notices of the Document.
E. Add an appropriate copyright notice for your modifications adjacent to theother copyright notices.
F. Include, immediately after the copyright notices, a license notice giving thepublic permission to use the Modified Version under the terms of this License,in the form shown in the Addendum below.
G. Preserve in that license notice the full lists of Invariant Sections and requiredCover Texts given in the Document’s license notice.
H. Include an unaltered copy of this License.
I. Preserve the section Entitled “History”, Preserve its Title, and add to it anitem stating at least the title, year, new authors, and publisher of the ModifiedVersion as given on the Title Page. If there is no section Entitled “History”
GNU Free Documentation License 46

in the Document, create one stating the title, year, authors, and publisherof the Document as given on its Title Page, then add an item describing theModified Version as stated in the previous sentence.
J. Preserve the network location, if any, given in the Document for public accessto a Transparent copy of the Document, and likewise the network locationsgiven in the Document for previous versions it was based on. These may beplaced in the “History” section. You may omit a network location for a workthat was published at least four years before the Document itself, or if theoriginal publisher of the version it refers to gives permission.
K. For any section Entitled “Acknowledgements” or “Dedications”, Preserve theTitle of the section, and preserve in the section all the substance and tone ofeach of the contributor acknowledgements and/or dedications given therein.
L. Preserve all the Invariant Sections of the Document, unaltered in their textand in their titles. Section numbers or the equivalent are not considered partof the section titles.
M. Delete any section Entitled “Endorsements”. Such a section may not be in-cluded in the Modified Version.
N. Do not retitle any existing section to be Entitled “Endorsements” or to conflictin title with any Invariant Section.
O. Preserve any Warranty Disclaimers.
If the Modified Version includes new front-matter sections or appendices thatqualify as Secondary Sections and contain no material copied from the Document,you may at your option designate some or all of these sections as invariant. To dothis, add their titles to the list of Invariant Sections in the Modified Version’s licensenotice. These titles must be distinct from any other section titles.
You may add a section Entitled “Endorsements”, provided it contains nothingbut endorsements of your Modified Version by various parties–for example, state-ments of peer review or that the text has been approved by an organization as theauthoritative definition of a standard.
You may add a passage of up to five words as a Front-Cover Text, and a passageof up to 25 words as a Back-Cover Text, to the end of the list of Cover Texts inthe Modified Version. Only one passage of Front-Cover Text and one of Back-CoverText may be added by (or through arrangements made by) any one entity. If theDocument already includes a cover text for the same cover, previously added by youor by arrangement made by the same entity you are acting on behalf of, you maynot add another; but you may replace the old one, on explicit permission from theprevious publisher that added the old one.
The author(s) and publisher(s) of the Document do not by this License givepermission to use their names for publicity for or to assert or imply endorsement ofany Modified Version.
5. COMBINING DOCUMENTS
You may combine the Document with other documents released under this Li-cense, under the terms defined in section 4 above for modified versions, providedthat you include in the combination all of the Invariant Sections of all of the origi-nal documents, unmodified, and list them all as Invariant Sections of your combinedwork in its license notice, and that you preserve all their Warranty Disclaimers.
The combined work need only contain one copy of this License, and multipleidentical Invariant Sections may be replaced with a single copy. If there are multipleInvariant Sections with the same name but different contents, make the title of eachsuch section unique by adding at the end of it, in parentheses, the name of theoriginal author or publisher of that section if known, or else a unique number.
GNU Free Documentation License 47

Make the same adjustment to the section titles in the list of Invariant Sections inthe license notice of the combined work.
In the combination, you must combine any sections Entitled “History” in thevarious original documents, forming one section Entitled “History”; likewise com-bine any sections Entitled “Acknowledgements”, and any sections Entitled “Dedi-cations”. You must delete all sections Entitled “Endorsements”.
6. COLLECTIONS OF DOCUMENTS
You may make a collection consisting of the Document and other documentsreleased under this License, and replace the individual copies of this License in thevarious documents with a single copy that is included in the collection, provided thatyou follow the rules of this License for verbatim copying of each of the documentsin all other respects.
You may extract a single document from such a collection, and distribute itindividually under this License, provided you insert a copy of this License into theextracted document, and follow this License in all other respects regarding verbatimcopying of that document.
7. AGGREGATION WITH INDEPENDENTWORKS
A compilation of the Document or its derivatives with other separate and inde-pendent documents or works, in or on a volume of a storage or distribution medium,is called an “aggregate” if the copyright resulting from the compilation is not usedto limit the legal rights of the compilation’s users beyond what the individual workspermit. When the Document is included in an aggregate, this License does notapply to the other works in the aggregate which are not themselves derivative worksof the Document.
If the Cover Text requirement of section 3 is applicable to these copies of theDocument, then if the Document is less than one half of the entire aggregate, theDocument’s Cover Texts may be placed on covers that bracket the Document withinthe aggregate, or the electronic equivalent of covers if the Document is in electronicform. Otherwise they must appear on printed covers that bracket the whole aggre-gate.
8. TRANSLATION
Translation is considered a kind of modification, so you may distribute transla-tions of the Document under the terms of section 4. Replacing Invariant Sectionswith translations requires special permission from their copyright holders, but youmay include translations of some or all Invariant Sections in addition to the originalversions of these Invariant Sections. You may include a translation of this License,and all the license notices in the Document, and any Warranty Disclaimers, providedthat you also include the original English version of this License and the originalversions of those notices and disclaimers. In case of a disagreement between thetranslation and the original version of this License or a notice or disclaimer, theoriginal version will prevail.
If a section in the Document is Entitled “Acknowledgements”, “Dedications”, or“History”, the requirement (section 4) to Preserve its Title (section 1) will typicallyrequire changing the actual title.
9. TERMINATION
You may not copy, modify, sublicense, or distribute the Document except asexpressly provided for under this License. Any other attempt to copy, modify,sublicense or distribute the Document is void, and will automatically terminateyour rights under this License. However, parties who have received copies, or rights,from you under this License will not have their licenses terminated so long as suchparties remain in full compliance.
GNU Free Documentation License 48

10. FUTURE REVISIONS OF THIS LICENSE
The Free Software Foundation may publish new, revised versions of the GNUFree Documentation License from time to time. Such new versions will be similarin spirit to the present version, but may differ in detail to address new problems orconcerns. See http://www.gnu.org/copyleft/.
Each version of the License is given a distinguishing version number. If theDocument specifies that a particular numbered version of this License “or any laterversion” applies to it, you have the option of following the terms and conditionseither of that specified version or of any later version that has been published (notas a draft) by the Free Software Foundation. If the Document does not specify aversion number of this License, you may choose any version ever published (not asa draft) by the Free Software Foundation.
ADDENDUM: How to use this License for yourdocuments
To use this License in a document you have written, include a copy of the Licensein the document and put the following copyright and license notices just after thetitle page:
Copyright c© YEAR YOUR NAME. Permission is granted to copy, dis-tribute and/or modify this document under the terms of the GNU FreeDocumentation License, Version 1.2 or any later version published by theFree Software Foundation; with no Invariant Sections, no Front-CoverTexts, and no Back-Cover Texts. A copy of the license is included in thesection entitled “GNU Free Documentation License”.
If you have Invariant Sections, Front-Cover Texts and Back-Cover Texts, replacethe “with . . . Texts.” line with this:
with the Invariant Sections being LIST THEIR TITLES, with the Front-Cover Texts being LIST, and with the Back-Cover Texts being LIST.
If you have Invariant Sections without Cover Texts, or some other combinationof the three, merge those two alternatives to suit the situation.
If your document contains nontrivial examples of program code, we recommendreleasing these examples in parallel under your choice of free software license, suchas the GNU General Public License, to permit their use in free software.
GNU Free Documentation License 49

Bibliography
[1] “The LATEX Companion”, Michel Goossens, Frank Mittelbach and AlexanderSamarin, Addison-Wesley (1994). 13, 14, 34
[2] “A Guide to LATEX2ε: document preparation for beginners and advanced users”,Helmut Kopka and Patrick W. Daly, Addison-Wesley (1995). 10, 12, 13, 14, 34
[3] “LATEX : a document preparation system”, Leslie Lamport, 2nd ed. Addison-Wesley (1994). 32, 34
[4] The TEX Archive. http://www.tex.ac.uk/ 41
[5] “LATEX for Complete Novices”, Nicola Talbot. http://theoval.cmp.uea.ac.uk/~nlct/latex/novices/ (2007). b, 1, 27
50

Index
Symbols! . . . . . . . . . . . . . . . . . . . . . . . . . . . . . . . . . . . .33\+ . . . . . . . . . . . . . . . . . . . . . . . . . . . . . . . . . . 26\- . . . . . . . . . . . . . . . . . . . . . . . . . . . . . . . . . . 26\< . . . . . . . . . . . . . . . . . . . . . . . . . . . . . . . . . . 26\= . . . . . . . . . . . . . . . . . . . . . . . . . . . . . . . . . . 26\> . . . . . . . . . . . . . . . . . . . . . . . . . . . . . . . . . . 26@ . . . . . . . . . . . . . . . . . . . . . . . . . . . . . . . . . . . 34\@chapter . . . . . . . . . . . . . . . . . . . . . . . . . . 10\@evenfoot . . . . . . . . . . . . . . . . . . . . . . . . . 12\@evenhead . . . . . . . . . . . . . . . . . . . . . . . . . 12\@makechapterhead . . . . . . . . . . . . . . . . 10\@makeschapterhead . . . . . . . . . . . . . . . 10\@oddfoot . . . . . . . . . . . . . . . . . . . . . . . . . . 12\@oddhead . . . . . . . . . . . . . . . . . . . . . . . . . . 12\@schapter . . . . . . . . . . . . . . . . . . . . . . . . . 10\@startsection . . . . . . . . . . . . . . . . . .9, 10
A\abstractname . . . . . . . . . . . . . . . . . . . . . . 8\acronymtype . . . . . . . . . . . . . . . . . . . . . . 37\addcontentsline . . . . . . . . . . . . . . . . . .11apalike package . . . . . . . . . . . . . . . . . . . . . . 22\appendixname . . . . . . . . . . . . . . . . . . . . . . 8
Bbabel package . . . . . . . . . . . . . . . . . . . . . . . 34\backmatter . . . . . . . . . . . . . . . . . . . . . . . . . 3\backref . . . . . . . . . . . . . . . . . . . . . . . . . . . 22backref package. . . . . . . . . . . . . . . . . .18, 22
ref . . . . . . . . . . . . . . . . . . . . . . . . . . . . .18\backrefpagesname . . . . . . . . . . . . . . . . 22\backrefsectionsname . . . . . . . . . . . . . 22\baselinestretch . . . . . . . . . . . . . . . . . . 23bib entry types
article . . . . . . . . . . . . . . . . . . . . 14, 15book . . . . . . . . . . . . . . . . . . . . . . . . 14–16booklet . . . . . . . . . . . . . . . . . . . . 14, 15conference . . . . . . . . . . . . . . . . . . . . 14inbook . . . . . . . . . . . . . . . . . . . . . 14, 15incollection . . . . . . . . . . . . . . 14, 15inproceedings . . . . . . . . . . . . . 14, 15manual . . . . . . . . . . . . . . . . . . . . . 14, 15mastersthesis . . . . . . . . . . . . . 14, 15misc . . . . . . . . . . . . . . . . . . . . . . . . 14, 15phdthesis . . . . . . . . . . . . . . . . . . 14, 15proceedings . . . . . . . . . . . . . . . 14, 15techreport . . . . . . . . . . . . . . . . .14, 15unpublished . . . . . . . . . . . . . . . 14, 15
bib field typesabstract . . . . . . . . . . . . . . . . . . . . . . . 14address . . . . . . . . . . . . . . . . . . . . . . . . 15author . . . . . . . . . . . . . . . . . . . . . 14, 15
booktitle . . . . . . . . . . . . . . . . . . . . . 15chapter . . . . . . . . . . . . . . . . . . . . . . . . 15edition . . . . . . . . . . . . . . . . . . . . . . . . 15editor . . . . . . . . . . . . . . . . . . . . . 15, 16howpublished . . . . . . . . . . . . . . . . . . 15institution . . . . . . . . . . . . . . . . . . . 15journal . . . . . . . . . . . . . . . . . . . . . . . . 15month . . . . . . . . . . . . . . . . . . . . . . . . . . 15note . . . . . . . . . . . . . . . . . . . . . . . . . . . 15number . . . . . . . . . . . . . . . . . . . . . . . . . 15organization . . . . . . . . . . . . . . . . . . 15pages . . . . . . . . . . . . . . . . . . . . . . . . . . 15publisher . . . . . . . . . . . . . . . . . . . . . 15school . . . . . . . . . . . . . . . . . . . . . . . . . 15series . . . . . . . . . . . . . . . . . . . . . . . . . 15title . . . . . . . . . . . . . . . . . . . . . . .14, 15type . . . . . . . . . . . . . . . . . . . . . . . . . . . 15volume . . . . . . . . . . . . . . . . . . . . . . . . . 15year . . . . . . . . . . . . . . . . . . . . . . . . . . . 15
\bibitem . . . . . . . . . . . . . . . . . . . . . . . . . . . 14\bibliography . . . . . . . . . . . . . . . . . .13, 22bibliography styles (.bst)
abbrv . . . . . . . . . . . . . . . . . . . 13, 16, 19acm . . . . . . . . . . . . . . . . . . . . . . . . . . . . .19alpha . . . . . . . . . . . . . . . . . . . . . . .13, 20apalike . . . . . . . . . . . . . . . . . . . . 18, 22ieeetr . . . . . . . . . . . . . . . . . . . . . . . . . 20plain . . . . . . . . . . . . . . . . . . . . . . .13, 21unsrt . . . . . . . . . . . . . . . . . . . . . . .13, 21
\bibliographystyle . . . . . . . . . . . . . . . 13\bibname . . . . . . . . . . . . . . . . . . . . . . . . . . . . 8bibunits package . . . . . . . . . . . . . . . . . . . . . 18book class file . . . . . . . . . . . . . . . . . . . . . . . . 3
C\chapter . . . . . . . . . . . . . . . . . . .6, 7, 10, 11\chaptername . . . . . . . . . . . . . . . . . . . . . . . .8\cite . . . . . . . . . . . . . . . . . . . . . . . 13, 14, 18\clearpage . . . . . . . . . . . . . . . . . . . . . . 6, 41\contentsname . . . . . . . . . . . . . . . . . . . . . . 8
D\doublespacing . . . . . . . . . . . . . . . . . . . . 23
E\endinput . . . . . . . . . . . . . . . . . . . . . . . . . . . 8\excludeonly . . . . . . . . . . . . . . . . . . . . . 5, 6excludeonly package. . . . . . . . . . . . . . . . . . .5
F\figurename . . . . . . . . . . . . . . . . . . . . . . . . .8file extensions
aux . . . . . . . . . . . . . . . . . . . . . . . . . . . . . . 6bbl . . . . . . . . . . . . . . . . . . . . . . . . . . . . . 22
SymbolsABCDEFGHIJKLMNOPQRSTUVWXYZ
51

bib. . . . . . . . . . . . . . . .3, 13, 16, 18, 22blg . . . . . . . . . . . . . . . . . . . . . . . . . . . . . 22bst . . . . . . . . . . . . . . . . . . . . . . . . . . . . . 13cls . . . . . . . . . . . . . . . . . . . . . . . . .7, 8, 10idx . . . . . . . . . . . . . . . . . . . . . . . . . . . . . 32ilg . . . . . . . . . . . . . . . . . . . . . . . . . . . . . . 35ind . . . . . . . . . . . . . . . . . . . . . . . . . . . . . 32ist . . . . . . . . . . . . . . . . . . . . . . . . . . . . . . 40tex . . . . . . . . . . . . . . . . . . . . . . . . . . . . . . 7
float package . . . . . . . . . . . . . . . . . . . . . . . . 30\floatname . . . . . . . . . . . . . . . . . . . . . . . . .30\floatstyle . . . . . . . . . . . . . . . . . . . . . . . .30\frontmatter . . . . . . . . . . . . . . . . . . . . . . . .3
Ggeometry package . . . . . . . . . . . . . . . . . . . . . 8glossaries package . . . . . . . . . . . . 35–37, 40
acronym . . . . . . . . . . . . . . . . .37, 39, 40toc . . . . . . . . . . . . . . . . . . . . . . . . . . . . .39
glossary . . . . . . . . . . . . . . . . . . . . . . . . . . . . . 32\glossarypostamble . . . . . . . . . . . . . . . 40\glossarypreamble . . . . . . . . . . . . . . . . 40\GLS . . . . . . . . . . . . . . . . . . . . . . . . . . . . . . . . 38\Gls . . . . . . . . . . . . . . . . . . . . . . . . . . . . . . . . 38\gls . . . . . . . . . . . . . . . . . . . . . . . . . . . . . . . . 38\glsadd . . . . . . . . . . . . . . . . . . . . . . . . . . . . 39\glsaddall . . . . . . . . . . . . . . . . . . . . . . . . .39\glsdisplaytext . . . . . . . . . . . . . . . . . . . 38\Glsentryfirst . . . . . . . . . . . . . . . . . . . . 38\glsentryfirst . . . . . . . . . . . . . . . . . . . . 38\glsentryplural . . . . . . . . . . . . . . . . . . . 39\Glsentrytext . . . . . . . . . . . . . . . . . . . . . 38\glslink . . . . . . . . . . . . . . . . . . . . 37, 38, 39\glslink keys
counter . . . . . . . . . . . . . . . . . . . . . . . . 38format . . . . . . . . . . . . . . . . . . . . . . . . . 37hyper . . . . . . . . . . . . . . . . . . . . . . .38, 39
\GLSpl . . . . . . . . . . . . . . . . . . . . . . . . . . . . . .38\Glspl . . . . . . . . . . . . . . . . . . . . . . . . . . . . . .38\glspl . . . . . . . . . . . . . . . . . . . . . . . . . . . . . .38
Hhtml package . . . . . . . . . . . . . . . . . . . . 37, 38\hyperbf . . . . . . . . . . . . . . . . . . . . . . . . . . . 37hyperref package . . . . . . . . . 18, 22, 37, 38
backref . . . . . . . . . . . . . . . . . . . . . . . . 18backref=section . . . . . . . . . . . . . . 18colorlinks . . . . . . . . . . . . . . . . . . . . 38
I\include . . . . . . . . . . . . . . . . . . . . . . . 4, 5, 6\includeonly . . . . . . . . . . . . . . . . . . .4, 5, 6index . . . . . . . . . . . . . . . . . . . . . . . . . . . . . . . 32\index . . . . . . . . . . . . . . . 32, 34, 35, 37, 38\indexentry . . . . . . . . . . . . . . . . . . . . . . . .32\indexname . . . . . . . . . . . . . . . . . . . . . . . . . . 8\input . . . . . . . . . . . . . . . . . . . . . . . . . . . . . . . 5\itshape . . . . . . . . . . . . . . . . . . . . . . . . . . . . 9
K\kill . . . . . . . . . . . . . . . . . . . . . . . . . . . . . . . 26
L\label . . . . . . . . . . . . . . . . . . . . . . . . . . . . . . . 6\listfigurename . . . . . . . . . . . . . . . . . . . . 8\listof . . . . . . . . . . . . . . . . . . . . . . . . . . . . 30\listtablename . . . . . . . . . . . . . . . . . . . . . 8\LoadClass . . . . . . . . . . . . . . . . . . . . . . . . . . 8lof . . . . . . . . . . . . . . . . . . . . . . . . . . . . . . . . . 11lot . . . . . . . . . . . . . . . . . . . . . . . . . . . . . . . . . 11
M\mainmatter . . . . . . . . . . . . . . . . . . . . . . . . . 3\makeglossaries . . . . . . . . . . . . . . . 36, 40makeidx package . . . . . . . . . . . . . . . . . 32, 35\makeindex . . . . . . . . . . . . . . . . . 32, 35, 36makeindex . . . . . . . . . . . . . . . . . . . . . . 32, 34\maketitle . . . . . . . . . . . . . . . . . . . . . . . . . 23memoir class file . . . . . . . . . . . . . . . .3, 7, 25
N\newacronym . . . . . . . . . . . . . . . . . . . . 37, 37\newcounter . . . . . . . . . . . . . . . . . . . . . . . .27\newfloat . . . . . . . . . . . . . . . . . . . . . . 30, 30\newglossaryentry . . . . . . . . . 36, 37, 38\newglossaryentry keys
description . . . . . . . . . . . . . . . . . . . 36first . . . . . . . . . . . . . . . . . . . . . . .36, 38firstplural . . . . . . . . . . . . . . . 36, 38name . . . . . . . . . . . . . . . . . . . . . . . . . . . 36plural . . . . . . . . . . . . . . . . . . . . . 36, 38sort . . . . . . . . . . . . . . . . . . . . . . . . . . . 36symbol . . . . . . . . . . . . . . . . . . . . . . . . . 36text . . . . . . . . . . . . . . . . . . . . . . . . 36, 38type . . . . . . . . . . . . . . . . . . . . . . . . . . . 36
\newtheorem . . . . . . . . . . . . . . . . 27, 29, 30
O\onehalfspacing . . . . . . . . . . . . . . . . . . . 23
Ppage styles
empty . . . . . . . . . . . . . . . . . . . . . . . . . . 11headings . . . . . . . . . . . . . . . . . . . 11, 12myheadings . . . . . . . . . . . . . . . . . . . . 11plain . . . . . . . . . . . . . . . . . . . . . . . . . . 11thesis . . . . . . . . . . . . . . . . . . . . . . . . . 12
\pagestyle . . . . . . . . . . . . . . . . . . . . . . . . .11\paragraph . . . . . . . . . . . . . . . . . . . . . . 9, 10\part . . . . . . . . . . . . . . . . . . . . . . . . . . . . . . . 10\partname . . . . . . . . . . . . . . . . . . . . . . . . . . . 8\printglossaries . . . . . . . . . . . . . . 39, 39\printglossary . . . . . . . . . . . . . . . . 39, 39\printglossary keys
style . . . . . . . . . . . . . . . . . . . . . . . . . . 39title . . . . . . . . . . . . . . . . . . . . . . . . . . 39toctitle . . . . . . . . . . . . . . . . . . . . . . . 39type . . . . . . . . . . . . . . . . . . . . . . . . . . . 39
SymbolsABCDEFGHIJKLMNOPQRSTUVWXYZ
INDEX 52

\printindex . . . . . . . . . . . . . . . . . . . . 32, 35\ps@empty . . . . . . . . . . . . . . . . . . . . . . . . . . 12\ps@plain . . . . . . . . . . . . . . . . . . . . . . . . . . 12\ps@thesis . . . . . . . . . . . . . . . . . . . . . . . . . 12
Rreport class file . . . . . . . . . . . . . . . . . . . . . 2, 7
oneside . . . . . . . . . . . . . . . . . . . . . . . . 12twoside . . . . . . . . . . . . . . . . . . . . . . . . 12
\RequirePackage . . . . . . . . . . . . . . . . . . . . 8
Sscrreprt class file . . . . . . . . . . . . . 2, 3, 7, 25\secdef . . . . . . . . . . . . . . . . . . . . . . . . . . . . 10secnumdepth . . . . . . . . . . . . . . . . . . . . . . . .10\section . . . . . . . . . . . . . . . . . . . . . . . . . . 7, 9\see . . . . . . . . . . . . . . . . . . . . . . . . . . . . . . . . 34\seename . . . . . . . . . . . . . . . . . . . . . . . . . . . 34\setcounter . . . . . . . . . . . . . . . . . . . . 10, 11setspace package . . . . . . . . . . . . . . . . . . . . 23\singlespacing . . . . . . . . . . . . . . . . . . . . 23\subparagraph . . . . . . . . . . . . . . . . . . . . . . 9\subsection . . . . . . . . . . . . . . . . . . . . . . . . . 9
T\tablename . . . . . . . . . . . . . . . . . . . . . . . . . . 8TeXnicCenter . . . . . . . . . . . . . . . . . . . . . . 32\textbf . . . . . . . . . . . . . . . . . . . . . . . . . . . . 37\thispagestyle . . . . . . . . . . . . . . . . . . . . 12titling package . . . . . . . . . . . . . . . . . . . . . . . 25toc . . . . . . . . . . . . . . . . . . . . . . . . . . . . . . . . . 11tocdepth . . . . . . . . . . . . . . . . . . . . . . . . . . . 11
U\uppercase . . . . . . . . . . . . . . . . . . . . . . . . . 16\usepackage . . . . . . . . . . . . . . . . . . . . . . . . . 8
V\vec . . . . . . . . . . . . . . . . . . . . . . . . . . . . . . . . 27\verbatiminput . . . . . . . . . . . . . . . . . . . . 25
SymbolsABCDEFGHIJKLMNOPQRSTUVWXYZ
INDEX 53