using clip art and draw tools in microsoft word 2000 development/draw... · using draw tools in...
TRANSCRIPT

Using Draw Tools in Microsoft Word / Pat Henry / 1
Using Draw Tools in Microsoft Word 2000
Use Auto Shapes With options from the AutoShapes button, you can choose from a variety of predesigned shapes.
Click the AutoShapes button and a pop-up menu displays.
The side menu will offer AutoShape choices for the selected option. For example, if you point to the Basic Shapes option, a number of shapes such as a circle, square, triangle, box, stop sign, etc., display a the right side of the pop-up menu. Click the desired shape and the mouse pointer turns into crosshairs. Position the crosshairs in the document screen, hold down the left mouse button, drag to create the shape, and then release the button.
Exercise 1 - Writing Your Name Make sure the Draw toolbar is displayed
Click the AutoShapes button on the Drawing toolbar, point to Lines, and then select the Scribble button (the last button in the bottom row).
Position the mouse pointer in the document screen, hold down the left mouse button, and then move the mouse pointer (a pencil) in the necessary directions to draw your name
When you release the mouse button, white sizing handles display around your name
If you need to continue drawing your name (for example, to cross a ―T‖), select the Scribble button again
Side
Menu
Using Draw Tools in Microsoft Word / Pat Henry / 2
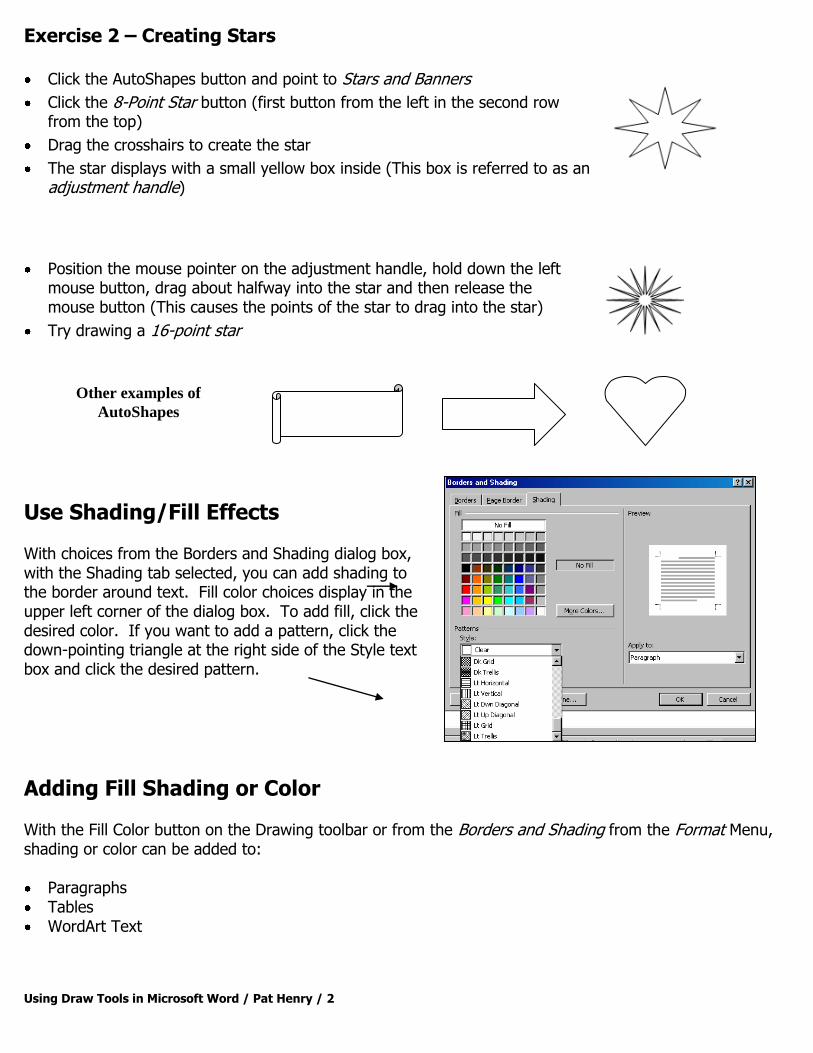
Exercise 2 – Creating Stars Click the AutoShapes button and point to Stars and Banners
Click the 8-Point Star button (first button from the left in the second row from the top)
Drag the crosshairs to create the star
The star displays with a small yellow box inside (This box is referred to as an adjustment handle)
Position the mouse pointer on the adjustment handle, hold down the left mouse button, drag about halfway into the star and then release the mouse button (This causes the points of the star to drag into the star)
Try drawing a 16-point star
Use Shading/Fill Effects With choices from the Borders and Shading dialog box, with the Shading tab selected, you can add shading to the border around text. Fill color choices display in the upper left corner of the dialog box. To add fill, click the desired color. If you want to add a pattern, click the down-pointing triangle at the right side of the Style text box and click the desired pattern.
Adding Fill Shading or Color With the Fill Color button on the Drawing toolbar or from the Borders and Shading from the Format Menu, shading or color can be added to:
Paragraphs Tables WordArt Text
Other examples of
AutoShapes

Using Draw Tools in Microsoft Word / Pat Henry / 3
Paragraphs
Select text Pull down the Format Menu Select Borders and Shading Click on the Shading tab Select Fill Color
Tables You can fill/shade cells
Select cells Pull down the Format Menu Select Borders and Shading Click on the Shading tab Select Fill Color
Or Display the Tables and Borders toolbar
WordArt text Click the Fill Color button and the WordArt text will be filled with the color displayed on the button. If you want to choose a different color, click the down-pointing triangle at the right side of the Fill Color button, and then click the desired color a the color palette.
Insert
WordArt Fill Color

Using Draw Tools in Microsoft Word / Pat Henry / 4
Exercise 3 – Creating and Customizing WordArt Text At the WordArt Gallery, double click the second option from the left in the second row (see below)
At the Edit WordArt Text dialog box, make the following changes:
1. Key Now is the time
2. Press Enter and then key to get out and
3. Press Enter and then key vote!
4. Change the font to a typeface of your choice
5. Click OK
Change the alignment, size and position
1. Chick the Alignment button
2. Click Letter Justify
3. Click the Format WordArt button
4. Click the Size tab
5. Select the current measurement in the Height text box and key 2.5
6. Select the current measurement in the Width text box and then key 6
7. Click the Layout tab
8. Click the Advanced button
9. Click the Picture Position tab
10. Click the down-pointing triangle at the right side of the to the left of text box (in the Horizontal
section—contains the word Column) and then click Margin at the drop-down list
Select the current measurement in the Absolute position text box (in the Horizontal section) and then
key 0
Click OK
Click OK
Click outside the WordArt text box to deselect it
Fill Effects
Using Draw Tools in Microsoft Word / Pat Henry / 5
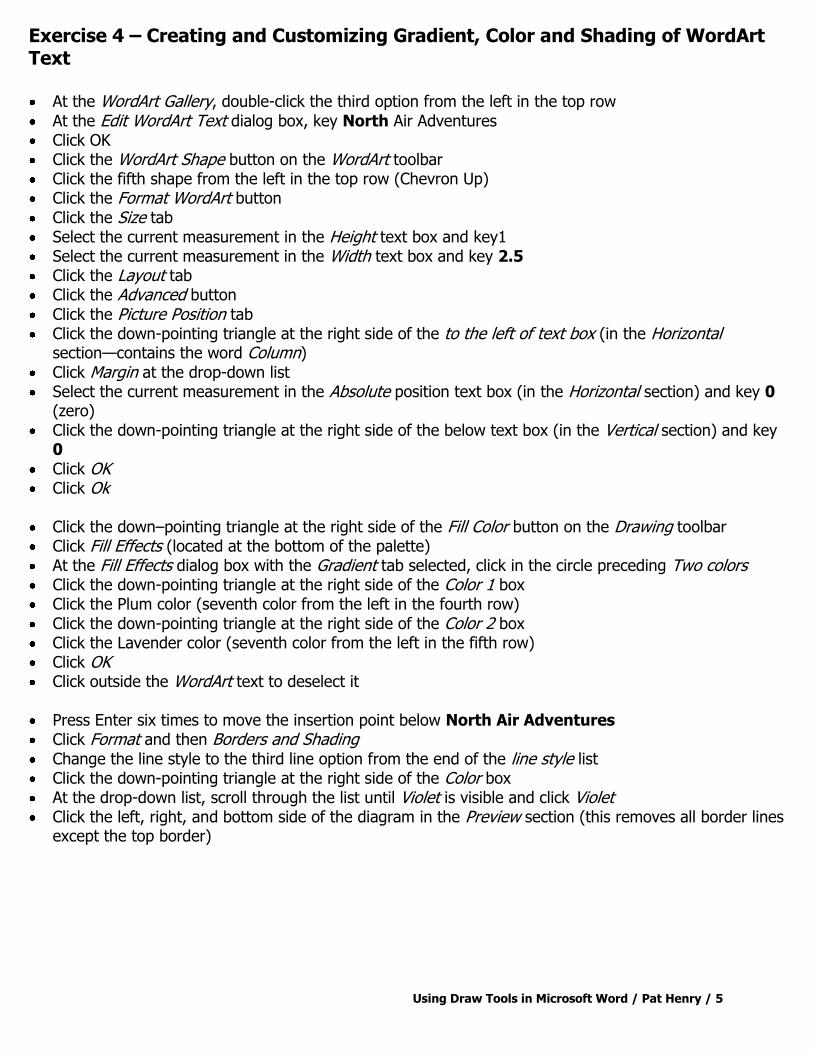
Exercise 4 – Creating and Customizing Gradient, Color and Shading of WordArt Text At the WordArt Gallery, double-click the third option from the left in the top row
At the Edit WordArt Text dialog box, key North Air Adventures Click OK Click the WordArt Shape button on the WordArt toolbar Click the fifth shape from the left in the top row (Chevron Up) Click the Format WordArt button
Click the Size tab Select the current measurement in the Height text box and key1 Select the current measurement in the Width text box and key 2.5 Click the Layout tab Click the Advanced button
Click the Picture Position tab Click the down-pointing triangle at the right side of the to the left of text box (in the Horizontal
section—contains the word Column)
Click Margin at the drop-down list Select the current measurement in the Absolute position text box (in the Horizontal section) and key 0
(zero)
Click the down-pointing triangle at the right side of the below text box (in the Vertical section) and key 0
Click OK Click Ok
Click the down–pointing triangle at the right side of the Fill Color button on the Drawing toolbar Click Fill Effects (located at the bottom of the palette) At the Fill Effects dialog box with the Gradient tab selected, click in the circle preceding Two colors Click the down-pointing triangle at the right side of the Color 1 box Click the Plum color (seventh color from the left in the fourth row)
Click the down-pointing triangle at the right side of the Color 2 box Click the Lavender color (seventh color from the left in the fifth row) Click OK Click outside the WordArt text to deselect it
Press Enter six times to move the insertion point below North Air Adventures Click Format and then Borders and Shading
Change the line style to the third line option from the end of the line style list Click the down-pointing triangle at the right side of the Color box At the drop-down list, scroll through the list until Violet is visible and click Violet Click the left, right, and bottom side of the diagram in the Preview section (this removes all border lines
except the top border)
Using Draw Tools in Microsoft Word / Pat Henry / 6
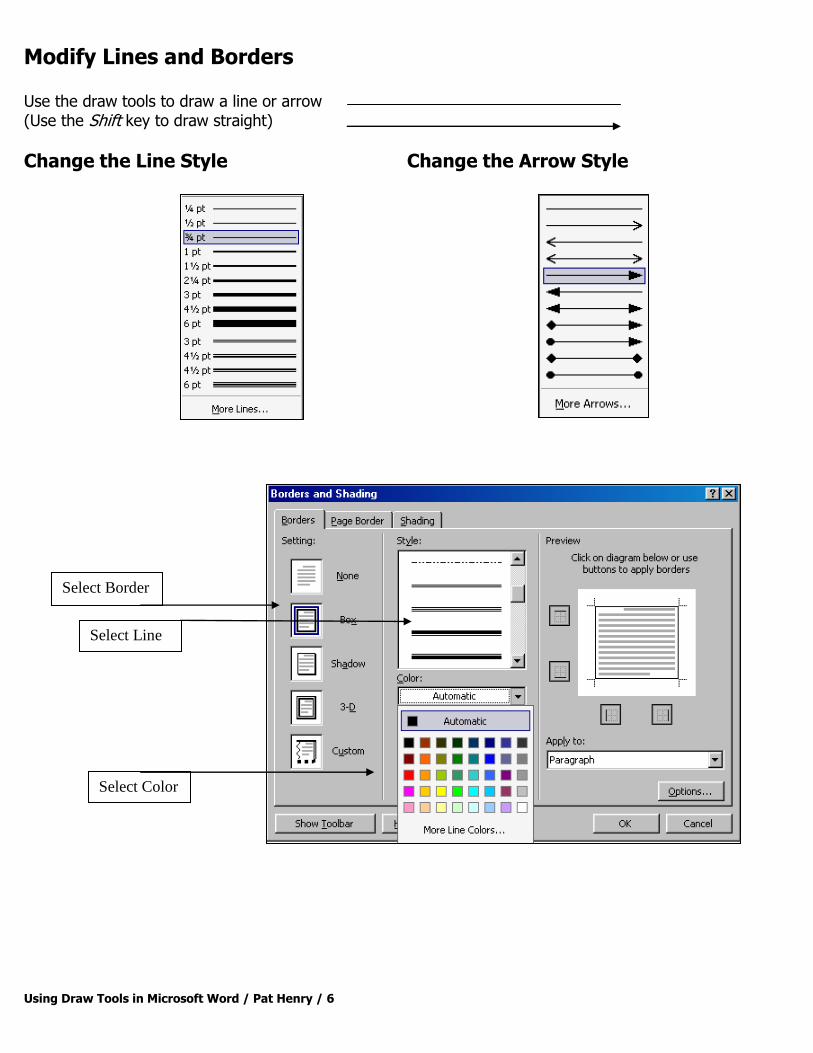
Modify Lines and Borders Use the draw tools to draw a line or arrow (Use the Shift key to draw straight)
Change the Line Style Change the Arrow Style
Select Border
Select Line
Select Color
Using Draw Tools in Microsoft Word / Pat Henry / 7
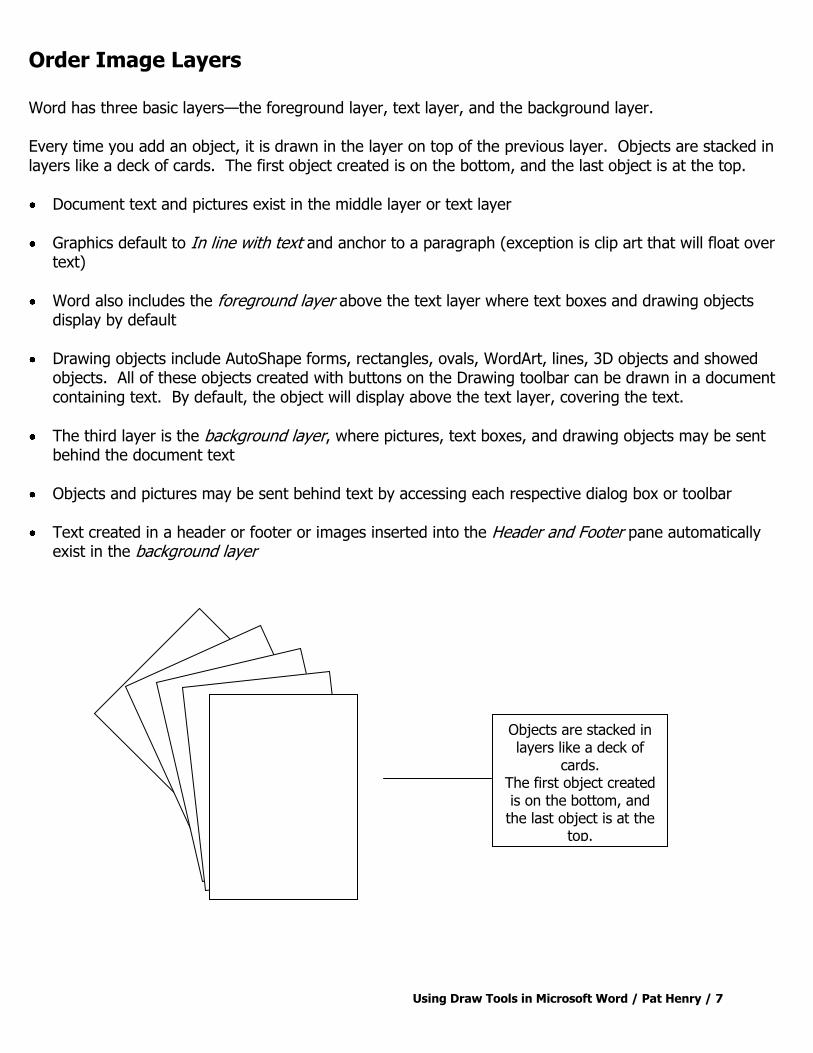
Order Image Layers Word has three basic layers—the foreground layer, text layer, and the background layer. Every time you add an object, it is drawn in the layer on top of the previous layer. Objects are stacked in layers like a deck of cards. The first object created is on the bottom, and the last object is at the top. Document text and pictures exist in the middle layer or text layer
Graphics default to In line with text and anchor to a paragraph (exception is clip art that will float over text)
Word also includes the foreground layer above the text layer where text boxes and drawing objects display by default
Drawing objects include AutoShape forms, rectangles, ovals, WordArt, lines, 3D objects and showed
objects. All of these objects created with buttons on the Drawing toolbar can be drawn in a document containing text. By default, the object will display above the text layer, covering the text.
The third layer is the background layer, where pictures, text boxes, and drawing objects may be sent behind the document text
Objects and pictures may be sent behind text by accessing each respective dialog box or toolbar
Text created in a header or footer or images inserted into the Header and Footer pane automatically exist in the background layer
Objects are stacked in layers like a deck of
cards. The first object created is on the bottom, and
the last object is at the top.
Using Draw Tools in Microsoft Word / Pat Henry / 8
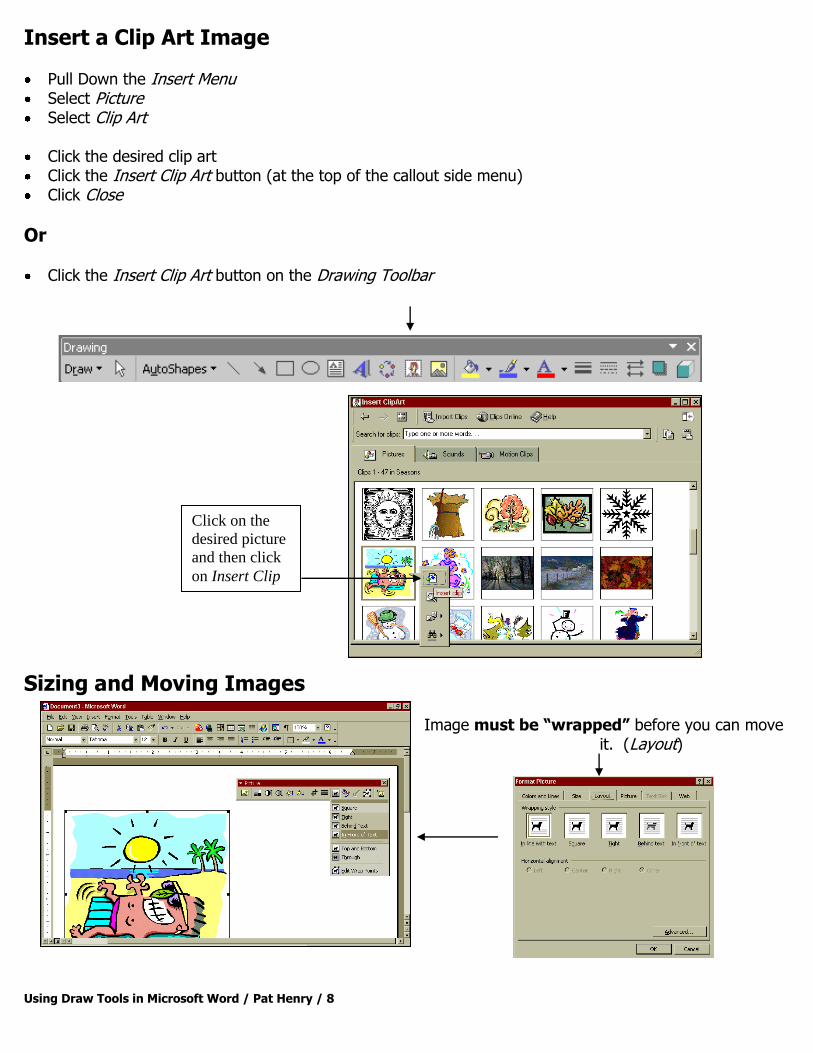
Insert a Clip Art Image
Pull Down the Insert Menu Select Picture Select Clip Art
Click the desired clip art Click the Insert Clip Art button (at the top of the callout side menu) Click Close
Or
Click the Insert Clip Art button on the Drawing Toolbar
Sizing and Moving Images
Image must be “wrapped” before you can move
it. (Layout)
Click on the
desired picture
and then click
on Insert Clip
Using Draw Tools in Microsoft Word / Pat Henry / 9
Once an image is inserted in a document, it can be sized using the white sizing handles that display around a selected clip art image. To change the size of an image, select it, position the mouse pointer on a sizing handle until the pointer turns into a double-headed arrow. Hold down the left mouse button, drag the sizing handle in or out to decrease or increase the size of the image, and then release the mouse button.
Always use the sizing handles in the corners to change the height and width at the same time and in proportion to each other.
Inserting Watermarks in a Document
Basically there are two methods for creating watermarks in Word documents. One method uses the Header and Footer feature, which automatically positions the image behind the text layer. The other method suggests that you send the image behind the text layer.
Creating a Watermark in a Header and Footer
Click View, then Header and Footer Click Insert, point to Picture, and then click Clip Art Display the Insert ClipArt dialog box, select the picture you want, and then click the Insert Clip Art
button Click once on the image to select it (make sure the Picture toolbar displays) Click the Text Wrapping button and select In Front of Text or Behind Text to change the default in line
option. (In Front of Text or Behind Text will allow you to move the image freely around the screen.) Drag a corner-sizing handle to size the image proportionally Drag the four-headed arrow to move the image Click the Image Control button on the Picture toolbar and select Watermark Click the Close button on the Header and Footer toolbar
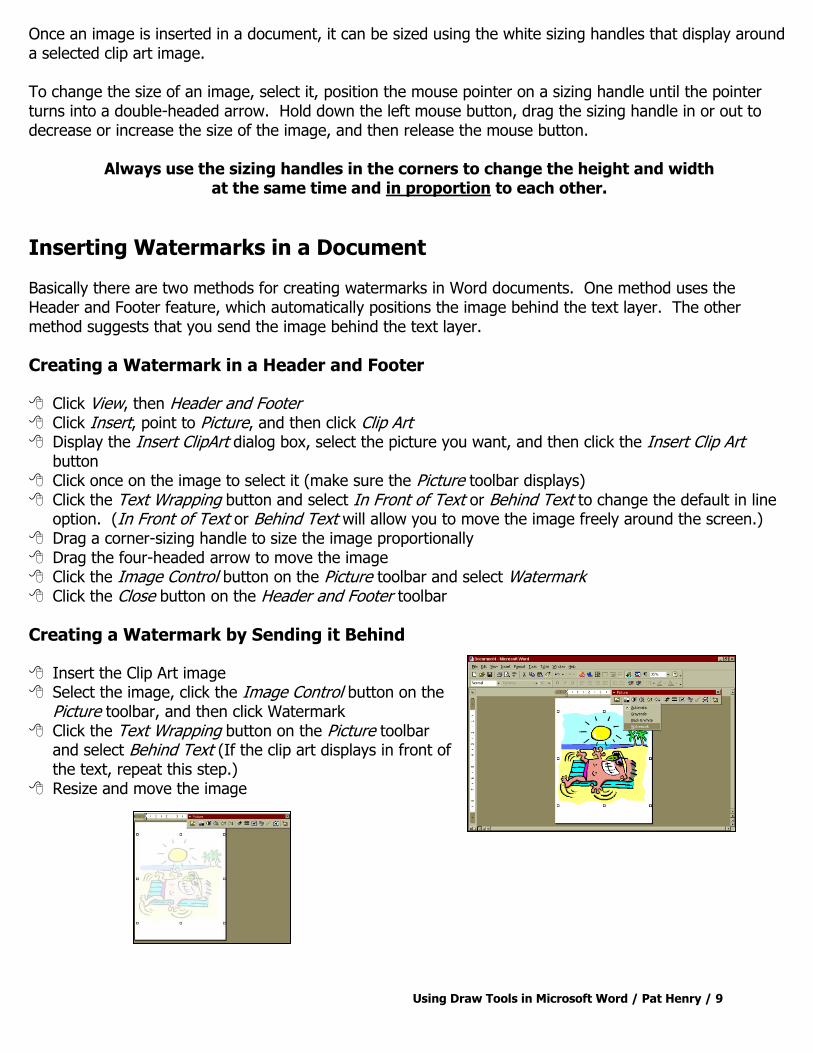
Creating a Watermark by Sending it Behind
Insert the Clip Art image Select the image, click the Image Control button on the
Picture toolbar, and then click Watermark Click the Text Wrapping button on the Picture toolbar
and select Behind Text (If the clip art displays in front of the text, repeat this step.)
Resize and move the image
Using Draw Tools in Microsoft Word / Pat Henry / 10
Reviewing the Drawing Toolbar
The Drawing toolbar provides tools you can use to draw, manipulate, and format all kinds of drawing objects.
Using the Draw Button
The Draw menu has many shape adjustment commands, including grouping, ordering, using a grid, nudging, aligning, distributing, rotating, flipping, editing points, changing shape, and setting AutoShape defaults.
Using the Grouping, Ungrouping, and Regrouping Commands
When you group pictures or objects, they function as a single unit. Ungrouping a group releases the individual components from a whole unit. Ungrouping and regrouping the image converts the clip art image into an object, which can be edited using the Drawing tools.
Changing the Order of Pictures and Objects
When you create an object on top of another object, you create an overlapping stack. You can rearrange the stacked objects by using the Order command on the Draw menu. You can also stack groups and then change their stacking order.
Using the Grid Option
The drawing grid is an invisible grid of lines that aligns drawing objects and draws straight lines. It acts as a magnet, attracting your crosshairs as you draw lines at certain increments.
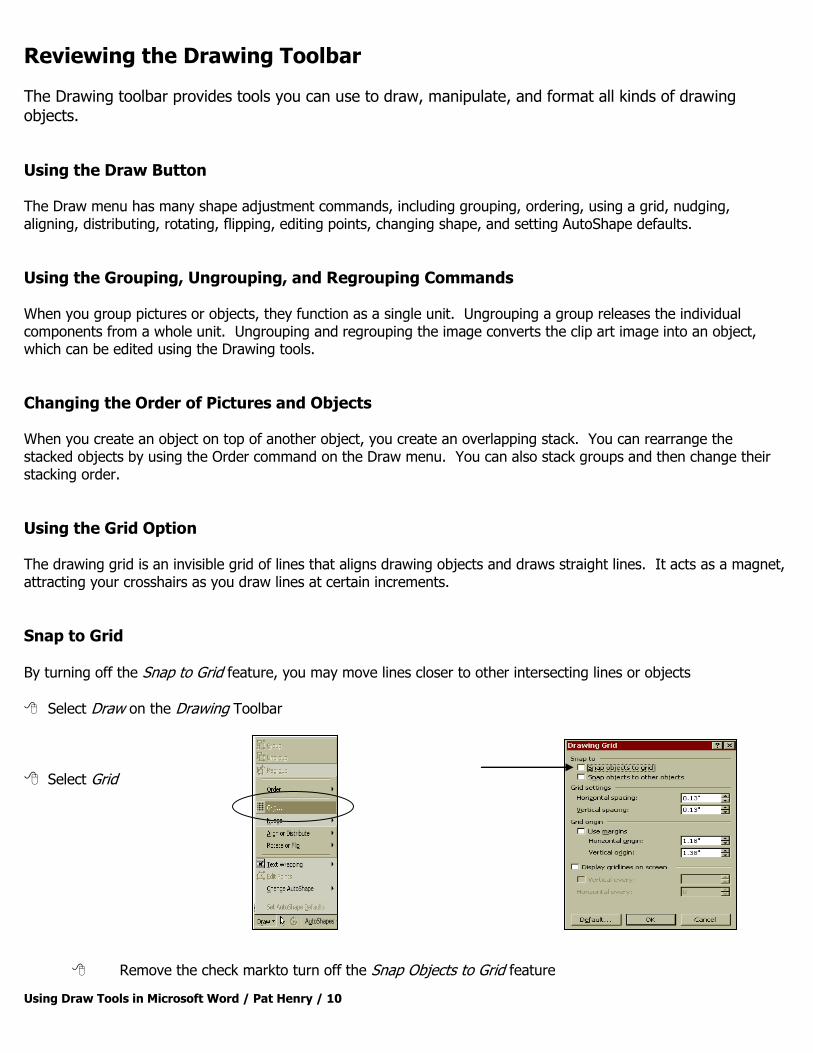
Snap to Grid
By turning off the Snap to Grid feature, you may move lines closer to other intersecting lines or objects
Select Draw on the Drawing Toolbar Select Grid
Remove the check markto turn off the Snap Objects to Grid feature
Using Draw Tools in Microsoft Word / Pat Henry / 11
Using the Nudge Option To nudge an object is to move it in small increments. Select the object you want to nudge, click Draw, point to Nudge, and then click the direction you want to nudge the object. You can also nudge an object by selecting it and pressing the arrow keys. Press Ctrl and the arrow keys t nudge an object in one-pixel increments.
Using the Align or Distribute Command
You can align two or more drawing objects relative to each other by the left, center, right, top, middle or bottom edges, or distribute them equally vertically or horizontally.
Using the Rotate or Flip Command
You can rotate a drawing object or group of drawing objects 90 degrees to the left or right, or flip a drawing object or group of drawing objects horizontally or vertically. Select the object, click Draw, point to Rotate or Flip, and then click the option you want to use. You can also click the Free Rotate tool on the Drawing toolbar.
Using the Text Wrapping Command
The Text Wrapping command provides options to change how text will wraparound an object, picture, or text box.
Using Edit Points
The Edit Points command on the Draw menu plots the points of your freehand drawing to enable you to modify it. You can point to any one of the editing points and drag it to a new location, altering the shape of your drawing.
Using the Change AutoShape Command
When you draw an AutoShape object in your document and decide you want to use a different shape, select the object, click Draw, point to Change AutoShape, and then select a different AutoShape. The new shape will automatically replace the old one.
Using Draw Tools in Microsoft Word / Pat Henry / 12
Using the Select Objects Button The Select Objects button enables the selection of one or more drawing objects. You can use the Select Objects button to draw a box around an object or picture to ungroup it, and after selecting a separate component and editing it, you can then group the image again by redrawing the selection box around the object or picture and clicking the Group option from the Draw menu. The Select Objects command is also helpful in selecting text, objects, or pictures that are positioned in different layers of the document. To select the picture, position the Select Objects pointer over the picture and click to select it; then click the Select Objects button to deselect it when you are finished. In addition, you can select several objects by holding down the Shift key as you select each object.
Using the Free Rotate Button You can rotate drawing objects to any degree by using the Free Rotate tool on the Drawing toolbar. Position the Free Rotate tool (circular arrow) over one of the green dots (rotation handles) that will display around the image, drag it in a desired direction, and then release the left mouse button.
Using the AutoShapes Button
The AutoShapes button opens a menu of shapes in six categories. Each of the categories offers a variety of shapes. The More AutoShapes category takes you to the Clip Gallery.
Using Draw Tools in Microsoft Word / Pat Henry / 13
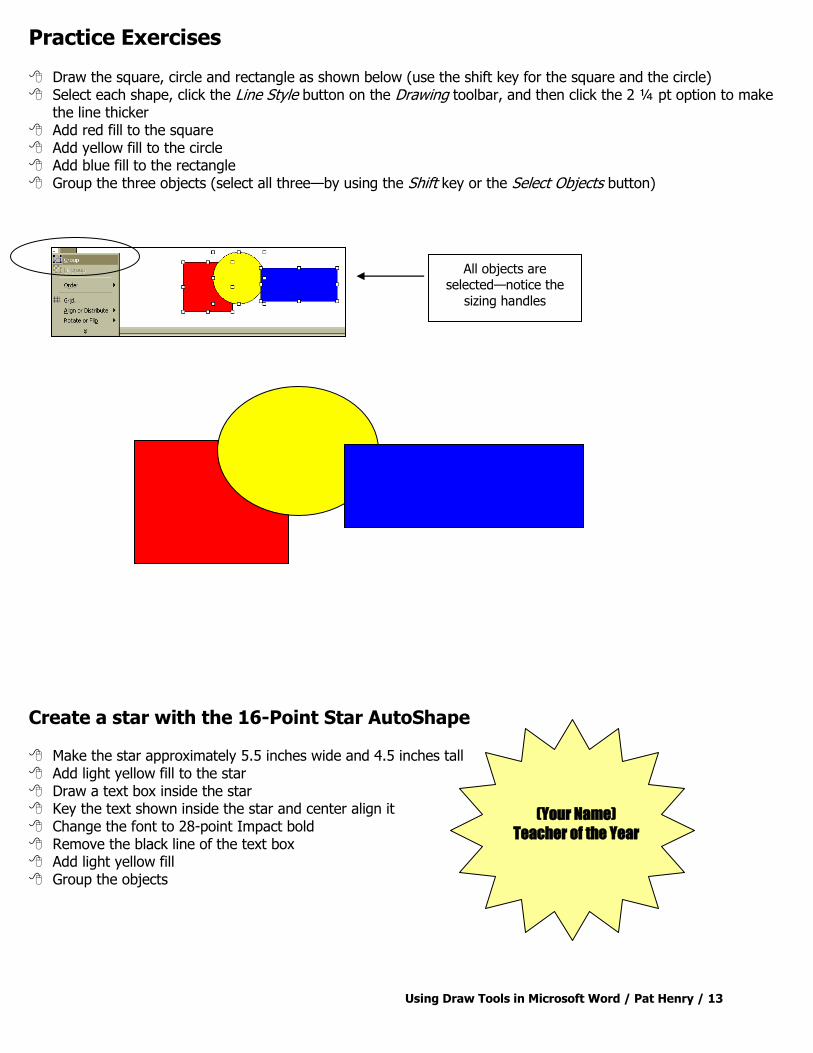
Practice Exercises
Draw the square, circle and rectangle as shown below (use the shift key for the square and the circle) Select each shape, click the Line Style button on the Drawing toolbar, and then click the 2 ¼ pt option to make
the line thicker Add red fill to the square Add yellow fill to the circle Add blue fill to the rectangle Group the three objects (select all three—by using the Shift key or the Select Objects button)
Create a star with the 16-Point Star AutoShape
Make the star approximately 5.5 inches wide and 4.5 inches tall Add light yellow fill to the star Draw a text box inside the star Key the text shown inside the star and center align it Change the font to 28-point Impact bold Remove the black line of the text box Add light yellow fill Group the objects
(Your Name)
Teacher of the Year
All objects are selected—notice the
sizing handles
Using Draw Tools in Microsoft Word / Pat Henry / 14
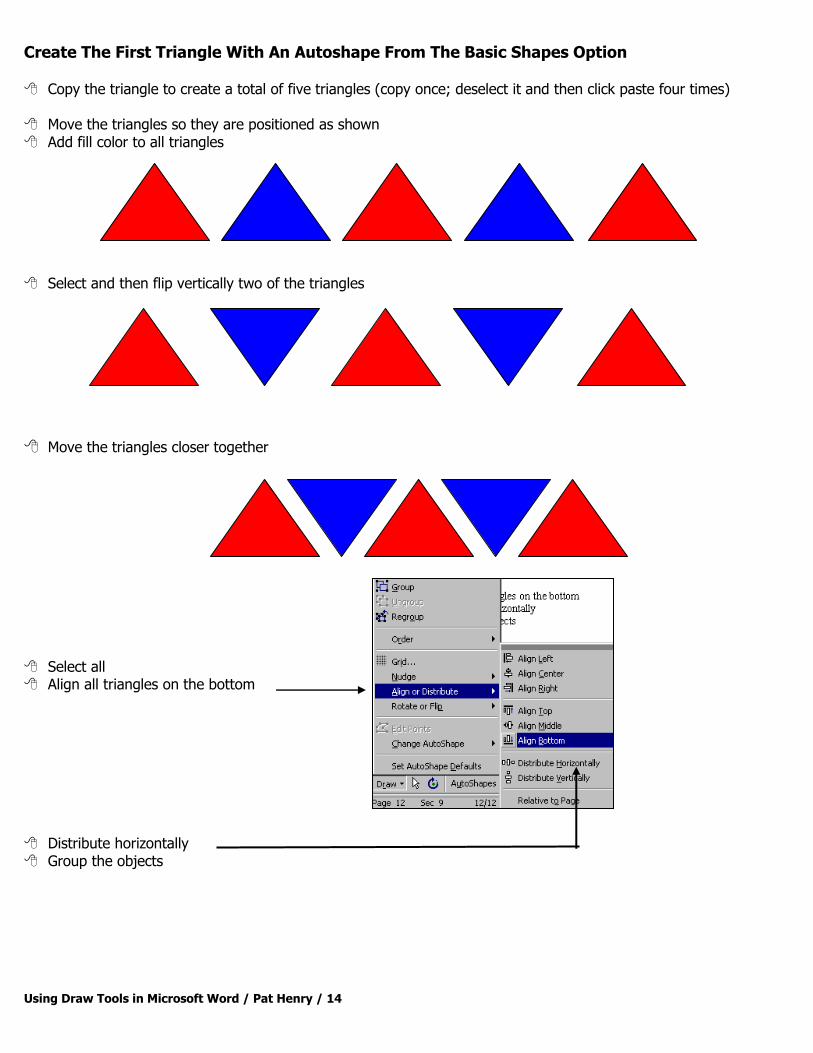
Create The First Triangle With An Autoshape From The Basic Shapes Option
Copy the triangle to create a total of five triangles (copy once; deselect it and then click paste four times) Move the triangles so they are positioned as shown Add fill color to all triangles Select and then flip vertically two of the triangles
Move the triangles closer together
Select all Align all triangles on the bottom Distribute horizontally Group the objects