user manual - hyperactive audiotechnik gmbh · user manual inspired instruments inc. 4590 ish dr....
TRANSCRIPT

User ManUal<Gen2>
InspIred Instruments Inc.4590 Ish dr. suIte 130, sImI valley calIfornIa, 93063
(805) 426-5000
2 user manual InspIred Instruments Inc. 3
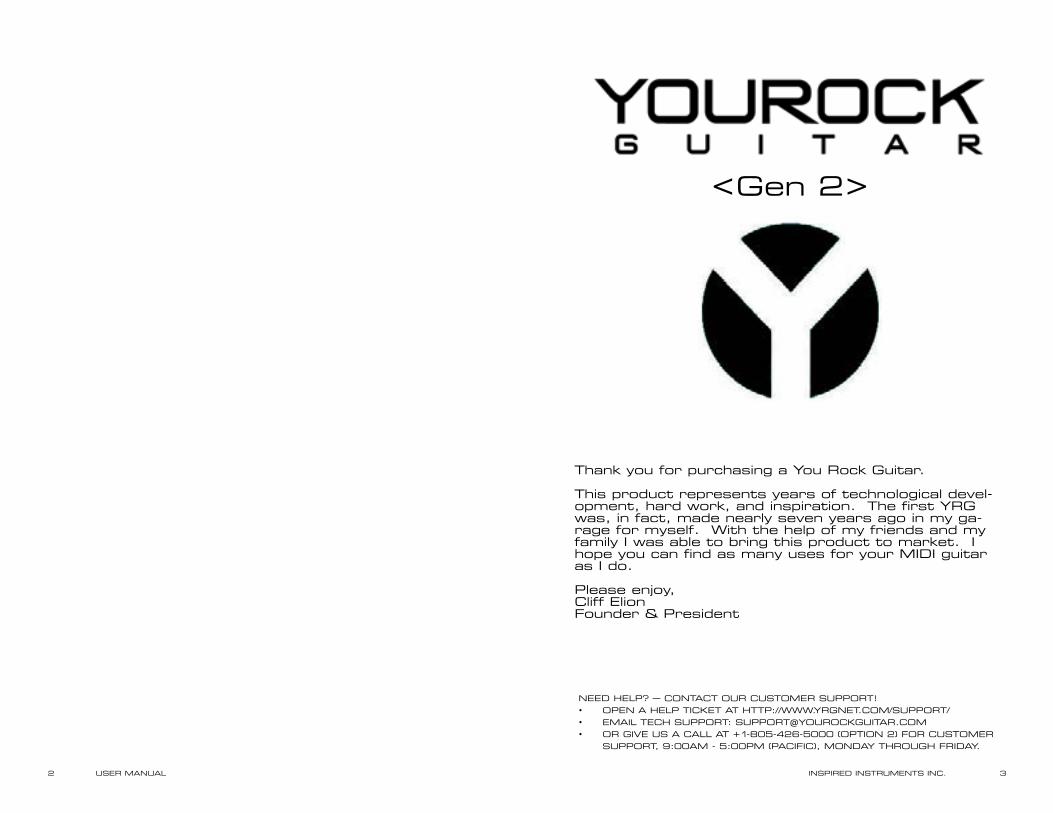
thank you for purchasing a you rock Guitar.
this product represents years of technological devel-opment, hard work, and inspiration. the first yrG was, in fact, made nearly seven years ago in my ga-rage for myself. With the help of my friends and my family I was able to bring this product to market. I hope you can find as many uses for your mIdI guitar as I do.
please enjoy,cliff elionfounder & president
need help? – contact our customer support! • open a help tIcket at http://WWW.yrGnet.com/support/ • emaIl tech support: [email protected]• or GIve us a call at +1-805-426-5000 (optIon 2) for customer
support, 9:00am - 5:00pm (pacIfIc), monday throuGh frIday.
<Gen 2>
4 user manual InspIred Instruments Inc. 5
• InstallInG a headstock
• removInG the neck
• attachInG the neck
setUp
power
the basics
• Internal sounds
• GuItar and synth layers
• hoW the dIsplay Works
• start playInG
cUstoMizing play
• button navIGatIon
• fret select
• navIGatIon
• adjustInG the GuItar layer
• savInG presets
• selectInG presets
• open tunInGs
• selectInG backInG tracks
• adjustInG the synth layer
• adjustInG strInG tensIon
• resettInG presets and settInGs
advanced featUres• accessInG submenus
• submenu 1: transpose
• submenu 2: user tunInGs
11
12
13
14
18
whats in the boX
• +/- buttons
• joystIck
• volume knob
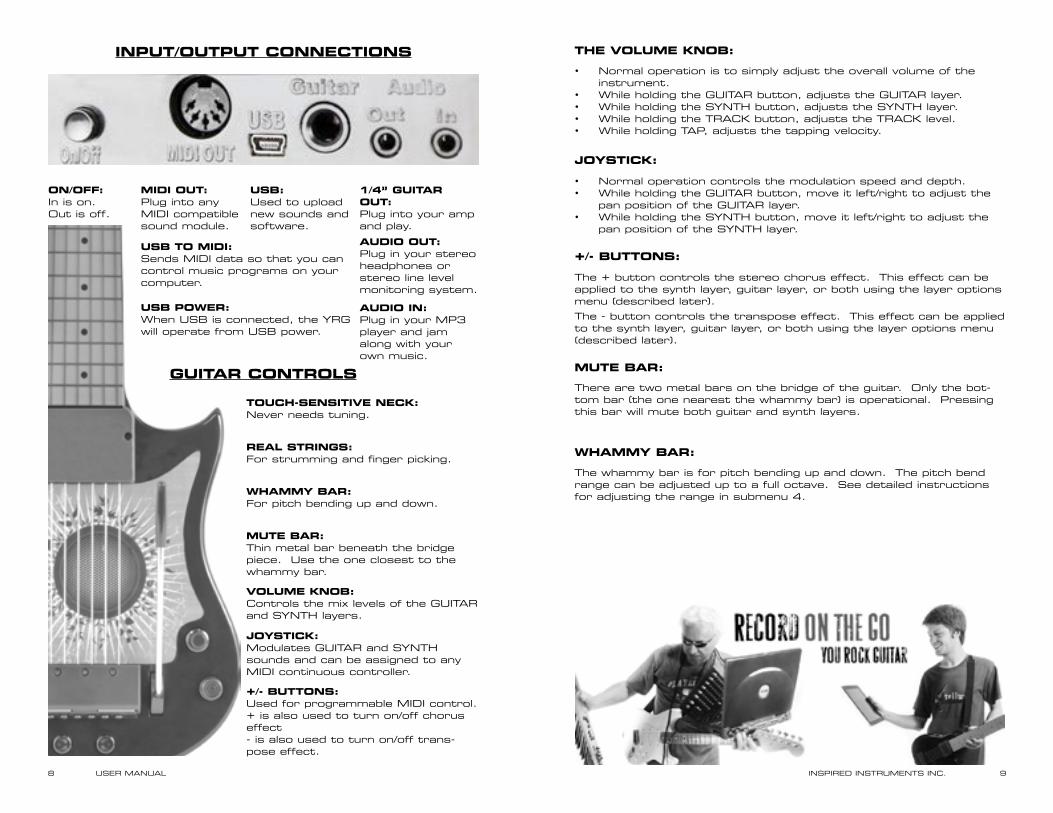
gUitar controls
i/o connections
optional hardware and software
7
7
8
8
• Whammy bar
• mute bar
• removInG a headstock
control panel 10
• slIde mode
• tap mode
• led dIsplay
• mIdI button
• poWer savInG functIon
gaMe Mode• overdrIve/star poWer actIvatIon
• WII™
• ps3™
troUbleshooting• before requestInG servIce
additional inforMation and legal
26
29
28
• submenu 3: layer optIons
• submenu 4: preset optIons
• submenu 5: Global settInGs
yoU rock Mode• recordInG WIth you rock tracks
24
• mIdI surface controller
• rock band 3 pro mode
• specIfIcatIons
• reGulatory notIce
• lImIted lIabIlIty and WarrantIes
• copyrIGhts and credIts
appendiX
• #3 synth sounds
• #2 GuItar sounds
• #1 presets
• #6 track chord proGressIons
• #5 open tunInGs
• #4 tracks
• #7 usInG clIps/scenes In lIve!
32
• #8 rockband 3 pro-mode button layout
• #9 chord dIaGrams
6 user manual InspIred Instruments Inc. 7
risk of electric shockdo not open
caUtion
attention: risque de chic electrique - ne pas ouvrir.warning: to reduce the risk of fire or electric shock. do not ex-
pose the equipment to moisture.these labels shown above are internationally accepted symbols that warn of potential hazards with electrical products. the lightning flash with arrowpoint in an equilateral triangle means that there are dan-gerous voltages present within the unit. the exclamation point in an equilateral triangle means that it is necessary for the user to refer to the owner’s manual.
these symbols warn that there are no user serviceable parts inside the unit. do not open the unit. do not attempt to service the unit yourself. refer all servicing to qualified personnel. opening the chas-sis for any reason will void the manufacturers warranty. do not get the unit wet. If liquid is spilled on the unit, shut it off immediately and take it to a dealer for service. disconnect the unit during storms to prevent damage.
electrostatic discharge stateMentthis unit may require resetting after a severe electrostatic discharge event.
radio freqUency interference stateMentthe unit may require resetting after exposure to radio frequency in-terference.
other caUtionary stateMentsa. “ the apparatus shall not be exposed to dripping or splashing and no objects filled with liquids such as vases, shall be placed on the ap-paratus.”b. “excessive sound pressure from earphones and headphones can cause hearing loss.”c. “batteries shall not be exposed to excessive heat such as sun-shine, fire or the like.”
please read before operating this device - warning
déclaration de décharge électrostatiqUecette unité nécessite une réinitialisation après un cas de décharge électrostatique grave.
déclaration sUr le broUillage radioélectriqUe de fréqUencecette unité nécessite une réinitialisation après un une exposition à des interférences de fréquences radio.
d’aUtres advertisseMentsa. “l’appareIl ne doIt pas être exposé à des Gouttes ou des éclaboussures
et qu’aucun objet remplI de lIquIde, tels que des vases, doIt être placé
surl’appareIl.”
b. “la pressIon excessIve du son par les écouteurs et le casque peut en-
traîner une perte d’audItIon.”
c. “pIles ne doIvent pas être exposés à une chaleur excessIve comme le soleIl,
le feu, etc.”
s’il voUs plaît lire avant d’Utilisation cet ap-pareil - avertisseMent
keep these instrUctions
• the apparatus should not be exposed to any lIquIds.
• do not place anythInG dIrectly on top of the yrG.
• do not place near any heat sources such as radIators, heat reGIsters,
stoves, or other apparatus (IncludInG amplIfIers) that produce heat.
• only use yrG compatIble attachments or accessorIes.
• unpluG thIs apparatus durInG lIGhtnInG storms or When unused for lonG
perIods of tIme.
refer all servicing to qualified service personnel. servicing is required when the apparatus has been damaged in any way, such as liquid has been spilled or objects have fallen into the apparatus, the apparatus has been exposed to rain or moisture, does not operate normally, or has been dropped.
operatIon Is subject to the folloWInG four condItIons:
• thIs devIce may not cause harmful Interference and
• thIs devIce may accept any Interference receIved, IncludInG Interference
that may cause undesIred operatIon.
operatIon of thIs unIt WIthIn sIGnIfIcant electromaGnet-Ic fIelds should be avoIded.
• use only shIelded InterconnectInG cables.
warning for yoUr protectionread the following
electroMagnetic coMpatibility
If you Want to dIspose of thIs product, do not mIx It WIth General household Waste. there Is a separate collectIon system for used electron-Ics products In accordance WIth leGIslatIon that requIres proper treatment, recovery and recyclInG.
private households in the 25 member states of the eu, in switzer-land and norway may return their used electronic products free of charge to designated collection facilities or to a retailer (if you pur-chase a similar new one).
for countries not mentioned above, please contact your local authori-ties for a correct method of disposal. by doing so you will ensure that your disposed product undergoes the necessary treatment, recovery and recycling and thus prevent potential negative effects on the envi-ronment and human health.
what’s in the boX
yrG 1000 (Gen. 2)
GuItar strap
3 GuItar pIcks
usb cable 6 feet
audIo cable (GuItar) 9 feet
user GuIde
optional hardware and software
headstocks
pIckGuards
sound lIbrarIes
jam tracks
Gameflex cartrIdGe
8 user manual InspIred Instruments Inc. 9
inpUt/oUtpUt connections
on/off:In is on.out is off.
Midi oUt:plug into any mIdI compatible sound module.
Usb:used to upload new sounds and software.
1/4” gUitar oUt:plug into your amp and play.
aUdio oUt:plug in your stereo headphones or stereo line level monitoring system.
aUdio in:plug in your mp3 player and jam along with your own music.
gUitar controls
toUch-sensitive neck:never needs tuning.
real strings:for strumming and finger picking.
whaMMy bar:for pitch bending up and down.
MUte bar:thin metal bar beneath the bridge piece. use the one closest to the whammy bar.
volUMe knob:controls the mix levels of the GuItar and synth layers.
joystick:modulates GuItar and synth sounds and can be assigned to any mIdI continuous controller.
+/- bUttons:used for programmable mIdI control. + is also used to turn on/off chorus effect- is also used to turn on/off trans-pose effect.
Usb to Midi:sends mIdI data so that you can control music programs on your computer.
Usb power:When usb is connected, the yrG will operate from usb power.
• normal operation is to simply adjust the overall volume of the instrument.
• While holding the GuItar button, adjusts the GuItar layer.• While holding the synth button, adjusts the synth layer.• While holding the track button, adjusts the track level.• While holding tap, adjusts the tapping velocity.
the volUMe knob:
joystick:
MUte bar:
whaMMy bar:
• normal operation controls the modulation speed and depth.• While holding the GuItar button, move it left/right to adjust the
pan position of the GuItar layer.• While holding the synth button, move it left/right to adjust the
pan position of the synth layer.
+/- bUttons:
the + button controls the stereo chorus effect. this effect can be applied to the synth layer, guitar layer, or both using the layer options menu (described later).
there are two metal bars on the bridge of the guitar. only the bot-tom bar (the one nearest the whammy bar) is operational. pressing this bar will mute both guitar and synth layers.
the whammy bar is for pitch bending up and down. the pitch bend range can be adjusted up to a full octave. see detailed instructions for adjusting the range in submenu 4.
the - button controls the transpose effect. this effect can be applied to the synth layer, guitar layer, or both using the layer options menu (described later).

10 user manual InspIred Instruments Inc. 11
control panel
gaMe:press to enter Game mode.
tap:enables tap mode. no strumming or picking required.
open:turns on and adjusts open tun-ings.
gUitar:hold to access GuItar layer sounds for the current preset.
MUsic:press to enter musIc mode. blinks to indicate unsaved preset modifications.
record:starts and stops on-board recorder.
used also in conjunction with the musIc button to save changes to presets.
play:starts and stops backing tracks and user record-ed play back.
Midi:turns the guitar into a mIdI controller for digital audio workstations.
Up/down:used for naviga-tion.
synth:hold to access the synth layer sounds for the current preset.
yoU rock:turns on you rock mode to automatically play in the same key as the current backing track.
slide:switches between hammer-on and bending.
led display:displays general information.
track:hold to select backing tracks.
led display:
displays the current patch number, menu, submenu, or parameter values during editing.
tap Mode:
With tap enabled, you don’t the need to strum or pick the strings to trigger notes. tap velocity can be adjusted via the volume knob. to do so, simply hold down the tap button and scroll through the volume settings (1-12) with the volume knob. setting 12 will cause the loud-est triggers.
slide Mode:
With slide mode enabled, while sliding up or down the neck, the pitch of new notes are changed without re-triggering the attack. the slide range can be adjusted (see: adjusting slide range in submenu 4).
Midi bUtton:
the mIdI button is used to activate the mIdI controller function of the yrG. When enabled the yrG can be used to control features on a daW or other applications like ableton live!™. mIdI controller features are implemented as an array of switches that are superim-posed on the guitar fingerboard. see: advanced features/mIdI sur-face controller.
setUpattaching the neck:
• make sure your you rock Guitar is powered down.• slide the neck into the grooves at the top of the guitar body until
the neck snaps into the locked position.
reMoving the neck:
• make sure your you rock Guitar is powered down.• release the latch at the base of the neck.• pull the neck out of the body.

12 user manual InspIred Instruments Inc. 13
installing a headstock:
• Insert headstock into the slot at the top of the neck.
• locate and tighten screw inside the headstock using a phillips head screwdriver.
note: tighten only until you feel resistance against the screw and the headstock is firmly attached.
reMoving a headstock:
• loosen screw inside the head-stock (screw from the top of the stock) until the headstock can be easily wiggled back and forth (you shouldn’t have to loosen too much).
• hold the guitar facing away from you. Wrap one hand around the top of the head-stock and use the other to grasp the top of the neck.
• Gently push forward and pull up to remove the headstock. you are now ready to install a different headstock. repeat the above instructions.
powerthe you rock Guitar can be powered by usb or by four aa batteries.
power saving fUnction:
to save power the yrG automatically shuts off if left idle for five min-utes. a minute prior to the automatic shut down the control panel lights will begin to pulsate.
note: this function only applies when powered by batteries.
(headstocks sold separately)
the basics
how the display works:
the numerical led display usually shows the current preset number. When the GuItar layer button is pressed, the led will show the sound mapped to the GuItar layer for a few seconds, then revert to the preset number. this func-tions the same for all the parameter buttons.
additionally, the numerical led display will display menu and submenu options as well as the pa-rameter values within those menus.
at the bottom of the display there are six orange led indicators, each representing a string on the guitar (the left led corresponding to the low e string, etc.). When a string is struck, or a parameter for that string is being edited, the matching led will light up.
gUitar and synth layers:
the yrG allows you to select two simultaneous sounds - one for the GuItar layer and another for the synth layer. both layers can ac-cess all sounds on the guitar.
pressing the synth button will turn on the synth layer allowing you to play the GuItar and the synth simultaneously.
this GuItar and synth layer concept can be used creatively by com-bining different sounds, effects, and other features available on your you rock Guitar.
there are many parameters that can be adjusted and assigned to the GuItar and synth layer: zone, volume, pan, effects, transpose, mIdI channel assign, velocity tables. these are described later in the advanced menu section.
internal soUnds:
you can play the you rock Guitar® as a stand-alone electronic guitar by plugging it into an amplifier, headphones, or stereo system.
under the GuItar layer, the yrG <Gen2> features 15 built-in sampled guitar sounds. see appendix #2 for a list of sounds. more details available at www.yourockguitar.com.
under the synth layer, the yrG <Gen2> features 15 synthesizer sounds all of which can be found in appendix #3.

14 user manual InspIred Instruments Inc. 15
start playing:
When you turn on the you rock Guitar the musIc button will blink several times and then all the leds will light up. on startup, the most recently used preset will be brought up by default.
• pick or strum the strings while you play notes or chords on the fret board.
• use the Whammy bar to bend notes up or down.• mute sustaining notes by touching the thin metal mute bar at the
back and behind the “bridge.” note that only the lower bar closest to the high e string will mute in this way.
• try moving the joystick while you play, it adds vibrato. to change presets, press the up or doWn buttons on the control panel. the led display blinks for about 3 seconds while the you rock Guitar loads the preset you have selected.
to adjust the volume of the preset, use the volume knob.
It’s easy to modify and save any of the presets. you can:
• choose a guitar sound (15 available) and set its volume / pan /etc.• choose a synthesizer sound (15 available) and set its volume / pan
/ etc.• choose a backing track (20 available) and set its volume / etc.• record your own track.• (you rock, open, slide, or tap).
cUstoMizing playnavigation:
there are two ways to adjust most of the values that configure the yrG. you can use button navigation or you can use fret se-lect™.
fret select:
fret select™ is configured so that the top ten frets on each string correspond to a value. they are as follows:
• low e string: 1 ~ 10, • a string: 11~20 • d string: 21~30 • G string: 31~40• b string: 41~50 • hie string: 51~60
hold down the button that corresponds to the parameter you wish to change and press the fret/string to set the value.
note: some parameters in the submenus use other value ranges.
bUtton navigation:hold down the button that corresponds to the param-eter you wish to change, then simply press the up/doWn buttons to move sequentially through values.
selecting presets:
fret-select: press and hold musIc while using the fingerboard to select a preset
button navigation: press up or doWn to navigate to the desired preset.
the display will blink the preset number while it’s loading, and go solid when the yrG is ready.
When a preset is loaded, all the parameters affecting the guitar are modified. see the preset guide that comes with your yrG, appendix #1, or at http://yourockguitar.com/support/manuals.
the you rock Guitar comes programmed with default presets, each combining one guitar and one synthesizer sound. In some cases, one layer is muted by default. It can be un-muted by pressing the synth/GuItar layer button.
note: you can only play or edit presets when the you rock Guitar® is in musIc mode.
saving presets:
to save your modified preset:• hold the musIc button.• press the record button.• release the musIc and record buttons.
note: a blinking musIc button indicates that your preset modifica-tions have not been saved.
adjUsting the gUitar layer:
to change the guitar sound:• hold down the GuItar button.• use any selection method to navigate through the sounds. the
led blinks the number corresponding to the selected guitar sound.
• release the GuItar button to load the new sound. the musIc button blinks to indicate that the preset has been changed.
to adjust the pan position of the GuItar layer:• hold the GuItar button• move the joystick left or right. the led display shows the GuItar
layer pan position.
to mute the guitar, press the GuItar layer button to turn it off.
to save your modified preset, hold down the musIc button and then press the record button.

16 user manual InspIred Instruments Inc. 17
adjUsting the synth layer:
to change the synth sound:• hold down the synth button.• use any selection method to navigate through the sounds. the
led blinks the number corresponding to the selected sound. • release the synth button to load the new sound. the musIc
button blinks to indicate that the preset has been changed.
to adjust the pan position of the synth layer:• hold the synth button• move the joystick left or right. the led display shows the synth
layer pan position.
to mute the synth, press the synth layer button to turn it off.
to save your modified preset, hold down the musIc button and then press the record button.
note: to save the new tuning to the current preset, hold musIc and press record.
selecting backing tracks:
each preset has a backing track that you can jam along to. these tracks are loops created specifically so that you can jam right out of the box. the tracks use chord progressions common to rock and roll, punk, country rock, pop rock, and the blues.
to play a backing track:• choose a preset with the up and doWn buttons, and wait a
couple of seconds for the preset to load. • press play. the track assigned to the preset starts looping. • play along with the backing track. note: to stop the backing track, press play again.
presets 1-10 are demo loops.presets 11-20 are beginner loops.presets 21-30 are advanced loops.
see appendix #1 for more details.
to change the track assigned to the selected preset:• hold the track button.• scroll through the available tracks using either navigation meth-
od. the led display shows you the track number.• release the track button. the musIc button blinks to indicate
that you have modified the preset.• press play to start and stop the track you selected. note: in addition to using the onboard backing tracks, internal sounds can also be mixed with an external sound source, such as an mp3 player.
open tUnings:
each preset can store a tuning configuration along with its guitar and synth sounds.
to select a tuning for the current preset:• press and hold the open button. the led display shows the cur-
rent preset’s tuning number for 3 seconds.• use buttons or fret select to choose the open tuning desired. val-
ues 1-55 correspond to open tunings. values 56-70 correspond to “capo” tunings (see tuning summary in appendix #5).
• release the open button.
adjUsting string tension:the tension of the six strings on the right hand action of the yrG can be adjusted by loosening or tightening the screws at the base of the bridge, beneath the mute bar. (turn clockwise to increase tension. turn counterclockwise to decrease tension).
these adjustments have some effect on sensitivity, but should only be adjusted slightly to match your play style.
resetting presets and settings:reload factory presetspress and hold GuItar and synth - press and release track.
reload global settingsWhile in the global option menu 5 press and hold record for 5 sec-onds until the display blinks.
warning: do not over tight-en or over loosen. this could cause the you rock Guitar to
malfunction.

18 user manual InspIred Instruments Inc. 19
advanced featUres
accessing sUbMenUs:
there are five control panel submenus. each allows you to customize the performance of the you rock Guitar to better suit your playing needs. these submenus are ordered numerically. to access a submenu: • press and hold the musIc button. • press and release the play button to move to the next sub-
menu. the lights at the bottom of the led display will begin to flash. the number of flashing leds correspond to the current submenu. the name of the submenu will scroll by while holding the music button.
• release the musIc button.
sUbMenU 1: transpose
here you can transpose the GuItar or synth layer up to two full octaves above or below the normal settings.
to do so: • press the button corresponding to the layer you would like to al-
ter (GuItar or synth). • the led display will display the current transposition setting. • use the up and doWn buttons or fret select to choose your
desired transposition.
each single digit deviation from ‘0’ represents a 1/2 step transposi-tion, either up or down. for instance, transposing the standard tun-ing (eadGbe) of the GuItar layer down to -2 will make it so that the strings are actually tuned to dGcfad. fret select can also be used, with the transposition amount is relative to the 12th fret.
note: fret select only allows adjustment within the fret range, which is limited to -11. to cover a full octave, press the first fret (-11) and then press the down button to get (-12)
note: the (-) button enables/disables the transposition amount saved in a preset.
sUbMenU 2: User tUnings
here you can set up to 9 custom open tunings. from the home menu, these can be accessed by holding open and using the up/doWn buttons to scroll through tunings -1 to -9. once you have reached your desired tuning number, set the open tuning by doing the following: • press and hold the open button. • using the 12th fret as a reference, press a fret above or below
that point to select the new open note for that string. for ex-ample, to set “dropped-d” tuning, press the 10th fret (d) on the lowest string. this will set the open tuning for that string to the d below standard e tuning (two frets below 12, two half steps below e).
• release the open button. your custom tuning will now be saved under the open setting (-1 through -9) that you have selected.
after setting a parameter, press the music button to leave the menus.
sUbMenU 3: layer options
layer options can be applied to the GuItar and synth layers individ-ually. for any of the following parameters press GuItar or synth to activate the layer, then use fret select to set the value of the pa-rameter. different values can be assigned to the GuItar or synth layer.
• EF - chorus effectassign a stereo chorus effect to the GuItar or synth layer - this parameter adjusts the depth of the chorus (range 0-12).
note: the (+) batton enables/disables the chorus effect amount saved in a preset.
• ch - Midi channel selection use this parameter to select the mIdI channel that the GuItar or synth layer will transmit. values of 1 ~ 20 can be selected indepen-dently for the GuItar layer and the synth layer.
mIdI selection: 1 - 16 transmit mIdI data for all of the strings on the mIdI channel selected.
mIdI selection: 17, 18, 19, 20 are reserved for mIdI mono mode. the mIdI information for each string is transmitted on a separate mIdI channel. this allows for polyphonic bending with slIde on.• mIdI 17: transmits on (1~6)• mIdI 18: transmits on (7~12)• mIdI 19: transmits on (6~1)• mIdI 20: transmits on (12~7)
• Vt - velocity tableshere you can adjust the reaction of the you rock Guitar to your picking style. each of the velocity tables handles dynamics – that is, your ability to control the volume of a triggered note by changing the applied force of an attack – in a slightly different way. velocity tables 1-6 allow for different dynamic ranges, with 1 being the most dynamic, and 6 being the least. table 7, however, has no dynamic range, rather setting all triggered notes to play at the same volume. depress the fret corresponding to your desired velocity table. fret 1 corresponds to table 1, fret 2 to table 2, etc. this can be done on any string.
• Hd - hammer decayhere you can set the rate at which hammer-on velocity decays after initially triggering a note. the lower the setting (0-21), the longer the decay. at setting 0, in fact, you will be able to hammer on indefinitely, with no decay whatsoever. With this option displayed, press down on a fret to select your desired decay setting. this can be done on any of the six strings. fret one corresponds to decay setting zero, and fret twenty-two corresponds to decay setting twenty-one.
• bE - bend enablehere you can toggle the whammy bar function on and off for the de-sired layer.

20 user manual InspIred Instruments Inc. 21
• Sn - single note (monophonic) modethis is an on/off function that limits the yrG to playing a single voice (monophonic). this is useful for soloing and sweep picking and is simi-lar to playing a synthesizer that is set to 1 voice only. single note mode can alleviate spurious notes and false triggers when soloing rapidly.
• tL and br - top left and bottom right zone selectionthese two parameters allow a zone to be setup for the GuItar or synth layers. the zone is specified by a rectangle created by the top left and bottom rIGht corners. you assign the parameters by simply pressing the string/fret that defines the corners of the rectangle.
for example, the zones can be de-fined anywhere on the neck. first set the top left (tl) corner of the GuItar layer by striking an open note on the lo e string. the dis-play will show the lo e string and fret 0.
next set the Zone for synth layer by plucking the d string open for tl then pressing the hi e string fret 22 for br.
note: If only one layer is enabled, it will cover the full neck and ignore the zone settings.
sUbMenU 4: preset options
here you can customize the performance of many aspects of the yrG presets. note that alterations made here will affect only your currently selected preset. Within this submenu, use the up/doWn buttons to scroll to your desired parameter. these are as follows:
• od - open damping adjust this is an enhanced version of our open damping algorithm, It allows the user to adjust the damping from 0 ~ 10. recommended settings are in the 4 or 5 range. open damping reduces the likelihood that open notes will ring out when playing other notes on the fingerboard.
then use up arrow to go to bot-tom right (br) and press the a string 22 fret. now GuItar layer will only sound in the zone that has been defined.
• Sr - slide range here you can set the number of half steps (1-12) you can slide up or down. note that the yrG uses pitch bend for slide, and that if you slide outside of the acceptable range, you will trigger a new note. With this option displayed, press down on a fret to set your desired slide range. pressing the first fret will allow you to slide up or down a single half step, while pressing the twelfth will allow you to slide up or down a full octave.
• br - whammy bar range here you can set the number of half steps (1-12) by which the fully en-gaged whammy bar will alter the pitch of any notes being played. With this option displayed, press down on a fret to select your desired whammy range. pressing the first fret will allow you to bend down or up a single half step, while pressing the twelfth fret will allow you to bend up or down a full octave. note that this setting is limited to be-ing no higher than the current slide range setting (if ‘sr’ is set to 5, for instance, ‘br’ can be set anywhere from 1-5, but not to 6).
• PC - Midi patch change here you can set the mIdI patch assigned to the current preset. With this option displayed, press down on the fret corresponding to your desired setting (1-128). fret 1 on the low e string corresponds with setting 1, fret 1 on the a to 23, and so on, up to fret 18 on the high e, which corresponds with setting 128.
• Pd - Modulation pitch depth here you can adjust the depth of the modulation joystick. With this option displayed, press down on the fret corresponding to your de-sired setting (0-127). fret 1 on the low e string corresponds with setting 0, fret 1 on the a to 22, and so on, up to fret 18 on the high e, which corresponds with setting 127.
• PS - Modulation pitch speed here you can adjust the frequency of the modulation joystick. With this option displayed, press down on the fret corresponding to your desired setting (0-127). fret 1 on the low e string corresponds with setting 0, fret 1 on the a to 22, and so on, up to fret 18 on the high e, which corresponds with setting 127.
• (C1) and (C2) - assignable Midi continuous controllers the joystick has both an x and a y direction, c1 corresponds to the x and c2 corresponds to the y. the x and y directions can be as-signed to any mIdI continuous controller number between 1 and 127. If x and y are assigned to the same controller, only a single value is transmitted that represents the distance from the center of the joy-stick.
• (S1) and (S2) - assignable Midi switches the two switches behind the bridge can be assigned to mIdI control-lers. the switches only send out two values 00 or 64 that can be used to turn on/off external mIdI devices. When a switch is assigned a mIdI controller number, the display will read on or of indicating the current state of the mIdI switch for a few seconds – then return to the preset value.
note: to save changes made to your current preset, hold down the musIc button and press the record button. switching between presets without doing so will cause you to lose any unsaved changes.

22 user manual InspIred Instruments Inc. 23
sUbMenU 5: global settings
here, much like in submenu 4, you can customize the behavior of many aspects of the yrG. alterations made here, however, affect not only a single given preset, but the behavior of the guitar as a whole.
use the up/doWn buttons to scroll to your desired parameter. these are as follows:
• HE - hammer enable With this option selected, press down on any fret to toggle hammer-ons and pull-offs on/off (1is on, 0 is off ). note that, while in tap mode, hammer-ons and pull-offs will be enabled, regardless of what this parameter is set to.
• HP - hammer pre-delay this parameter allows you to set a slight delay between when a note is hammered on and when said note actually sounds. this is useful if you are getting double triggers from hammer-ons when plucking. the higher the setting (0-20), the longer the delay before the note is sounded. With this option displayed, press down on a fret. • Hb - hammer blanking sets a short time window after hammering on a note during which new plucks are not accepted. this can help reduce double triggers with some playing styles. the velocity of the last trigger is used for the first hammer – after the first hammer, the velocity is controlled by the hammer decay parameter.
note: both hp and hb remove double triggers resulting from ham-mering and picking at the same time. do not use both hammer blanking and hammer pre-delay together, as they both address the same issue. hammer pre-delay favors picking and hammer blanking favors hammers.
• Fr - fret release this sets a delay after releasing the fingerboard before the system turns off all notes. decreasing this value will help users who have ex-perienced dropped notes when playing fast runs. this also helps with sliding up/down the neck. note that hammer pre delay may adversely affect sliding on the neck.
• SG - string gain this parameter allows you to set the gain of each string individually. a value of 1-10 can be assigned, with 10 being the setting with the loudest response, and 1 being the setting with the quietest. With this option displayed, press down on a fret on the string whose gain set-ting you wish to alter. the first fret corresponds to setting one, the second to setting two, and so on. see note on next page.
• tS - trigger sensitivity here you can set the level required to trigger a note. a value of 1-10 can be assigned, with 10 being the setting where a note requires the least vibration to trigger, and 1 being the setting where a note re-quires the most vibration to trigger. With this option displayed, press down on the fret corresponding to your desired setting. the first fret corresponds to setting one, the second to setting two, and so on.
trigger sensitivity is a global parameter and applies to all strings evenly while string Gain is individually adjustable per string. typically you should use trigger sensitivity to adjust the guitar so that it feels like it is responding correctly to your playing without significant cross-talk. In some cases, you may find that one of the strings is louder or softer than the others - use string Gain to compensate for this. the default setting is 5, and it should not be necessary to make significant adjustments.
note: the string Gain and trigger sensitivity parameters can be used to adjust the guitar for different playing styles. these two parame-ters are global settings and they do interact - use them to adjust and tweak the feel of the instrument to your playing style.
• CF - crosstalk filter adjustthis is an enhanced version of the older crosstalk filter that only had two setting’s: on or off. the new crosstalk filter is adjustable from 0-9. a setting of 4 or 5 is recommended.
• AS - auto silence on/off by default, when you lift your fingers off the fretboard, the yrG mutes all notes currently sounding. this parameter allows you to dis-able that feature. With this option displayed, press down on any fret to toggle auto silencing on/off (1 is on, 0 is off ).
• LH - left hand Mode With this option displayed, press down any fret to toggle left handed mode on/off (1 is on, 0 is off ).
note: to reset these parameters to their default settings, simply press and hold the record button while within submenu 5. When the operation is complete, the lights on the control panel will briefly flash.
Midi sUrface controller
the yrG can be used to control features on a daW or other applica-tions like ableton live!™. mIdI controller features are implemented as an array of switches that are superimposed on the guitar finger-board. the following controller data can be transmitted:
frets 16~22 on all strInGs are mapped Into mIdI con-troller numbers, as folloWs:
fret 16 fret 17 fret 18 fret 19 fret 20 fret 21 fret 22
lo e c:20 c:21 c:22 c:23 c:24 c:25 c:26a c:27 c:28 c:29 c:30 c:31 c:32 c:33d c:34 c:35 c:36 c:37 c:38 c:39 c:40G c:41 c:42 c:43 c:44 c:45 c:46 c:47b c:48 c:49 c:50 c:51 c:52 c:53 c:54hI e c:55 c:56 c:57 c:58 c:59 c:60 c:61
24 user manual InspIred Instruments Inc. 25
pressing a fret sends the controller value 64 (on) releasing the fret sends the controller value 0 (off).
While holding the mIdI button down, the joystick is mapped into mIdI controllers as follows: up c:70, doWn c:71, left c:73. rIGht c:72. moving the joystick sends a 64 (on), returning it to rest, send a 0 (off).
the record button transmits c:74, the play button transmits c:75
the joystick always requires that mIdI button is held down to trans-mit mIdI surface controller info. the fingerboard and play/record buttons will work while the mIdI button is held down, or while the mIdI led is illuminated in latched mode.
to switch between momentary and latched mode press and hold the mIdI button and use the up/doWn arrows to select between:
mode 1. momentary, mode 2. latched
With most daW’s you can map these control numbers into functions as you like.
see appendix #7 for using the mIdI surface controller with ableton live!™
yoU rock Mode
you rock mode™ helps beginners experience the fun of music with little experience. simply pick a backing track, turn on the you rock button, press play, and jam along. you rock mode ensures that the notes you play are in key with the chord progressions of the backing track. you don’t need music theory, lessons, or the hassle of figuring out the right notes to play. just pick a backing track and start jam-ming.
If you play a note that is not in the same key as the backing track, the you rock Guitar reacts according to the you rock mode selected.
Mode 1: automatically pitch corrects to the nearest acceptable note.
Mode 2: teaches you to play in the correct key by playing a “buzz” sound when you play the incorrect note.
Mode 3: Works similarly to mode 2, but is silent when an incorrect note is struck.
to select a you rock mode hold the you rock button and use the up/doWn arrows to select one of the above modes.
the built-in backing tracks use many of the most common modes and scale patterns used in rock and roll, the blues, and pop. you can use the you rock mode to learn which notes work and which ones don’t.
the you rock mode scales are illustrated on the preset table.
recording with yoU rock tracks:
the you rock Guitar lets you record your own performances to inter-nal memory. this is a great tool for those times when you find inspira-tion but are away from your recording system. the recording feature provides a “sketch pad” so you don’t forget great riffs or new chord progressions. each recording is stored as part of the preset you are playing while recording. each preset stores a single recording, which you can overdub or erase entirely.
to record a new track:• choose a preset that you want to play while recording• choose a backing track that you want to listen to while recording• hold record, press play, then release record.• While the backing track plays, play your own track. you can bend
notes with the whammy bar and even turn the GuItar and synth buttons on and off while you play. you rock Guitar re-cords it all!
• to stop recording, press record. • to hear your recorded track, press play to stop, then press
play again to start playback. you hear your recorded perfor-mance.
to punch-in new notes in an existing track:• press play to start playback of the backing track and your own
track.• to punch-in, press record. anything you now play will replace
the existing track’s notes.• to punch-out, press record.
When you play back the track, you will hear your original track except in the section where you punched-in to record the new notes.
the you rock Guitar has two types of you rock scales: • type 1 scales correspond with the built in backing tracks, and are
selected by default upon selecting a track. • type 2 scales correspond to standard major/minor and pentatonic
keys. these can be selected by holding down the you rock but-ton, and using fret select on either of the strings. notes select-ed on the low e string will select the corresponding major scale. notes selected on the high e string will select the corresponding minor scale. notes on the a string will select the pentatonic ma-jor scale. notes on the selected b string will select the pentatonic minor scale.
as an example, selecting fret 2 on the low e string, as shown in the picture to the left, will set the you rock scale to f# major. pressing the 4th fret on the high e string, as shown in the picture to the right, will set the you rock scale to ab minor.
note: setting the you rock mode scale this way will not transpose the active backing track. It is therefore not recommended that you change keys if you wish to play along with the included backing tracks.
26 user manual InspIred Instruments Inc. 27
tips:• your recordings are saved in the current preset when you record
them.• the recorder will record note bending. you can bend notes with
the whammy bar. you can also turn the GuItar and synth but-tons on and off while you play.
• to erase an existing recording, press and hold record for 3 seconds
• If you reset your you rock Guitar’s operating system, your tracks are erased.
• to export your recordings, record the stereo or GuItar audio out into a audio recording device, or record the usb/mIdI output into a mIdI sequencer.
you rock Guitar® works with many games on both ps3 and Wii. most games require the corresponding Gameflex™ cartridge from Inspired Instruments (not included with you rock Guitar®).
rock band 3 pro mode does not require a Gameflex™ cartridge how-ever a mIdI pro adapter is (sold separately by mad catz).
the you rock Guitar® takes game-playing to a completely new level! you can use it as a controller for Guitar hero™ or rock band™, but instead of pressing buttons on the neck or strumming a switch, you’ll play on actual strings and play notes and chords on a realistic string-like fret board!• you rock Guitar® enhances your gaming experience with:• touch the fret anywhere, strike any string.• Whammy bar works for extra star power and points.• slide hand down mute bar to activate star power/overdrive.• Gamer hand-positioning guide on the back of the neck.
warning! always turn off you rock Guitar power before install-ing or removing Gameflex™ cartridges. Installing with power on may cause damage to the guitar and cartridge.
gaMe Mode
wii:
before you can play Wii games with the you rock Guitar®, you have to “sync” it with your console.
to sync to the Wii:• Insert the Wii bluetooth Gameflex™ cartridge in your you rock
Guitar®.• open the front panel on your Wii game console, and press the red
sync button.• on the control panel, press the Game button.
overdrive/star power activation:
as an alternative to using the mute bar, you can pull the whammy bar up (away from the body of the guitar). the effect of pushing the whammy bar down (towards the guitar body) is the same as standard Guitar hero™ or rock band™ controllers.
ps3:
before you can play playstation 3 games with the you rock Guitar®, you have to make sure the Gameflex™ wireless cartridge is “paired” with your usb dongle. In most cases it is shipped this way.
to see if your guitar is already paired with the Gameflex™ cartridge:• Insert the you rock Wireless Gameflex™ cartridge into the you
rock Guitar®.• connect the you rock Wireless usb dongle to the console’s usb
port.• press Game on the you rock Guitar®. If the led displays “2” (not
blinking), your Gameflex™ cartridge is already “paired” to the usb dongle. If the led display blinks “2,” the guitar is not yet “paired.”
to pair to the usb dongle with your console:• press the button on the Gameflex™ cartridge in your guitar.• press the button on the Gameflex™ Wireless usb dongle (con-
nected to your ps3 game console). the dongle led blinks rapidly. When it stops blinking, the “2” on your Guitar will also stop blinking and your you rock Guitar® is ready to play with your playstation 3 console.
rock band 3 pro Mode:
the you rock Guitar is compatible with rock band™ 3 pro mode.
to interface with your game console, you will need:the appropriate mad catz ® mIdI pro-adapter™ for your console (Wii™, xbox 360™, playstation ® 3). standard 5-pin mIdI cable.
Getting started:• connect your yrG to the mad catz ® mIdI pro-adapter™ using
the 5-pin mIdI cable.• plug the mad catz ® mIdI pro-adapter™ into the console.• on the you rock Guitar, press and release the musIc and
Game buttons simultaneously. both lights will stay on, and the panel led’s will read “rb”
• power on your console, start rock band™ 3, and use the button mapping chart (appendix #8) to navigate using the yrG.
note: the mad catz ® mIdI pro-adapter™ cannot be used to navi-gate menus outside of rock band™ 3. however, once in the game, the mad catz ® mIdI pro-adapter™ will come online. at this point the yrG can be used to navigate throughout the game.
the display blinks a #1 when not in sync. the #1 will be solid when in sync.
If the you rock Guitar® does not sync, press the record button. the led display blinks for a moment, and then reads a solid “1”to indi-cate that the sync was successful.
once your you rock Guitar® has synced to your Wii, the Wii will rec-ognize it every time you use it. If there is a problem syncing, please repeat the process after first cycling the power on and off on the guitar. use the joystick for navigation.

28 user manual InspIred Instruments Inc. 29
In addition to the standard features of rock band™ 3 pro mode, the yrG allows you to listen to your performance during the game. this affords the opportunity to turn your gaming experience into a learning experience. to hear your performance plug your 1/4” cable into both your yrG and your amplifier. note: you can also use headphones via the “1/8” out.
to change sounds:• leave rock band™ mode by pressing musIc and Game simulta-
neously.• Go to music mode and select your guitar and or synth sound.• once you have adjusted all the desired parameters press musIc
and Game simultaneously to enter back into rock band™ mode.
note: your instrument settings cannot be edited inside rock band™ mode.
troUbleshootingno lights? If the control panel does not light up, change the bat-teries, check the usb power (if used), and make sure power button is turned on.no soUnd? check the batteries, make sure the power button is turned on, select musIc mode. ensure that you have a sound source, Guitar or synth, then check the outputs: earphones or amp. refer to the connection panel page in this manual. track soUnds bUt no gUitar? If both Guitar & synth buttons are not lit then there is no sound selected. select at least one with up/down arrows. triggering not accUrate? replacing the batteries - 4 x aa, this compartment is found on the back of the guitar. note the string sensitivity is analog and needs well charged batteries or usb power. also try adjusting the string gain and trigger sensitivity. won’t work with a video gaMe? a Gameflex cartridge is re-quired for normal game modes. compatibility with rock band™3 pro mode requires a mIdI pro-adapter, not sold by Inspired Instruments. compatibility with rocksmith does not require a Gameflex cartridge. each gaming system uses a separate cartridge: only Wii™ and ps3™ are currently supported. warning: unplugging a Gameflex cartridge while the power is on can damaGe the GuItar and the cartrIdGebroke a strInG? If you accidentally break a high tension steel wire on your yrG, don’t fret! email us to have your first string replace-ment kit sent out free of charge.
before reqUesting service:• check your batteries (swap them out) or make sure the usb
cable is plugged in.• check your audio cables or check the audio out with headphones.• power on/off on the connection panel; down is on, up is off.• visit our website at www.yourockguitar.com/support/technical-
support
additional inforMation and legal
specifications:
• Guitar• 22 fret full scale neck with you rock optimized fret spacing• 6 strings• pitch bending electronic whammy bar, range programmable• control panel• led backlit keypad• 2x 7 segment led display for selecting tracks/sounds• sounds and features• 99 presets• 15 16-bit digital Guitar sampled sounds• 15 16-bit digital synthesizer sampled sounds• 20 jam tracks• open tunings• 14 digital capo settings• content storage in 128 mbyte• Internal sdram 8 mbyte• connectors• stereo headphone output• ¼” phone plug mono ‘guitar’ output• stereo line input (mp3, ipod)• mIdI out (5 pin din)• usb for mIdI and data • power• 4x 1.5v aa alkaline batteries. please recycle batteries• usb power• Weight: 5 lbs
regUlatory notice:
warning: changes or modifications to this unit not expressly ap-proved by the party responsible for compliance could void the user’s authority to operate. note: this equipment has been tested and found to comply with the limits for a class b digital device, pursuant to part 15 of the fcc rules. these limits are designed to provide reasonable protection against harmful interference in a residential installation. this equip-ment generates, uses and can radiate radio frequency energy and, if not installed and used in accordance with the instructions, may cause harmful interference to radio communications.
however, there is no guarantee that interference will not occur in a particular installation. If this equipment does cause harmful interfer-ence to radio or television reception, which can be determined by turning the equipment off and on, the user is encouraged to try to correct the interference by one or more of the following measures:* reorient or relocate the receiving antenna.* Increase the separation between the equipment and receiver.* connect the equipment into an outlet on a circuit different from that to which the receiver is connected.* consult the dealer or an experienced radio/tv technician for help.shielded cables must be used with this unit to ensure compliance with the class b fcc limits.
30 user manual InspIred Instruments Inc. 31
liMited liability and warranty:
InspIred Instruments warrants to the original purchaser that your you rock GuItar® hardware product shall be free from de-fects in material and workmanship for the length of time, identified on your product package and/or contained in your user documentation, from the date of purchase. you may also find this information by se-lecting your product in the online support section of our web site at www.yourockguitar.com/support. except where prohibited by applica-ble law, this warranty is nontransferable and is limited to the original purchaser. this warranty gives you specific legal rights, and you may also have other rights that vary under local laws.
InspIred Instruments’ entire liability and your exclusive remedy for any breach of warranty shall be, at InspIred Instruments’s option, (1) to repair or replace the hardware, or (2) to refund the price paid, provided that the hardware is returned to the point of pur-chase or such other place as InspIred Instruments may direct with a copy of the sales receipt or dated itemized receipt. shipping and handling charges may apply except where prohibited by applicable law. InspIred Instruments™ may, at its option, use new or re-furbished or used parts in good working condition to repair or replace any hardware product. any replacement hardware product will be warranted for the remainder of the original warranty period or thirty (30) days, whichever is longer, or for any additional period of time that may be applicable in your jurisdiction. this warranty does not cover problems or damage resulting from (1) accident, abuse, misap-plication, or any unauthorized repair, modification or disassembly; (2) improper operation or maintenance, usage not in accordance with product instructions or connection to improper voltage supply; or (3) use of consumable, such as replacement batteries, except where such restriction is prohibited by applicable law.
how to obtain warranty supportbefore submitting a warranty claim, we recommend you visit www.yourockguitar.com/support for technical assistance. valid warranty claims are generally processed through the point of purchase during the first thirty (30) days after purchase; however, this period of time may vary depending on where you purchased your product – please check with InspIred Instruments or the retailer where you pur-chased your product for details. Warranty claims that cannot be pro-cessed through the point of purchase and any other product related questions should be addressed directly to InspIred Instruments. limitation of liability
limitation of liabilityInspIred Instruments shall not be lIable for any spe-cIal, IndIrect, IncIdental or consequentIal damaGes Whatsoever, IncludInG but not lImIted to loss of prof-Its, revenue or data (Whether dIrect or IndIrect) or commercIal loss for breach of any express or ImplIed Warranty on your product even If InspIred Instru-ments has been advIsed of the possIbIlIty of such dam-aGes. some jurisdictions do not allow the exclusion or limitation of special, indirect, incidental or consequential damages, so the above limitation or exclusion may not apply to you.
duration of implied warrantiesexcept to the extent prohibited by applicable law, any implied warranty or condition of merchantability or fitness for a particular purpose on this hardware product is limited in duration to the duration of the ap-plicable limited warranty period for your product. some jurisdictions do not allow limitations on how long an implied warranty lasts, so the above limitation may not apply to you.
national statutory rightsconsumers have legal rights under applicable national legislation gov-erning the sale of consumer goods. such rights are not affected by the warranties in this limited Warranty.
no other warrantiesno InspIred Instruments dealer, agent, or employee is autho-rized to make any modification, extension, or addition to this war-ranty.
warranty periodsplease note that in the european union, any warranty period less than two years shall be increased to two years.
for more detailed information on how to request a return or warran-ty replacement please contact support; [email protected]
limitation on damagesIn no event will Inspired Instruments Inc. be liable for special, incidental or consequential damages resulting from possession, use or malfunc-tion of the product, including damages to property, loss of good will, computer failure or malfunction, and to the extent permitted by law, damages for personal injuries, even if Inspired Instruments Inc. has been advised of the possibilities of such damages. Inspired Instru-ments Inc.’s, liability should not exceed the actual price paid for the product. some states/countries do not allow limitations on how long an implied warranties lasts and or the exclusion or limitation of inci-dental or consequential damages.
indemnityyou agree to indemnify, defend and hold InspIred Instruments, Inc, its partners, affiliates, contractors, officers, directors, employ-ees and agents harmless from all damages, losses and expenses arising directly or indirectly from your acts and omissions using the product pursuant to the terms of this agreement.
copyrights and credits:
all content copyright © 2012 by Inspired Instruments, Inc. all rights reservedthe you rock Guitar® is protected by us and International copyright, trademark and patent law. us patent number: 8003877 other copyright & trademarks are property of their respective owners.
InspIred Instruments Inc. reserves the rights to make improve-ments in the product described in this manual at any time without notice.
member usb associationmember mIdI manufacturers association
32 user manual InspIred Instruments Inc. 33
appendiX#1 presets:
1 acoustIc GuItar + (synth bass reZZo)
ac rock*
2 (dIstortIon GuItar) + electrIc pIano
pro blues*
3 (banjo) + mInIlead
knock knock*
4 evIl bass + (strInGs jp6)
louie*
5 nylon pIcked + orGan 1
power ballad
6 surfs up + (orGan church)
usa rock
7 strat clean + les paul clean
power ballad*
8 acoustIc pIano + acoustIc pIano [detuned]
12 bar blues
9 (acoustIc 12 strInG) + ooh pad
usa rock*
10 jaZZ drum kIt + (mallet)
knock knock*
11 nylon pIcked + (synth quack)
power ballad
12 (surfs up) + electrIc pIano
usa rock
13 strat clean + (overdrIve GuItar)
ac rock
14 (strat clean) + ooh pad
you rock
15 nylon fInGered + (strInGs jp)
magic hombre
16 (acoustIc 12 strInG) + mInI lead
two endings
17 acoustIc 12 strInG + (saWtooth)
knock knock
18 nylon pIcked + (acoustIc pIano)
louie
deMo presets 1-10
learning presets 11-20
em pentatonic
am pentatonic
G major
am pentatonic
am pentatonic
em pentatonic
am pentatonic
em pentatonic
em pentatonic
G major
am pentatonic
em pentatonic
em pentatonic
c major
em pentatonic
G major
G major
am pentatonic
20 (overdrIve GuItar) + electrIc pIano
12 bar blues
19 dIstortIon GuItar + (synth bass reZZo)
metal jam em pentatonic
em pentatonic
note: there are two versions of each track. tracks with (*) besides their name indicates that the track is the advanced ver-sion.
see appendix #6 for track chord pro-gressions.
48 overdrIve GuItar + (ooh pad)
49 dIstortIon GuItar + (saWtooth)
50 mute + overdrIve + (synth bass reZZo)
51 mute + overdrIve velocIty + (mInI lead)
52 overdrIve 5ths + (synth bass)
53 evIl bass + (synth quack)
54 dobro + (mallet)
55 banjo + (jaZZ drum kIt)
gUitar soUnd presets 41-55
41 acoustIc fInGered + (acoustIc pIano)
42 acoustIc 12 strInG + (electrIc pIano)
43 nylon pIcked + (orGan 1)
44 nylon fInGered + (orGan church)
45 strat clean + (strInGs jp)
46 les paul clean + (strInGs jp6)
47 surfs up + (tIme fIltered pad)
21 strat clean + (acoustIc pIano)
power ballad*
22 acoustIc fInGered + strInGs jp
usa rock*
23 evIl bass + tIme fIltered pad
ac rock*
24 (orGan 1) + overdrIve GuItar
you rock*
25 nylon fInGered + strInGs jp
magic hombre*
26 acoustIc fInGered + acoustIc pIano
two endings*
27 strat clean + (orGan church)
knock knock*
28 overdrIve 5ths + (saWtooth)
louie*
29 overdrIve GuItar + strInGs jp6
metal jam*
30 les paul clean + overdrIve GuItar
12 bar blues*
31 basIc mIdI channel 1 maj2nd bend
32 basIc mIdI channel 1 octave bend
33 2 layer mIdI ch1, ch2, maj2nd bend
34 2 layer mIdI ch1, ch2 0ctave bend
35 mono mode ch1:6 maj2nd bend
36 mono mode ch1:6 octave bend
37 2 layer mono, ch1:6, ch7:12, maj2nd bend
38 2 layer mono, ch1:6, ch7:12, octave bend
39 mono mode ch9:12 maj2nd bend
40 mono mode ch7:12 octave bend
advanced presets 21-30
Midi setUp presets 31-40
am pentatonic
em pentatonic
em pentatonic
c major
em pentatonic
G major
G major
am pentatonic
em pentatonic
em pentatonic

34 user manual InspIred Instruments Inc. 35
(acoustIc fInGered) + electrIc pIano
acoustIc 12 strInG + (electrIc pIano)
(nylon pIcked) + orGan 1
(nylon fInGered) + orGan church
(strat clean) + strInGs jp
(les paul clean) + strInGs jp6
(surfs up) + tIme fIltered pad
(overdrIve GuItar) + ooh pad
(dIstortIon GuItar) + saWtooth
(mute + overdrIve) + synth bass reZZo
(mute + overdrIve velocIty) + mInI lead
(overdrIve 5ths) + synth bass
(evIl bass) + synth quack
(dobro) + mallet
(banjo) + jaZZ drum kIt
synth soUnd presets 56-70
6364656667686970
56575859606162
#2 gUitar soUnds:1 acoustIc fInGered
2 acoustIc 12 strInG
3 nylon pIcked
4 nylon fInGered
5 strat clean
6 lp clean
7 surfs up
8 overdrIve
9 dIstortIon
10 mute + overdrIve
11 mute + overdrIve velocIty
12 overdrIve 5ths
13 evIl bass
14 dobro
15 banjo
#3 synth soUnds:16 acoustIc pIano
17 electrIc pIano
18 orGan 1
19 orGan church
20 strInGs jp
21 strInGs jp6
22 pads
23 ooh pad
24 saWtooth
25 synth bass reZZo
26 mInI lead
27 synth bass
28 synth quack
29 mallet
30 jaZZ drum kIt
#4 tracks:
1 poWer ballad
2 usa rock
3 ac rock
4 rItchIe’s rock
5 black maGIc
6 tWo endInGs
7 knock knock
8 louIe
9 metal jam
10 12 bar blues
11 poWer ballad
12 usa rock
13 ac rock
14 rItchIe’s rock
15 black maGIc
1617181920
learning advanced
tWo endInGs
knock knock
louIe
metal jam
12 bar blues
am pentatonic
em pentatonic
em pentatonic
c major
em pentatonicG major
G major
am pentatonic
em pentatonic
em pentatonic
am pentatonic
em pentatonic
em pentatonic
c major
em pentatonicG major
G major
am pentatonic
em pentatonic
em pentatonic
21 pro blues am pentatonic

36 user manual InspIred Instruments Inc. 37
#5 open tUnings:
1 rock e e b e G# b e
2 open e major e a d G# b e
3 open e mInor e b e G b e
4 e GuInnevere e b d G a d
5 open e add9 e G# e f# b b
6 drop d on loW e d a d G b e
7 drop d on e’s d a d G b d
8 drop c on loW e c G c f a d
9 drop c on e’s c G c f a c
10 rock d d a d G a d
11 open d d a d f# a d
12 modal d d a d G b d
13 open d major 7 d a d f# a c#
14open d mInor 7 d a d f a c15open d 5 d a d d a d16open G d G d G b d17open G 6 d G d G b e18modal G d G d G c d19open G mInor d G d G bb d20open G mInor 2 G bb d G bb d21open G major 7 d G d f# b d22open G major 7 v2 d G d G d f#23open G sustaIn 4 d G c G c d24open G sustaIn 4 v2 d G c G c d
26 open G 5 d G d G d G
27 open G add 9 G G d G G a
28 open G add 9 v2 d G d G a d
29 cross note G d G d G bb d
30 dobro open G G b d G b d
31 cross note In a e a e a c e
32 pentatonIc In a a c d e G a
33 open a e a c# e a e
34 open c c G c G c e
35 open c v 2 c G e G c e
36 hardcore c c G c f a bb
37 orkney c c G d G c d
38 G/c hedGes c G d G b d
39 c 6 add 9 hedGes c c d G a d
40 robert frIpp c G d a e G
41 nashvIlle top e a d G b e
42 ostrIch e e e e e e e
434445
open d mInor d a d f a d
4647
25
f mInor f c f ab c f
bb add 2 sustaIn 4 bb f c eb f bb
am 7 add 4 e a d G a c
lute e a d f# b e
jonI G G d G b d
49hedGes b 6 c# G# d# e G# d#
hedGes b mInor 9 sustaIn 4 b f# c# e a a
48
505152535455
hedGes bb add 2 sustaIn 4 bb f c eb f bb
56 loW d transposItIon doWn d G c f a d
57 eb transposItIon doWn eb ab db Gb bb eb
58 fIrst fret f f bb eb G# c f
59 fIrst fret f# f# b e a c# f#
60 fIrst fret G G c f bb d G
capo tUnings
61 fourth fret G# G# c# f# b d# G#
62 fIfth fret a a d G c e a
63 sIxth fret a# a# d# G# c# f a#
64 seventh fret b b e a d f# b
65 eIGhth fret c c f bb eb G c
66 nInth fret c# c# f# b e G# c#
67 tenth fret d d G c f a d
68 eleventh fret d# d# G# c# f# a# d#
69 tWelfth fret e e a d G b e
70 for bass on b b e a d G c
banjo style G G d G b d
fourths e e a d G c f
fIfths e e b f# c# G# d#
fIfths d d a e b f# c#
fourths d d G c f a# d#

38 user manual InspIred Instruments Inc. 39
#6 track chord progression:
power ballad
Usa rock
ac rock
ritchie’s rock
black Magic
two endings
knock knock
louie

40 user manual InspIred Instruments Inc. 41
Metal jam
12 bar blues
pro blues
#7 Using clips/scenes in live!:
• for ableton live! We have a custom script available that will auto-matically map the yrG controls into abletons user interface, you can download the script files from: www.yourockguitar.com/sup-port.
• create a folder in ableton’s mIdI remote scripts folder called yrG1000 and place the downloaded scripts there.
example: c:\program files (x86)\ableton\live 8.2.6\resources\mIdI remote scripts\yrG1000
• If you use our script frets 16~21 will trigger the clips in the red box. fret 22 will trigger entire scenes.
• the joystick will move the ‘red box’ . • play will start the transport, record will stop the transport.
see mIdI surface controller for more info.
• select the yrG1000 script in the control surface drop down.• select III you rock Guitar as the input device.• make sure that the remote mode is turned on.
• hold the mIdI button and use the joystick to move the red box up/doWn/left/rIGht.
• hold the mIdI button and use frets 16~21 to launch clips.• hold the mIdI button and use fret 22 to launch scenes.• note that leaving a scene blank will allow you to turn all scenes off
by selecting the blank scene.• use the play button to start the transport.• use the record button to stop the transport.

42 user manual InspIred Instruments Inc. 43
#8 rockband 3 pro-Mode bUtton Mapping:
yrG ps3™ WII™ xbox 360™
plus
mIdI
track
record
play
mInus
Game
start
trIanGle
square
o
x
select
home
start
2
1
b
a
select
home
start
y
x
b
a
back
home
1
2
3
4
5
6
7
#9 chord diagraMs