use "wysiwyg"as html editor · web viewwith this editor, the user can perform key...
TRANSCRIPT
USE "WYSIWYG"AS HTML EDITOR
DESCRIPTION
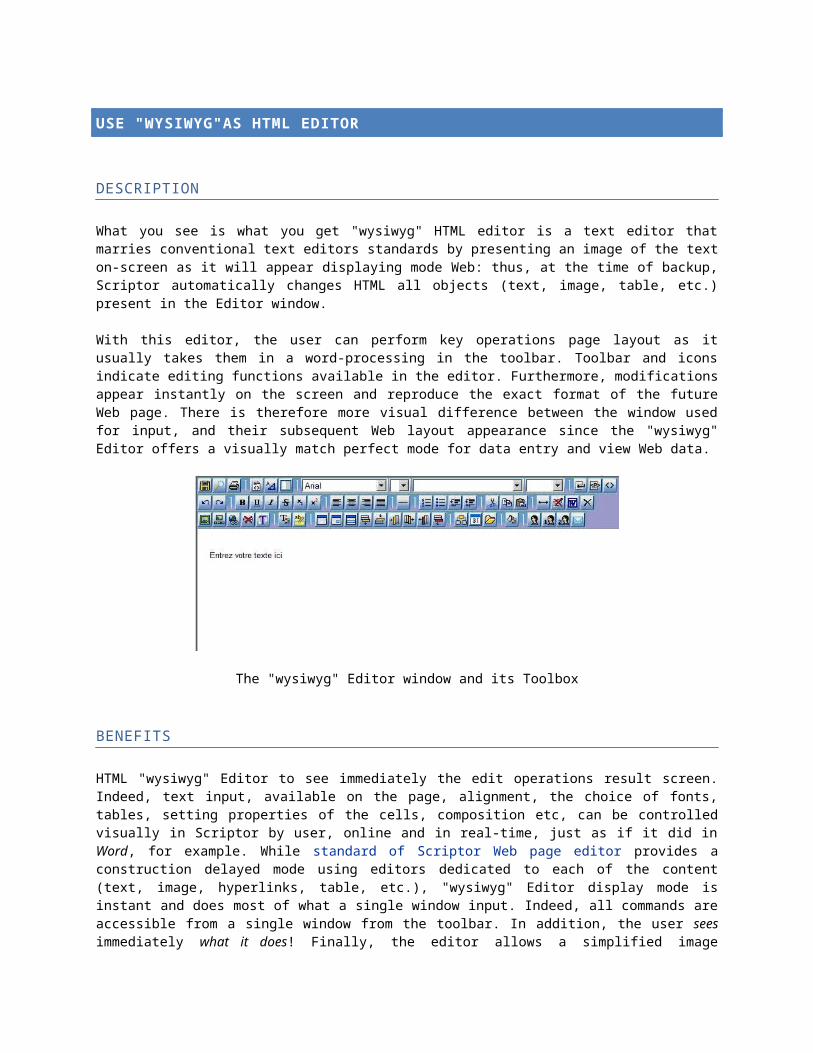
What you see is what you get "wysiwyg" HTML editor is a text editor that marries conventional text editors standards by presenting an image of the text on-screen as it will appear displaying mode Web: thus, at the time of backup, Scriptor automatically changes HTML all objects (text, image, table, etc.) present in the Editor window. With this editor, the user can perform key operations page layout as it usually takes them in a word-processing in the toolbar. Toolbar and icons indicate editing functions available in the editor. Furthermore, modifications appear instantly on the screen and reproduce the exact format of the future Web page. There is therefore more visual difference between the window used for input, and their subsequent Web layout appearance since the "wysiwyg" Editor offers a visually match perfect mode for data entry and view Web data.
The "wysiwyg" Editor window and its Toolbox
BENEFITS
HTML "wysiwyg" Editor to see immediately the edit operations result screen. Indeed, text input, available on the page, alignment, the choice of fonts, tables, setting properties of the cells, composition etc, can be controlled visually in Scriptor by user, online and in real-time, just as if it did in Word, for example. While standard of Scriptor Web page editor provides a construction delayed mode using editors dedicated to each of the content (text, image, hyperlinks, table, etc.), "wysiwyg" Editor display mode is instant and does most of what a single window input. Indeed, all commands are accessible from a single window from the toolbar. In addition, the user sees immediately what it does! Finally, the editor allows a simplified image processing because their movement is provided by the function drag - drop ('drag and drop"); it makes it easier to have images exactly there where the user wants. Labour input of different content is greatly simplified and someone who already knows how publishers and treatments of texts again in familiar terrain: it can even copy and paste objects into another document, and literally paste in a Scriptor page without that did in either corrupt formatting. Thus, page copied in Word will be reproduced as in Scriptor retaining all its attributes (formats, tables, images, lists bulleted, etc.); only the layout settings will be ignored; they need to be recreated by user in the own homepage, format using a table and cells with specific properties.

EDITOR FUNCTIONS
LAUNCH HTML "WYSIWYG" EDITOR
When you create a new webpage in Scriptor, you can proceed in two ways:
(1) you use conventional editor and call necessary each specialized editors Scriptor; in doing so, you may need to employ multiple modules to insert text, a picture, a table, a list smart, etc.
(2) you can use the "wysiwyg" editor that will greatly simplify your task. By using the "wysiwyg" Editor, you can perform all operations in composition of the Web page from a single window input, as if you were working in Word for example. Thus all input and editing maneuvers are simply from the same page working: just choose the steps suggested by the CAP in boring toolbar.
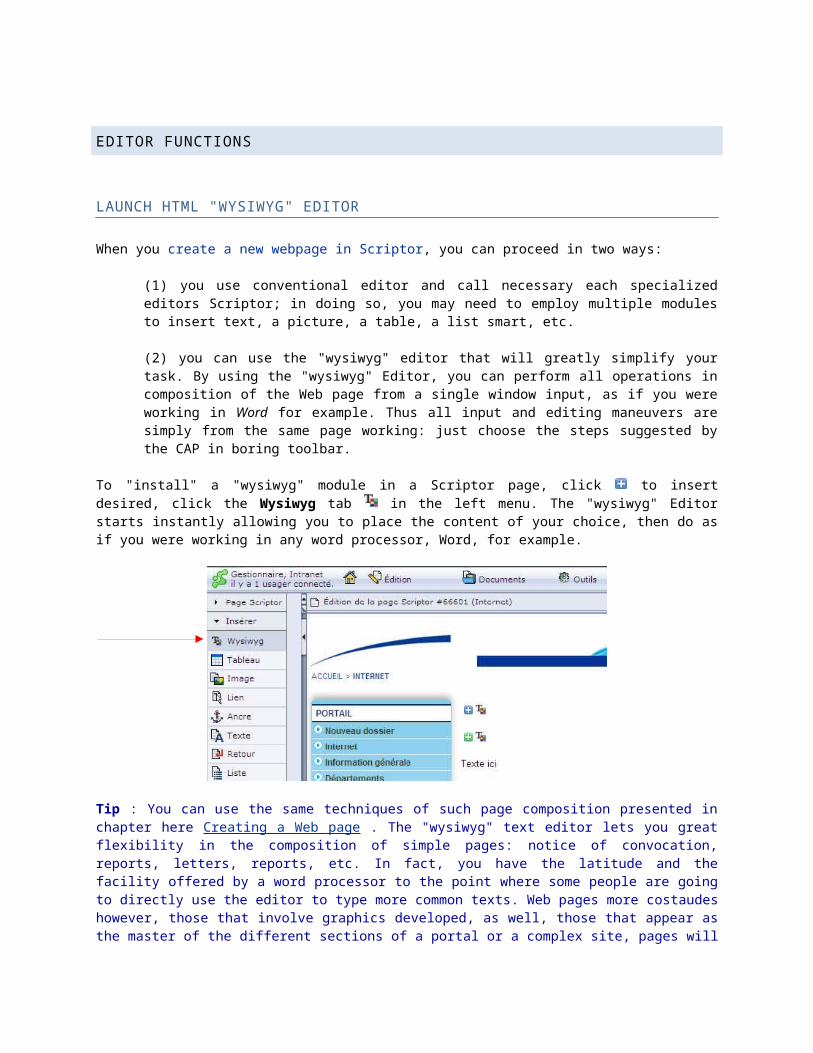
To "install" a "wysiwyg" module in a Scriptor page, click to insert desired, click the Wysiwyg tab in the left menu. The "wysiwyg" Editor starts instantly allowing you to place the content of your choice, then do as if you were working in any word processor, Word, for example.
Tip : You can use the same techniques of such page composition presented in chapter here Creating a Web page . The "wysiwyg" text editor lets you great flexibility in the composition of simple pages: notice of convocation, reports, letters, reports, etc. In fact, you have the latitude and the facility offered by a word processor to the point where some people are going to directly use the editor to type more common texts. Web pages more costaudes however, those that involve graphics developed, as well, those that appear as the master of the different sections of a portal or a complex site, pages will have to be built with the traditional Scriptor editor advantage. Traditional Editor to manage certain functions including the merge pages, indispensable technique for which wants to build a website large-scale as these pages often require specialized editors using as Editor menu .
DISPLAY MODES
THE WYSIWYG TOOL BAR BUTTONS
VIEW IN THE BROWSER WINDOW
To view the contents of the "wysiwyg" Editor window in your browser window, click Preview. Your browser immediately opens a window that shows the rendering of the HTML code generated by the editor. This allows you to immediately visualize the content generated by the editor, without however page context area.
VIEW THE HTML
To view the HTML code generated by the "wysiwyg" Editor, click the button mode (source/html). The HTML code then appears on the screen. You can then modify it as you wish. Experienced programmers will appreciate working directly in the source code generated by the "wysiwyg" Editor; they are able to achieve a level of sophistication in the programming that does not yet allow "wysiwyg" Editor For the normal user, however, this function will be not useful until it is true that "wysiwyg" editor for him doing the work of its content layout as it
wishes. To return to normal mode simply click again button change mode (source/html).

DISPLAY STYLES AND SPLIT THE WINDOW You can split the working your "wysiwyg" Editor window to display a box allowing you to see the styles available in
the input box. By clicking on the button panel on the right, are automatically displayed all the Scriptor style sheet styles. To apply these features, select characters from the left portion of the window and click the style you want in the right portion: the chosen formatting applies immediately to the selected characters to return to view
full page simply click again on the show right panel button.
DISPLAY THE CURRENT DIRECTORY
To view Directory Manager, click Show directories.
INSERT CHARACTERS, WRITE TEXT
To insert characters by using the "wysiwyg" Editor, launch first module, and then type directly text that falls directly at the insertion point at the top left of the window. Characters appear in the font style and the position (left aligned) "normal" of the style sheet. (Times 12 points) editor. Enter text and perform the desired layout. To
keep the changes, click the Save icon. The Editor window disappears and the screen returns to input window. If you wish to return in the input window for further work, click the tag Edit text "wysiwyg" Editor window opens again to continue your work as you would in a word processor.

CHOOSE FONT To change the font of a character string, select the characters that you want to change the font, deploy the font selection menu in the toolbar, and select the desired font.
CHOOSE THE SIZE OF CHARACTERS To change the size of a string of characters, select the character you want to change the font, deploy the character size selection menu in the toolbar, and select the desired size.
CHOOSE THE LEVEL OF TITLE Choose the level of a title, select the title you want to change the level, deploy the choice of titles menu in the toolbar, and select the desired level.
Bold: To display a string in bold characters, select the characters you want to put in bold and click the bold icon in the toolbar.
Italic:To display a string in italics, select these characters and click italic icon in the toolbar.
Underlined: To display a string in underlined characters, select these characters and click the underline icon in the toolbar.
With stroke: To display a string in stroked characters, select these characters and click Barré icon in the toolbar.
Superscript: In superscript characters, select the character and click the superscript icon in the toolbar.

Subscript: Characters in index, select the character and click subscript icon in the toolbar.
CHOOSE THE FONT COLOR
To choose the color of the characters, select these characters and click the text color icon on the toolbar. In the choice of color, window slider on a color from the palette and click. The active color appears in the color box, and HTML code is indicated in the text area that adjoins. You can, if you want accurate color swatches, enter directly the RGB code into entry color boxes: directly enter numbers or choose it from the drop-down arrows.
Confirm your choice by clicking the Save button.
CHOOSE THE COLOR OF THE HIGHLIGHTING OF THE TEXT
To choose the color of characters you want to place highlighted, select the desired characters and click text highlight color. Do likewise for the choice of colour. Before leaving, click the Save button.
INSERT A RETURN
In the "wysiwyg" Editor, return (from trolley) adopts a particular behavior. When you press return only, the editor creates a double-spaced. If you want to perform a single spacing, press the shift key and hold, press the return key.
INSERT A LINE BREAK
To insert a simple return (single line spacing), place the cursor where you want and click on the back of the cart icon.

INSERT A PARAGRAPH RETURN
To insert a double return of cart (double-spaced), place the cursor where you want and click on the paragraph.
AUTOMATICALLY INSERT A TITLE
To automatically insert the name of your Web page as the title in the text of a "wysiwyg" page, click the Auto title
icon . The software opens the document search window and prompts you to choose the document you want to see the name automatically entered in the "wysiwyg" page Scriptor automatically entered in the page title tag followed by the number of the document to which it refers (e.g., [title: 667442]). Note : This function allows you to automatically reproduce the document name in the body of the "wysiwyg" page Scriptor thus performs instant titles update when you use the numbering feature.
INSERT A PICTURE
To insert a picture in the "wysiwyg" Editor, place the cursor at the desired location, click on the image icon.

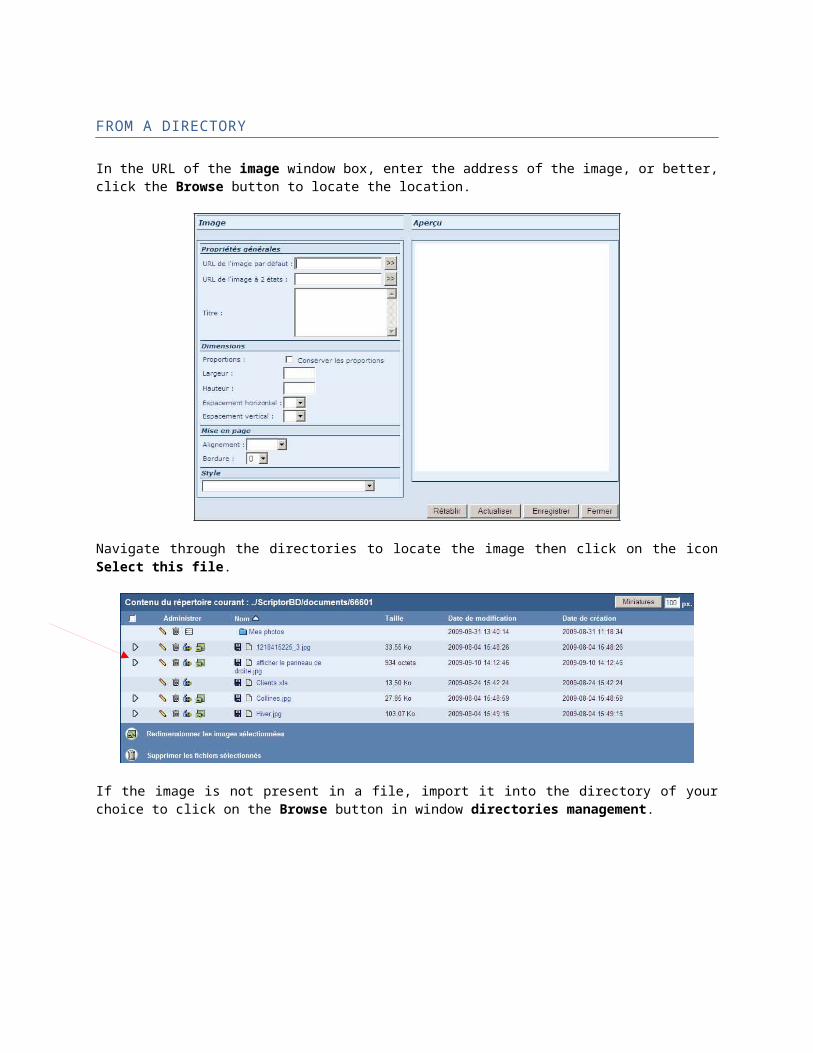
FROM A DIRECTORY
In the URL of the image window box, enter the address of the image, or better, click the Browse button to locate the location.
Navigate through the directories to locate the image then click on the icon Select this file.
If the image is not present in a file, import it into the directory of your choice to click on the Browse button in window directories management.

Follow the usual procedure for navigation on your computer or your network to identify the source of the image. Double click on the image to import it into Scriptor.
Then complete the operation by clicking Add and image copy automatically directory Scriptor target.
FROM A SITE To dynamically introduce image belonging to another Web site, copy just the address in the first text box.
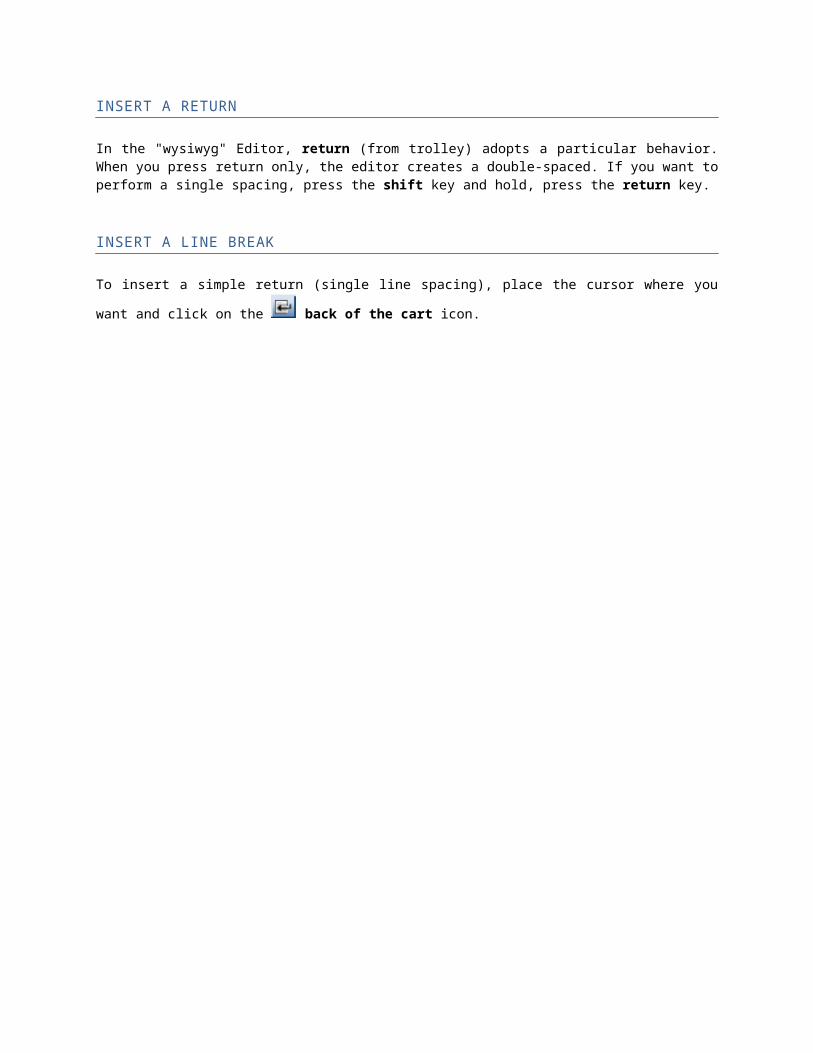
IMAGE IN TWO STATES
Choose to introduce an image in two States (image that changes when the mouse cursor passes over them) the first State of the image and enter its URL in the box (*) default image, and choose the second State of the image and make the same zone image in 2 States. Apply the usual image selector as previously described procedures.
When your cursor 1.58 image, it will switch to e status 2.
IMAGE DIMENSIONS
You can determine the size of the image by entering it in the dimensions section. Select the maintain aspect ratio check box so that the image doesn't distort (proportional equivalency report stood between the original image and desired values); determine the pixel width and height dimensions in the appropriate boxes.
PAGE LAYOUT
The default Scriptor places image at the top left of the page or the cell. When you insert a picture into the "wysiwyg" Editor, you can control certain parameters such as page layout: alignment (left, Center, right), border (pixels, a box empty quashing the border around the image) and the horizontal location of the image in the page or the cells in a table by choosing the choices horizontal spacing and vertical spacing.

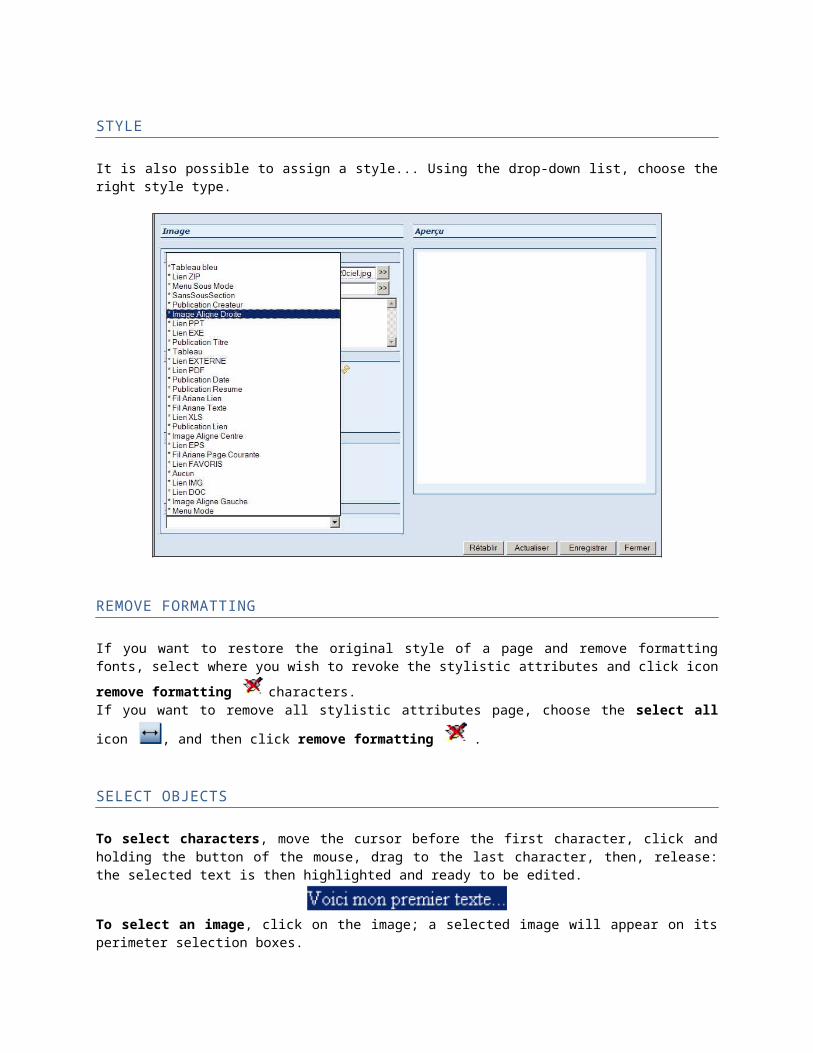
STYLE
It is also possible to assign a style... Using the drop-down list, choose the right style type.
REMOVE FORMATTING
If you want to restore the original style of a page and remove formatting fonts, select where you wish to revoke
the stylistic attributes and click icon remove formatting characters.
If you want to remove all stylistic attributes page, choose the select all icon , and then click remove
formatting .
SELECT OBJECTS
To select characters, move the cursor before the first character, click and holding the button of the mouse, drag to the last character, then, release: the selected text is then highlighted and ready to be edited.
To select an image, click on the image; a selected image will appear on its perimeter selection boxes.

To select a Table, move the cursor over a row of the perimeter of the table and click.
You can select a table by dragging the cursor over a row perimeter; note the characteristic shape of the cross hair.
Select all, To select all objects on a page, click the Select all icon.
Cancel, To cancel the last operation that you just made, click Cancel.
Restore, To redo the action that you just made, click on the restore icon.
EDIT OBJECTS PAGE
You can, after you have selected, move objects (text, image, table) in the page "wysiwyg" Editor by using the cut-copy-paste technique.
Copy, To copy an object in the "wysiwyg" (text, image, table) editor select it and click the copy icon in accordance with the specific techniques for each object: drag the cursor over the text in now the left button of the mouse, click on the image to select it, and on external borders in a table. The selected text will be highlighted, the image and the table will appear circumscribed by selection markers (small squares).
Cut, To cut an object (text, image, table) select it and click cut.
Paste, To paste an object (text, image, table) choose the insertion point to where you want to paste the object, and click the Paste icon. Tip : For users who use Windows, you can use the right mouse button to do the same maneuvers displacement using copy-cut-paste.
Move To move an object in the "wysiwyg" Editor, just the Select, maintain the cursor to select, click, hold the left mouse button down, drag to the desired page location and release the mouse button. You can move easily from text, a picture or a table.
A sequence of characters To move a character sequence, select them, move the slider of the selection and drag by holding down the mouse button. Choose the target area and leave the text being deposited there where flashing cursor. You can move the text anywhere on the page in a table cell to another.

An image To move an image, select it and drag by holding down the mouse button. Choose the target area and let the image file. You can move an image anywhere on the page including a table cell to another.
A table To move a table, select it, drag the mouse on one of the lines of the perimeter and drag by holding down the mouse button. Choose the target area and leave the table to settle there where flashing cursor. You can move it anywhere on the page including in cells in another table.
You can select a table by dragging the cursor over a row perimeter; note the characteristic shape of the cursor.
Erase Word formatting codes When you copy a text in Microsoft Word paste it directly into the "wysiwyg" editor this text appears with the original page layout. However the text copied in MS Word goes invisible characters that might affect rendering display "wysiwyg" Editor To avoid the hassle of an erratic display, select all the text and click remove Microsoft Word codes in order to eliminate the "secrets" of Word.
Delete To quickly delete a "wysiwyg" (text, image, table) editor, select it, and then click the Remove button.
TABLE The table is a virtual geometric surface that can install a number of objects (text, image, another table). Although the "wysiwyg" Editor allows you to center the objects, align, etc., it can be useful if you want to work with greater precision to insert a table to set all values governing the dimension view of your web page to the screen. A table therefore consists of a set of cells that you can set a number of characteristics which are specific: spacing between cells and in the cell, you can determine the background of the table and that of each cell, you can also choose the width and color of borders, or even, making them invisible; you can even merge cells vertically or horizontally. In short, the table offers a sort of geometric grid page tag location for each object that you drop.
Insert a table To insert a table on a page maintained by the "wysiwyg" Editor, place the cursor at the insertion point chosen, and then click the Table icon. Note : If you want imbue you table construction techniques, see Insert a table . Although the procedures that are described are not absolutely identical to those that are found "wysiwyg" Editor, processes of building and editing table are notably simpler, you will inspire you to design some strategies for using tables. Indeed, this chapter contains interesting information for anyone who wants to deepen table construction techniques. You will find among other words describing the benefits to specify the width of a table or a cell.
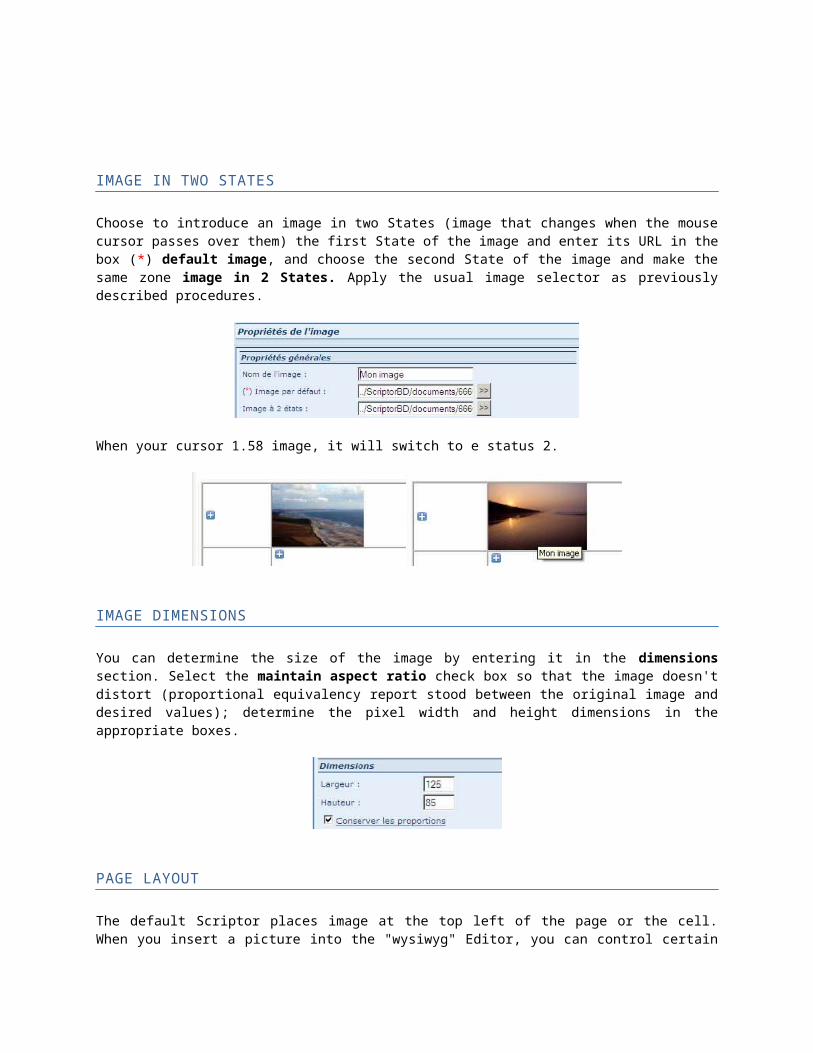
TABLE PROPERTIES
In the property of the Table window, choose the properties of the table. Here are the properties that you can choose for a table:
1) Number of columns.
2) Number of rows.
3) Table height (the % if you want the height of the table occupies a specific percentage from the page; otherwise the height will be displayed in pixels, if height box is left empty, check settings do not apply).
4) Table width (the % if you want the height of the table occupies a specific percentage from the page; otherwise the height will be displayed in pixels, if height box is left empty, check settings do not apply).
5) Shading table (to change the color of the background of the table, use the technical editing colors for tables, if you choose to use transparency, the background color will cease to see).
6) Alignment of the table relative to the page (aligned to the left, Center, or right).
7) (Stroke width) size of the border in pixels.
8) Color of the border line (to change the color of the line of the table border, apply the technical editing of colors for tables; if you choose to use the default color, the color of the stroke will be black).
9) In cell spacing (unit of measure is the pixel).
10) Spacing around the cell (define the thickness of the border (the unit of measure is the pixel).)
11) Style table as defined in the current style sheet.
Such table properties specified in the "insert table".

THE LINE PROPERTY
To change the properties of a row in a table, click line. The line that you can edit properties are:
1 Height of the line (the % if you want the height of the line occupies a specific percentage compared to the table; otherwise the height will be displayed in pixels, if height box is left empty, check settings do not apply).
2 Horizontal alignment (left, middle, right) objects inserted in the line.
3 Vertical alignment (low, medium, high) objects inserted in the line.
4 Shading color (to choose color fill line, apply technical editing color-if you choose transparent, the color will not appear).
CELL PROPERTIES
To change the property of a cell, place the cursor in cell of your choice and click the cell. In the window properties of the cell, here are the properties that you assign to a cell:
1) Width of the cell (the % if you want the height of the cell occupies a specific percentage compared to the table; otherwise the height will be displayed in pixel, if the height box is left empty, check settings do not apply).
2) Cell height (the % if you want the width of the cell occupies a specific percentage compared to the table; otherwise the height will be displayed in pixel, if the width check box is left empty, check settings do not apply).
3) Horizontal alignment of objects in the cell (left, Center or right).
4) Vertical alignment of objects in the cell (top, middle, bottom).
5) Cell background color (to change the cell background color, use technical editing color; if you choose transparency, the background color will cease to see).
6) Style of the cell: If Styles have been preset you will have access from the drop-down list.
MERGE CELLS
Unlike conventional editing a table, it is not allowed to merge cells in the "wysiwyg" Editor
CHOOSE COLOR TABLE, ROW, OR CELL
To change the color of a table, row, or cell, open the window property of the table, the row property or property of the cell. Default to opening a table never displays colors. That's why use transparency is active the window opening.

In the choice of color, window slider on a color from the palette and click. The active color appears in the color box, and the HTML code is indicated in the text box that adjoins it. You can, if you want accurate color swatches, enter directly the RGB code into entry color boxes: directly enter numbers or choose it from the drop-down arrows.
Before leaving, click the Save button.
Back in the window property of the table, the row property or property of the cell, remember, here also, click the Save button before leaving.
INSERT INTO A TABLE You can, once a created table, modify it as you wish. You can add rows, or columns, delete them.
A Row: To add a row in a table, place the cursor in a cell above or below which you want to add a row and click the
button to add a row below or on the button to add a row above.
A column: To add a column in a table, place the cursor in any cell to the left or right of which you want to add a
column and click the button to add a column to the left or on the button to add a column to the right.
DELETE
You can delete rows or columns in a table created previously.
A Row To delete a row in a table, place the cursor in the cell above the line you want to delete and click the button. A column To remove a column from a table, place the cursor in cell to the left of which you want to remove a column, and
click the button.

ALIGNMENT OF PARAGRAPHS
"Wysiwyg" Editor enables easy alignment of paragraphs, or objects. To align an object on the page, select it (see object selection technique) and choose the icon corresponding to the position you want to see it occupy on the page or in the cell of a table in the toolbar. To align text however, it is not necessary to select the entire; place the cursor in the string of characters that composed it, then click the desired alignment.
Left: To align to the left, click align left tool bar.
In the centre: To Center Align, click align to the Center of the toolbar icon.
On the right: To align to the right, click align right tray tool icon.
Justify: Justify, click justify the toolbar icon.
CREATE A LIST
"Wysiwyg" Editor to easily create ordered lists: bulleted lists and numbered ordered lists are two types of lists created by the list manager. You can also promote or demote a title from the list using buttons that manage the indentation left or right. Finally, you can in a given list do appear both concurrently, that is to create a bulleted list in a list ordered for example.
ORDERED LIST
To create an ordered list with digital markers, click create an ordered list icon.
You can Remove a list by selecting all its titles in by pressing the create an ordered list icon again. Digital markers disappear and the list entries are transformed into autonomous paragraphs.
Bulleted list (non-ordonnée)
To create a bulleted list, click Insert an unordered list.
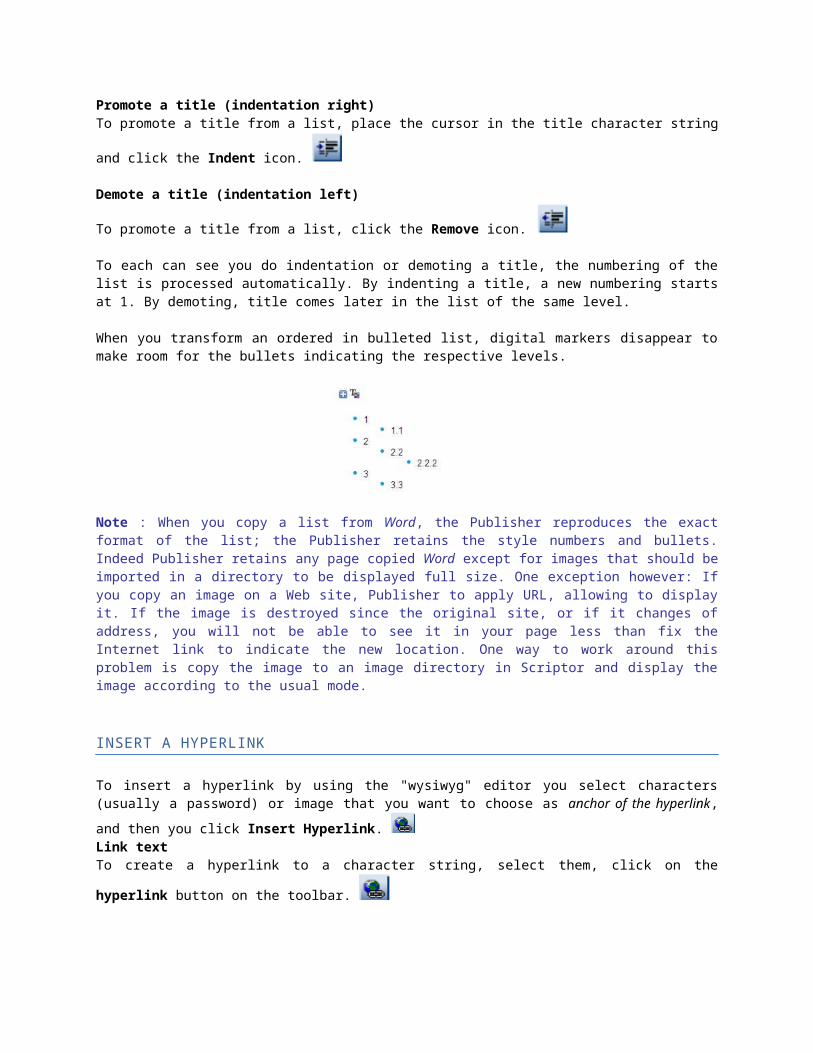
Promote a title (indentation right)
To promote a title from a list, place the cursor in the title character string and click the Indent icon.
Demote a title (indentation left)
To promote a title from a list, click the Remove icon.

To each can see you do indentation or demoting a title, the numbering of the list is processed automatically. By indenting a title, a new numbering starts at 1. By demoting, title comes later in the list of the same level. When you transform an ordered in bulleted list, digital markers disappear to make room for the bullets indicating the respective levels.
Note : When you copy a list from Word, the Publisher reproduces the exact format of the list; the Publisher retains the style numbers and bullets. Indeed Publisher retains any page copied Word except for images that should be imported in a directory to be displayed full size. One exception however: If you copy an image on a Web site, Publisher to apply URL, allowing to display it. If the image is destroyed since the original site, or if it changes of address, you will not be able to see it in your page less than fix the Internet link to indicate the new location. One way to work around this problem is copy the image to an image directory in Scriptor and display the image according to the usual mode.
INSERT A HYPERLINK
To insert a hyperlink by using the "wysiwyg" editor you select characters (usually a password) or image that you
want to choose as anchor of the hyperlink, and then you click Insert Hyperlink. Link text
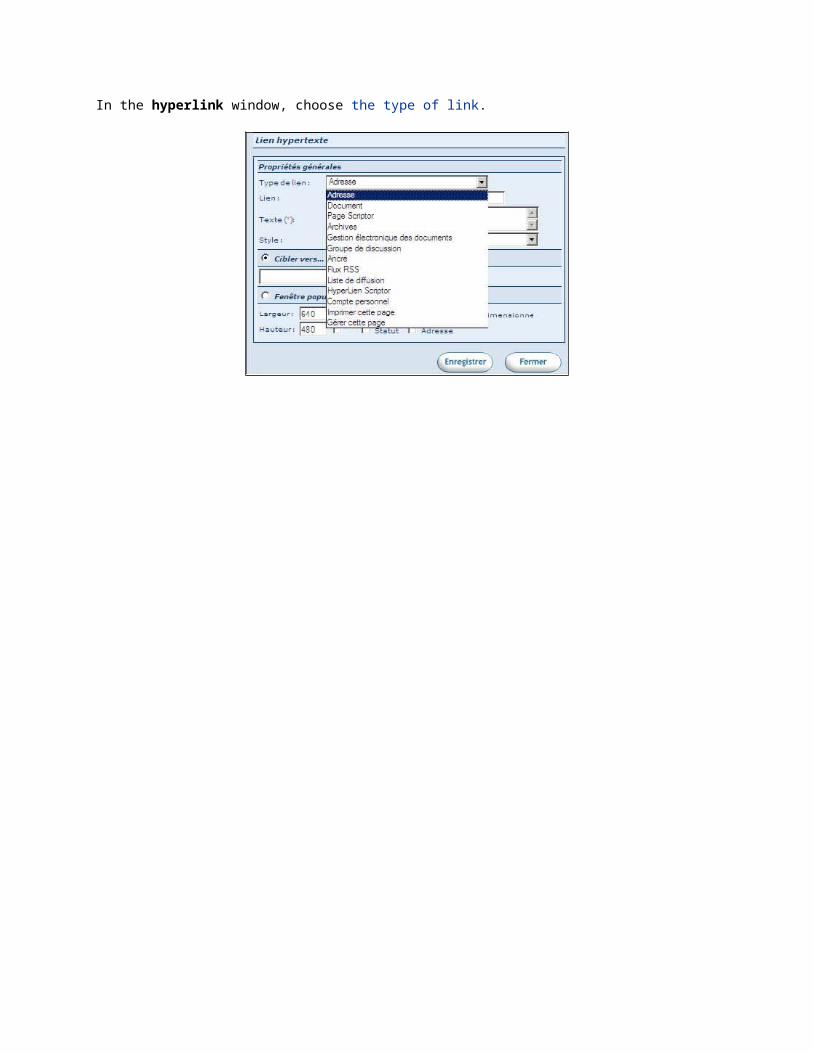
To create a hyperlink to a character string, select them, click on the hyperlink button on the toolbar. In the hyperlink window, choose the type of link.

Here are the types of links that you can choose:
1) Address: directs your navigation to a URL.
2) Document: a document already stored in a Scriptor directory pointing.
3) Page Scriptor: opens a Scriptor determined page (works with the Scriptor page number).
4) Archives: opens the page to archive published.
5) Electronic document management: points to one of the elements of the DGs (document or folder)
documentation center.
6) Newsgroup: opens a Scriptor discussion group.
7) Anchor: directs navigation to an anchor in the current page.
8) Flux RSS: opens a page containing an RSS feed.
9) Mailing list: opens a window for the user to directly subscribe to a mailing list.
10) Hyperlink Scriptor: a Scriptor hyperlink pointing.
11) Personal account: opens a page from a personal account.
12) Print this page: opens a framework print and launches printing page.
13) Manage this page: reveals icons management page.
Specify the address of the link, then determine the target page, choose the style of the link may also determine if you want to target page displays in flying window (or "pop-up" popup), decide if you want the page is displayed in percentage or pixel, choose, or not to display the menu bar, status, address, or the standard view of the page and give the user the ability to resize the page with the button resize, finally confirm your choice by clicking the Save button. You can choose the type of desired target window by choosing from the options drop-down list targeting to. By checking the radio button without choosing target type, the Editor opens the page in its own window.
1) Parent: the parent page is, the hierarchical perspective, a page which depend on other pages which are
his descendants; "daughter" page that displays its content has all the characteristics.
2) Page blank: a blank page is a standalone page open in a pop-up window.
3) Oneself: opens the document in the same framework replacing the content of origin by new content.
4) Another: allows the user to define another name to navigate from one frame to another.
LINK TO AN IMAGE
If you want to create a hyperlink to a picture, insert the image (using the usual image insertion), select it and click
the hyperlink. In the Insert Hyperlink window, choose the type of link.
Specify the address of the link, then determine the target page, choose the style of the link may also determine if you want to target page displays in flying window (or "pop-up" popup), decide if you want the page is displayed in percentage or pixel, choose, or not to display the menu bar, status, address, or the standard view of the page and give the user the ability to resize the page with the button resize, finally confirm your choice by clicking the Save button. You can choose the type of desired target window by choosing from the options drop-down list targeting to.
In the hyperlink properties window, choose the type of link, specify the address of the link, determine the target page, and then confirm your choice by clicking the Save button.
IMAGE IN TWO STATES: ROLLOVER EFFECT
You can create a rollover effect when you choose an image as the anchor of the hyperlink. To do this, insert first first picture in the URL box 1 according to the "wysiwyg" Editor insertion technique and then a second in URL 2
and save the image. Then select the image (by clicking on it) and click on the hyperlink button . Then specify the type of hyperlink you want to generate and save your changes.
TYPE LINK: LINK TO...
After you have determined the anchor of the hyperlink (character or image), you must choose the type of link that this; a hyperlink can indeed point to either the Web page from another site or to another page Scriptor, either to a document of the DG, or to a document generated by other software (Word, Excel, PowerPoint, picture jpg or sequence Quick Time, etc.), to Scriptor discussion group or is to the content a archive, etc. to you choose. In order to enable the type of link that corresponds to your connection, select the characters or invited image as the anchor
for your hyperlink, and then click Insert Hyperlink. In the Insert Hyperlink window, expand the type of links menu and choose the type of link that's right for you. Finally complete the operation by complementing other fields, and then clicking the Save button. In the Insert Hyperlink window, choose the type of link.
SPECIFY THE ADDRESS OF THE LINK
After you choose the link type, point to its destination by clicking the Browse button.
Web page If you follow a hyperlink to a Web page, simply enter the address in the text box provided for this purpose.
Complete address, example: http://www.groupeebi.com and click the Browse button.
Document If you want the hyperlink points to a document (Word, Excel, image in .jpg, .pdf, document format spreadsheet document etc, choose this link in the drop-down list hyperlink window.)

Then click the Browse button . In directories window, navigate to the desired document circulating among the available directory hierarchy. Select the file by clicking the icon Select this file.
Then fill in if there are other fields window (style, window pop up, etc.) and, finally, click the Save button. When the target file is not present in a Scriptor directories, you must first import it to create the hyperlink. (See the section create a link to an external document). For this do so, click the Browse folder window , and then apply the same technique of selection as described above.
LINK TO A SCRIPTOR PAGE
If you want the hyperlink points to a page Scriptor, choose this link in the drop-down window hyperlink. Then click the Browse button. From the search window that appears, select the desired document. (To familiarize yourself with the technical research documents necessary see the topic find document (you can browse by using either the normal or tree view according to your preference).)
Finally, to complete if there are other fields in the window, and then click the Save button.

ARCHIVE If you choose to display a document in hyperlink to archive, the software will open the window search the archives database and will prompt you to select the archive desired. You can navigate by using the normal mode or tree view according to your preference.
ELECTRONIC DOCUMENT MANAGEMENT If you choose to display a document in hyperlink or the DGs folder, the software will open the DGs, and you will be asked to navigate to identify the document or folder to which you want to see point your hyperlink.
NEWSGROUP If you choose to display hyperlink newsgroups, software will open the newsgroups database search window and you will be prompted to select the desired s. You can navigate by using the normal mode or tree view according to your preference.
ANCHOR To insert a link to allow quick navigation in a specific section of a complex page, choose Insert anchor link in the drop-down list of the types of links available. By choosing this link, the list of available page anchors appear automatically right. Click on the desired place click the Save button.
RSS FEED If you choose to display a feed in hyperlink, the software asks you to browse to locate the folder in which you have subscribed to an RSS feed.
MAILING LIST To direct the link frame on a mailing list, choose this type of link and click the Search button, the search in the electronic document management window opens and prompts you for the documents list to which you want to
see point your hyperlink.
HYPERLINK SCRIPTOR If you choose to display hyperlinks hyperlink Scriptor, software will open the window to search for the hyperlinks, and you will be asked to navigate to identify the document or folder to which you want to see point your hyperlink.
PERSONAL ACCOUNT If you choose to display hyperlinks in a document or folder from your personal account, the software will open the search window and you will be asked to navigate to identify the document or folder to which you want to see point your hyperlink.

PRINT THIS PAGE
When you want to print the current page by using the gauge frame print, create page print this page link. When you click this link, Scriptor starts printing the page using the framework print page. Thus, the printer will only reproduce information entered in the framework print. This way, you can print only the content of the page without its main graphic elements such as menus, corporate logos, banners, etc. However, when you prepare a framework printing (see this section) you can register a system of automatic insert the title page and the date for example.
To print this page link, choose this link in the drop-down list and save. The link on the image (usually a printer icon) will launch the printer automatically by displaying the print window system in which you perform traditional choices: number of copies, the paper orientation etc.
MANAGE THIS PAGE
To insert a link that should start current page management tools, choose it from the drop-down list and click Save. By clicking this link, appropriate management icons will appear allowing you to quickly modify content elements (text, Visual, etc.) of the current page. Choose the display window, choose the target The target page is page that will be opened by the software when you click the hyperlink.
Type of pages You can choose the type of desired target window by choosing from the options drop-down list targeting to.
1) Parent: the parent page is, the hierarchical perspective, a page which depend on other pages which are
his descendants; "daughter" page that displays its content has all the characteristics.
2) Page blank: a blank page is a standalone page open in a pop-up window.
3) Oneself: opens the document in the same framework replacing the content of origin by new content.
4) Another: allows the user to define another name to navigate from one frame to another.

Display in a pop up window When you view a pop up window you can choose to display this window as what or even see it with various buttons to facilitate browsing from this window. By checking the relevant topics, you can display for flying window immediately above the page content area:
• the desired window displayed in percentage or pixel; dimension
• bar menu.
• standard; buttons
• button to resize the window;
• bar status;
• the address bar.
CANCEL A HYPERLINK
To cancel a hyperlink (text or image), select it and click the Cancel a hyperlink of the toolbar button.
INSERT A HORIZONTAL LINE
To insert a horizontal line of crossing the entire width of the window, place the cursor where you want and click
horizontal line button. In the horizontal line window, specify the thickness of the line (in pixels), its colour and optionally style of the line. Click Save to display the row in the "wysiwyg" Editor
INSERT THE DG
You can insert a representation of the DG anywhere in a Scriptor page if you call it to appear in a "wysiwyg" Editor
window To do this, start the editor and click electronic documents button. Management of electronic management of documents display preferences window opens.

In the electronic document management window, complete the fields that match your choices display. Choose the type of scroll, specify the target by navigating the DG after clicking on the button Browse; if you do require that the root of the DGs check root (this will allow to consider the folder of your choosing as a top-level folder, you will therefore trace beyond this folder then considered folder "root") and determine the width and height of the DGs (does not the checkbox %, values are in pixels). Finally, click Save to save your choice.
AUTOMATICALLY INSERT A CALENDAR
You can insert a calendar which the update will occur automatically if you link to a publication. To do this simply
click on the button browse in order to have access to the publications search window.
Choose the publication you want to see calendar events or activities
By selecting from the rafters.

Assign the desired format and finish by clicking on the button Save.
GO DIRECTLY TO THE DIRECTORY
You can directly access the directories by simply clicking the button.
PREVIEW PAGE
To preview the current page in a new window of your browser, click on the Preview icon.
SEE THE SOURCE CODE IN HTML FORMAT
If you want to look at the source HTML of the current page-based code, click on the HTML button. The content of the "wysiwyg" Editor window is replaced by its source code. If you want to modify the source code of
your page, you can do this directly in the new window. To return to the normal state of the page, click the button again.
INSERT A PARAGRAPH
To insert a paragraph (a double carriage return) after the insertion point, click paragraph.
INSERT THE "SPAN". If you use a style sheet (CSS), and you want to apply different formatting to the text elements, insert a "span" tag
To introduce this tag, select the target character with the cursor and click Insert a span.
To print the contents of the "wysiwyg" window only, click the print button. In the printing of your browser window, choose the options that you want (number of pages, the page orientation, etc.).
ENLARGE THE SURFACE OF THE "WYSIWYG" EDITOR WINDOW
To enlarge the surface "wysiwyg" the full dimension of the frame window, click on the button panel on the
right. To display items in the right portion of the window (directory or images), click the button again.
DISPLAY STYLES
To display in the right-hand portion of the window styles that are available from the style sheet, click styles.
SAVE THE CHANGES
To keep changes to your webpage, click on the Save button in the toolbar. Changes are automatically saved and all the objects seized in the page will be transformed into HTML code; they are ready to be published on the
site. To do this, click the publish menu on the left button.
"WYSIWYG" FORMS MANAGEMENT To facilitate entering information Scriptor pages, you can transform each publishers "wysiwyg" dedicated to a specific field editing entry form (title, text, image, hyperlink, etc.). How to deposit and edit content is then greatly simplified since it is the system which automatically manages the display settings. Indeed, when user backup information page, form editor saves the contents of each input field in batch and apply specific stylistic parameters (font, size characters, etc.). This procedure allows you to easily enter information by ensuring compliance with the graphic standards. Also, each form can be configured individually to restrict or increase the editor tools. To transform a "wysiwyg" Editor in zone type form input, the webmaster must configure the Preferences folder in the window of the electronic management of documents. The configuration procedure is as follows:
1) A from the tab edit - Editor content, go to the management of the DG pages. Then click on the icon change folder next to the folder that you want to change.
2) In window changes to a folder, click form.
In the window of the form to the folder you can deprive the window's toolbar buttons "wysiwyg" Editor and transform editor in entry form type box. This helps you to simplify entering information in a page while providing stylistic uniformity in each area of text. Thus, loaded create or update different fields of the Scriptor, page that captures the information in each field user may be asked to enter information in specific areas dedicated to specific content editing: title, body text. Thus, a Scriptor Web page could contain multiple areas of specific content, entering each configured individually and dedicated to the specific content online: title, text, image, hyperlink. In addition, these publishers configured specifically to a particular task mixes that useful buttons. Webmaster ensures that responsible users of publishing the content pages will conduct to set stylistic tasks.