understanding php: language basics
TRANSCRIPT
C H A P T E R 2 � � �
29
Understanding PHP: Language Basics
So far you’ve bypassed the old, cumbersome method of creating a development environment, and you’re now ready to start writing code.
But where do you start? In this chapter, I’ll cover the steps you need to follow to start using PHP in the creation of powerful, dynamic web applications; you’ll also begin to develop the basic skills you need to create your blog.
In this chapter, you’ll learn how to accomplish several tasks:
• Embed PHP in web pages
• Send data as output to the browser
• Add comments in your code
• Use variables and understand the datatypes they support
• Use operators to manipulate data
• Use control structures to add power to your scripts
By the end of this chapter, you should be comfortable writing basic PHP that will allow you to create, store, manipulate, and output data.
�Note This chapter discusses basic aspects of the PHP language, but you should keep in mind that some functions won’t be covered completely. For clarification, more examples, or for concept reinforcement, visit the PHP manual at http://www.php.net/manual/en/ and search the function in the field where it says, “search for _______ in the function list.” Alternatively, you can access information about many PHP functions by navigating to http://php.net/function_name. Don’t forget to read the comments because many of your fellow programmers offer insight, tips, and even additional functions in their commentary.
Embedding PHP Scripts In Chapter 1, when I talked about Apache and web servers in general, I mentioned how a server will process PHP in a file before sending that file to the browser. But you might be curious how the server knows where to look for PHP.
CHAPTER 2 � UNDERSTANDING PHP: LANGUAGE BASICS
30
By default, servers look for PHP only in files that end with the .php extension. But a .php file can contain elements that aren’t part of your PHP script, and searching the entire file for potential scripts is confusing and resource-intensive. To solve this issue, all PHP scripts need to be contained with PHP delimiters. To begin a PHP script, you include the opening delimiter <?php and start coding. To finish, you simply add ?> to the end of the script. Anything outside of these delimiters will be treated as HTML or plain text.
You can see this in action by opening Eclipse and editing the test.php file by double-clicking the file in the project folder you created in the last chapter (full path: /xampp/htdocs/simple_blog/test.php) so it contains the following code:
<p>Static Text</p> <?php echo '<p>This text was generated by PHP!</p>'; ?> <p>This text was not.</p>
Save the file, navigate to http://localhost/simple_blog/test.php in your browser, and you
should see the following:
Static Text This text was generated by PHP! This text was not.
As you can see, the text inside the PHP delimiters was handled as a script, but the text outside was rendered as regular HTML. There is no limit to how many blocks of PHP you can include in a page, so the following snippet is completely valid:
<?php echo '<p>This is some text.</p>'; ?> <p>Some of this text is static, <?php echo 'but this sure isn't!'; ?></p> <?php echo '<p>'; ?> This text is enclosed in paragraph tags that were generated by PHP. <?php echo '</p>'; ?>
The preceding code snippet outputs the following to the browser:
This is some text. Some of this text is static, but this sure isn't! This text is enclosed in paragraph tags that were generated by PHP.
Alternative Delimiters There are a few alternative methods for delimiting your PHP scripts that you might come across from time to time, so you should be aware of them. However, it’s important to note that the use of these alternative delimiters is discouraged, so you should avoid using them.
CHAPTER 2 � UNDERSTANDING PHP: LANGUAGE BASICS
31
Short Tags PHP offers a shortcut syntax known as short tags; these allow your scripts to be delimited with <? and ?>, which is easier to type. However, the use of short tags requires that the short_open_tag directive be enabled, which means that scripts using short tags can create compatibility problems for applications that need to run on multiple servers that might not have the same configuration.
�Caution The use of short tags conflicts with XML syntax (XML declarations use the syntax <?xml version="1.0" encoding="ISO-8859-1"?>), so you should not use them.
There is also a shortcut syntax for outputting data quickly, which you use like this:
<?='Some text to output.'?> The previous snippet functions identically to this longer-winded syntax:
<?php echo 'Some text to output.'; ?>
Again, keep in mind that you should avoid using this syntax because of its incompatibility, both
with various server configurations and XML syntax.
HTML <script> Tags and ASP-Style Delimiters For the sake of compatibility with editing software such as Microsoft Front Page, PHP also supports the use of HTML <script> tags:
<script language="php"> echo 'This is some text'; </script>
Another option provided to Front Page users was Microsoft’s ASP-style delimiters:
<% echo 'This is some text'; %>
�Caution Use of the <script> tag is discouraged because it can cause confusion with JavaScript in files. As of PHP 6, ASP-style tags are no longer supported.
CHAPTER 2 � UNDERSTANDING PHP: LANGUAGE BASICS
32
Variables and Datatypes So far, you’ve learned how to output data, as well as how to use variables to a certain extent. Before going any further, let’s take a moment to drill down on variables and how they work.
What Is a Variable? A variable is a keyword or phrase that acts as an identifier for a value stored in a system’s memory. This is useful because it allows us to write programs that will perform a set of actions on a variable value, which means you can change the output of the program simply by changing the variable, rather than changing the program itself.
Storing Values in a Variable PHP lets you store nearly anything in a variable using one of the following datatypes:
String: Alphanumeric characters, such as sentences or names
Integer: A numeric value, expressed in whole numbers
Float: A numeric value, expressed in real numbers (decimals)
Boolean: Evaluates to TRUE or FALSE (sometimes evaluates to 1 for TRUE and 0 for FALSE)
Array: An indexed collection of data (see the “Understanding Arrays” section later in this chapter for more information on this subject)
Object: A collection of data and methods (see Chapter 4 and its section on PHP Data Objects for more information on this subject)
PHP is a loosely typed language, which means it determines the type of data being handled based on a “best guess” principle, as opposed to a strictly typed language such as C, which requires you name datatypes for every variable and function. Consider this code snippet:
$foo = "5"; // This is considered a string $bar = $foo + 2; // This converts $foo to an integer (outputs 7)
This might seem confusing at first, but it’s actually intuitive and eliminates debugging if you
enclose a number in quotes accidentally.

CHAPTER 2 � UNDERSTANDING PHP: LANGUAGE BASICS
33
Understanding Strings A string is any series of characters enclosed in single (') or double (") quotes, or that you create using special heredoc or nowdoc syntax, which I’ll cover in a moment.
Strings have a few characters that will cause problems if you do not escape them with a backslash (\). Escaping allows you to use characters in strings that might otherwise cause problems, such as an apostrophe in a string enclosed in single quotes:
$string = 'It\\'s cold outside today!';
If you don’t escape the apostrophe in it’s, the script has no way of knowing that the apostrophe
is part of the string and not the end of it—and your script would fail.
Single-Quote Syntax Enclosing a string in single quotes is the simplest way to create a string in PHP. It doesn’t expand special characters or variables, but instead delivers them as plain text to the browser.
Let’s look at some examples to see how single quotes behave. Add the following into test.php to see how different data is handled:
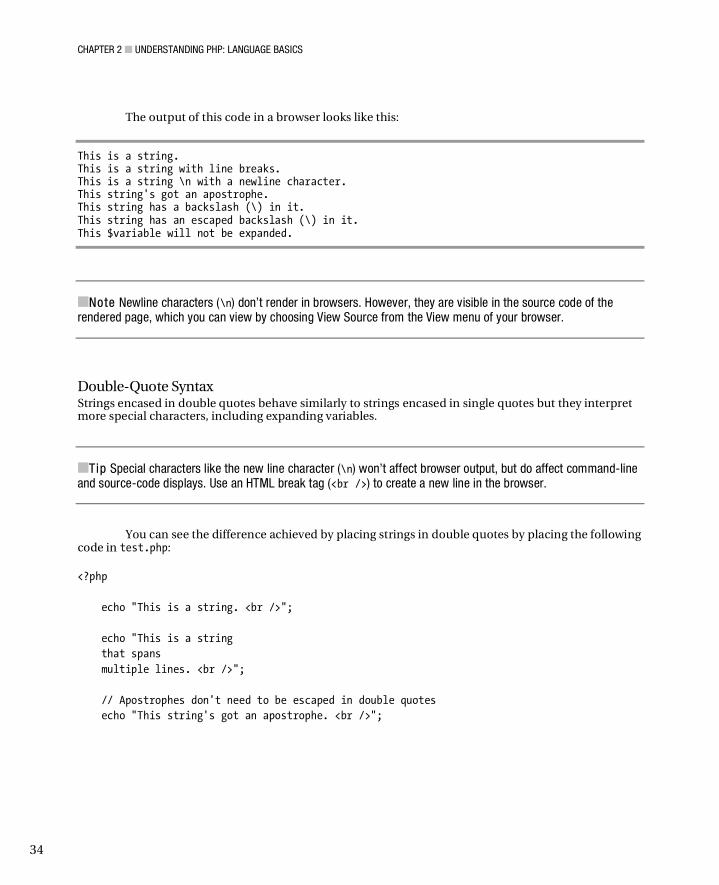
<?php // The <br /> adds a line break in the browser for readability echo 'This is a string. <br />'; echo 'This is a string with line breaks. <br />'; // Special characters, such as the newline (\n) character, // won't be expanded when in single quotes. echo 'This is a string \n with a newline character. <br />'; echo 'This string\'s got an apostrophe. <br />'; // A backslash doesn't need to be escaped if not escaping a // special character. echo 'This string has a backslash (\) in it. <br />'; echo 'This string has an escaped backslash (\\) in it. <br />'; // Variables will not be expanded in single quotes echo 'This $variable will not be expanded. <br />'; ?>
CHAPTER 2 � UNDERSTANDING PHP: LANGUAGE BASICS
34
The output of this code in a browser looks like this:
This is a string. This is a string with line breaks. This is a string \n with a newline character. This string's got an apostrophe. This string has a backslash (\) in it. This string has an escaped backslash (\) in it. This $variable will not be expanded.
�Note Newline characters (\n) don’t render in browsers. However, they are visible in the source code of the rendered page, which you can view by choosing View Source from the View menu of your browser.
Double-Quote Syntax Strings encased in double quotes behave similarly to strings encased in single quotes but they interpret more special characters, including expanding variables.
�Tip Special characters like the new line character (\n) won’t affect browser output, but do affect command-line and source-code displays. Use an HTML break tag (<br />) to create a new line in the browser.
You can see the difference achieved by placing strings in double quotes by placing the following code in test.php:
<?php echo "This is a string. <br />"; echo "This is a string that spans multiple lines. <br />"; // Apostrophes don't need to be escaped in double quotes echo "This string's got an apostrophe. <br />";

CHAPTER 2 � UNDERSTANDING PHP: LANGUAGE BASICS
35
// Double quotes will need to be escaped echo "This string says, \"I need escaping!\" <br />"; // New line characters will be interpreted echo "This string has \n newline \n characters. <br />"; // A backslash will be printed if a special character doesn't // directly follow it echo "This string contains a backslash (\). <br />"; // Variables will be expanded if not escaped $variable = "word"; echo "This string uses a $variable. <br />"; // A variable can be interpreted as plain text by escaping the // dollar sign with a backslash echo "This string escapes the \$variable. <br />"; ?>
The output of this code in a browser looks like this:
This is a string. This is a string that spans multiple lines. This string's got an apostrophe. This string says, "I need escaping!" This string has newline characters. This string contains a backslash (\). This string uses a word. This string escapes the $variable.
Str ing Concatenat ion
It’s often necessary to join two strings together in a script. You accomplish this using the string concatenation operator, a period (.).
You join two strings together by placing a period between them:
<?php $foo = "This is a " . "string."; echo $foo; ?>
CHAPTER 2 � UNDERSTANDING PHP: LANGUAGE BASICS
36
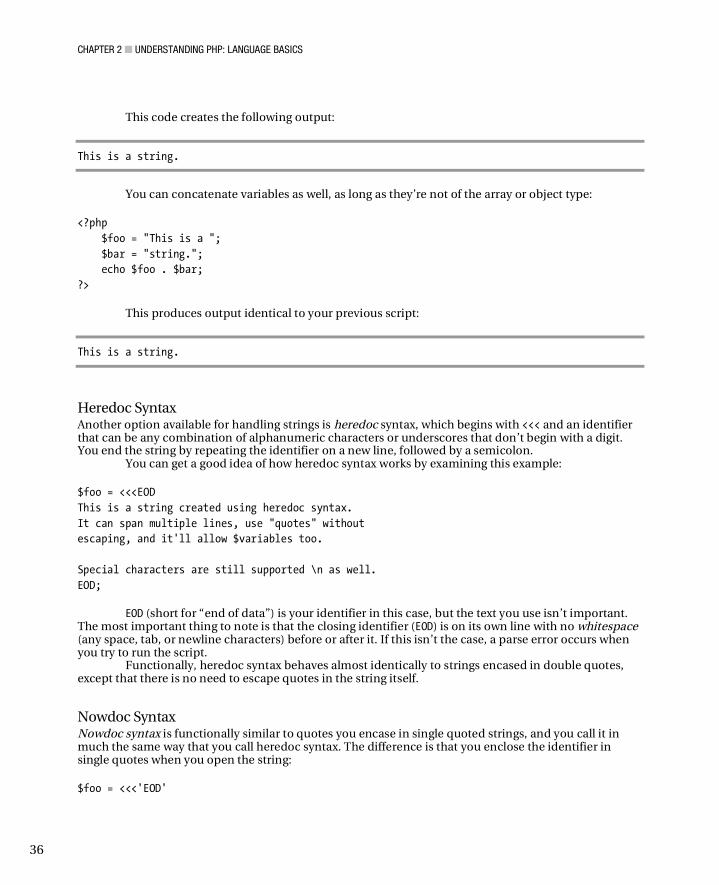
This code creates the following output:
This is a string.
You can concatenate variables as well, as long as they’re not of the array or object type:
<?php $foo = "This is a "; $bar = "string."; echo $foo . $bar; ?>
This produces output identical to your previous script:
This is a string.
Heredoc Syntax Another option available for handling strings is heredoc syntax, which begins with <<< and an identifier that can be any combination of alphanumeric characters or underscores that don’t begin with a digit. You end the string by repeating the identifier on a new line, followed by a semicolon.
You can get a good idea of how heredoc syntax works by examining this example:
$foo = <<<EOD This is a string created using heredoc syntax. It can span multiple lines, use "quotes" without escaping, and it'll allow $variables too. Special characters are still supported \n as well. EOD;
EOD (short for “end of data”) is your identifier in this case, but the text you use isn’t important.
The most important thing to note is that the closing identifier (EOD) is on its own line with no whitespace (any space, tab, or newline characters) before or after it. If this isn’t the case, a parse error occurs when you try to run the script.
Functionally, heredoc syntax behaves almost identically to strings encased in double quotes, except that there is no need to escape quotes in the string itself.
Nowdoc Syntax Nowdoc syntax is functionally similar to quotes you encase in single quoted strings, and you call it in much the same way that you call heredoc syntax. The difference is that you enclose the identifier in single quotes when you open the string:
$foo = <<<'EOD'
CHAPTER 2 � UNDERSTANDING PHP: LANGUAGE BASICS
37
Using nowdoc syntax tells PHP not to parse $variables or newline (\n) characters. According to
the PHP manual: Nowdocs are to single-quoted strings what heredocs are to double-quoted strings.1 No variables or special characters within a nowdoc will be expanded; this makes nowdoc syntax
ideal for outputting large blocks of PHP code.
�Note Nowdoc syntax support was added in PHP 5.3.0—this means that nowdoc syntax won’t work in XAMPP out-of-the-box because PHP 5.2 is installed by default.
Understanding Integers An integer is any positive or negative whole number (a number without a decimal value). For example, the numbers 1, -27, and 4985067 are integers, but 1.2 is not.
Because PHP is a loosely typed language, it’s not necessary to declare a variable as an integer; however, if you find it necessary, you can explicitly cast, or force, a value as an integer using the following syntax:
$foo = 27; // No quotes around a whole number always means integer $bar = (int) "3-peat"; // Evaluates to 3 $baz = (int) "seven"; // Evaluates to 0 $bat = (int) "ten 4"; // Evaluates to 0
�Note A string value will always evaluate to 0 unless it starts with a numeric value (such as “10 years”).
Understanding Floating Point Numbers Floating point numbers (also known as floats or doubles) are numbers with decimal values, or real numbers. This includes numbers such as 3.14, 5.33333, and 1.1.
Note that floating point numbers can produce unexpected results due to the fact that it’s impossible to represent all values with a finite number of digits. A good example of this is 1/3, which evaluates to a repeating decimal (0.33333...). You should not use floating point numbers to compare equality for this reason.
Understanding Boolean Values A Boolean value is the simplest type of data; it represents truth, and can contain only one of two values: TRUE or FALSE. It’s important to note that the FALSE (not in quotes) Boolean value is different from the "FALSE" string value, and the same goes for TRUE. Boolean values are not case sensitive.
1 Quoted from the PHP Manual, “Strings,” http://us.php.net/manual/en/language.types.string.php#language. types.string.syntax.nowdoc
CHAPTER 2 � UNDERSTANDING PHP: LANGUAGE BASICS
38
Booleans are very useful when determining if a condition exists. For example, you can use an if-else statement (which I’ll cover in a moment) to perform different actions if a condition is TRUE:
if($condition===true) { echo 'The condition is true!'; } else { echo 'The condition is false!'; }
�Note This example uses the comparison operator === to verify that the $condition is TRUE. I’ll go over why this is important in the “Operators” section later in this chapter.
Understanding Arrays Arrays are among the most powerful datatypes available in PHP, due to their ability to map information using a key to value pairing. This means that an array can store multiple pieces of information in a single variable, all indexed by key. For instance, if you have a blog entry to store in variables, you would need to do the following if you didn’t use arrays:
<?php $entryTitle = "Sample Title"; $entryDate = "April 13, 2009"; $entryAuthor = "Jason"; $entryBody = "Today, I wrote a blog entry."; ?>
This can become confusing, especially if the entry needs to be passed to a function for
processing. You can use an array to simplify the entry:
<?php $entry = array( 'title' => 'Sample Title', 'date' => 'April 13, 2009', 'author' => 'Jason', 'body' => 'Today, I wrote a blog entry.' ); ?>
CHAPTER 2 � UNDERSTANDING PHP: LANGUAGE BASICS
39
The power of this approach resides in the fact that you now have all of that information stored in one variable, $entry. To access any part of that information, you add the key to the end of the variable in square brackets ([]).
<?php echo $entry['title']; // Outputs "Sample Title" echo $entry['date']; // Outputs "April 13, 2009" echo $entry['author']; // Outputs "Jason" echo $entry['body']; // Outputs "Today, I wrote a blog entry." ?>
Arrays can also index information automatically using a numerical index that starts at 0. You
access array values that have been indexed automatically using the numeric index as the key, without quotes (e.g., $entry[0]). You can create an automatically indexed array by omitting the keys when you declare the array:
<?php $entry = array('Sample Title', 'April 13, 2009', 'Jason', 'Today, I wrote a blog entry.'); echo $entry[0], ' by ', $entry[2]; ?>
This snippet produces the following output in a browser:
Sample Title by Jason
�Note In programming, counts generally start at 0. This means that the first character in a string is at position 0, not position 1 as you might expect.
When using arrays in strings, you must take an additional step to avoid errors. In order to avoid an error, you must wrap the array variable and key in curly braces ({}). This is known as complex syntax, but not because it’s complicated to use; rather, it’s called complex because it allows PHP to parse complex statements within a quoted string:
<?php $person = array('name' => 'Jason', 'age' => 23); echo "This person's name is {$person['name']} and he is {$person['age']}."; ?>
CHAPTER 2 � UNDERSTANDING PHP: LANGUAGE BASICS
40
Another option when using arrays in double-quoted strings is to leave the single quotes off the array index:
<?php $person = array('name' => 'Jason', 'age' => 23); echo "This person's name is $person[name] and he is $person[age]."; ?>
�Caution When working with multidimensional arrays (see below), curly braces must be used. Leaving the single quotes off the array indices will behave unexpectedly.
Multidimensional Arrays Another cool feature of arrays is their ability to nest within themselves. This creates an array within an array, or a multidimensional array.
Multidimensional arrays are exceptionally powerful because they allow even more information to be stored in one variable, making immense data sets conveniently portable, as you’ll see when you start working with databases.
A multidimensional array of people might look something like this:
<?php $people = array( array('name' => 'Jason', 'age' => 23), // $people[0] array('name' => 'Carly', 'age' => 18) // $people[1] ); echo "{$people[0]['name']} has a sister who is {$people[1]['age']} years old."; ?>
This script produces the following output:
Jason has a sister who is 18 years old.
CHAPTER 2 � UNDERSTANDING PHP: LANGUAGE BASICS
41
Multidimensional arrays can also feature multiple string literal keys:
<?php $colors = array( 'fruits' => array('apple' => 'red', 'plum' => 'purple'), 'flowers' => array('rose' => 'red', 'violet' => 'blue') ); // Output: An apple is red, and a violet is blue. echo "An apple is {$colors['fruits']['apple']}, and a violet is {$colors['flowers']['violet']}."; ?>
Sending Data to the Browser as Output To see the data that you’re processing, you need a way to send it as output. This enables you to display the contents of a variable in the browser to your users.
There are several ways to send output, but the most common methods are the commands echo(), print(), printf(), and sprintf(). There are differences in how you use each of these, but the result is the same: something is output for display in the browser.
The Different Output Commands It’s important to have a solid understanding of your options when sending output to the browser, so I’ll go over the different statements available, how they work, and what special properties are associated with each.
�Note Whenever I introduce a language construct or function in the course of this book, I’ll begin by walking you through the prototype, or breakdown, of the function’s name, accepted arguments, and a return value defined by its datatype. Don’t worry if you’re not sure what that means yet because I’ll cover all this information fully in the course of this chapter.
The print() Statement The print() statement is the most straightforward method of generating output. Its prototype looks like this:
int pprint ( string $arg )
This means that print() accepts one argument, which is a string to be output to the browser,
and returns an integer—print() always returns 1. You can use print() by placing this code in test.php:
CHAPTER 2 � UNDERSTANDING PHP: LANGUAGE BASICS
42
<?php print("Some text."); ?>
This code produces the following output if you reload test.php.
Some text.
The echo() Statement The most common method of generating output is probably the echo() statement. It differs slightly from print() in that it can accept multiple arguments. Consider this prototype:
void eecho ( string $arg1 [, string $... ] )
The echo() statement accepts one or more arguments, separated by commas, and outputs all of
the arguments to the browser in succession. Unlike print(), echo() does not return a value—the void keyword in the prototype tells it not to.
Because echo() is also a language construct, the parentheses are optional and generally omitted. Add the following code to test.php:
<?php echo "Hello ", "world!"; ?>
The preceding snippet produces this output:
Hello world!
Your two strings are added together as arguments to the echo() statement, producing one string that ends up being passed to the browser. The same approach works for variables:
<?php $foo = "Hello "; $bar = "world!"; echo $foo, $bar; ?>
This produces the same output as above:
Hello world!
CHAPTER 2 � UNDERSTANDING PHP: LANGUAGE BASICS
43
�Note Because print() is a language construct and not a function, you can use it without parentheses (i.e., <?php echo 'Some text'; ?>); the clarity achieved with this syntax makes it the preferred approach for many developers. Benchmarks using echo() with arguments have generally proved slightly faster than any other method of outputting data to the browser, so I’ll use this approach throughout the rest of this book.
The printf() Statement The next statement, printf(), gives you more fine-grained control over your output, allowing you to define the format of data that will be sent to the browser. You can think of this statement as meaning “print formatted.” This is especially useful when you’re dealing with numbers, which I’ll cover in a moment. First, take a look at the prototype for printf():
int pprintf ( string $format [, mixed $args [, mixed $... ]] )
�Note When a function accepts a mixed type, it means that the function can accept several argument types. Generally, all datatypes except arrays and objects are acceptable. Also, arguments in square brackets in a function prototype are optional.
At this point, you can pass a formatting string to printf() along with other arguments that will fit into the format. This is a great way to verify that the data you are passing is of the proper type for the task at hand. Try the following code in test.php:
<?php printf("PHP is %s!", "awesome"); ?>
This snippet produces the following output:
PHP is awesome!
In the preceding code snippet, you created a formatting string ("PHP is %s!") with a conversion specification, which starts with a percentage sign (%) and is followed by a series of specifiers. In this example, you assigned a type specifier string, which tells the function what datatype the argument to expect.
The most practical use of printf() is with floating point numbers, such as dollar amounts. Consider the following code using echo():
CHAPTER 2 � UNDERSTANDING PHP: LANGUAGE BASICS
44
<?php $amt1 = 2.55; $amt2 = 3.55; $total = $amt1 + $amt2; echo 'The total cost is $', $total; ?>
You might expect to see this sentence when you run your code:
The total cost is $6.10.
However, what you see when you run the code is this:
The total cost is $6.1
For obvious reasons, this isn’t what you want to happen if you’re trying to display a price. Fortunately, this is a case where printf() comes in handy; simply add the following code to test.php:
<?php $amt1 = 2.55; $amt2 = 3.55; $total = $amt1 + $amt2; printf('The total cost is $%%.2f', $total); ?>
Saving and reloading produces the desired result:
The total cost is $6.10
The reason you get the properly formatted number in the latter case is that you’ve specified the type as a floating point number and told the printf() statement to return a decimal out to two places using your formatting string (%.2f). No matter what you pass as the argument, the output will be a floating point value with a decimal out to two places.
For example, you might try to placing a string into your printf() statement to see what happens. In test.php, try running the following code:
<?php printf('The total cost is $%.2f', 'string'); ?>
CHAPTER 2 � UNDERSTANDING PHP: LANGUAGE BASICS
45
When you save and reload, you see the following output:
The total cost is $0.00
This happens because PHP tries to parse, or process, the string called string for a value of some sort; when it doesn’t find one, it evaluates to zero, and the value is taken out to two decimal places by the formatting requirements.
Some of the more common datatype specifiers supported by printf() include:
• %s: Treats the argument as and outputs a string
• %d: Treats the argument as an integer and outputs a signed decimal
• %f: Treats the argument as an integer and outputs a floating point number
�Note printf() supports a wide variety of datatypes, such as scientific notation, ASCII values, and octal numbers. You can learn more about this by visiting the PHP manual at http://www.php.net/manual/en/ and search for sprintf(). (printf() and sprintf() are very similar, so the manual only goes over type specifiers in the sprintf() entry).
The sprintf() Statement The sprintf() statement works in the same way as the printf() statement: you provide a format with type specifiers and a set of arguments to be inserted into your formatting string. The only difference is that while printf() outputs directly to the browser, sprintf() returns a string.
Now is a good point to look at the prototype:
string ssprintf ( string $format [, mixed $args [, mixed $... ]] ) The only difference you see between sprintf() and printf() is the “string” preceding the
statement. The word preceding a function tells you what type of value a function will return. The benefit of using sprintf() in our scripts is that you’re able to format only select sections of
data, which saves you from having to format the entire output. For example, try placing the following code in your test.php file:
<?php $gpa1 = sprintf("%.1f", 4); $gpa2 = sprintf("%.1f", 3.7); echo 'Kelly had a ', $gpa1, ' GPA, and Tom had a ', $gpa2; ?>
CHAPTER 2 � UNDERSTANDING PHP: LANGUAGE BASICS
46
When you save and reload, the output reads like this:
Kelly had a 4.0 GPA, and Tom had a 3.7
You were able to force the numbers to conform to a format necessary for them to make sense, but you weren’t required to pass the entire string as a formatting string. However, if you want to format multiple variables in one call to sprintf() or printf(), you can do so easily with the following bit of code:
<?php printf('Kelly got a %.1f GPA, and Tom got a $.1f.', 4, 3.7); ?>
Commenting Your Code There are several ways to write comments in PHP, but only two are encouraged. For inline comments, you can use two forward slashes (//); for block comments, you can start with a forward slash followed by an asterisk (/*), then close with an asterisk followed by a forward slash (*/).
$foo = 'some value'; // This is an inline C++ comment
/* This is a block comment in C style. It allows the developer to go into more detail about the code.
*/ function bar() { return true; }
Inline vs. Block Comments There’s not really a right or wrong way to comment code, but accepted practice is to use inline comments for quick descriptions, such as the purpose of a variable:
<?php $foo = time()+7*24*60*60; // One week from now ?>
A block-level comment is typically used when more detail is necessary. For example, this
comment might be used to describe an entire section of code:
CHAPTER 2 � UNDERSTANDING PHP: LANGUAGE BASICS
47
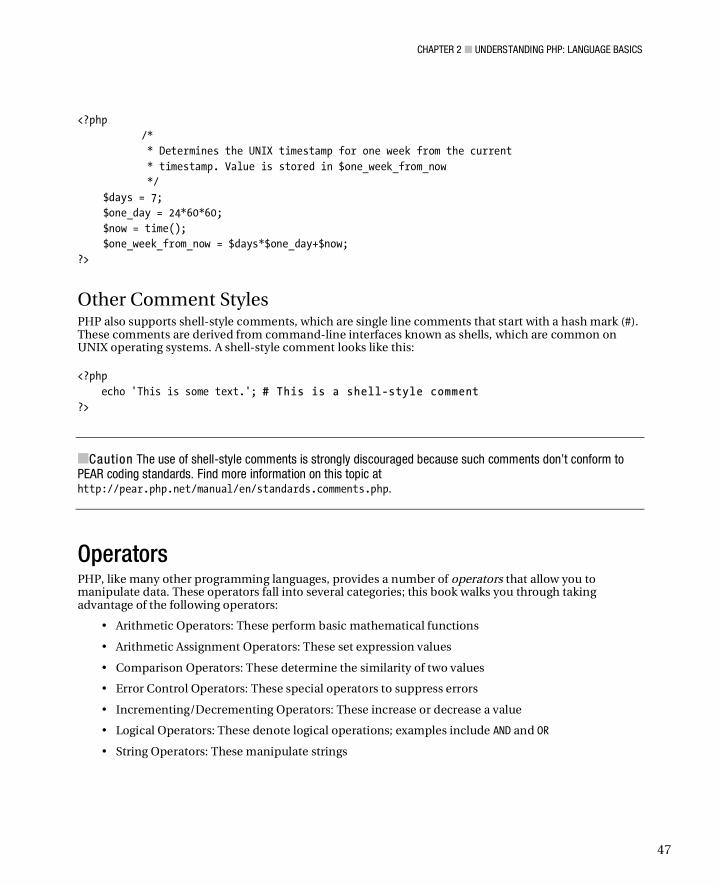
<?php /* * Determines the UNIX timestamp for one week from the current * timestamp. Value is stored in $one_week_from_now */
$days = 7; $one_day = 24*60*60; $now = time(); $one_week_from_now = $days*$one_day+$now; ?>
Other Comment Styles PHP also supports shell-style comments, which are single line comments that start with a hash mark (#). These comments are derived from command-line interfaces known as shells, which are common on UNIX operating systems. A shell-style comment looks like this:
<?php echo 'This is some text.'; ## This is a shell-style comment ?>
�Caution The use of shell-style comments is strongly discouraged because such comments don’t conform to PEAR coding standards. Find more information on this topic at http://pear.php.net/manual/en/standards.comments.php.
Operators PHP, like many other programming languages, provides a number of operators that allow you to manipulate data. These operators fall into several categories; this book walks you through taking advantage of the following operators:
• Arithmetic Operators: These perform basic mathematical functions
• Arithmetic Assignment Operators: These set expression values
• Comparison Operators: These determine the similarity of two values
• Error Control Operators: These special operators to suppress errors
• Incrementing/Decrementing Operators: These increase or decrease a value
• Logical Operators: These denote logical operations; examples include AND and OR
• String Operators: These manipulate strings
CHAPTER 2 � UNDERSTANDING PHP: LANGUAGE BASICS
48
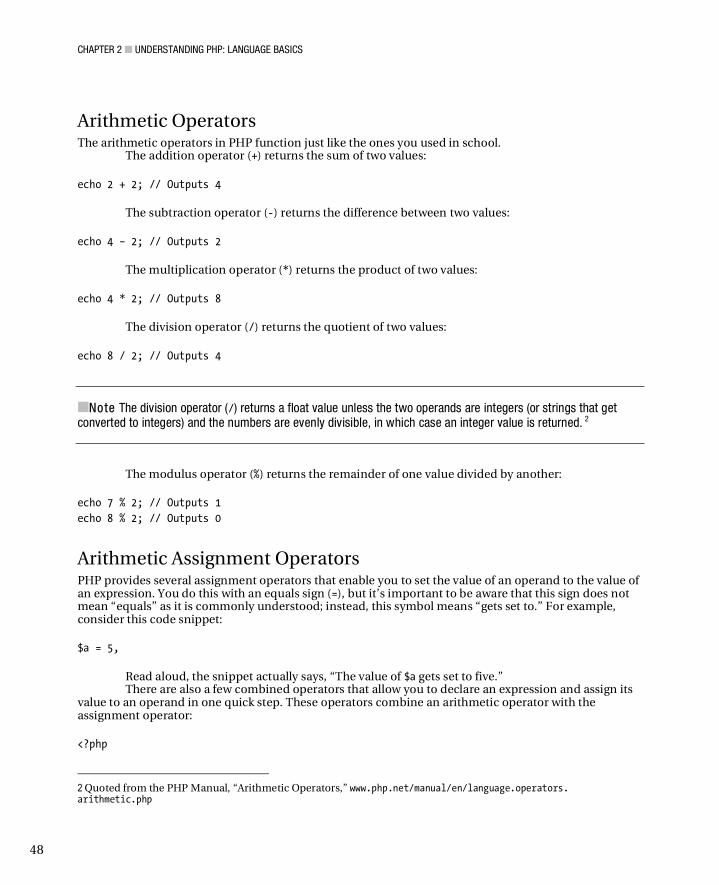
Arithmetic Operators The arithmetic operators in PHP function just like the ones you used in school.
The addition operator (+) returns the sum of two values:
echo 2 + 2; // Outputs 4 The subtraction operator (-) returns the difference between two values:
echo 4 – 2; // Outputs 2 The multiplication operator (*) returns the product of two values:
echo 4 * 2; // Outputs 8 The division operator (/) returns the quotient of two values:
echo 8 / 2; // Outputs 4
�Note The division operator (/) returns a float value unless the two operands are integers (or strings that get converted to integers) and the numbers are evenly divisible, in which case an integer value is returned. 2
The modulus operator (%) returns the remainder of one value divided by another:
echo 7 % 2; // Outputs 1 echo 8 % 2; // Outputs 0
Arithmetic Assignment Operators PHP provides several assignment operators that enable you to set the value of an operand to the value of an expression. You do this with an equals sign (=), but it’s important to be aware that this sign does not mean “equals” as it is commonly understood; instead, this symbol means “gets set to.” For example, consider this code snippet:
$a = 5,
Read aloud, the snippet actually says, “The value of $a gets set to five.” There are also a few combined operators that allow you to declare an expression and assign its
value to an operand in one quick step. These operators combine an arithmetic operator with the assignment operator:
<?php
2 Quoted from the PHP Manual, “Arithmetic Operators,” www.php.net/manual/en/language.operators. arithmetic.php
CHAPTER 2 � UNDERSTANDING PHP: LANGUAGE BASICS
49
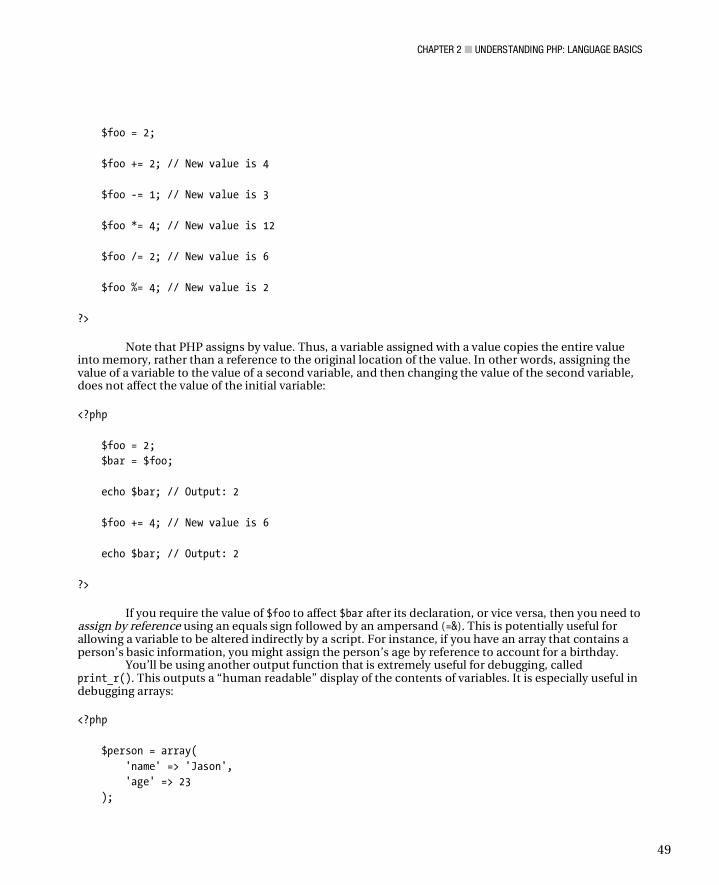
$foo = 2; $foo += 2; // New value is 4 $foo -= 1; // New value is 3 $foo *= 4; // New value is 12 $foo /= 2; // New value is 6 $foo %= 4; // New value is 2 ?>
Note that PHP assigns by value. Thus, a variable assigned with a value copies the entire value
into memory, rather than a reference to the original location of the value. In other words, assigning the value of a variable to the value of a second variable, and then changing the value of the second variable, does not affect the value of the initial variable:
<?php $foo = 2; $bar = $foo; echo $bar; // Output: 2 $foo += 4; // New value is 6 echo $bar; // Output: 2 ?>
If you require the value of $foo to affect $bar after its declaration, or vice versa, then you need to
assign by reference using an equals sign followed by an ampersand (=&). This is potentially useful for allowing a variable to be altered indirectly by a script. For instance, if you have an array that contains a person’s basic information, you might assign the person’s age by reference to account for a birthday.
You’ll be using another output function that is extremely useful for debugging, called print_r(). This outputs a “human readable” display of the contents of variables. It is especially useful in debugging arrays:
<?php $person = array( 'name' => 'Jason', 'age' => 23 );
CHAPTER 2 � UNDERSTANDING PHP: LANGUAGE BASICS
50
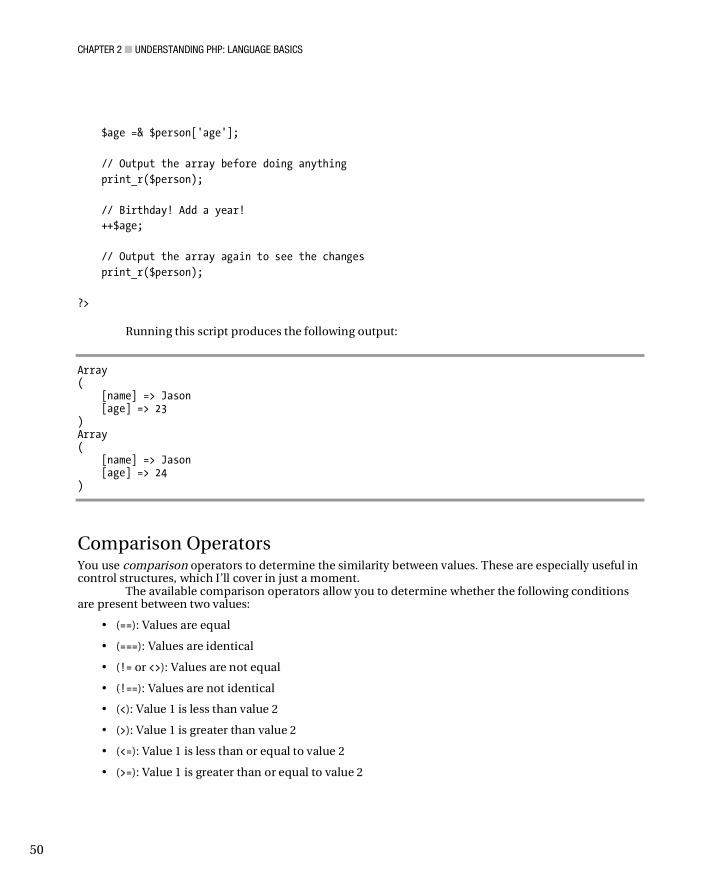
$age =& $person['age']; // Output the array before doing anything print_r($person); // Birthday! Add a year! ++$age; // Output the array again to see the changes print_r($person); ?>
Running this script produces the following output:
Array ( [name] => Jason [age] => 23 ) Array ( [name] => Jason [age] => 24 )
Comparison Operators You use comparison operators to determine the similarity between values. These are especially useful in control structures, which I’ll cover in just a moment.
The available comparison operators allow you to determine whether the following conditions are present between two values:
• (==): Values are equal
• (===): Values are identical
• (!= or <>): Values are not equal
• (!==): Values are not identical
• (<): Value 1 is less than value 2
• (>): Value 1 is greater than value 2
• (<=): Value 1 is less than or equal to value 2
• (>=): Value 1 is greater than or equal to value 2
CHAPTER 2 � UNDERSTANDING PHP: LANGUAGE BASICS
51
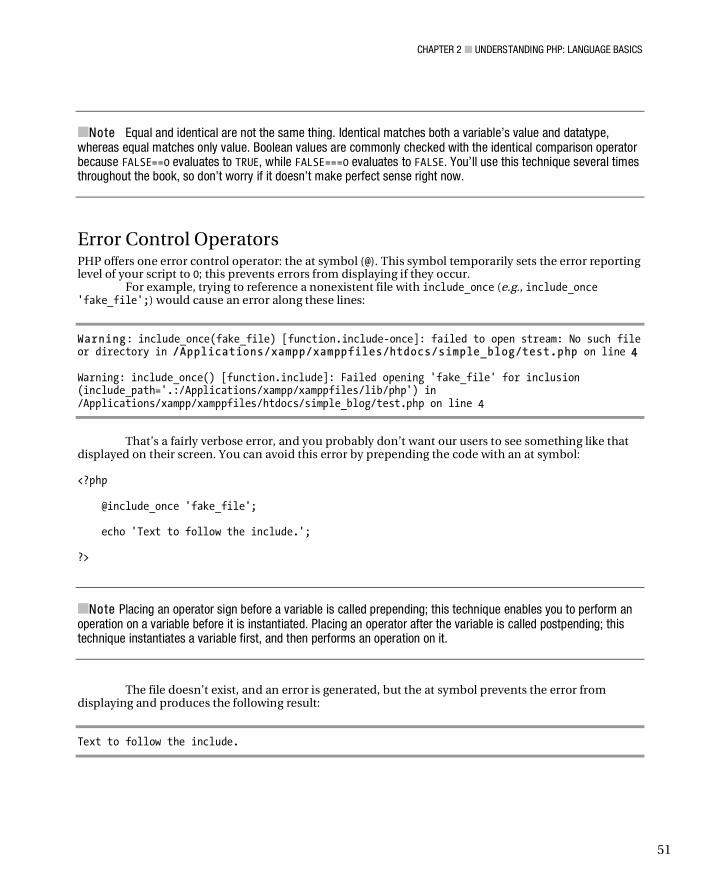
�Note Equal and identical are not the same thing. Identical matches both a variable’s value and datatype, whereas equal matches only value. Boolean values are commonly checked with the identical comparison operator because FALSE==0 evaluates to TRUE, while FALSE===0 evaluates to FALSE. You’ll use this technique several times throughout the book, so don’t worry if it doesn’t make perfect sense right now.
Error Control Operators PHP offers one error control operator: the at symbol (@). This symbol temporarily sets the error reporting level of your script to 0; this prevents errors from displaying if they occur.
For example, trying to reference a nonexistent file with include_once (e.g., include_once 'fake_file';) would cause an error along these lines:
Warning: include_once(fake_file) [function.include-once]: failed to open stream: No such file or directory in //Applications/xampp/xamppfiles/htdocs/simple_blog/test.php on line 44 Warning: include_once() [function.include]: Failed opening 'fake_file' for inclusion (include_path='.:/Applications/xampp/xamppfiles/lib/php') in /Applications/xampp/xamppfiles/htdocs/simple_blog/test.php on line 4
That’s a fairly verbose error, and you probably don’t want our users to see something like that displayed on their screen. You can avoid this error by prepending the code with an at symbol:
<?php @include_once 'fake_file'; echo 'Text to follow the include.'; ?>
�Note Placing an operator sign before a variable is called prepending; this technique enables you to perform an operation on a variable before it is instantiated. Placing an operator after the variable is called postpending; this technique instantiates a variable first, and then performs an operation on it.
The file doesn’t exist, and an error is generated, but the at symbol prevents the error from displaying and produces the following result:
Text to follow the include.
CHAPTER 2 � UNDERSTANDING PHP: LANGUAGE BASICS
52
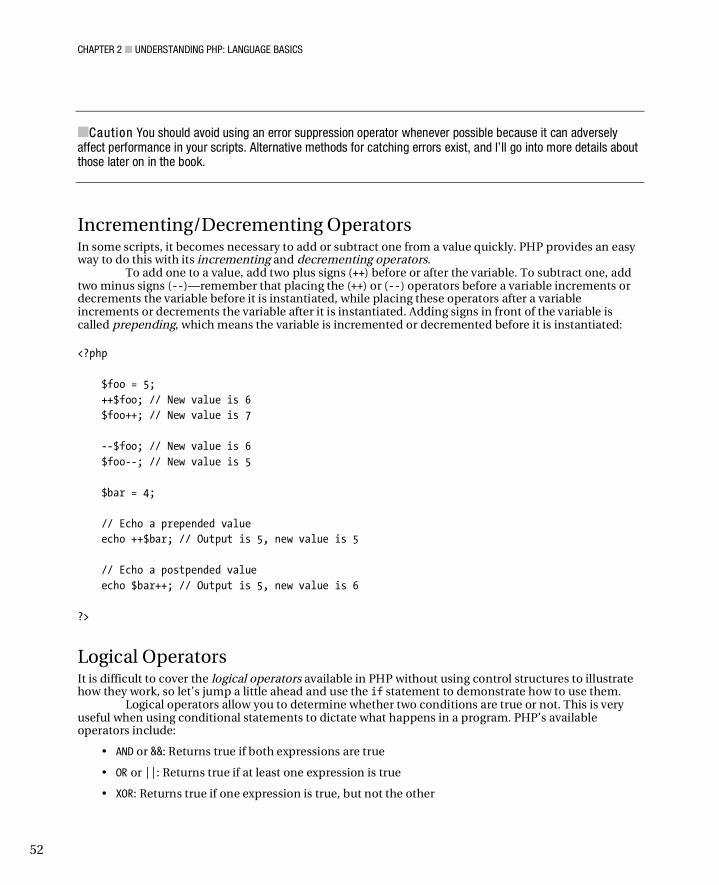
�Caution You should avoid using an error suppression operator whenever possible because it can adversely affect performance in your scripts. Alternative methods for catching errors exist, and I’ll go into more details about those later on in the book.
Incrementing/Decrementing Operators In some scripts, it becomes necessary to add or subtract one from a value quickly. PHP provides an easy way to do this with its incrementing and decrementing operators.
To add one to a value, add two plus signs (++) before or after the variable. To subtract one, add two minus signs (--)—remember that placing the (++) or (--) operators before a variable increments or decrements the variable before it is instantiated, while placing these operators after a variable increments or decrements the variable after it is instantiated. Adding signs in front of the variable is called prepending, which means the variable is incremented or decremented before it is instantiated:
<?php $foo = 5; ++$foo; // New value is 6 $foo++; // New value is 7 --$foo; // New value is 6 $foo--; // New value is 5 $bar = 4; // Echo a prepended value echo ++$bar; // Output is 5, new value is 5 // Echo a postpended value echo $bar++; // Output is 5, new value is 6 ?>
Logical Operators It is difficult to cover the logical operators available in PHP without using control structures to illustrate how they work, so let’s jump a little ahead and use the if statement to demonstrate how to use them.
Logical operators allow you to determine whether two conditions are true or not. This is very useful when using conditional statements to dictate what happens in a program. PHP’s available operators include:
• AND or &&: Returns true if both expressions are true
• OR or ||: Returns true if at least one expression is true
• XOR: Returns true if one expression is true, but not the other
CHAPTER 2 � UNDERSTANDING PHP: LANGUAGE BASICS
53
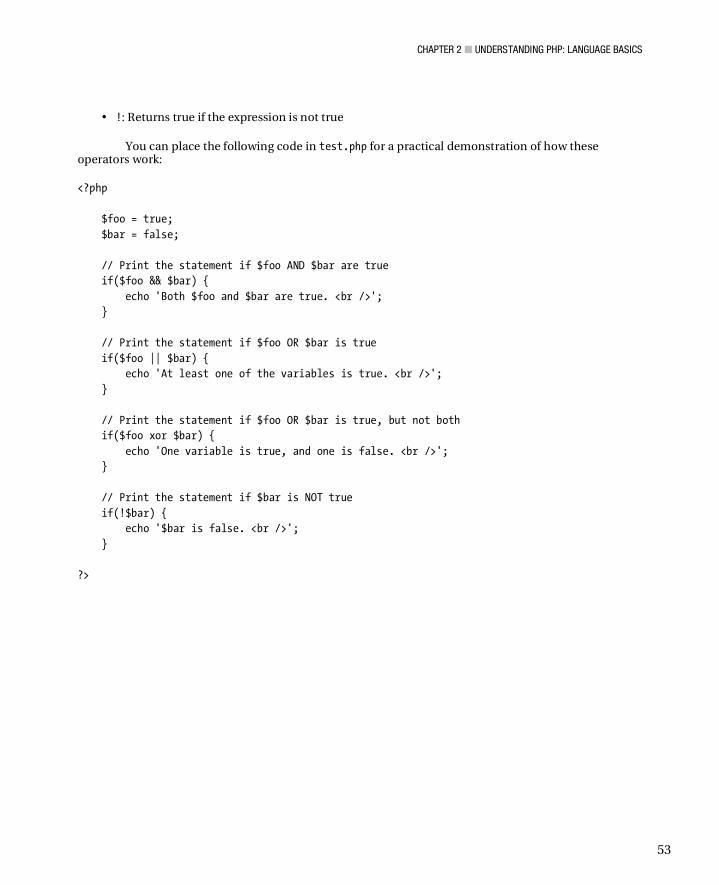
• !: Returns true if the expression is not true
You can place the following code in test.php for a practical demonstration of how these operators work:
<?php $foo = true; $bar = false; // Print the statement if $foo AND $bar are true if($foo && $bar) { echo 'Both $foo and $bar are true. <br />'; } // Print the statement if $foo OR $bar is true if($foo || $bar) { echo 'At least one of the variables is true. <br />'; } // Print the statement if $foo OR $bar is true, but not both if($foo xor $bar) { echo 'One variable is true, and one is false. <br />'; } // Print the statement if $bar is NOT true if(!$bar) { echo '$bar is false. <br />'; } ?>
CHAPTER 2 � UNDERSTANDING PHP: LANGUAGE BASICS
54
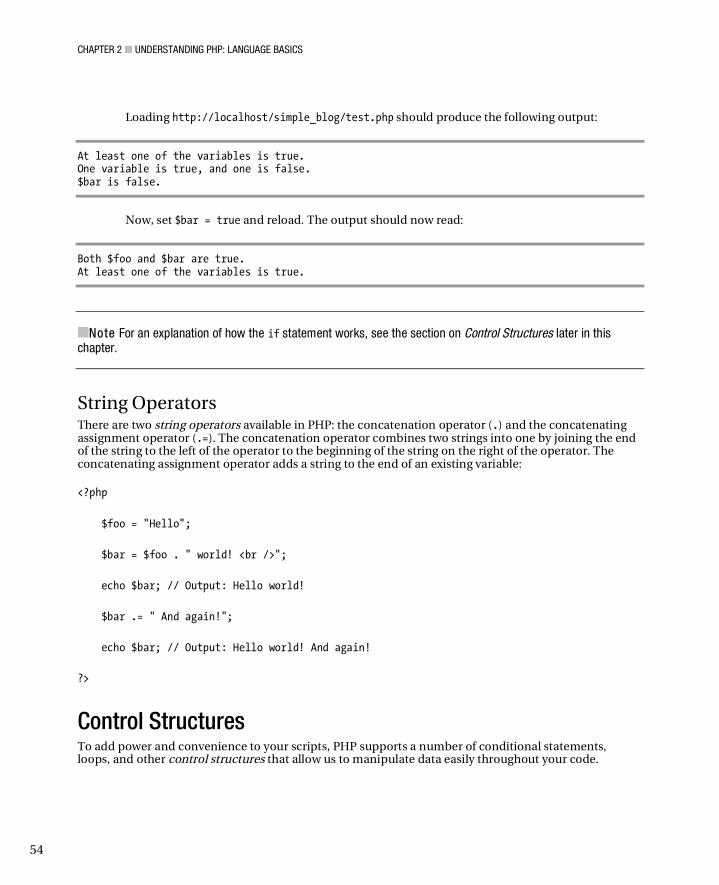
Loading http://localhost/simple_blog/test.php should produce the following output:
At least one of the variables is true. One variable is true, and one is false. $bar is false.
Now, set $bar = true and reload. The output should now read:
Both $foo and $bar are true. At least one of the variables is true.
�Note For an explanation of how the if statement works, see the section on Control Structures later in this chapter.
String Operators There are two string operators available in PHP: the concatenation operator (.) and the concatenating assignment operator (.=). The concatenation operator combines two strings into one by joining the end of the string to the left of the operator to the beginning of the string on the right of the operator. The concatenating assignment operator adds a string to the end of an existing variable:
<?php $foo = "Hello"; $bar = $foo . " world! <br />"; echo $bar; // Output: Hello world! $bar .= " And again!"; echo $bar; // Output: Hello world! And again! ?>
Control Structures To add power and convenience to your scripts, PHP supports a number of conditional statements, loops, and other control structures that allow us to manipulate data easily throughout your code.
CHAPTER 2 � UNDERSTANDING PHP: LANGUAGE BASICS
55
The control structures supported by PHP are:
• if
• else
• elseif/else if
• while
• do-while
• for
• foreach
• break
• continue
• switch
• return
• require
• include
• require_once
• include_once
• goto
if, else, and else if The most basic control structure is the if statement. It defines a block of code between curly braces ({}) that is to be executed only if a condition is met:
<?php $foo = 5; if($foo < 10) { echo "The condition was met. <br />"; } ?>
In this program, nothing is output if $foo doesn’t meet your condition. In some cases, this is an
unacceptable result, so you would need to use an else statement to provide an alternative value to output if the condition isn’t met:
CHAPTER 2 � UNDERSTANDING PHP: LANGUAGE BASICS
56
<?php $foo = 15; if($foo < 10) { echo "The condition was met. <br />"; } else { echo "The condition was not met. <br />"; } ?>
If you have a value that failed the if condition, but you aren’t ready to pass it to the else
statement yet, you can add an elseif statement to be evaluated. You place this new statement between the if and else blocks; it executes only if the first condition isn’t met, but the second is:
<?php if($age < 18) { echo "Not old enough to vote or drink! <br />"; } else if ($age < 21) { echo "Old enough to vote, but not to drink. <br />"; } else { // If we get here, $age is >= 21 echo "Old enough to vote and drink! <br />"; } ?>
while and do-while The while loop allows you to repeat a block of code continuously for as long as a condition is TRUE. This allows you to cycle through data sets without needing to know how many exist; all that matters is the number of datasets you want to use at a maximum.
In this example, you use a counter variable ($i) that stores the count, incrementing this at the end of each loop cycle. When the counter reaches three, the condition is no longer true, so the loop ends. Place this code in test.php:
<?php $i = 0; while($i<3) { echo "Count is at $i. <br />"; ++$i; } ?>
Loading this script in a browser produces the following output:
CHAPTER 2 � UNDERSTANDING PHP: LANGUAGE BASICS
57
Count is at 0. Count is at 1. Count is at 2.
�Note Keep in mind that the loop will not execute if the condition isn’t met. In the previous example, no output would be generated if $i were set to 4.
A more practical example is looping through an array to generate output based on the stored values. You can add the following code to test.php to output a list of bands:
<?php $bands = array("Minus the Bear", "The Decemberists", "Neko Case", "Bon Iver", "Now It's Overhead"); $i = 0; $n = count($bands); // Stores the number of values in the array while($i < $n) { echo $bands[$i], "<br />"; ++$i; } ?>
This loop produces the following output when loaded in a browser:
Minus the Bear The Decemberists Neko Case Bon Iver Now It's Overhead
You need to use a do-while loop if you want to set up a loop that executes at least once, then continues if the condition is met:
<?php $i = 10;
CHAPTER 2 � UNDERSTANDING PHP: LANGUAGE BASICS
58
do { echo "The count is at $i.\n"; ++$i; } while($i<5); // Outputs "The count is at 10." // even though $i doesn't meet the condition. ?>
for One of the most versatile statements in PHP programming is the for loop, which accepts three expressions: expression one is evaluated once at the beginning of the loop, unconditionally; expression two is evaluated at the beginning of each iteration of the loop, and the loop continues only if the expression evaluates to true; expression three is evaluated at the end of each iteration.
Each expression can have more than one part, with each part separated by a comma. You separate the three main expressions using semicolons:
<?php for($i=0; $i<3; ++$i) { echo "The count is at $i.\n"; } // Output: // The count is at 0. // The count is at 1. // The count is at 2. ?>
At this point, you might find it helpful to revisit the previous code example where you created a
list of bands. This code produces output identical to the while loop you used previously, while also cleaning up the code a bit:
<?php $bands = array("Minus the Bear", "The Decemberists", "Neko Case", "Bon Iver", "Now It's Overhead"); for($i=0, $n=count($bands); $i<$n; ++$i) { echo $bands[$i], "<br />"; } ?>
CHAPTER 2 � UNDERSTANDING PHP: LANGUAGE BASICS
59
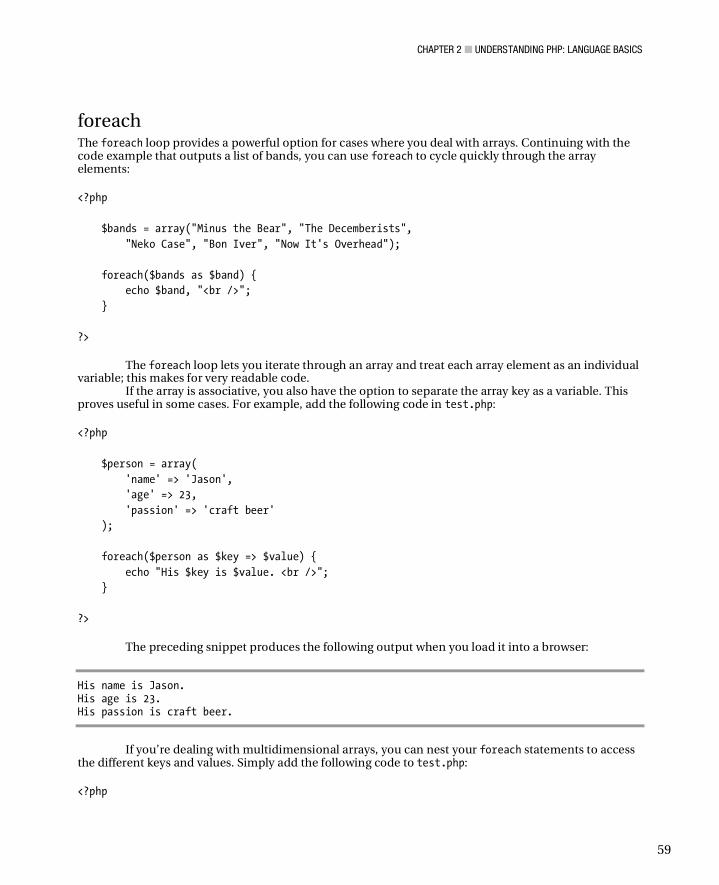
foreach The foreach loop provides a powerful option for cases where you deal with arrays. Continuing with the code example that outputs a list of bands, you can use foreach to cycle quickly through the array elements:
<?php $bands = array("Minus the Bear", "The Decemberists", "Neko Case", "Bon Iver", "Now It's Overhead"); foreach($bands as $band) { echo $band, "<br />"; } ?>
The foreach loop lets you iterate through an array and treat each array element as an individual
variable; this makes for very readable code. If the array is associative, you also have the option to separate the array key as a variable. This
proves useful in some cases. For example, add the following code in test.php:
<?php $person = array( 'name' => 'Jason', 'age' => 23, 'passion' => 'craft beer' ); foreach($person as $key => $value) { echo "His $key is $value. <br />"; } ?>
The preceding snippet produces the following output when you load it into a browser:
His name is Jason. His age is 23. His passion is craft beer.
If you’re dealing with multidimensional arrays, you can nest your foreach statements to access the different keys and values. Simply add the following code to test.php:
<?php
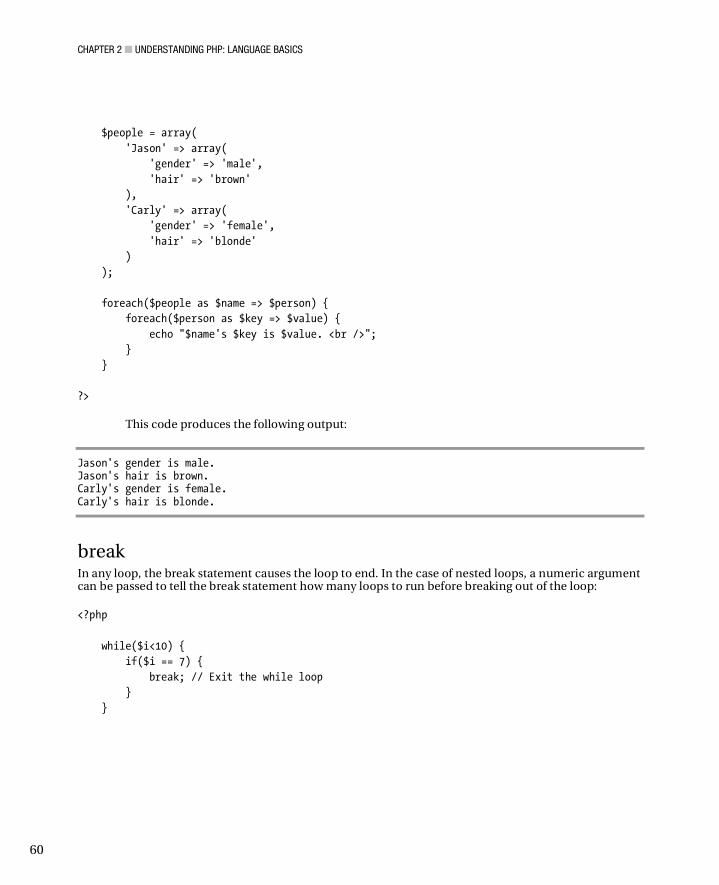
CHAPTER 2 � UNDERSTANDING PHP: LANGUAGE BASICS
60
$people = array( 'Jason' => array( 'gender' => 'male', 'hair' => 'brown' ), 'Carly' => array( 'gender' => 'female', 'hair' => 'blonde' ) ); foreach($people as $name => $person) { foreach($person as $key => $value) { echo "$name's $key is $value. <br />"; } } ?>
This code produces the following output:
Jason's gender is male. Jason's hair is brown. Carly's gender is female. Carly's hair is blonde.
break In any loop, the break statement causes the loop to end. In the case of nested loops, a numeric argument can be passed to tell the break statement how many loops to run before breaking out of the loop:
<?php while($i<10) { if($i == 7) { break; // Exit the while loop } }
CHAPTER 2 � UNDERSTANDING PHP: LANGUAGE BASICS
61
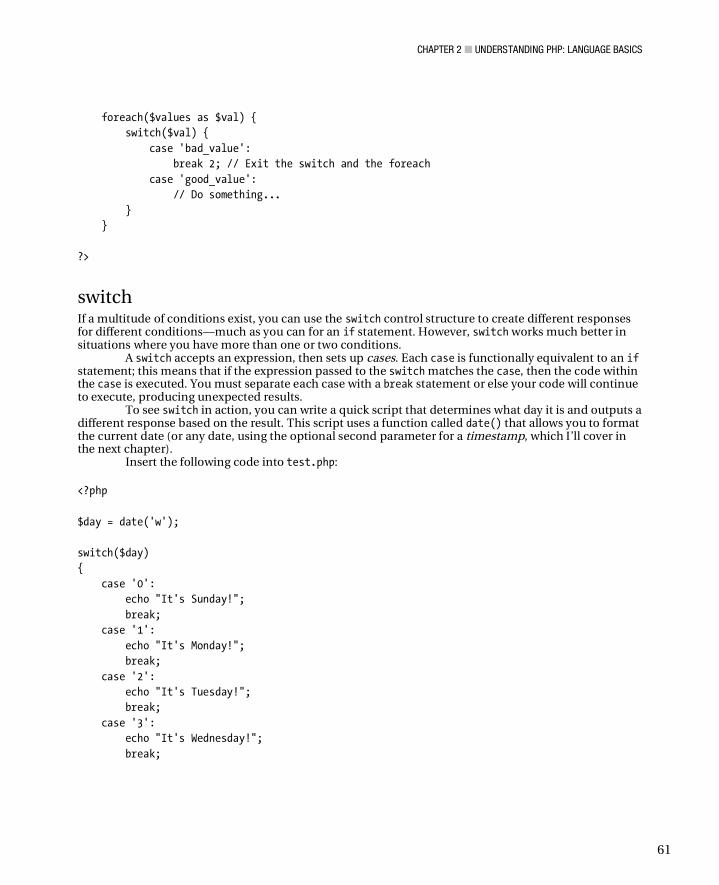
foreach($values as $val) { switch($val) { case 'bad_value': break 2; // Exit the switch and the foreach case 'good_value': // Do something... } } ?>
switch If a multitude of conditions exist, you can use the switch control structure to create different responses for different conditions—much as you can for an if statement. However, switch works much better in situations where you have more than one or two conditions.
A switch accepts an expression, then sets up cases. Each case is functionally equivalent to an if statement; this means that if the expression passed to the switch matches the case, then the code within the case is executed. You must separate each case with a break statement or else your code will continue to execute, producing unexpected results.
To see switch in action, you can write a quick script that determines what day it is and outputs a different response based on the result. This script uses a function called date() that allows you to format the current date (or any date, using the optional second parameter for a timestamp, which I’ll cover in the next chapter).
Insert the following code into test.php:
<?php $day = date('w'); switch($day) { case '0': echo "It's Sunday!"; break; case '1': echo "It's Monday!"; break; case '2': echo "It's Tuesday!"; break; case '3': echo "It's Wednesday!"; break;
CHAPTER 2 � UNDERSTANDING PHP: LANGUAGE BASICS
62
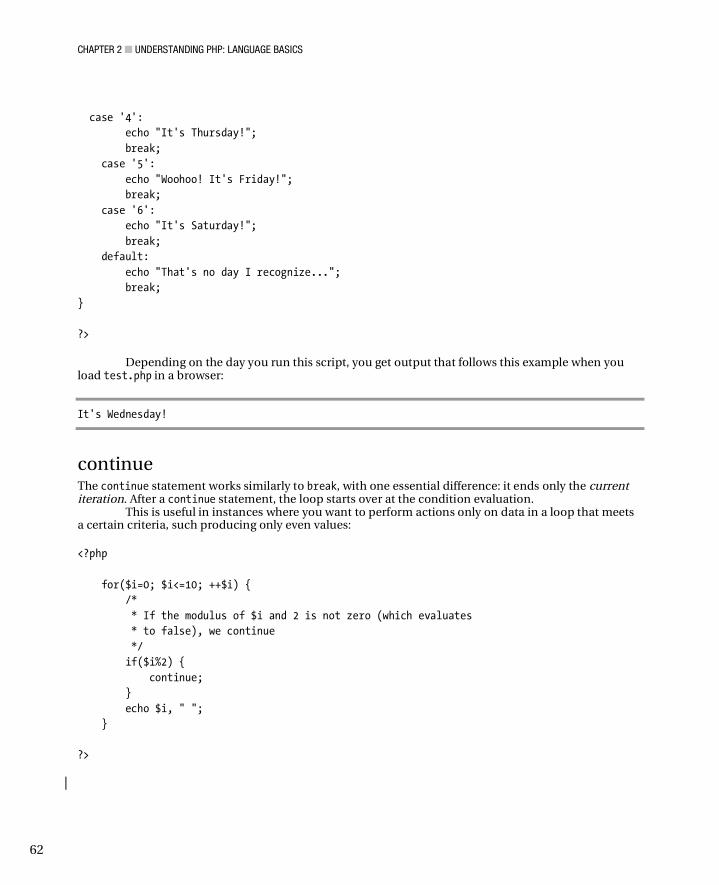
case '4': echo "It's Thursday!"; break; case '5': echo "Woohoo! It's Friday!"; break; case '6': echo "It's Saturday!"; break; default: echo "That's no day I recognize..."; break; } ?>
Depending on the day you run this script, you get output that follows this example when you
load test.php in a browser:
It's Wednesday!
continue The continue statement works similarly to break, with one essential difference: it ends only the current iteration. After a continue statement, the loop starts over at the condition evaluation.
This is useful in instances where you want to perform actions only on data in a loop that meets a certain criteria, such producing only even values:
<?php for($i=0; $i<=10; ++$i) { /* * If the modulus of $i and 2 is not zero (which evaluates * to false), we continue */ if($i%2) { continue; } echo $i, " "; } ?>
CHAPTER 2 � UNDERSTANDING PHP: LANGUAGE BASICS
63
Running this loop creates the following output:
0 2 4 6 8 10
return The return statement in PHP is most useful in functions. When reached within a function, return immediately stops the execution of the function and passes its argument as the value of the function call. I’ll cover the return statement in the section of this chapter named, “User-Defined Functions.”
If you use the return statement outside of a function, the statement ends the execution of the script. Like echo and print, return is a construct of the PHP language, so no parentheses are required when you use it.
include, include_once, require, and require_once A great feature provided by PHP is the ability to load a script from an external file; this makes it much easier to organize your code in larger projects.
PHP provides four constructs you can use to load an external script: include, include_once, require, and require_once.
The PHP manual recommends that developers use include_once and require_once because these constructs first check whether the file has already been loaded before either will load a given script. This saves resources and can increase the performance of your applications.
Now let’s take a look at an exercise that illustrates the power of loading external scripts. Fire up Eclipse and press Ctrl+click or right-click your simple_blog project folder, hover over “New...” and select “File...” from the drop-down menu. Name the new file extras.php and add the following code to the blank document that opens:
<?php $foo = "green"; $bar = "red"; ?>
Save the file, then go back to our test.php file and write the following code:
<?php include_once 'extras.php'; echo 'Variable $foo has a value of ', $foo, "<br />\n"; echo 'Variable $bar has a value of ', $bar, "<br />\n"; ?>
CHAPTER 2 � UNDERSTANDING PHP: LANGUAGE BASICS
64
Save, then navigate to http://localhost/simple_blog/test.php in a browser to see the results:
Variable $foo has a value of green Variable $bar has a value of red
By including the extras.php file you created using include_once, you are able to access the information stored in the file. This proves especially useful when you’re working with a large set of functions, which allows common functions to be stored in a file that is included in other areas of your site, rather than requiring that you copy-and-paste those functions into each file. Adopting this approach reduces the size of your applications and can play a part in optimizing your application’s performance.
This next short example illustrates how using include_once can reduce the load on your server; begin by adding this code toe extras.php:
<?php $var += 1; ?>
Next, add this code to test.php:
<?php $var = 0; include 'extras.php'; echo $var, "<br />"; include 'extras.php'; echo $var, "<br />"; ?>
This code produces the following output when loaded into a browser:
1 2
CHAPTER 2 � UNDERSTANDING PHP: LANGUAGE BASICS
65
Now, change test.php so it uses include_once instead of include:
<?php $var = 0; include_once 'extras.php'; echo $var, "<br />"; include_once 'extras.php'; echo $var, "<br />"; ?>
Next, load test.php in a browser to see the result:
1 1
The file is loaded only once, the script executes only once. This reduces the load on the server, which in turn reduces the execution time of your scripts.
goto PHP 5.3.0 introduced the goto statement, which enables you to skip ahead to a new section of code:
<?php if ($i==7) { goto foo; } echo "This will be jumped if \$i is equal to 7."; foo: echo "This should be printed."; ?>
CHAPTER 2 � UNDERSTANDING PHP: LANGUAGE BASICS
66
�Note goto is a controversial addition to the language, not least because many developers feel it will have negative effects on code legibility. Also be aware that XAMPP is running PHP 5.2 by default, so goto will not work in the default testing environment.
User-Defined Perhaps the most powerful feature of PHP is the ability to define and execute functions from within your code. A function is a named block of code that you declare within your scripts that you can call at a later time. Functions can accept any number of arguments and can return a value using the return statement.
The basic format of a function requires that you first identify the function using the function reserved word in front of a string that serves as the function’s name. This string can contain any alphanumeric characters and underscores, but it must not start with a number. You enclose any arguments you want in parentheses after the function name. Note that you still must include the parentheses even if the function doesn’t require that you pass any arguments.
�Note Reserved words are special terms that cannot be used for function names. These include the word function, control structure names, and several other terms which will be noted as they come up. You can find a full list of reserved words at http://us2.php.net/manual/en/reserved.php.
Begin by declaring your first function in test.php:
<?php function sayHello() { echo "Hello world!"; } // Execute the function sayHello(); ?>
CHAPTER 2 � UNDERSTANDING PHP: LANGUAGE BASICS
67
The function produces the following output when you call it:
Hello world!
To add arguments, you place variables inside the function declaration’s parentheses, separated by commas. You can use these arguments within the function to determine the function’s return value:
<?php function meet($name) { echo "Hello, my name is $name. Nice to meet you! <br />"; } meet("Jason"); ?>
For example, calling meet("Jason") produces the following output:
Hello, my name is Jason. Nice to meet you!
Returning Values from Functions Most of the time, you won’t want to immediately the result of a function call immediately. To store the result in a variable, you use the return statement discussed earlier. Add the following code to test.php:
<?php /* * Based on the time passed to the function in military (24 hour) * time, returns a greeting */ function greet($time) { if($time<12) { return "Good morning!"; } elseif($time<18) { return "Good afternoon!"; }

CHAPTER 2 � UNDERSTANDING PHP: LANGUAGE BASICS
68
else { return "Good evening!"; } } $greeting = greet(14); echo "$greeting How are you?"; ?>
PHP stores the result of greet()in the $greeting variable, which you can use later to display a
time-sensitive greeting to the user. When you set 14 (2 PM) as your parameter and run this script in your browser, you get the following output:
Good afternoon! How are you?
Summary At this point, you should be comfortable placing PHP scripts into our web pages, adding comments them to help clarify their purpose, using variables to manipulate data, and using operators and control structures to traverse and manipulate data. You should also know how to write a function and call it from within our scripts.
In the next chapter, you’ll learn how to send data from one page to another in your web applications, and you’ll start building the basics of your blog!