tx2000u tx2000ubt(bluetooth compatible) - canford · mic gain quiet talk ... completely before...
TRANSCRIPT

www.ttikorea.co.kr
INSTRUCTION MANUAL
TX2000UTX2000UBT(Bluetooth Compatible)

Thank you for purchasing this radio.
All our products are built to offer excellentvalue by combining advanced features,great design and manufacturing quality.
To ensure you are familiar with the operationand features of your radio, and in order toobtain the best performance, please readthis manual carefully before operation.
CONTENTS
....................................................................................... 4........................................................................... 5
........................................ 6............................................................... 6
......................................................................... 7............................................................................ 8
.............................................................................. 10.............................................................. 11
............................................................................... 11........................................................ 13
....................................................................13 ........................................... 13
................................................................. 13 ................................................................. 13
......................................................... 14 ............................................................... 14
.................................................................. 14 ............................................................................. 14
...................................................................... 15.................................................................... 15
........................................................... 15 ............................................................................. 15
.............................................................. 15 15
....................................................................... 16................................. 16
........................................................................ 16.................................................................... 16
...................................................................... 16 ............................................................................ 16 ....................................................................... 16
............................................................. 16..................................................................... 17
....................................................................... 17.............................................................. 17 ......................................................... 18
Caution1. Radio Controls2. Equipment and Accessories Supplied3. Fitting the Battery pack4. Battery Charging 5. Radio Controls6. LCD Display7. Basic Radio Operation8. Menu Mode9. Radio Features Explained Out Power Squelch Level Adjustment DTMF Tone Roger Beep LCD Backlighting Keypad Tone Compander VOX Mic Gain Quiet Talk10. Advanced Radi Features Activated by PC Program
TOT Battery Saver Privacy Code(CTCSS and DCS Tone Code Stun Kill Bluetooth Compatible (Optional) Cloning Scrambler Grouping Scan ID Tone Reapeater use 11.Troubleshooting12. CE Declaration13. Safety Requirements 14. Technical Specifications

4 TX-2000U
Caution
IMPORTANT - READ ALL INSTRUCTIONS carefully andcompletely before operating your radio and retain this manualfor future reference.
NEVER connect the radio to a power source other than thesupplied battery. This may damage your product.
NEVER operate your radio with the antenna less than 5cmfrom exposed parts of the body.
NEVER use the radio in or near a mining facility or other areawhich uses remotely triggered explosives or an area labelled"Blasting Area".
NEVER use or charge your radio in a potentially explosiveatmosphere.DO NOT place your radio in front of a vehicle airbag.DO NOT operate your radio on board an aircraft.DO NOT use your radio with a damaged antenna.DO NOT attempt to modify your radio in any way.ALWAYS charge your radio at normal room temperature.ALWAYS switch off your radio where notices restrict the use oftwo-way radio or mobile telephones.ALWAYS replace the accessory jack cover (if applicable)when the jack is not in use.
ONLY use TTI approved rechargeable batteries with thesupplied charger .
AVOID charging your radio or battery pack while is it wet.
AVOID storing or charging your radio in direct sunlight.
AVOID storing or using your radio where temperatures arebelow -20ºC or above +60ºC.

1.Radio Controls
1.Antenna2.Channel Knob3.Strap Hole4.TX/RX Indicator5.PTT Button6.Monitor Button7.Belt Clip
8.Power ON/Off & Volume Control Knob 9.Lock Button10.Accessory Jack11.Speaker12.Microphone13.LCD Display14.P1/P2/P3/P4 Button
TX-2000U 5

Fitting
1. Ensure that your radio is switched off.
2. Align the battery pack with the bat tery guide at the back of the radio.
3. Slide the battery pack up to the top until you hear the snapping sound.
Removal
1. Ensure that your radio is switched off.2. Press down on the battery release
catch and separate the battery pack from the radio.
6 TX2000U
1. TX2000U(or TX2000UBT) Radio 1 unit
3. Li-Ion Battery pack (2200mAh) 1 unit4. Charging Cradle 1 unit
rotpadA rewoP .5 1 unit1 unit
2. Equipment and Accessories Supplied
3. Fitting the Battery pack
2. Antenna 1 unit
6. Belt Clip

7TX-2000U
4. Battery Charging
Battery Pack
LEDPower Adaptor-Input : 230VAC-Output : 12VDC 1AhNote- Upon the red LED blinking, there is a doubt on the battery quality.- Upon the orange LED blinking, there is a doubt on the high temperture of the battery. In this case, separate the battery from the cradle and try again after cooling.

8 TX2000U
1. Power On/Off/Volume Control
2. Push-To-Talk (PTT) Button
3. Monitor Button
4. Channel Knob
Turn the knob clockwise to switch on and increasethe volume and counter-clockwise to decrease thevolume and switch off the radio. The radio will emit aconfirmation tone when it switches on.
Press and hold this button to speak (transmit) andrelease the button to hear (receive) messages. Youcan only communicate with other radios when thechannel and privacy code or ID setting is the sameas that of yours. The red LED lights during the PTTpress.
Press and hold this button to activate the monitor function. The function works only when the button is pressed and held. To deactivate this function, just release the button.
To change the channel, turn right or turn left. The right turn leads channels upward and the left turn leads downward.
5. Radio Controls
Note : The green or orange LED lights during receive. The green lights on the basic channels and the orange lights on the channel swith privacy codes.
5. P1,P2,P3 and P4 Button i. P1 As factory default, the menu mode is assigned to
P1. Press and hold for about 2 seconds to enterthe menu mode. Then briefly press to step downthrough the menus.

9 TX2000U
As factory default, the button works as up button orvalue selection of each menu.
ii. P2
iii. P3As factory default, the button works as down button or value selection of each menu.
iv. P4As factory default, this button is in charge of returnning function to the just previous menu or value.
6. Emergency/Keypad Lock Button
Emergency : Press and hold this button to transmit the emergency tone. The radio PTT is automatically pressed and held after the emergency tone. To stop the emergency situation, press the PTT again and press and hold the emergency button.
Keypad Lock : Momentarily press this button to activate the Keypad Lock.

부
NO Description 1 Receive 2 Transmit
woL rewoP 3 4 2 Tone 5 5 Tone 6 Priority Channel 7 CTCSS/DCS Tone 8 Scan
NO Description10 Battery Indicator11 VOX(Hands free)12 Key Tone13 Bluetooth Compatible (Optional)
14 Information Indicator 15 Roger Beep
B
6. LCD Display
9 Keypad Lock16 Scrambler
17 Compander
10 TX2000U

The UHF Radio service which this radio users share channelson a ‘take turns' basis. This means that other users and groupsmay be using any channel and privacy code combination.To communicate with other UHF radios, all units must beswitched to the same frequency and privacy code.If the combination you have chosen is already in use, pleasemake an alternative selection.1. Switch on your radio.2. Check and if necessary change the channel or frequency and
privacy code settings.3. To speak, hold the radio upright, about 10cm from your mouth
and press the PTT. Speak slowly and clearly towards the radio. Release the PTT when you finish speaking.
You will hear messages from other radios that are within rangeand have the same channel and privacy code setting.The appropriate icon will appear in the radio display when youreceive or transmit a message.
7. Basic Radio Operation
8. Menu Mode
11TX2000U
1. Function Buttons
P1 P2 P3 P4 Entering Menu Value Value& Menu Selection Selection Selection

12 TX2000U
The menu mode allows you to set-up and edit the basic functions.To access this menu mode press and hold the menu(P1) button. Each press of this button(P1) steps the radio sequentially throughthe different functions.The radio display indicates the current functions. The current setting and associated icon display. Use the up(P2) or down(P3) button to change the value of any selected menu. Press the PTT button or wait for about 5 seconds to confirm the change.
2.Menus
2
3
4
5
6
7
8
9
10
Output Power
Squelch Level Adjustment
DTMF Tone
Keypad Tone
Quiet Talk
Roger Beep
LCD Backlighting
Compander
VOX
Microphone Gain
1

13TX-2000U
Output Power
This feature permits the selection of the transmit power. Using the low power the
9. Radio Features Explained
radio will have lower transmit range but the battery life will be increased.
Squelch Level Adjustment
The DTMF tone is a kind of combinationsof short tones. The DTMF tone can
There are 9 squelch levels, 1 to 9 and auto. If the auto is selected,the squelch level is adjusted in most proper level for communicationsThe level 1 is the most sensitive and level 9 is the least sensitive.The more distant message you like to hear, the smaller level the squelch should be down to.
DTMF Tone
This function allows you to adjust the squelch level of your radio.
Roger Beep
This is a short tone that is automatically added to the end of your transmissions
preamble to the message upon every press of the PTT button. Selecting this allows the other party never to miss your initial message that might arrive before the audio of the other party’s is open to receive.This can be activated and de-activated.
to tell other users that you have finished speaking. This can be activated and de-activated.

14 TX-2000U
LCD BacklightingThis is adjustable. Always indicates thatthe backlighting is on always.Auto indicates that the backlighting isactive for 5 seconds from every press ofkeys or knobs(except for the PTT button).If Off is selected, the LCD backlighting isalways off.
This function reduces the background noise upon receive.
VOXWhen VOX(hansfree) mode is selected the radio will automatically transmit when
Keypad Tone
This function however, might be able to reduce the audio of massges also.
Compander
If this function is activated your radio willemit a confirmation tone whenever you
use the keypad or the channel knob.
the microphone detects your voice(or other noise). It can be usedwith the internal microphone or a suitable audio accessory(availableseparately)

15TX-2000U
There are 5 different levels(from 1 to 5)and auto. The level 1 is the most
This is used when you are requird totalk quietly. Your radio responds to your
sensitive and the level 5 is the least sensitive. The level oneresponds to quiet sound. For normal use auto is recommended.
Microphone Gain
Quiet Talk
very small and quiet voice to transmit.
10.Advanced Radio Features Activated by PC Program
1.TOTThis timer is used to limit the transmit time of your radio. Byselecting this function, your radio will automatically release the PTT when the selected time limit is reached.
2.Battery SaverThis reduced the battery consumption. However, there might beslight delay receiving signal when the radio is in the sleep mode by this saver activation.
Only one type of privacy code can be used on each channel. If the other unit(s) do not have privacy codes ensure your radios privacy codes are set to off.
3.Privacy Codes(CTCSS and DCS Tone Codes)

16 TX-2000U
4.Stun KillWhen a radio is lost and not found, it can be remotely controlledto be inoperative.
5.Bluetooth Compatible(Optional)This is an optional system and can be active with most of marketpurchasable Bluetooth headphone.
Using TTI supplied cloning cable, the frequencies and current setting can be copied.
6.Cloning
7.ScramblerThe other parties who do not use the same scrambling codes arenot permitted to take your messages.
8.GroupingRadios can be combined in groups. The messages to betransmitted can be taken by the radios in the same group.
9.ScanEach channel can be stored for scanning. Upon activating the scanning. only the stored channels are scanned and monitored.When the priority channel has been selected, the radio alwaysmonitor the priority channel during scanning.
10.ID ToneUsing 5 tone system, each ID can be transmitted and received.
11.Repeater useThe 2 tone system is used for the repeater environment.

If you experience problems with your TX2000U first check the battery power level as low batteries can cause problems such as poor transmission, weak reception and reduced sound quality.Then check the manual and radio display to ensure that a function (such as VOX or Lock) has not been activated by accident.In case of further difficulty please consult your dealer or visit our websites at www.ttikorea.co.kr.
This radio can be used without license and charges in; Austria, Belgium, Cyprus, Czech, Denmark, Estonia, Finland, France, Germany, Greece, Hungary, Iceland, Ireland, Italy, Latvia, Lithuania, Luxembourg, Malta, Netherlands, Norway, Poland, Portugal, Slovakia, Slovenia, Spain, Sweden, Switzerland and U.K.
This warning symbol indicates that this equipment operates in non-harmonized frequency bands and/or may be subject to licensing conditions in the country of use.Be sure to check that you have the correct version of this radio or the correct programming of this radio, to comply with your national licensing requirements.
CE version of the TX2000U which displays the CE symbol on the product label, complieswith the essential requirements of the European Radio and Telecommunications Terminal Directive 1999/5/CE.
11. Troubleshooting
12. CE Declaration
17TX2000U
CA devorppa EC a ylno ,seirettab elbaegrahcer eht gnigrahc roFadaptor complying with the following specifications must be used :
INPUT : 230VAC 50HzOUTPUT : 12VDC 1AH
13. Safety Requirements

14. Technical Specifications
18 TX2000U

14. Technical Specifications
19TX2000U
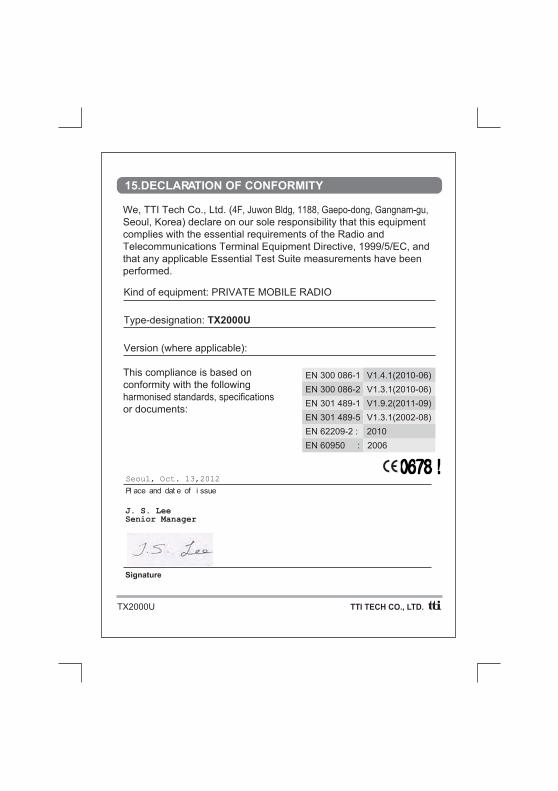
We, TTI Tech Co., Ltd. (4F, Juwon Bldg, 1188, Gaepo-dong, Gangnam-gu,Seoul, Korea) declare on our sole responsibility that this equipmentcomplies with the essential requirements of the Radio andTelecommunications Terminal Equipment Directive, 1999/5/EC, andthat any applicable Essential Test Suite measurements have beenperformed.
15.DECLARATION OF CONFORMITY
TX2000U
This compliance is based onconformity with the followingharmonised standards, specificationsor documents:
Kind of equipment: PRIVATE MOBILE RADIO
Type-designation: TX2000U
Version (where applicable):
Seoul, Oct. 13,2012
Pl ace and dat e of i ssue
J. S. LeeSenior Manager
Signature
EN 300 086-1EN 300 086-2EN 301 489-1EN 301 489-5EN 62209-2 :EN 60950 : 2006
V1.4.1(2010-06)V1.3.1(2010-06)V1.9.2(2011-09)V1.3.1(2002-08)2010