tutorial: races in liftoffliftoff-game.com/tutorials/liftoffracestutorial.pdf · tutorial: races in...
TRANSCRIPT
Tutorial: Races in Liftoffv0.3.0
Introduction
This is a short explanation/tutorial on how Races in Liftoff work: what are they, what do they do and how do you work with them? We'll be making a completely custom Track with some checkpoints in it and a custom Race to go along with it. For the record, this little tutorial does not tell you how to fly Races successfully – that's entirely up to your skills. ;) I
The Track and Race files created here should be found alongside this tutorial and can be downloaded from these links:
https://www.dropbox.com/s/wunvzbok4zomo2k/TutorialTrack.xml?dl=1https://www.dropbox.com/s/gbrukgahucp1d2c/TutorialRace.xml?dl=1
You can either follow along entirely and recreate the files (or something similar) in the process, or simply add the finished result to your game directly.
Tracks and Races
Tracks have been in Liftoff for a while now, and the community has already created and shared some amazing stuff. Races however are a new thing, included from v0.3.0 onward. Version 0.2.4 already featured a sneak peek of race functionality, but the power to create, edit and share Races for use in the Race game mode is now also entirely in your hands.

For starters, let's take a quick look at the differences between Tracks and Races. A Track, essentially, is nothing but a collection of track items that you place in an environment. A Race, on the other hand, describes what those items are expected to do for a Race: which gates do I have fly through, in what order, how many laps do I have to do, … Keeping the two separate allows us to do a whole bunch of things in the future, such as adding more functionality without breaking older Tracks, or creating other non-Race game modes that also use Tracks. Additionally, it also allows you to create any number of Races for a single Track.
Like Tracks, Races in Liftoff are contained in separate files in their own folder under your Liftoff directory.
• Tracks can be found at [YourLiftoffInstallPath]\Liftoff_Data\Tracks• Races can be found at [YourLiftoffInstallPath]\Liftoff_Data\Races
Building a Track
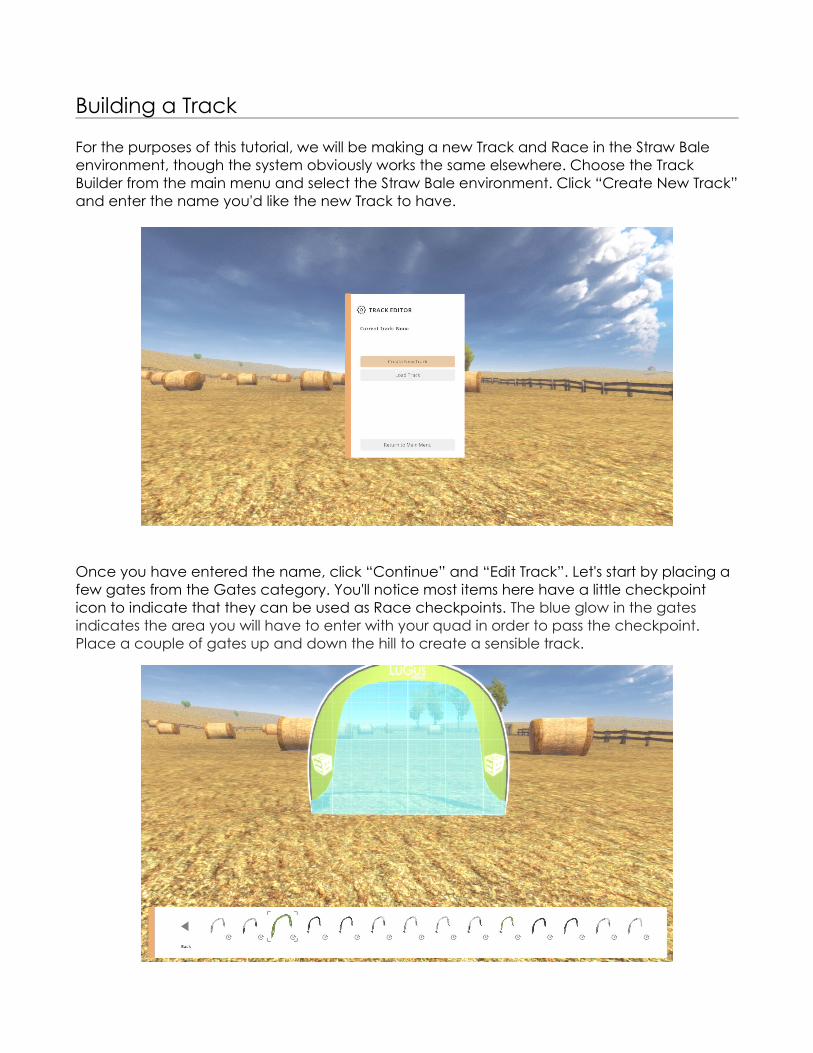
For the purposes of this tutorial, we will be making a new Track and Race in the Straw Bale environment, though the system obviously works the same elsewhere. Choose the Track Builder from the main menu and select the Straw Bale environment. Click “Create New Track”and enter the name you'd like the new Track to have.
Once you have entered the name, click “Continue” and “Edit Track”. Let's start by placing a few gates from the Gates category. You'll notice most items here have a little checkpoint icon to indicate that they can be used as Race checkpoints. The blue glow in the gates indicates the area you will have to enter with your quad in order to pass the checkpoint. Place a couple of gates up and down the hill to create a sensible track.
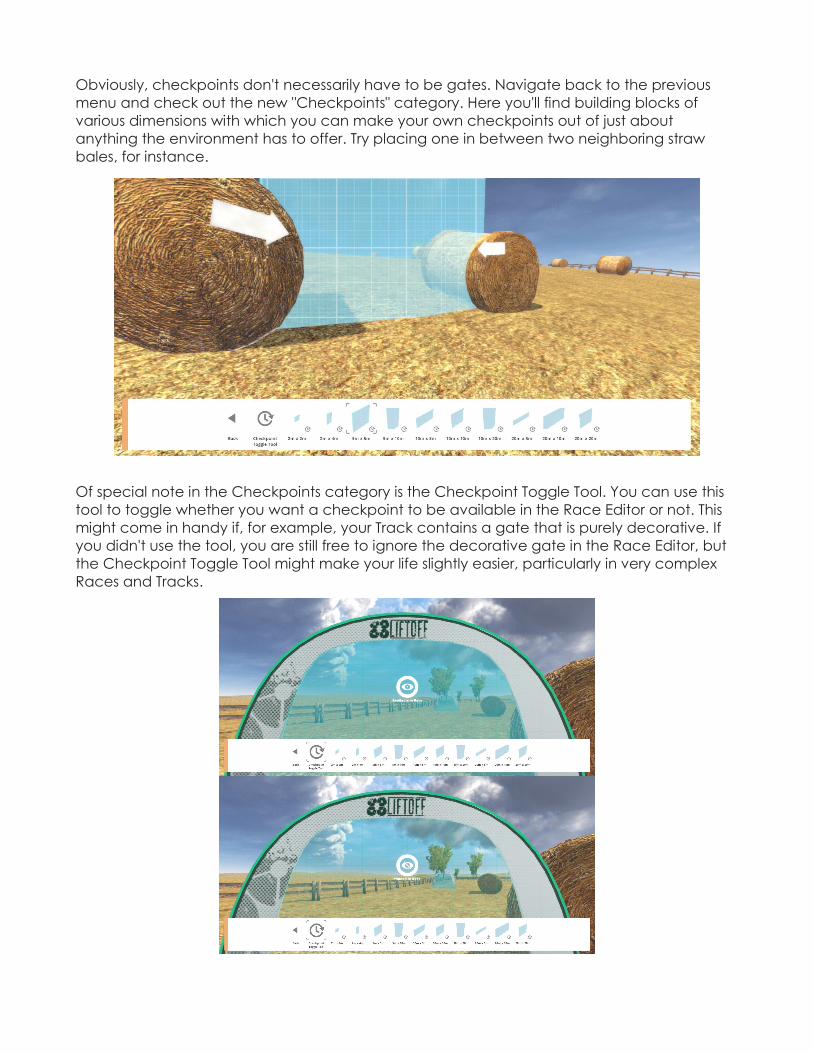
Obviously, checkpoints don't necessarily have to be gates. Navigate back to the previous menu and check out the new "Checkpoints" category. Here you'll find building blocks of various dimensions with which you can make your own checkpoints out of just about anything the environment has to offer. Try placing one in between two neighboring straw bales, for instance.
Of special note in the Checkpoints category is the Checkpoint Toggle Tool. You can use this tool to toggle whether you want a checkpoint to be available in the Race Editor or not. This might come in handy if, for example, your Track contains a gate that is purely decorative. If you didn't use the tool, you are still free to ignore the decorative gate in the Race Editor, but the Checkpoint Toggle Tool might make your life slightly easier, particularly in very complex Races and Tracks.
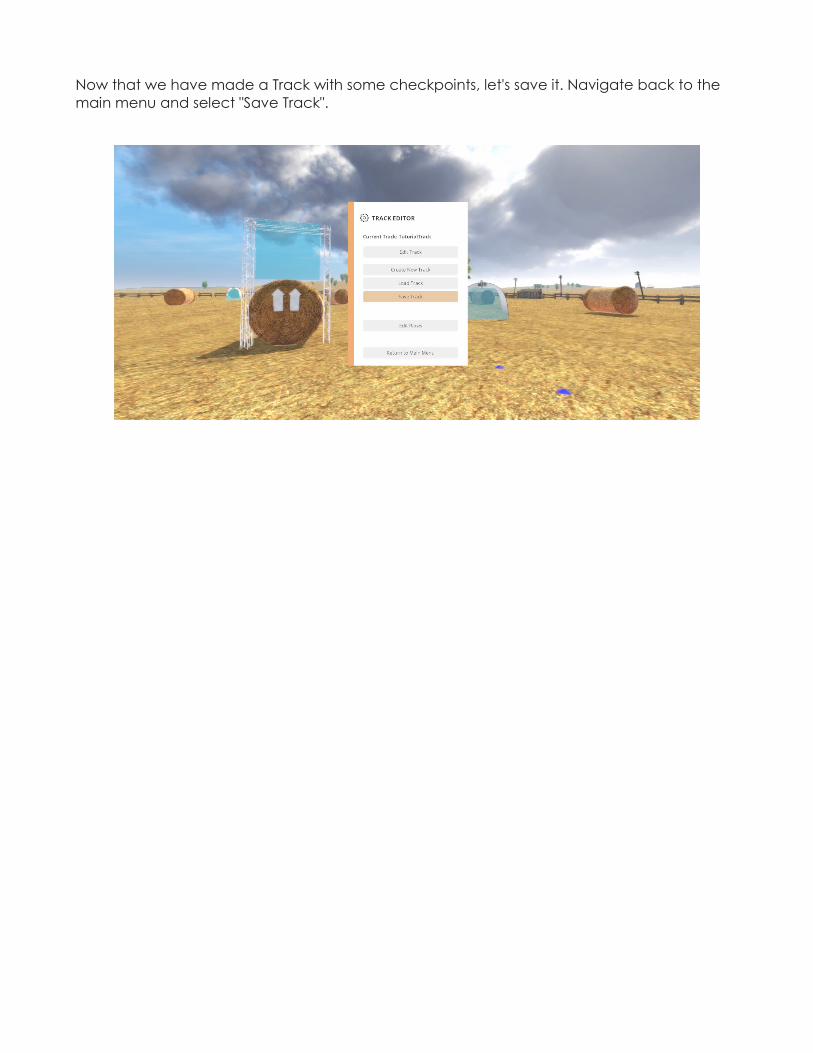
Now that we have made a Track with some checkpoints, let's save it. Navigate back to the main menu and select "Save Track".
Building a Race
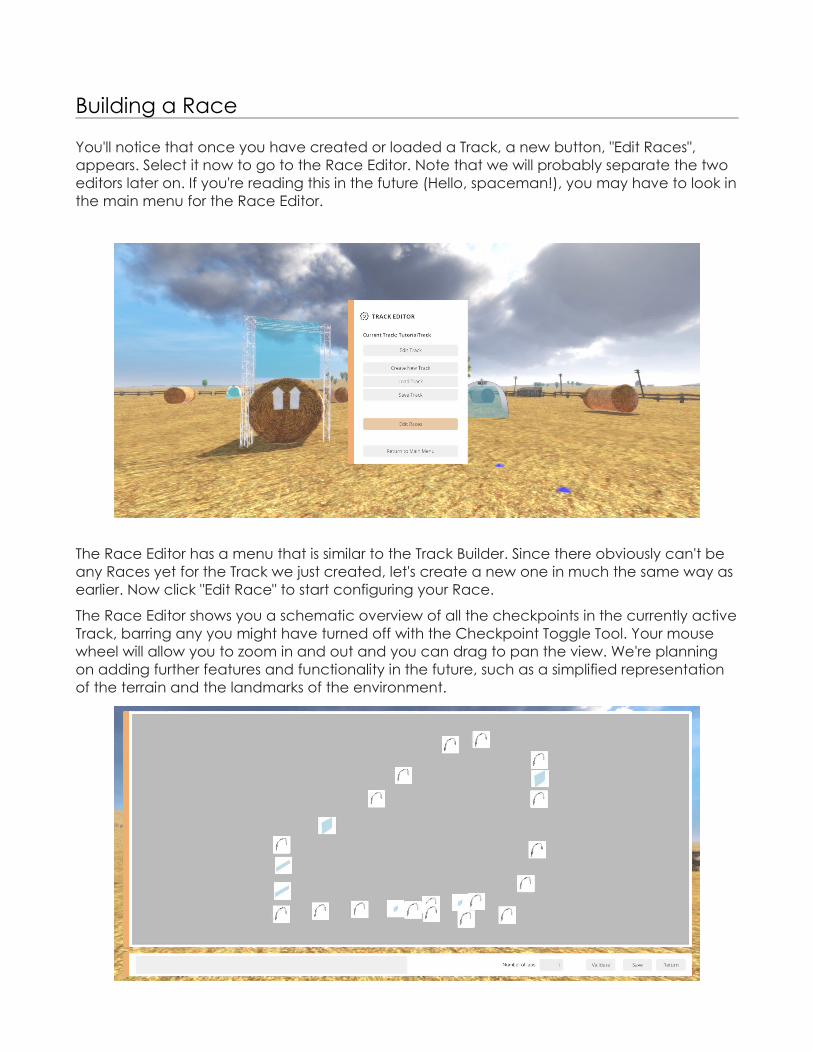
You'll notice that once you have created or loaded a Track, a new button, "Edit Races", appears. Select it now to go to the Race Editor. Note that we will probably separate the two editors later on. If you're reading this in the future (Hello, spaceman!), you may have to look inthe main menu for the Race Editor.
The Race Editor has a menu that is similar to the Track Builder. Since there obviously can't be any Races yet for the Track we just created, let's create a new one in much the same way as earlier. Now click "Edit Race" to start configuring your Race.
The Race Editor shows you a schematic overview of all the checkpoints in the currently activeTrack, barring any you might have turned off with the Checkpoint Toggle Tool. Your mouse wheel will allow you to zoom in and out and you can drag to pan the view. We're planning on adding further features and functionality in the future, such as a simplified representation of the terrain and the landmarks of the environment.
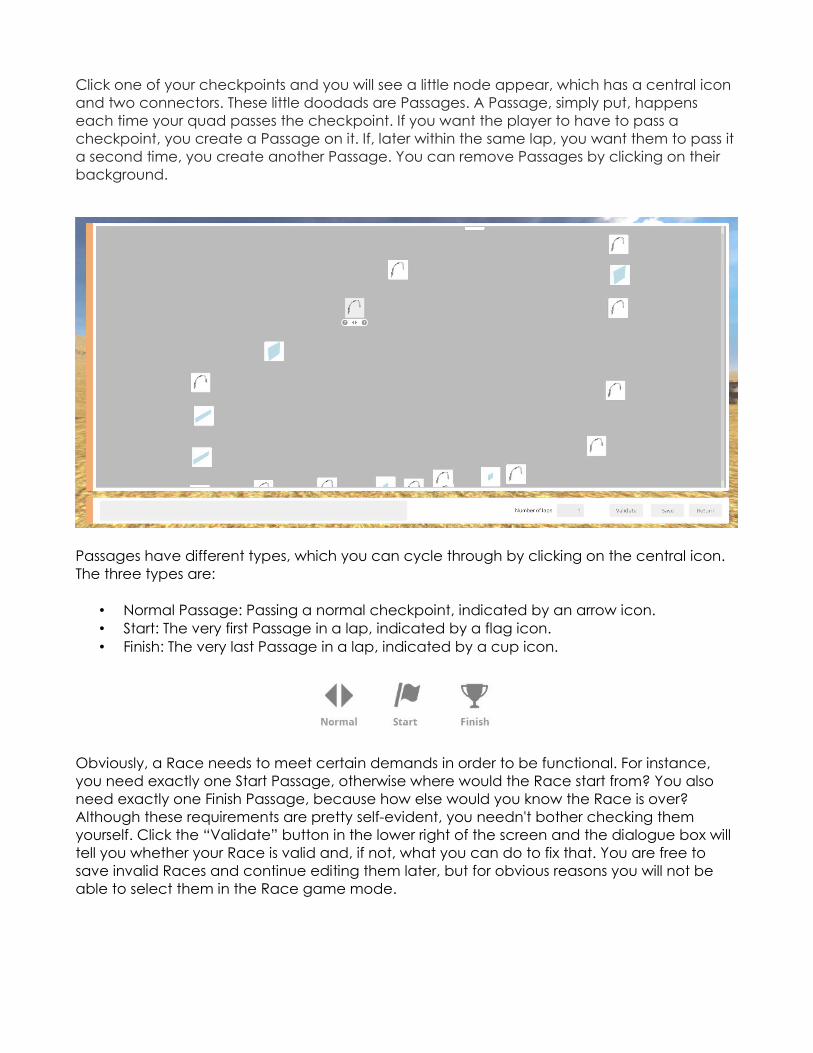
Click one of your checkpoints and you will see a little node appear, which has a central icon and two connectors. These little doodads are Passages. A Passage, simply put, happens each time your quad passes the checkpoint. If you want the player to have to pass a checkpoint, you create a Passage on it. If, later within the same lap, you want them to pass it a second time, you create another Passage. You can remove Passages by clicking on their background.
Passages have different types, which you can cycle through by clicking on the central icon. The three types are:
• Normal Passage: Passing a normal checkpoint, indicated by an arrow icon.• Start: The very first Passage in a lap, indicated by a flag icon.• Finish: The very last Passage in a lap, indicated by a cup icon.
Obviously, a Race needs to meet certain demands in order to be functional. For instance, you need exactly one Start Passage, otherwise where would the Race start from? You also need exactly one Finish Passage, because how else would you know the Race is over? Although these requirements are pretty self-evident, you needn't bother checking them yourself. Click the “Validate” button in the lower right of the screen and the dialogue box will tell you whether your Race is valid and, if not, what you can do to fix that. You are free to save invalid Races and continue editing them later, but for obvious reasons you will not be able to select them in the Race game mode.
Let's get down to business and create a Race now. The Track we created earlier in this tutorialsuggests a looped Race, so that's what we'll be doing, but you are also free to use (or not use) checkpoints as you see fit.
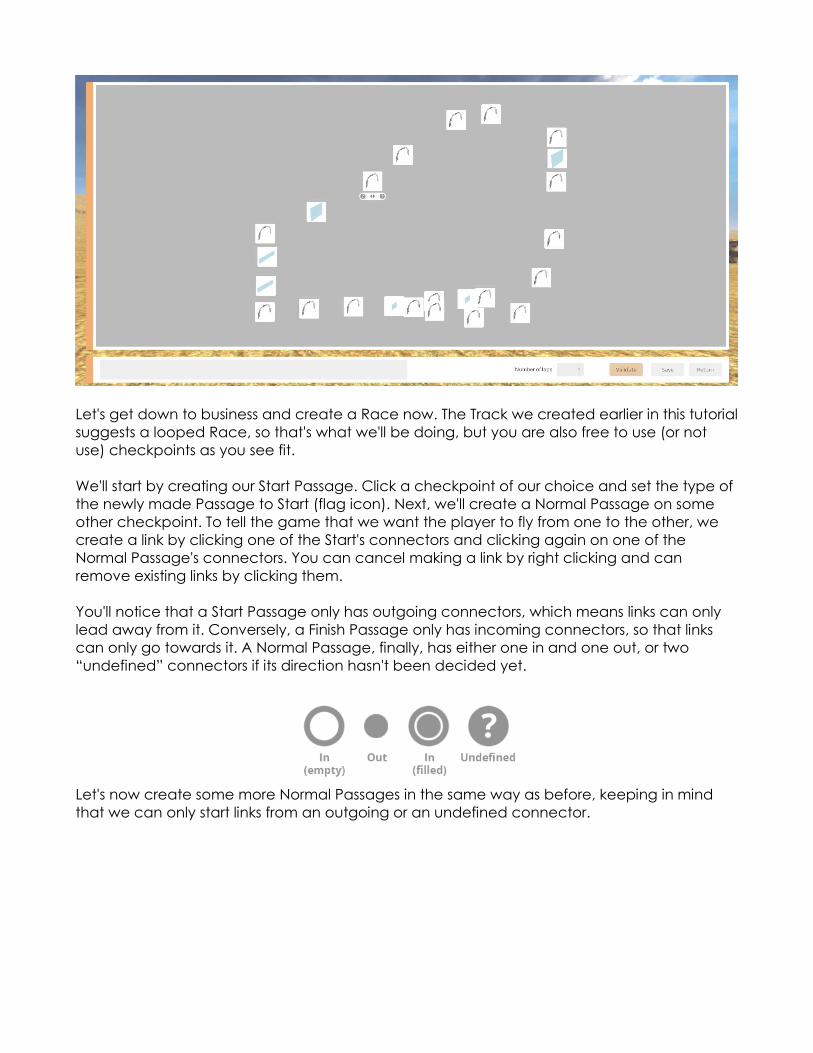
We'll start by creating our Start Passage. Click a checkpoint of our choice and set the type of the newly made Passage to Start (flag icon). Next, we'll create a Normal Passage on some other checkpoint. To tell the game that we want the player to fly from one to the other, we create a link by clicking one of the Start's connectors and clicking again on one of the Normal Passage's connectors. You can cancel making a link by right clicking and can remove existing links by clicking them.
You'll notice that a Start Passage only has outgoing connectors, which means links can only lead away from it. Conversely, a Finish Passage only has incoming connectors, so that links can only go towards it. A Normal Passage, finally, has either one in and one out, or two “undefined” connectors if its direction hasn't been decided yet.
Let's now create some more Normal Passages in the same way as before, keeping in mind that we can only start links from an outgoing or an undefined connector.
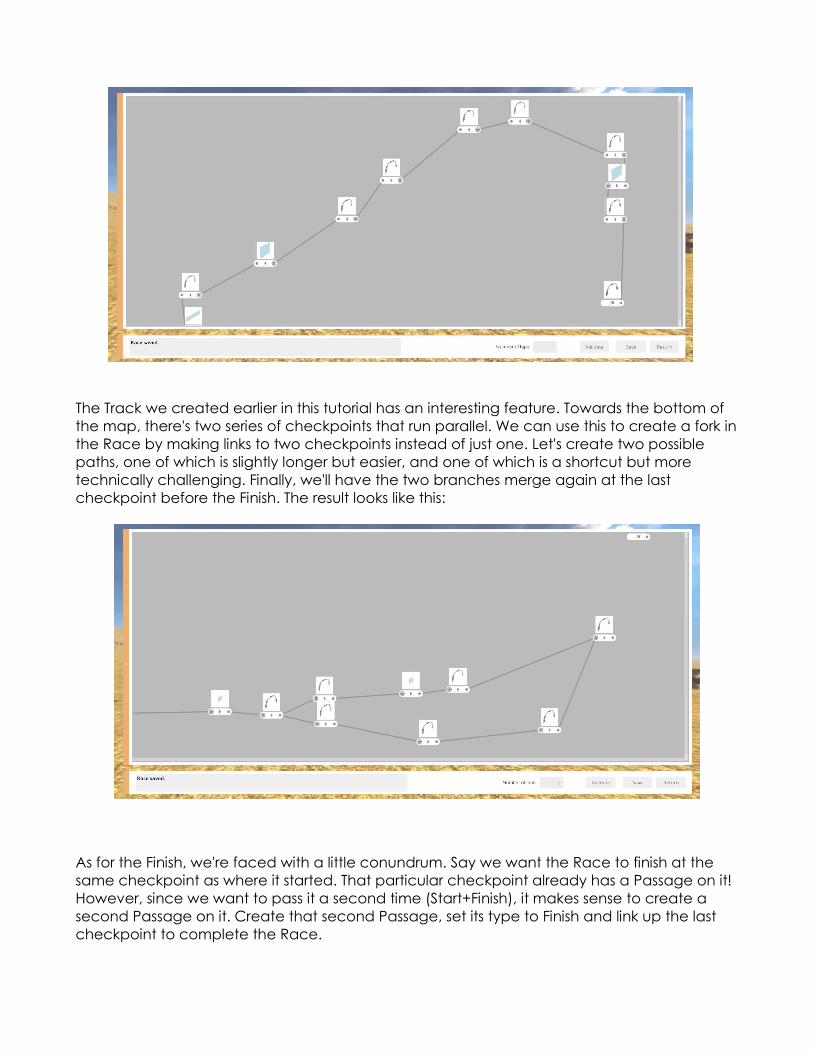
The Track we created earlier in this tutorial has an interesting feature. Towards the bottom of the map, there's two series of checkpoints that run parallel. We can use this to create a fork inthe Race by making links to two checkpoints instead of just one. Let's create two possible paths, one of which is slightly longer but easier, and one of which is a shortcut but more technically challenging. Finally, we'll have the two branches merge again at the last checkpoint before the Finish. The result looks like this:
As for the Finish, we're faced with a little conundrum. Say we want the Race to finish at the same checkpoint as where it started. That particular checkpoint already has a Passage on it! However, since we want to pass it a second time (Start+Finish), it makes sense to create a second Passage on it. Create that second Passage, set its type to Finish and link up the last checkpoint to complete the Race.
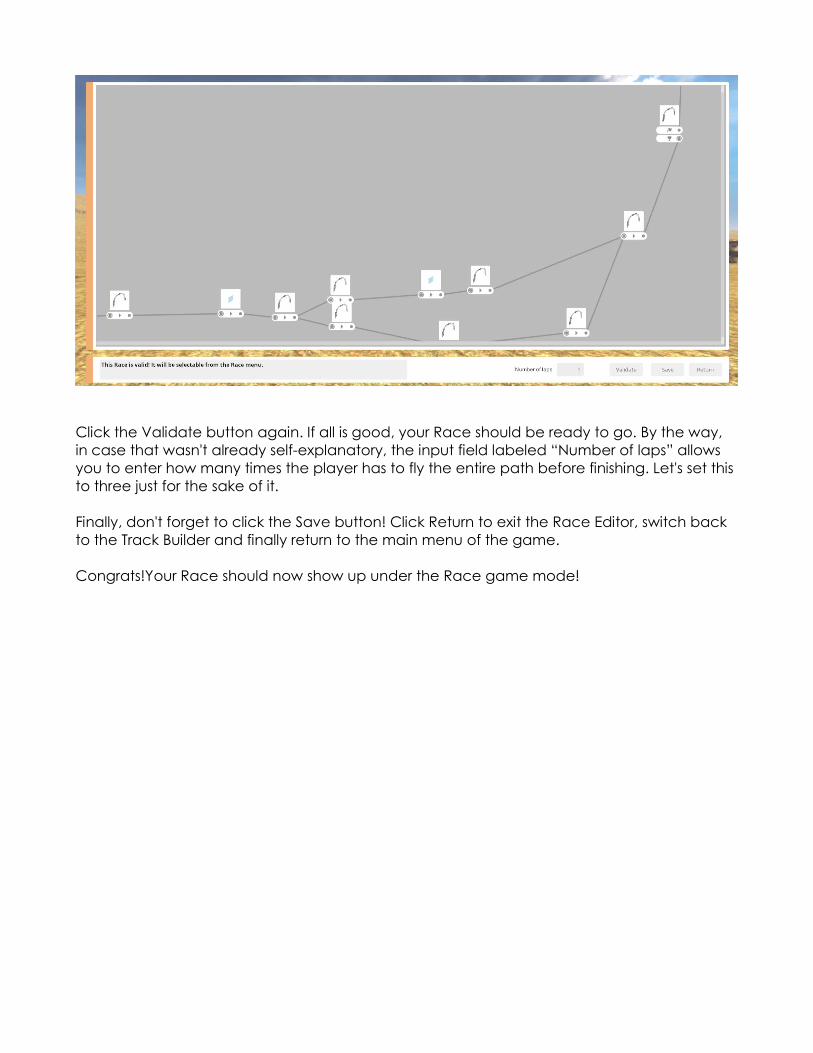
Click the Validate button again. If all is good, your Race should be ready to go. By the way, in case that wasn't already self-explanatory, the input field labeled “Number of laps” allows you to enter how many times the player has to fly the entire path before finishing. Let's set this to three just for the sake of it.
Finally, don't forget to click the Save button! Click Return to exit the Race Editor, switch back to the Track Builder and finally return to the main menu of the game.
Congrats!Your Race should now show up under the Race game mode!