troubleshooting milking systems - lsu agcenter · troubleshooting milking systems 1 ... essentially...
TRANSCRIPT
Troubleshooting Milking Systems 1
One of the most often neglected areas on a dairy farm is the milking parlor. Even though it is used two or three times a day, it is often assumed to be working properly and operated correctly. But it’s dangerous to think that as long as the motors run and milk flows through the pipeline, every-thing is OK. This may or may not be true.
The two major problems with milking sys-tems are malfunctioning equipment and opera-tor misuse. The problems can occur separately or simultaneously. In either case, the dairy farmer increases his chances of lowering milk production and, ultimately, lowering income. Research shows a high correlation between the incidence of mastitis and poorly functioning or poorly operated milking equipment.
Mastitis is not a new disease. It was recognized and studied even before the milking machine was invented. Because the dairy industry became more dependent upon efficient milking operations, the milking machine is now used on nearly every dairy farm in the United States. In many cases, when a dairy herd’s incidence of mastitis increases, the first area to be targeted is the milking equipment. The milking system can be adjusted or adapted to func-tion properly, but other factors can contribute to this problem.
The milking system is only as good as the person who operates it. Even the best-designed system can perform poorly if operated incorrectly. Likewise, an inadequate system can produce satisfactory results with a skilled operator. A good combination of machine and operator means more salable milk in the bulk tank.
The How-to of Milking CowsThe correct way to milk cows should begin even
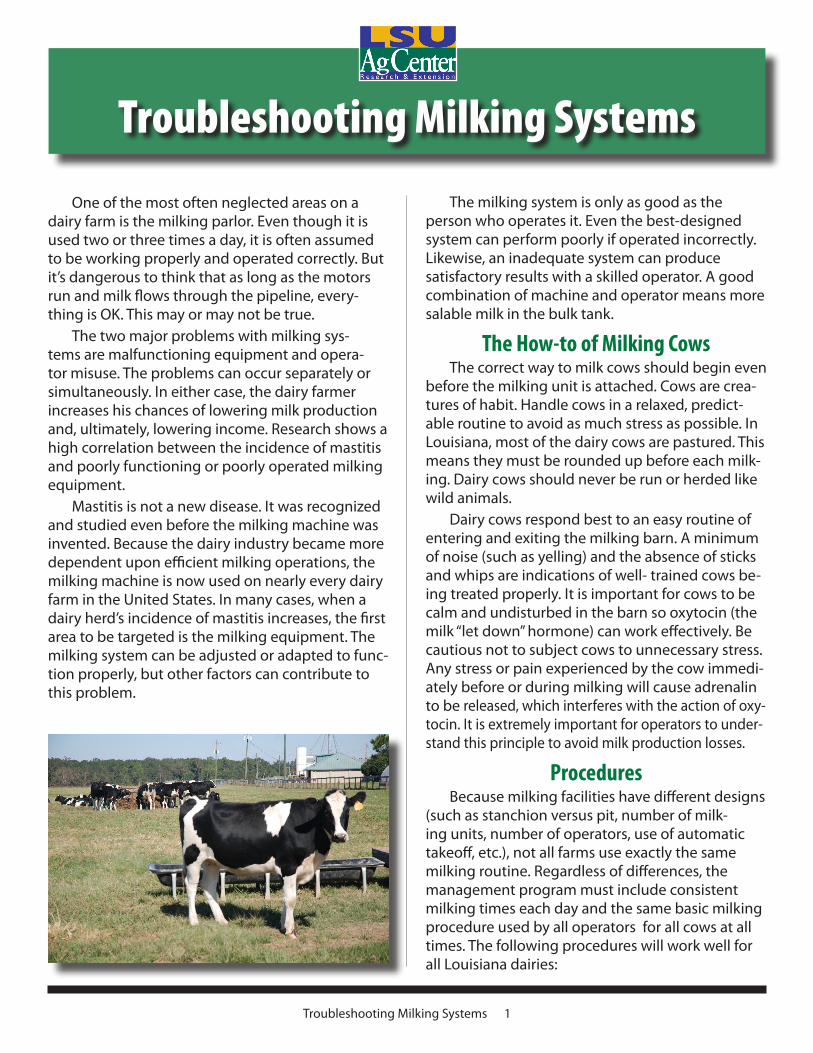
before the milking unit is attached. Cows are crea-tures of habit. Handle cows in a relaxed, predict-able routine to avoid as much stress as possible. In Louisiana, most of the dairy cows are pastured. This means they must be rounded up before each milk-ing. Dairy cows should never be run or herded like wild animals.
Dairy cows respond best to an easy routine of entering and exiting the milking barn. A minimum of noise (such as yelling) and the absence of sticks and whips are indications of well- trained cows be-ing treated properly. It is important for cows to be calm and undisturbed in the barn so oxytocin (the milk “let down” hormone) can work effectively. Be cautious not to subject cows to unnecessary stress. Any stress or pain experienced by the cow immedi-ately before or during milking will cause adrenalin to be released, which interferes with the action of oxy-tocin. It is extremely important for operators to under-stand this principle to avoid milk production losses.
ProceduresBecause milking facilities have different designs
(such as stanchion versus pit, number of milk-ing units, number of operators, use of automatic takeoff, etc.), not all farms use exactly the same milking routine. Regardless of differences, the management program must include consistent milking times each day and the same basic milking procedure used by all operators for all cows at all times. The following procedures will work well for all Louisiana dairies:
Troubleshooting Milking Systems
2 Troubleshooting Milking Systems
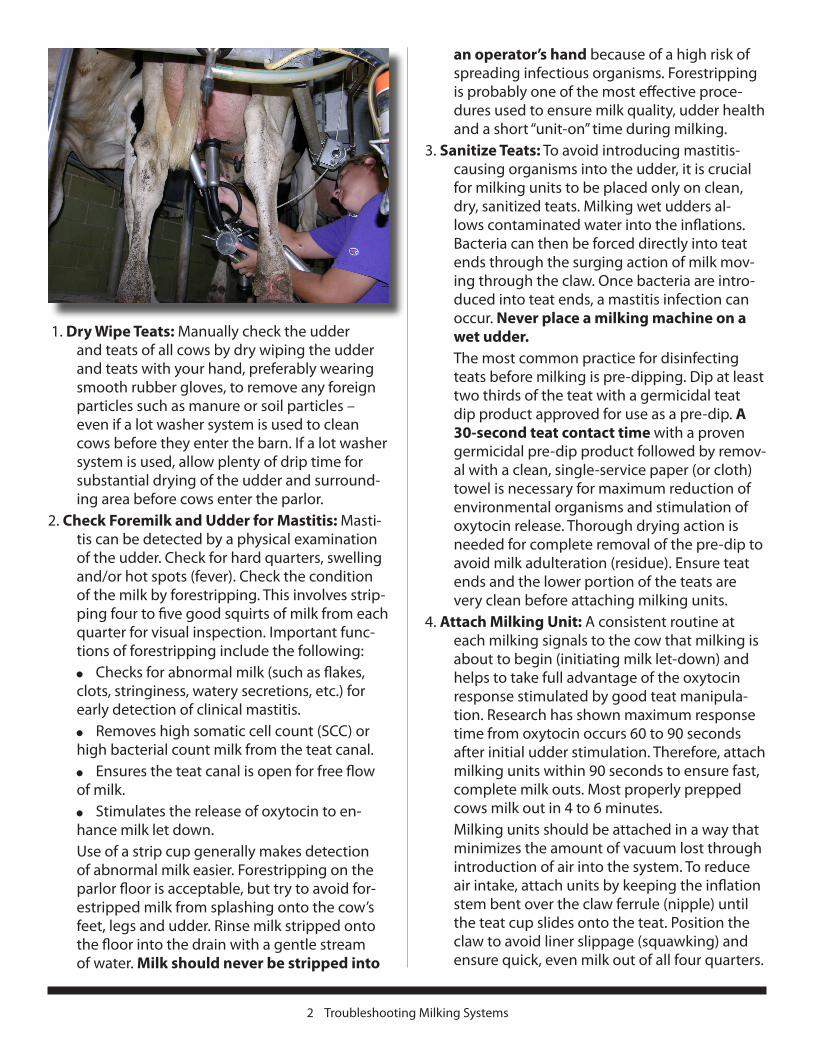
1. Dry Wipe Teats: Manually check the udder and teats of all cows by dry wiping the udder and teats with your hand, preferably wearing smooth rubber gloves, to remove any foreign particles such as manure or soil particles – even if a lot washer system is used to clean cows before they enter the barn. If a lot washer system is used, allow plenty of drip time for substantial drying of the udder and surround-ing area before cows enter the parlor.
2. Check Foremilk and Udder for Mastitis: Masti-tis can be detected by a physical examination of the udder. Check for hard quarters, swelling and/or hot spots (fever). Check the condition of the milk by forestripping. This involves strip-ping four to five good squirts of milk from each quarter for visual inspection. Important func-tions of forestripping include the following:
Checks for abnormal milk (such as flakes, clots, stringiness, watery secretions, etc.) for early detection of clinical mastitis.
Removes high somatic cell count (SCC) or high bacterial count milk from the teat canal.
Ensures the teat canal is open for free flow of milk.
Stimulates the release of oxytocin to en-hance milk let down.
Use of a strip cup generally makes detection of abnormal milk easier. Forestripping on the parlor floor is acceptable, but try to avoid for-estripped milk from splashing onto the cow’s feet, legs and udder. Rinse milk stripped onto the floor into the drain with a gentle stream of water. Milk should never be stripped into
an operator’s hand because of a high risk of spreading infectious organisms. Forestripping is probably one of the most effective proce-dures used to ensure milk quality, udder health and a short “unit-on” time during milking.
3. Sanitize Teats: To avoid introducing mastitis-causing organisms into the udder, it is crucial for milking units to be placed only on clean, dry, sanitized teats. Milking wet udders al-lows contaminated water into the inflations. Bacteria can then be forced directly into teat ends through the surging action of milk mov-ing through the claw. Once bacteria are intro-duced into teat ends, a mastitis infection can occur. Never place a milking machine on a wet udder.
The most common practice for disinfecting teats before milking is pre-dipping. Dip at least two thirds of the teat with a germicidal teat dip product approved for use as a pre-dip. A 30-second teat contact time with a proven germicidal pre-dip product followed by remov-al with a clean, single-service paper (or cloth) towel is necessary for maximum reduction of environmental organisms and stimulation of oxytocin release. Thorough drying action is needed for complete removal of the pre-dip to avoid milk adulteration (residue). Ensure teat ends and the lower portion of the teats are very clean before attaching milking units.
4. Attach Milking Unit: A consistent routine at each milking signals to the cow that milking is about to begin (initiating milk let-down) and helps to take full advantage of the oxytocin response stimulated by good teat manipula-tion. Research has shown maximum response time from oxytocin occurs 60 to 90 seconds after initial udder stimulation. Therefore, attach milking units within 90 seconds to ensure fast, complete milk outs. Most properly prepped cows milk out in 4 to 6 minutes.
Milking units should be attached in a way that minimizes the amount of vacuum lost through introduction of air into the system. To reduce air intake, attach units by keeping the inflation stem bent over the claw ferrule (nipple) until the teat cup slides onto the teat. Position the claw to avoid liner slippage (squawking) and ensure quick, even milk out of all four quarters.

Troubleshooting Milking Systems 3
About 60 percent of the milk is produced in the rear quarters and 40 percent in the fore. Therefore, the claw should be positioned for more downward pressure on the rear teats to result in more uniform milk out.
A considerable amount of time is wasted “ma-chine stripping” cows. This process involves ap-plying slight downward pressure on the claw when cows are almost milked out, coupled with massaging each quarter in a gentle down-ward motion. Avoid unnecessary machine stripping because cows become accustomed to the practice and will not milk out without it. Machine stripping should be used only on “problem” cows (slow milkers with problems caused by injury, poor udder shape, mastitis or udder edema).
5. Detach Milking Unit: Do not squeeze the infla-tion milk tube to detect milk flow, since this causes detrimental vacuum fluctuation within the claw impacting teat ends. When milking is complete, shut off the vacuum to the claw before removing the unit. Vacuum must be broken before removing teat cups to avoid teat stress damage and potential mastitis problems resulting from air rushing into the claw.
When individual quarters milk out early, leave the teat cup on as long as it is not squawking. How teat cups are removed is more important than when they are removed. Very little, if any, teat damage results from moderate overmilk-ing. Removing liners one at a time as individual quarters milk out can increase the chances of teat injury from vacuum fluctuations. If a teat cup is squawking because of milk out, howev-er, remove it immediately by pinching off the short milk tube and lay it over the claw to keep air from being admitted. If liner plugs are used, wash and sanitize them thoroughly after each use.
6. Post-dip Teats: Once the milking unit is de-tached, immediately dip teats with an ap-proved germicidal teat dip that has been proven safe and effective. When units are removed, teats are covered with milk and the teat end sphincter muscles are fatigued. This muscle fatigue prevents proper closure of the streak canal until the muscles contract again.
Because of the relaxed sphincter muscles, mi-croorganisms on teats can easily enter the teat ends. Dipping teats with an effective germicid-al product immediately after units are removed destroys most of the microorganisms present at that time.
Effective teat dips also provide residual germi-cidal activity to combat bacteria from making contact with teats soon after milking. If cows lie down in muddy areas or go into standing water shortly after milking, there is an in-creased chance of bacteria entering teat ends because of relaxed sphincter muscles. To pre-vent this, keep cows standing for up to an hour after milking, giving sphincter muscles time to contract and securely close teat ends. This can be done by directing cows to the feed bunk or grazing immediately after they leave the milk-ing facility.
Also, keep exit lanes and surrounding areas as clean as possible to avoid udder contamina-tion if cows lie down. If unavoidable heavy mud conditions exist, consider using an ap-proved barrier-type dip. Barrier teat dips generally contain germicides, skin conditioners and ingredients that form a protective film that essentially “seals” the teat ends to provide ad-ditional protection.
Good sanitation is very important in teat dip-ping. Use only clean, well washed/sanitized dippers in the milking barn. The preferred dip-per is the “squeeze bottle” type that dispenses dip into an upper reservoir when squeezed. Fill the reservoir with fresh dip, being careful not to overfill, or to back siphon contaminants into the container. Use freshly dispensed product in the reservoir, refill the reservoir and proceed to the next cow. Do not leave residual teat dip in the reservoir between cows, because the germicidal agent rapidly deactivates once it is contaminated. Do not use contaminated, deac-tivated teat dip, since it can potentially spread mastitis organisms.
Teat spraying is an alternative to teat dipping. Results may be acceptable if spraying is done correctly with a suitable spray device that pro-vides adequate coverage of each teat. A com-mon problem with spraying is that only one portion of the teat is sprayed.

4 Troubleshooting Milking Systems
Troubleshooting Your SystemHave milking systems checked at least annu-
ally by a qualified service person. This assures top performance. Between checkups, you can moni-tor your system’s performance by following some simple guidelines.1. Milking parlor appearance. If hired laborers
milk your cows, make sure they handle the cows gently. A quiet barn with little noise and no yelling by employees indicates an efficient milking operation.
2. Vacuum level. The general recommendations for vacuum levels are 12.5 to 13.5 inches for low milk lines and 14 to 15 inches for high milk lines. High milk lines require extra vacuum to move milk up a vertical hose. No matter what system you have, the vacuum level at the teat end should average 11 to 12 inches during milking.
a. Vacuum regulators. A properly functioning regulator has a steady hissing noise of air pass-ing through it when all valves are closed (no air leaks). When an air leak occurs, the regulator should immediately close (stop hissing) and balance the vacuum level. Once the valves are closed again, the vacuum level should be restored within 1 to 2 seconds.
b. Vacuum gauge. Vacuum gauges do not always reflect the correct vacuum level. Uneasy cows with red teats could mean high vacuum levels. Slow milking and milking units that con-tinuously fall off usually indicate low vacuum. Periodic calibration of vacuum gauges is rec-ommended.
3. Pulsation. Most pulsation systems work at or near a 50:50 milk-rest ratio. This means the liner is open (milk) 50 percent of the time and closed (rest) 50 percent. For best results, the system should have milk rest ratios between 60:40 and 40:60. A steady, rhythmic pulsating sound indicates proper function. But, to be sure, insert one finger inside a liner and check the open-close ratio. An abnormal ratio is easy to recog-nize.
a. Alternating pulsation. Alternating systems are designed to produce the rest phase and milk phase simultaneously between the front and rear quarters. Certain settings allow the rear quarters to receive longer milk phases than the front. Make sure that the front hose is supplying pulsation to the front quarters and rear to rear. If your system has different ratios for front and rear quarters, the hose supplying the longest milk phase should be attached to the rear quarters.
4. Milk Lines. Shorten milk hoses as much as pos-sible. Large loops and unnecessary lifts require extra vacuum and reduce teat-end vacuum.
5. Pipelines. A flooded pipeline – one that is more than half full at any time during milking – can cause major problems. Flooding is caused by insufficient slope or diameter being to small or both.
a. Slope. The correct slope should be 1.5 inches per 10 feet of line. Look for low spots or reverse slopes that can slow the passage of milk.
b. Diameter. Although popular in years past, 1.5-inch lines are too small. They should be used only as transfer lines such as between the milk pump and milk tank. In general, 2-inch lines should have no more than 6 units per slope, and 3-inch lines no more than 8 units per slope.
MaintenanceA good maintenance program can reduce
expensive emergency service calls and extend the productive life of your equipment and cows. The operator should know how the system works and be aware of any subtle changes that could decrease milking efficiency. A qualified, trained service technician also should inspect the system regularly.
Troubleshooting Milking Systems 5
The maintenance guide will help you keep your milking system operating at its best. The following areas should be checked or maintained as indi-cated:
DailyVacuum level. The level should remain the
same during milking. (If adjustments are required, contact a service person who has the proper equip-ment for setting vacuum levels.)
Pulsators. Listen for irregular pulsation cycles. (Check operation of inflations with your finger.) Water or milk between the shell and inflation can reduce the effectiveness of your pulsator. (If milk is found, check the inflation for holes or cracks.) Before milking, replace any air tubes, inflations or hoses with holes in them.
Weekly Check vacuum pump oil reservoir, and refill as
needed with recommended oil. Wash the outside of all milk lines, vacuum lines
and equipment, checking connections for leaks. Check tension of vacuum pump belts.
Monthly Clean or replace filters in pulsators and vacuum
regulators. (This is very important in milking parlors with feed troughs.)
Replace inflations according to the manufactur-er’s recommendations. (Never extend the usage of old inflations.)
Break down pipeline and milker connections, checking for milkstone buildup. Hand-clean problem areas, and reevaluate your cleaning procedure.
6 Months to 1 YearYour milking system should get a complete
checkup by a qualified service person at least once a year that includes: Checking vacuum at the teat end for proper
level and problem fluctuations. Evaluating vacuum pump capacity with respect
to the milking system requirements. (Although a vacuum pump is a very durable machine, over time its output can decrease below the system’s requirements.) www.lsuagcenter.com
Changing vacuum pump oil, checking oilers and reclaimers.
Flushing vacuum lines and balance tanks. Checking for stray voltage and faulty electrical
wiring. Replace all rubber hoses, gaskets and O-rings throughout the system. Consult with your serviceman, equipment dealer or extension dairyman about updating your system for more efficient operation.
Author:Wesley S. Farmer
Revised by:Charles Hutchison, Ph.D.
School of Animal Sciences
Louisiana State University Agricultural CenterWilliam B. Richardson, Chancellor
Louisiana Agricultural Experiment StationDavid J. Boethel, Vice Chancellor and Director
Louisiana Cooperative Extension ServicePaul D. Coreil, Vice Chancellor and Director
Pub. 2362 (online only) 6/10 Rev.
Issued in furtherance of Cooperative Extension work, Acts of Congress of May 8 and June 30, 1914,
in cooperation with the United States Department of Agriculture. The Louisiana Cooperative Extension Service provides equal opportunities
in programs and employment.